Likes
Comments
Share
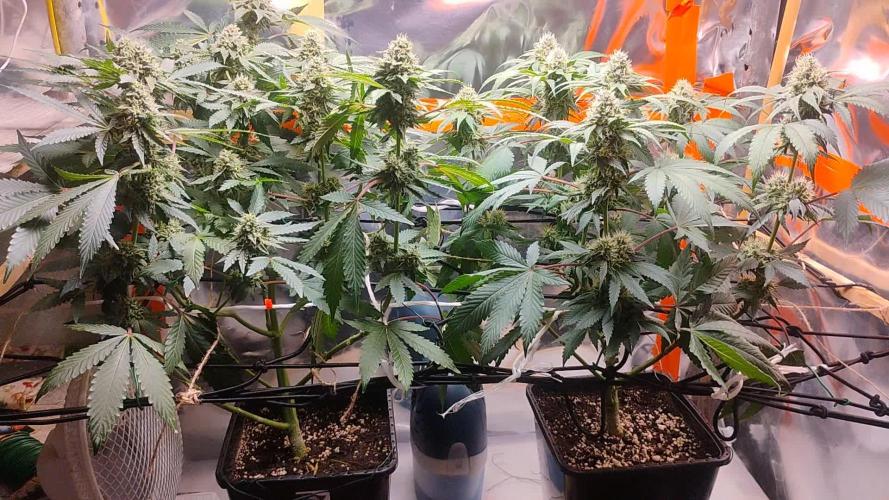
Ahojte všetci otvárame kútok šťastia v 5.týždni Flower.Mám v sebe nostalgiu na film Critters , keď vidím tieto šišky 😀. Verím, že všetky problémy s xmag calmagom od Advanced nutriens sú už za mnou a môžem sa sústrediť už len na poctivé Vianočné priberanie na váhe mojich paličiek. Teraz chcem už len pre kitky stabilitu, pravidelné hnojky samozrejme všetko na mieru nepotrebujem si naháňať Ego koľko tá kitka zvládne. Lepšie ju držať nech žere je kľudná ako dať veľa rozhodiť ju a budeme na nervy obaja. Stabilita v kanvičke zabezpečí pôžitok pri fajočke. Na veľkú noc sa chlasce 👉 2.5L 👉Bloom A/2.5ml ,Bloom B/2.5ml, Rhino skin 1.2/ml Sugar Royal 2.2/ml Vitamaxpro 1ml, ktorý už dávam preč. Druhá Kitka dostáva 3ml základu Bloom A/B. Teplota deň Max 24.5° noc 21° vlhkosť sa pohybujem 53% vonku je to horšie 4 dni dážď,odvlhčovač sa plní a čakám kedy bude lepšie počasie. Samozrejme to ochladenie pomáha v noci púčikom a teplota v noci je lepšia a vyhovuje im. Tá kitka vľavo je hladná beštia a cucá Hnojky ako vysávač Rowenta 😀.Dnes 3.4 končím 5 týždeň Flower. Borci growu zdar a nech to rastie vždy a za každého počasia Váš kutil ✌️.
Likes
25
Share
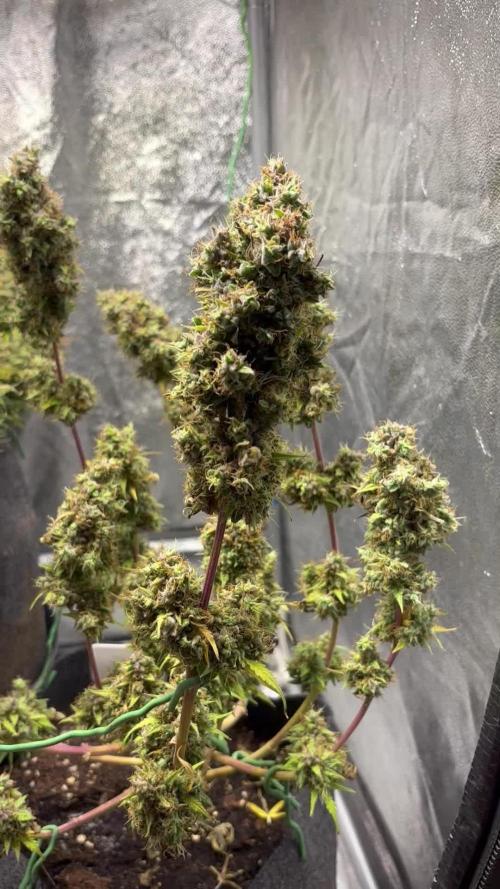
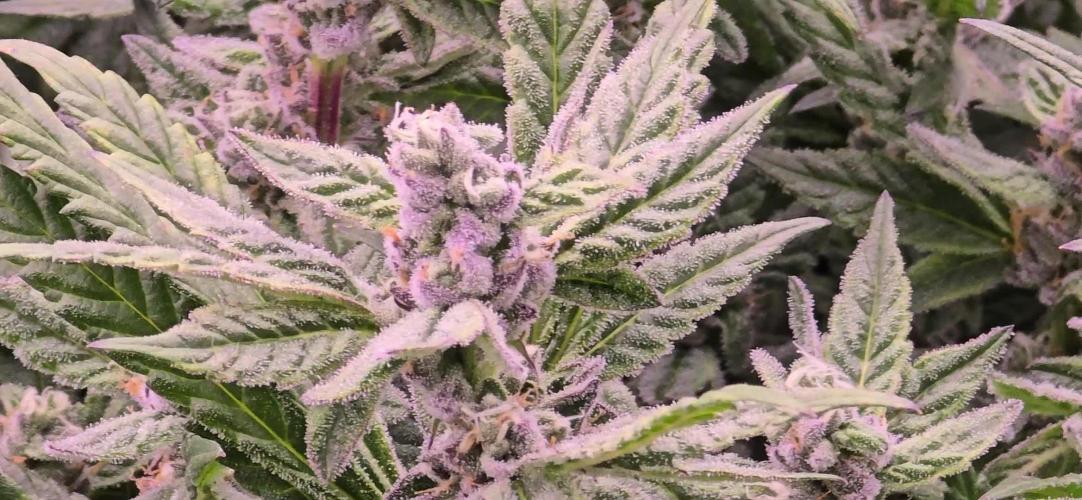
Cut the grow nutrient this week. This girl has been powering through as the lone survivor. Amazing trichome production for such an early stage. Should be another few weeks with this girl but shes already turning colors. 12/12 since September 5th, first buds September 14th.
Likes
18
Share
🍇 BlueBerry #1 & #2 — Week 7 Flower From Roots to Resilience Hello beautiful souls, welcome back to our BlueBerry adventure — and a warm hello to anyone just joining us! Let’s do a little recap before diving into the magic. From seed to soil, our girls were lovingly nurtured in Aptus Holland super soil, guided by biological balance and living nutrients. Through every stage — from seedling to lush vegetation, from first pre-flower pistils to dense, frosty colas — these BlueBerries have been nothing short of spectacular. Last week brought a challenge: Bud rot found its way into one of our beauties. But quick action, gentle hands, and a bit of intuition made all the difference. We removed the affected areas, adjusted airflow, and kept a close eye. This week, we’re happy to say no new signs of rot — just thriving flowers and crystal-coated buds glowing under the light. 🌞 Environmental Notes It’s been hot, really hot — outdoor temps reaching 45°C (around 110°F). To manage, we’re running the grow during night cycles, where we can keep the environment steadier. Even with heat challenges, the girls are handling it like queens — strong stems, thick stalks, and buds forming beautifully from top to bottom. 🌿 Feeding & Support Our current recipe remains the Aptus + Plagron combo: • Aptus Regulator, CalMag Boost • Plagron Power Buds, Sugar Royal & Green Sensation Together, they’re forming the symphony of this bloom — supporting cell structure, enhancing terpene expression, and encouraging thick resin development. One of the top buds was removed this week — not out of sadness, but as a precaution and an act of love. It was massive, too dense, and could’ve invited humidity trouble again. We took the chance to document it with photos, showing both the beauty and the lesson. 🌸 Reflections This grow has become a story of evolution — from the first transplant to the first flower, from trial to triumph. The inner canopy lights (ICL300) continue to shine beautifully, ensuring every level of the canopy is well-fed with photons. The plants are stacking heavy, leaning on the yo-yos for support, like true heavyweights in the ring. 💬 A Note of Gratitude A huge thank-you to Zamnesia for keeping the classics alive and to everyone following this journey — readers, growers, dreamers, haters, lovers, and the endlessly curious. Every comment, every question, every bit of love fuels this passion. We’ll keep learning, keep growing, and keep showing that even when nature throws a curveball, love and attention always bring balance back. Until next week — may your gardens be green and your buds be clean. 🌱💫 ⸻ 📲 Don’t forget to Subscribe and follow me on Instagram and YouTube @DogDoctorOfficial for exclusive content, real-time updates, and behind-the-scenes magic. We’ve got so much more coming, including transplanting and all the amazing techniques that go along with it. You won’t want to miss it. • GrowDiaries Journal: https://growdiaries.com/grower/dogdoctorofficial • Instagram: https://www.instagram.com/dogdoctorofficial/ • YouTube: https://www.youtube.com/@dogdoctorofficial ⸻ Explore the Gear that Powers My Grow If you’re curious about the tech I’m using, check out these links: • Genetics, gear, nutrients, and more – Zamnesia: https://www.zamnesia.com/ • Environmental control & automation – TrolMaster: https://www.trolmaster.eu/ • Advanced LED lighting – Future of Grow: https://www.futureofgrow.com/ • Root and growth nutrition – Aptus Holland: https://aptus-holland.com/ • Nutrient systems & boosters – Plagron: https://plagron.com/en/ • Soil & substrate excellence – PRO-MIX BX: https://www.pthorticulture.com/en-us/products/pro-mix-bx-mycorrhizae • Curing and storage – Grove Bags: https://grovebags.com/ ⸻ We’ve got much more coming as we move through the grow cycles. Trust me, you won’t want to miss the next steps, let’s push the boundaries of indoor horticulture together! As always, this is shared for educational purposes, aiming to spread understanding and appreciation for this plant. Let’s celebrate it responsibly and continue to learn and grow together. With true love comes happiness. Always believe in yourself, and always do things expecting nothing and with an open heart. Be a giver, and the universe will give back in ways you could never imagine. 💚 Growers love to all 💚
Likes
4
Share
Hi guys it’s been 2 weeks since the last update. She has been growing at a nice steady pace. Not too much lateral growth but she is getting wider. Have used a few garden stakes for lst & have been leaf tucking and defoliating selectively. She is also in pre flower low lights already at 24/0 and have been giving a P/K spike in her nutrition to initiate flower. She is responding well to the feeds. No topping so she will be growing in all her glory how she is meant to grow. She’s stout and bushy and hasn’t given me any problems at all. Leaves are a nice rich green so she is all good no deficiency that I’ve noticed. What a strain! This was the first Autoflower I ever grew some years back so this is sentimental to me. I’ll be back next week now that we are off to the races. Thanks to fastbuds for the genetics. Won’t let you guys down Let’s grow!!!!
Processing
Likes
15
Share
@Hawaiian
Follow
First grow ever in my life. I hope I’m doing it right. Any help would be greatly appreciated
Likes
3
Share
🌱 : 💧 : 4l day 59 💡 : Dli: 40 mol/m²/d 🤔 :
Likes
5
Share
Day 63- Switched to plain ph’d water at the end of the week. Probably going to be 2 more in the upcoming week as they finish off. #1 is the tallest, and has some big buds, but are bit looser than the rest. #2 has gone beast mode, she is fattening and had hard dense nugs from top to bottom. #3 was a slow start but is quickly gaining on her sister’s. She has about 1 week longer than the rest, but is hard and dense, and is greasy! Did a big defoliation mostly to help ease the final trim when it comes, but to also allow for a little more trichome development as they finish up the remaining nutrients. It’s been a much cooler week so I have been gradually increasing the light intensity to get a final push for some weight and trichome production. Running at about 95% intensity at the moment with the tent hovering around 79-81 degrees freedom units. Checking trichomes daily with my 30x jewellers loupe, mostly cloudy now, with anlmost no amber popping up, just a few on the leaves. I’m watching my other strain as well, hoping the timing will be right for both to come down. I’m not in a rush, really want to maximize these buds, they are already very hard, and should be a good haul. Happy Gardening ❤️🌱🇨🇦😎💨
Likes
3
Share
Likes
7
Share
Samen am 30.04. getauft und am 02.05. eingetopft. 20g Green House Feeding BioGrow in der Erde eingemischt. Am 04.05. das Licht der Welt erblickt.
Likes
4
Share
Installed my new suplimental lights. 440 en 660 nm. Harvested the other 2. Hang them all up in tent. Aiming for low 60% humdity and around 19 - 20 C. No oscilating fans active, only 2 exhaust fans on low setting.
Likes
17
Share
@Naujas
Follow
She is much prettier than she was a week ago :) I remembered that I have my first grow light, which is more compact and it will give me more space, so I changed my light, now the girl's side branches get light too:) I add a lot of video memes, because I really want to win Iphone16 pro ;) and those who don't take risks don't drink champagne:) good luck to everyone.
Likes
51
Share
2/22/24 - Day 108 - ok yall harvest is done! I'm exhausted! It took about 3hrs. There were a few things that I will highlight the differences. I have tons of pictures and video to go through. I'll update later...... I'm tired! 2/23/24 - Day 109 - Everything went really well yesterday. I was able to cut the harvest time from 9 hrs last time to 3 hrs this time. Here are some of the details on this. Last time I hung each branch on its own, it took forever to use the twist ties and then to hang each one. This time i used some drying nets. The only problem with the drying nets is for sure there will be one side that is going to be flat..... it's still going to smoke the same and if it saves me 5 hrs. then I'm doing that. LOL I also decided this time not to wet trim the buds before putting them up to dry. I did remove fan leaves that had 0 THC on them, but if there was a leaf sticking from a bud and it had THC on it i left it. That also saved me some time. The bud quality was better this time around, the buds are denser and more compact. I also had almost NO popcorn buds. The last grow I had 2 to 3 ounces in popcorn schwag buds. They were tasty and great but this time around every bud was a legit contender. This could be due to having more space, I used an Auto in the box this time. I thought Autos would be difficult to control in this space limited environment, but it was the exact opposite. It's just as easy if not easier to grow an Auto in this Magic Box. I think its important to note that anything I talk about here is from my own experience, I've purchased everything with my own money and no one pays me for my reviews or details. This is such a labor of LOVE for me. They day I get a job in the Cannabis industry is the day I stop working, at that point it would just be me living my dream having a BLAST! That being said if you would like this same exact experience here are the tools i have used. Growing Box: www.getleaf.co Seeds: www.Sensiseeds.com Strain: Skunk#1 Curing Bucket Controller: www.ACInfinity.com Last thing I want to share before my next update of dry weight. If you want to see even more photos and videos from my last grow (GovernMint Oasis) along with any new grows im working on you can check out my Instagram (@ChumpkillaOG). I update almost daily with new details on my grows. Ill go into more detail on how or why I did something. I have not posted about this Skunk#1 grow yet, that will be the next few weeks' worth of content. So, if you want to see a lot more documentation throughout these grows check me out @ChumpkillaOG. I would absolutely appreciate the likes, shares, and follows! 2/25/24 - Day 111 - There was no place that I saw to add the dry weight. I finished the harvest today and now it sits to cure. Final weight 364.5gams! Not quite a pound but very close! This strain came out really well, the bud quality with this strain is better than the last grow. It only gets better. See yall on the next one!
Likes
44
Share
Info: Unfortunately, I had to find out that my account is used for fake pages in social media. I am only active here on growdiaries. I am not on facebook instagram twitter etc All accounts except this one are fake. Flowering day 1 since time change to 12/12 h. Hi guys :-) . The time has finally come 👍 You have been switched to 12/12 hrs and are ready to flower. Of course, cuttings were cut beforehand to keep the genetics. For 4 days now she has also been getting Fast Buds from GreenBuzzLiquids. They were also sprayed again with GBL Fast Plant spray. She is very healthy and I am excited to see how she gets going again in bloom :-). This week it was poured twice with 1.2 l each time (for nutrients, see nutrient table above). Then I filled canisters with fresh osmosis water for the next few weeks 👍. The tent was cleaned and every plant was checked for health. At the moment I am tinkering with the ventilation because there are currently 4 fans with 4 activated carbon filters running, which I want to make more efficient by putting a hose through 2 tents. These are the things about which you desperately at the beginning but learned from them in the end. I wish you all a nice week. Stay healthy 🙏🏻 You can buy this Nutrients at : https://greenbuzzliquids.com/en/shop/ With the discount code: Made_in_Germany you get a discount of 15% on all products from an order value of 100 euros. You can buy this Strain at https://www.amsterdamgenetics.com/product/super-silver-haze/ Type: Super Silver Haze ☝️🏼 Genetics: Haze x Skunk #1 x Northern Lights Type: 70% Sativa – 30% Indica 👍 Vega lamp: 2 x Todogrow Led Quantum Board 100 W 💡 Bloom Lamp : 2 x Todogrow Led Cxb 3590 COB 3500 K 205W 💡💡☝️🏼 Soil : Canna Coco Professional + ☝️🏼 Nutrients : Green Buzz Liquids : Organic Grow Liquid Organic Bloom Liquid Organic more PK More Roots Fast Buds Humic Acid Plus Growzyme Big Fruits Clean Fruits Cal / Mag Organic Ph - Pulver ☝️🏼🌱 Water: Osmosis water mixed with normal water (24 hours stale that the chlorine evaporates) to 0.2 EC. Add Cal / Mag to 0.4 Ec Ph with Organic Ph - to 5.8
Processing
Likes
3
Share
These days it managed to have some nice sun light, but most days the sky is cloudy.. Had to bend several branches to make it fit in the greenhouse, but she's still growing strong!
Likes
4
Share
@myketb
Follow
Week 1 Day 1 - Clones #1 and #2 are looking alright, not super strong and slight nutrient deficiency issues, but OK. Will just observe for now. - These clones are currently under a very mild CFL light (20 cm away and about 200 ppfd measured roughly by phone app - Tent Buddy.) - Clone #3 still need to be covered to maintain moisture. Yesterday I un-cupped the clone and it wilted a lot. This morning it looks better again after a night of rest under the plastic cup. - I've checked the run off and these clone's pH are so low, while TDS are so high (pH 5.7 and TDS 800pm). This evening, I flushed them with pH 6.5 water and brought the runoff to about pH 6.0 and 350 ppm) Week 1 Day 2 - Just foliage spray with mild CalMag this morning. Soil is still moist, so no watering. Week 1 Day 3 - Just minor watering today. Glad to see the clones are doing well as they are growing a bit everyday. Will transfer them to 3 gallon airpots with new soil mix soon. Week 1 Day 4 - Foliage spray with mild CalMag and Seaweed. Add 5ml of 250 ppm of balanced NPK nutrients AN B52 for each plant. Week 1 Day 5 - Foliage spray with mild CalMag and Seaweed. Transfer them to 3 gallon airpots. Week 1 Day 6 - Foliage spray with mild CalMag and Seaweed. Skip watering. The clones responded OK to the new airpots. Week 1 Day 7 - TBA
Processing
Likes
20
Share
@mikemobes
Follow
7/28/19 --Super happy to see the plants doing this well. Ive found that every other day feeding is the best for these specific plants. Im a big proponent of only watering the plant when it signals it is ready for watering. The least possible amount of induced stress for these plants is the goal for me. Cheese seemed to be totally unaware of the FIM that was done on it, as it showed not even 1 sign of stress post FIM. Cream cookies is another story, she's quite sensitive to absolutely everything--including watering. I am super happy to see that the last fan leave on the 5th node has 9 leaves--a really good sign that the plant is doing extremely well. The more leave nodes on each leave the healthier than plant. There are zero signs of nutrient burn at all. It was difficult at first to see if the slight bending of the leaves was due to nutrient burn, but I later figured out that the leaves were pressing against the side of their pot and as a result bending--wasnt nutrient burn. Ive been varying the pH widely each week--with the attempt to be as random as possible. I want to make as many nutrients available to the plant as absolutely possible. I really am loving the Advanced Nutrients Sensi line. Im growing in coco but I bought the nutrient mix not designed for coco with the understanding there might be some potassium issues down the road. But otherwise as a chemist by profession, when I heard about the pH perfect line I was rightly skeptical. It will balance your solution to the correct pH range (5.6-6) IF you start with dead neutral pH 7.00±0.05 water with no dissolved salts (distilled water). the distilled water I've been buying (from Walmart) clocks in on the pH meter at around 7.6-8.6 which will cause the pH perfect technology to neutralize some of the dissolved ionic species and bring the pH well below safe range for cannabis. Ive found that if you pH the distilled water to 7.00--add your Ca/Mg/Fe, THEN add the pH perfect technology the range will be much more suitable. It was kind of annoying since my pH down is so much more concentrated than my pH up. Me problems I know but still annoying. --One of my amazing collages at work is going to water both babies today with Week 4 nutrient solution even though we are technically in week 5. My vacation has prevented me from mixing the solution to feed. --This vacation has brought so many new automation ideas to coco coir growing. Ive been developing a hypothesis that involves what I call the "level of droop age" and its correlation to plant thirst. It began when I was growing in soil and needed a better way of telling when to feed the plants instead of a fixed schedule, which seemed to be giving way too much water to the plants. ---Ive developed a "droop scale" which can be directly correlated to plant thirst. Ive also found that very happy plants that do not want water will go through a natural droop cycle as night approaches. I take this as the plants time to grow out its root system (happens at night). By the morning the leaves are pointing up in what I call "leaves up loving life" ---So the scale I've developed is kind of arbitrary but it does a really good job imo if you become very familiar with your plants. ---The scale ranges from -10 (the most droop in the leaves every observed) to +10 (the most extreme leaves up loving life ever observed). the scale is out of 10 not 20. ---lets say that you watered your plants today, and their leaves were at a -7/10 droop (what when I water my plants). If you water them you should observe no increase in droop--in other words after watering the droop should only improve not regress. If the droop increases after watering your plants wanted a little more time before their feed--so alter your droop scale until you find the level of droop that when feed causes only an increase in the droop. 6 hours after watering you plant droop should be >+1/10. The next day you should see your plants at least at +5/10 droop. ---Merging this scale with automation is going to be difficult as ill have to use an open source machine learning AI to learn when the plants droop is sufficient enough to justify a watering. I hope to set up the system to be automated or manually operated over the cloud. ---Using a Raspberry pi and an Arduino as well as a whole set of motor control boards and sensor boards I hope to put together an integrated system that can detect when the leave droop reaches critical levels using a camera, and feed accordingly. Ive been all over the internet and all automated grow projects rely on soil moisture sensors which only penetrate <4 inches into the substrate. This doesn't cut it for me as the root ball of the plant is way below that 4 inches of the sensor, yielding readings which only pertain to the top layer of soil, which just so happens to dry out the fastest. ---Im going to keep my grows at 2 plants each from no on--and I plan to make an automated system for both plants which can control watering to both plants individually. Im currently trying to figure out the best way to track volume of water dispensed. A flow meter with a know diameter tubing and a known diaphragm pump rate seems to introduce all sorts of inaccuracies into the mix. I think im going to design an automated measuring system that uses an ultrasonic distance sensor coupled with a camera and AI to fill up a the hopper to the desired volume of nutrient solution. ---I have all the hardware listed but im a complete dumbass when it comes to coding. My profession is chemistry, coding goes right over my head. I have an immense respect for coders as I honestly have no idea how you guys do it. Its like learning 15 different languages at once and using them all together. Blows my the ability of our society. The wide range of skills. Love it. ---If anybody would like to help me code this project it would be greatly appreciated. 7/30/19 -Cream Cookies is doing extremely well. FIM was a great idea. 4 new main cola sites came out of the FIM which im very happy about. The undergrowth also has caught up to the canopy. the canopy has a plethora of bud sites. Defoliation done to increase light to bottom branches. Largest fan leaves towards the canopy removed. FIM'ed leaves that opened up also trimmed, allowing more light to penetrate to those small bud sites. --Ive counted sites where main colas can form. Very happy with this HST I decided to do. --LST done and branches separated from each other so they can receive ample light. Thinking of adding supplementary 40W flowering bulbs for flowering. -Cheese FIM didn't work as intended but it did break the symmetry of the plant. One of the first branches has grown higher than the canopy and I had to tie it down using LST. Did some defoliation and going to do some LST later. --Some light stress spots on Cheese, makes sense since I wasn't physically at my apartment to raise the lamp. Before raising the lamp the plants were 14 inches from the light which is way too close. The closest it should be is 17 inches. Raised the lamp to 18 inches and spots are subsiding. --Being overly cautious ive increased the dose of Ca/Mg/Fe to 4 mL/gal incase spots are actually a Ca/Mg/Fe deficiency from explosive growth. 7/31/19 -Cream Cookies is showing beautiful pre flowers. Still recovering from light stress. Looks very similar to nutrient burn but only present in tip most growth suggesting light burn. 14 inches was way too close-vacation problems lmfao -defoliation done on both cheese and cream cookies to expose bud sites -LST done on both cheese and cream cookies to bring bud sites into the light -both plants fed 400 mL Week 5 nutrient solution-when I mix next weeks nutrient solution im going to reduce the concentration to 12mL/gal w/ 3mL/gal Ca/Mg/Fe. --I want to precent any nutrient burn plus plants are slightly stressed from defoliation and light burn from my vacation. -lamp raised to 19 inches to help aid in stress relief -plants are responding in a weird way to the watering. Not in a bad way-but in a different way--larger lower leaves are not drooping like in the past its just the much newer growth is drooping. Makes sense since newer growth has less developed support system. Makes me feel much better about my watering schedule. --Clawing which I suspected was due to light stress is getting better-especially after a feeding. 8/1/19 --Calcium deficiency just barely showing on midlevel fan leaves. Good thing calcium is a mobile nutrient. Going to readjust the nutrient solution ph to be 6.2-6.3. Been accidentally locking out calcium. --Defoliation done on both plants to expose more bud sites and to thin out the thick canopy so light can penetrate below. The hope is to defoliate correctly. If done right I won't have to lollipop. --Cheese has no preflowers yet--still in veg --Cream cookies looks like it started flowering. 2 preflowers were spotted earlier in the week. Surprised to see how fast the plant moved into flowering. Going to be feeding it with flower nutrients starting week 6. --Going to continue feeding cheese with veg solution until preflowers are observed.
Likes
15
Share
@Siriuz
Follow
Check out the videos guys, she is flowering real good even tho we are not using any special nute like big bud for example, but i really want to try it soon, hopefully! Still she is doing great and im happy to have her! How are you doing growers whats up!? Dont forget to leave a comment Any suggestion is welcome! We are happy to learn new things alwas, Thanks for the support happy growing everybody Enjoy the footage thanks to Siriuz