


Likes
Comments
Share

@The_Doctor_Green
Follow
Hola a todos! Esta semana he regado solo con top candy 2ml x litro de agua.
Esta misma semana que comienza mañana, empezare a lavar raices de todas las variedades.
Muchos tricomas están lechosos aunque hay algunos transparentes, pero la idea es hacer un lavado de raices progresivo, En 2 veces, ya que no les deben de quedar más de 2 semanas previo al corte✂️🙌🤩


Likes
28
Share


@w33dhawk
Follow
Hallo meine Freunde des gepflegten Grow sports! 💐
Die Damen sind abgehackt und aufgehangen davor habe ich alle Fächer Blätter entfernt noch als die Pflanzen im Zelt standen heut morgen Ach ja wir haben den 26.04.23 nur so zur Info 😂😂 danach habe ich alle Damen also 4stk an der Zahl genau unter dem ersten Knoten entfernt das gesamte ScroG netzt abgegangen umgedreht und wieder an gehangen (bin irgendwie faul diesmal) war die schnellste und einfachste Lösung und somit wurde aus dem ScroG netzt ein trocken netz 😂🍾😂 Jetzt heisst es warten bis sie trocken sind wie man sehen kann auf dem letzten Video überwache ich weiter die Temperatur und Feuchtigkeits Werte! liegen bei 50% rlf und guten 16 Grad, denke mal in 10 bis 14 Tagen werde ich dann diesen Bericht als ernte ein tragen da die Damen dann in die Gläser gehen werden zum curing, feucht Gewicht kann ich grad nicht sagen, da ich sie ja nicht aus dem netzt entfernt habe aber so bald sie in die Gläser wandern werden sie gewogen
Ach ja bevor ich es vergesse habe die Basis der Pflanze dran gelassen da sonnst einiges aus dem netzt fallen würde ohne Befestigung. Wir lesen uns dann in ca 14 Tagen wieder wenn alles soweit fertig ist euch allen einen erfolgreichen Grow und bis die Tage 🖖🤘✌️👋

Likes
153
Share


@Ju_Bps
Follow
Hello my friends 🌲👨🌾,
This week was good, the last week✂️✂️!
I've just given 1 time water Sunday, only 2.5l clear water PH@6.
I've removed lot of dead leaves dpend the week, she had a well senesence, almost all leaves was yellow, Taste should be nice, fruity flower smeel, and so frosted ❄️❄️❄️.
I'll publish the full harvest in few minutes.
Thanks to all for supporting spend this grow 👨🌾👩🌾👊❤️❤️,
Thanks to Mars Hydro for the TS1000 and Royal Queen Seeds for seeds ❤️❤️
https://www.mars-hydro.com/ts-1000-led-grow-light
https://www.royalqueenseeds.com/autoflowering-cannabis-seeds/537-mimosa-automatic.html


Likes
91
Share


@PEAKYPLANTERS
Follow
ladies and gentlemen .... welcome to the end of this other journey together in the enchanted valley of Peakyplanters 🌈 My God .... the plant in front is really impressive 😲
it literally branched its flower around the net and a huge cactus came out of it !!! it was a real shame not to be able to balance the nutrition of the other two, this is the proof that each plant has its own diet!
So, in a way, it lacks a little structural strength ... but all in all it wasn't that bad ... I only suffered a bit in the final weight
Its flowers have a very particular smell 😋
Likes
26
Share


@CampaCavallo
Follow
E si parte con la seconda settimana vegetativa💚
Aspettiamo un attimo che si riprenda la piccola per poi iniziare a darle un po di Plagron👍🏻
30.10.23 trapianto => 6,5 litri ✅
.. Sul fondo del vaso, questa volta, ho provato a mettere lapillo vulcanico al posto della classica argilla espansa👍🏻
Ad un giorno dal travaso possiamo già vedere che la piccola è in netta ripresa💪🏻👹🍬
2.11.23 Fertilizzanti ⚗️

Processing
Likes
22
Share


@Rtush
Follow
Entering week 7 and this plant is one of a kind!
Really getting fat, not a lot of frost on her but still enough time for her to shine!
Sturdy little girl, recovers very well from HST (and accidentally topping)
Likes
10
Share


@Boris1888
Follow
I've bn a bit late with update but all well ,I flushed 2 plants for 1 week and now just 1 lsd left,,,,I managed to get some ATA-XL so hoping for denser buds on the last one I'll give the overall harvest weight at the end,happy growing growers👍👍👍👍👍👍👍
Likes
81
Share


@HerbalEdu
Follow
Smaller buds: 7 day drying
Main colas: 8-9 days drying
Curing: 15days
( currently 7 days and on going, will update if needed)
This is my first time with bubblehash, and very happy with the result, got some quality smoke and more than i expected.
I did a total of 5 pass:
- 3 first pass with all the bag 220µ - 190µ - 150µ - 70µ - 45µ - 25µ
- 2 last pass with 220µ - 150µ - 25µ bags only
All in all, beautiful growth, dank smell in the tent room last 2 weeks of flowering, they reached a perfect height for my set up with 3 weeks of veg, good yielder in comparison to some other strain i have grown so far & nice amount of frosty trim material to work with for hash or else.

Likes
147
Share


@MrJones
Follow
MrJones Black Berry OG
🔹🔹🔹🔹🔹🔹GOALS🔹🔹🔹🔹🔹🔹
🌞Flowering Environment - 75/80℉ and 50% Humidity
💧 Feeding - Advanced Nutrients Bloom Regiment - Great APP!
🍃Training / Letting ladies stretch then heavy defoliation under the trellis and cleaning above to open up the airflow.
🕷️ IPM - Will be using Green Cleaner" 1 OZ per Gallon, and CannControl from Mammoth alternating between product each month for Integrated Pest Management.
💡Mars Hydro LED / Veg TS-1000 / Flower 480W FC 4800, this light is just performing very well!
🔹🔹🔹🔹🔹🔹🔹🔹🔹🔹🔹🔹🔹🔹🔹🔹🔹🔹
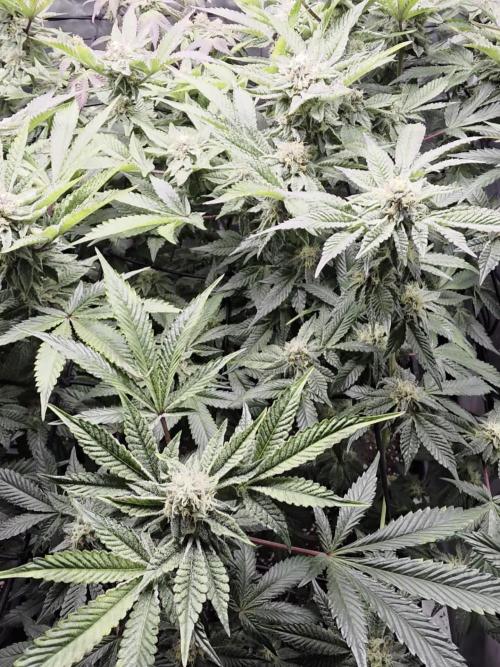
📜 Rambling - With week 10 here, the ladies are about 2.5 weeks into flower, they continue to stretch nicely, and starting to stack on some buds!
🔹🔹🔹🔹🔹🔹🔹🔹🔹🔹🔹🔹🔹🔹🔹🔹🔹🔹
▶️ Friday - 03.12.21 / Just feeding and admiring, not too much left now but the waiting!
▶️ Saturday - 03.13.21 / The ladies like their 40 ounces every day, they continue to stack up, the internode spacing should make for some rather lush buds.
▶️ Sunday - 03.14.21 / Fed the ladies tonight, I hope the stretch stops soon, these ladies are just getting so tall!
▶️ Monday - 03.15.21 / Continuing to feed 40 ounces per day - the girls are just lusty drinkers!
▶️ Tuesday - 03.16.21 / The internode stacking is unreal, the leaf production is so fast, thinking I may have to do another deep defoliating!
▶️ Wednesday - 03.17.21 / Cant help to stare at these ladies, they grow so fast think I can see it!
▶️ Thursday - 03.18.21 / Last day of week 10, 3.5 weeks into flower, next week we should see fat stacks!
🔹🔹🔹🔹🔹🔹🔹🔹🔹🔹🔹🔹🔹🔹🔹🔹🔹🔹
📜 Cultivar Information - We have created this strain by crossing the best Black Domina available with Very Berry and our own Lost Coast OG Kush, this plant produces large colas with a super intense sweet berry flavor with a sweet-smelling aroma that varies from fruit and berries to sweet candy. This lady offers tight internal stacking giving a perfect structure for those super heavy colas, which is perfect for growth both indoors and out, if grown outside she is fairly resistant to mold and powdery mildew which is a real bonus with such large colas.
🔹🔹🔹🔹🔹🔹🔹🔹🔹🔹🔹🔹🔹🔹🔹🔹🔹🔹




Likes
16
Share


@RFarm21
Follow
Olá growmies.
Rega: 5 janeiro.
Estou à espera que os tricomas amadureçam mais, se não fosse por isso diria que já estava pronta para colher.
Likes
30
Share


@FlavoursUk
Follow
Great week for the Peyote Cookies, faded out beautifully. She stacked up size right until the end. Smells super dank, and her buds are rock hard. Loads of purple in this pheno. Very high calyx to leaf ratio which is what I like to see. Definitely bringing her back into the garden again. Her flush was done for about 20 Days. She’s now down drying.
Likes
15
Share


@38PLAN
Follow
Stiamo ancora raccogliendo,ancora nessuna pianta é morta,sto rimuovendo piano piano le cime più mature,così facendo evitiamo le cime popcorn e diamo il tempo alla pianta di riempire anche le cime inferiori,per adesso levando quella fumata e venduta siamo all'incirca sui 780g,però aspettiamo anche il nuovo stendino,alla fine del raccolto dovremmo arrivare a quasi 2 Kili con 7 piante e 6 vasi,con una media di 333g a pianta,ho pubblicato tutto quello che potevo,ogni procedimento,spero vi piaccia e mi seguiate
Likes
36
Share


@GYOweed
Follow
Stem rubs are light lemon cake. Some have no taste. 3 are pretty big, 1 no smell nothing special. One is unwinding twisted root but has tight nodes lots of new growth but no stem rub.
They all nice n hairy good immunity some are very fast and nice smell!
Culled the two shortest ones after snell n node test they were just nothing special. Down to 3 with one lanky one small nodes but hairy n good smell gonna give her a week n see.

Likes
189
Share


@Green_Man_420
Follow
Evening fellow growers. Hope all is well and you’re all doing great!
⚠️I’m down to one 😞😞😞😞 the other lady is now chilling in the garden. I was running out of space and no matter what I did I couldn’t get her back.
I will add more pics but it’s just too cold in the garage to have them out.
This has got to be one of the hardest grows i have done. I always knew starting this early in the year was going to be hard and it’s proving that way.
And again a massive shout to James and the team at RQS for supporting me and supplying me with the seeds. 🙌
Here we are week 6 the start of the second week of flower. This lady is moving along alright (I think) although the cold weather is back and has not been to kind over the last couple days. She is still stretching out which is good, some sativa characteristics coming through. Just signs of cold which isn’t the best. The bud sites are forming slowly and the structure of these plants looks good. Let’s see what this week brings. ✌️
Day 37, Watered tonight with 500mil she is doing ok. Added some nutrients in today as she has only been on plain water and looking a little faded. I’ll try get some pics later but it’s too cold to be in the tent any longer than I need to be. ✌️
Day 38, warmer today and this girl is finally starting to love life. Nothing done today just a few photos and a little video. ✌️
Day 39, watered with 500mil and a bit of feed. Took a few leafs off too. ✌️


Likes
7
Share


@JsGrowShow
Follow
Stress training hair cut water change fresh nutrient mix hit the numbers right on the head 💯👊☀️

Likes
8
Share


@STAYINGONMYMAINCBATORUNTWO
Follow
I made some extract and then made some gummies I’ve added the outcome in all running diaries
She’s doing amazingly although I’d like her to be a little taller in that corner, hopefully during transition she shoots up to canopy level but all in all no complaints! I’ve turned them to 12-12 yesterday so awaiting bloom to activate! I’m using bud blood on this girl and all the other back row plants and bud ignitor on my front row plants to see what has the best outcome to start bloom!
