Likes
14
Share
@DTHEREID
Follow
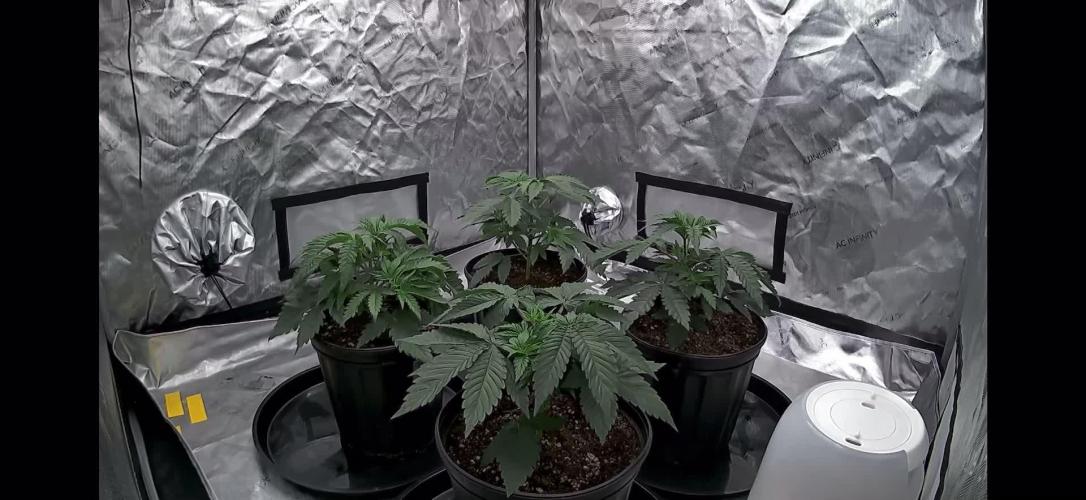
She’s flawless with no problems, can’t wait to see what week 4 brings for flower development! Week 5 I’ll be running koolbloom powder. 30 inches tall after being laid down and trained. Have to conserve room for height restrictions in my space. Starting to get a bit bigger and the structure of the bud sites are pretty solid.
Likes
40
Share
@xbrico
Follow
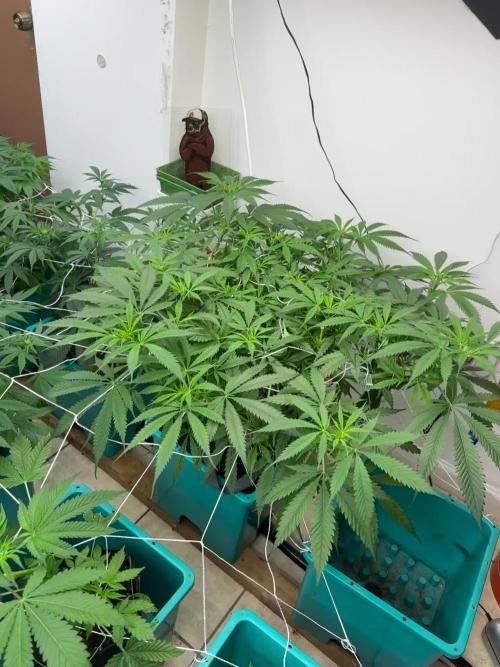
Day 89 - pH thing has been quite steady the last few days, but I think part of the reason is I have been keeping it over 6 (between 6.1 & 6.3) which makes me think it may not be able to feed on something so keeps pH stable (This pH issue could be root acidification with too much Potassium; it seems to coincide with the PK Warrior being added - pH needs to be below 6 for Potassium uptake to happen so I artificially blocked it by keeping pH above 6!!!). EC also going up but not as quick as it was...drops back further than it was when adding RO water (i.e. if it drank 10L and EC went from 1.7 to 1.9, adding 10L back takes it to 1.6). So, as I have been promising myself for the last couple of days, I did a full tank change. Have dropped the feed substantially for the start of week 7 (Which is technically Monday coming). New Nute Strength: Silicon - 1ml/L Sumo Boost - 2ml/L Bloom A - 1.2ml/L Bloom B - 1.2ml/L PK Warrior - 0.4ml/L Sensizym - 2ml/L Fulvic - 2ml/L EC 0.8, pH 5.9 Did have A & B @ 1ml/L but EC was barely 0.7 (Background EC of water is 0.2) so added the touch more A&B so as not to super starve them. Will now monitor pH/EC for the next few days and try to keep levels nice and even for the next 9-10 days before going to week 8 force and week 9 flush and the finishing bulb! ************************************************* Day 85 - Dayum this pH management getting funky now!!! For the last week, pH keeps taking a nose dive (0.5-0.7 a day) with water level dropping and EC rising. Can't work out what the girls are at at all. Apart from lower leaf loss due to light being blocked, the plant is creating some new leaf matter (As you would expect) where light is getting reflected down low but can't work out the pH drops. No matter what EC i set them too, or pH, they only appear to be taking on water...or something micro (Ca/MG or the likes) and leaving the macro's. Topped up tank with some RO (Reclaimed from dehumidifier) water and only added calmag since tank change 3 nights back (It has some N in it for the new green and hopefully just gives what it needs with Ca/Mg). Apart from that, just keeping an eye on things to make sure no burn...dont want to put them on a starve on the beginning of Flower week 6!!!
Likes
Comments
Share
🌱 Grow Diary Update — Sour Diesel Week 4 | First week of flower (12/12) This week, the spotlight is on Sour Diesel, because she clearly stood out from the rest of the room — and when one plant speaks louder than the others, we listen. ⸻ 📍 Quick recap (so everyone is on the same page) • Sour Diesel just entered week 6 / first week of flower • She was running on Autopots with mineral-only feed • Organics and amendments were removed from the Autopot system • The rest of the room handled this change fine • She did not She started showing: • Droopy posture • Loss of vigor • Early deficiency-type signals • A general “I’m not comfortable” look Important detail: 👉 She was the only plant reacting like this. ⸻ 🌿 Why this happened (the key lesson) Sour Diesel is an old-school genetic, and not all strains respond the same way to abrupt system changes. In her case: • She was previously thriving with organics + minerals • Removing organics reduced: • Nutrient complexity • Biological buffering • Availability of secondary elements • This happened right at the transition into flower, when demand increases sharply On top of that, we had environmental pressure: • Outside temps: ~4°C • Outside humidity: ~98% • Room stabilized at: 21°C / 58% RH Those conditions are acceptable — but combined with: • Feed change • Flower transition • Genetic sensitivity …it was enough for her to react. ⸻ 🚿 Why we took her off Autopots Autopots are great — but they’re not universal. We removed her from the Autopot regimen because: • She needed immediate, tailored feeding • She wasn’t responding well to mineral-only delivery • Hand-feeding lets us: • Adjust EC gently • Reintroduce organics • Observe response feed by feed This wasn’t a system failure — it was a plant-specific decision. ⸻ Current feeding strategy (now) • Medium: hand-fed (off Autopots) • EC: 1.43 • pH: 5.9 • Full recipe: organics + minerals • Added: CalMag Pro Why CalMag Pro? • We’re using rainwater + humidifier water, which is very soft • Low calcium & magnesium availability can show fast in flower • This is both: • A corrective move for her • A preventive move for the whole room Meanwhile, the rest of the Autopot system is running: • 2.29 EC • pH 6.0 • Mineral-only • Other plants are stable and happy ⸻ 🌬️ Environment (current) • Lights: stable • Airflow: good • Temp: ~21°C • RH: ~58% Nothing extreme — but this shows how context + timing + genetics matter more than numbers alone. ⸻ 🔮 What we expect (and what we don’t) What we expect: • Gradual recovery, not overnight • Leaf posture improving first • New growth responding before old leaves • Stability over speed What we don’t expect: • Instant “fix” • Old damage to reverse • Her to behave exactly like the rest of the room From now on, she’ll simply need a bit more attention than her sisters — and that’s okay. ⸻ 🧠 The bigger takeaway This is a perfect example of why: • There is no single “best way” • Systems are tools, not rules • Genetics always get a vote • Listening beats forcing We’re not chasing perfection — we’re responding with intention. We’ll keep monitoring her closely over the coming week and adjust calmly, step by step. As always, this is just our experience and observation — not a universal recipe. Plants teach, we adapt 🌱💚 👽 New team member Meet Mr. Baggy Our new fluffy alien/beaver/whatever-he-is friend, won through a Grow Diaries contest. Expect to see him around — he’s officially part of the grow now. Week 5 Veg/pre-flower | 8×8 Tent | Master Conditions 🌍 External Environment (Context) • Outside temperature: ~5 °C • Outside RH: 92–96% (very high humidity) • Strong seasonal pressure influencing internal stability ⸻ 🌡️ Internal Tent Conditions • Tent temperature: ~21.8 °C (noted drop due to cold external temps) • Tent RH: ~58% → Very good considering outside conditions ⸻ 💨 Airflow & Circulation • Primary airflow: Bottom → top → wall return • Pattern: Full-room vortex circulation • Additional fans: Central airflow to break blind spots and mix layers • Goal: No stagnant pockets, uniform VPD across canopy ⸻ 💧 Water Source & Rationale • Water: Dehumidifier water + rainwater • Base EC: force • Systems designed to support plant intelligence, not override it FOR DISCOUNT CODES AND MORE JUST FOLLOW THE LINK https://website.beacons.ai/dogdoctorofficial 📲 Don’t forget to Subscribe and follow me on Instagram and YouTube @DogDoctorOfficial for exclusive content, real-time updates, and behind-the-scenes magic. We’ve got so much more coming, including transplanting and all the amazing techniques that go along with it. You won’t want to miss it.GrowDiaries Journal: https://growdiaries.com/grower/dogdoctorofficial Instagram: https://www.instagram.com/dogdoctorofficial/ YouTube: https://www.youtube.com/@dogdoctorofficial ⸻ Explore the Gear that Powers My Grow If you’re curious about the tech I’m using, check out these links: 🔆 Lighting & Environmental Control • Future of Grow — Advanced LED lighting technology https://www.futureofgrow.com/ DISCOUNT CODE: DOG20 • Lumiflora — Under-canopy LED lighting https://lumiflorade.com/ • TrollMaster — Environmental controllers and automation gear (past collaboration) ⸻ Genetics • Zamnesia Seeds — Genetics used in this project https://www.zamnesia.com/ ⸻ 🌱 Soil, Substrates, Boosters & Root Support • Plagron — Substrates, bio mixes, and supportive products https://plagron.com/en/ ⸻ 🎒 Storage, Curing & Preservation • Grove Bags — Curing and storage solutions https://grovebags.com/ ⸻ 📸 Photography Equipment & Tools (Not sponsors, but part of my creative toolkit) • Sony A6700 • Sony full-frame macro lens + few more • Stacking photography workflow - learning • iPhone (for behind-the-scenes shots) We’ve got much more coming as we move through the grow cycles. Trust me, you won’t want to miss the next steps, let’s push the boundaries of indoor horticulture together! As always, this is shared for educational purposes, aiming to spread understanding and appreciation for this plant. Let’s celebrate it responsibly and continue to learn and grow together. With true love comes happiness. Always believe in yourself, and always do things expecting nothing and with an open heart. Be a giver, and the universe will give back in ways you could never imagine. 💚 Growers love to all 💚 📸 P.S. – The Eye Behind the Lens All photos in this diary (for now — except for the ones showing the camera, which I took with an iPhone) are taken with a Sony A6700 paired with a Sony full-frame macro lens and a few more. Photography is part of the story — it’s how we share the fine textures, the glow, and the quiet details that words can’t always capture. I’ve also started experimenting with photo stacking — a technique where multiple images, each taken at a slightly different focus point, are layered together to create one perfectly sharp image from front to back. It’s not digital enhancement or AI; it’s pure photography — a way to reveal the plant’s beauty in microscopic depth, from trichome to petal. You’ll even see a few shots of "ghost me" capturing the shots — camera, lens, setup — because every grow deserves not just to be cultivated, but documented like art. FOR DISCOUNT CODES AND MORE JUST FOLLOW THE LINK https://website.beacons.ai/dogdoctorofficial NEW DISCORD - Official Server Invite Link : https://discord.gg/ksjAkA5T74
Likes
36
Share
Loved growing this. Sang its praises rhe whole way through because it just looked like a beast. I like the pretty Cali strains but I always find the yields are close to frustrating for abilities not up up there. Overall the strain helped me take chances that paid off so I really enjoyed it. Will grow again. Threnneighbors should smell this on the balcony this summer 😂💚🙏🏼
Likes
13
Share
Day 70 - She's almost done stretching and starting to focus on bud formation. She grew 12" in the last 7 days and is drinking 1.5 gallons per day. Last week, the pH didn't rise quickly enough on it's own, so I will add pH Up to get her to 5.5 and let it drift up over the next week. Increased light to 45 DLI. Day 76 - For the last two weeks, I've had to add pH Up for the first 3 days after a water change to get the pH in range. By day 4, the pH starts slowly drifting up like it should. Wondering if getting more oxygen in the water will help better regulate pH
Likes
19
Share
I have finally been able to get a dome with light and heat, so the Runtz muffin has had more room in the tent to stretch and expand. Close to starting its flowering process, the plant looks healthy 🙏
Processing
Likes
12
Share
5-26-19 Day 40 of flower and they are stacking hard! Smells are getting stronger and they are healthy. Feeding @ 550ppm (1.1ec) 6.1-6.3pH. Switching between Massive and Liquid Koolbloom every other week.
Likes
26
Share
@GrowGuy97
Follow
Day 14, Two of the Orange Sherbets are a little behind & the one I’m trying to pull back from nutrient burn.. So far the White Widow Autos by Seedsman have been doing the best! Day 17 two of the Orange sherbet are a little behind the rest of the plants but overall I would say everything is going good! Seems like the orange sherbet that had the nutrient burn is starting to bounce back! Day 19 They are all really starting to take off! Probably gonna do some LST tonight or tomorrow!
Processing
Likes
13
Share
Lowered the nutes -- didn't feed every 3 days like I previously did, just watered today. Overall looking good. I'm gonna have to move some of the plants to the tub because the bigger auto is getting so bushy. Let me know what you think in the comments, please!
Likes
21
Share
A-Week 10(Day 74), B&C-Week 10(Day70) A- Still fattening up, took a Growmie’s advice, she was a little over fed, eased back this week on the nutrients and just used water and Sensi CalMag Extra. Gave her a regular dose Friday and she seems good, no new discoloured/burnt leaves. Tricomes are still showing as clear and cloudy mixed in with a few amber here and there. Watching closely to when I feel she is done, then I will start a water flush cycle for the last few feeds… B- Is looking great, doesn’t seem to have slowed down one bit, hard to tell sometimes when you are looking at them so frequently, but week to week you can see the stack grow 😍 Defoliated a little, and pulled her branches down a bit to let in more light, otherwise she’s chugging along! C- Is making me wonder how much she will produce?! Big colas all around, from 10-14 inches long 🤩Stacking very well, and loving the Indo Nutrient line. She’s a big drinker, takes almost a full gallon every 2.5 days. I figure it will be at least 1-2 weeks longer to harvest than A… Happy Gardening Growmie’s 🌱😎💨
Likes
64
Share
11.29- the 4x4 went up yesterday with a brew new LED. all plants are happy since overnight, watered this morning. Older GDP id's showing me purple hues on sugar leaves, along with cannibalizing its lower fan leaves. The diary GDP is doing great as well, we are in the 5th week of flower, could not be happier. May brew a P K tea for the 5gal just to get it to end of flower, but no more dry nutes to either plant. The main diary plant is packing on weight, continuing to move leaves off of bud sites and tucking them under. All in all things are good, temp is very dropped in the tent (68f-74f) and RH is steady 35%-45%. More pictures to come as I will be going to the garage often to monitor environment. Thanks for reading all, it means a lot! Happy growing! 12.2-5gal is doing amazing. Deficiencies showing and buds/sugar leaves changing color to a purple hue. Quite cold in that tent at night, hovering around 61f. Minor defoliation performed 12.1 to remove some sickly leaves and provide light to lower canopy. Trichomes are appearing everywhere also. Time to stop thinking I'm doing something wrong and enjoy what this plant is providing. Next watering will help the plant get to the finish line for sure. *3gal not tracked on diary stats, but harvesting 12.7-12.9 on the full moon. Trichome check shows 50/50 clear to milky. Darkness will ensue 3-4 days before chop...i will also only be giving one more watering to the 3 gal of un PH'd water. Water for both again 12.3. Thank you for reading, please follow and visit my Instagram page! 12.4-last update to the week, plants were watered last night until very minor run off to the 5gal. Gave the 3 gal 1/2gal bottom watering but pot is still light. End is near, 3gal harvest officially on 12.8 in the AM. Gave the 5 gal some banana juice for P K, maybe this will help the obvious nutrient deficiencies this early yet in flower. Going to let this plant ride past the 8th week of flower to ensure its reached it's full potential. It's covered in trichomes though already and pulling from its leaves. I cant wait for the new pics tomorrow morning, start of the new week. Thanks for following along!
Likes
16
Share
@Ensign420
Follow
Introduction - Week 14|07 Summary - Ensign's log, stardate 9437.65, Great week of growing! Wow what a good week! Growth in the main tent has all around been incredible! Submitted my first submission to the Global Grow Cup! Filmed a video of the solo cup container (marked with the ticket/order number) that will be used for the competition. Also had to fill and prove the solo cup holds 2 cups of soil. Now I need to root a clone (for the first time), transplant her into this cup, and submit my 2nd entry before the 30th of this month. As far as my first attempt at cloning, have already begun the rooting process! Managed to take cuttings from 3 out of the 6 phenos in the main tent (the first cutting was also my first time topping). Soaked the cuttings for two days before planting them into Coco Coins. So far everything has gone surprisingly well! The clones are now rooting under the propagation dome with the vents fully closed. Will check for roots soon! At the end of the week, growth was just raging! Was planning on flipping to flower in a week, but decided to begin the first week of flower next week! Thus this is the last week of veg. Plan to flip to 12/12 next Monday! Onwards to next week! [START OF WEEK 14|07] ========================================================== Garlic Budder #1 - WEEK 14|07 - Full Veg Wk5 Garlic Budder #2 - WEEK 14|07 - Full Veg Wk2 Garlic Budder #3 - WEEK 07 - Full Veg Wk5 Garlic Budder #4 - WEEK 06 - Full Veg Wk4 06/03/24 → 06/09/24 This Week's Estimated Goals ---------------------------------------------------------------------------------------------- DLI: ~26 mol/m²/d PPFD: ~400 μmol/m²/s VPD: ~1.0 kPa This Week's Meter Readings & Averages [Lights On: 16:00 - 10:00] ---------------------------------------------------------------------------------------------- DLI: 24.56 mol/m²/d PPFD: 379 μmol/m²/s VPD: 0.91 kPa Soil %: [32.7, 37.6, 37.9, 34.1] ========================================================== Day 01 - Monday - 06/03/24 - Total Days: 098 ----------------------------------- Daily Averages [~23:00] - Temps: 80.7°F [27.1°C] - Humidity: 74.4% - VPD: 0.90 kPa - Soil %: [31, 34, 39, 35] ----------------------------------- - [09:57]: Quick morning check! --- #1 is looking a bit droopy, but almost lights off (at 10:00) so not concerned. --- Nice! Mainly wanted to check on #4 and she is looking great! She’s perked back up and looking good! - [23:08]: Evening check. --- Wow! It’s a jungle in here! --- #1 has gotten too big? Nah!? Keep on growing girl! --- #2 is growing and definitely getting bigger! Growth just looking really weird. --- #3 has continued to get larger and is looking quite uniform in growth! --- #4 is growing and looking perky again! --- Even the original #1 and #2 phenos (in the back) are looking good! --- Wow! #4 is really getting close to the light. - [23:14]: Checked down both fill tubes. --- Both reservoirs were completely dry! - [23:27]: Checked the Ecowitt soil moisture sensor data: --- 30% - [CH01 EB1 - Garlic Budder #1] --- 34% - [CH02 EB2 - Garlic Budder #2] --- 39% - [CH03 GFP - Garlic Budder #3] --- 32% - [CH04 FPT - Garlic Budder #4] - [23:32]: Poured 4 cups of distilled water down EB1’s fill tube. --- Poured 2 cups of distilled water down EB2’s fill tube. - [23:38]: Checked the humidifiers. --- Refilled the 4X4’s humidifier with distilled water. --- Tomorrow, plan to defoliate and start cloning for the first time! --- Going to take multiple cuttings from both #1 and #4 for sure, but still deciding on the rest. --- Getting hyped! Day 02 - Tuesday - 06/04/24 - Total Days: 099 ----------------------------------- Daily Averages [~23:00] - Temps: 81.4°F [27.4°C] - Humidity: 74.3% - VPD: 0.93 kPa - Soil %: [29, 35, 38, 32] ----------------------------------- - [11:59]: Time to film the first entry for the Global Grow Cup! --- Going to be using BuildASoil 3.0 potting soil. --- Filming the video using a stand and my phone. --- This video is mainly to establish the container that the plant will be grown in. Also to prove that the container is a 16oz container and that it can hold 2 cups of soil. --- The ticket (order) number also had to be written on the cup. - [12:36]: Done! --- The video had to be done in one continuous shot with no edits (my original submission does not have the logo). --- There was also a photo that needed to be shot which shows the cup filled with 2 cups of soil (just like the video, the original image submission did not have the logo). --- I think I did everything correctly, but also sent an email for verification of submission and validation. --- Getting hyped! --- [*smokes a bowl] --- Going to defoliate today along with for the first-time, going to take cuttings for clones! --- After a bit of online research, decided to split the cloning process into two days. --- Today going to take cuttings and will soak them in a solution of aloe for 24hrs. Afterwards will change the water out and use straight distilled water. --- Then in a couple days, plan to transplant into coco plugs (Coco Coins) for rooting. --- For optimal results, also be using a rooting hormone (Clonex). --- Well.. Here goes nothing! - [17:01]: Evening check. --- Wow! #1 is looking huge! Her main top is stretching above the lower canopy which is continuing to bush out. --- #2 is growing along. Growth is gnarly and a bit droopy, but she’s getting taller! --- #3 is looking great! Still a bit small, but she is continuing to get larger. --- #4 looks like she needs a watering. --- Both plants in the back are also looking surprisingly great as well! - [17:05]: Checked down both fill tubes. --- Both reservoirs were completely dry! --- As far as today's defoliation, going to leave #2 and #3 alone and will focus my defoliation and cloning on the rest of the plants. --- This will be my first attempt at cloning, also going to try topping for the first time today. --- No pressure Ensign. What can possibly go wrong right? - [17:27]: Time to start the cloning and defoliation process! --- Filled a measuring cup with 3 cups of distilled water. ------ Added 3/4tsp of Horticultural Aloe ------ Added 1 more cup of distilled water --- Mixed the solution and poured an even amount into three separate solo cups. --- Made sure to mark two of the cups (#1 and #4). The unmarked one will be for any other clones from amongst the 6 phenos (if any at all). - [17:43]: Time to top and defoliate #1! --- Using a pair of brand new trimmers (AC Infinity), --- Gently cut the main stalk to even out the canopy. --- Then trimmed and cleaned most of the nodes leaving the top node or two. --- Also trimmed the leaf fingers a bit before placing the top cutting into the cup of aloe solution. --- Now for the rest of the cuttings! --- [~45 minutes later] - [18:32]: Managed to finish defoliating and cutting the rest of the clones. --- Took two more lower cuttings from #1 (3 clones total). --- Took 3 lower cuttings from #4 --- While defoliating, decided to try and clone the original #2 pheno as well. Took 4 small cuttings. --- Similar to the top cutting, trimmed and cleaned each lower node for each cutting before placing them into the cups. --- Before finishing up the 2nd cutting, I noticed the first cutting (the top cut that was also trimmed) was drooping. --- So I did not trim and the leaf fingers for the other cuttings. --- In total there were 10 cuttings taken for potential clones. --- My main focus was to take cuttings and to clean up all the lower growth from both #1 and #4. --- Defoliated and cleaned up the back original phenos as well (also trimmed back the cover crop). - [18:35]: Temporarily placed the cuttings onto the floor of the 4x4 tent. --- Took the trimmings (about 3 cups) and spread them onto the top mulch of #1 and #2. --- Time to set the environmental controls for the 3x3 veg tent. - [18:43]: Within the AC Infinity App, --- For the Veg Tent [3x3] controller, --- Adjusted the 'Vegetative [18/6]' Schedule for the grow light. ------ Set the Mode to ‘On Mode’ ------ Set the START/END times to 04:00PM/10:00AM ------ Set the MAX to 1 --- The IonBoard S33 is now utilizing around 60.8W (at intensity 1 out of 10). --- Adjusted the 'Vegetative [18/6]' Schedule for the exhaust fan. ------ Increased the Humidity’s HIGH trigger value from 81% to 87% --- Adjusted the 'Vegetative [18/6]' Schedule for the humidifier. ------ Decreased the VPD target value from 1.5kPa to 0.8kPa - [18:52]: Moved the cuttings into the 3x3 veg tent. --- It begins! I think. --- Going to let these cutting drink some aloe for a day before switching to straight distilled water. --- Hmm. Could be the white floor of the 3x3 veg tent, but have noticed the S33 has a whiter spectrum whereas the FC-6500 seems to be warmer in color. --- Anyways, - [18:58]: Poured 4 cups of distilled water down EB1’s fill tube. --- Poured 2 cups of distilled water down EB2’s fill tube. - [19:06]: Filled a pump sprayer with 5 cups of distilled water. --- Focused mainly on the straw mulch of #4. --- But also misted the straw mulch for the rest of the plants a bit. - [19:12]: Checked the humidifiers. --- Refilled the humidifiers with distilled water. - [19:44]: Going to be using Clonex rooting gel before planting the cuttings into Coco Coins (pre-soaked with microbes and aloe). But before that begins, going to transfer the Clonex gel into a squeeze bottle. --- Gently peeled back the seal on the original Clonex bottle. Just enough make a tiny opening, --- Then slowly and carefully poured the gel into an empty squeeze bottle. --- Also removed the sticker from the original bottle and placed it onto the new one. - [19:54]: Perfect! --- Instead of applying the gel to the cutting, going to be applying the gel to the Coco Coin. --- This squeeze bottle will make applying the gel a lot easier. --- Will take PPFD readings tomorrow. --- Also will change out the aloe solution to distilled water. --- I really hope I didn’t screw things up before they could even begin. --- Don’t die on me ladies! --- Please. Day 03 - Wednesday - 06/05/24 - Total Days: 100 ----------------------------------- Daily Averages [~23:00] - Temps: 81.9°F [27.7°C] - Humidity: 75.5% - VPD: 0.90 kPa - Soil %: [29, 36, 38, 36] ----------------------------------- - [09:40]: Quick morning check! --- #1 is looking a bit droopy, but looking okay. Topping is a high stress technique so going to take some time to recover. Don’t plan on flipping the main 4x4 tent to flower for a good week or so which should be enough time. --- #4 looks great! The defoliation seems to have no effect on growth. Nice! - [09:41]: Also quickly checked on the 3x3 veg tent, --- Nice! The cuttings are looking great! --- No yellowing and they all seemed to have turned up towards the light. --- So far so good! - [22:53]: Evening check. --- #1 is continuing to dominate this grow! She has spread wide and looking incredible! --- #2 is looking gnarly, but getting there. --- #3 is getting larger! But still a runt. By far, her leaves are the darkest of the bunch, but she is still growing! --- #4 looks happy and growing along beautifully! Wow! - [22:55]: Checked down both fill tubes. --- Both reservoirs were completely dry! - [22:59]: Poured 5 cups of distilled water down EB1’s fill tube. --- Poured 2 cups of distilled water down EB2’s fill tube. - [23:05]: Checked on the 3x3 veg tent. --- Ooo yea! The cuttings are still green! Nice! - [23:07]: Took PPFD readings. --- The cuttings were around 121 μmol/m²/s which gives a DLI of 7.84 mol/m²/d --- Nice! These levels are on the lower range for seedlings (~100-300), perfect! I think. - [23:14]: Swapped the aloe water out to straight distilled water. --- Going to let these cuttings soak for one more day before planting. --- Please don’t die girls! - [23:15]: Checked the humidifiers. --- Refilled the humidifiers with distilled water. --- Ooo yea! --- Tomorrow is the big rooting day! Day 04 - Thursday - 06/06/24 - Total Days: 101 ----------------------------------- Daily Averages [~23:00] - Temps: 81.9°F [27.7°C] - Humidity: 75.2% - VPD: 0.91 kPa - Soil %: [32, 38, 38, 34] ----------------------------------- - [16:20]: Evening check. --- #1 is a bit droopy, but growth is looking green and healthy. --- #2 is looking bigger! She’s also looking sort of droopy. --- #3 is growing along nicely! Looking good girl! --- #4 is looking great! A bit droopy but plan to water today. - [16:23]: Checked down both fill tubes. --- EB1's reservoir still has some water. --- EB2's reservoir was completely dry! - [16:23]: Checked the Ecowitt soil moisture sensor data: --- 28% - [CH01 EB1 - Garlic Budder #1] --- 36% - [CH02 EB2 - Garlic Budder #2] --- 37% - [CH03 GFP - Garlic Budder #3] --- 30% - [CH04 FPT - Garlic Budder #4] - [16:30]: Using a pump sprayer, --- Misted the straw mulch of #4 with 6 cups of distilled water. --- Focused mainly on the straw mulch. --- Also misted the straw mulch of #3 (in the grassroots fabric pot) a bit. - [16:43]: Poured 5 cups of distilled water down EB1’s fill tube. --- Poured 3 cups of distilled water down EB2’s fill tube. - [16:52]: Checked the Ecowitt soil moisture sensor data: --- 56% - [CH01 EB1 - Garlic Budder #1] --- 44% - [CH02 EB2 - Garlic Budder #2] --- 40% - [CH03 GFP - Garlic Budder #3] --- 45% - [CH04 FPT - Garlic Budder #4] - [17:01]: Took general PPFD readings. --- #1 was around 379 μmol/m²/s which gives a DLI of 24.56 mol/m²/d --- #2 was around 333 μmol/m²/s which gives a DLI of 21.58 mol/m²/d --- #3 was around 293 μmol/m²/s which gives a DLI of 18.99 mol/m²/d --- #4 was around 378 μmol/m²/s which gives a DLI of 24.49 mol/m²/d - [17:09]: Took the weekly height and light distance measurements. --- #1 was about 21" tall. --- #2 was about 13.5" tall. --- #3 was about 9.5" tall. --- #4 was about 19.25" tall. --- Hmm.. - [17:19]: Adjusted the right oscillating fan a bit. --- Re-angled the CloudRay S6 oscillating fan upwards. Been noticing that the air has been hitting the tops of the plants so easing off a bit (#1 is still getting hit, but she’s huge so not too worried). - [17:23]: Back to the measurements! --- #1 was about 9.5" away from the grow light. --- #2 was about 17" away from the grow light. --- #3 was about 17.5" away from the grow light. --- #4 was about 11.5" away from the grow light. - [17:46]: Checked on the 3x3 veg tent. --- Cuttings are still green! They do look a bit droopy but no signs of yellowing. --- Okay! - [17:55]: Time to begin the rooting process! --- For my first attempt at rooting, going to be using Coco Coins pre-soaked in saponins, microbes and aloe. --- To further help with rooting, going to also be using Clonex rooting gel. --- Filled a measuring cup with 4 cups of distilled water. ------ Added half of 1/64tsp of Quillaja Saponaria Extract [60] ------ Added 1/16tsp of Horticultural Aloe ------ Added 1/8tsp of Mycrobe Complete --- Mixed the solution thoroughly. --- Time for the Coco Coins! --- 10 cuttings means 10 Coco Coins. - [18:09]: Dropped 10 Coco Coins into the measuring cup. --- The coins immediately started to expand. --- A bit too much.. Oops! --- Poured the solution and Coco Coins into a pitcher. --- Added 2 cups of distilled water to the solution (now at 6 cups). --- Great! The coins are pretty much fully expanded, but going to wait a bit longer to fully saturate each coin. --- [~20-30 minutes later] - [18:42]: Great! --- Took the seedling and flood tray from the AC Infinity propagation dome and placed all 10 Coco Coins into the slots. --- Gave each Coco Coin a quick shake to remove excess solution. The coins were not dripping with solution but still pretty saturated. --- Arranged them into 3 groups with the cuttings in mind. --- Also tried to keep the pre-made holes intact. --- Time to inoculate the Coco Coins! - [18:54]: Using a squeeze bottle, --- While keeping the nozzle from making contact with the coco, gently filled each pre-made hole with Clonex rooting gel. Just enough gel to fully cover the hole of each coco coin. - [19:00]: Time to plant the cuttings! --- Gave each cup a misting of distilled water. Focused on wetting the top growth with water. --- Okay! --- To avoid mixing cuttings up. - [19:01]: Starting with the original #2 pheno cup, --- For each cutting, --- Using a pair of clean trimmers, made a final 45° cut about 1/2" from a bottom node. --- Then stripped away and scared the protective membrane below the node before planting. --- Made sure the node was about 1/2" below the surface of the coco. --- To help with planting, while inserting each cutting, gave the Coco Coin a gentle squeeze to loosen the coco. This also helped to ensure the coco and gel was in good contact with the cutting. --- Once the cutting was planted into the Coco Coin, made sure to place back in the same spot (made sure to keep the cuttings in their groupings). --- Once a cup was complete, made sure to keep the label with the group. --- Re-misted the top growth as needed to keep it wet. --- Also wiped the trimmers with isopropyl alcohol in between cuttings (plan to use 10% bleach solution for next time). --- Repeated this process until all 10 cuttings were cut, planted, and in the tray. --- The coco coins fit perfectly into the tray and don’t reach the bottom. Nice! --- The bottom air gap is important. --- Poured a bit of distilled water through one of the empty slots into the bottom of the tray. Just enough to fill the bottom of the tray, but not enough to reach any of the Coco Coins (~1/4cup). - [19:35]: Placed the propagation tray with cuttings into the 3x3 veg tent. --- Placed the first layer of the propagation dome on before giving the sides a misting of distilled water. --- Also sprayed the top of the propagation dome before covering the cuttings. --- Vents are all fully closed. - [19:40]: Placed the bar lights onto the top of the dome before configuring the controller. ------ Set the START/END times to 04:00PM/10:00AM ------ Set the bar light’s intensity to 2 (out of 10). --- Also made sure the propagation light controller’s time was in sync with the Controller 69 Pro. - [19:47]: Took PPFD readings. --- The cuttings were around 136 μmol/m²/s which gives a DLI of 8.81 mol/m²/d --- The PPFD levels are similar to the floor. --- Perfect! --- Going leave the IonBoard S33 on during this rooting process. --- Will check back tomorrow to cycle the air under the dome. - [19:56]: Checked the humidifiers. --- Refilled the humidifiers with distilled water. - [20:17]: Quick night check! --- Ooo yea! Growth is raging and looking perky! --- Mainly checked on #1 and #4 which were looking incredible! --- Keep on growing ladies! Day 05 - Friday - 06/07/24 - Total Days: 102 ----------------------------------- Daily Averages [~23:00] - Temps: 82.7°F [28.2°C] - Humidity: 76.2% - VPD: 0.89 kPa - Soil %: [37, 40, 38, 35] ----------------------------------- - [10:03]: Decided to increase the ambient temp in the 3x3 veg tent. --- Within the AC Infinity App, --- For the Veg Tent [3x3] controller, --- Adjusted the 'Vegetative [18/6]' Schedule for the heater. ------ Increased the Temp target value from 78°F to 82°F --- Hopefully this will help to keep the veg tent at a more consistent temp. - [22:26]: Evening check. --- Ooo yea! The garden is looking incredible! --- #1 is looking perky and just bushing out! Wow! --- #2 is getting big! Growth is weird and leaf fingers are huge! Just going to let her grow. --- #4 is looking happy and growing along like a champ! Nodes are starting branch out and she is turning into a bush! - [10:28]: Checked down both fill tubes. --- Both reservoirs were completely dry! - [22:33]: Poured 5 cups of distilled water down EB1’s fill tube. --- Poured 3 cups of distilled water down EB2’s fill tube. - [22:40]: Checked on the propagation dome (inside the 3x3). --- Ah yea! Looking great ladies! --- Lifted the top of the dome to let some fresh air in for a bit. --- Wow! --- Leaves still look nice and green! --- So far everything looks great! --- Just going to continue on! - [22:53]: Checked the humidifiers. --- Refilled the humidifiers with distilled water. - [11:01]: Decided to adjust the humidifier for the 3x3. --- Within the AC Infinity App, --- For the Veg Tent [3x3] controller, --- Adjusted the 'Vegetative [18/6]' Schedule for the humidifier. ------ Increased the VPD target value from 0.8kPa to 1.5kPa --- The higher VPD level will essentially turn the humidifier off. --- I won’t be needing the humidifier for a good week so might as well save the water. Day 06 - Saturday - 06/08/24 - Total Days: 103 ----------------------------------- Daily Averages [~23:00] - Temps: 81.6°F [27.6°C] - Humidity: 74.9% - VPD: 0.91 kPa - Soil %: [35, 40, 37, 31] ----------------------------------- - [07:40]: Quick morning check! --- #1 and #4 are looking perky and happy! --- Also checked on the propagation dome, --- All cutting still look green! Hyped! - [20:02]: Evening check. --- Wow the garden is raging with growth! --- #1 has blown up! She has clearly recovered and growth is ramping up again! --- #2 is stretching upwards! --- #3 is now the smallest of the 4, but still getting larger! --- #4 is looking incredible! Wow! Growth looks perky and happy! - [20:05]: Checked down both fill tubes. --- Both reservoirs were completely dry! - [20:10]: Poured 6 cups of distilled water down EB1’s fill tube. --- Poured 2 cups of distilled water down EB2’s fill tube. - [20:16]: Checked the Ecowitt soil moisture sensor data: --- 35% - [CH01 EB1 - Garlic Budder #1] --- 40% - [CH02 EB2 - Garlic Budder #2] --- 36% - [CH03 GFP - Garlic Budder #3] --- 27% - [CH04 FPT - Garlic Budder #4] - [20:19]: Using a pump sprayer, --- Misted the straw mulch of #4 with 5 cups of distilled water. --- Focused mainly on the straw mulch. --- Also misted the mulch of #3 a bit (in the fabric pot). - [20:27]: Checked propagation dome (in the 3x3), --- To cycle the air under the dome, lifted the top off for a bit. --- Ooo yea! Everything is still green and looking great! --- Keep on rooting ladies! --- Oops! - [21:45]: Checked the humidifiers. --- Refilled the humidifiers with distilled water. Day 07 - Sunday - 06/09/24 - Total Days: 104 ----------------------------------- Daily Averages [~23:00] - Temps: 81.5°F [27.5°C] - Humidity: 74.8% - VPD: 0.91 kPa - Soil %: [36, 40, 37, 36] ----------------------------------- - [08:18]: Quick morning check! --- Nice! The main tent is looking great! #1 and #4 are both raging with growth! --- Checked on the propagation dome (inside the 3x3) and the clones are still looking green! --- Wow! Everything is going almost too well! Just keep on growing! - [19:08]: Evening check. --- Garden is just exploding with growth! Seems everyone has fully recovered from the defoliation and topping! --- Wow #1 is bushed out and looking incredible! --- #2 is growing really starting to get large! Growth still is funky, but stoked none-the-less. --- #3 is starting to fill in the pot! Getting larger! --- Wow! #4 is getting taller and looks healthy and green! - [19:12]: Checked down both fill tubes. --- Both reservoirs were completely dry! --- Wow the canopy is really starting to get taller and closer to the light. May need to raise it up soon. --- Absolutely surprised how low the light levels have been throughout this entire cycle. Barely moved the light and have not increased the intensity past 2 (out of 10). Less is really more. --- Anyways! - [19:18]: Checked the Ecowitt soil moisture sensor data: --- 36% - [CH01 EB1 - Garlic Budder #1] --- 41% - [CH02 EB2 - Garlic Budder #2] --- 37% - [CH03 GFP - Garlic Budder #3] --- 34% - [CH04 FPT - Garlic Budder #4] - [19:19]: Poured 6 cups of distilled water down EB1’s fill tube. --- Poured 3 cups of distilled water down EB2’s fill tube. - [19:24]: Checked propagation dome (in the 3x3), --- To refresh the air, lifted the top off for a bit. --- Sweet! Still green! Wow! --- Using a spray bottle, misted the top growth with distilled water. - [20:35]: Checked the humidifiers. --- Refilled the humidifiers with distilled water. --- Wow what a week! --- Growth has been just insane in the 4x4 tent! All plants have fully recovered and have just exploded with growth. --- I think it’s time to flip to flower! --- Also, I’m absolutely baffled about how well the cloning process has been going. --- So far no issues! --- Not complaining, but just surprised. Keep on growing ladies! --- If all goes well, should have fully rooted clones soon ready for transplanting (into solo cups of course). --- Absolutely hyped for next week! --- Maximum warp Ensign, Engage! [END OF WEEK 14|07]
Likes
9
Share
@gr3g4l
Follow
Una semana en la que seguimos observando el engorde de los cogollos y una disminución de los pistilos. Esta variedad se calcula que estaría entre 45-50 dias pero por lo que voy viendo a mi se me retardaron un poco, posiblemente llevaré un retardo de una semana mínimo. This week we've continued to observe the buds fattening and the pistils decreasing in size. This variety is estimated to take between 45-50 days, but from what I'm seeing, mine are a bit delayed, possibly by at least a week.
Likes
15
Share
@Waveform
Follow
Not much to say about this real first grow week’s start. Everything looks ok, steady growth at 40% light. I had to restart the control app a few times, therefore the broken graphs. At night times, the control software tries to attain optimum humidity rather than optimum VPD. That’s why VPD is dropping when the lights are out. CO2 is back to baseline – really wonder what the reliable values are … I found I have to silence the blowers when a timelapse photo is being taken. The shaking you see at the beginning of the grow video should not appear, or to a much less degree, in the future. Day 13 (July 30th) shows good, steady growth. Leaves are a bit spotty, although less then the processed images show. Something to be worried about? I would not currently … All are developing their 3rd nodes now. The controlling Raspberry Pi crashed last night when I tried to access it remotely … ;( – looks like the Connect software is in need of an update. The leaf temperature sensor is now really aimed at lady-to-be nr. 1’s leaves. Nothing to change that I see. I won’t cut the top yet, just watered the outer circle of the big pots slightly to encourage root growth. Day 14: Nice growth. First plant is now at 11 cm, and at 12 cm on day 15. Nothing special to report so far, except for I had to move the internal camera a bit upwards to keep little lady #1 in focus. Day 16 and last day of this week (Aug 2nd): The young ladies are now at about 14 cm tall. Growth looks very compact though. I think the two inside girls will lose their heads next week; I’d still prefer to have one or two more nodes available. Pictures of this day are taken at the end of the plants’ day. Notice their leaves are pointing upwards, which should be a sign that they want more light. I turned the lights up by another 20% for a total of 60 W now. Weather was pretty hot the last days so it wasn’t possible to stay in optimum VPD range but as long as growth is this satisfying I don’t mind. I will water them slightly at their next day start. Outside plant’s soil humidity might still be at around 58% officially, but drying starts at around 40% with this measurement and the sensors are placed quite closely to the stems so outer soil is dryer. I am preparing the plant water with some additions and a frequency imprint suing some Solfeggio and Schumann frequencies.
Likes
7
Share
@vicisdope
Follow
Feb 25 Miss Mia Wallace is growing nicely! See images Feb 19. I had a bad day. In general. Whoever is in charge of autocorrect on iOS update is either on GrowDiaries (in which case, bravo and what strain are you growing) or should be auto-canned. Anyhoo Miss Mia Wallace. Buds are boomin. Did a NPK treat. *TEST And looks a little low on nutes but otherwise ok. Agree? Comments on this? Would love feedback. The scrog net - installed by the autocorrect person as it turns out - still sloppy but doing its job. Turned down the power on the quantum board. Is intensely of the light the same as distance? Help! More to come after (*later) in the week. Took some vids also. Have a great day folks!
Likes
26
Share
Nothing but plain water this week as the bulking has continued.. trichomes are cloudy and pistils are at least 60/70 percent red depending on the pheno. That tells me its about time to harvest. Also would like to get these ladies down to avoid any bud rot or mold in the larger buds as they are getting quite big and will hold much more water and have lost quality top buds before due to over flushing and the buds having to much water in them at the time of the actual chop and hang. Anyways, they look great I cant wait to give them a try.
Likes
15
Share
@Wizzel420
Follow
The odd amber tric is showing up, given her the first flush today, filtered water at 24 PPM ph 6.8: flushed her with 3 litres. Leaves starting to yellow expecting them to really yellow off this week. Smells of berries, baked cheesecake and pine
Likes
12
Share
@HighKing
Follow
All in all a good run but because of my fault with the wrong lightcolour. Wont Happen again. On to the next one. (After I smoked All these)
Likes
5
Share
🗓️ Week 7 – Flower Week 3 (MAC n Cheese only) This week called for a slight adjustment in the feeding plan: I had ramped up to ~75 % of the Advanced Nutrients schedule, but the very tips of the leaves started showing mild signs of burn. To stay on the safe side, I’ve dialed it back a bit. 🌱 🌿 MAC n Cheese has been lollipopped along with the others – now all the plant’s energy can focus on developing the top sites. 📏 Post-stretch height: 102 cm Stretch seems to be complete, and this girl definitely reached for the sky. The tent is officially maxed out – lights are at their highest position now, with very little room to spare. 😅