


Likes
Comments
Share


@eldruida_lamota
Follow
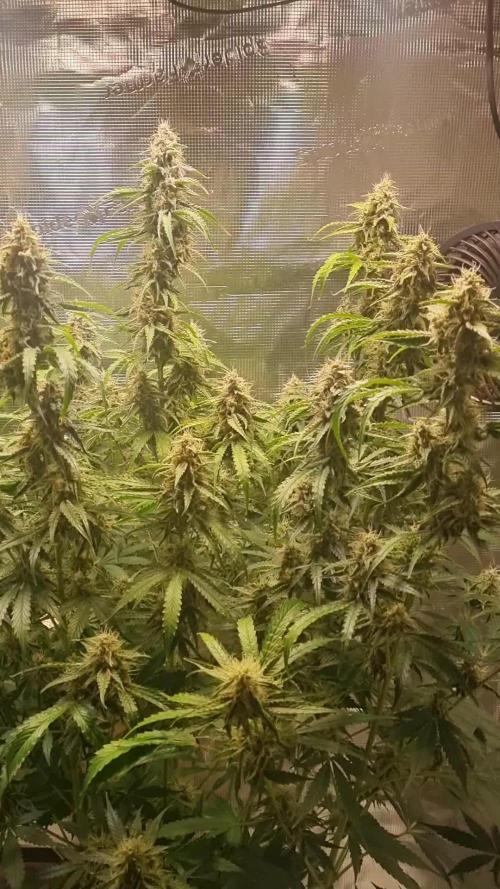
Que pasa familia, vamos con la novena semana de floración de estas Gorilla Girl F1 de Sweetseeds.
Vamos al lío, las plantas se trasplantaron a macetas de 7 litros.
El ph se controla en 6.5, la temperatura la tenemos entre 24/21 grados y la humedad ronda el 50%.
El ciclo de crecimiento puse 12h de luz, el foco está al 50% de potencia.
Me gustaría estar más encima este cultivo pero la salud me está impidiendo un poco este 100% con el proyecto.
- os dejo por aquí un CÓDIGO: Eldruida
Descuento para la tienda de MARS HYDRO.
https://www.mars-hydro.com
Hasta aquí todo, Buenos humos 💨💨💨

Likes
3
Share

@RakonGrow
Follow
+
data online : rakongrow.lima.zone/growme-godfeather-og-f1-auto-016.html
Day 74
+
Likes
7
Share

@ThatsmyGrow
Follow
Another week of flower is over for both Permanent Marker plants, and they're showing some really nice flowering development now.
The LST has worked out really well, and I'm happy with the structure of both plants. The branches are nicely spread out and the developing flower sites are getting good exposure to the light.
The plants are now clearly settling into flower, and I'm really looking forward to seeing the buds start to bulk up.
So far, I'm very happy with the progress of both Permanent Markers

Likes
44
Share


@SooSan
Follow
12/12 + 35 jours
Vu qu’il y a 16 plantes mais que sur growdiaries on ne peut mettre que 8 variétés j'ai divisé en 2 diaries pour le bas de la tente
1️⃣
🏠 90x60x90
☀️ FC-E 4800 => puissance a 20%
🍁
1x Black Bomb / Philosopher Seed
2x Amnesia Lemon / PEV Seeds
1x Blueberry / PEV Seeds
1x Blueberry / 00 Seeds
1x Wappa / Paradise Seed
1x Dark Phoenix / Green House Seed
1x Quick Sherbet / Exotic Seeds
1x Mango Cream / Exotic Seeds
1x Banana Frosting / Sensi Seed
1x Hindu Kush / Sensi Seed
3x Fast Mix / Sweet Seed
📎 https://growdiaries.com/diaries/122084-grow-journal-by-soosan
📎https://growdiaries.com/diaries/124052-grow-journal-by-soosan
2️⃣
🏠 30x60x50
☀️TS1000 => puissance a 50%
🍁 4x Quick Sherbet - Exotic Seed
📎 https://growdiaries.com/diaries/122080-grow-journal-by-soosan


Likes
14
Share


Likes
4
Share

@SWITCH420
Follow
Hi folks,
I'm coming here to start the process of ending this grow journal. I harvested about three months ago and the weed is definitely cured. Photos are about to come — I'm doing a real studio photo shoot for those buds, they deserve it!
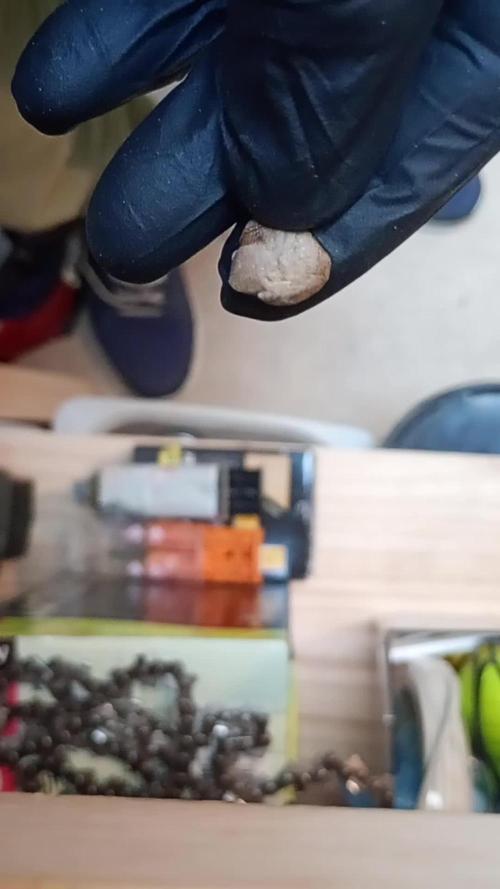
While waiting for the shots, I made some pretty damn dank hash temple balls using the iced water extraction method (solvent-free) with my little washing machine. It's a mix of the 8 strains I grew here — never ideal to mix different kinds of resin... but man, this is some serious dedicated work, so I'm making myself happy with that 14g shiny temple ball in the end 😉
Here are a few details about my process for you guys (and don't forget — you can do it with fresh material! Fresh frozen is always tastier. Also, the drying process is much more efficient and faster with a freeze dryer, but... you need the budget for that. I don't, so I go with the air drying method — check it out below):
1. Get your dry trim, then cure it properly for at least a month (I did 3 months). Smell it — mmh, sweet, dried to perfection. ✅
2. Freeze it, delicately wrapped in a freezer bag.
3. Let a large amount of tap water sit for at least 24h to remove chemicals like chlorine, then use it to make plenty of ice cubes — don't be shy, especially if you're not working in a cool environment.
4. Prep your washing machine: add trim between two layers of ice, fill up with clean water (as much as you can, large vortex is better than a smaller one), then make it seat for 30 min (45 min for thicker buds) the time that the dried green material gets wet again.
5. Prep your filtering tools: catch bag, different mesh bags, spoon, etc.
6. Wash as many times as you can before green contaminants appear, as these lower the quality of your hash — don't hesitate to go up to 8 to 12 washes if the resin still looks clean! Important: each wash has its own specific duration, and they get progressively longer as you advance through the process. Frenchy Cannoli (a true hash legend) provides a detailed timetable for this — from as little as 30 seconds to 1 minute for the first wash, all the way up to around 25 minutes by wash 8. Make sure to follow that schedule rather than using the same duration for every run or running it too long the first wash !! It could breaks to quickly your precious material before you collect all the trich's and the quality would be lower in the end.
7. Collect the wet resin in the mesh bags with a frozen metal spoon, make patties with the resin, and let them sit over some towels in order to drain as much water as possible (place a tissue made for hash collecting over the towel).
8. When the patties are a little dry to the touch, wrap them as they are in the tissue and place them in the freezer for 48h or more.
9. With an iron strainer, microplane your patties over the biggest flat surface you can get! It's important that your micro pieces of hash dry widely and don't get too compacted. Any failure in the air drying process will nucleate rot, ruining your hash in the end and making it a poor product — eventually something to throw away. Sad when you think about all the phases of the process to get to this point!
10. So, in order to air dry properly, you must — it's not optional — lower the RH of your dry room to 35% or slightly below, never above and let it dry as long as needed until the material feels like dry sand. For myself, I found 10 to 15 days is ideal. The room must be very lightly ventilated (not directly on your resin!) and in complete darkness — the goal is to preserve all those delicious terpenes! Ideally, temps around 60°F or 16°C
11. Now that it's dry, collect your resin with a large thin spatula! Make a little mound between two layers of PaperHash, boil some water, and fill up a wine bottle with it!
⚠️ From this point on, to avoid exposing your carefully dried resin to a more humid environment — which could ruin all your hard work — everything must happen in the same drying room. Keep working at 35% RH until your temple ball is tightly and airtight wrapped in PaperHash. (And don't forget to drink water — it's dry in there! 💧)
12. Start to slowly press your resin. Magical moment. Finally....
13. Press 3 times for 10 to 15 minutes in order to really decarb your hash — because that's what it's all about! Between each press, try as best you can to shape a patty... until the final press, when you'll be able to form that magical shiny temple ball (it only shines with gloves on, guys 😄)
14. You are now allowed to try it — for quality control purposes only, of course!
15. Because you want to age your hash for the sweetest 5-star smoking experience: wrap your temple ball in a large piece of PaperHash — if you can get that brand it's ideal, or another kind (check https://thepressclub.co) as long as it's organic!
16. Place the wrapped temple ball in a glass jar and store it in a dark, cool place.
17. Wait a minimum of 3 months before opening it.
18. Open, smell, touch — you'll be amazed. Roll it up with some weed or tobacco or both (I do both) / Or get a Hooka... you are smoking some true primo aged hash made by yourself! Taste the difference and realize all the path from choosing the seeds online until this first amazing puff ... 🙏
I want to credit my inspiration for making this kind of hash to the great Frenchy Cannoli, who has shared all his knowledge through amazingly rich tutorial content that you can find online with a bit of searching. 😉 Peace Frenchy 🕊️☮️




Likes
54
Share


@ASCBOOGS
Follow
Day 93 currently into day 22 of flowering these stardawg clones havent stretched much and im not sure if it is a good thing or bad and still have the odd yellow leafs so decided to increase the nutrient strength as i got advised by someonewho has grown the same strain ph levels seems to be fine anything going in always is in the range of 5.6 - 6.0 but most times 5.8 last week of big bud then will use PK for a week then finish of with overdrive can already see thc productiion let me know what you think so far guys and any tips thanks

Likes
20
Share


@Elysian_gardens710
Follow
We are starting to get the nitrogen issue handled. She was almost white! lol now all new growth is a healthy green, just in time to stop, and start giving her Phos. She just ate every drop of nutrients out of her soil during stretch. I think the white spots on some of the leaves are light bleaching so we went ahead and raised the lights another 12" to 36" total now.
We also noticed it looks like her roots receded back into the soil some? Does that make sense?
Stats:
Ohahu(not reccomended)4x4 tent
1gal water pitcher
Fox farms happy frog soil
Optic 8+ LED
Durabreeze carbon filter
4" inline fan


Likes
17
Share


@sxcultfarms
Follow
All seems to be progressing nicely had a bit of a heat issue because of the weather i got got in at the minute but apart from that all is well
Likes
1
Share

@RootboundCANNApy
Follow
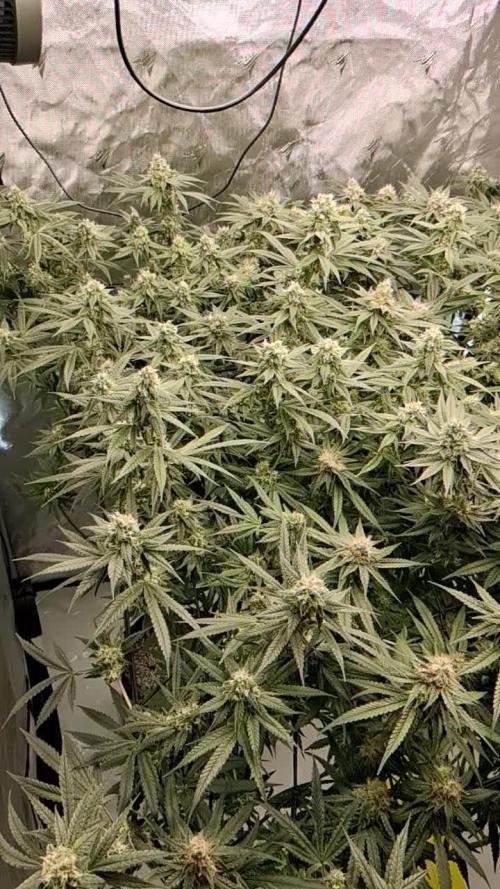
The canopy forms an edge-to-edge sea of green with decent uniformity. Up close, the bud development looks highly promising, displaying dense, healthy stacks of white pistils heavily frosted with a thick blanket of trichomes that point to the strong resin potential of the Electric Blueberry x Secret Stomper genetics. There are no glaring signs of nutrient deficiencies or stress—the overall leaf color remains a healthy, deep green, which confirms the daily feeding and runoff routine is keeping the root zone exceptionally stable. The plan this weekend is more defoliation to thin the dense canopy and increase light penetration for the lower bud sites.
Likes
Comments
Share

@Decimotox
Follow
End of week 7 for DL1/2 and E4.
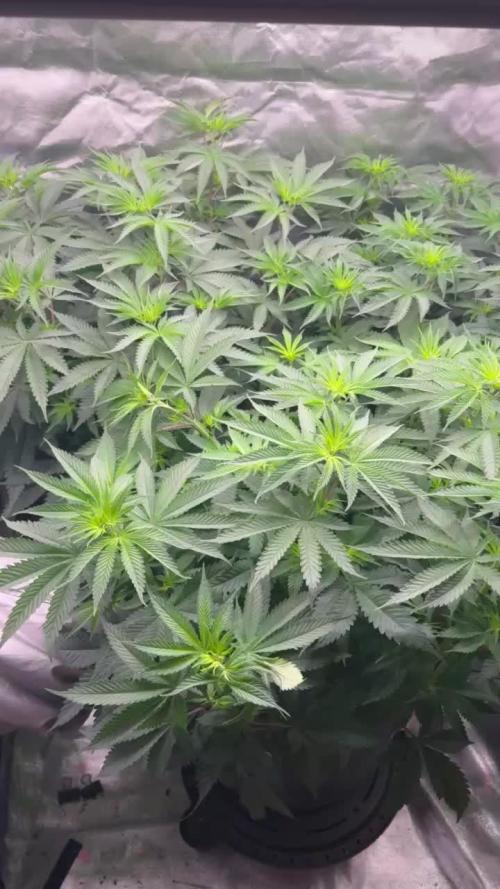
Start of flowering for E/1/2/3! I flipped those girls 3 days ago. Will be transplanting DL1/2 and E4 today after I post this update, so next week's update will have the start of flower for those girls as well! DL1 especially is showing her hunger, so it's definitely time to transplant! We pushed it out a few days longer than I'd have liked, but it's ok.
We're looking good overall. The Eucalypti (1/2/3 especially) are looking insanely healthy. They seem to have taken to their new soil well and are loving the silicore supplement from Solfire that I've worked into the waterings. Can't wait until I can buy more of this silicore stuff. The sample won't last me long lol.
In about 10 days, I'll do a heavy defoliation on E/1/2/3 and check for herms/sacs; then another, lighter defoliation 2 weeks later around week 4 of flower. Smooth sailing after that. Haven't seen any signs of sacs in the preflowers, but we'll see what we get in a couple weeks. I'm not even close to the best grower in the world, but I definitely feel like I've found a great recipe for success. This might've been the least amount of LST I've ever done on plants to get ~10-12 tops per plant, which is usually my goal. I would love to find a keeper pheno in a grow sometime and keep one giant mother plant, or even just train one plant in my 3x3 and fill the whole thing out. But for now, I'll keep going with three in the 3x3 lol. Should be another great harvest when all is said and done; fingers crossed no major issues. Humidity and temp will be my biggest challenges this summer. I likely will have to contend with 60+% humidity in flower. It's gonna suck. But we're going to persevere...somehow.
Likes
10
Share

@NuclearPyro
Follow
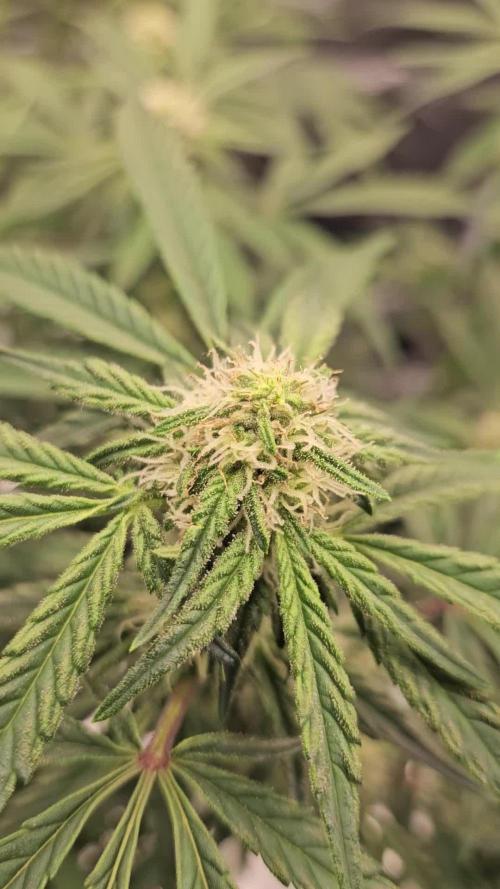
After 1st big defoliation, Plants took 4 days to recover 100%. Started eating 1 day ago. Guzzled H2O tho. 5 day, early am, plants grew all fan leaves back but smaller. Fuzz and crystals are forming. Maybe 3 weeks if I lucky. Need to stretch. Small buds rn. 4 days after post video and trichome pic taken after defoliation during early flower/mid-flower
Likes
4
Share


@frenchylovegrow
Follow
Premier test de one bud sur cette variété et au top pour ce mode de culture de bon bourgeons bien remplit et bien coloré .
Pour un poids final de 75gr
j'ai bouturé a nouveaux mon pied mère et je vous ferait un nouveau journal avec celle ci et des la croissance cette fois si ;)
Bon grow à tous😉

Likes
5
Share


@LittleBigTrees
Follow
Defoliated a bit more, feeding sugar royal and green sensation.
The smell is really coming through now.

Likes
17
Share


@Hoodoo
Follow
2020-07-27 Waited all week to post. Haven't changed nutrient levels at all. The plants are drinking at a normal rate and sit around 700 ppm and 6.0 pH on the regular. They've actually become more much stable, they are starting to get so sticky and smelly already. I can't remove them from the tent anymore to change water so I just put a water pump in there, drain it as much as I can, then flush with tap water, drain that, refill. I think the UC Roots and Great White will keep it healthy. The roots did not get out of hand at all on this grow but the upper plant absolutely did. It's right up to the top of the tent, I keep having to smack it down and bend it down...
I have noticed there are pure white tipped buds forming on plant 1. Supposedly this is a good sign: https://www.leafly.com/news/growing/white-tips-on-cannabis-buds
I feel like the buds aren't as fat as other people by week 5 of flower but I accidentally have so many growth tips, I think some of the growth is misguided right now. They are thickening up but not as fast as I expected. Looking forward to harvesting in 4-6 weeks!

Likes
9
Share


@shabazz411
Follow
I love it when the buds are so fat thick and heavy in weight that they bend the branches, All plants being flushed for the next 2 or 3 weeks to get that ripe sweet taste ALL MOST THERE ! ( patience patience) LOL.

Likes
2
Share

@Ensign420
Follow
|»» LOG DISCLAIMER: Not intended as a grow guide. Grow log entries are usually posted 3-4 weeks later and are for my learning reference. ««|
Introduction - Week 23 Summary -
Ensign's log, stardate 17759.5,
Another grow week..
In the main tent, nothing but general checkups and straight RO water.
In the veg tent, been tending to solo cup waterings. Also transplanted rooted Coco Coins and topped the garden.
Furthermore, started the next grow cycle and cut more clones to begin my first breeding project.
Peace & Good Memories Father..
Onwards to next week..
[START OF WEEK 23]
==========================================================
---------- [ 3x3 VEG TENT - GR3 ] ----------
Heady OG BX1 #1 - WEEK 15 - Full Veg
TKO #2 - WEEK 05 - Full Veg
Chill Out OG #3 - WEEK 12 - Full Veg
Chill Out OG #2 - WEEK 08 - Full Veg
---------- [ 4x4 MAIN TENT - GR30 ] ----------
Chill Out OG #2 - WEEK 23 - Full Bloom Wk9
TKO #2-2 - WEEK 17 - Full Bloom Wk9
Heady OG BX1 #1 - WEEK 19 - Full Bloom Wk9
04/06/26 → 04/12/26 [WEEK 23]
This Week's Estimated Goals
----------------------------------------------------------------------------------------------
DLI: ~16 mol/m²/d
PPFD: ~400 μmol/m²/s
VPD: ~1.2 kPa
This Week's Meter Readings & Averages
----------------------------------------------------------------------------------------------
Light On/Off: 16:00 - 10:00 | Wattage: ~268.6W [LV03]
Distance From Canopy: ~[19”, 3”, 3”]
Plant Height: ~[33”, 49”, 49”]
Max Plant Height: ~52” [Lamp-to-Soil Distance]
DLI: ~14.73 mol/m²/d
PPFD: ~372 μmol/m²/s
VPD: ~0.61 kPa
Soil %: ~[53.7, 43.9, 47.6, 43.3, 50.0, 56.1, 49.0, 58.3, 50.7, 89.4]
==========================================================
Day 01 - Monday - 04/06/26 - Total Days: 152
-----------------------------------
Daily Averages ~[+01:00]
- Temps: 77.7°F [25.4°C]
- Humidity: 81.1%
- VPD: 0.61 kPa
- Soil %: [52, 41, 47, 41, 51, 57, 48, 59, 51, 88]
-----------------------------------
- [22:19]: Night check on the 4x4 tent.
--- Wow the garden is looking incredible and smelling even better.
--- The under canopy is looking great.
--- Harvest day is now 9 days away.
- [22:24]: Checked the Ecowitt soil moisture sensor data:
------------------ [ 3x3 VEG TENT – GR3 ] ----------------
------ 52% - [CH01 » M1 » VBL – Heady OG BX1 #1-1]
------ 41% - [CH02 » M2 » VBR – TKO #2]
------ 45% - [CH03 » M3 » VFL – Chill Out OG #3]
------ 41% - [CH04 » M4 » VFR – Chill Out OG #2]
----------------- [ 4x4 MAIN TENT – GR30 ] ---------------
------ 50% - [CH05 » P1 » FLT – Chill Out OG #2]
------ 57% - [CH06 » P1 » FLB – Chill Out OG #2]
------ 48% - [CH07 » P2 » BLT – TKO #2-2]
------ 59% - [CH08 » P2 » BLB – TKO #2-2]
------ 51% - [CH09 » P3 » FRT – Heady OG BX1 #1]
------ 88% - [CH10 » P3 » FRB – Heady OG BX1 #1]
--------- Veg: ~38%-45% | Flower: ~45%-55%
--------- General: ~30% [Dry] «| ~45-60% [Moist] |» ~70% [Wet]
- [22:38]: Checked the 3x3 veg tent.
--- Veg garden is looking great.
--- Two solo clones need watering.
- [22:44]: Here are the starting initial watering ranges:
------ Heady OG BX1 #1-2 » 255.4g → 335.4g
------ Gorilla Goat #1-2 » 294.4g → 325.4g
--------- General Weight Range: [Dry] ~275g «| [Dryback] ~300g |» ~325g-400g [Wet]
--- Both cups were last watered 2-4 days ago.
--- Took the starting weight of both clones before watering,
------ Heady OG BX1 #1-2 » 286.3g
------ Gorilla Goat #1-2 » 292.4g
--- While on a scale,
--- Evenly misted the top of both cups with RO water.
--- Did not spray the top growth.
--- Misted 10-20 sprays. Waited a moment, then misted again.
--- Repeated this process until both cups weighted at least 300g.
--- There was no runoff.
- [23:04]: Took the saturated weight of both cups after watering,
------ Heady OG BX1 #1-2 » 365.4g
------ Gorilla Goat #1-2 » 365.4g
--- Updated the wet weight and watering dates for both cups.
--- Placed both cups back into the tent.
--- Woah veg cuttings in the propagation tray look under-watered.
--- Misted each Coco coin with 10-15 sprays of RO water.
--- Also misted the top growth and added more RO water to the bottom drip tray.
- [23:19]: Checked the humidifiers.
--- Tanks are still full and no leaks found.
Day 02 - Tuesday - 04/07/26 - Total Days: 153
-----------------------------------
Daily Averages ~[+01:00]
- Temps: 77.7°F [25.4°C]
- Humidity: 82.2%
- VPD: 0.58 kPa
- Soil %: [52, 41, 46, 41, 50, 56, 48, 59, 50, 89]
-----------------------------------
- [20:39]: Night check on the 4x4 tent.
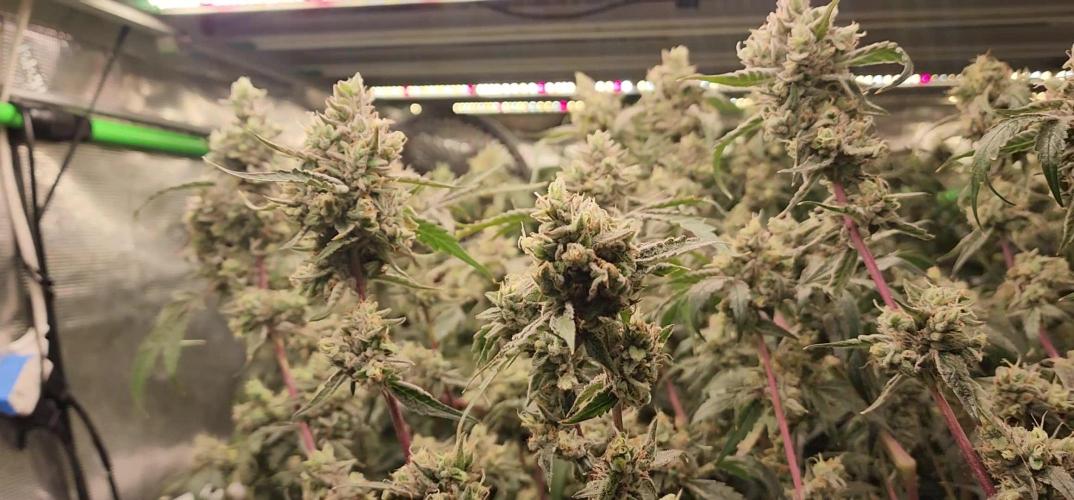
--- The garden is smelling incredible and buds are stacking weight.
--- The terpenes are definitely on the fuel-side (from fuel, earthy, floral, fruity/sweet).
--- Unfortunately based on terpenes, Chill Out OG is probably not for me. Although still have both the #2 and #3 as mothers in the veg tent.
--- More impressed with the growth of the #3 pheno which seems to express more broad-leaf growth (similar to the TKO #2 pheno) and may decide to flower her later. Will keep both mother plants for now, but unfortunately, probably won’t be breeding with them.
- [20:45]: Checked the Ecowitt soil moisture sensor data:
------------------ [ 3x3 VEG TENT – GR3 ] ----------------
------ 52% - [CH01 » M1 » VBL – Heady OG BX1 #1-1]
------ 41% - [CH02 » M2 » VBR – TKO #2]
------ 48% - [CH03 » M3 » VFL – Chill Out OG #3]
------ 41% - [CH04 » M4 » VFR – Chill Out OG #2]
----------------- [ 4x4 MAIN TENT – GR30 ] ---------------
------ 49% - [CH05 » P1 » FLT – Chill Out OG #2]
------ 56% - [CH06 » P1 » FLB – Chill Out OG #2]
------ 48% - [CH07 » P2 » BLT – TKO #2-2]
------ 59% - [CH08 » P2 » BLB – TKO #2-2]
------ 51% - [CH09 » P3 » FRT – Heady OG BX1 #1]
------ 89% - [CH10 » P3 » FRB – Heady OG BX1 #1]
--------- Veg: ~38%-45% | Flower: ~45%-55%
--------- General: ~30% [Dry] «| ~45-60% [Moist] |» ~70% [Wet]
- [20:46]: Checked the 3x3 veg tent.
--- Veg garden is looking healthy.
--- Clones don’t need watering and propagation cuttings are looking a lot better.
- [20:58]: Checked the humidifiers.
--- Tanks are still full and no leaks found.
--- With harvest 8 days away, have already started to plan out the next grow cycle which will also be my first long-term breeding project.
--- Need to ultimately decide on mother plants to breed to the keeper pheno of the Heady OG BX1 (#1).
--- As of right now, plan to do a full tent pollination in the main tent with 4 mother plants. Currently the mothers will be:
------ Heady OG BX1 [Mendo Dope Farms] (#1 pheno)
------ TKO [James Loud Genetics] (#2 pheno)
------ Garlic Budder [Humboldt Seeds Company] (original #1 pheno)
------ Gorilla Goat [Irie Genetics] (#1 pheno)
Day 03 - Wednesday - 04/08/26 - Total Days: 154
-----------------------------------
Daily Averages ~[+01:00]
- Temps: 78.8°F [26.0°C]
- Humidity: 81.6%
- VPD: 0.62 kPa
- Soil %: [53, 41, 48, 41, 48, 56, 49, 58, 50, 89]
-----------------------------------
- [16:05]: Evening check on the 3x3 veg tent.
--- Veg garden is looking great.
--- TKO #2 needs watering.
- [16:09]: Here is the starting initial watering range:
------ TKO #2 » 252.5g → 335.5g
--------- General Weight Range: [Dry] ~275g «| [Dryback] ~300g |» ~325g-400g [Wet]
--- Been 3 days since the last watering.
--- Took the starting weight before watering,
------ TKO #2 » 252.5g » 284.9g
--- While on a scale,
--- Evenly misted the top of the cup with RO water.
--- Did not spray the top growth.
--- Misted 10-20 sprays. Waited a moment, then misted again.
--- Repeated this process until the cup weighted at least 300g.
--- There was no runoff.
- [16:22]: Took the saturated weight after watering,
------ TKO #2 » 252.5g » 365.7g
--- Updated the wet weight and watering date.
--- Placed the cup back into the tent.
--- Going to start cutting clones for the next grow cycle.
- [16:47]: Filled a measuring cup with 1 cup of RO water.
------ Added 1/8tsp of Horticultural Aloe
--- Mixed the solution and poured it straight into a clear solo cup.
--- Placed the PVC rig into the cup just above the aloe water.
--- Okay! Time to take the cuttings!
--- Using a pair of clean trimmers,
- [17:35]: Cut several clonal cuttings.
--- Only need one cutting to root, but took extra cuttings of each cultivar.
--- Made sure to trim most of the branches leaving a top node or two.
--- Did not cut any leaf fingers and made sure to cut the tip of the stalk (about 45-degree) before placing each cutting into the cup of aloe solution.
--- Made sure each tube on the PVC rig had the correct names labeled.
- [17:36]: Also topped and defoliated the entire veg garden.
--- Mulched the trimmings.
--- Placed the cup into the veg tent.
--- Have the cup resting on top of the drip tray (front center pot).
--- Will change the water out tomorrow and plan to start rooting in two days.
--- The current rooting Coco Coin cuttings probably need to be transplanted into solo cups by now.
- [17:44]: Checked for roots and all Coco Coins had roots.
--- Going to transplant one of each pheno.
--- Planting into clear cups with bottom holes cut out for drainage.
--- Will also be using opaque red cups (without holes) to keep the roots protected from light damage.
--- Partially filled the clear cup with recycled BuildASoil 3.0 potting soil.
--- Made sure the soil at the bottom of each cup was well compacted and had enough room for the Coco Coin.
- [18:04]: Inoculated each cup with Great White mycorrhizae along with a bit of Beauveria Bassiana.
------ Sprinkled 1/16tsp of Great White
------ Sprinkled 1/64tsp of Beauveria Bassiana Plus
--- Mainly tried to dust the center of each cup.
- [18:07]: Placed a rooted Coco Coin into each inoculated cup.
--- Made sure each cup still had enough room for more soil.
--- To fully hydrate all Coco Coins, misted each with about 20-30 sprays of RO water.
- [18:17]: Gently filled each cup with more soil.
--- Completely covered each Coco Coin making sure to tuck the sides in.
--- Each Coco Coin is about 1/4-1/2 inch below the top soil.
--- Marked the names on each cup with blue painter's tape.
--- Also defoliated both cups and removed the lowest fan leaves.
- [18:35]: Covered the soil with BuildASoil Organic Straw Mulch.
--- Made sure the top soil was completely covered.
--- Culled the extra Garlic Budder and Chill Out OG phenos.
--- Mulched the trimmings.
- [19:01]: Filled a measuring cup with 2 cups of RO water.
------ Added 1/64tsp of Quillaja Saponaria Extract [60]
------ Added 1/16tsp of Horticultural Aloe
------ Added 1/16tsp of Horticultural Coconut
------ Added 1/8tsp of Mycrobe Complete
--- Mixed and poured the solution straight into a spray bottle.
- [19:03]: Took the initial dry soil weight before watering,
------ Garlic Budder OG#1 » 276.8g
------ Chill Out OG #3 » 260.0g
--- While on a scale,
--- Evenly misted the top of both cups with the wetting solution.
--- Did not spray the top growth.
--- Misted 10-20 sprays. Waited a moment, then misted again.
--- Repeated this process until each cup weighted at least 300g.
--- There was no runoff.
- [19:36]: Took the saturated weight after watering,
------ Garlic Budder OG#1 » 335.4g
------ Chill Out OG #3 » 335.3g
--- Marked the date, pheno names, and weight ranges on each red opaque cup with blue painter's tape.
--- Then placed both clear cups into their corresponding red cups.
- [19:41]: Placed both cups into the 3x3 veg tent,
--- Removed the seedling plug tray and have both cups resting in the propagation drip tray.
--- As for PPFD, at the lowest light intensity (and raised ~14 above the tray), the PPFD is around 40 μmol/m²/s which gives a DLI of 2.59 mol/m²/d under an 18/6 light cycle.
- [19:45]: Checked the Ecowitt soil moisture sensor data:
------------------ [ 3x3 VEG TENT – GR3 ] ----------------
------ 58% - [CH01 » M1 » VBL – Heady OG BX1 #1-1]
------ 42% - [CH02 » M2 » VBR – TKO #2]
------ 48% - [CH03 » M3 » VFL – Chill Out OG #3]
------ 41% - [CH04 » M4 » VFR – Chill Out OG #2]
----------------- [ 4x4 MAIN TENT – GR30 ] ---------------
------ 48% - [CH05 » P1 » FLT – Chill Out OG #2]
------ 56% - [CH06 » P1 » FLB – Chill Out OG #2]
------ 48% - [CH07 » P2 » BLT – TKO #2-2]
------ 58% - [CH08 » P2 » BLB – TKO #2-2]
------ 51% - [CH09 » P3 » FRT – Heady OG BX1 #1]
------ 89% - [CH10 » P3 » FRB – Heady OG BX1 #1]
--------- Veg: ~38%-45% | Flower: ~45%-55%
--------- General: ~30% [Dry] «| ~45-60% [Moist] |» ~70% [Wet]
- [19:47]: Checked the 4x4 tent.
--- The garden is smelling and looking great.
--- Buds are all ripening and smelling gassy and dank.
--- The under canopy is looking clean and all pots look good.
--- Took the trimmings from earlier and top dressed each pot.
--- Tried to spread the trimmings evenly.
- [20:07]: Quickly checked on the RO reservoir and auto-watering system.
--- Everything looked good and no leaks detected.
--- The gravity feed was holding steady at ~2 psi of pressure at ~22” from the floor.
--- Checked the humidifiers.
--- Tanks are still full and no leaks found.
Day 04 - Thursday - 04/09/26 - Total Days: 155
-----------------------------------
Daily Averages ~[+01:00]
- Temps: 79.2°F [26.2°C]
- Humidity: 80.7%
- VPD: 0.65 kPa
- Soil %: [57, 46, 51, 43, 49, 56, 49, 58, 51, 89]
-----------------------------------
- [19:06]: Night check on the 4x4 tent.
--- Garden is smelling dank and buds are looking frosty.
--- Bud growth is finishing up quite nicely and terpenes are louder than ever. Nice.
--- The under canopy is also clean and pots look good.
- [19:11]: Checked on the BluMat soil moisture sensors:
------ Chill Out OG #2 » 99mbars
------ Heady OG BX1 #1 » 59mbars
------ TKO #2 » 84mbars
--------- Watering Range: [Too Wet] ~25mbars «| [Ideal Target] ~40-80mbars |» ~125mbars [Too Dry]
--------- BluMat Max Values: [10mbars «||» 750mbars]
- [19:14]: Decided to make a slight adjustment to Chill Out OG #2’s watering carrot.
--- Using the BluMat key, increased the water moisture by rotating the tension cap slightly counter-clockwise.
- [19:15]: Checked the Ecowitt soil moisture sensor data:
------------------ [ 3x3 VEG TENT – GR3 ] ----------------
------ 56% - [CH01 » M1 » VBL – Heady OG BX1 #1-1]
------ 47% - [CH02 » M2 » VBR – TKO #2]
------ 50% - [CH03 » M3 » VFL – Chill Out OG #3]
------ 44% - [CH04 » M4 » VFR – Chill Out OG #2]
----------------- [ 4x4 MAIN TENT – GR30 ] ---------------
------ 48% - [CH05 » P1 » FLT – Chill Out OG #2]
------ 55% - [CH06 » P1 » FLB – Chill Out OG #2]
------ 49% - [CH07 » P2 » BLT – TKO #2-2]
------ 58% - [CH08 » P2 » BLB – TKO #2-2]
------ 52% - [CH09 » P3 » FRT – Heady OG BX1 #1]
------ 89% - [CH10 » P3 » FRB – Heady OG BX1 #1]
--------- Veg: ~38%-45% | Flower: ~45%-55%
--------- General: ~30% [Dry] «| ~45-60% [Moist] |» ~70% [Wet]
- [19:18]: Checked the 3x3 veg tent.
--- Veg garden is looking healthy.
--- Two solo clones need watering.
- [19:21]: Here are the starting initial watering ranges:
------ Heady OG BX1 #1-2 » 255.4g → 335.4g
------ Gorilla Goat #1-2 » 294.4g → 325.4g
--------- General Weight Range: [Dry] ~275g «| [Dryback] ~300g |» ~325g-400g [Wet]
--- Both cups were last watered 3 days ago.
--- Took the starting weight of both clones before watering,
------ Heady OG BX1 #1-2 » 296.9g
------ Gorilla Goat #1-2 » 262.8g
--- While on a scale,
--- Evenly misted the top of both cups with RO water.
--- Did not spray the top growth.
--- Misted 10-20 sprays. Waited a moment, then misted again.
--- Repeated this process until both cups weighted at least 300g.
--- There was no runoff.
- [19:39]: Took the saturated weight of both cups after watering,
------ Heady OG BX1 #1-2 » 365.4g
------ Gorilla Goat #1-2 » 365.5g
--- Updated the wet weight and watering dates for both cups.
--- Placed both cups back into the tent.
- [19:47]: Time to swap the aloe water out for the cuttings.
--- Filled a clear cup with fresh RO water (1.5cups).
--- Gently lifted the PVC rig out of the cup of aloe water and set it gently into the RO cup.
--- Going to let these soak for another day before transplanting into Coco Coins for rooting.
--- Solo cups in the propagation tray look good and no need to water.
- [19:58]: Checked the humidifiers.
--- Tanks are still full and no leaks found.
Day 05 - Friday - 04/10/26 - Total Days: 156
-----------------------------------
Daily Averages ~[+01:00]
- Temps: 79.1°F [26.2°C]
- Humidity: 82.0%
- VPD: 0.61 kPa
- Soil %: [55, 47, 47, 45, 52, 56, 49, 58, 51, 89]
-----------------------------------
- [20:44]: Night check on the 4x4 tent.
--- Five more days until harvest and the garden is looking and smelling great.
--- Buds are ripening and terpenes are smelling loud and dank.
--- Under canopy is looking clean and pots are all good.
- [20:48]: Checked the Ecowitt soil moisture sensor data:
------------------ [ 3x3 VEG TENT – GR3 ] ----------------
------ 55% - [CH01 » M1 » VBL – Heady OG BX1 #1-1]
------ 46% - [CH02 » M2 » VBR – TKO #2]
------ 46% - [CH03 » M3 » VFL – Chill Out OG #3]
------ 45% - [CH04 » M4 » VFR – Chill Out OG #2]
----------------- [ 4x4 MAIN TENT – GR30 ] ---------------
------ 51% - [CH05 » P1 » FLT – Chill Out OG #2]
------ 56% - [CH06 » P1 » FLB – Chill Out OG #2]
------ 49% - [CH07 » P2 » BLT – TKO #2-2]
------ 58% - [CH08 » P2 » BLB – TKO #2-2]
------ 51% - [CH09 » P3 » FRT – Heady OG BX1 #1]
------ 89% - [CH10 » P3 » FRB – Heady OG BX1 #1]
--------- Veg: ~38%-45% | Flower: ~45%-55%
--------- General: ~30% [Dry] «| ~45-60% [Moist] |» ~70% [Wet]
- [20:55]: Checked the 3x3 veg tent.
--- Veg garden is looking healthy and good.
--- The next grow cycle of cuttings are ready to be rooted in the Coco Coins.
- [21:04]: Filled a measuring cup with 2 cups of RO water.
------ Added 1/64 of Quillaja Saponaria Extract [60]
------ Added 1/32tsp of Horticultural Aloe
------ Added 1/16tsp of Mycrobe Complete
--- Mixed the solution thoroughly.
- [21:05]: Dropped 6 Coco Coins into the measuring cup.
--- The coins immediately started to expand.
------ [» ~5 MINUTES LATER «]
--- Placed each fully saturated Coco Coin into half-cut clear cups.
--- Using a squeeze bottle filled with Clonex,
- [21:16]: Gently filled each pre-made hole with Clonex rooting gel.
--- Using a pair of clean trimmers, made a final 45° cut.
--- Also stripped and scrapped some of the stem’s outer membrane.
--- To help with planting, gave each Coco Coin a squeeze to loosen the coco.
--- Made sure to insert each stem straight and snug with the tip about a 1/4 inch from the bottom of the Coco Coin.
--- Also secured the stem by pinching and pressing in the top of the Coco Coin.
- [21:39]: Once each cutting was planted,
--- Placed each Coco Coin into the propagation plug tray.
--- Made sure to keep each cutting properly tagged.
--- Did not spray the top growth with any water.
--- As far as PPFD,
--- At the lowest light intensity (and raised ~14 above the tray), the PPFD is around 42 μmol/m²/s which gives a DLI of 2.72 mol/m²/d under an 18/6 light cycle
--- Culled the extra cuttings.
- [23:00]: Checked the humidifiers.
--- Tanks are still full and no leaks found.
--- Since the next grow cycle is going start off my first breeding project, plan to reverse Heady OG BX1 (#1 pheno) to pollinate TKO #2
--- As this will also be an open air pollination, plan to include Heady OG BX1 #1 as a pollen receiver along with Garlic Budder (original #1 pheno) and Gorilla Goat (#1 pheno). Regrettably, have decided to not include Chill Out OG #2
--- If successful, plan to pheno hunt through the Heady OG BX1 to TKO seeds for keeper phenos to begin trait stabilizing.
--- Anyways.
--- One impossible task at a time..
Day 06 - Saturday - 04/11/26 - Total Days: 157
-----------------------------------
Daily Averages ~[+01:00]
- Temps: 77.9°F [25.5°C]
- Humidity: 81.8%
- VPD: 0.59 kPa
- Soil %: [54, 46, 46, 46, 50, 56, 50, 58, 51, 90]
-----------------------------------
------ [ » NO GROW LOG ENTRIES FOR TODAY « ]
--- Peace & Good Memories Father.. 🖖
Day 07 - Sunday - 04/12/26 - Total Days: 158
-----------------------------------
Daily Averages ~[+01:00]
- Temps: 77.2°F [25.1°C]
- Humidity: 81.3%
- VPD: 0.59 kPa
- Soil %: [53, 45, 48, 46, 50, 56, 50, 58, 51, 92]
-----------------------------------
- [20:03]: Night check on the 4x4 tent.
--- Garden is looking great..
--- Under canopy is clean and pots look good..
- [20:09]: Checked the Ecowitt soil moisture sensor data:
------------------ [ 3x3 VEG TENT – GR3 ] ----------------
------ 53% - [CH01 » M1 » VBL – Heady OG BX1 #1-1]
------ 44% - [CH02 » M2 » VBR – TKO #2]
------ 47% - [CH03 » M3 » VFL – Chill Out OG #3]
------ 45% - [CH04 » M4 » VFR – Chill Out OG #2]
----------------- [ 4x4 MAIN TENT – GR30 ] ---------------
------ 52% - [CH05 » P1 » FLT – Chill Out OG #2]
------ 56% - [CH06 » P1 » FLB – Chill Out OG #2]
------ 50% - [CH07 » P2 » BLT – TKO #2-2]
------ 58% - [CH08 » P2 » BLB – TKO #2-2]
------ 52% - [CH09 » P3 » FRT – Heady OG BX1 #1]
------ 93% - [CH10 » P3 » FRB – Heady OG BX1 #1]
--------- Veg: ~38%-45% | Flower: ~45%-55%
--------- General: ~30% [Dry] «| ~45-60% [Moist] |» ~70% [Wet]
- [20:40]: Checked the 3x3 veg tent.
--- Veg garden is looking healthy..
--- Two solo cups need watering..
- [20:48]: Here are the starting initial watering ranges:
------ Heady OG BX1 #1-2 » 255.4g → 335.4g
------ Gorilla Goat #1-2 » 294.4g → 325.4g
--------- General Weight Range: [Dry] ~275g «| [Dryback] ~300g |» ~325g-400g [Wet]
--- Both cups were last watered 3 days ago.
--- Took the starting weight of both clones before watering,
------ Heady OG BX1 #1-2 » 281.5g
------ Gorilla Goat #1-2 » 245.6g
--- While on a scale,
--- Evenly misted the top of both cups with RO water.
--- Did not spray the top growth.
--- Misted 10-20 sprays. Waited a moment, then misted again.
--- Repeated this process until both cups weighted at least 300g.
--- There was no runoff.
- [21:14]: Took the saturated weight of both cups after watering,
------ Heady OG BX1 #1-2 » 365.5g
------ Gorilla Goat #1-2 » 365.4g
--- Updated the wet weight and watering dates for both cups.
--- Placed both cups back into the tent.
--- Cuttings in the propagation tray are looking good..
- [21:27]: Checked the humidifiers.
--- Tanks are still full and no leaks found.
--- Onwards to next week..
[END OF WEEK 23]



Likes
20
Share


@CorinnaFarm
Follow
Endspurt 🤗
Es wird sich hier nur noch um Tage handeln🙌 dann heißt es endlich...
Erntezeit😅
Es duftet herrlich und die Knospen sind ordentlich geschwollen und können noch ein kleines bisschen😉😁
Fortsetzung folgt...✌️😊💚

Likes
13
Share


@Vegetoo420
Follow
We are finally into flower stage !
I moved this lady into a bigger room with more powerful light.
She not actually tall and I’ll see how I control the stretch
I made a big work on her root and I’m satisfied of the result !
