


Likes
Comments
Share

@ohcibi
Follow
Update June 22nd
Third week of flower is starting off very well visually. Buds are developing. Pistils are emerging everywhere. The concerning part is the temperature as well as the humidity. My fans are doing their job well, but I hope those buds will survive this steam-room-type situation.


Likes
12
Share


@Mistertemps
Follow
Final week I’ll be chopping them in 2 days. Gonna try the 48hrs of darkness. They look so good to me. I can’t wait to see what they can do!!! Next grow journey HARVEST DRY. CURE 😱😱😱😱. Wish me luck. Any and all TIPS APPRECIATED!!!!
Likes
16
Share


@Virgosmokes
Follow
Went away for a week but no massive problems and she's oretty resilient so happy days! Few more weeks hoping for a bit more bulk in the buds.!

Likes
23
Share


@Horseluisweed
Follow
Bueno, le salió la radícula en las primeras 24h, pero quise esperar a que se desarrollara más antes de transpartarla al sustrato, tras pasar más de 48h me quedé sorprendido que siguiera (aparentemente) igual, la pase a la tierra(💦mojada en el centro con 100ml del agua que utilicé para germinarla), se me hizo eterno esperar a que sacara la cabeza, tremenda alegría al 4 día ❤️🙌🌱, al ver el sustrato relativamente seco volví a mojar💦(esta vez con la mitad, 50ml aprox.). Decidí comer hummus (como ella jijiji) y ponerle el plástico de invernadero con la idea de manter la humedad alta💦💦💦

Processing
Likes
73
Share


@Andres
Follow
she is growing fast and great ... it's just a matter of time to start taking her potential... 56 cm....

Likes
5
Share


@Foxtrotoscar
Follow
Small harvest but was due to the over feed of CAL-MAG I had quite early on but still pulled through and flowered almost and OZ. Really nice Sativa from Barneys Farm.

Likes
3
Share


@Angelgrows
Follow
I know I missed a few weeks I honestly just forget sometimes😂 but regardless I harvested middle of week 9 of flower, I’m excited to see how she dries I’m not going for weight I want the stem because it looks cool lol but I’m guessing I’ll get around a half OZ
Likes
12
Share

@GERGrowDesigns
Follow
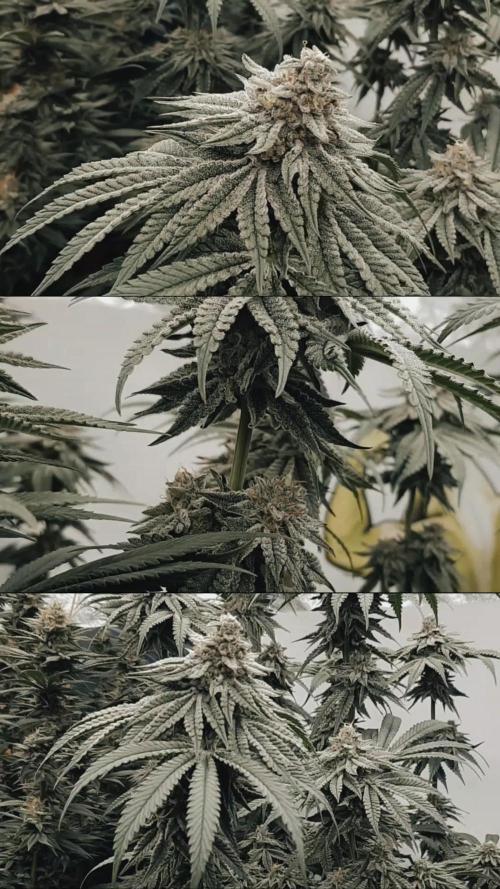
Welcome to Flower Week 6 and harvest of Sweet Seeds Strawberry Cola Sherbet F1
For this Project , I’ve chosen the Feminized Photo strain Strawberry Cola Sherbet F1 :
Here’s what I’m working with:
• 🌱 Tent: 120x60x80
• 🧑🌾 Breeder Company: Sweet Seeds
• 💧 Humidity Range: 40
• ⏳ Flowering Time: 7weeks
• Strain Info: 18-22%THC
• 🌡️ Temperature: 26
• 🍵 Pot Size: 16
• Nutrient Brand: Narcos
• ⚡ Lights : 600W x 2
A huge thank you to Sweet Seeds for allowing me to try my Best with this amazing collection from Photo Strains they managed to Sponsore . Big thanks for supporting the grower community worldwide! Your genetics and passion speak for themselves!
I would truly appreciate every bit of feedback, help, questions, or discussions – and of course, your likes and interactions mean the world to me as I try to stand out in this exciting competition!
Let’s grow together – and don’t forget to stop by again to see the latest updates!
Happy growing!
Stay lifted and stay curious!
Peace & Buds!
Likes
21
Share


@Lazuli
Follow
Was fun to grow and looks beautifull in any garden 💜 u can really taste the blueberry crossed in this strain

Likes
39
Share


@DogDoctorOfficial
Follow
And the flowering journey begins on this perfect exemplar, i mean she is growing as perfect as they can possible came, she is in did a very stable and outstanding girl and i am very curious to see how she goes from here <3 <3 <3
Man she is growing fast and getting taller and taller , loving this one
As always thank you all for stoping by, for the love and time you guys spend on my stuff, i fell blessed and humble, many thanks to you all <3<3<3
Genetics - Fast Buds Tester 2309
Ligth - LUMATEK ZEUS 465 COMPACT PRO
Food - APTUS HOLLAND
#aptus #aptusplanttech #aptusgang #aptusfamily #aptustrueplantscience #inbalancewithnature #trueplantscience #fastbuds #dogdoctorofficial #growerslove
With true love comes happiness <3 <3 <3 Always believe in your self and always do things expecting nothing and with an open heart , be a giver and the universe will give back to you in ways you could not even imagine so <3 <3 <3
All info and full product details can be find in can find @
https://2fast4buds.com/ wen released
https://aptus-holland.com/
https://autopot.co.uk/
https://lumatek-lighting.com/
Have a bunch more diaries going on, fell free to drop by and say hi <3 <3 <3
<3 <3 <3 Growers love to you all <3 <3 <3

Likes
31
Share


@TheHighentist
Follow
10/7 Water day*
1125ml total pr plant. Upped the Bloom and Bio heaven
+400ml neutral ph 6.1 water for run through.
-Temp 25-27day/22-24night
-51%RH (2+-)
11/7 - They look and smell good! Very happy for the progress
-Temp 25-28day/22-24night
-51%RH (2+-)
12/7 - Rainy day, so had a humidity peak at 60% RH
-Temp 25-28/23-24night
-51-60% RH
13/7 - Water day*
1250ml pr plant
-Temp 24-27/22-24night
-52-58% RH
14/7
-Temp 24-27/22-24night
-50-54% RH
15/7
-Temp 24-27/22-24night
-50-53% RH
16/7
-Temp 24-27/22-24night
-50% RH (+-2%)
Likes
15
Share

@masterofsmeagol
Follow
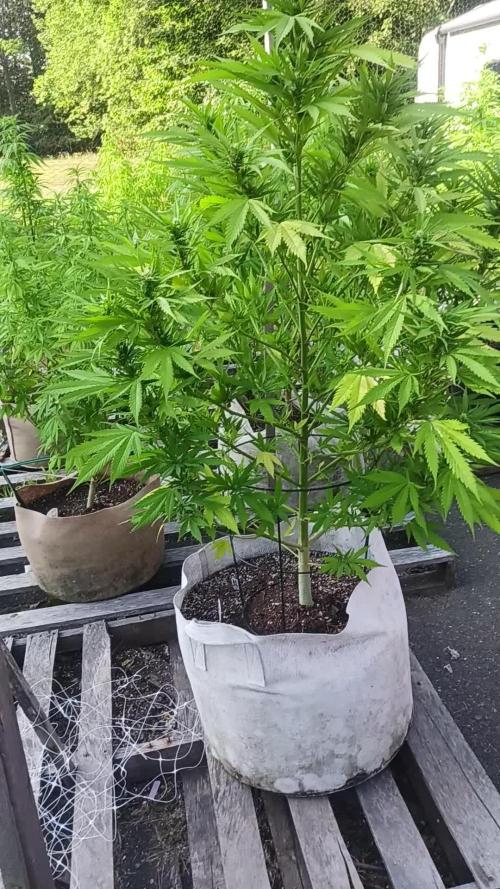
8/10 Hurried morning. Today was water day and the hose fucked up. Dad got it working while I filled half the jugs needed with water and the requisite amount of plant doctor. I gave the preventative dose (which is 1/2 tsp per gallon but I upped it closer to 1 tsp per gallon) on the plants that have received the three full treatments, the 10th planet in the middle and the chemdog. The rest received their last full dose. I had watered the NATURAL mk ultra and other tenth planet yesterday so I'm waiting until tomorrow when the need water to give them their treatment. Other than the 10th planet I'm worried things are going pretty good. Tjat's probably tine too. I certainly wouldnt have even noticed it a few years ago. I only bought like half the amount of soil as last year and really tried keeping costs down. These aren't the biggest plants I've grown but I'm grateful for what I have. I'm working hard to get the most out of them I can. I'm planning to give it a few days and then feed later in the week.
EDIT: I THINK I got my grow question deleted. Finally. It's strange that I didn't get ONE outdoor growers response. Doesn't matter. I figured out the best course of action. I'm lucky. Or maybe I just work hard. I defoliate twice a day. I have some pruning to do on the interior of a COUPLE plants. I've cleaned them up pretty good this year. No signs of ANY wpm which is great but suprisinging considering the rh and the rolling fog most mornings.
8/11 I gave the tenth planet in the back and the mk ultra I didn't get yesterday. The mk ultra got the preventative dose (upped from 1/2tsp to 1tsp) and the 10th planet tge full dose. I'll have to check but I think this is the last cure dose for everyone. Found a pillar INSIDE a bud on the special kush that's far ahead. Then you can see on the video a HUGE cut worm or something on the branch I pull down. Luckily I saw it. Wasn't there when I got back but it took a few bites. Looked on the camera and saw a bird swoop in and grab him. Thank the lord! It's going to be 100° today and tomorrow with heat advisory in effect. I'm going to have to treat these plants for pests/pillars some how. I might just use BT and my super alkaline water. The septoria is under control and I'm just afraid spraying anything would make things worse. I'm certainly jot going to let them eat my early flowering plant. I can't apply ANYTHING in this heat. I'll research and maybe if it gets low enough tonight I might be able to do something. I'm going to go back over and check that plant going branch by branch. That one 10th planet tgat WAS the biggest plant is severely stunted amd has some "strange" looking leaves. I wasthinking about getting it off property or just chopping and burning but I figure it's been in there long enough that the others could be infected. I think it spreads through pests if that's the case then it might be better to get rid of it. I'm not sure what I'm going to do yet. I'm going to stop and try to get some mulch today.
EDIT: I found a place I can get a bale of straw and I think I'll use that to mulch. It's almost a 100°. After killing the pillar this morning and missing that cutworm I came back over to REALLY look at the special kush in later flower. I looked through every branch and every bud. I found four pillars on that plant. No REAL damage yet and extremely small. I had to pull buds apart to find them. It's like they were hiding from the heat. That was miserable hand picking them in 100° degree weather. Luckily the bird feeders are close but the bigger birds chase the smaller ones. The smaller birds have found a new food source and perch on my cage waiting. I'm leaning towards treating the flowering plant with BT-k. Seeing that tge citric acid WON'T kill fungus I'll just use OUR super alkaline water and hope for the best. Nothing will get treated during this weather.
8/11 IT reached 105° yesterday and I had a family medical emergency. Came over this morning to several plants drooped right over despite me checking MD day and them being fine. Phone dodnt charge so I couldn't get pictures. Watered everything but the ones that got it yesterday cause they looked good and still had weight. I had to leave before the ones that were down could pick back up. The kush plants seem to tolerate this heat much better. Beside the ones in the 10s tge others are taking this hear fine. I'll update when I get back.


Likes
2
Share

@Grow4meds20
Follow
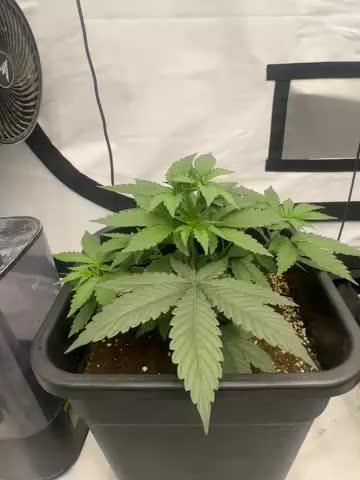
As I said I topped once on the last update they have grown significantly since then lateral branches are all pretty much even witch is really good hoping they get tall enough for the trellis and scrog by my flip date if not I will just do my usual of this top and lst while in stretch. Cherry popper are all relatively the same height apart from one witch is probably 2cm smaller two jaw breakers defiantly different phenos spotting has completely stopped on the papaya frosting and the lemon cherry gelato is also doing well all in all good so far !
Likes
67
Share


@AsNoriu
Follow
Day 9. All girls are out. Just last 3 finally showed up two days ago. Two Orange Sherbet and one Strawberry Banana were the late ones. All look terrible and unhappy, stems pink and if I keep spraying - pots will be overwatered. Tough life ... Will do my best, they need to stay for 10 more days in those seedlings pots, maybe will split into two gangs ...
Happy Growing !!!
Likes
11
Share


@Willy_Balls
Follow
23.08
These girls with co2 and so much light exploded in growth and are really packed in the tent. Never had such density. I will defoliate hard after this week and hope it will turn out fine.
Fingers crossed cause the yield can be huge.
Likes
1
Share

@Grapes
Follow
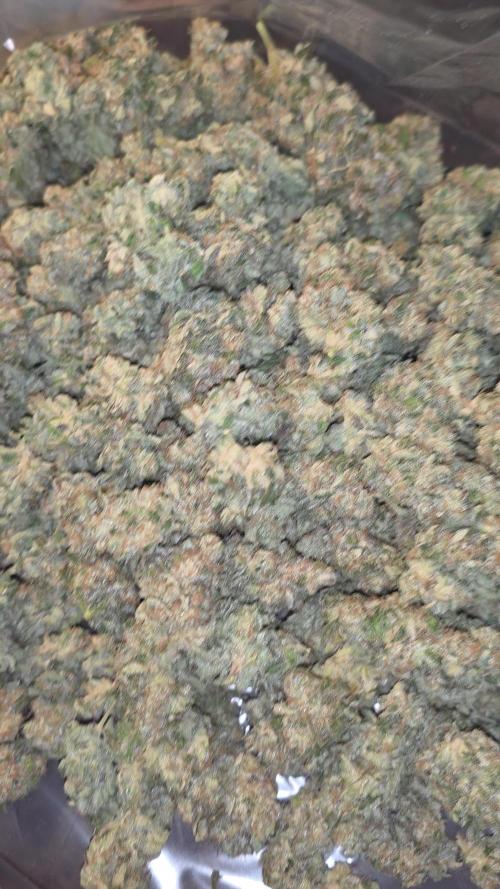
I harvested at 65 days. Dried for about a week and a half at 55% - 60% humidity and about a constant 61 degrees. barely it in the tent to dry and it was just one plant. It made about 200g trimmed , it was way more than I expected. Easily got over 1 gram per watt since I only could keep the light at 75% because it was too close to the plant. Trimming was the easiest Ive had so far and only took a day with a friend.
Likes
46
Share

@DogDoctorOfficial
Follow
Hey, cannabis enthusiasts and connoisseurs! 🌿🔥 The journey with our Runtz F1 has been nothing short of legendary, and now we’re at the stage that every grower eagerly awaits—the trim and smoke report. This Runtz F1 has delivered beyond expectations, and I can’t wait to share the details with you. Let’s dive in!
The Trim Process 🌾✂️
The trimming process was an experience in itself, filled with care and attention to detail. Here’s how it all went down:
• Breaking Down the Branches 🌿:
• First, we carefully broke down the plant into manageable branches, making sure to preserve the integrity of each bud. The structure of the Runtz F1 made this easy, with its dense, compact colas ready for precision trimming.
• Trim Bin Magic ✂️:
• Using a Trim Bin, we meticulously trimmed away the sugar leaves, leaving behind only the most beautiful, resin-coated buds. The Trim Bin isn’t just a tool; it’s a game-changer, allowing us to catch every last bit of precious kief that falls during the process. This extra kief is like a bonus for those special moments when you want to add a little something extra to your smoke.
• Preserving Terpenes with Grove Bags 🛍️:
• Once trimmed, the buds were placed into Grove Bags for curing. These bags are revolutionary in the cannabis world, designed to lock in terpenes and keep your buds fresh for the long haul. Unlike traditional jars, Grove Bags use a special TerpLoc technology that creates a perfect microclimate within the bag, balancing out oxygen and moisture levels. This means your buds cure evenly without the need for burping, preserving that incredible citrus terpene profile we’ve come to love from the Runtz F1.
The Legendary Smoke 🌬️🔥
Now, let’s talk about the smoke—because this is where the Runtz F1 truly shines.
• Flavor Explosion 🍊🍋:
• The moment you take your first inhale, you’re hit with a symphony of citrus flavors. It’s like walking through a citrus grove with the sun shining down—notes of oranges, tangerines, and lemons come through strong, each one distinct yet harmoniously blended. But the magic doesn’t stop there; an underlying hint of vanilla sneaks in on the exhale, rounding out the flavor with a creamy, smooth finish. It’s an experience that dances on your palate, leaving you craving more.
• Aroma 🌿🌸:
• The smell is just as captivating as the flavor. As soon as you open the Grove Bag, the room fills with that zesty citrus aroma, complemented by a subtle sweetness from the vanilla undertone. It’s the kind of smell that makes you pause and appreciate the craft that went into growing this plant.
• The Effects 🌟:
• The effects of the Runtz F1 are as balanced as its flavor profile. Expect an initial wave of uplifting energy—perfect for daytime use or when you need a creative boost. As the high settles in, it mellows into a relaxed, yet focused state. It’s the best of both worlds: energizing without being overwhelming, and calming without knocking you out. This makes it an ideal strain for those who want to stay productive while still enjoying a potent, flavorful smoke.
Final Thoughts and Invitation 🎥✨
The Runtz F1 has proven itself to be a true connoisseur’s strain—a perfect blend of flavor, aroma, and effects that’s both complex and satisfying. This was a journey that showcased the importance of patience, precision, and care, from germination all the way to the final cure.
If you want to dive deeper into the entire process, from the first week of veg to the final trim, I’ve documented it all on my YouTube channel. Join me there for a closer look at how this incredible strain came to life, and learn more about the tips and techniques I used to bring out the best in these plants.
Thank you to everyone who’s been part of this journey, from the community to the amazing brands like Gro Diaries, TrolMaster, Aptus Holland, Kannabia, and more. Your support and tools have been invaluable.
Remember, the magic is in the details—so never stop learning, growing, and enjoying the fruits of your labor. Stay positive, stay curious, and keep spreading the love! 🌿💚
#RuntzF1 #LegendarySmoke #CannabisConnoisseur #GroveBags #TrimMagic #StayPositive #GreenMagic #YouTubeJourney
Germination method 🌱 @thecannakan
Genetics Runtz F1 @zam.nesia Runtz auto @kannabiaglobal
Nutrition
@aptusholland 🌿
@aptus_world 🌎
@aptus_es 🌍
@aptusbrasil 🌱
@aptus_thailand 🌿
@aptus_portugal 🌳
@aptususa_official 🍀
@aptusplanttechnz 🌺
@aptusplanttechaus 🍃
Ambient controls🎮
@trolmaster.eu @trolmaster.eu.support @trolmaster.support @trolmaster.agro
Soil @promix_growers_eur @promix_cannabis
LED - @lumatekeu
Watering- @autopot_usa @autopot_global
Love and attention- @dogdoctorofficial
#aptus #aptusplanttech #aptusgang #aptusfamily #aptustrueplantscience #inbalancewithnature #trolmaster #trolmastereurope #trolmastersecrets #Autopots #RuntzBattle #KannabiaVsZamnesia #GreenJoy
As always thank you all for stopping by, for the love and for it all , this journey of mine wold just not be the same without you guys, the love and support is very much appreciated and i fell honored and so joyful with you all in my life 🙏
With true love comes happiness 💚🙏 Always believe in your self and always do things expecting nothing and with an open heart , be a giver and the universe will give back to you in ways you could not even imagine so 💚
More info and complete updates from all my adventures can be found ⬆️ link in the profile description ⬆️
Friendly reminder all you see here is pure research and for educational purposes only
💚Growers Love To you All 💚


Likes
Comments
Share


@MumboJump
Follow
They now geht 4l of water every 2 days. The left Lemon Og Candy has a very heavy citrus flavor and the right one more Like Candy. The left one has more orange/red pistils than the right one
