


Likes
Comments
Share

@WMinerva007
Follow
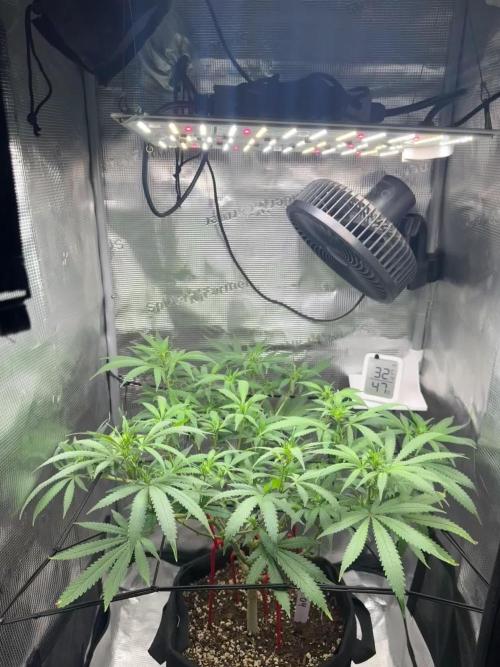
3 weeks into flowering and she has stretched nicely to a strong and rigid structure. Shes starting stack budsites and producing more pistils to start her bulking next week
To prepare her for mid flowering, I have defoliated her and increased her bloom feed to give her full flower power - so excited!!
The heatwave where I live has affected my the overall temperature in the lung room and the tent, but with automations, I was able to stabilize the right VPD range with the humidifier. Next, Bio Heaven and speed controller for the exhaust fan :)

Likes
Comments
Share


@Uneasy
Follow
Towards the end of the harvest, mold developed due to high temperature and humidity. I lost about 30% of my harvest. The buds did not fully mature. Despite all the setbacks, we managed to get a harvest.

Processing
Likes
19
Share


@CannabisAprendiz
Follow
Esta es una genética de un olor muy fuerte y pesado se siente intenso desde la vegetación , es una variedad muy resinosa con unos colores morados hermosos , probando las flores cuando terminó el secado y ahora curando las flores se siente un sabor terroso , al principio no me gusto ya que nunca había probado este , pero después al seguir fumando se siente un sabor final muy agradable.
Esta genética se conservará para futuros cruces y experimentar algo nuevo.
muy conforme con la producción de cada clon


Likes
6
Share


@CanOli95
Follow
The made a jump in size. The weather conditions change each day. Some days it's very hot, some days it's more cold with less light. She tripped her size and shows the first pre flowering.
Unfortunately she has had heat damage, but it's minor and should not effect her that much. The new leafs look very healthy and the other leafs also look good, except for the heat damage.
I think she will be growing to about one meter or so, which is fine for me. I'm looking forward to some nice growth:)
I do not plan to use topping or other training techniques, since it's the first time I'm using this genetic and don't want to f it up. She has a really nice spot an my south balcony, which gives her more than enough direct sunlight to bring her to its full potential, if the weather will become more consistent. If more sunlight is predictable, I will increase the silica dosage to prevent more heat damage, even though I know even that has limits.
Thanks for participating in this project by viewing or commenting:)
Likes
1
Share


Likes
4
Share


@LoganatorDude
Follow
I did her second tie-down on day 22 actually.
Day 24- I’m okay with the fan leaf laying on the surface for *now.* Just because I live in a high, dry desert with a consistent RH at around 20-25%. And also, because the top quarter inch of soil is dry. However I will probably be propping it up with something tomorrow morning.
Day 25- finally I decided to fold down the rim of the pot for more light!

Likes
11
Share


@Glen1818
Follow
Led runs on 74watt, grow very fast
Removed some large leaf,
On day 28 removed again larger leafes , think i will send them in the flower in a few days

Likes
7
Share

@LST420
Follow
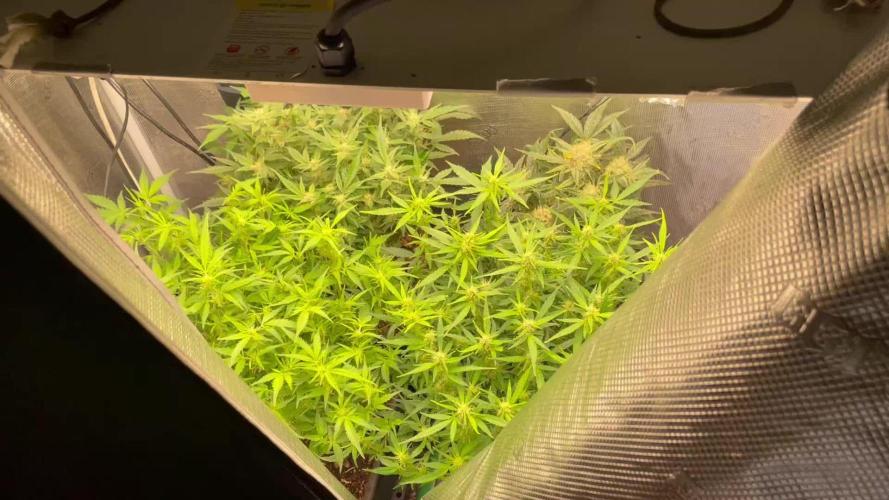
Week 7
Although the Gelato is the smallest of the bunch it's definitely the fastest flowering. Also I'm trying out a little experiment, if the results are positive I might share more about it in the future..
I've also added an extra Biotab in the OGK and NQ. My theory is that you need more Biotabs than adviced if you train and defoliate your plant a lot. Because you produce more plant material and with defoliation you technically are taking away nutrients of the plant. I've also did this to the Spliff Strawberry (other diary) and it's looking much more green since.


Likes
5
Share


@deepsheeba
Follow
Corrected the nutrient ratio to 120-20-100 ppm.
Plant is still stretching and I'm waiting she start fattening.
Two sanlight are going to be implemented for a CO2 heavy growing


Processing
Likes
2
Share


Likes
11
Share


@Stacy_smokez
Follow
WDrying waiting weight it . This was a good grow to get back into a rhythm overall great I will like to rerun using different soil and nutrients as well as switch up my training as well . I will update my journal once it’s completely dry trim and everything like that with better numbers and better information. The genetics were pretty good and solid overall I’m happy with my girl.
Likes
14
Share


@SunshineBud
Follow
Finally started seeing some baby buds! YES!!!
I really start running into issues with humidifier staying on so I've basically gave up on it, at some point around here I added a heater near the inlet fan and it's jumped the temp numbers up quite a bit
Some log entries:
1/21: Fed w/ 2 gallons for all 4 15ml big bloom, 10ml grow big and tiger bloom, 2.5ml cleankelp. all units per ga h2o
1/24: Fed w week 7 noots, trimmed 1-4, heavy on 1 & 4

Likes
57
Share


@Silverback_Guerilla
Follow
1/4:
Moved a few other plants out of the closet, now they've got a little elbow room.
Both Zenzations are fattening and frosting up very nicely. The Gorilla Girls have finally stopped stretching and are budding up nicely now. Their lowers are as all as the tops.
The Black Jacks look great, too.
1/7:
Fed today and gave them all a sniff test...killer stink from the Zenzations.😵
I added a dose of endoboost in their feed today...kinda worried about the monstrous size of my plants considering that they are only in 3 gallon pots..
Likes
9
Share


@Haoss
Follow
new life is born
I will do my best to make this beautiful girl grow up big, healthy and beautiful.
Together we will see what kind of girl she will grow up to be
Likes
44
Share


@RakonGrow
Follow
Note : Jegliches Equipment aufgelistet welches ich nutze findet Ihr in der Germinations Woche !!!
Day 15 :
ich weiss noch nicht ob der mineralische dünger wirklich sofort etwas gebracht hat . schauen wir was die zeitraffer so vermitteln. ist es seit gestern schneller am wachsen ?
Day 16 :
PPFD 275 * 20h = DLI 19.8
Day 17:
+ 0.5L Flaschenwasser (EC 0.26)
+ + Canna Rizothonic
+ + Canna Terrar Vega
+ = Total EC 0.68 (PH 7.2)
+ Final PH 6.15
Day 18:
es wächst
Day 19:
es wächst immer noch
ventilation übern blätterdach angemacht. ich glaub daher kommt das ruckeln im video
Day 20:
+ 0.5L Flaschenwasser (EC 0.26)
+ + Canna Rizothonic
+ + Canna Terrar Vega
+ = Total EC 0.68 (PH 7.2)
+ Final PH 6.15
+ 0.5L Leitungswasser (PH 8.0)
Der Stamm hat sich in den letzten 3 Tagen verdreifacht vom Volumen. Jetzt hat er so Bleistift dicke erreicht.
Day 21:
die temps und relative luftfeuchte sind hier zwischen 58%-68% und 23.5°-25.5°C . reguliert sich aber immer zu den höheren werten . ist hier halt so :))
Likes
21
Share


@cal917
Follow
Noticed the blueberry requires lots of nitrogen and stretches much. All plants fed nutrients 1 per week and microbes once per week with regular watering in between. Start of 5th week of flower.

