
Processing
Likes
Comments
Share


@GIJOSE
Follow
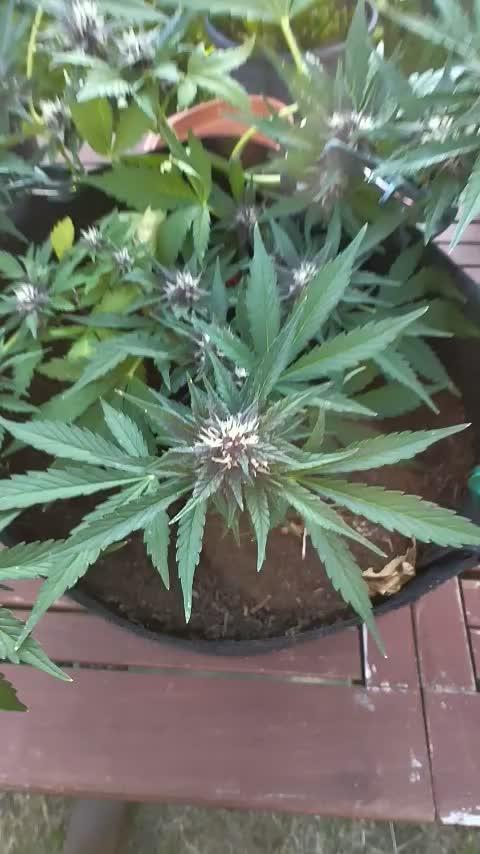
Week 11 VEG! In today's video we do the second transplant to the girls final pot. In two weeks I'll be sending the Clones to flower cutting the veg time short. I got some new beans that I'm wanting to pop and try out. Hope everybody's doing well what's a lockdown. Cheers!-G.I.JOSE


Likes
16
Share


@Sur_cannabico
Follow
5ta semana 12/12
#greengelato by RQS.
Alimentada con Quemanta nutrientes bajo un spectrumboard de 75w de los chicos de heaven Grow ligths.

Likes
1
Share


@Barzenegger
Follow
Transplanted them into the AutoPots this week, humidity could be higher. Maybe I can turn on the reservoir next week already.

Likes
1
Share


@Pestitel
Follow
Amazing experience with the Mix Pack, I will try it again next summer for sure. Love the variety.

Likes
15
Share


@Destro
Follow
Day 67 F14 2/7/2021 Watered plants with nutes at 6pm
Day 70 F17 2/10/2021 Watered the plants with nutes at 4pm
Day 73 F20 2/13/2021 Watered at 4:20pm no nutes


Likes
30
Share


@Dunk_Junk
Follow
The flowers are starting to pack on weight this week. I'm not doing anything at all other that watering/feeding.
I left the tape measure visible in the video for scale. Good? Helpful?

Likes
17
Share


@maelxich
Follow
Saw spidermites setting up camp on the dark side of the plant on 1 bud site. There was no sign of them anywhere else. This plant is becoming more trouble than it’s worth and I’ve decided to chop her early after.
Likes
6
Share

@KickSweets
Follow
So only Sour Jelousy left and i will let her around 5-8 days more , Both are nice smelling plants , My Mango Smile was smelling also really nice mango fruty gassy smell and at end i made catastrophic fail that i destroyed whole taste and smell and everything and that hapened with turning on wrong Schedule Cycle on my Viovsun Vcure simply i didnt sow that fast cycle dry/cure it is 20c with 55rh for 8 days which at end i burned all my trycoms . Wanted just to share my bad experience and how eazy can ruin your 3 months work 😁💨💣

Likes
5
Share

@Ibgrowing
Follow
I have watered her twice this week, once with 3l of rain water and once with 3,5l of rain water. I will probably up the volume a bit more next week.
I upped the nutrition a bit despite the burned tips.
I will not be home for the next 2 weeks so I will rely on other people to take care of my girls, the pics might be not up to standard.
Likes
8
Share


@Tango_Hotel_Charlie
Follow
Easy grow, was Concerned at first about leaf shape, I thlught issues at first, but seems to be a crinkle leaf pheno. Its goddang chop day on this mammy.

Likes
53
Share


@SativaSteve88
Follow
All going well upto now my estimate is another 3 weeks or so till harvest so i will see the diferrence in them this time next week an decide wether its time to start my 2 week flush or not, love how well these tropicana bannana and mimosa evo have grew from the start and it is a strain i will run again sometime given i enjoy the smoke, buds have formed really well and can tell they will all be nice and dense, see you next week for my latest update when we will be 1 week closer to the finish line 😁✌️👊

Likes
179
Share


@Tropicannibis_Todd
Follow
💩Holy Crap We Are Back At It And Loving It💩
Growmies we are at DAY 49 and she's just killing💀it👌
👉We are in full flowering mode and she's doing great 👈 Everything is looking good even the Tiny Cup 🥤
So Shit , I gave them just a tad to much nutes at the start of feeding 👈 But I have since fixed it
So I'm still doing some low stress training 🙃 and some defolation 😳
Lights being readjusted and chart updated .........👍rain water to be used entire growth👈
👉I used NutriNPK for nutrients for my grows and welcome anyone to give them a try .👈
👉 www.nutrinpk.com 👈
NutriNPK Cal MAG 14-0-14
NutriNPK Grow 28-14-14
NutriNPK Bloom 8-20-30
NutriNPK Bloom Booster 0-52-34
I GOT MULTIPLE DIARIES ON THE GO 😱 please check them out 😎
👉THANKS FOR TAKING THE TIME TO GO OVER MY DIARIES 👈


Likes
5
Share


@pHilosophy420
Follow
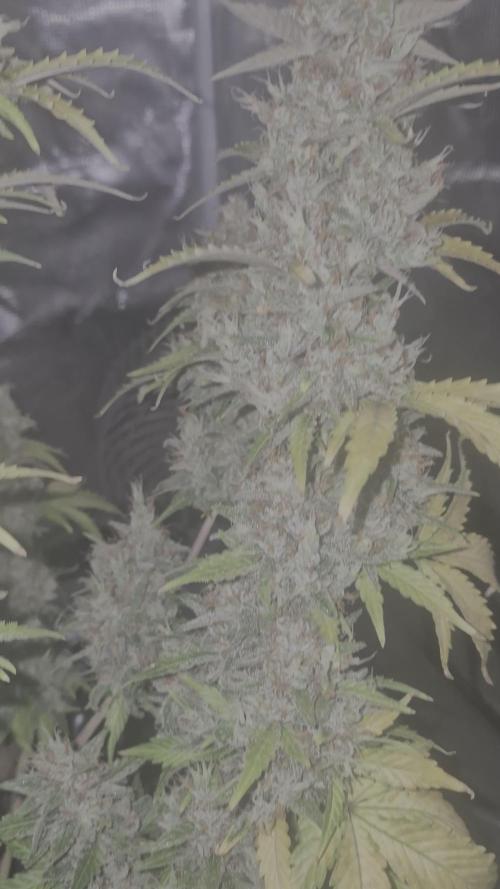
She is getting nice and fat next few weeks and it will be harvest time. This strain should taste nice so another strain I'm looking forward to smoke


Likes
20
Share


@JohnnyBlaz3
Follow
Realized I was a week behind so I updated a few days early but same same lol she is looking and smelling great. when its calm out she definately has a very pleasurable stank to her within a few feet radius. Shes actually starting to get some nice little flowers on her 😋 mayb i'll get like 10-14 dried grams??? guess well see but whatever it is dont really matter, already stoked to try again next year but i'll be doing things a little differently and also i'll add a couple more now that i know autos solve the issues of outdoor growing in a very short summer season. will not be using fabric pots outdoors anymore being the main change.
Likes
10
Share


@Pozzy67
Follow
Starting to get close to the finish line now! Light is at 100% and they are stacking really nice! Can’t wait to see the final product! I’m really like the Cronk Grow nutrients. After trying Fast Bud Genetics for the first time, they are the only auto flower I will grow moving forward.
Likes
7
Share


@CanarianGrow92
Follow
Another week of flowering, this week we started with some ultra PK and also some sugars, the buds are already starting to get bigger so lets see next week! We will continue to give some ultra PK next week!

Likes
58
Share


@Mrs_Larimar
Follow
Friday, March, 5ht
After some cleaning up the Bottomarea, i bend them alittle just to spread her
In my Eyes they are ready to go into Flower.
Iam just thinking about the Other Strain in the Tent.......but yeah on Sunday i will know
After defo and LST,,, they got their first Feeding with N and Fast Buds

Processing
Likes
9
Share


