
Processing
Likes
Comments
Share


@Cannibalgardens
Follow
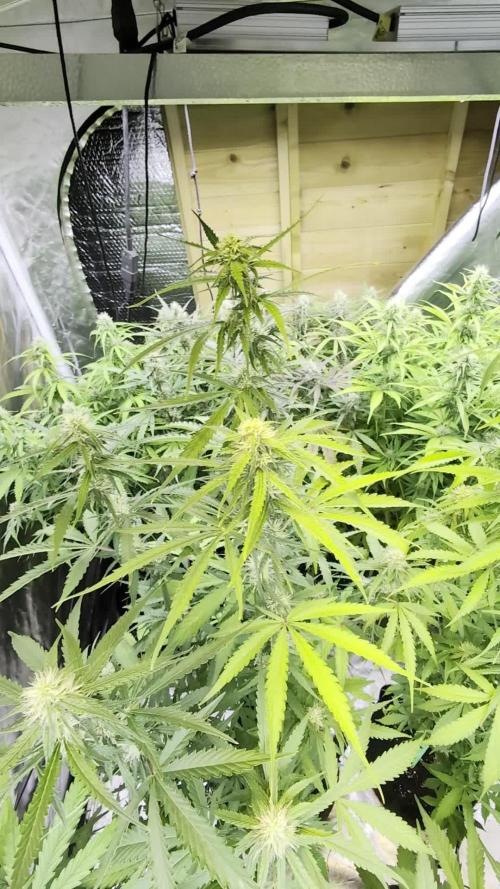
The genetics in this little lady are very good she stayed short.. All the stretching and bending are paying off right now she has a very nice even canopy .. Well we are gonna start to see some buds getting size now . Can't wait till next I also can't wait for the few bid sites I dusted with some male pollen ..

Likes
6
Share


@yggy-420
Follow
Only water filled up again. 💦
Due to the rather humid living soul substrates,
a few fungus gnats have appeared, which I will fight next week with SF nematodes.


Likes
14
Share


@SunshineBud
Follow
This week went fairly well, but I became concerned with some leaves appearing crispyfried along the edges and some looking deficient.
I finally started cutting my girls and I have to say, I felt ashamed at wounding my babes but hopefully it'll go the right way, guess we'll see!!!
I also flushed my plants with ph Balanced water this week and going to only provide this to water/feed them for another few days for fear of nutrient burn and simply following the feed schedule for my nutrients.
Also, I took some pics for the Christmas contest for Crop King Seeds lol hope you like them more than my Paw did!
I want to send a big shout out to my Dad who is giving me advice based upon his UNCA Biology BS experiences... Thanks Paw!!!
I also want to say thank you for all the likes and interest in my grow, much love yall! See you next week!!!
What follows below is the transcribed daily notes from the images above!
12/9 Plants looking good, I fed/watered w/Sunday's Ph 6.2 6tsp/ga Big Bloom & 3 tsp ga Grow Big. Next time I'll flush. I don't know if my runoff ph is bad or good because the plants are eating leaving acidic runoff
12/10 Plant 1 looks so Good, might be time for LST soon
12/11 Plants all showing Improvement/Growth Plant 3 still slowest but she's still growing. Under grow lights I think I see fringe yellow tips. Still on track to flush w/Plain H2o next watering.
12/12 Flushing w/ PH Balanced H2O no noots. Plant 1 has a leaf turning yellow on half so went with ph balanced water w/no nuets to flush all. 3 Growing ok but still a little off looking
12/13 Moved inlet vent to point up and clip on fan to blow on girls. Plants look great after a day of plain H2O.
12/14 Plant one having a small bit of leaf burn on widest leaves and a weird dying on lower leaf. They looked bad under light so I pruned em. Turned up humidifier to 65% been running low.
12/15 Topped Plant 2 Rinsed all w/PH Balanced H2O. Nervous I took too much from #2 But my thinking was I went easy on 1 yesterday so go aggressive on 2 to view effects.
12/16 Trimmed 2 crispy leaves off Plant 1 used Bonsai paste to cover wounds, Plant 2 stem looks narrow@ base wider up top. Trimmed 2 sucker leaves (1st leaves) from Plant 4 Rinsed all w/ PH Balanced H2O
Thats it! Thanks yall, see ya next week!

Likes
22
Share


@BruWeed
Follow
☘️22/11 - Empieza su tercera semana en Etapa de Floración.
☘️Esta semana le estuve agregando solamente agua ya que las hojas están un poco amarillas, esto se debe por exceso de nutrientes, así que esta semana solo le agregaré agua.
☘️Crece muy rápido en altura de una semana a otra.
☘️Los cogollos ya se pueden apreciar mejor, tienen tonos lilas/violetas.
☘️Por el momento su desarrollo continua de forma correcta.
☘️En estos días seguiré subiendo más imágenes.

Likes
3
Share


@cmstacker01
Follow
Dense nuggets, identical plants.
Pretty easy to trim. Don't think this species is really fungus prone,small buds but very dense.
Will update smoke report later.
Need to cure now at least 4 weeks.
Will post and update in september.


Likes
44
Share


@The_Good_Twin
Follow
22 Aug 2021
Today I’m starting to give some nutrients to assist my ladies in their development. I have been using plain pH’ed water to use the nutrients in the soil before giving anything extra.
My girls are looking bleached out and weak. Maybe trying to reduce the nutrients by using the soil for the first week or so in their new homes isn’t paying off. I was hoping to see them flourish, but they aren’t. Growing is all about trial and error, and I’m hoping that my error isn’t going to hurt them in the long run!
I’m starting the “Late Growth, stage 4” on my Flora-Trio 6 part feeding chart, but in the beginning I’m going to give them only half of the recommended amount to hopefully prevent any nutrient burn that they might experience. If there are no negative impacts seen, then I’ll adjust the amount as necessary.
Today I’m giving them a half gallon of water with the following nutrients: CALiMAGic 2ml, FloraMicro 3.8ml, FloraGro 4.5ml, FloraBloom 2.5ml, and Floralicious Plus 1ml.
The initial pH was as follows: C1 - 6.4, C2 - 6.3, C3 - 6.3. I did not need to adjust it, so I didn’t. The TDS going in was: C1 - 636 ppm, C2 - 634 ppm, C3 - 653 ppm.
I was originally planning on giving each plant a gallon of water, but I received enough runoff after only half a gallon. I guess they still haven’t developed an extensive root system enough to require the additional water. It just made it to where I don’t have to worry about making more to give them in a couple of days.
The runoff pH and TDS were as follows: C1 - pH 5.7, TDS 498 ppm; C2 - pH 6.0, TDS 562 ppm; C3 - pH 5.7, TDS 707 ppm.
It’s always funny to see how plants in the same type of soil, and given nearly the same solution still have such varying pH and TDS runoff levels. 🤷♂️ That’s all I have to say. It’s a mystery, but not an overly important one as long as they’re healthy.
The heat in the tent today was somewhat warm, but not as bad as it has been lately. The temperature was 81F, and the humidity was 56%. I’m hopeful that adding nutrients today will improve their color and get them to start developing their branches some more so I can flip them to flower in a little bit. We’ll have to see how it goes.
25 Aug 2021
Today I gave my ladies the second half of the gallon that I prepared a few days ago. They received the first half gallon on the 22nd, so I’m not going to repeat everything here again. To see what they were given read the note above.
I am going to note the runoff levels and the temperature and humidity because they are important to note.
Runoff was as follows:
C1 - pH 6.0, TDS 610 ppm
C2 - pH 6.1, TDS 546 ppm
C3 - pH 6.0, TDS 765 ppm
Again, it just weird seeing plants with different pH and TDS levels when they’re given nearly the exact same solution. 🤷♂️
The temperature in the tent was 81F, and humidity 62%.
Overall, my little ladies are looking better since starting the nutrients. They no longer look bleached out, and the green is returning to her leaves quite well. I decided to measure them today as well to document their growth. C1 is now 16 inches tall, and C2 is 15 inches, and C3 is 16 inches. C1 and C2’s lights were adjusted to be 19 inches away, and C3’s light is at 18 inches to keep the light canopy level. The difference in the light and size is due to the size of the pot C3 is in. She stands taller because her pot is half a gallon larger, but also because the pot has small legs on which it stands on so it sits higher. They’re looking better, so that’s all that I care about in reality.
Good luck, and happy growing everyone!!

Processing
Likes
33
Share


@FreshCoastOrganics
Follow
These girls are starting to get really big and bushy! This has started to become quite the sea of green setup but they seem to be happy and healthy still! These are definitely slower to flower than my other strains going in the other box but with the long veg/flower time with this strain I know I’m going to get a decent yield compared to the LSD25 and BlueBerry!
Continued with a light feeding with Advanced Nutrients, I’m starting to see slight bits of burn on the edges so I will have to keep an eye on them throughout the week. Hopefully she starts to develop some big colas soon!!
Processing
Likes
Comments
Share


@Godspharmacy
Follow
Starting to really stink now the gorilla zkittles seems so fill out a lot earlyer than the purple berry kush will pics of each plant next feed. Also start the shooting powders next week witch will be 3weeks of shooting pwders then 2weeks flush cantbwaitbto see how these turn out as this is my 1st grown in around 8years

Likes
Comments
Share


@Chronickarl
Follow
So alot has happened since the beginning I had to keep them longer than I wanted in my small room as my previous grow still wasn't quite finished, so to help with this I topped both strawberries and tried abit of LST on the others, generally happy with how things are going so far will be moving them to there final home next week


Likes
15
Share


@Homegrown93
Follow
Day 15-defoliated her probably for the last time after a few weeks of growth, she was very bushy. Added another fan to get more air moving as well. Also, I decided to try out the AN Sensi Bloom set. I didn’t mean to get the coco version but a little extra cal-mag won’t hurt in this case, I only fed at 75% strength and added big Bud powder at 0.5 grams/liter. I’m hoping her stretch finishes soon or I’ll run out of space, although she’s starting to really stack.

Likes
41
Share


@PrairieFrostGrow
Follow
******* Week 7 Flower - October 31 to Nov 6, 2020, Days 43 to 49 *********
This was flush week.......hurry the hell up and flush week!!!!!😃 This strain is an 8 week strain!! She was close to ready at the end of the week, Day 49. Start your flush week 6......I waited for week 7 thinking she would go 9 weeks. Gave them two doses fo Flawless Finish and 10 gallons of water each. Cant do much more than that🤞👍
She is a sticky girl........move any leaves around and you find out just how much😃 These are some nice Freakin looking buds!!!!!! Beautiful colours and so frosty all the way down the fan leaves........so pissed off at myself because I missed her flush timming.....there are some beautiful purples and yellows in this strain that I missed!☹️
Little more detail.......
Nov 1/20, Day 44
- Heavy flush day today.
- 32L of tap water with 180oom and 5.7pH going into the girls.
- runoff numbers for the girls were both pretty close to the same at 185ppm and 6.3pH.
- last 3.5L of flush contained Flawless Finish @ 2ml/L.
- Decided I do need to use a flushing agent with these girls......they are so close to done now!!!!!
Nov 3/20, Day 46
- Another flushing agent watering today.
- each girl given roughly 5L mixture of half tap water and half RO water with Flawless Finish at 4ml/L
- More than I would normally do but feeling a little desperate at this point!!!
- I am almost feeling like C472 is close to pulling now........damn.....I need a couple of more days yet so just going to let more go amber and hopefully she will continue to take the water and flush herself.
Nov 6/20, Day 49
- 1L of plain water for each girl. 25ppm and 6.2pH.
- we are at the finish line.....just keeping the pot moist right now.
- they are ready for darkness anytime now........they are......I am not😂
Looking good Apolo.......Trichomes are lots and smells are plentiful👍 They finishing too damn fast though😀😀 Good problems I guess, wish I cut some clones to run her one more time and stop feed at week 5 flower😞


Likes
34
Share


@Salokin
Follow
Hello Growmies,
We’ve entered week 10, and the Watermelon Candy F1 Hybrids stand as a testament to the art of cultivation. Sharing the tent with Epic Buzz and Red Banana Pudding, they've reveled in the same meticulously controlled environment, with each plant exuding its unique vibrance.
The fade has begun its delicate dance, a visual symphony of hues signaling the nearness of harvest. This gradual shift is not just a visual treat but also a sign of the plants channeling their energy into the dense, trichome-laden buds that have developed into rock-hard nuggets. The intense, pungent aroma that fills the air is a prelude to the flavors and effects to come.
Watermelon Candy #1 stands out with its remarkable bud structure, its stature commanding attention amidst its siblings. Not to be outdone, Watermelon Candy #2 and #3 boast their own magnificent floral nodes, each a promising indication of the bountiful harvest that looms a mere two weeks away.
The TrolMaster's environmental control has been nothing short of exceptional, keeping the conditions optimal for these final and decisive stages of flowering. Our unwavering nutritional regimen has supported the plants without the need for alteration, ensuring a finish as robust as the care provided.
As we anticipate the impending harvest, we're reminded that cultivation is as much about the journey as it is about the destination. The hard nuggets and the powerful scent are clear markers of success, yet it's the anticipation of the cut that holds a certain thrill—a culmination of weeks of dedicated effort.
Soon, we'll have the privilege of trimming and curing the fruits of our labor, but until then, we watch and wait as the Watermelon Candy F1 Hybrids prepare to reveal their final, glorious form.
Stay lifted, and ready for the harvest that awaits,
Salokin
Likes
7
Share


@JayBane
Follow
FastBuds? More like FatNugz!
What a delight this Strawberry Banana was to grow!
Smelling wonderful, trichome rich and compact buds!
Will update a harvest report once she's dried and trimmed up & ready to bottle.

Likes
17
Share


@Mr_nugs_lover_David
Follow
The strain is awesome, very happy about Ak420, it's my first time growing this strain, I'm growing 3 plants of ak420 this is the pheno #1 as you guys can see and smells just like her 2 sisters, very sweet and floral aromas I cannot stop smelling those flowers, I'm super happy about this strain, would love to keep working with her💚❤️🧡 stay tuned to see how this lady performs at the end of the process! 👨🌾
Likes
Comments
Share

@smoking_hills9
Follow
Big trees, fat ,hard frosty buds, fantastic smell, top genetics. What else u can wish 4? I like 🔥

Likes
63
Share


@AsNoriu
Follow
Day 15. Girls are bad, will recalibrate ph meter and give first nutes, very strange grow, looks like all 4 cookies want to selftop aswell ..
Cant get a brake ...
On some girls see nutes def, so my guess is that ph meter went wrong and i have all those mutations or shitty seeds ;)))))))))))))
Day 16. Recalibrated ph pen and fed them with first full nutes.
Lets see, cookies looks really sad, 3 gorillas are ok, bunny gorilla will have two main stems - funky ;))
Day 17. Girls responded well to first feed, still sad situation with most of cookies.
I plan to veg them long, so bad grow rate is not a problem, but health is, one girl is in tragic state, lets hope she will bounce back !
Day 18. Girls start to love life, looks like they responded well to nutes. Worst Cookie show sighns of progress, maybe again she will be that Black Swan story ? ;))
Would start training today before watering, but will give them one more nutes and then will start.


Likes
15
Share

@Kominest
Follow
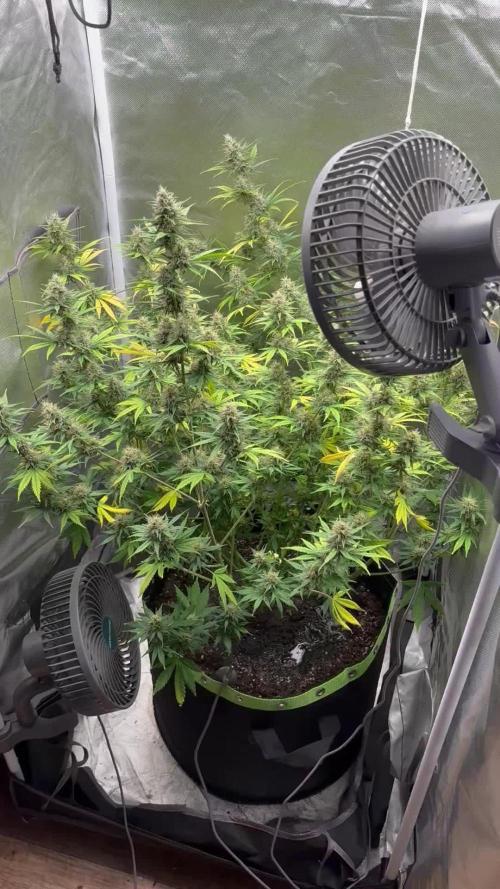
She’s evolving a sweet chewing gum like smell which is very pleasant . I think she’s taking the nitrogen of the leafes since there’s not much in the soil anymore . We’re aiming for 8-10 weeks of flower so this is fine for me . Overall she’s developing nicely except the lower branches which I usually cut off when lollipopping but this time I didn’t .
Likes
12
Share


@Daviz_42
Follow
Como podemos ver ya todas están para el corte o casi, en algunas tendré que seleccionar el pheno, ya que hay alguna que me gusto más que la otra, en general un terpeno muy diferente en cada variedad y también la calidad de la resina, en general mucha resina, pero por ejemplo he podido observas que los tricomas de la Gorilla Melon son más grandes y se oxidan de una manera más lenta, ideal para hacer extracciones, en cambio, la Reinbow Melon .... ese terpeno dulce intenso tanto que es hasta abrumador...me muero de ganas ya de probarla... la Lemon Mandarín es exagerado el olor que tiene a mandarina si cierras los ojos y ueles fuere parece que te vayas a comer una buena mandarina y la Paya Sherbet tiene un olor dulce y muy agradable, pero nada que aún pueda relacionad del todo..... un saludo y buenos humos fam.