
Likes
Comments
Share


@Albargina
Follow
Otra semana mas, y sigo enamorandome cada día, las Blue Elite no paran de sacar resina blanca, y las Rica CBD estan hermosisimas, con grandes y gruesos cogollos, empiezo a notar las macetas de 3L y que la lámpara está ya para el retiro😬, aun así estan saliendo unas piedras con forma de cogollos muy interesantes😂

Likes
27
Share


@R_Dank
Follow
10 days into flower with the first taste of bloom! Happy with how things are going.. don’t know why my videos won’t play

Likes
11
Share


@CBDreamer
Follow
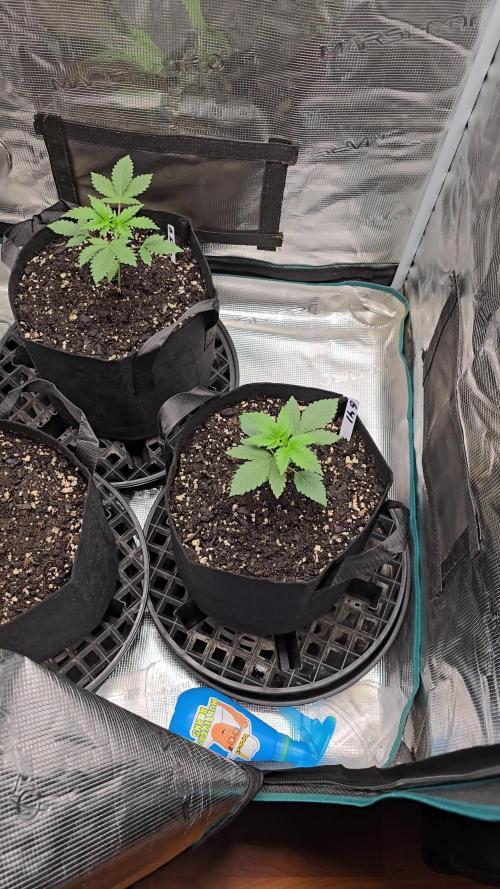
I noticed that the plant had some trips on the leaves, for sure the problem started before I placed the pot in the cabinet. Had to spray the plant with some potassic soap. I noticed that after that some leaves suffered some minor burns on the tips. Started to train in day 4 bending on a side.

Likes
12
Share


@Kakui
Follow
Flower35, riego 6.3 pH y EC 2.8, los cogollos están bastante grandes, aún quedan 2 semanas aprox para seguir engordando, todo apunta a una cosecha más grande que la anterior y en menos tiempo.

Processing
Likes
5
Share


@MUDBUG
Follow
Almost CHOP CHOP time will give a full report one day but I can tell u this if I wouldn't of topped this plant no telling how big she would of got she had a 25 inch stretch after topping so u do the math this can easily be a 80 inch plant ✍️✍️✍️✍️✍️🔥🔥🔥🔥🔥🔥

Likes
43
Share


@Coopmc
Follow
Good for sure
Might be 7 week flower to finish such great indoor plants!!
The shortest FruitWalker I have found with s Short SVF !!


Likes
12
Share


@la_piper
Follow
ола
washing machine пересажены в горшки на пмж и включены в систему.
ppm 590.
ph 5.9.
полив: через час после включения света(7.00) помпа включается на 30минут и через 12часов ещё на 30минут

Likes
13
Share


@WeedM8
Follow
Hello m8 welcome to this journey with me in this diary will have very interesting strains hope u find something useful
Persian Girl
- [ ] 1st week Veg: germinated in substrate lighting very close so it jets medium high humidity after the 3rd day they started sprouting
- [ ] 2nd week Veg: this week my ventilator broke down and as the temperature stayed very warm nothing developed much i did change light hight put them more far
- [ ] 3rd week Veg:fortunately this week i had fixed the ventilation and the temperature has go down a bit allowing the little plants to develop and reinforce
- [ ] 4th week:very good developments in this week I already started feeding a bit two times but i didn’t have to…once was enough
- [ ] 5th week Veg:
- [ ] 6th week Veg
- [ ] 7th week Veg
- [ ] 1st week Fl
- [ ] 2nd week Fl
- [ ] 3rd week Fl
- [ ] 4th week Fl
- [ ] 5th week Fl
- [ ] 6th week Fl
- [ ] 7th week Fl
if this was useful please like and follow

Likes
9
Share


@FrostyCloudzz
Follow
Flush flush
Bigger buds buds
Let’s prepare harvest :)
Did the full cycle from the advanced nutrients feeding chart , know I flush and prepare the harvest , planing a late harvest for more cbn and relaxing high - and little bit other terps
Today 16.02.2025 - blooming starts at 20.12.2024 - D59

Likes
3
Share


@IndoorNeophyte
Follow
Topped the White Widow a second time. Going to be adding a scrog net soon


Likes
10
Share

@Hempface86
Follow
So far so good.. Plug it on, hoping she gets a growth spurt. Soon, the temperatures have been a little low, so I think they've just had a slow start all of them... But that is okay.We can stay in veg an extra week or 2... thank you everybody for checking it out.God bless and happy growing 🙏

Processing
Likes
26
Share


@GrowGuy97
Follow
Day 35, start of week 2 in flower, everything is going great so far✌️🏼🌱
Day 37 - All the ladies are looking great✌️🏼🌱
Day 38 - ladies got watered today, looking good & starting to put off a nice smell😍
Day 40 - Still have a lot of yellowing leaves towards the bottom of almost all the plants can’t figure out exactly what’s wrong😅😅


Likes
16
Share


@DutchFarmer
Follow
2 sprouted 1 more I’m going to plant into the dirt into the solo cup.
So far 3 out of 3 germinated
Waiting on dryback before feeding again
I am using the. AC infinity sprayer bottle to feed the seedlings ill also be using for folair spray later in the grow!
Light intensity: 20%
PPFD: approx. 500 umol
Light distance: 35 cm
hours day/night: 18/12
Temperature day: approx. 27.5 degrees
RLF day: 78%
Temperature night: 25-27 degrees
RLF night: approx. 70%
VPD value: approx. 0.8-0.9
PH value water/fertilizer solution: 5.9
EC value: 1.2
ventilator oscillation: level 3
Humidifier: off
Dehumidifier: off
Check out my Cannabis Community, please👇like👇, follow, comment, and subscribe to my YouTube channel👇. ❄️🌱🍻
https://www.youtube.com/@DutchF4rmer
Join our discord community for weekly giveaways 👌
(Join the patreon for help advice and mentoring)
https://www.patreon.com/DutchFarmer
(Discord Server)
https://discord.gg/VMu6rH4a7V
IG
https://www.instagram.com/dutchfarmer1/
It will be appreciated! ❤️
Happy Growing 🌱🌱🌱

Likes
4
Share


@UrbanBoer
Follow
I cannot believe it, 14 days to go then I am going to harvest, I am confident that I would of flushed Lamby quiet thoroughly, for some reason weed needs it’s roots to flushed if you want a super smooth smoke, I wonder if fruit was the same as weed, would we flush the roots to get such tasty and juicy fruit or veggies, or would we bare with that sourness. The real test will be on the 15th of December when it comes to my test smoke, then I shelf Lamby until January after returning from the festive season, by then I would have achieve top tier curing.
Likes
29
Share


@Spliffing_Around
Follow
Has a sweet taste to it. Again , I didn’t log any larf in the weight. Very resistant strain.
Likes
12
Share


@Benssa
Follow
This girl was too bushy, I had to defoliate twice during the veg due to lack of space in my grow room.
believe me, she is big!
Likes
69
Share

@wolfvb
Follow
Happy new year every one,
The girls are doing okay I think the runtz and blue cheese are entring flowering stage.
Our star is doing great, maybe some feeding issues or light burn.
Otherwise they are doing great.
7.01.26
We are going into flowering already I have increased the light to 70% and left it a bit as the runtz go so long and still reaching to the light.
Blue cheese have choose to be compact hopefully we will see her Stretching in the next weeks.
And our star the one and only pineapple expresses is doing extremely well I love how she looks


Likes
17
Share


@Lazuli
Follow
Very intense high, hits very fast and long. Im not stoned but still sleep like a rock after a few hits

Likes
4
Share


@Aleks555
Follow
Hello people. We're doing well, we're grown up and we're now 35cm, we like to eat delicious food from Xpert Nutrients, and we really like it. Dutch Passion - Melonads Runtz

Likes
6
Share


@IQuSX
Follow
H1, topman !
This is 5-6 weeks of vegetation.
At 4-5 week been topping and 5 week been defoliation.
>>
+1,5 week = switch 12/12!
Let's see how beautiful she will be!