


Likes
1
Share

@Olduffybastard88
Follow
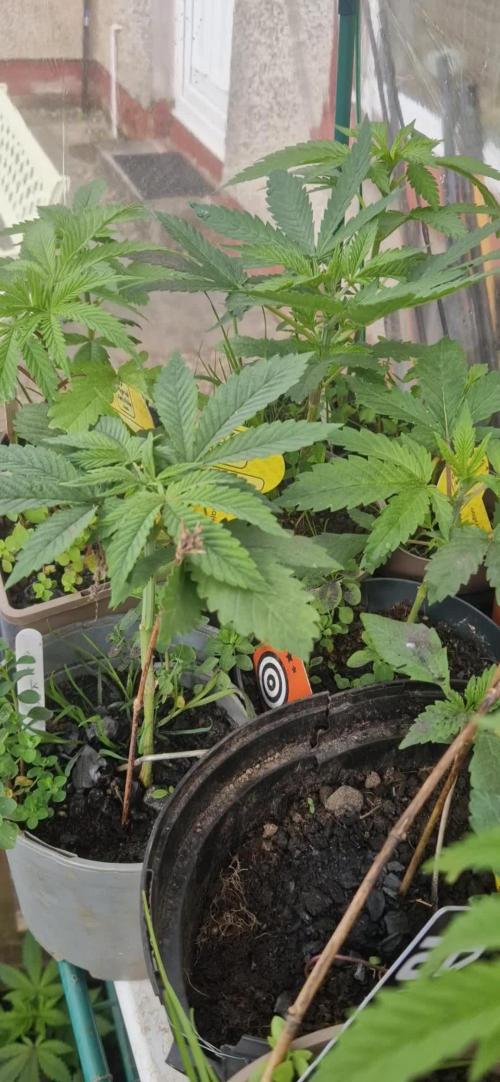
Got everyone in the greenhouse for the moment as I wait for a couple of the plants to catch up then off to plant them in the ground will be keeping a few back to flower inside the marshydro tent and light so we will get a good comparison out of the two

Processing
Likes
26
Share


@GrowGuy97
Follow
Day 7 & 2 of the NHLs still havnt popped, transplanting the one NHL that did pop today!
Day 12 think 1 of the orange sherbet have nute burn so flushing it out and dropping the dose a little hopefully that helps!


Likes
3
Share


@xipo86
Follow
Day 35 of Bloom.
They are looking very good entering the late week of flowering... buds are gonna be huge 😋😋😋
terps profile are so diferent on each strain... so delicious.... wow mouth watering....


Likes
12
Share


@CropHouseLew
Follow
Trying flawless finish for the first time, hoping it will help with this rushed flowering stage.
Really unfortunate to have to cut this one short, but some things in life are out of our control...
Anyway, harvest is currently curing. Check out the results and leave a like/comment cos I'm always looking for constructive criticism!
Lets gooo

Likes
Comments
Share


Processing
Likes
32
Share


@Dunk_Junk
Follow
14cm vertical growth this week. Flowering stretch reducing.
Trichome production has started! She's starting to get frosty.
Likes
11
Share


@Chubbs
Follow
420Fastbuds-Week9
Strain:FBT2309
What up grow fam. Weekly update for these gorgeous girls. They're definitely getting close to being done and getting the chop. I did a defoliation this week to allow the light down to the lower bud sites. All in all Happy Growing.
Likes
11
Share


@HegauHillsFarmers_M11
Follow
Tag 28 - Ende der 4. Woche.
In dieser Woche an Tag 22 habe ich das Licht auf 12/12 umgestellt und es sind schon die ersten einzelnen Stigmen ersichtlich.
Die Pflanze entwickelt sich sehr gut und hat den vegetativen Wachstum fast komplett eingestellt. In der kommenden Woche, werde ich den Dünger auf die Blüte umstellen und wahrscheinlich die Pflanze davor noch etwas entlauben.
An Tag 22 wurde die Pflanze zum letzten Mal mit vegetativen Dünger gedüngt.
Nährstofflösung:
2 ml/l - B-52 Advanced Nutrients.
3 ml/l - pH Perfect Sensi Grow Part A
3 ml/l - pH Perfect Sensi Grow Part B
Davon hat die Pflanze 500ml an Tag 22 erhalten.

Likes
4
Share


@MXHerc
Follow
the autos are extremely close to harvest and the vegging plants look great. Getting very bushy in the back and the moms will need defoliation soon. The raspberry diesel that I suspected was a male has been successfully converted into an outside plant and looks happier than ever.
Likes
4
Share

@CWolcott1991
Follow
11/12 start of week 3 of flower hoping she is done stretching cus I'm out of room when it comes to height. Gave all the goodies plus added Fulpower and molasses
11/15 stretching seems to have stopped. Dropped humidity and raised vpd to stay around 1.5 super cropped the main top to be more level with all the side branches that are pretty uniform and cranked ppfd to the tallest top to 1000 ppfd
Likes
19
Share


@eldruida_lamota
Follow
Que pasa familia, perdonar por la tardanza pero aquí estamos de nuevo y es que traemos la 6 semana de floración de nuestras gorillas.
No veas que aroma que empiezan a desprender , es increíble.
Son plantas con forma indica y follaje sativa, floración rápida unas semanas más y ya están listas para cortar.
Ph controlado, 7 semana prepárate lavado raíces y solo agua, que lo agradecerán.


Likes
8
Share


@GrownwithLED
Follow
After week 2 the two Barbarian (=AK-47 x Barabara Bud) plants were transplanted into their final container, a plastic pot with 11 liter of soil (light-mix) in it. Now the roots can continue to develop rapidly and the plant growth is amazingly fast. At day 18 the plants are almost 20 cm tall already and look VERY healthy as you can see in the videos.
Likes
6
Share


@PrinceOfHerbs
Follow
The plant grows slowly in terms of flower size. However, the flowers are very resinous.
Flowering day: 41

Likes
15
Share


@Lordviper28
Follow
Plants have enjoyed the scrog net for support also had a nitrogen build happen with two of the red hot cookies but got it corrected and plants looking healthier
Likes
4
Share


@HookahCli
Follow
d87
No se ha regado todavía, ha crecido bastante, muy ramificada, esta semana ha pegado un buen estirón, el cambio de luna nueva a luna llena les hace subir la savia a las hojas, ahora esta en cuarto creciente, se prevé buen crecimiento para la próxima semana.
d90
Se ha regado con abundante agua y luego con 2L de mezcla con fertilizantes.


