
Likes
Comments
Share


@Master_weeda
Follow
Bonjour à tous les padawans et maîtres jedis
Tout d'abord merci à @pyramidseeds de me permettre de faire cette culture en m'offrant les graines
Merci aussi à @lientec_led de m'offrir l'opportunité de tester sa toute nouvelle lampe Roccit 240w ainsi que organic nutrients pour l'engrais
MATÉRIEL CONFIGURATION
Box 80×80×160
Lampe led Lientec Roccit 240w
Ventilateur à pince 15 watts
Xiaomi Deerma humidificateurs 5L
Hygrometre thermomètre
Extracteur PROFAN 107 m3/h - 100
Prise programmable électronique ×2
1 pot carré noir 11 litres
Engrais organic nutrients
Substrat biobizz ligthmix
Fil de fer et pince coupante
Microscope
Petite balance de précision
CULTURE ÉTAPE PAR ÉTAPE
J'ai tout dabord fais germé ma graine avec le easy start de Royal queen seed et je suis agréablement surpris car franchement le taux de réussite est très élevé (18 graines sur 20) simple d'utilisation et très efficace.
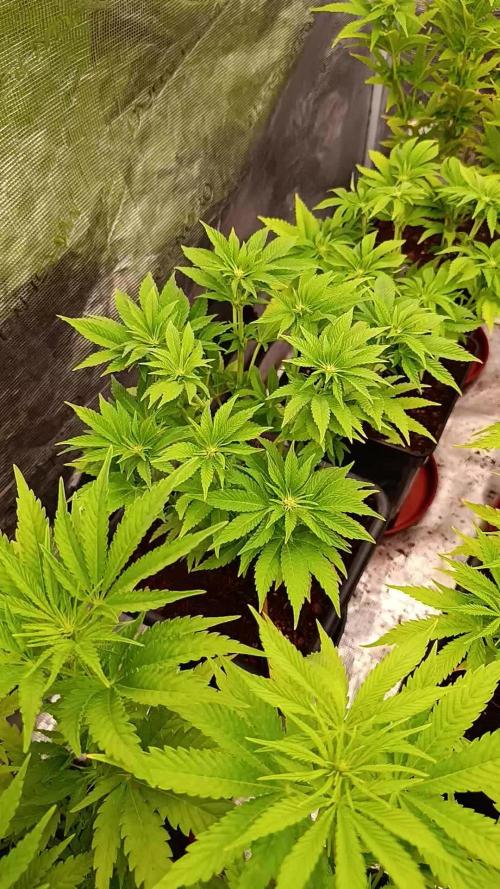
Une fois la plantule sortie et d'une hauteur de 2 ou 3 centimètres je la prend délicatement et la place directement dans son pot définitif. Je préconise des pots allant entre 10 litres et 15 litres pour des autofloraisons cultivées en intérieur.
Le pot aura été préalablement préparé avec 80 grammes de big plant de organic nutrients que je mélange avec les 11 litres de substrat
Je dépose la plantule dans son pot définitif je recouvre un peu de avec de la terre je tasse légèrement et j'arrose pour garder le substrat humide pas plus
Je place ma lampe led 300watts à environ 90 centimètres de la plantule avec un cycle de lumière de 20/4 grace a un programmateur car c'est pour moi le cycle de lumière qui offre le meilleur rendement pour une autofloraison.
Jour 1 préparation du substrat
Avant transplantation définitive je mélange 80 grammes de bio stimulant bib plant de organic nutrients et j'arrose avec 2 litres d'eau ph6.3 à laquelle j'ajoute 0.7 gramme de enhancer feeding greenhouse par litre d'eau

Likes
4
Share

@420DeepGrow
Follow
📆 Semana 3:
Con el coco ya limpio y la EC estabilizada, la planta entra en dinámica de absorción normal. El estiramiento se regula y comienzan a definirse los primeros botones florales en las puntas, con pistilos multiplicándose y estructura cada vez más ordenada.
Los riegos siguen suaves pero constantes, manteniendo el equilibrio radicular y evitando nuevas acumulaciones. La planta responde con hojas firmes, color uniforme y mayor presencia aromática, que evoluciona desde la nota cítrica inicial.
Semana de consolidación tras el ajuste del medio.
Seguimos creciendo fuerte 💪!

Likes
2
Share


@CannaIGrow
Follow
Topped this girl this week, she’s growing pretty good. Very nice looking plant to my eye.


Likes
17
Share


@RakonGrow
Follow
**** HAARVEST ZOE ****
Nice Strain ,
My little Zoe really made all the mistakes you could possibly make. No matter when I give light or want water or fertilizer. It grows and grows and grows, the main thing is that there is light. It was one of my free seeds from Zamnesia. So far all seeds have germinated. I store my seeds in a dark, airtight container at 6°C. Tastes kind of sweet after curing.
Greenhouse Feeding is a really easy fertilizer to use. I used the BioEnhancer again and again. My little Zoe thanked me. The BioGrow was used as topdressing and is doing its job. The BioBloom also does its job at the right time.
And that's really great and easy if you don't have an autoflower. Of course there is a corresponding product. But I was happy to get anything here at all. Legalization has wiped out the market. But for next time I have an appropriate soluble fertilizer for fast-flowering plants. It doesn't work for 8 weeks :))
I use a Sanlight Evo 3-60 1.5 with Bluetooth dimmer. There's nothing to complain about there. Set daily cycle via app. Helpful if the weather or environment is so bad that you have to regulate the light intensity.
33g after 5 days dry . 24.5 °C to 22°C with 50%-60% .
curing in a vaccum box at 18°C .
It looks like I'm drying too long. // It tastes a bit crunchy.
Day 79:
trim , slow vacuum box to cure 22°C and 61%rH .
Day 76:
videostuff: been drying for 4 days (res 640x480) ( optical zoom x200 - x250 )
Day 72:
DLI usage total this Plant : 2236.6 DLI in 70 Days .
wet trimmed, cut off, hung upside down. see you after 14 days
Day 71:
preparing for harvest . 24h long night session .
DLI : 0
Day 70:
- Sanlight DaylightCycle
- + ON 200PPFD (00:00) - 800PPFD (03:30) - 800PPFD (16:30) - 200PPFD (18:00) OFF
video and photo tryouts with the digimicro mobil x300 optical zoom , mostly freehand
Day 69:
- Sanlight DaylightCycle
- + ON 200PPFD (00:00) - 1000PPFD (03:30) - 1000PPFD (14:30) - 200PPFD (18:00) OFF
incredibly hot and rain. lost some terpene :)) Well, summer is coming,
Day 68:
- Sanlight DaylightCycle
- + ON 200PPFD (00:00) - 600PPFD (00:30) - 800PPFD (03:30) - 800PPFD (14:30) - 600PPFD (17:30) - 200PPFD (18:00) OFF
- Added 1L bottle of water
It's hot, hot, hot, Zoe would like more water.
changed daylight cycle so it match the weather problems. tent is open until my real night comes.
103 flowers (including popcorn) counted, due to an accident about 15 flowers are missing.
Day 67:
- Sanlight DaylightCycle
- + ON 200PPFD (00:00) - 600PPFD (00:30) - 900PPFD (03:30) - 900PPFD (14:30) - 600PPFD (17:30) - 200PPFD (18:00) OFF
- watering bottle water 1.75L
weather to hot , changed daylight start time and daylight cycle so it match the weather problems.
I'm lucky, buds are still growing :)))
Day 66 (we are on the road with maximum sanlight )
- analyse some trichome .
- make some Zoom Pics and Video stuff .
- Sanlight DaylightCycle :
- + ON 200PPFD (00:00) - 1000PPFD (00:30) - 1000PPFD (13:30) - 800PPFD (17:30) - 200PPFD (18:00) OFF
- DLI will stress alot ...
Anyway, it's too hot in my room... I open the tent and now everything is fine with the temperatures and I increase the Sanlight to 100% for the first time. May Zoe love it or leave it :)) We'll see what happens
Day 65 :
Sanlight DaylightCycle : ON 200PPFD (00:00) - 800PPFD (00:30) - 850PPFD (13:30) - 800PPFD (17:30) - 200PPFD (18:00) OFF
It will soon be ready for harvest.

Likes
8
Share


@BeanCrop
Follow
This is my first ever grow I have decided to go for Cash Crop from Cream Of The Crop Seeds and have made myself a DIY Aero/Hydroponic system from a few bits I picked up from site, B&Q and a pet shop so it will be interesting to see how it turns out!
Happy growing 🌱


Likes
7
Share


@NORTHWALESAUTOS
Follow
Another problem free week. This strain is impressive. She's grown unbelievabley quick and she's starting to give off a lovely aroma.
The next few weeks is where she's going to fill out.. just maybe... I might get this harvested for Christmas 🤣👌🏼🙌🏼💯

Likes
16
Share


@BudsBanditUK
Follow
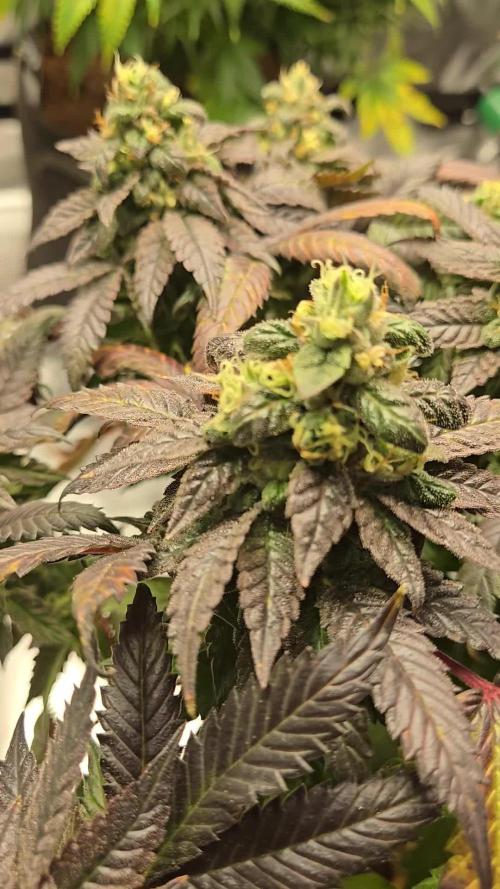
Buds are now forming and also turning purple. No smell as of yet. Lots and lots of buds lets hope they get huge! Nice little plant from fastbuds as usual.

Likes
2
Share


@BonjaMan
Follow
Hello!
Everything same, buds don't grow anymore vut they become Tighter.
I am gonna cut her off these days!
Likes
21
Share


@Wrongholn519
Follow
It's been another easy week in the Fastbuds tent. I've spent most my energy preparing my outdoor grow space for a wild summer. At this point, there's not much I can do except water and watch my plants grow. I've added videos of other plants in relations to the mimosa cake just for visual aid. I also added a photo of my cheese auto.. it's still drying!
With the Mimosa cake auto I've been taking fan leaves off slowly for weeks now. This is a very busy plant. She is also going to run later than I expected. She's on day 76 and I suspect 95 to 100 days to finish time. I'll have to keel feeding her bloom nutes for the next few weeks; her 3 gallon bucket ran out of nutrients already.
Feeding schedule: water, feed, water, feed
Step 1- I'll take an aeration stone and use it to remove the chlorine residual in the water... this only takes 8 - 12 hours depending on water temperature. (I'm a water treatment process operator, I have checked several times in the past with my own Cl2 meters).
Step 2 - add Calmag
Step 3- add bloom nutes
Final step - pH the water accordingly (very important that this is final step)
A TDS residual of 500 ppm equals roughly 1 E.C. (I just double it)
Likes
77
Share


@Ukfarmer420
Follow
Hi guys
So entering week 11 now on this grow sherbert mimosa still have another 4 weeks I rekon and the last gelato cake is ready for the chop when I get 5 mins. Colours are popping and the frost keeps coming.
The blue cheese and dark phoenix are growing fast and have a plan for these on there own diary so keep looking.
Happy growing guys

Likes
11
Share


@ChefSpliff
Follow
Week 3 has come and gone and it was a sight to see!! All the pistills came in nice and strong. I have to get in there and defoliate every couple a days a bit. This will be the last week of defoliation. Once I can see the main bud sights I will do my final trim. Started reducing the Nitrogen as the stretch faze comes to an end and up the bloom ferts. I cant raise my light much more so I hope they stop stretching this week. Im excited to see the flowers grow into these pistills and watcch the calayx swell.

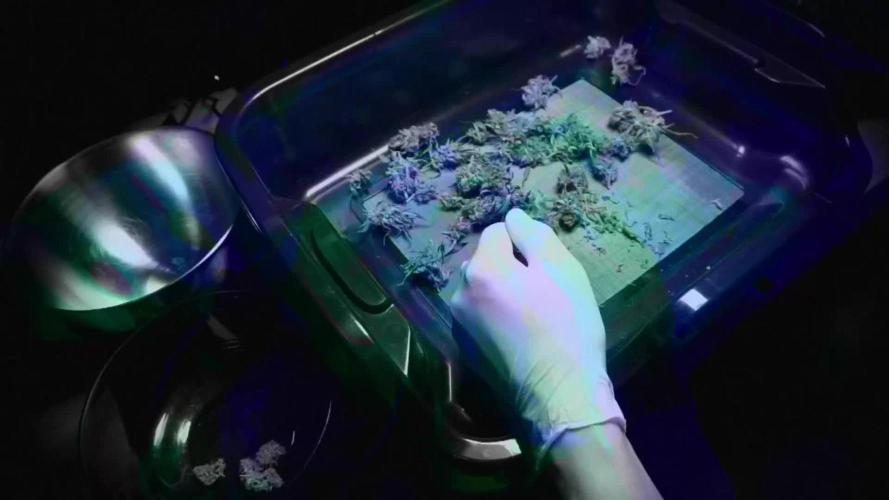
Processing
Likes
12
Share


@jahredi
Follow
Day 17
First feed... Starting to look stronger and more uniform than the Lifted strain.
Day 20
Emergency transplant! Ever heard of biosolids? I hadn’t. F#@k that shit. Too many unanswered questions and lack of information. I’m out. Back in organic soil. Fingers crossed 🤞
Likes
31
Share


@DudeGrowsWeed
Follow
This Green Crack was my 3rd round of started seeds in my perpetual garden of auto's. I decided to get a little experimental and try topping and bending this girl at the beginning of the flowering stretch (about a week ago). So far she has not missed a beat, she just keeps stretching and growing. Starting to see the bud sites develop. One branch did take a little damage from the bending, but I put some blue painters tape on it and expect a full recovery.
Growing in organic composted 'super soil'. Have not added any additional nutrients yet. Looks great to me so far.
Setup:
24x48x72 grow tent
1 Viparspectra V300 300w LED fixture
1 Viparspectra R300 300w LED fixture
1 CFL 100w (26w actual)
4” exhaust fan w/carbon filter 190cfm
6” clip on fan
Electric oil filled radiator behind air intake
Likes
6
Share

@Radagast_
Follow
17.08.
OG KUSH
Day 114# Flowering Day 6#
The plant was at the end of its 16th week 2 days ago.
The flowering has begun.
Video and photos are from yesterday.
Stay High and Keep Growing!!!

Likes
Comments
Share


@JararacaHaze
Follow
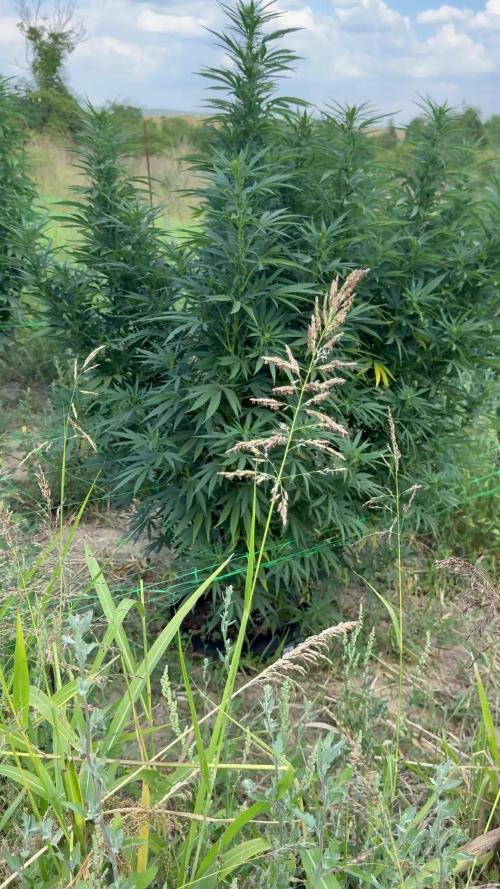
We’ve reached the eighth week, and the plants continue to tell their stories. Two of them have revealed themselves as males, fulfilling their role in genetics, while the others keep growing vigorously. The dynamics of the garden change, but the journey remains steady and promising.
During flowering, I stick to my consistent approach: I don’t change how I provide water and biofertilizers. I believe regularity is the key to a healthy and balanced transition. Additionally, I’m not a fan of heavy defoliation; I prefer to respect the plants’ natural rhythm, removing only the leaves that fall off easily, as if the plants themselves are telling me they no longer need them.
Observing each stage of this cycle is an exercise in patience and learning. Each plant has its own personality, and watching them is like uncovering a secret only nature can reveal. I can’t wait to see how the garden will bloom in the coming weeks!


Likes
15
Share

@Aircoholic
Follow
She was getting ancient - on day 117, after almost 4 months, it was time - the trichomes increased oxidization, her buds purpled and her leafs showed all kinds of lovely autumn colors, signalling that she's ready. She matured for a really long time and her buds significantly chunked up in the last few weeks, her aroma ripened from a super sweet cherry flavor during most flower, she added some really nice spicy, earthy flavors to the mix.
She's drying at a nice 18° C in my "poor man's Cannatrol", a whine chiller I repaired and added better drying racks to. Very curious about the result!

Likes
8
Share


@jayizrollin
Follow
Ended up pulling about 65 grams from Top Gun2, another 55 from the Top Gun1 I harvested earlier, fun grow, I was lazy with this diary as I was more excited for gorilla cookies, I’ll try to keep to one diary from now.

Likes
33
Share

@MrGrowDiarie
Follow
Day 120
The buds look dense and frosty, with swollen calyxes and visible trichome coverage-clear signs that the plant is nearing harvest. Some leaves are fading or curling slightly, which is normal at this stage as the plant directs its remaining energy into the buds. The environment appears stable, with reflective tent wo!!- controlled lighting, and monitoring equipment