


@MrJones
Follow
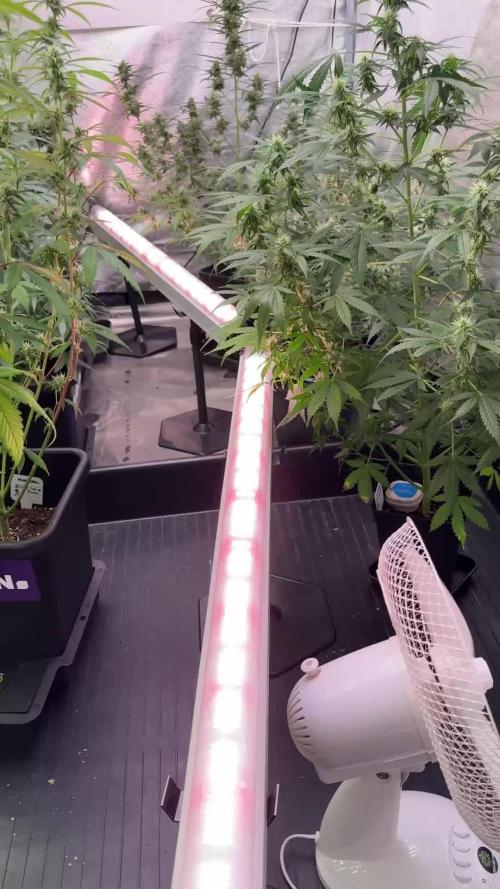
MrJones Black Berry OG
🔹🔹🔹🔹🔹🔹WEEKLY GOALS🔹🔹🔹🔹🔹🔹
🌞Environment - 75/80℉ and 55% Humidity
💧 Feeding - Using "Super Coco" amended soil. compost teas, Dechlorinated H20 PH/6.5 Fish Fertilizer, about 4 ounces of water per day.
🍃Training /
🕷️ IPM - Will be using Green Cleaner" 1 OZ per Gallon, and CannControl from Mammoth alternating between product each month for Integrated Pest Management.
💡Mars Hydro LED / 480W FC 4800
🔹🔹🔹🔹🔹🔹🔹🔹🔹🔹🔹🔹🔹🔹🔹🔹🔹🔹
▶️ Tuesday 12.29.20 Started these seeds in a mixture of 70/30 COCO 80% and Lobster Compost 20%, using my gemination cabinet, keeping RH at 55/60% and Temperature around 75/78F under a TS-1000 at 25% power.
▶️ Wednesday - 12.30.20 Keeping soil moist waiting for seeds to pop
▶️ Thursday - 12.31.20 Keeping soil moist waiting for seeds to pop
▶️ Friday - 01.01.21 Keeping soil moist waiting for seeds to pop, looks like 5 of the 6 are starting to push up
▶️ Saturday - 01.02.21 Keeping the soil moist the seedlings are about 1/2 inch tall, looking great, I have faith that the 6th seed will pop soon
▶️ Sunday - 01.03.21 Keeping the soil moist the seedlings continue to look great
▶️ Monday - 01.03.21 Keeping the soil moist, turned on a fan to add movement to the seedlings, along with BioBiz Root Juice.
▶️ Tuesday - 01.04.21 The new ladies are doing great already starting to move past 1 inch tall, sp the final seeds to pop were 5/6 that pretty damn good to me!
🔹🔹🔹🔹🔹🔹🔹🔹🔹🔹🔹🔹🔹🔹🔹🔹🔹🔹
📜 Cultivar Information - We have created this strain by crossing the best Black Domina available with Very Berry and our own Lost Coast OG Kush, this plant produces large colas with a super intense sweet berry flavor with a sweet-smelling aroma that varies from fruit and berries to sweet candy. This lady offers tight internal stacking giving a perfect structure for those super heavy colas, which is perfect for growth both indoors and out, if grown outside she is fairly resistant to mold and powdery mildew which is a real bonus with such large colas.
🔹🔹🔹🔹🔹🔹🔹🔹🔹🔹🔹🔹🔹🔹🔹🔹🔹🔹



@DogDoctorOfficial
Follow
🌸 Pink Rosay Auto by Zamnesia | Pheno A | Week 9
💗 Small Plant. Massive Presence. An Absolute Beauty.
There are plants that are big.
There are plants that are tall.
There are plants that fill every available centimetre of a tent.
And then...
there are plants like Pink Rosay Pheno A.
She's something different.
She's small.
She's compact.
She's incredibly dense.
And somehow, she manages to carry an absolutely ridiculous amount of flower for a plant of her size.
Every time I look at her, I find myself thinking the same thing:
How did all of that fit into this little plant? 😂💗
This girl continues to impress me.
Not because she's trying to compete with the giants around her.
Not because she's stretching toward the ceiling.
But because she has taken her relatively small frame and turned almost every available centimetre into productive flowering structure.
And honestly...
few plants are like this.
At least, few plants I've had the pleasure of growing.
She's compact in size.
But she is absolutely not compact in personality.
🌸 Week 9 – She's Still Radiant
Pink Rosay continues moving beautifully through flowering.
The plant remains around 111 cm, but that number really doesn't tell the story.
Height is only one measurement.
Look at the flowers.
Look at the density.
Look at the way the buds occupy the structure.
Look at the proportion between the plant itself and the amount of flower she's carrying.
That's where this girl becomes special.
The flowering sites have developed into substantial, clearly defined flowers, with impressive structure and increasingly mature-looking resin coverage.
The calyxes continue swelling.
The pistils are changing as the flowers progress.
And the overall appearance is becoming increasingly impressive.
She's not simply producing flowers.
She's packing them in.
And she's doing it beautifully.
💗 Small Frame. Huge Flower-to-Plant Ratio.
This is probably the characteristic I appreciate most about her right now.
Pink Rosay has one of those structures where you can immediately see how much of the plant is dedicated to flowering.
She's compact.
But the flowers are large relative to the plant.
The branches aren't disappearing into endless stretches of empty space.
Instead, they're carrying substantial flowering structures throughout the canopy.
The result is something I find incredibly satisfying to look at:
a small plant with an enormous flowering presence.
It's almost like someone took a much larger plant and compressed it.
😂
And that's exactly why I keep calling her special.
You can find tall plants.
You can find massive plants.
But finding a plant that remains this compact while developing this much flower relative to her overall size?
That's something I really appreciate.
🌿 The Beauty Is in the Structure
The structure is another thing that continues catching my attention.
She's dense, but she doesn't look chaotic.
The flowers have their places.
The branches support them.
The foliage surrounds the developing buds.
And the whole plant has that feeling of everything working together.
There's a real sense of balance here.
That's important.
Because density by itself isn't necessarily impressive.
A plant can be dense simply because everything is crowded together.
Pink Rosay is different.
She has organized density.
Her compact structure has become a framework for the flowers rather than simply a mass of foliage.
And after the selective defoliation we performed previously, the plant has continued developing beautifully.
We didn't strip her.
We didn't try to expose every single flower.
We simply opened areas where necessary and then stepped back.
And now...
we let her do what she does best.
Build flowers.
✂️ After the Defoliation – Now We Watch
The selective flowering defoliation from the previous week has now become part of the story.
Some foliage was removed where it was contributing to unnecessary congestion, while plenty of healthy leaves were deliberately left behind.
That distinction remains important to me.
I'm not interested in making a plant look naked.
I'm interested in making the canopy functional.
And Pink Rosay still has plenty of green.
The remaining leaves are working.
They're capturing light.
They're supporting photosynthesis.
They're feeding the developing flowers.
And the plant is responding exactly how I hoped she would.
So this week?
No need to reach for the scissors again.
She's beautiful.
She's balanced.
She's developing.
Leave her alone.
Sometimes cultivation is knowing when to intervene.
Sometimes it's knowing when to stop.
Right now, I think Pink Rosay is telling me very clearly:
"I've got this."
😂💗
❄️ The Flowers Are Becoming Serious
The flowers are now entering a really exciting stage.
They're no longer just developing structures.
They're becoming proper flowers.
The calyxes are becoming more pronounced.
The pistils are beginning to change.
The buds are gaining density and volume.
And the resin continues to become increasingly visible.
When you look closely at the photographs, there is so much happening.
Every flower has layers.
Pistils crossing through the developing structures.
Calyxes stacking around one another.
Sugar leaves emerging through the flowers.
And resin covering the surfaces.
This is where the plant starts becoming more than just a green plant under a light.
The architecture you spent weeks watching develop is finally turning into the thing you've been waiting for.
Flowers.
And Pink Rosay is producing some beautiful ones.
📸 A Photographer's Dream
This girl is also becoming incredibly enjoyable to photograph.
Her structure gives you the wide shots.
Her compact frame tells the story.
But then you move closer...
And suddenly the entire image changes.
The flowers are full of texture.
The pistils create those beautiful fine lines.
The calyxes create layers.
The resin catches the light.
And the surrounding leaves provide that deep green background.
It's one of those plants where I can understand why macro photography and growing became so connected for me.
You can photograph the whole plant...
and then spend another hour looking at one flower.
There's always another detail.
Another texture.
Another little piece of biology happening right in front of the lens.
And Pink Rosay is giving me plenty to photograph.
💡 Eating Photons
The lighting system remains unchanged.
The Future of Grow Black Series LED continues providing the primary overhead illumination, with the Lumiflora under-canopy lighting adding another layer of light into the lower portions of the garden.
And Pink Rosay is clearly making use of the available energy.
The plant has plenty of flower structure.
The foliage remains strong.
And the flowers continue progressing.
This is another reason I like having different phenotypes growing together.
The environment gives them the opportunity.
But their genetics decide what they do with it.
Some plants turn that opportunity into height.
Some into branches.
Some into enormous individual flowers.
Pink Rosay seems to have chosen:
"I'll just make everything count."
And I love that.
🌿 The 8×8 Perspective
When I step back and look at the entire 8×8 Adventure, Pink Rosay becomes even more interesting.
There are plants around her that are significantly taller.
There are plants that occupy much more physical space.
There are plants that look enormous from across the room.
And then there's this little powerhouse.
Standing there at around 111 cm...
covered in flowers.
It's a perfect reminder that comparing plants purely by height doesn't make much sense.
A plant's potential isn't measured by the ruler alone.
It's in the architecture.
The density.
The flower distribution.
The health.
The efficiency of the canopy.
And ultimately...
what she gives you at the end.
And Pink Rosay is giving me plenty of reasons to be excited.
💧 Feeding & Environment
The current program continues consistently:
🌱 Plagron Terra Bloom — 2.2 ml/L
🌿 Plagron Power Buds — 1 ml/L
✨ Plagron Green Sensation — 1 ml/L
🍯 Plagron Sugar Royal — 1 ml/L
⚗️ Lemon Kick / pH adjustment as required
Current recorded conditions:
🌸 Flowering: Week 9
📏 Height: 111 cm
💡 Light schedule: 12/12
🌡️ Day temperature: 29°C
🌙 Night temperature: 25°C
💧 Relative humidity: 60%
⚗️ pH: 6.0
⚡ EC: approximately 2.0 mS/cm
🌡️ Solution temperature: 25°C
🌱 Substrate temperature: 26°C
🌬️ CO₂: 529 ppm
? Pot size: 15 L
💦 Watering: approximately 1.4 L per plant / 24h
Nothing dramatic needs changing.
The plant is progressing.
The environment remains stable.
The flowers are developing.
So we stay consistent and let the biology continue doing the work.
🌬️ Density Means Attention
Because Pink Rosay is so compact and flower-dense, environmental management remains something I pay close attention to.
The more compact the flowering structure becomes, the more important airflow and general cleanliness become.
That's not unique to Pink Rosay.
It's simply part of managing a dense flowering canopy.
And this is also why the work we did previously wasn't simply cosmetic.
Opening selected areas can give light and air better pathways through the structure.
But again...
there is a balance.
I don't want to destroy the very thing that makes this phenotype special.
Her density is part of her identity.
So we're managing it rather than fighting it.
💗 Phenotype Spotlight – One of the Special Ones
I think I'm finally comfortable saying this:
Pink Rosay Pheno A is one of those plants that doesn't come around every day.
Maybe I'm biased.
Of course I am. 😂
I've been watching her develop for weeks.
I've photographed her.
I've watered her.
I've watched her change.
I've watched the flowers develop from tiny early structures into what we're seeing now.
So yes...
I'm attached.
But even objectively looking at her structure, there's something unusual about the relationship between her size and her flowers.
She's small.
She's compact.
She's balanced.
And yet she's carrying an enormous amount of flowering structure for that frame.
That's what makes her interesting.
Not simply that she's beautiful.
It's how she's beautiful.
And that's the difference.
🔭 Where Is She Going?
This is the question now.
And honestly...
I don't know.
That's what makes it exciting.
She's progressing quickly.
The flowers are developing beautifully.
The pistils are changing.
The calyxes are swelling.
The resin is becoming increasingly apparent.
And the structure is already impressive.
But there's still a story left to write.
How much more will those flowers swell?
How much more density will they gain?
How will the resin develop?
How will those compact colas finish?
And ultimately...
what will this little powerhouse look like when she decides she's finished?
I'm very curious.
Because if she continues on this trajectory...
she could be something really special.
❤️ Final Thoughts – Let Her Shine
Pink Rosay Pheno A has officially reached the point where I don't think I can call her simply "the small plant" anymore.
She's small.
Yes.
But that's almost irrelevant now.
Because look at what she's carrying.
Look at the flower-to-plant ratio.
Look at the structure.
Look at the density.
Look at the development.
Look at those flowers.
This is one of those plants where the ruler tells one story...
and the camera tells another.
The ruler says:
111 cm.
The plant says:
"And?" 😂
Because she doesn't need another 50 centimetres.
She has already done an incredible job with the centimetres she has.
She's compact.
She's dense.
She's balanced.
She's beautiful.
She's developing some seriously impressive flowers.
And every week, I find myself liking her more.
So this week, I'm not going to ask whether Pink Rosay might surprise us.
I'm going to say something much simpler:
She already has.
And now I'm just curious to see how far she can take it.
This little lady has earned her spotlight.
Not because she's the biggest.
Not because she's the tallest.
But because she has managed to turn a small frame into something that feels absolutely enormous.
Pink Rosay Pheno A.
Small plant.
Huge flowers.
Beautiful structure.
Exceptional presence.
And one hell of a personality.
💗🌸❄️
🙏 Thank You
A huge thank you once again to Zamnesia for these beautiful Pink Rosay genetics.
Thank you to Plagron for supporting the nutrition throughout the journey.
Thank you to Future of Grow for the Black Series lighting.
Thank you to Lumiflora for bringing the under-canopy lighting into this experiment.
Thank you to TrolMaster for the environmental control.
And, of course, thank you to everyone following the 8×8 Adventure on GrowDiaries.
Every phenotype has something different to teach us.
Every plant writes a different story.
And Pink Rosay Pheno A?
She's writing one of my favourites.
She's small.
She's compact.
She's absolutely packed with flowers.
And she's becoming more beautiful every single week.
So let's keep watching.
Let's keep photographing.
Let's keep learning.
And let's give this little powerhouse exactly what she deserves:
the spotlight. 💗✨
Until next week...
Small frame. Huge flowers. Let her shine.
Growers love and happy growing! 🌱💚🌸


@TopNotchBud
Follow
Week 7: [16/12/20 - 22/12/20]
[17/12/20]: Sprayed down all plants with Neem Oil as I started to have some Fungus Gnats which usually are not an issue but their numbers started increasing.


@Buff716cannathis
Follow
The Terp tent in full flush mode.... started flawless finish on day 75/81 and flushed all 4 plants throughly let dry out on day76 at night b4 loghts out i then fed 1 liter each plant of plain ph reg water 6.0 ... day77 marked plain water 5.95ph. With slight run off about 3 liters. Day 78 /84 is today which upon checking my trics id say they will be ready for 48 hrs of straight darkness on day 83/89..... from there they will be sawzawed unless yall got a pair of scissors that can cut through 3 inch stems hahaha damn rhino skin .....(buyit)
All 3 cookies gelato are turning purple 😋 💜 😍 ya babe shine for me
Cg1 is a yeilder that smells like straight up Blueberry pancakes with some side muffins
Cg2 is short but she got cake bro ..... sticky n will be a trimmer
Cg3 no joke smells like candy gas and so frosty I think we might class this one as the best I might ever grow lol no shares on this lady fingerprint scanner on the jar opener .......
Green gelato is one hella weird growing plant to me idk why maybe I did something wrong or right but these buds r still skinny but fattened up alot tha ks to over drive .... they are about 20 inch buds and 6 main colas that long smells like lemon candy and gas earthy mix deff gonna be a trimmer but a decent yeild I bet for how small the bud sticks are lol 😆 they like foot long hotdogs but like 2 of em in 1 lol 😆 😂 👌
Anyways so far so good kept it clean tidy and fulfilled my passion for thc ...
What more could always bored needed something to do carpenter with zero side time ask for honestly tho for my 1st ever grow eith 100%brand new equipment not knowing what I'm doing , I think I did well I pat myself on. The back ... I hope to make my name in the I dusty somehow someway down the line ... possibly breed my own strains and brand it the terp tent thanks for those who veiw my.grow and stay green fams. Till next week when we get some hopefully final pics b4 dry?????



@Dr_Zauberer
Follow
Day 43-49
Using 60g per l soil. They dont stretch that much. So u can really veg them sooo big in my opinion. I didnt but enjoy anyways!
I think last week i put net in and out. This time it gets in for sure!

shorts_status_processing


@Lahuertade_Bototo
Follow
🌱🌱🌱Continuamos este cultivo, con esta hermosa cepa de FastBuds, Girl Scout Cookies Auto, de lleno en el periodo de Floración .🌱🌱🌱
👨🍳👨🌾🏻 Nutrición y Bitácora 👨🌾🏻👨🍳
-Día 36. Se riega con agua declorada 1.5 litros
-Día 37. Se riega con una solución nutritiva NPK de 1.5 Litros con Plagron Alga Bloom (2.6 ml), Plagron Sugar Royal (0.75 ml) y Plagron Green Sensation (0.75 ml). Alimentación para la producción y el engorde de las flores.
-Día 38. Se riega con una solución nutritiva NPK de 4 Litros con Plagron
-Día 39. Responde de buena manera al riego, se nota el engorde de las flores 💪 y una capa helada mas contundente.
-Día 40. Cada vez se llena de mas resina y luce simplemte hermosa, a los olores cítricos frescos de limon con menta y cítricos dulces como mandarina, se le suma un fuerte olor a diesel que deleita a cualquiera 🍋🍊⛽️
-Día 41. Se riega con una solución nutritiva NPK de 3 Litros con Plagron Alga Bloom (5.1 ml), Plagron Sugar Royal (1.5 ml) y Plagron Green Sensation (1.5 ml). Se agregan trichodermas (1.5 ml).
-Día 42. Responde excelente al riego del día 41, siguen engordando las flores y aumentando cada vez mas los intensos olores de los terpenos
🚀Equipamiento🚀
Indoor de 60x60x159 cm y una iluminación BlackCob F320, se activa solo 1 modulo (160w) a 45 cm del canopy por el resto del cultivo. Intractor de 135mm, extractor de 135mm, filtro de carbón, ventilador "oscilofan", ventilador "clip fan", este ultimo ventilador se ajusta en la parte baja de la carpa para mejorar la circulación de aire bajo el canopy, 2 termohigrometros y una malla SCROG de kanovi a 15 cm de la maceta.
Acompáñenme para ver los resultados de este hermoso desafío, un saludo cultivadores 🔥🔥🔥


@Dingle_Dangle
Follow
16/06/2022 - Day 28 - First day of the 5th week.
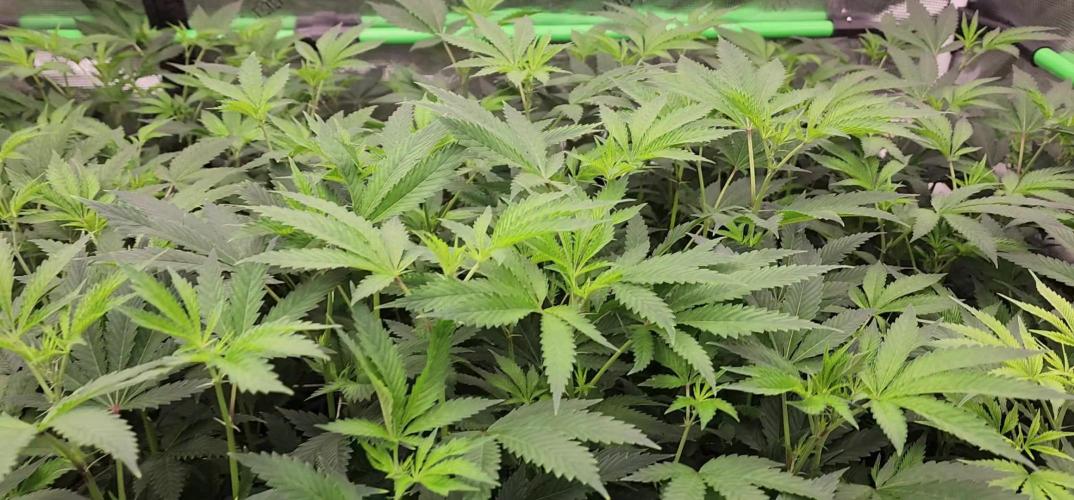
Time to flower.
Defoliated bottom parts and tried to give space to lower branches.
Can't wait to see those colors!
Wish me good luck and let's hope in sunny mild days 🤞☀️
- DD


@Ensign420
Follow
|»» LOG DISCLAIMER: Not intended as a grow guide. Grow log entries are usually posted 3 weeks later and are for my learning reference. ««|
Introduction - Week 16 Summary -
Ensign's log, stardate 17547.8,
Wow what a great week in the garden!
By the end of the week, the main tent has pretty much doubled in size! Upgraded the scrog frame and now have a second layer of netting about 14in above the original netting which is already filling in and looking incredible! The tent’s floor slightly flooded, but fixed it. Also trying Stash Blend for the first time!
As for the veg tent. To preserve the genetics, started the mother plant cycling process and took more clone cuttings (which were rooting in Coco Coins by the end of the week). To make more room, also bonsaied all mother plants.
The stretch is starting to slowing down and next week begins the first week of bloom!
Ca-Caw! Let’s go! Onwards Ensign!
[START OF WEEK 16]
==========================================================
---------- [ 4x4 MAIN TENT ] ----------
Heady OG BX1 #1 [Round4 ~Wk9] - WEEK 16 - Pre-Bloom [Stretch Wk2]
TKO [Round2 ~Wk14] - WEEK 16 - Pre-Bloom [Stretch Wk2]
----------- [ 3x3 VEG TENT ] ------------
Garlic Budder OG#1 - WEEK 09 - Full Veg
Garlic Budder OG#2 - WEEK 09 - Full Veg
Gorilla Goat #1 - WEEK 09 - Full Veg
Gorilla Goat #2 - WEEK 09 - Full Veg
08/04/25 → 08/10/25
This Week's Estimated Goals
----------------------------------------------------------------------------------------------
DLI: ~13 mol/m²/d
PPFD: ~300 μmol/m²/s
VPD: ~1.0 kPa
This Week's Meter Readings & Averages
----------------------------------------------------------------------------------------------
Light On/Off: 19:00 - 07:00 | Wattage: ~326.5W [LV04]
Distance From Canopy: ~31”, 27”
DLI: ~15.60 mol/m²/d
PPFD: ~361 μmol/m²/s
VPD: ~0.69 kPa
Soil %: [40.7, 47.0, 38.1, 56.6, 41.9, 42.7, 42.9, 43.9]
==========================================================
Day 01 - Monday - 08/04/25 - Total Days: 113
-----------------------------------
Daily Averages ~[+01:00]
- Temps: 83.6°F [28.7°C]
- Humidity: 83.6%
- VPD: 0.66 kPa
- Soil %: [49, 37, 45, 60, 44, 43, 43, 45]
-----------------------------------
- [+00:14]: Night check on the 4x4 tent.
--- Holy Cannoli! Wow! These girls are in full stretch!
--- Both cultivars have grown beyond the netting and have stretched beyond the (green) Vivosun’s CFM bars! Heady is a bit low on the left, but the canopy is pretty even and perky!
--- Ca-Caw! Let’s go cuddies!
--- Heady OG (BX1 #1) is starting off shorter than TKO, but am pretty confident that she’ll catch up.
--- TKO is looking incredibly healthy! She’s the larger plant, but also in the smaller 20-gallon pot. Well she is 5 weeks older than Heady OG so makes sense. Regardless of the growth difference, absolutely stoked for this grow cycle!!
- [+12:19]: Checked the Ecowitt soil moisture sensor data:
------------------ [ 4x4 MAIN TENT ] ---------------
------ 46% - [CH01 FT » G30 - Heady OG BX1 #1]
------ 37% - [CH02 FB » G30 - Heady OG BX1 #1]
------ 48% - [CH03 BT » G20 - TKO]
------ 62% - [CH04 BB » G20 - TKO]
------------------ [ 3x3 VEG TENT ] ----------------
------ 41% - [CH05 BL » GR7 - Garlic Budder OG#1]
------ 44% - [CH06 BR » GR7 - Garlic Budder OG#2]
------ 40% - [CH07 FL » GR7 - Gorilla Goat #1]
------ 50% - [CH08 FR » GR7 - Gorilla Goat #2]
--------- Veg: 38% - 45% | Flower: 45% - 55%
--------- General: 30% [Dry] «| 45 - 60% [Moist] |» 70% [Wet]
- [+00:14]: Checked the 3x3 veg tent.
--- Ooo yea! The veg garden is looking incredible!
--- All mamma plants are looking bushed out and beautiful!
- [+00:37]: Super-cropped and bend the canopy down a bit.
--- Lowered the canopy down a few inches. Really need to defoliate soon. The top growth is bushing out and getting really thick!
--- Clones are also looking incredible and both are rotting along beautifully! Heady is going to make it and she is looking great!
- [+00:38]: The cuttings are looking good for the most part. One is looking pretty droopy (damnit Ensign).
--- Misted the cups with RO water.
--- Think the RH may not be consistent enough and the cups might be drying out too quickly.
- [+00:41]: Checked the humidifiers.
--- Tanks are still full and no leaks found.
--- Another day done!
--- Okay! Since growth is raging upwards, decided to upgrade the scrog frame and plan to add a second layer tomorrow.
--- Ahh yea! This grow is turning out to be an epic one!
Day 02 - Tuesday - 08/05/25 - Total Days: 114
-----------------------------------
Daily Averages ~[+01:00]
- Temps: 83.3°F [28.5°C]
- Humidity: 83.3%
- VPD: 0.67 kPa
- Soil %: [49, 38, 47, 62, 41, 43, 43, 45]
-----------------------------------
- [16:25]: Evening check on the 3x3 veg tent.
--- Ooo yea! The clones are looking incredible!
--- The cuttings still seem to be struggling.
--- Hmm.
- [16:27]: Misted the cups with RO water.
--- Made a slight modification and wrapped the top of both cups with plastic wrap.
--- Cut a slit from the middle to the edge. Misted the cup through the slit with RO water (2-3 sprays each).
--- Then gently slipped the cups over each cutting.
--- Also slightly misted each Coco Coin with RO water.
--- Great! This should hopefully make a better seal and will keep the RH higher. I think.
--- Anyways!
--- The mother garden is vegging along beautifully!
--- Growth is getting really bushy and need to do a heavy defoliation soon.
- [16:56]: Checked the Ecowitt soil moisture sensor data:
------------------ [ 4x4 MAIN TENT ] ---------------
------ 48% - [CH01 FT » G30 - Heady OG BX1 #1]
------ 36% - [CH02 FB » G30 - Heady OG BX1 #1]
------ 47% - [CH03 BT » G20 - TKO]
------ 61% - [CH04 BB » G20 - TKO]
------------------ [ 3x3 VEG TENT ] ----------------
------ 41% - [CH05 BL » GR7 - Garlic Budder OG#1]
------ 43% - [CH06 BR » GR7 - Garlic Budder OG#2]
------ 41% - [CH07 FL » GR7 - Gorilla Goat #1]
------ 49% - [CH08 FR » GR7 - Gorilla Goat #2]
--------- Veg: 38% - 45% | Flower: 45% - 55%
--------- General: 30% [Dry] «| 45 - 60% [Moist] |» 70% [Wet]
- [19:03]: Night check on the 4x4 tent.
--- Ooo yea! Wow these girls are stretching!
--- Growth has clearly grown since the last checkup and getting taller!
--- Ca-Caw! Let’s go ladies!
- [19:14]: Wait. Uh-Oh!
--- The tent seemed to have flooded slightly.. DAMNIT ENSIGN!
------ [» A FEW HOURS LATER.. «]
--- Okay! Think I figured out why the tent flooded and how to fix it.
--- The main reason was the new soil sensor which was probably not in proper contact with the soil.
--- Fixed this by re-seating the unit. Also adjusted the drip ring a bit.
--- Also poured about a cup of water straight onto new sensor. This should make the surrounding soil wetter and will hopefully fix the dry pocket. I think.
--- For added redundancy, added additional trigger conditions to both Ecowitt WittFlows (TKO and Heady OG).
- [23:45]: Adjusted the watering triggers for the auto-watering system for TKO.
--- Changed the ON trigger from:
--------- When CH3 soil moisture is under 45%
------------ Updated to:
--------------- When CH3 soil moisture is UNDER 45%
--------------- AND When CH4 soil moisture is UNDER 50%
--- Changed the OFF trigger from:
--------- When CH3 soil moisture is OVER 50%
------------ Updated to:
--------------- When CH3 soil moisture is OVER 50%
--------------- OR When CH3 soil moisture is OVER 50%
--- Applied similar watering triggers for Heady OG.
--- Changed the ON trigger from:
--------- When CH1 soil moisture is under 45%
------------ Updated to:
--------------- When CH1 soil moisture is UNDER 45%
--------------- AND When CH2 soil moisture is UNDER 50%
--- Changed the OFF trigger from:
--------- When CH1 soil moisture is OVER 50%
------------ Updated to:
--------------- When CH1 soil moisture is OVER 50%
--------------- OR When CH2 soil moisture is OVER 50%
--- Will check back daily to make sure the flooding has completely stopped.
--- Well that pushed everything back a bit.
--- Okay! Anyways,
- [23:57]: Time to both build and install the second frame and netting. Let’s go!
--- Got four 1in PVC corner fittings (local Lowes) along with four 1in PVC pipes (10ft long each). Also got more self-tapping screws.
--- For the netting, using mason string. Usually use the braided nylon, but the twisted variant is a lot cheaper.
--- To build the frame, I cut the 1in PVC pipes down to two different lengths:
------ [» x2 @ 42.5in «] – Front / Back
------ [» x2 @ 44in «] – Left / Right
--- This makes the frame slightly thinner from left to right.
--- Saving the extra piping for future projects.
- [+04:04]: Okay! The new frame is built and looking sturdy!
--- Did not use any glue and simply dry fitted each component.
--- For easier fitting, smoothed the ends of each pipe with sand paper.
--- Also marked each pipe to indicate the front, back, left, and right sides.
--- For the fittings, used corner fittings and have open slot facing downwards. This way I can add the legs.
--- After the frame was built, marked and drilled screws about 3in apart (self-tapping). Made sure to mirror the screw spacing on the opposite side.
--- Time to weave the netting!
- [+04:06]: Using some mason string,
--- Started at one corner and strung all the horizontal lines.
--- Double-wrapped each screw.
--- After the horizontal lines were strung, continued and wrapped the vertical lines.
- [+04:44]: Now that the frame is built and the netting fully weaved, time to install the frame!
--- First the support poles. Cut and sanded more 1in PVC piping.
------ [» x4 @ 14in «] – Vertical Support
- [17:56]: Installed the back support poles before the front ones.
--- Temporarily removed the front CFM bar and had to raise the fan up a bit (was not easy, but got it done).
--- Once the support poles were installed, gently set the new frame on top.
- [+06:07]: Done and wow she’s a beauty!
--- Well that took a bit longer than anticipated (also the flooding did not help), but glad the frame fit perfectly and the netting looks great!
- [+06:12]: Checked the humidifiers.
--- Tanks are still full and no leaks found.
--- Ooo yea! What a day!
Day 03 - Wednesday - 08/06/25 - Total Days: 115
-----------------------------------
Daily Averages ~[+01:00]
- Temps: 83.9°F [28.8°C]
- Humidity: 83.1%
- VPD: 0.69 kPa
- Soil %: [42, 54, 43, 60, 42, 43, 43, 45]
-----------------------------------
- [+00:17]: Night check on the 4x4 tent.
--- Ca-Caw!! Let’s go cuddies! Growth is looking beautiful and green!
--- The second layer of scrog netting was not the easiest to install, but wow the garden is looking incredible!
--- Both Heady OG and TKO are still stretching upwards with new nodes branching out everywhere!
--- The canopy hasn’t reached the top net yet but hoping a few will make it.
--- Regardless, absolutely hyped for this flower cycle!
- [+00:23]: Checked the 3x3 veg tent.
--- Looking beautiful in the veg garden!
--- Wow the mothers have bushed out and have reached the grow light!
- [+00:32]: Super-cropped and lowered the canopy
--- The canopy is getting really thick! Plan to do a pretty heavy defoliation tomorrow.
--- Clones look great and stoked that both Heady OG and TKO seem to be rooting along in the cups. Need to check the weights. Let’s go!
- [+00:37]: Here are the starting initial watering ranges:
------ Heady OG BX1 » 261.4g → 301.2g
------ TKO » 240.9g → 301.4g
--------- General Solo Range: [Dry] «| [Initial Cup Weight] + ~55-100g |» [Wet]
--- All cups were last watered 5 days ago.
- [+00:37]: Took the starting weight of both clones before watering,
------ Heady OG BX1 weighed 250.4g
------ TKO weighed 240.9g
--- Oops! Probably should have watered earlier, sorry ladies!
--- Stoked that Heady OG is clearly going to make it! Also good to know the soil dryback can be at least 10g from the initial pre-saturated weight.
--- Anyways!
--- While on a scale,
--- Gently misted the straw mulch of both cups with RO water.
--- Focused on the straw and sprayed as evenly as possible.
--- Misted 10-20 sprays. Waited a moment, then misted again.
--- Made sure to reference the watering weights.
--- Repeated this process for both cups.
--- There was no runoff.
- [+01:08]: Took the saturated weight of both clones after watering,
------ Heady OG BX1 » 335.5g
------ TKO » 345.1g
--- Marked the final wet weight on the back of each cup. Also marked the watering date on the front.
--- Placed both phenos back into the tent.
--- Cuttings are looking better!
--- Glad that the slight modification to the cups helped to keep the moisture in (covered both with plastic wrap).
--- Gently removed both cups and re-misted each with RO water (~2 mists).
--- Carefully placed the cups back onto the cuttings.
- [+01:21]: Checked the Ecowitt soil moisture sensor data:
------------------ [ 4x4 MAIN TENT ] ---------------
------ 34% - [CH01 FT » G30 - Heady OG BX1 #1]
------ 52% - [CH02 FB » G30 - Heady OG BX1 #1]
------ 39% - [CH03 BT » G20 - TKO]
------ 58% - [CH04 BB » G20 - TKO]
------------------ [ 3x3 VEG TENT ] ----------------
------ 44% - [CH05 BL » GR7 - Garlic Budder OG#1]
------ 47% - [CH06 BR » GR7 - Garlic Budder OG#2]
------ 41% - [CH07 FL » GR7 - Gorilla Goat #1]
------ 46% - [CH08 FR » GR7 - Gorilla Goat #2]
--------- Veg: 38% - 45% | Flower: 45% - 55%
--------- General: 30% [Dry] «| 45 - 60% [Moist] |» 70% [Wet]
- [+01:23]: Checked the humidifiers.
--- Tanks are still full and no leaks found.
Day 04 - Thursday - 08/07/25 - Total Days: 116
-----------------------------------
Daily Averages ~[+01:00]
- Temps: 84.9°F [29.4°C]
- Humidity: 82.0%
- VPD: 0.75 kPa
- Soil %: [32, 51, 37, 57, 42, 43, 43, 45]
-----------------------------------
- [09:42]: Quickly checked on the propagation dome (in the 3x3 veg tent).
--- Nice! Clones are both looking great!
--- Heady OG is clearly recovering and looking better!
--- Wow! TKO is looking incredibly healthy! Top growth has perky leaves with a few nodal growth sites starting to stretch. As far as cloning, she has been healthiest with no issues the entire way!
--- Both Heady OG cuttings are looking beautiful and should be rooting. Plan to check for roots in a few days.
--- Plan to do a pretty heave defoliation today.
--- Also going to start the mother plant cloning process.
- [17:12]: Evening check on the 3x3 veg tent.
--- Mother garden is looking beautiful and the canopy is bushy with growth!
--- Both Heady OG and TKO clones also look green and healthy!
--- My main focus for today is the veg garden and the preservation of the genetics .
--- Lots of work to do and time to also start the mother cycling process!
--- This time, going to do a pretty heavy defoliation!
--- Going to pretty much bonsai each mother while taking a few clones to preserve the genetics.
--- Let’s go Ensign!
- [17:58]: Filled a measuring cup with 1.5 cups of RO water.
------ Added 1/8tsp of Horticultural Aloe
--- Mixed the solution and poured it straight into a clear solo cup.
--- Repeated this process until 4 cups were filled.
- [18:05]: Also marked each cup with the corresponding mother plant name.
--- Time to defoliate and take the clone cuttings!
- [18:07]: Using a pair of trimmers (AC Infinity),
--- Bonsaied each mother plant. Removed over 75% of overall growth leaving several branches and nodes.
- [19:44]: Done and wow what a difference!
--- Pretty much removed all growth leaving a few nodal growth sites to heal.
--- This is my first time going this heavy and am hoping that they recover.
--- If this bonsai defoliation heals up with healthy growth, this can also be an alternative to a full plant cycling.
--- Anyways!
- [19:46]: To preserve the genetics, made sure to cut clone cuttings from each mother plant.
--- To ensure successful rooting, took several cuttings.
--- Made sure to clean each cutting by trimming most of the branches off leaving the top one or two nodes.
--- Did not cut any leaf fingers and made sure to cut the tip of the stalk (about 45°) before placing into the cup of aloe solution.
- [19:55]: Placed the fresh cuttings into the 3x3 veg tent.
--- Have each cup resting on top of the corresponding mother plant.
--- Okay! Let the two-day soak begin!
- [20:00]: Mulched the trimmings in a paper bag.
--- Since the bottom of the paper bags tend to decompose, have the bag in a used BuildASoil soil bag which should not decompose (these are meant for soil).
--- Also added a bit of Kashi Blend and worm castings to the bottom of the bag.
--- Back to the Heady OG cuttings!
--- Gently removed the cups and misted the inside of each with RO water (~2 mists each).
- [20:02]: Carefully placed the new cups onto the cuttings.
--- Great! Plan to check for roots soon.
- [20:08]: Checked the Ecowitt soil moisture sensor data:
------------------ [ 4x4 MAIN TENT ] ---------------
------ 31% - [CH01 FT » G30 - Heady OG BX1 #1]
------ 51% - [CH02 FB » G30 - Heady OG BX1 #1]
------ 35% - [CH03 BT » G20 - TKO]
------ 56% - [CH04 BB » G20 - TKO]
------------------ [ 3x3 VEG TENT ] ----------------
------ 41% - [CH05 BL » GR7 - Garlic Budder OG#1]
------ 40% - [CH06 BR » GR7 - Garlic Budder OG#2]
------ 42% - [CH07 FL » GR7 - Gorilla Goat #1]
------ 44% - [CH08 FR » GR7 - Gorilla Goat #2]
--------- Veg: 38% - 45% | Flower: 45% - 55%
--------- General: 30% [Dry] «| 45 - 60% [Moist] |» 70% [Wet]
- [20:12]: Checked the 4x4 tent.
--- Ca-Caw! Ah yea! The garden is looking incredible and wow growth is raging!
--- The tallest growth is just barely under the netting!
--- Not much to do in the main tent now but to wait until the stretch slows down.
--- Time to relax and let the grass grow! Let’s go!
- [21:34]: Have an extra stainless steel rack and thought of a better way to hold the solo cups in the veg tent.
--- The cups are balancing on the edge of the pots am concerned that they may tip over.
--- Carefully too each cup out of the tent.
- [21:36]: Placed the rack upside-down in the middle of the tent.
--- Have the rack positioned on top of all 4 pots just above the center floor fan.
- [21:39]: Gently placed each cutting cup onto the rack.
--- The floor fan can easily still blow through the grid of the rack. Great!
--- This should be way more stable while still allowing decent airflow.
- [21:40]: Checked the humidifiers.
--- Tanks are still full and no leaks found.
Day 05 - Friday - 08/08/25 - Total Days: 117
-----------------------------------
Daily Averages ~[+01:00]
- Temps: 84.5°F [29.2°C]
- Humidity: 82.5%
- VPD: 0.72 kPa
- Soil %: [32, 50, 30, 53, 40, 42, 41, 42]
-----------------------------------
- [23:02]: Night check on the 4x4 tent.
--- Ahh yea! The garden is thriving!
--- Both Heady OG and TKO are still stretching upwards and the canopy is getting dense!
--- Wow! TKO has reached the top netting! Heady OG is just under the top netting.
--- Ca-Caw! Let’s go ladies!
- [23:11]: Checked the 3x3 veg tent.
--- The veg garden is looking great!
--- The bonsaied mother plants are still recovering from the heavy defoliation. But growth is looking a lot better than I would expect from such a large biomass reduction. Nice!
--- Cuttings are looking great as well!
- [23:13]: Time to swap the aloe water out!
--- Replaced each solo cup with a clean one filled with fresh RO water (1.5cups).
--- Plan to start using the propagation dome soon!
--- Going to let these soak for another day before transplanting into Coco Coins for rooting.
- [+02:05]: Quickly checked on the auto-watering system.
--- System is still charged and no leaks or kinks found in the tubing.
- [+02:08]: Checked the humidifiers.
--- Tanks are still full and no leaks found.
Day 06 - Saturday - 08/09/25 - Total Days: 118
-----------------------------------
Daily Averages ~[+01:00]
- Temps: 83.4°F [28.6°C]
- Humidity: 83.3%
- VPD: 0.67 kPa
- Soil %: [32, 50, 35, 52, 41, 40, 41, 41]
-----------------------------------
- [07:55]: Quickly checked on the 3x3 veg tent.
--- Looking great in the veg garden!
--- Mothers are all recovering nicely from the bonsai defoliation. Great!
--- Cuttings also look healthy and ready for transplanting!
--- Both Heady OG and TKO clones are looking perky and getting bigger!
--- Heady OG cuttings also looking green and rooting! I think. Will check for roots in a few days.
- [20:58]: Night check on the 4x4 tent.
--- Ca-Caw! This is why we grow! Wow!
--- Also hyped that the canopy is getting dense with nodal growth!
--- TKO has more tops stretching through the top scrog netting! Heady OG has not reached the net yet.
--- Stoked the 14in space in between the netting is filling quite nicely and just going to let everything grow!
- [21:01]: Checked the Ecowitt soil moisture sensor data:
------------------ [ 4x4 MAIN TENT ] ---------------
------ 29% - [CH01 FT » G30 - Heady OG BX1 #1]
------ 50% - [CH02 FB » G30 - Heady OG BX1 #1]
------ 34% - [CH03 BT » G20 - TKO]
------ 53% - [CH04 BB » G20 - TKO]
------------------ [ 3x3 VEG TENT ] ----------------
------ 40% - [CH05 BL » GR7 - Garlic Budder OG#1]
------ 40% - [CH06 BR » GR7 - Garlic Budder OG#2]
------ 40% - [CH07 FL » GR7 - Gorilla Goat #1]
------ 40% - [CH08 FR » GR7 - Gorilla Goat #2]
--------- Veg: 38% - 45% | Flower: 45% - 55%
--------- General: 30% [Dry] «| 45 - 60% [Moist] |» 70% [Wet]
- [21:05]: Checked the 3x3 veg tent.
--- Growth is still recovering quite nicely! This may be my solution to maintain mother plants longer between cycles.
--- Mother clone cuttings are also looking healthy and ready to be rooted!
--- Was originally planning on rooting all of the cuttings, but since the mother plants are recovering better than anticipated, just going to plant one of each pheno.
--- Let’s go!
- [21:23]: Filled a measuring cup with 1.5 cups of RO water.
------ Added a pinch of Quillaja Saponaria Extract [60]
------ Added 1/64tsp of Horticultural Aloe
------ Added 1/32tsp of Mycrobe Complete
--- Mixed the solution thoroughly.
- [21:26]: Dropped 4 Coco Coins into the measuring cup.
--- The coins immediately started to expand.
------ [» ~10 MINUTES LATER «]
--- Placed each fully saturated Coco Coin into half-cut solo cups.
- [21:41]: Using a squeeze bottle filled with Clonex,
--- Gently filled each pre-made hole with Clonex rooting gel.
- [21:43]: Time to plant the cuttings!
--- Using a pair of clean trimmers, made a final 45° cut.
--- Also stripped and scrapped some of the stem’s outer membrane.
--- To help with planting, gave each Coco Coin a squeeze to loosen the coco.
--- Made sure to insert each stem straight and snug with the tip about a 1/4 inch from the bottom of the Coco Coin.
--- Also secured the stem by pinching and pressing in the top of the Coco Coin.
--- Once each cutting was planted,
- [22:11]: Placed each pheno into the propagation dome’s tray.
--- Made sure to keep each clone properly tagged.
--- Added 1/4 cup of RO water to the bottom of the tray.
--- Placed the side extensions onto the tray.
- [22:15]: Misted the top of the propagation dome before covering the cuttings.
--- Vents are fully closed.
--- Also lowered the intensity from 5 to 1.
--- At the current light intensity (LV1), the PPFD is around 110 μmol/m²/s which gives a DLI of 7.13 mol/m²/d under an 18/6 light cycle
--- Will check back daily to cycle the air under the dome.
- [22:17]: Placed the extra mother cuttings back on the rack. Will try to keep these cuttings alive until the planted ones root.
--- Will need to change the water every day or two.
--- Also need to water the Heady OG and TKO clones.
--- Ca-Caw! Let’s go!
- [11:33]: Here are the starting initial watering ranges:
------ Heady OG BX1 » 261.4g → 301.2g
------ TKO » 240.9g → 301.4g
--------- General Solo Range: [Dry] «| [Initial Cup Weight] + ~55-100g |» [Wet]
--- All cups were last watered 3 days ago.
--- Took the starting weight of both clones before watering,
------ Heady OG BX1 weighed 257.0g
------ TKO weighed 259.7g
--- While on a scale,
--- Gently misted the straw mulch of both cups with RO water.
--- Focused on the straw and sprayed as evenly as possible.
--- Misted 10-20 sprays. Waited a moment, then misted again.
--- Made sure to reference the watering weights.
--- Repeated this process for both cups.
--- There was no runoff.
--- Also defoliated and removed the lowest growth on both clones.
- [23:03]: Took the saturated weight of both clones after watering,
------ Heady OG BX1 » 345.3g
------ TKO » 355.4g
--- Marked the final wet weight on the back of each cup. Also marked the watering date on the front.
--- Placed both phenos back into the tent. Have them now resting on the rack (on drip trays).
- [23:14]: Checked the humidifiers.
--- Tanks are still full and no leaks found.
Day 07 - Sunday - 08/10/25 - Total Days: 119
-----------------------------------
Daily Averages ~[+01:00]
- Temps: 83.9°F [28.8°C]
- Humidity: 83.6%
- VPD: 0.66 kPa
- Soil %: [49, 49, 30, 52, 43, 45, 46, 44]
-----------------------------------
- [08:02]: Quickly checked on the 3x3 veg tent.
--- Ooo yea! Looking great in the veg garden!
--- All mothers are still green and recovering. New growth is starting to develop and growth is looking healthy!
--- Quickly checked on the propagation dome.
--- All clone cuttings are looking green and healthy!
- [19:04]: Night check on the 4x4 tent.
--- Ca-Caw! Ah yea! Heady OG has reached the top scrog net!
--- TKO has several tops above the netting and she is raging with healthy!
--- Canopy is also showing more signs of pistil crowning and vertical growth seems to be slowing down. I think.
- [19:07]: Checked the Ecowitt soil moisture sensor data:
------------------ [ 4x4 MAIN TENT ] ---------------
------ 48% - [CH01 FT » G30 - Heady OG BX1 #1]
------ 49% - [CH02 FB » G30 - Heady OG BX1 #1]
------ 36% - [CH03 BT » G20 - TKO]
------ 55% - [CH04 BB » G20 - TKO]
------------------ [ 3x3 VEG TENT ] ----------------
------ 41% - [CH05 BL » GR7 - Garlic Budder OG#1]
------ 43% - [CH06 BR » GR7 - Garlic Budder OG#2]
------ 43% - [CH07 FL » GR7 - Gorilla Goat #1]
------ 43% - [CH08 FR » GR7 - Gorilla Goat #2]
--------- Veg: 38% - 45% | Flower: 45% - 55%
--------- General: 30% [Dry] «| 45 - 60% [Moist] |» 70% [Wet]
- [19:10]: Checked the 3x3 veg tent.
--- The veg garden is recovering beautifully!
--- Since the stretch seems to be slowing down in the main tent, going to give these ladies a little extra.
- [19:17]: Going to feed some Stash Blend for the first time.
--- This blend of beneficial microbes and mycorrhizal fungi also includes a bit of silica which should help during the bloom phase.
--- Also shout out to Mr. Grow It, Rob (from CLTV), and Pigeons420! Stay lifted!
- [19:19]: Filled a pitcher with 16 cups (1gal) of RO water.
------ Added 1/8tsp of Quillaja Saponaria Extract [60]
------ Added 1tsp of Stash Blend
--- Mixed the solution before pouring 6 cups straight into a pump sprayer.
--- Gave the sprayer a good shake before spraying the entire solution onto Heady OG’s straw mulch.
- [19:52]: Repeated this process again for TKO.
--- Depending on how growth develops, may start feeding these ladies weekly.
--- From personal experience, the veg phase can easily be grown with straight RO water.
--- Flower is probably the most important time to feed because there are more roots and the plants are trying to produce more biomass. I think.
--- Anyways!
- [20:10]: In the veg tent, repeated the watering process for all mothers (1 cup + 1 cup RO each).
--- Focused mainly on the straw (2 cups each).
- [20:13]: Checked the humidifiers.
--- Tanks are still full and no leaks found.
--- Wow what a grow week!
--- The difference in growth from Monday until now has been incredible!
[END OF WEEK 16]



@AsNoriu
Follow
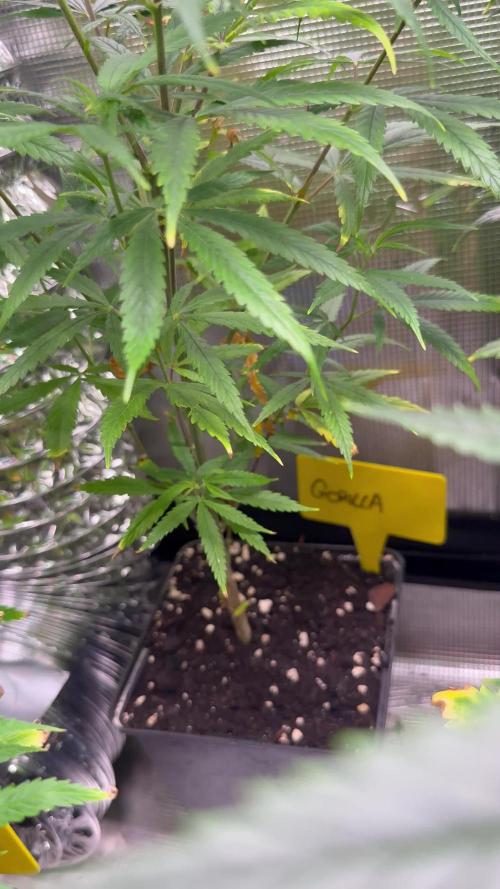
Day 43 since seed touched soil. Hard week past. Those long not drinking days when cycle was taking 8 days to dry out made damage, i still see magnesium, but now added some rusty spots and i cant understand is it calcium or my spraying of Leaf Coat and burn. No spray this week, will check if new will appear. Because of troubles i postponed flip and top up till next watering. It should be in 4-5 days.
Done huge clearing, a lot new ties added.
3.5 liters of 6.3 phed dechlorinated water went in after training.
Twins grow okeish, but i see some damage on them too, canopy forms very nicely tho, thin, but very well spaced.
Planning to create scrog this week too.
Mars Hydro TSL2000 is on 70% output, thinking to increase it with flip to 75. Light is working fine , really covers all space , great affordable light for colder climate.
Day 45. Girls recovered from training very nice ! In few days flip .
Day 47. Girls got top up. Put first level of scrog. Flipped to 12/12, tent is rammed ;) light output on 75%, 4 liters of 6.3 phed water went in.
Top up was dosed, mixed well and laid on top, then i rough and mix top lair of soil with top up and only then i water.
All pots are 30 litres ( grams and ml , have in mind ) :
Ecothrive - Biosys - 5 ml / pot
Ecotrive - Charge - 120 ml / pot
Ecothrive - Life Cycle - 60 g. / pot
Ecothrive - Bio Blend - 200 ml / pot.
Think this will be my standart top up, i run out of Great White, have for one top up, will do it in 2-3 waterings seperately from all.
Planning to repeat same top up at begining of week 4 of flower. Girls look better without spraying, most prob burn from too intense light, despite me giving 30-60 min of reduced to minimum after spraying. From now on - only when lights off. Will apply in few days, think Saturday.
Happy Growing !!!


@KCduzit
Follow
Dropped my light as well as adjusted my fans and intakes all in the name of lowering the humidity. Some hairs are turning red which worries me but I will try to maintain the same environment as much as possible for the rest of the grow. Also I need to figure out my plugin timer which isn’t the moSt reliable. ✌️🏽


@Ensign420
Follow
Greetings fellow growers 🖖 and welcome to my first grow ever. This adventure actually started several months ago when I decided to stop buying flower from dispensaries and just grow my own bud. How hard can it be!?
This is actually my second seed of this strain. The first bean sadly died due to over watering (sorry girl, RIP). I was literally watering the cube to the point where water was dripping from the bottom, then heavily sprayed the humidity dome and tray with the vents completely closed. Everyday. Multiple times. I never let the dome or try dry out. So after about 8 days of not sprouting, there was a funky smell of rot. So that was that.
Later I learned that rockwool retains a lot of water and can easily drown seeds. So a wet/dry cycle is best for rockwool germination.
So even after hours of researching and digging through forums and tutorial videos, I was still under prepared for this journey. Did not consider how delicate the germination phase is. Oh well. Lesson learned. Reset and try again!
I hope everyone is safe and stoned during this corona crisis. Just like everyone else in the world, I want this pandemic to be over with. But in the meantime, let's grow some weed! 🖖
[START OF WEEK 01]
Day 01 - Monday - 08/03/20 - Total Days: 001
-----------------------------------
- [0830]: Light Schedule: 24Hrs/0
--- Soaked cube in 5.5 PH water for 10 min. Did not shake water out.
--- NO NUTES! Only PH'd down to control the PH levels.
--- Did not use the default hole (way too deep).
--- Flipped cube upside down and made a shallow hole for the seed (less than 0.25" deep).
--- Placed seed in and pinched hole close. No additional water added.
--- Sprayed the tray and dome with straight water (5.5 PH).
--- Vents are cracked opened a for ventilation (about 1/4 opened each).
--- Distance between the light and tray was 53"
--- AC was set to 80 °F
--- Exhaust fan was set to 86 °F
--- Room average temp was at 85 °F
--- Dome humidity was at 85-99% when sprayed.
--- Allowing to completely dry before respraying.
- [2200]: Dome and tray were completely dry! Sprayed only tray and dome with more water.
Day 02 - Tuesday - 08/04/20 - Total Days: 002
-----------------------------------
- [0845]: Sprayed dome and tray in the morning. Everything was dry.
--- Hoping for the best!
- [2130]: Everything was dry again, so sprayed dome and tray at night along with a light spray on the cube.
Day 03 - Wednesday - 08/05/20 - Total Days: 003
-----------------------------------
- [0830]: Everything was dry again. Resprayed dome and tray. Slightly sprayed cube.
- [2125]: Hooo damn!! She popped! Am little stub is visible! Resprayed dome and tray again.
--- Still going 24/0 for lights.
- [+0033]: Just checked up on her and I swear she grew a bit taller! Getting excited!
Day 04 - Thursday - 08/06/20 - Total Days: 004
-----------------------------------
- [0845]: Wow! Went from a little stub to fully sprouted overnight! Everything was pretty dry again so resprayed dome and tray.
- [2200]: Tap root is visible! Over 1" long too! Just resprayed dome and tray again.
-- Going to prep for hydroton transplant tomorrow!
Day 05 - Friday - 08/07/20 - Total Days: 005
-----------------------------------
- [0930]: She keeps growing!
-- Added a bit of CalMag to the spray bottle (8 drops to 650ml of distilled water). Resprayed dome and tray. Water was at a 5.4 PH with 141 PPM.
- [1045]: Prepped the bubble bucket with 4.5gal of water. Water is high enough to reach about 0.25" above the bottom of the net pot.
--- Added 3 drops of Superthrive
--- Added 3.5ml of CaliMagic
--- Added 2ml Hydroguard
--- Then PH'd down to 5.6
--- Solution Strengh: 120 PPM
--- Water chiller is set to 20 °C
- [1100]: Transplant time!
--- Filled the net basket 1/3 with hydroton. When placed in the bucket, air bubbles are not visible, but are slightly below the surface (slight digging will reveal the water/bubbles below).
--- Removed plastic on rockwool cube and placed in basket, then filled around and covered with hydroton. Making sure to block any light from passing through the net pot and into the nutrient solution.
--- Covered with a half-bottle dome sprayed with the CalMag water from earlier.
--- Hoping for the best!
- [1300]: Raised Bucket 5" higher. Now light distance is 48" to top of bucket.
- [1820]: Lowered tent exhaust temp to 76 °F
--- Lowered AC to 75 °F
--- Raised bucket even higher so light distance is 30" to top of bucket.
- [2300]: Looking good!
--- Sprayed dome and surrounding hydroton with more CalMag water.
--- Attached timer to light! So new 18 Hrs On/6 Hrs Off light schedule.
--- Lights On: [1600] (4pm)
--- Lights Off: [+1000] (10am the next day)
--- Decided to go with lights on during the evening/night and off during the later mornings/afternoon (the hottest part of the day) to see if temps can be controlled better.
--- Please survive girl!
Day 06 - Saturday - 08/08/20 - Total Days: 006
-----------------------------------
- [0800]: Everything was dry. Resprayed hydroton and dome.
- [2000]: Here first night cycle seemed to go well! Get'n taller!
--- Dry again. Removed the dome.
--- PH went up to 6.5 so PH'd down to 5.7
--- Ran the top feed drip ring for a bout a minute to wet the hydroton and rockwool with the nutient solution.
---Too scared to leave the top feed on 24hrs (I don't want over water her and cause dampening-off). Will let dry before re-watering.
- [2100]: After closer inspection, I think she's looking a bit yellow.
--- Decided to add a bit of grow nutes to the bubbler solution.
--- Added 2ml of Sensi Grow A
--- Added 2ml of Sensi Grow B
--- Solution strength after adding more nutes: 176 PPM
--- PH went up to 6
--- I hope that the extra chelating properties of the 'PH Perfect' solution is enough of a buffer for proper nutrient uptake.
Day 07 - Sunday - 08/09/20 - Total Days: 007
-----------------------------------
- [0800]: Water dropped a bit (mostly due to evaporation) so solution strength was at 190.
--- Checked PH again. Was still at 6, so PH'd down to 5.4
--- Ran the top feed for a minute to wet the hydroton a bit.
- [0915]: Since she's looking perky but still a bit yellow. So decided to up the nutrient concentration even more before lights out.
--- Added 2ml more of Sensi Grow A
--- Added 2ml more of Sensi Grow B
--- Solution strength after adding more nutes: 199 PPM
--- PH went up to 5.8
- [1700]: Checked nutrients.
--- PH: 5.9
--- Solution strength: 202 PPM
--- Added 4ml of Voodoo Juice
--- Added 4ml of B-52
--- PH after adding more nutes: 5.9
--- Solution strength after adding more nutes: 238 PPM
- [2130]: Decided to make a new foliar spray to address the continued yellowing.
--- Started with 500ml of distilled water.
--- Added 3 drops of CaliMagic
--- Added 3 drops of Sensi Grow A
--- Added 3 drops of Sensi Grow B
--- Added 3 drops of B-52
--- Added 1 drop of Superthrive
--- Solution strength: 164 PPM
--- PH was at 5.9 and did not adjust.
--- Gave her one spray.
--- Also sprayed the surrounding hydroton.
[END OF WEEK 01]


