
Likes
Comments
Share


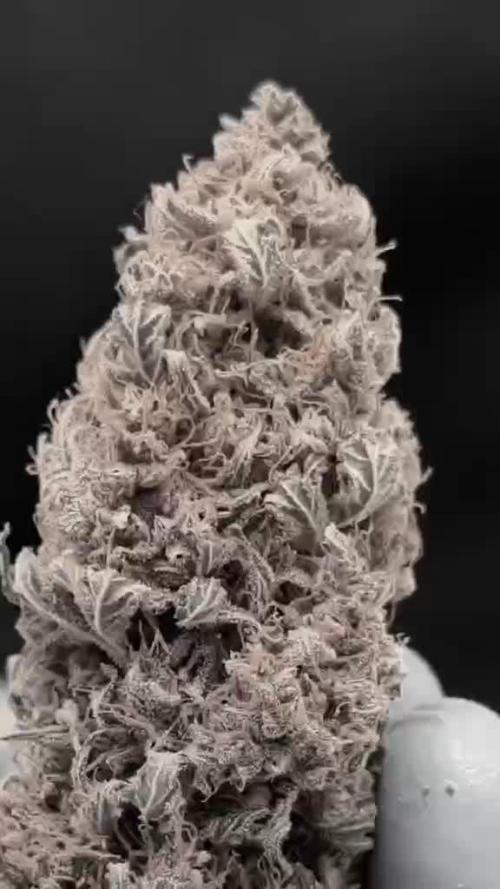
@Toughpuff
Follow
Very good plant to grow 8/10 for me 💯💯🔥 very high yielding with a crazy yield of 131grams of 1 plant very tall and skinny but dense buds 🙏🏽


Likes
21
Share


@w33dhawk
Follow
Da ich mittlerweile eher der Meinung bin das meine Pflanzen etwas zu viel dünger bekommen haben gebe ich zur Zeit nur noch Wasser werde die auch bis zum Ende jetzt durchziehen (Spülung)........
Ach ja und diese Woche war hart die Temperaturen in der Box unten zu halten habe montag, dienstag und mittwoch in der beleuchtungs Phase das Zelt auf gehabt dadurch hatte ich 28,2 spitzen Temperatur 🌞 ziemlich hoch für die blüte Phase aber bei geschlossenem Zelt hatte ich morgens 32 Grad in der licht Phase da musste ich reagieren das problem an der nummer is das ich in einem Mehrfamilienhaus haus lebe mit 24 Parteien da gab es Dann schon auf meiner Etage komische Blicke Vor allem am Dienstag bin kurz einkaufen gegangen Zelt war offen und habe vergessen das Küchen fenster zu schließen komme wieder und mein Nachbar spricht mich an......... 😂🤣✌️
Das da ja ein sehr schöner Geruch aus meiner Küche kommt und ich sollte doch mal lieber mein Fenster schließen
da er zwar kein Problem mit dem Geruch hat aber es ja noch andere Parteien im Haus gibt..... Puh😰😰😰😰😰😰😰😰😰 mehr Glück als Verstand gehabt. Da ich aber auch den halben Tag dem Geruch von gras ausgesetzt bin nehme ich das auch nicht mehr so stark wahr wie andere.......

Likes
11
Share


@4_Pro2Bono_0
Follow
Seedlings stretched a bit had to put them under the light early. Popped 2 seeds initially with 2 freebies I got, unfortunately the freebies didn't germinate in a week so I tossed them and popped two more Dolatos and all four germinated with 100% success rate. Kept them on a 20/4 schedule watering them only once and sprayed the top soil with a mister every now and again. 👍🏿

Likes
31
Share


@Cultivate
Follow
Well... What a very very stressful week this has been, A few pistils started browning. I went over each girl no Nana’s definitely all female, started panicking thinking I maybe had bugs, root rot e.t.c.
Flushed for two days and all new growth showed healthy signs kicking out some serious trichomes! Smells beautiful and PH for the run off was exact.
Gave 1/2 Nutrients/Feed today for the first time just to ease the girls back in but fingers crossed I have either had some PH issues or wind burn possibly.
Had to Defoliate again today as the foliage was ridiculous😂 I hope next week isn’t so stressful 🙏🏻 Wish me luck man please I need it 🤦♂️🏻😅

Likes
27
Share


@valiotoro
Follow
Pheno 1 dark purple : On the nose, it reveals a sharp burst of fresh lemon, layered with a powerful eucalyptus aroma that’s both invigorating and camphorous. A truly refreshing and vibrant terpene profile😈🍋
Pheno 2 Green : this one is a real surprise! If I close my eyes, it’s like Nutella! It’s as if you’ve just walked into a kitchen where hazelnuts have been freshly roasted 🤤🌰
Pheno 3 light purple : It’s a mix of the first two with a hint of amarena cherry at the end🍒🍧


Likes
23
Share


@dataTwiiix
Follow
05/13: graine mise pour 12h dans un verre d'eau
05/14: passage dans le papier toilette.
05/15: germe sorti la graine commence à s'ouvrir direction le jiffy
05/16: 24h plus tard le jiffy ce craquelle et on aperçoit la graine remonter vers la lumière
05/17: je me réveille et aperçoit la graine presque ouverte qui a percé le sol encore quelque heures et je place le jiffy dans le pot de 11L qui l'attend.
Voilà qui est fait le jiffy est enterré avec un dôme dans son pot.
05/18: je suis épaté par la vigueur de ce plant, elle a vraiment envie de vivre la petite elle est passée au travers de la graine avec une force incroyable !!
Je compte suivre la logique d'arrosage suivante: je maintient le substrat dans sa globalité +/--humide car la petite est au millieu de son énorme pot et je vais arroser à hauteur de +/- 150ml les pourtours du plantules quand le subsrat montrera des signes de sécheresse plus avancés et je réhydrate la terre en surface en dessous du dome pour maintenir un taux d'humitée élévée pour les premiers jours de la lady.
05/19: première arrosage en douceur autour du plantule. Dans ma première culture j'ai utilisé des pots de 5L mal rempli y devais y avoir +/- 3.5L en réalité et sur cette plante ci j'utilise un pot de 11L et l'arrosage est plus simple à gérer dans un grand pot enfin on as moins peurs de sur arroser. ...
05/20: jusqu'ici tout va bien!


Likes
16
Share

@Zdenda
Follow
Před čtyřmi dny jsem sundal která jednu už byla.. trichomy už začaly mít i jantarovou kterou nechávám jen trochu..ani né třetinu.Světlo jsem dal na 75%..No a dneska jsem sklidil zbytek. Prorostlé a tvrdé. Lepkavá brokolice mi voní a vypadá to pěkně.. těším se na kouř. Pověsil a nechám schnout.. potom zvážím až suché a ostříhané.

Likes
6
Share

@SkunkyDog420
Follow
Hallo zusammen 🤙.
Sie wächst sehr schön und macht keine Probleme.
Rabattcode für den BIOTABS-Webshop https://biotabs.nl/en/shop/ GDBT420, damit erhalten Sie 15 Prozent

Likes
3
Share


@StickyFingah420
Follow
Día 43 desde semilla y se ha comportado bien, pienso que el frío nocturno pueda haber afectado en la velocidad de su desarrollo, el siguiente riego lo haré agregando overdrive a la Mezcla para potenciar el engorde de flores, ha producido resina de un olor bastante peculiar con tonos dulces y algo parecido al perejil 🤷♂️🏽, el tono morado comienza a notarse desde el interior de las hojas.


Likes
24
Share


@Natrona
Follow
Apollo F1 had to come down due to bud rot. These videos were taken n June 10 and at that time no bud rot was visible. We've had so much rain this spring season with limited fully sunny days.
I harvested June 14. The main cola was full of bud rot. That's how fast it can spread.

Likes
2
Share


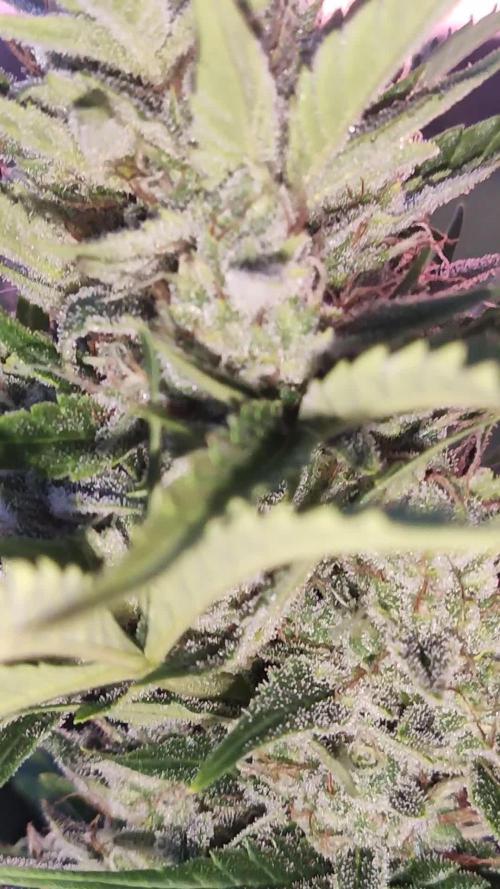
@Keep_it_Cleannabis
Follow
Smell is insane and the purple is coming threw the leaves. Flush soon and oh boy the fade is gunna be real.


Likes
154
Share


@CBD_Sweden
Follow
@FAST_BUDS,
Hi all the happy people here in GrowDiaries.
This is my second cultivation ever and it will be fun to try a bigger space than my closet grow.
First, I'm just going to say I'm done with the construction of my new growroom.
I put some pictures on the construction here in week one.
The room is 2.14 meters by 1.7 meters and has a ceiling height of 2 meters.
It provides a floor area of 3.6 square meters.
I use a 54 Watt Lightwawe T5 for germination and 2 Pcs 400 Watt HPS lamps.
I have a channel fan that replaces the room air about 40 times an hour to get a comfortable environment in the room, the air enters a fresh air intake from the outside.
The air is purified through a carbon filter to then leave the room to the rest of the basement.
Then I use that heat to heat the rest of the basement.
I will use 8 pcs 15 liter Autopots to grow with and a 100 liter water tank that supplies the pots of water and nutrition.
I will grow completely organically in soil and will watercure my buds to get the best possible medicine for me.
But there are no cultivation rooms to be displayed here, so I continue with what is most important.
Today I have put my seeds in my moisture dome and hope the seeds have germinated within a few days.
I am very excited to see how the new growroom will work and how this new secret CBD plant from @FAST_BUDS, will turn out.
..............................................................................................................................................................................................................................................................................................................................................
2017-09-11. Kl 12.00. Week 4 starts. I have cleaned the whole room for the new week and gave the girls water and nutes. Added videos and pics. Girl nr 1 is 27 cm high and girl nr 2 is 22 cm high.
-----------------------------------------------------------------------------------------
2017-09-12. Kl 10.00. New pics and video. Girl Nr1 has grown 5 cm in 23 hours, from 27 to 32 cm.😍
-------------------------------------------------------------------------------------
2017-09-13. Kl 22.00. Everything is looking great in the garden right now. Added new video.
--------------------------------------------------------------------------------------------------
2017-09-15. KL 10.00. New video added. Girls are looking great and they got 3 liters of water and nutes this morning. Girl Nr 1 is 38 cm high and Nr 2 is 28.
-----------------------------------------------------------------------------------------------------------------------------------------------------------------------------
2017-09-16. Kl 10.00. The girls grow like crazy, i have to defoliate about 20 leafs a day. Added 2 liters of water and nutes this morning and 2 new videos.
-------------------------------------------------------------------------------------------------------------
2017-09-17. This is the last day of week 4. Added a time laps from germ to week 4.


Likes
20
Share


@Densko
Follow
2/5 is insanely big for day 35.
It has many shoots and im debating whether or not i should lollipop this plant, what do you guys reckon?
Flowering mode has really begun this week, extra shoot production stopped and more and more pistils are forming. The stretching has also stopped.
I really think topping is the way to go for these genetics, with this short veg time. Or my LST is just bad and i should do it differently.
Still watering 3L of water every 2/3 days.
Let's see those buds form😍. Way to go RQS for this record holding autoflowering seed to harvest time.


