
Likes
Comments
Share


@GirlGoneWeed
Follow
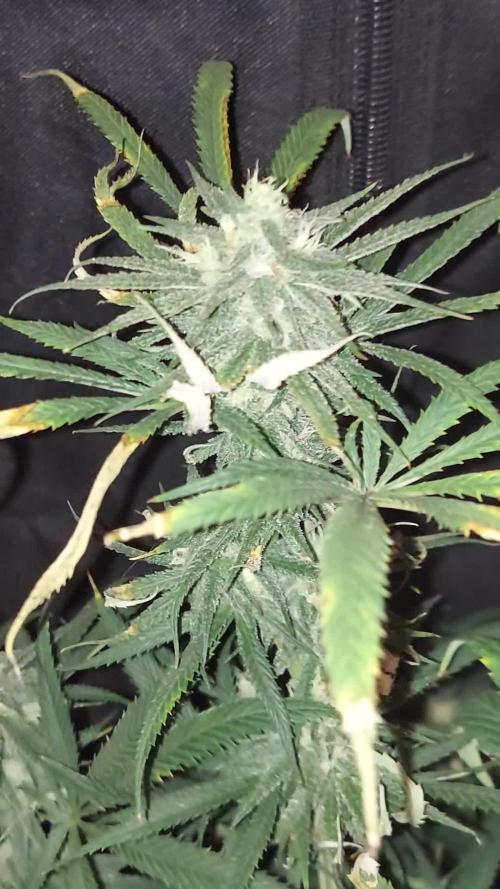
Plants continue to enjoy the heat of the summer,
Growing big fat leaves, going bone dry from sunrise to sunset and drinking lots of water every day at dusk. Some mild calcium deficiency started appearing the yellowing of the leaves with brown-ish spots, corrected with foliar spray Element XX (calcium supplement)
I have also introduced my spray homemade pesticide with natural ingredients, you can find the recipe on my Instagram @Girlgoneweed (under the highlights), spraying 2x a week to keep rodents, deer, aphids, mites, mildew and other threats away.
Thanks for following along, Happy Growing !! xoxo

Likes
5
Share


@RastaRick
Follow
Full on flowering. Gave first 10ml dose of bio pk 5-8 on day 37 with 1tsp bactrex in 1L water. Triton Biscotto Lime Auto is a bit behind but looks ok. All got massive defoliation and still tons of leaves... Natural form maybe was a mistake hahahah

Likes
9
Share


@rolling_stoned
Follow
So pleased with the growth, this week I put a net up to separate out the buds a bit and trimmed the plants to try and get more light to the lower buds. Instead of replacing the water, I'm now directly recycling and adding nutrients and additives. I found the easiest way was to pump the system out into another bucket so I could measure more accurately how much to add and then replace the mix back in the system. The grow room smells wonderful. I'm so looking forward to when I can try it.

Likes
5
Share


@Cannibalgardens
Follow
We are on week two of flowering and the ladies are loving it .. we defoliated and pulled some branches around increasing air movement and light penetration.. The cheese has been a little picky .. lighter on the nutes and doesn't like training very well..The team @seedsmen seeds have bomb genetics and I can't wait to stArt my next seedsman diary sooo good ..keep an eye out for week three ..

Likes
13
Share


@NSABND
Follow
Day57 hot summer day 😎👍🙏
Day58 cloudy and normal temp 😳😵
Day59 cloudy and cold temp 😵😵😕
Day60 the sun came back but late 😩😵
Day61 sun and warm weather 😁🙏👍
Likes
4
Share


@TheSurfBud
Follow
Nice sweet smell... could say what strain it is because its from sweetseeds sweet auto mix 10 pk of the best..
Definitely going to enjoy this one ...
Grow went well and fast 62 days flat...


Likes
2
Share


@Gardens_of_Of
Follow
Trichomes are filling up. There are amber ones here and there. Next week I start flushing.


Likes
19
Share


@ScrogFreak
Follow
Increased nutrients to 11ml/gal each. Trichomes still mostly clear. Several weeks of flower left yet.

Likes
65
Share


@Roberts
Follow
She fox tailed on me to summed heat at end. She grew good overall. Didn't have many extra issues with her. She grew under a Spider Farmer SE5000 light in a New Level Hydro bucket. Thank you Spider Farmer, New Level Hydro, and Quebec Seeds 🤜🤛❄️🌱
Thank you grow diaries community for the 👇likes👇, follows, comments, and subscriptions on my YouTube channel👇. ❄️🌱🍻 Happy Growing 🌱🌱🌱
https://youtube.com/channel/UCAhN7yRzWLpcaRHhMIQ7X4g
SE5000
https://amzn.to/3qFpAML
Spider Farmer Official Website Links:
US&Worldwide: https://www.spider-farmer.com
UK: https://spiderfarmer.co.uk
CA: https://spiderfarmer.ca
EU: https://spiderfarmer.eu
AU: https://spiderfarmer.com.au
Coupon Code: saveurcash (is stackable in most cases)
Www.newlevelhydro.com
Www.hygrozyme.com

Likes
1
Share


@LIPANJA
Follow
This plant is an autoflower and was under a 12/12 light schedule because the other plants in the grow tent were photoperiods that were already flowering, and that was bothering me. I felt like it was extending the flowering period too much, and its size is already great, so I moved it to a separate tent. Now I'm giving it 18 hours of light with 3 different lights:
- one 150W LED,
- one 150W flowering LED,
- one 5m LED strip with 60W at 3000K to help the center of the plant ripen faster.
I'm keeping the watering schedule at every other day with 2 liters, following the Advanced Nutrients feeding chart.
I imagine about one more week with fertilizer and another week of flush before harvesting
I also preferred to cut some ties that were too tight. (lst)


Likes
39
Share

@AestheticGenetics
Follow
4/15/25 Things are progressing nicely. Some plants dont seem to be doing too much but 3 of them or so that are really standing out.
Im curious if some of these are going to be longer flowering time than anticipated with the very obvious sativa dominant plants.

Likes
4
Share


@mr_smooke
Follow
Christmas update
she starting to put some holiday weight on it seems. next watering I will ad some molasses. the smell is amazing, full of fruit. here is day 49 of flovering
I wish you all a Merry Christmas
Likes
8
Share


@High_Grade_Dadli
Follow
Well I having been laggin with update but I think am up to speed now...well u kno the fitess of the fitess must survive....still been having so water lag issue with the older one so finally decided to change the pot but she still managed that bit of stress good well see what happens in the rest weeks to come.....the other two are 6 weeks this week ...the one that got hst not by choice the crown is barely hanging on have some tape holding it managed to push a seed....this strain seem to be very resilient.....look at dem resin and this is jus the 2nd week of flower....until next time happy growing
Likes
5
Share


@SlamFM
Follow
11/2/24 - Start of Week 9
11/5/24 - Swapping out Bulky B for Full Tilt. The fruity smell is starting to come out but "fruity" as in it smells like a real fruit.
-2ml Cal-Mag
-1.5g B1
-1.5g B2
-2g Full Tilt
in 1 gallon water


Likes
19
Share


@adam_pawloski87
Follow
Let’s Go!! Today is day 31 from seed an these lil baby girls are shooting pistols an showing female productions!! Over the past couple weeks these girls been feasting up an building nice thick structures,building themselves up to get ready for pre flower pretty soon !! Everything is going just how we want it, everything is working properly, our air temp an humidity is stayin on point around 70-75 degrees trough the day and a humidity of 55 - 62% ! Always great! I hope you all enjoy an y’all have an amazing productive day! Peace , love an positive vibes to y’all Cheers 😶🌫️💨💨💨💨🤙🏻Keep them eyes peeled for next week !!🤘🏻🔥💯

Likes
59
Share


@Mastr
Follow
Hi everyone I chop her down day 86 and let her dry in 19° temp and RH 65 % I'm going to slow drying for best results 7 to 8 days
She is very dense and sticky bud and so heavy too I think she yield over 150g plus but the bud are not 100% purple its mix with light purple and green ass you can see in pic or video but still I'm very very happy and already germinate another purple lemonade 💜 next week I will update smoke reviews and final dry weight 😀

