


Likes
96
Share


@PapaNugs
Follow
Was an amazing experience overall. The girls all did great. No complaints. Training went well. Topped twice and lollipopped the lower growth. All the buds, even the lower growth, are large. So frosty too. Amazing overall and will have to grow again as long as I like the smoke.

Likes
41
Share


@Zurban_Poison
Follow
Hello hello greetings!
our girls are taking acceleration for a burst of growth!
after I transplanted them into 15 liter pots, they began to grow more actively. I did not notice any anomalies or deviations. all plants are doing great.
and of course my favorite is number 2204)) she's just cute! and apparently Dominant indica)) I also hope that at least one of them will be colored!
watch the video for a closer look at the plants.
I also want to say a few words about my New Light from MarsHydro!
as you can see plants of different heights. and the difference in distance to the light source is significant.
but this does not seem to affect development.
all plants grow equally well and receive every ray of home sun from MarsHydro!
and also welcome to my instagram: https://www.instagram.com/zurbanpoisonia/

Likes
22
Share


@EhJay
Follow
D36 Collected runoff from #1 and was not happy with the results only the ph from the runoff was perfect. Performed a flush until the runoff was at 400ppm. Will give a small feeding when the soil dries up.

Likes
149
Share


@CBD_Sweden
Follow
Hi all the happy people here in GrowDiaries.
This is my second cultivation ever and it will be fun to try a bigger space than my closet grow.
First, I'm just going to say I'm done with the construction of my new growroom.
I put some pictures on the construction here in week one.
The room is 2.14 meters by 1.7 meters and has a ceiling height of 2 meters.
It provides a floor area of 3.6 square meters.
I use a 54 Watt Lightwawe T5 for germination and 2 Pcs 400 Watt HPS lamps.
I have a channel fan that replaces the room air about 40 times an hour to get a comfortable theme in the room, the air enters a fresh air intake from the outside.
The air is purified through a carbon filter to then leave the room to the rest of the basement.
Then I use that heat to heat the rest of the basement.
I will use 8 pcs 15 liter Autopots to grow with and a 100 liter water tank that supplies the pots of water and nutrition.
I will grow completely organically in soil and will watercure my buds to get the best possible medicine for me.
But there are no cultivation rooms to be displayed here, so I continue with what is most important.
Today I have put my seeds in my moisture dome and hope the seeds have germinated within a few days.
I am very excited to see how the new growroom will work and how this Blue cheese Auto from Royal queen seeds will turn out.
Blue Cheese automatic cannabis seeds are a cross of Blueberry Automatic and Cheese Automatic that has been perfected over five years of breeding and careful selection. The result is a feminized, autoflowering strain with superior yield, flavor, and effects to either of its distinguished parent strains.
THC: 16%
CBD: Low
Yield Indoor : 325 - 375 gr/m2
Yield Outdoor: 60 - 110 gr/plant
Height Indoor: 40 - 70 cm
Height Outdoor: 60 - 110 cm
Flowering: 7 - 8 weeks
Harvest month: 9-10 weeks after planting
Genetic Background: Blueberry x Cheese x Ruderalis
Type: Sa 35% In 40% Ru 25%
Effect: Cerebral and uplifting
Climate: Mild
..............................................................................................................................................................................................................................................................................................................................................
2017-09-11. Kl 12.00. Week 4 starts. I have cleaned the whole room for the new week and gave the girls water and nutes. Added videos and pics. Girl nr 1 is 27 cm high and girl nr 2 is 50 cm high and nr 3 is 15 cm high.
-------------------------------------------------------------------------------
2017-09-12. Kl 10.00. New pics and video. Nr 2 has grown 5 cm in 23 h, its incredible.
---------------------------------------------------------------------------------------------
2017-09-13. Kl 22.00. Everything is great in the garden right now. Updated with new video.
----------------------------------------------------------------------------------------------------------------------------
2017-09-15. KL 10.00. New pics and videos. Girl Nr 1 is 33 cm high, Nr2 is 70 cm and girl Nr is 22 cm. Nr 2 has grown 20 cm the last 3 days. Look at the stem of girl Nr 2 😍
The girls are starting to smell a lot now. Its a intense smell in the grow room.
-----------------------------------------------------------------------------------------------------------------------------------------
2017-09-16. Kl 10.00. The girls grow like crazy, i have to defoliate about 20 leafs a day. Nr 2 is 76 cm tall now, i wonder when she slows down?. Added 2 liters of water and nutes this morning and 2 new videos.
------------------------------------------------------------------------------------------------------------------------------------------------------------------
2017-09-17. Made a time laps of the girls first 28 days.

Likes
11
Share


@Mr_Motalovah
Follow
Hello Growers & Tokers!
The route to having a jungle starts with the roots!
That's why my main goal in those first 14-21 days is developing the root system.
I like to give them time to expand the roots which is very important for a healthy plant.
That also gives them more time to get bigger and stronger before going into flower.
More growth, more bud sites, more buds. Trust me the wait is worth the reward.
We'll be seeing some truly sweet and zenzational flowers.
This week they got transplanted to their final pot, 11L fabric pots.
It's one step closer to getting that jungle, zenzational!
Medium used was Light Mix from BioBizz.
Synergy from Grotek nutrients was blended in the medium to help out the roots.
Let the mycorrhizae do its job and take over the soil, then the roots just follow.
Take care out there and happy growing!

Likes
38
Share


@J_diaz420
Follow
Enamorado totalmente de cada una de estas genéticas, ésta me tiró 4 monstruos de plantas 😍
Processing
Likes
6
Share


@ganjaman24
Follow
***Update*** have switched 2 of 3 to 5 gals will do the other one as soon as I get more coco..looking to veg maybe another 2 weeks then going to flip. Recently acquired LED light for my veg room so have 250w hps n 300w LED..ladies seem to be loving it.


Likes
1
Share

@HK_OG
Follow
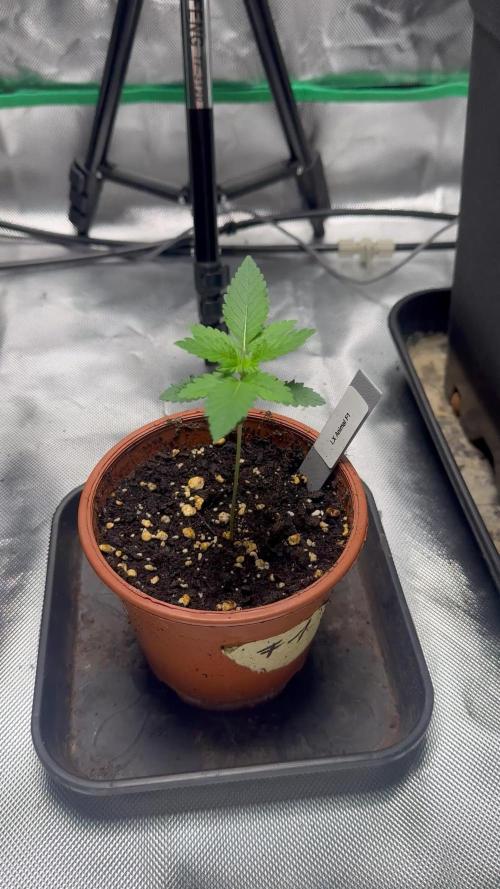
Ist sehr gut in der durch die 2. Woche gekommen und startet gesund in die 3. Woche.
Das Wachstum beginnt jetzt richtig und ich denke ich werde sie bald umtopfen - 3,5L
Likes
38
Share


@DaddyPrime
Follow
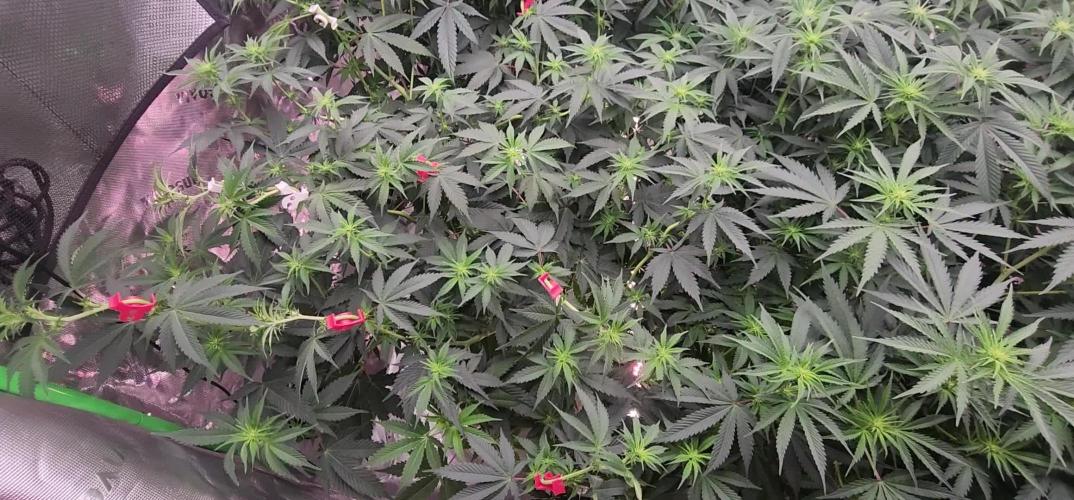
6/16 today was a feed day. Transplanted into 20 gal rain science mesh pots
6/19 today was a tea day. applied some LST clips to try and stretch her out more wide
Likes
9
Share


@eldruida_lamota
Follow
Que pasa familia, vamos con la séptima semana de floración de estas Pink Sunset feminizadas de silentseeds.
Vamos al lío ,se trasplantaron en macetas de 7 litros definitivamente.
El ph se controla en 6.0 , la temperatura la tenemos entre 24/20 grados y la humedad ronda el 50%.
El ciclo de floración puse 12h de luz, el foco está al 100% de potencia.
De momento van creciendo a buen ritmo y tienen un buen color.
La flor está engordando y van formándose, también empieza a producir tricomas.
Agradecer Agrobeta por el envío de un kit para la temporada, son unos jefes.
- os dejo por aquí un CÓDIGO: Eldruida
Descuento para la tienda de MARS HYDRO.
https://www.mars-hydro.com
Hasta aquí todo, Buenos humos 💨💨💨


Likes
1
Share


@Skynets_Growing
Follow
Eva my little fast buds lady is such a wonder. In week 3 she is bigger than her Both sisters at the Same time. That‘s why I cut leaves only at first in her 3 week, because they are to many and to big and I am surprised about mother nature, because Eva‘s First Leaves are so nice and huge that i call her Aircraft Carrier…see with your own eyes. Respect and i will love her week 4 … I know.
Likes
6
Share


@w4tch2gr0w
Follow
D1
Looking good! Let’s start into week 6 of flowering. She could be done in two weeks as the description says 7-8 weeks in total, but i guess she will rather need 3 more from now.
D5
It’s going alright 👍
She is more than pretty 😍 buds could be a bit bigger by now but i guess she will just grow longer than the 7-8 weeks of flowering and will be fine. The smell is so insane already. Also added my fertilizer into the whole plan started at week 7
D7
End of week 12, 6 weeks of flowering behind 2 to go so happy with those buds already. Counted 10 which are quite equally in size so LST was worse it


Likes
3
Share


Muy buena cepa, potente, productora y fácil de cultivar. El efecto fue exactamente lo que buscaba; intenté curar la yerba lo mejor que pude para poder preservar los terpenos y así disfrutar aún más. Cepa recomendada😄

Likes
77
Share


@Roberts
Follow
FBT2309 is doing great. She has grow a lot in a week. In a few days more space will open in grow room and that will help as well. Everything is looking good under the Medic Grow Mini Sun-2, in the Gen1:11 nutrition. Thank you again Gen1:11, Medic Grow, and Fast Buds. 🤜🏻🤛🏻🌱🌱🌱
Thank you grow diaries community for the 👇likes👇, follows, comments, and subscriptions on my YouTube channel👇. ❄️🌱🍻
Happy Growing 🌱🌱🌱
https://youtube.com/channel/UCAhN7yRzWLpcaRHhMIQ7X4g
If anyone needs to purchase fastbuds here is a link for my affiliate program
https://myfastbuds.com/?a_aid=60910eaff2419
Likes
3
Share

@NEPA-Cultivations
Follow
Another week left of the stretch should be where I want them...good grow so far
Likes
1
Share


@thefrozenking
Follow
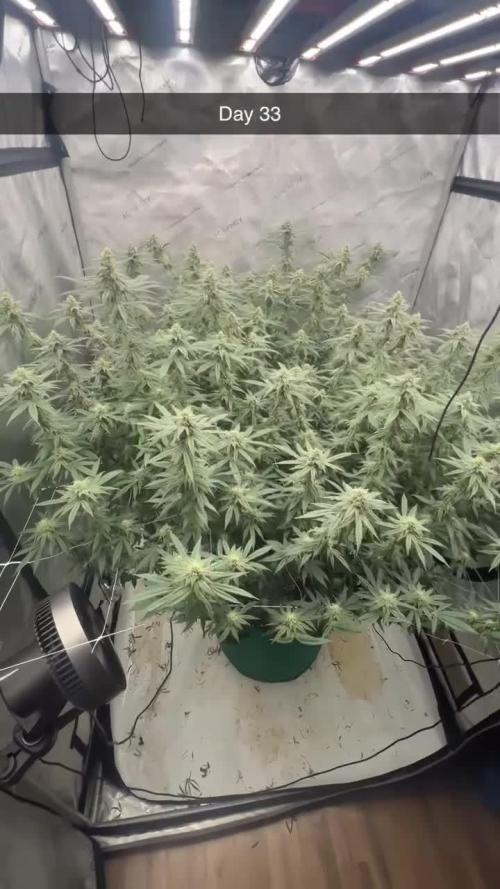
Day 63
this one kinda got overtaken by the others. but still has good solid Buds.
Likes
31
Share


@MadeInGermany
Follow
Info:
Unfortunately, I had to find out that my account is used for fake pages in social media.
I am only active here on growdiaries.
I am not on facebook instagram twitter etc All accounts except this one are fake.
Have fun with the update.
Hey everyone :-)
Quick update this week.
It was poured twice with 0.8 l each time.
Everything is going as it should and I'm really looking forward to the next week.
until then I wish you all the best and stay healthy 🙏🏻
You can buy this Strain at :
www.Zamnesia.com
Type:
Runtz
☝️🏼
Genetics:
Zkittlez x Gelato
👍
Vega lamp: 2 x Todogrow Led
Quantum Board 100 W
💡
Bloom Lamp : 2 x Todogrow Led
Cxb 3590 COB 3500 K 205 W
💡💡☝️🏼
Soil : Bio Bizz Coco
☝️🏼
Nutrients : Green House Seeds Company Powder Feeding Bio
☝️🏼🌱
Water: Osmosis water mixed with normal water (24 hours stale that the chlorine evaporates) to 0.2 EC. Add Cal / Mag to 0.4 Ec Ph with Organic Ph - to 5.8
Likes
6
Share


@pzwags420
Follow
On week 2 she is putting out much more preflowers. She is stretching for sure but still maintaining excellent node spacing. the average ppfd is 850.
