Likes
Comments
Share


@Herbinator
Follow
Nearly there! The left plant was seeded first so has matured before the right plant. There was a 2 week gap between seeding because one of my first attempts died on me. Defoliating the right plant has created some huge top colas, but it needs another 7-14 days to mature. I'm trying to think of ways to isolate the left plant from the reservoir so I can flush it separately and allow feeding on the right plant to continue.
Signs of nutrient problems. Leaves are yellowing at the tips and showing signs of an imbalance somewhere. Research needed.

Likes
51
Share


@gottagrowsometime
Follow
Grew really tall. "Explained up top", buds are really nice and dense, so overall I'm harpy with the yield. Harvested more or less whole. Drying 7 days. At least 3 more to go. Will get to trimming and weighting soon. Had a little tester last wk. But, was hard to get the measure of it. Was sweet, but pretty planty.. buds, as I said are dense.


Likes
8
Share


@Alien98
Follow
Fat buds and 4 phenotypes. The first two are very similar: indica and very productive. One is a highly sativa phenotype who grows high but have large-indica leaves. At last I found a not so big yielding phenotype but it produced top buds with much resin.


Likes
2
Share


@Hydro_sweetness
Follow
Hey welcome back in the 6th week of flowering with the Dutch Passion’s Brooklyn Sunrise.
Last week my fan broke down and I had to order some new bottles of nutrients because the CannaZym and CannaBoost/accelerator had gone empty,
but yesterday I received the nutrients and a new fan!
Not to long anymore before harvest! I stopped giving the PK booster, from this week on I will decrease the nutrient values for the coming 2 weeks for the last week I will perform a flush (on most of them).
The Brooklyn Sunrise and the other 2 Colorado Cookies just need a week or 2 extra.
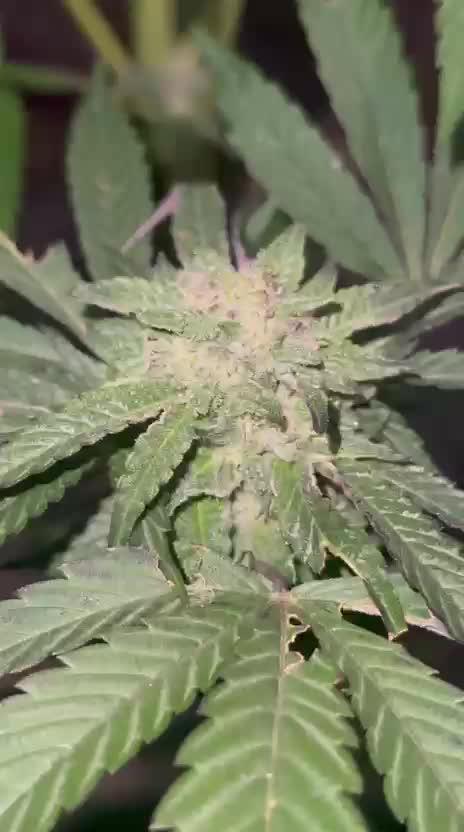
The Brooklyn Sunrise is getting fatter and fatter, buds are getting frosty and dense. Only one of them is turning yellow and im not sure why, I was thinking of a nitrogen deficiency. What do you guys think?
That’s it for now see you all next week!


Likes
1
Share


@sunshinegroww
Follow
She had clean up few days ago and now ready to start pumping those nuggets smeels nice and super frosty
Likes
3
Share


@JeyGanesha
Follow
Inizio 5 settimana di veg.. ancora una settimana e poi in fiore
Oggi 6/2/2025 passato a 12/12
Likes
27
Share


@Frosty_farm
Follow
There was a lot of ups and downs with this plant. It was my first time growing cannabis. I did learn a lot from other growers which I really appreciate it, thanks to grow diaries for that. She was doing well at first, I never checked her runoff pH and at about day 30 I noticed her leaves were not as green as they should have been. The runoff ended up being a 4.7ph. she almost died, I taught about chopping her down and starting over. I'm happy I didn't, she ended up bouncing back, took a long time to harvest but it was well worth it for the experience. Didn't really care about harvest weight. I learnt a lot and I'm satisfied with that. Thanks to everyone that helped me on this grow.

Likes
32
Share


Likes
17
Share


@Brickie74
Follow
This plant has been growing unbelievably well. She has not only grown fast but evenly. I've been doing some pruning of the tiny lower bud sites that won't grow into much and doing some more LST to let more light in.


Likes
4
Share
@Guerrilla_grower777
Follow
11/10/2025
18:45
Everything good this week,full of Sunny days and temperature raised to 22°C during days and 12 °C during nights
Plants are enjoying this climate even with cold nights,they will not be so big at the end but the quality Is on point
#1 Coco Milk 84 days from seed
This one has small buds pretty dense but glistering in resin ,the top nugs are greasy at the touch leaving the fingers sticky and smelly
Didn't check the trichomes but they look like there Is some amber,the smell is super strong telling the finish Is near maybe earlier than i expected
Brought a friend with me who has grown much more plants than me,also he tells the smell and the look are amazing,the flavour is fresh,deep,complex to describe
I say it's like a good shampoo flavour when you enter in a barber shop not so pungent but creamy like a coconut milk exactly as the name says,AWESOME!!!
There are some spider nets i think there will be some problems if this situation keeps going like this
#2 and #3 Coco fresh 72 days from seed
This plant keeps going fast even with cold climate,the buds are really fattening a lot and so dense
Resin production Is not on point by now but It has to consider the late start of flowering,this plant Is blooming from only 30 days
The smell Is now coming out,not strong but good fresh and flowery
Leaves are starting to show some problems and the under sides are all purple with only a part of some leaves turning to a blue/deep purple colour
Sorry for the bad quality of the last video,battery was running low and the final result Is pure lag😂
Next time i will bring an identifier and check,obviously Coco fresh will be the last one standing,if this keeps bumping maybe will end her life in november
Edit: i added some pictures and better close up videos made with an iPhone 16 pro

Likes
3
Share


@Kokot
Follow
Did a little more lst… let me know if im doing something wrong or could be doing better, i appreciate every single tip and opinion.
Processing
Likes
7
Share


@Kushizlez
Follow
Days 35-42
(Day 36) Some minor problems starting to arise here. A few times this week it got up to 90+ degrees which I think may have caused a bit of heat stress in some of the plants. I’m seeing a bit of cupping/crinkles on some of the fan leaves and some of the new growth is looking pretty gnarled and twisted. I hear windburn can cause this too so I’m turning my fans down to low speed. This could also be a problem with humidity so I’m going to turn off my humidifier, dim the lights and raise them. During my last feeding I mulched in some worm castings but it seems like they’re keeping the soil/coco from drying out. Pots are still decently heavy and even the surface is still quite moist but they aren’t showing any major signs of overwatering. I figure it will only be a few weeks before the castings break down so I will just leave it.
A few of the plants are starting to show yellowing leaf tips which is probably some kind of micro nutrient lockout from my PH being slightly too high. It could also be from nute burn so I will water in 6.0 until I see some runoff. Although the most likely culprit is potassium excess. I’ve been feeding potassium almost as much as nitrogen so far. I know that can cause the yellowing of leaf tips by locking out trace minerals. It can also cause leaf problems like crinkling. Excess K can even cause water retention! Will water at 6.0 until run off next watering.
The lst is coming along nicely. It was a good idea to remove the first two sets of branches (not leaves). Now I have 4-6 perfectly even stems coming from each plant that I plan to top one more time each.
(Day 37) Today I’m going to vacuum, clean, wipe down and spray all my equipment in the tent. I’ve been letting the floor get quite dirty and I haven’t had the chance for a thorough clean since last round. I’m kind of surprised I haven’t seen any powdery mildew yet. I guess the prevention spray is working because the room has to be infected from my last crop.
(Day 40) I was reading that you can foliar spray whatever you are deficient in for an immediate uptake. I‘m going to try that with my current potassium excess since it locks out trace minerals. I’m going to foliar feed a bit of phytoplankton at 15ml/L and some MagnifiCal + VeloKelp from Remo nutrients both at 5ml/L. The cal mag is not organic but as long as it’s not going into the soil and doesn’t contain chlorine I’m fine with it. I’m also going to be changing the light cycle to 18/6 for the remainder of veg. This will be their first dark cycle so they can properly foliar feed. Edit: humidity shot up to 85% a few hours after foliar spray.
I went to top dress everything today and I mixed up the plants while doing so! So the ones I was unsure about I gave 1 extra tablespoon. I won’t top dress again for at least 10 days. Might give a light tea sometime next week. I also tilled the shit out of the top of each pot. It had a hard crusty layer on top that was keeping the medium from drying out properly. I’m not going to water again until everything is bone dry. Then I will water until slight runoff at 6.0 ph with some Dr. Marijane bacteria/root probiotic.
I’m starting too see a lot more of these abrasions on some of the bigger fan leaves. It almost looks like thrip damage but I’m 100% sure it’s not a pest above ground. It could be bulb mites, which I found in my worm castings but I can’t check until the roots are more established in their pots. The leaves themselves are cold and feel damp to the touch. I haven’t even seen a fungus gnat since I last fed. I’m hoping it’s related to the K excess and clears up with the troubleshooting.
(Day 41) Just ordered a wire cube rack to prop my plants up with and help evaporation/root warmth. Each cube is 11.8”x11.8”x11.8” and it comes with 16 cubes. So it will fit just perfectly in my 4x4. Depending on the size, I might order another one for the flower room where I would need 25 cubes.
Likes
10
Share

@Chrisandweed
Follow
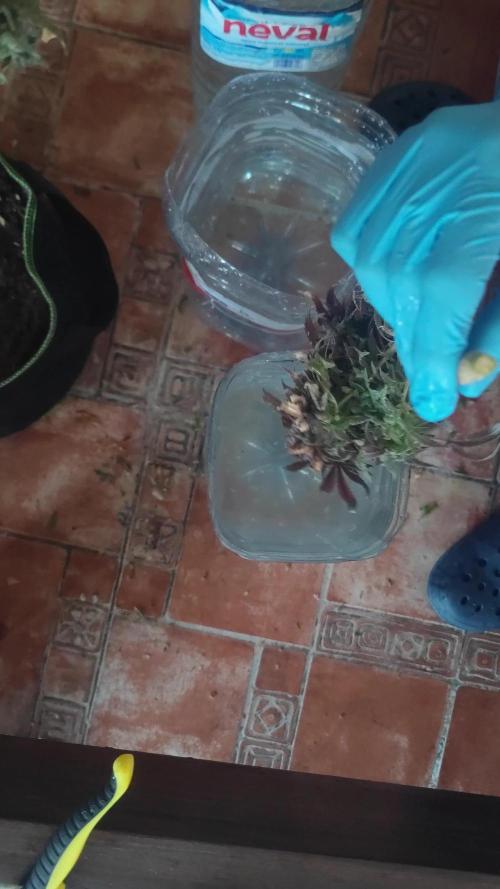
Bueno, ayer hice el último riego, mas cantidad de lo habitual, y ya cuando seque, se corta, supongo que actualizaré fotos, conforme avance la semana, del corte y posterior proceso ya que dado que hubo araña y ciertos problemas, voy a hacer el budwashing que habitualmente hago,
Ultimos dias de esta planta, estos ultimos dias he notado un ultimo engorde de los cogollos que hasta se están cayendo del peso! Muy muy muy toop la variedad, encantado es poco. Pero bueno, no corramos de mas, cortaré y en un par de semanas finalizaré el diario con los cogollos ya secos y manicurados + la opinion de haberlos probado aunque no estasen aún curados para ese entonces.
Edit 12-02-2026: CORTADA! ya puesta a secar en el tendedero xD dado que en el armario había algo de araña aunque no habia afectado a todas las plantas (a esta no) , he decidido hacerles budwashing a todas no sin un petique que me centre y buena música 😁. (Al final aceptó a poner su voz 🙄😂). Normalmente subía fotos del proceso, en esta ocasión, aunque sea un poco mas tedioso, he subido un video del proceso.
Cuando seque finalizaré el diario y subiré las fotos de los cogollos manicurados.
Aclaro, la he puesto a secar en el tendedero pero metido al armario ya sin luces y tal XD solo ventilador oscilante y extractor con el filtro, que solo con el corte la he liado en la calle 😅😂😂😂
TENGO UN P*TO HYPE CON ESTA! jajajajajaja quiero manicurarla y verla azul! Está morada pero la voy.... VAMOS a ver azul! 😂😂

Likes
4
Share


@sunnykuyall
Follow
OG KUSH - Bag seed from a grateful dead show (Chem Dawg)
04 - 07 May 2023 - Germination Week
08 - 14 May 2023 - Veg week 1
15 - 21 May 2023 - Veg week 2
22 - 28 May 2023 - Veg week 3
29 - 04 June 2023 - Veg week 4
05 - 11 June 2023 - Veg week 5
12 - 18 June 2023 - Veg week 6 - Final Veg

Processing
Likes
7
Share


@Encuentra
Follow
24.11 : C+4
25.11 : C+4
26.11 : C+4 33cl of fertilizer for all
28.11 : the hydro are turning yellow, i think i will put them in soil, maybe they suffocate ?
Likes
4
Share


@MoneyMorris
Follow
I finally got my LED light in and installed. The plants are in the first week of flower and are adapting well to the light