
Likes
Comments
Share


@Peeman
Follow
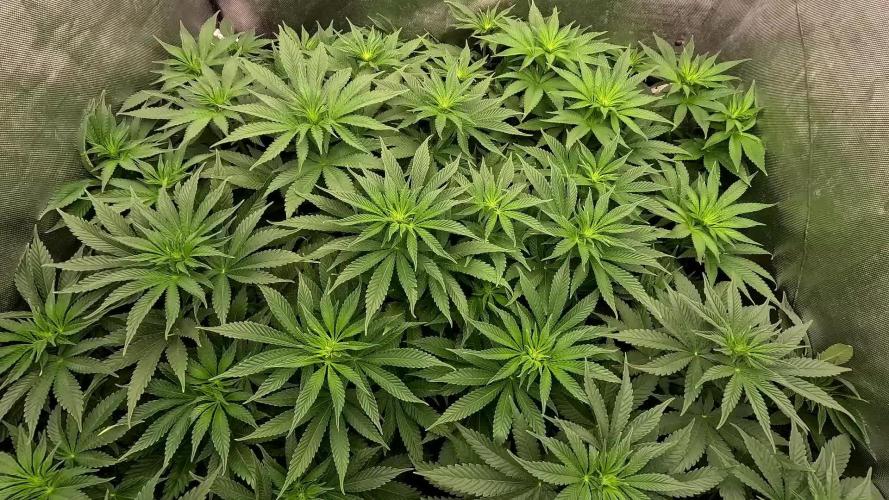
I’m watering the 7 girls (minus Trainwreck 1) every other day with 15+ gallons of R/O water & week 4 bloom nutes between 6.2-6.5 PH and 1100-1500 ppm. Every third feeding is just water with molasses
Sept.. 7 the day started with 15+ millimeters of rain and wind gusts over 50 km/h. A couple of girls got blown over but luckily no broken branches. Time to start tying down these pots geez.
I was checking up on Super Skunk auto #2 while she’s been drying and unfortunately bud rot has taking over most of her so the entire plant has been trashed. FAK!😢😢😢😢😢
Sept. 8 it's been overcast and humid all day and noticed some more powdery mildew on some of the girls. 😩 Unfortunately temps overnight have been in the mid to low teens celsius which is not helping
Sept.9 mixed a new concoction of 3 teaspoons baking soda & 1 teaspoon vegetable oil to 500 ml of water and carefully sprayed fan and sugar leaves trying best to avoid bud sites.
Sept.10 powdery mildew seems to be under control although the baking soda concoction burned some of the white hairs on a few buds.
Trainwreck 1 is on her final week of nutrients followed by a long flush.
Sept.12 the last couple of days have been cooler than average and somewhat breezy. The girls are looking healthy and the colas are starting to put on some serious weight so I added a few more bamboo stakes and a bunch of ties for more support. 👌😁👍
Sept.13 started the day with almost 15 mils of rain (that's about 1 inch for you non-metric peeps)😄 Colas are getting way heavy😲 A couple more branches snapped on Blue Fire 2. Man I can't catch a break. I hope it doesn't stress her out too much. 🙏
Thanks for stopping by, hope to see ya next week👉
Cheers and happy growing👍


Likes
18
Share


@TitanRage420
Follow
Lots of new growth this week, plants are healthy and doing well, one is a female the others I can't see yet.. Did some more LST on the one plant...


Likes
32
Share


@Proto420
Follow
So 3 weeks in, 4 were males, unfortunately all 4 were descendants of mephisto’s gen’s. Bit disappointed about that but what can ya do.
After growing 10 of the bitches at once I am NEVER doing that again. People always talk about how many they want to grow before they do… to those that haven’t started in this pursuit yet, heed my warning lol.
They just hit their pre flower growth spurt, I did have 30 days marked on their lives on a reminder on my phone to defoliate because last grow I had so much larf. The fog dog grows nice and stout, the glue sniffers tall and lanky. Both phenos differ very little.
I cut off like 3/4 of the bottom nodes off each. Fingers crossed they take it well.

Likes
2
Share


Likes
28
Share


@Bread_n_Buds
Follow
Here we are, ready, after a week of truly profitable germination we have 20 beautiful plants all marked with the Z of Zamnesia.
She is the Karen Kush, a brand new strain with almost no previous cultivation, Zamnesia guarantees us that it will be a bomb and the parents confirm it when we read the sheet we are certain that the conditions to do well are all there, now let's get to work with the best known skills and the best suppliers of growth material.
The two plants are in excellent condition to be on day 9 and we are ready to see them break through now that they are taking the feeding program.
---- New Home - The ladies have almost all been transplanted into 11-liter pots which is my favorite size to get the best ratio of presence of plants in the grow box / yield. Especially if you don't have to do exaggerated topping or you have to grow the plants straight with main cola as I do for catalog needs as I do, 11 liters guarantees you to make excellent plants. Topping with 11 pots is recommended up to a maximum of 16 tops (4 main crops) - The pots are square plastic and canvas pots branded Zamnesia - The soil used is Plagron Promix with peat and worm castings but not fertilized -
--- Start feeding program - A very serious feeding program branded Plagron has begun. We made our own personalized table based on the chosen soil (Plagron Promix 100% organic) that you can all do at the link https://plagron.com/en/tools/grow-schedule-calculator and I started giving:
- Power Roots - 1ml/l
- Alga Grow - 2 ml/l
- Pure Zym - 1 ml/l
- Sugar Royal - 1ml/l
- Vita Race - 1 ml/l
- The 100% Organic pack by Plagron can be found on Zamnesia at the link:
https://www.zamnesia.io/it/11457-plagron-easy-pack-natural.html
We are giving a lot of humidity with a humidifier and we oscillate between 65% and 70%.
// Site Strain Description // Formidable genetics: These seeds contain the genes of Monster Bud Kush and White Widow. High THC content: With 24%, the effects are pronounced and intense. Fast flowering: This indica-dominant hybrid needs just 8–9 weeks to reach harvest. Excellent yield potential: This plant is very generous, if grown in the right way!
- Get a seed of this fantastic strain --- https://www.zamnesia.io/it/10780-zamnesia-seeds-karen-kush.html
- Soil and Fertilizers entirely organic --- https://plagron.com/en buy on www.zamnesia.io
- Growbox and air sistem --- https://www.secretjardin.com/
- Music and sound --- I made my girls listen to 432hz frequencies and music from www.radionula.com
- Light - Sp3000 - https://marshydro.eu/
- Z --- You can find these seeds, much more from the world of cannabis, mushrooms and an incredible series of accessories and gadgets on the reference site not only mine but of many growers ---- https://www.zamnesia.io

Likes
20
Share


@usere
Follow
Lamp at full power 200 W. Start adding bioboost, don't have much of it. I'm ok with the final stratching, not too much about buds growing seems slow growing and fatten. maybe high temp.


Likes
5
Share


@Ninjabuds
Follow
My Rainbow Saltz plant is branching out really nicely! It's about medium-sized compared to the others in the tent, but it looks super healthy and vigorous. I've got a good feeling about this one – it seems like it's going to be a strong grower. Can't wait to see how it develops!
The weather has been absolutely gorgeous this past week! We've been hitting that sweet spot of 70 degrees during the day, perfect for getting outside and soaking up some sun. Then, it cools down to a comfy 50 degrees at night, which is ideal for sleeping with the windows open. I've been loving all the fresh air!
I finally got around to building that little wooden planter for my windowsill. It was a fun project, and now my regular plants have a nice new home. It really brightens up the room, and I'm thinking of adding some herbs to it soon. Maybe I'll even try growing some basil!


Likes
2
Share


@PrinceOfHerbs
Follow
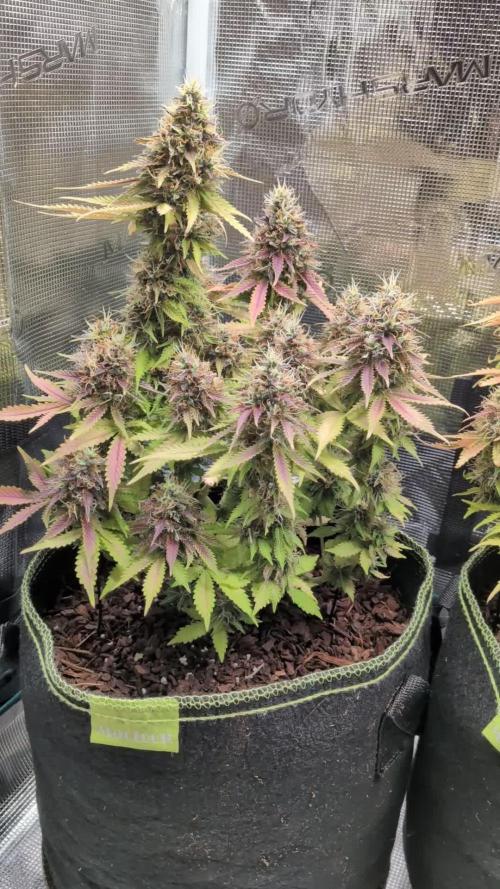
The plants become surprisingly resinous and have a very pungent odor. The Strawberry Gorilla is already turning purple.

Likes
Comments
Share

@gr3g4l
Follow
Inicio de semana tranquila.
Final de semana tocaria poda de bajos y de chupópteros pero se dejó para el siguiente dia, dia 22 .
Da gusto cultivar semillas bien estabilizadas, que todas parezcan sacadas de un mismo patron como si fueran estas esquejes de una misma madre. Me encanta xd. Por ahora un crecimiento muy parejo, veremos si seguiran igual de parejas a partir de la poda de hojas y chupópteros que hay que hacerles.


Likes
4
Share


@Growstopher
Follow
4.14.25
2nd week of veg! Started the tie down method on the 7th and had to tie down 3 times already! Going good will start wrapping plant around perimeter of pot until flower!
Likes
Comments
Share


Processing
Likes
12
Share


@freshwaterjellyfish
Follow
Other than spreading folage out to new found space (had two male seedlings), I haven't maintenanced much. I want to get the pH down slow. I'm doing a top up and going to be careful for no big jumps.
I'm gonna take the bins my tank sits on out to give me more grow room for next crop, and to keep reservoir temp down. Check ya later dudes:))))
Oh..I agree that the value of buds far exceeds the amount of vegetables I could ever grow but I'm an outdoors man- it's majority of what I smoke. im doing this strictly as hobby and for more variety.

Likes
145
Share


@Salokin
Follow
Hi Growmies,
Here we are at week 11, and our botanical star continues to astound with her growth. The stretching phase has persisted throughout the week, each day adding a bit more to her stature. It's as if she's reaching for her personal best, and I'm here to cheer her on every step of the way. As the buds begin their own stretch along the colas, it's time to introduce Green Sensations into her diet. This should give her the extra boost she needs for this critical phase of development. Her thirst is growing, a sign of her expanding needs and vigorous metabolism. It's a balancing act to match her hydration requirements, but one that's deeply rewarding. I can't emphasize enough how smooth and stress-free this experience has been. There's a certain peace that comes with tending to a plant that asks so little yet gives so much. If the yield is anywhere near my usual harvests, I might seriously consider making a permanent switch to soil and the Plagron lineup. It's exciting to ponder the potential of a new cultivation method. This journey has been one of simplicity and satisfaction. The connection between grower and plant, the quiet anticipation of each new stage of growth – these are the moments that make it all worthwhile.
As always, a reminder for my fellow plant lovers: use the code ZAMMIGD2023 at Zamnesia's online store to get a 20% discount. Sharing is caring, especially in our tight-knit community.
Stay tuned for the next update. We're on this journey together, and I'm grateful for every step.
Likes
1
Share

@therealgrowmie
Follow
Hey Growmies! I’ve been out of town, so this entry is a bit off-schedule, and watering was handled by an automatic irrigation system.
That said, the flowers are looking big and developing fast, with senescence in full effect. The leaves are yellowing significantly, which tells us the plants are now entering the late stage of their lifecycle.
They’re basically ready for harvest any day now—depending on your individual preference. I’m going to let them ride a little longer to aim for no more than 10% clear trichomes. 🙂
---
Quick rundown on everything else:
Watering: 1500ml every third day
Fertilizer: According to the BioBizz schedule
Light intensity: ~1000 PPFD
VPD: ~1.82 kPa
Temperature: ~28°C
Relative humidity: ~50%
Likes
3
Share

@Tower84
Follow
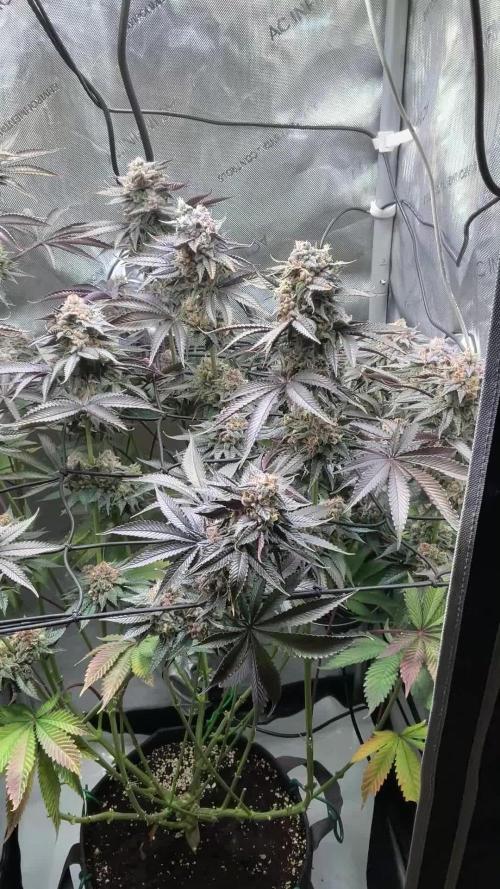
Alles entwickelt sich prächtig. De Geruch ist sehr süß und blaubeerig. Der Trichombesatz ist sehr dicht und teilweise sind diese schon milchig bzw. bernsteinfarben. Die flowering time ist vom breeder mit 60 Tagen angegeben, dass kommt auch sehr gut hin. Heute ist Tag 48 in der Blütephase, Tag 90 insgesamt.
Ich habe den Ablüfter aus dem Zelt geholt und dieser liegt jetzt oben auf dem Zelt. Dadurch habe ich mehr Platz nach oben. Die Sanlight habe ich etwas höher gestellt, dadurch kriegen die Headbuds etwas weniger PPFD ab, was letztendlich auch besser ist.
Derzeitige Parameter:
Sanlight Stufe 8 / 1060 PPFD / DLI 45 mittig gemessen
1-2 Headbuds bekommen noch etwas mehr ab, dadurch leichtes foxtailing von diesen
VPD 1,6 / 50% RLF / 26 Grad
Dünger nach Biobizz Schema

Likes
76
Share


@Canna96
Follow
The buds are very tight, but they didn't grow large colas so that means wasted time trimming cannabis, which I am not a huge fan of. I will not be growing this strain again, as I believe there are far better breeders and strains out there. I will continue to seek out the best breeders and strains until I am satisfied. I believe this Auto will yield in the 16-22 Ounce range dry, so I am not super disappointed, but I know I can do much better than this. After 6 days of drying, it took me around 7 hours to trim this auto, and she ended up yielding 16.72 Ounces. So she was definitely on the lower end of the spectrum from what I estimated on chop day, but still in the range. The buds are very tight, and smell like like cheese. I am only running one mature auto at a time now, so next up will be the Acid Dough from Ripper Seeds. I hope everyone has a great rest of your weekend, stay safe and Blaze On!!