
Processing
Likes
Comments
Share


@Joedirt
Follow
Slow grow so far... I’ve been out of town for two weeks and had another hand taking care of her, which she didn’t like. So far so good. Great earthy smell coming off her...


Likes
14
Share


@Bread_n_Buds
Follow
Our number #15 is the tallest of the grow, a lanky that seems to fill out well, we always hope it gives its best in this respect because if it finishes filling well it will be perfect.
We measured it at 125 cm which is not bad for an 11lt pot indoors but we are waiting to see the flowers that swell slowly but seem to swell.
https://seedsmafia.com/en/
https://www.mars-hydro.com/
Processing
Likes
68
Share


@themartian911
Follow
hi guys I take the photos with a new camera i take it in 4k mod 😀👍 but idk if it's 4k on the website because he resizing the picture. 😒
some news we can see the roots go through the pot. She can take more oxygen 😂
I do sometimes some small defoliation.
I reduced hours on week 6 to switch to flowering period, the way than i take :
day1 18/6
day2 17/7
day3 16/8
day4 15/9
day5 14/10
day6 13/11
day7 12/12

Likes
8
Share


@Spliffi
Follow
Heya👍🤙👍🌱
Apricot stopped drinking.
Check out my Facebook profile:
https://www.facebook.com/share/v/H6PnoahTHrEzm63U/?mibextid=oFDknk
Big BIG BIG thank you to Sebastien, Heather from Fastbuds420. You guys are the best. Can't wait for the next live.
Even Bigger shout out to Hydroponic.co.za. My local Hydro Shop and Sponsor. Thank you Sir.
👍🤙👍🌱

Likes
7
Share

@The710Garden
Follow
Good yield,good terpprofil on Both phenos Crazy trichome Productions!
I will Look what she will she will do it i dial her in in a next run,theres so much potential in this genetic!


Likes
20
Share


@BudXs
Follow
Well, it looks as if one of the 3 plants is a male. I live in denial for one more day and then I toss it. Not sure which plant it is, as I painted over the strain names when I painted the cups grey. Smooth. So I will find out soon. Otherwise, good weather and some good growth. Roots are balled up at the bottom of the dutch bucket reservoir, Im sure, because I let the drip go dry for a day or two and the plants were droopin (coco)

Likes
38
Share


@Lui1983
Follow
1 of the autos is finished and hanging. Maybe 2 weeks to go for the other one. The candy kush will get a haircut in the next week👍 the future one looking good so far but 1 is a little bit behind. Same with one of the candies🤷♂️ but i have no rush as long as they look healthy. Im still impressed with the lights and the new tent was a good choice too😁 i think they will finish around christmas

Likes
6
Share


@IQuSX
Follow
Hi, topman!
In my opinion, this would be an important performance!
The roots of the second plant replace the first plant in the root ecosystem! I have not seen such experiments! And I think this method will be used next time by other growers!
For comparison, there are ordinary processes!
Follow the process and be one of the first to witness the AUTO stimulations Revolution!
Now the left one is 15 days old, and the right one is 31 days old from moving under the light!
Likes
39
Share

@squalino
Follow
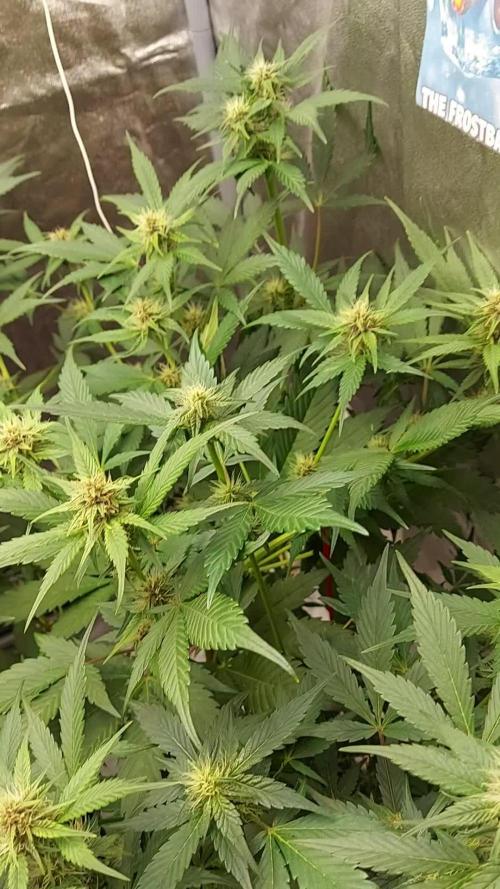
Journal de Culture : Frost 1 (Semaine 6)
Génétique : Frostbanger (F2 Perso) | Système : Autopot 20L
📣 Remerciements
Un immense merci à toutes les personnes qui suivent ce journal depuis le début ! Un grand merci en particulier à @MIA_BIOTABS et à Mrs_Larimar pour leurs précieux conseils toujours aussi utiles. Merci à tous pour votre soutien !
🛠️ Configuration Technique & Gestion de l'Espace
Éclairage :
Lumatek ATS 300W Pro (réglé à 75%)
Distance lampe/canopée :
52 cm (obtenue de justesse après domptage)
Climat :
Jour : 25°C / Nuit : 21°C
Humidité (HR) :
50%
Tente :
1m80 de hauteur
📅 Évolution, Changement d'Espace et Domptage du Stretch
Observations Phénotypiques & Réorganisation de la Tente :
Sur cette session de Frostbanger F2 perso, la stabilité nous montre deux phénotypes bien distincts qui ressortent entre elle et sa sœur :
un phénotype violet et un phénotype plus vert.
Grand soulagement dans la box :
nous étions à 4 plantes au départ dans cet espace. J'ai enfin pu déplacer les deux MAC 1 dans la tente qui leur était initialement prévue. Avec le recul, je me suis rendu compte que l'une des MAC 1 avait pris une envergure tellement énorme qu'elle masquait et bloquait le développement de nombreuses branches secondaires sur les trois autres plantes !
Aujourd'hui, la structure de ma Frostbanger est vraiment très belle, mais je reste persuadé qu'elle aurait pu être encore plus
impressionnante si elles n'avaient pas été entassées à 4 au début. Maintenant qu'elle a de la place, elle va pouvoir s'exprimer pleinement !
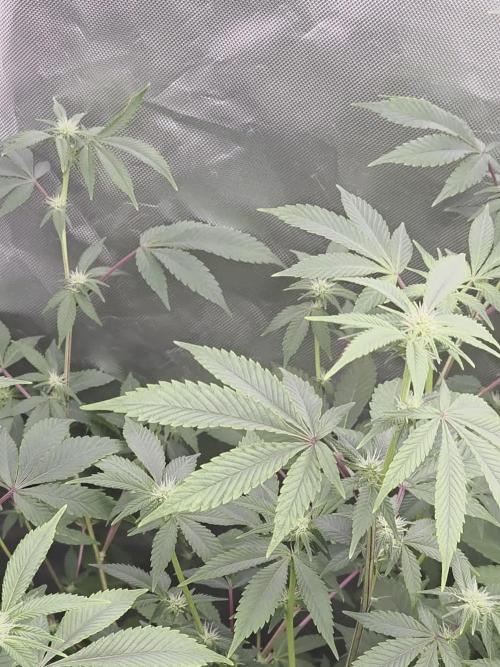
Le combat contre la hauteur (Nouveau LST) :
Hauteur maximale atteinte :
Libérée de ses voisines, la demoiselle a complètement explosé sa croissance verticale pour culminer à plus de 87 cm de hauteur !
Action :
Face à cette poussée ingérable et pour éviter qu'elle ne finisse brûlée dans le panneau, j'ai dû ressortir les ficelles et refaire un gros LST pour la coucher et contraindre sa structure.
Hauteur après LST :
78 cm (Ce qui nous fait tout de même +10 cm par rapport à la semaine dernière, tout en ayant gagné 9 cm de sécurité grâce au pliage).
Le casse-tête du Système D pour la lampe :
Avec un pot de 37 cm de haut, le sommet de la plante après son palissage culmine tout de même à 1m15 du sol.
En ayant supprimé les attaches d'origine qui me faisaient perdre 10 cm pour la suspendre au plus haut directement avec des ficelles (système D),
mon panneau est calé à environ 1m67 du sol.
Cela me permet de maintenir mes 52 cm de distance de sécurité avec la canopée.
Si je plaque la lampe à fond contre les barres de toit de la tente, je n'ai plus que 10 cm de marge de manœuvre totale pour toute la fin de session. C'est très serré !
Nutrition & Gestion Autopot :
Action :
Je viens tout juste de couper l'arrivée d'eau de l'Autopot.
Objectif :
Je laisse le pot sécher tranquillement pour les prochains jours. Dès que le substrat sera bien sec et aéré, je lui ferai un arrosage manuel pour envoyer le PK 5-8 de chez Biotabs afin de donner un grand coup de fouet aux premiers pompons qui pointent le bout de leur nez.
le 21/05
Apport de 0,75 cl d'eau avec 4 ml de PK 5-8 biotabs PH 6,3
Résumé :
Le grand ménage dans la tente et le nouveau palissage ont permis de rééquilibrer la canopée. Les branches secondaires, enfin libérées de l'ombre des MAC 1, vont pouvoir profiter à 100% de la lumière. Malgré l'espace restreint en hauteur, la plante affiche une santé resplendissante et commence à bien cristalliser.
À bientôt pour le premier engraissage PK !❤️
Likes
9
Share


@TheGreenGroomer
Follow
🌿 Grow Update: Day 2, Week 8 of Flower 🌸
Hey fellow growers,
We’ve hit Day 2 of Week 8 in the flower stage, and wow, she’s smelling delicious! The buds have definitely grown since the last update, but nothing too dramatic. Still, her appearance, aroma, and stickiness are on point. Not too shabby for my first run!
There’s a fair amount of larf below that I’ll be tossing, but the top buds? Holy smokes, they’re looking fantastic. I'm aiming for at least 3 ounces, and if I hit that or more, I'll be over the moon!
I'll be starting my 2-week flush very soon to ensure the best quality for the final product. Wish me luck as we head into these final weeks. Let’s finish strong! 🌿💪 #GrowLife #Week8 #FirstGrow #FinalStretch #FlushingTime
Note : Good job i installed a scrog net as checkout my buds in the video posted they can barely hold themselves up if i never added a scrog id of been screwed would of either had to constantly check and tie them up or worst case scenario id of gone in the room and came across snapped branches bent over!!!! SCROG IS OP for huge plants

Likes
20
Share


@Pulsar00
Follow
Welcome back in the Purple Project !
Buds still growing gently, nice earthy smell slowly tickling my nose.
No excess or deficiency at the moment.
I'm not using Rhino Skin and Bud Factor X cause I couldn't find them where I am. I Ordered some from a online spanish shop but it's never been sent ...
Stay tuned for big purple colas,
The Dude

Likes
32
Share


Likes
7
Share


@Ganjo
Follow
Very satisfied with this genetics. From bud to harvest in only 60 days. Once dried and trimmed I got 89 grams of beautiful buds, with a very intense aroma. This plant never gave me any problems, it grew very fast and healthy despite very hot, dry days and the presence of aphids
Likes
46
Share

@German_GrowLab
Follow
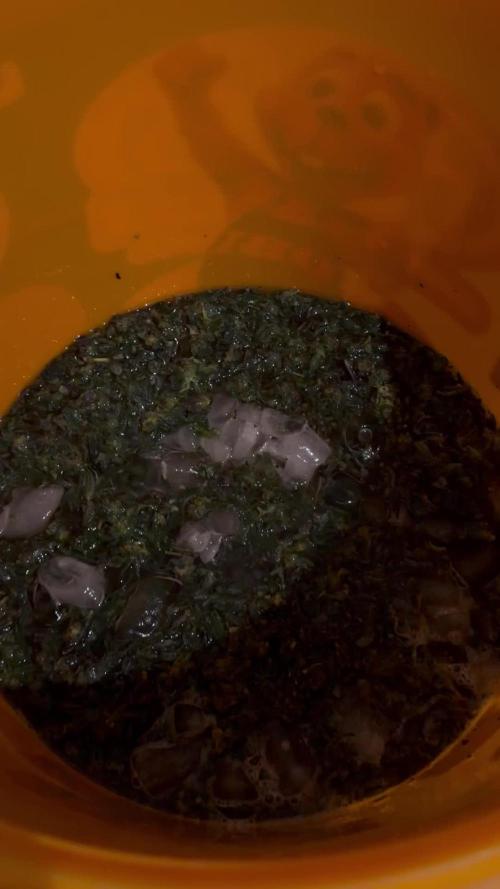
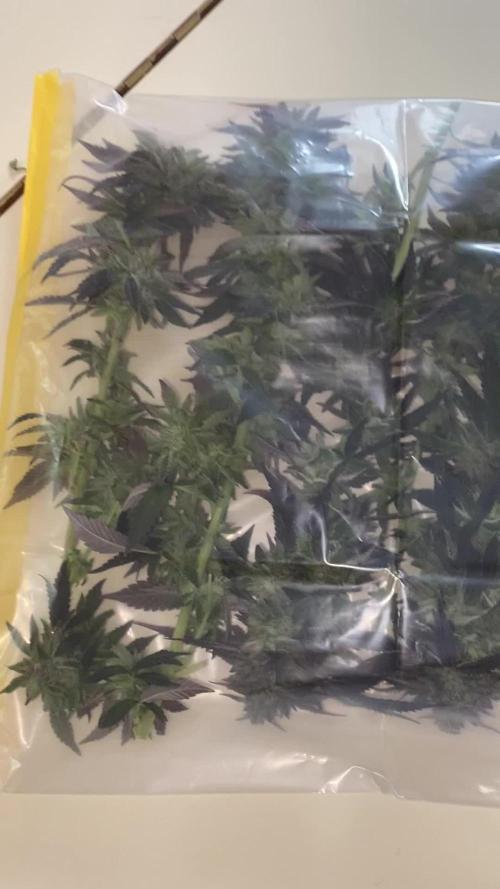
Soooo, nach langem Warten (ich bitte um Entschuldigung, es kam immer irgendwas dazwischen), nun die Ernte! Nachdem ich jetzt alle Sorten verkostet habe, kann ich euch nun mein Fazit präsentieren.
Im Großen und Ganzen bin ich eigentlich ganz zufrieden mit dem Ergebnis, muss aber auch gestehen, dass ich bei der ein oder anderen Strain doch etwas mehr erwartet habe. Bei den nun folgenden Bewertungen möchte ich noch anmerken, dass sich diese rein auf den Outdoor-Anbau der jeweiligen Sorte und nur auf den einen bekannten Phäno beziehen. Man kann grundlegend behaupten, dass sich alle Sorten doch sehr solide geschlagen haben, und das bei diesem … naja, sagen wir mal wechselhaften Sommer. Allerdings merke ich einfach, dass sie lange nicht ihr volles Potenzial ausgeschöpft hatten, was ich immer etwas schade finde. Ich bin trotzdem froh, dieses Projekt durchgezogen zu haben, und gehe mit reichlich neuen Erkenntnissen sowie einem abwechslungsreichen Stash in die besinnliche Zeit.
Was hat mich grundlegend bei den meisten Sorten gestört?
Bei fast allen Sorten, mit Ausnahme der Hella Jelly und der Lemon Tree (wer hätt's gedacht), waren die Terps doch sehr flüchtig. Im Vape kamen sie wirklich gut zur Geltung, wenn man sie allerdings im Joint (pur, versteht sich) geraucht hatte, haben sie oft nach den ersten Zügen an Präsenz verloren, was wirklich schade ist. Dies ist aber wahrscheinlich auf die Anbaubedingungen zurückzuführen und soll den Breedern keinesfalls ihre Qualität absprechen. Wie schon in einem vorigen Kommentar erwähnt, haben sie einfach nicht ihr volles genetisches Potenzial erreichen können.
Ich bin mir des Weiteren auch nicht sicher, ob ich beim nächsten Mal wieder auf die Dryferm-Bags setzen werde. Es war doch ein ziemliches Gefummel, bis man die Blüten ohne Kontakt zueinander in die Beutel verfrachtet hatte. Außerdem hat es meiner Meinung nach die Trocknungszeit eher verkürzt, obwohl ich mich an die Temperatur- und Luftfeuchtigkeitsrange gehalten hatte, was ich auch nicht unbedingt begrüße. Und zu guter Letzt sind sie auch echt nicht billig, wenn man bedenkt, dass ich pro Pflanze teilweise über 4 Beutel benötigt hatte (pro 3 Stk. ca. 25 Euro) und sie laut Hersteller nur dreimal verwendet werden sollten. Das ist doch auf Dauer ein ganz schönes Investment. Aber das sind nur meine 2 Cent zu dem Thema :).
Nach und nach sollten jetzt hier die Erntereports eintrudeln. Ich hoffe, ich schaffe alles heute. Falls nein, seht es mir bitte nach. Falls ihr noch spezifische Fragen zu einer Sorte habt, lasst es mich einfach wissen, dann bekommt ihr noch eine ausführlichere Beschreibung.
PS: Die Filmore-Slim musste ich leider fast komplett entsorgen. Sie hatte die festesten Blüten, die ich je bei einer Outdoorpflanze gesehen habe, was ihr leider zum Verhängnis geworden ist (durchgeschimmelt). Von ihr hatte ich leider keine rauchbaren Blüten. Von der Optik war sie auf jeden Fall ein Champion!
Ich habe von allen Sorten Fresh Frozen in der Gefriertruhe, die ich in der kommenden Zeit wachsen möchte (auch von der Filmore Slim). Also kann ich sie hoffentlich als Konzentrat verkosten.
Das soll es gewesen sein. Ich wünsche euch viel Spaß mit den folgenden Ernteberichten und eine ruhige, besinnliche Weihnachtszeit mit euren Liebsten! Wir hören uns dann hoffentlich im nächsten Jahr wieder, mit vielen neuen spannenden Projekten.


Likes
4
Share


@Rko41
Follow
Les pompons blanc grandissent bien , c’est bizarre elle stretch en s’étirant sans faire beaucoup de feuille en tous cas c’est sympa vraiment différent des autres

Likes
6
Share


@jackh3rrer
Follow
Everything still looking fine. Moved them to 5 Gallon fabric bags. Let’s start vegging!
Likes
179
Share


@Grow3rPT
Follow
Total de Dias 36 (F 06) - 07/09/2021 / Rega com nutrientes, 1ml de calmag e 1ml de Bloom. Na próxima rega ja penso aumentar um pouco o bloom.
Total de Dias 37 (F 07) - 08/09/2021
Total de Dias 38 (F 08) - 09/09/2021 / Rega apenas com agua
Total de Dias 39 (F 09) - 10/09/2021
Total de Dias 40 (F 10) - 11/09/2021 / Rega com nutrientes ( 1ml de Bloom e 1ml de micro + cal mag) e desfolhação das folhas inferiores
Total de Dias 41 (F 11) - 12/09/2021
Total de Dias 42 (F 12) - 13/09/2021 / Rega apenas com agua

Likes
42
Share


@MrJoint
Follow
🍁Dicas e sugestões? As meninas agradecem.
📸Update de fotos, vídeos e informações diariamente.
DAY 15
Muito feliz com a germinação da COP, ela está se desenvolvendo muito bem. Good girl!
💡Coloquei a luz em 50% de potência e gostei do resultado.
💦Reguei a C1 e C2 (250ml cada) com BACTOHEMP bacilos e bactérias + Acophyllum extrato de algas. Elas parecem felizes :)
DAY 16
Escoras de apoio para C3 e C4 até o transplante. COP está muito bem.
O transplante será realizado antes das meninas dormirem (menos stress para as raízes) e serão regadas com 💦1L de água + 🥄1 colher de chá de BACTOHEMP.
DAY 17
C1 e C2 estão cheias de vigor.
COP e C4 reagiram muito bem ao transplante.
C3 um pouco triste com o processo.
DAY 18
Todas as meninas estão lindamente bem!
C3 já está com mais saúde e feliz, 24h após o transplante.
📝NOTA:
💡Aumentei o dimer do Led para 75%
⚠️Temperatura aumentou 3°C no growbox.
DAY 19
🚫🐜Antes das meninas dormirem vou borrifar óleo de neem (250ml) para evitar pragas e insetos.
DAY 20
Hoje foi dia de beber água! Dia de rega, as meninas estão todas saudáveis.
DAY 21
C1 e C2 estão com muita sede! Estava regando 125ml/dia, hoje aumentei a para 250ml/dia.
Após a difícil germinação COP está crescendo muito bem.
🎃Obrigado por verificar o meu cultivo.
