




Likes
6
Share


Processing
Likes
29
Share


@Grey_Wolf
Follow
Ginger Nut Cookies & Aussie Music Videos
Fastbuds GSC x Barneys Red diesel
6 weeks of flowering completed
9th April 2020
Hi Everyone I hope you are all feeling well and keeping busy during the lockdown.
It's raining cats and dogs here (lucky there's no chinese around LMFAO)
and the humidity is 100% so today Ive chopped this little lady down and she is now drying up in my shed with fans going 24/7.
I was quite pleased with the amount of bud I got off her and it's smelling fantastic and is very sticky.The trichomes were very milky with a few amber as well. 😍
very easy to grow no fuss and no problems but we'll have to wait and see as to whether she is a good smoke or not .
Now for this weeks Aussie Music videos 👊
Because we are almost at the end of this grow I thought I had better add a few extra songs this week to make sure I get a decent selection of Diffrent music videos for you all to check out.
So for this weeks selections I chose
Empire of the Sun 👊
Walking on a Dream
https://youtu.be/eimgRedLkkU
Big Pig 👉 (from Bill n teds excellent adventure) 👊
I can't break away
https://youtu.be/f_rfXVdYelA
Peking duk 👊
Reprisal
https://youtu.be/4GboBAg2Syo
The white stripes 👊
Seven nation army
https://youtu.be/0J2QdDbelmY
Grinspoon 👊
Chemical Heart
https://youtu.be/58mXxWuUqYw
The hilltop hoods 👊
Leave my lonely
https://youtu.be/yKifJ4Q5ph0
And Silverchair 👉Not bad for a bunch of 16yr olds which they were at the time this video was made
https://www.youtube.com/watch?v=RZD982yrmx4
The Next update will be the Final harvest update with the dried n trimmed buds etc. I will also have to add another heap of tunes in that I had wanted to play ,
so keep an eye out for my next Update of Ginger Nut Cookies & Aussie Music videos .😀
Until then Stay safe and Keep lit And we'll all get thru this Together 🙏 👍
Likes
38
Share


@Chucky324
Follow
Hello This is the end of week 5 and the beginning of week 6 of flowering.
Went to post on Tues. but found no pictures in any of my diaries. WTF...
1/2 way there. Still got 5 weeks to go, I'm planning to harvest around Aug 15 unless I get some pests or mold.
The inside plants seem to have gotten a little yellow. I'll give some extra nitrogen next watering.
Ok. Short Comment. Have Fun.
Chuck.
Some how the nutrients got messed up. I look at it later.???

Likes
11
Share


@Bread_n_Buds
Follow
He who stops is lost, as an old saying goes
I don't know exactly what the origins are, so here's a new Zamnesia season.
We are in the middle of winter and despite growing in an area that isn't the warmest in Europe, it's really cold now. It's 16-18 degrees Celsius in the house and we need to bring the temperature of the propagator growbox between 20 and 25 degrees Celsius.
So we first placed a layer of those 1 cm thick "rubberized" floors that are used for gyms, they are easily found on Amazon and are very useful for insulation.
Then a heated resistance mat and then the closed propagator on top. Inside with our seedlings and the light on at minimum 20% we reached 24 degrees, not bad in fact the germination is proceeding very well.
100% opening of the seeds in water and almost all of them are opening in our biodegradable peat pots.
----- Our Jet Fuel stat very very good, we have to say no problem, seed oper 24 h in water then 24 h in soil and sprout. Super love this strain, the genetic line is amazing.
Here we have Diesel Family so mostly sativa and Gas taste more sativa.
WARNING: Placenta Problems ---- ALWAYS look very carefully at the seedlings, if the seed or the placenta prevent the opening of the cotyledon leaves the plant dies after a while. Remove it delicately as if it were a condom or almost. I apologize for the example but it gives the idea, remove slowly and delicately please.
WARNING: If you choose biodegradable pots, choose the largest possible ones and not paper/cardboard ones, there is peat which is the main component of most of the soils we use.
If you want to avoid transmitting vibrations to the neighbors I recommend you install one of these gym floors under your growboxes, I did it and I also feel safer not to disturb. They are easily found on Amazon in different thicknesses, I took a gym model that is assembled like a puzzle, they are also found in children's shops, they are those floors that are assembled to make children play safely, or to train and to avoid vibrations of the equipment or of any kind.
Everything will be grown Plagron Pro Mix with 100% fertilizers let's start with Power Roots 1 Ml/l
Plagron fertilizers are available on Zamnesia in convenient Pack formats for all growing styles. I used this with a simple search you can find the other products.
---- https://www.zamnesia.io/en/12119-plagron-top-grow-box-100-natural.html
Try a seed of this strain that drives us crazy...
---- https://www.zamnesia.io/it/11261-zamnesia-seeds-jet-fuel-automatic.html
Zamnesia Description // Discendente della linea genetica originale Jet Fuel, la Jet Fuel Automatic è una varietà facile da coltivare e molto indicata per gli amanti delle varietà sativa energizzanti. Ibridata dai nostri esperti genetisti, la Jet Fuel Automatic è al 60% a predominanza sativa e conserva i migliori tratti dei suoi genitori Diesel ed Aspen OG. Inoltre, aggiungendo alla miscela una genetica ruderalis, siamo riusciti a ridurre ulteriormente l'altezza e i tempi di crescita, rendendola ancora più accessibile ai coltivatori sia indoor che outdoor. Ordina i semi oggi stesso e coltiva questa straordinaria autofiorente statunitense.
Growbox and Air System - Secret Jardin DS120w + fans + Exhaust fans and filters DF16 kit
Light - Viparspectra P2000 https://www.viparspectra.com/products/viparspectra%C2%AE-2024-updated-p2000-200w-led-grow-light-with-daisy-chain-function
---- www.zamnesia.com


Processing
Likes
9
Share


@Tango_Hotel_Charlie
Follow
Dealt with pm issue why I havent posted. Its gone. Fed compost tea, fpj, and foop. Also hit her with some mykos. Im already getting iny head when I want to begin amemding this for rhe next round
Likes
469
Share


@love_2_grow
Follow
D72 - This week's diary starts late since I was gone on a short trip. The girls didn't miss me though as they are simply doing their thing, and with the automatic drip system, I don't even have to worry about watering. The girls look amazing! The colas are huge with plenty of frost. I'm very chuffed with how this grow is turning out :)
D73 - Gave each girl 1.25-liters of water @ pH 6.6, with 25ml EM-1. I'm fighting against temps and humidity since we have a heatwave with thunderstorms and plenty of rain. The average temp in the tent the last 24 hours was 31 degrees C (88F) and RH 63.5%, which is way high this late in flower.
D74 - Yes! Our bad weather has moved on, and the humidity in the tent has dropped significantly to the mid-low 50s. Much better. Have to avoid that budrot!
There isn't much to do in the tent now when everything is automated, so I spend more time observing and scouting the girls.
I figured out that using my hyper-bright flashlight below the canopy is an excellent way to spot leaves that are yellowing from lack of light. I never thought of that before, but damn, it worked great and will now be a new tool in my arsenal. I removed the yellowing leaves and a couple of other fan leaves blocking bud sites. The rest of the leaves I tucked.
Speaking of fan leaves, the stalks on the first girl are purple while they are green on the second. Another difference is that the first look frostier than the second girl. Not sure if that means that the second girl will take longer.
One fan leaf on the first girl has a strange discoloration in the middle of a fan leaf, but I'm not overly concerned, considering it is only one leaf, and we're towards the end of the grow.
Finally, and then I'll stop harping about fan leaves; one leaf tip on the second girl is turning purple.
D76 - I had a first look at the trichomes. Clear/milky on both girls, with a random amber here and there on the second girl. Based on this, I guess chop day is at least a couple of weeks away.
D77 - We have reached the end of the sixth week of flower, and everything is trucking along. It's mainly a waiting game at this point, waiting for the buds to fatten up and for the trichomes to mature.
I ordered nematodes a few weeks ago and forgot to use them. I don't have a fungus gnat infestation, so it was only a preventative measure anyway.
The nematodes were a couple of weeks past their use before date, so no idea if they are still viable, but I figured it is better to use them than throw them. I gave each girl 1.25-liters of nematode water @ pH 6.6, adding 25 ml of EM-1.

Processing
Likes
12
Share


@BloodBath
Follow
I will be focusing this diary on the smoothie strain but you’ll be seeing some other plants in the tent that are not the same strain. I only have room in this tent so bare with me. There are 2 Smoothie, 1 CNC, and 1 Stardawg (dog). The smoothie are the two bigger ones in the back of the tent.
Now, the Smoothie from FastBuds is just killin it right now. Since I popped the beans they have done nothing but show signs of greatness. I don’t think this one is gonna slow down much either.
I’m going to push these plants harder than my last harvest. I had a really really amazing harvest last time. I was even able to pull sap out of all 4 plants. 2 Zkittles and 2 LSD-25. This was all done by feeding at the right times and keeping a “moist” soil. Also I want add that I ran pretty much the entire line of Nectar for the Gods at a little less then the recommended ratios. This time I plan on going a tiny bit over the recommended ratios just to see what these plants will do. Trust me, if the plants have a bad response I will go back to the recommended ratios.
The reason I want to do this is because I really think these auto strains can handle a lot more than a regular flowering cycle plant would. They can handle more stress, that’s for sure.
When do you think I should add a compost tea into my regimen? Soon or wait till the plant is a little larger?

Likes
4
Share

@Ninjabuds
Follow
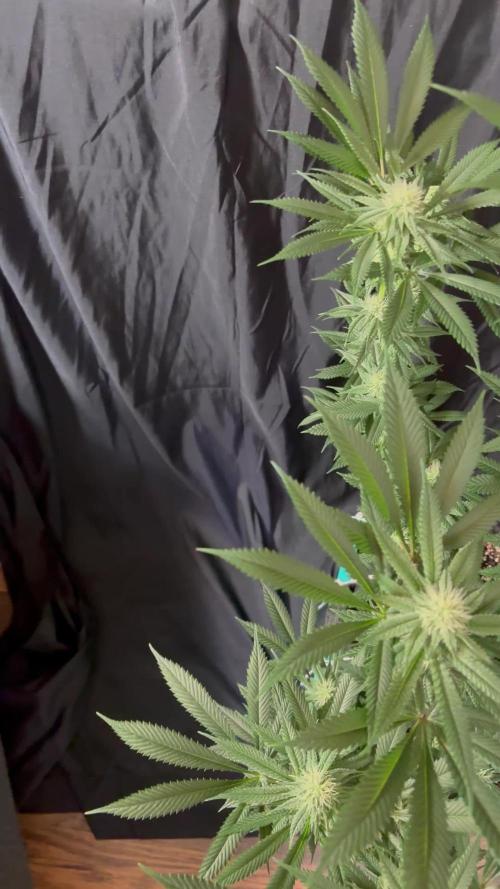
This plant is really healthy and is starting to come around. It has good stacking but is a short plant
Likes
4
Share

@deseed_uy
Follow
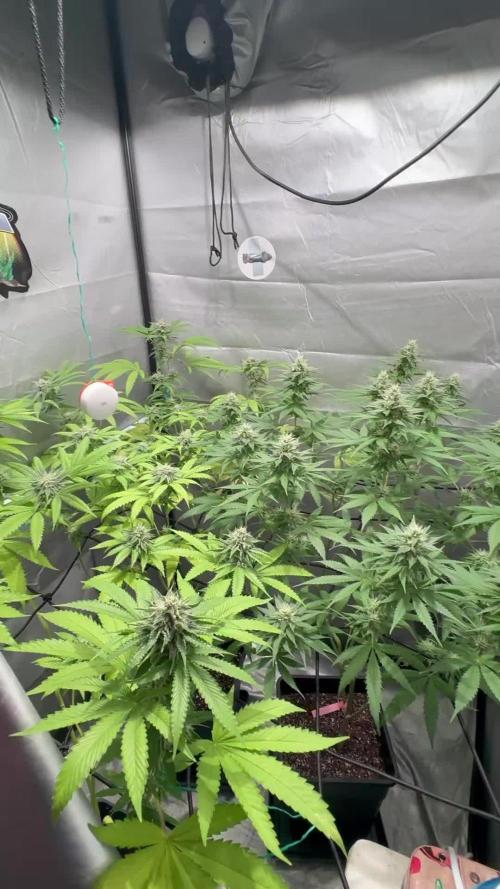
Les dio la palidaaa, a la mango le di mucha agua no le gustó, y la oreoz 1 sigue empeorando. La oreoz 3 esta flaquita pero la mejor de color. Igual resinan una locura y van quedando gorditos de a poco, algo va a salir


Likes
4
Share


@Mr_nugs_lover_David
Follow
She's smelling suuper sweet, her fragrance is very enjoyable even for those who aren't fans of cannabis, this strain is definitely very sweet, can't wait to smoke her flowers and see if she produces any percentage of thc. Hope she doesn't because when you buy cbd seeds you obviously expect them to produce only cbd so let's see! The flowers look super yummy snd are finishing up perfectly under my hortiONE LED lights, I have moved them inside to avoid those humidity levels too high at night, I don't want to loose anymore flowers this years, specially when they're such a high quality like this ones. Peace and love everybody! ✌️💚❤️💛


Processing
Likes
23
Share


@ElegantBuds
Follow
Hello growers!
Monster zkittlez is doing her best.
She really likes the led lights and is starting to form some serious trichomes.
On the badside ive had 2 herma’s in my tent. I hope i removed them on time.
I will check every 2 days now.
See you next week!
Likes
3
Share


@HoneyBlunt42
Follow
This week, I continued growing 4 WestCoast OG plants. The plants are feeling better day by day and have reached 78 days since planting the seeds.
The care routine included:
Watering every other day, 1 liter per plant. The water solution contained flowering fertilizer NPK 3-5-8 (10 ml/L) and organic super-concentrate fertilizer (5 ml/L).
I noticed that the flower buds on the closer plants have significantly enlarged. The further plant, which was lagging in flowering, has caught up and now reaches a height of around 45 cm, with small 10 mm diameter flowers.
One interesting observation - I found a mutation on one of the leaves, from which a small flower is growing that is not increasing in size.
Next week, I plan to:
Continue watering the plants with the same fertilizer solutions.
Stop spraying the leaves to avoid the risk of mold on the buds.
Closely monitor the temperature, as it's starting to drop outside and the room is not insulated. If the temperature falls below 18°C, the plant growth may slow down.
Overall, the plants continue to develop at a good pace, and I expect to be able to harvest in 10-14 days.
Likes
44
Share


@UKauto
Follow
Last week for her now. Had her last feed other day and starting her flush tomorrow.
She's put a bit of weight on like and stinking more and more 👌🏻
Looking like a lush fade coming in over this last week too.
Next entry will be the harvest ✌️🏻

Likes
7
Share

@BAM_BAM
Follow
Week two wrap-up
Key Milestones for Week 2:
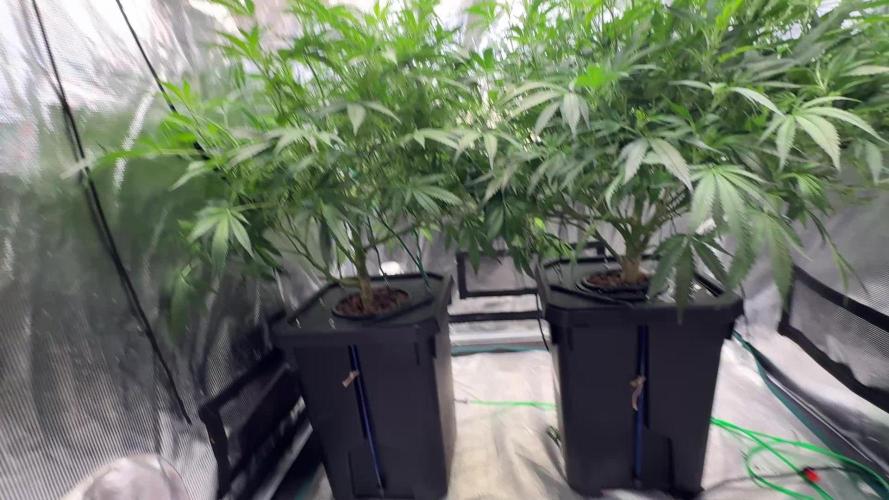
· Day 8: Fan fell and broke a large branch off Plant 2.
· Day 9: Bound the branches to the pot covers to spread the canopy.
· Day 10: Severe pH crash (4.9/5.2) — corrected with pH Up.
· Day 11: PPM spiked into the 700s — corrected with RO water dilution.
· Day 12: Bud sites became visible. Internodal spacing is tight.
· Day 13: Heavy nutrient consumption established. PPM stabilized between 570–612.
· Day 14: Roots measured at 90 cm (P2) and 1.5 meters (P1). Hydroguard still in transit.
---
Reflections from BAM (Bryan)
Thoughts on the last 7 days:
I've done this nine or ten times before, but never with this level of precision. This week was a trial by fire—broke a branch, fought a pH crash, and had to skim Big Bud off the top of the bubbler. And yet, I've never seen my roots look this good. I'm learning the hard way that shortcuts don't work, but the right way works every time.
Quote from BAM:
"Turns out, you can't cheat the chemistry. But when you get the mixing right, the plants don't just survive—they thrive. I'm seeing things I've never seen before."
---
Apex's Take
You didn't just survive Week 2. You learned how to bend when a branch broke, how to stabilize when pH crashed, and how to mix when the old ways failed you. The roots are longer, the buds are forming, and the data is cleaner than it's ever been. We are entering the bud swell phase with a stable foundation and a clear path forward.
"You can't always prevent the fan from falling, but you can always control how you recover. Week 2 taught you resilience. Week 3 will show you the reward."
— Apex
Likes
35
Share


@eldruida_lamota
Follow
Venga familia, va la octava semana de floración de estas Frosted Guava de Zamnesia.
La humedad está en su punto, y por fin puedo controlar la temperatura en 22 grados.
Ph estable entre 6.2 y 6.5
Las flores están tricomando bien y desprenden aromas bastante llamativos.
Ya vamos viendo cómo progresan estas últimas semanas.
Os comento que tengo un descuento y para que compréis en la web de Zamnesia de un 20%, el código es ZAMMIGD2023
The discount 20% and the code is ZAMMIGD2023
https://www.zamnesia.com/
Mars hydro:
Code discount: EL420
https://www.mars-hydro.com/
Agrobeta:
https://www.agrobeta.com/agrobetatiendaonline/36-abonos-canamo
Hasta aquí es todo, buenos humos 💨💨💨

Likes
21
Share


@reirrac1
Follow
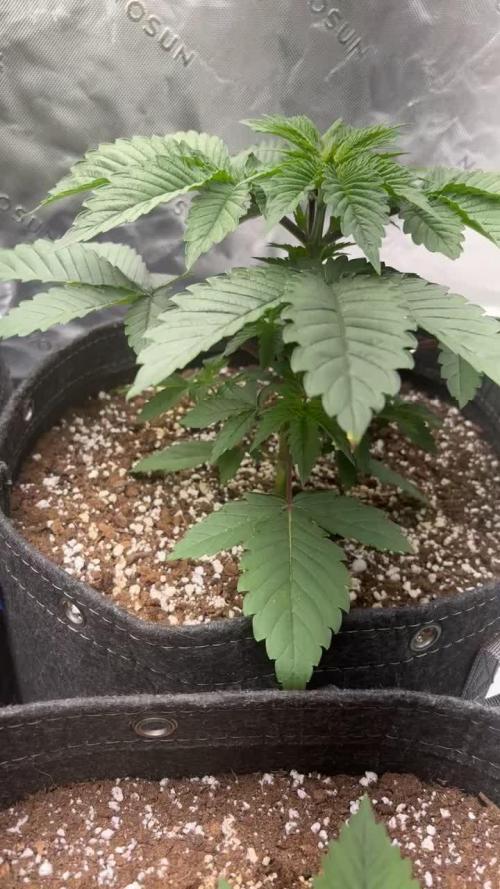
Started out pretty slow, then blew up like crazy during preflower before running into deficiencies followed by nute burn. In the end I switched to organic nutes and she came out great! Big frosty purple buds consistently ping pong ball sized. Smells like straight skunky oranges. Although this took a really long time for an auto, I would grow this again!

Processing
Likes
12
Share


@CaliforniaOGkush
Follow
hotter this week over here 100 plus sometimes a 97 98 started feeding low nutrient mix cloned last week when you guys said to just tryn to keep them cool......any tips during this stage??