The Grow Awards 2026 🏆 


Likes
Comments
Share
@CRIM_mir
Follow
NOV 17 (DAY 52): Oooohhhh... I let the plants go too long without watering them. Plant 3 looked so limp and pathetic, I was afraid to touch it. I have got to start setting a reminder to pick the pots up every day to be sure.
NOV 18 (DAY 53): Everyone is looking much better now that they have been thoroughly watered. They need to be fed next time I water.
NOV 20 (DAY 55): The fan leaves on my comparison plant, which up to now had been light years ahead of the others, are now rapidly yellowing and turning brittle. And Plant 3 is also starting to look lighter yellow green... time for food.
I mixed everything as per FF’s feeding schedule (minus the dry ingredients and plus a few other things), adjusted the solution’s pH, and then diluted it to 1500ppm. I’m a little uncertain about what to expect from my comparison plant... so I’m feeding it at least one more time.

Likes
33
Share
@NuggetPawn
Follow
More calm this week, not a lot of people mention on here that the work load reduces a couple weeks after the big stretch. Not had to do too much except a little bending as she’s still getting a bit too close to the lights again.
Most of the fan leaves are off now, that I can reach that is.
No more reservoir changes now until it gets the chop, as my nutrients stay fairly consistent for the next 3-5 weeks. At around 950 TDS @ 0.5 or 1900 PPM.
Still no nutrient deficiencies, the longest stretch I have gone without at least some spots or marks on leaves.
Would be interested to know what you guys think she might yield now she’s just about into her 5th week of flower?

Likes
40
Share
@BudXs
Follow
These 6 slurricane are set up to be some frosty MFr's. 4 phenos, im hoping at least one of em is the frostiest nug ive ever seen, cuz thats what the marketing told me. A smaller stature plant than some of the others, but one of em is just a fkn mutant. The growth in the coco/perlite hempy's is astounding, right up there with DWC. Many of these girls have outgrown their mother which resides in 5 gallons of soilless. Loving the node structure and red stems on this plant.
F11 and all is good. Environment on point, smell in check, and visiting the garden only 3 times a week. Stay tuned for some monster nuggies!!!

Likes
12
Share
@Willy_Balls
Follow
First week of flowering.
Girls are super happy. And drink a lot. I very much prefer the lower plant count with 8 plants. And I’m probably not going to go back to more than 9 plants. Perhaps will even try 6 or 7. 12 or 16 was a bit of overkill. Maybe with super short veg it has its place.
26.01 first day of flower.


Processing
Likes
12
Share
@WheezyMango
Follow
After keeping an eye on the tricomes I've seen most of them turn white so last night I mixed 1.5ml/L of flawless finish and saturated the soil and left to set overnight this morning I flushed all 3 plants so far they dont look stressed out at all I was scared being my first time yet I still dont know if it was successful

Likes
9
Share
@Mo_Powers
Follow
the weather in germany is still totally changeable. temperatures from 10 degrees at night to 30 degrees during the day. and lots of rain. she's still alive, that's the most important thing. 💪


Likes
4
Share
@Sebb_growt
Follow
Die O.G. wächst unglaublich schön und hat einen guten stretch hingelegt. Auch hier geht die Blüte fleißig vorran und sie nimmt immer mehr Platz ein.
Sie ist mein Goldstück in diesem run und ich bin sehr auf die Blüte gespannt.

Likes
4
Share
@oregonian
Follow
Memory loss began to show female by july 4, so it's now 6 weeks since first hairs. I am using bamboo stakes (only on this girl) at about 3.5 feet above soil to create a canopy, similar to a SCROG. There are hundreds of budding sites. Star killer and Calif orange are just beginning to show female. Star killer 1 is being allowed to bud with minimal interference, star killer 2 has me reducing the number of buds to a dozen and cali will have only 2 colas. Daytime temps range between 80 and 100. But they are used to it and are thriving. nighttime 55-70. in containers. fed organic in flower twice. watering is whenever soil dries a bit and pulls away from edge. about 3 gallons does all 4 plants.
Plants are between 53 and 60 inches tall. Memory loss canopy is nearly 4 feet square. heavy watering 3.5 gal all 4 plants total.


Likes
10
Share
@Posse
Follow
Good 🦍, nice looking AutoBuds, Upper buds are ready, did some serious defoliation, maybe a bit too much 😁, I was on a row, planning to cut soon, give some extra light to the lower buds, looking forward to dry and smoke this Gorilla glue,

Likes
140
Share
@MrJones
Follow
mrjones - Slurricane #7 S1
🌱Slurricane #7 S1
@inhousegenetics_official
👨🌾🏽GD Grower: MrJones
🔹🔹🔹🔹🔹🔹GOALS🔹🔹🔹🔹🔹🔹
🌞Environment - 75/80℉ and 55% Humidity
💧 Feeding - Advanced Nutrients Organic
⚗️Soil - 50% Ocean Forest / 20% Tupur Royal Gold / 10% Earth Worm castings / 10% lobster Compost / 10% Additional Perlite
🍃Training / HST, Will be topping, Cloning, and creating larger plants, and placing to flower under a trellis
🕷️ IPM - Will be using Green Cleaner" 1 OZ per Gallon, and CannControl from Mammoth alternating between products each month for Integrated Pest Management.
💡Using 480 Watts of LED Lights.
🔹🔹🔹🔹🔹🔹🔹🔹🔹🔹🔹🔹🔹🔹🔹
📜 Rambling - Week 17 / The number of buds that are growing here is just insane, the smell coming from the tent is amazing, I am noticing the leaf color getting a bit too green, I will decrease the PPM/EC by 200 for the next few weeks.
🔹🔹🔹🔹🔹🔹🔹🔹🔹🔹🔹🔹🔹🔹🔹
▶️ Sunday - 05.30.21 / No watering today - these ladies are looking great
▶️ Monday - 05.31.21 / Fed with half a gallon of above-mentioned nutrient / continue defoliation will need to focus this down,
▶️ Tuesday - 06.01.21 / No watering today - these ladies are looking great
▶️ Wednesday - 06.02.21 / Fed with half a gallon of the above-mentioned nutrient
▶️ Thursday - 06.03.21 / No watering today - these ladies are looking great
▶️ Friday - 06.04.21 / Fed with half a gallon of the above-mentioned nutrient
▶️ Saturday - 06.05.21 / No watering today - these ladies are looking great
🔹🔹🔹🔹🔹🔹🔹🔹🔹🔹🔹🔹🔹🔹🔹
Likes
1
Share
@Barzenegger
Follow
On the second day of this week, I filled the reservoir again. This time I have an RO filter available to deal with the tap water (EC 0.8mS). I mixed 10l of RO and 10l of tap, which netted a pH of 7 and an EC of just below 0.4. But of course I had to add more CalMag to make up for the filtered calcium. Even after adding all nutrients, the EC was still just shy of 1.5mS which surprised me a little, I was expecting to land closer to 1.7mS, so I am going to increase it a bit next time, probably to around 1.9mS.
The plants are in stretch, and they are indeed stretching quite a bit. NYC and SAD are the tallest right now, although the BJ has been catching up a bit recently. They are between around 45cm and 58cm tall, so overall not too much of a difference, which is also good, but I need to keep an eye on it as I would like to keep them below 70cm.
I have no plans to put a net in place at the moment, but this depends on the growth of the next week.
All of the plants have been showing preflowers around day 7-9 of flower. No signs of pollen sacs so far. Aside from one calcium-deficiency-lookalike type of leaf issue, which I suspect is something else, ther are no issues whatsoever, which makes me happy.

Likes
3
Share
@Rko41
Follow
La banner m’a l’air compacte elle a stretch de 8cm mais c’est bientôt la fin je pense les poils blancs se renforce bel progression

Processing
Likes
5
Share
@Ensign420
Follow
Week 02 Introduction
This week has been a bit of a struggle. Had my first experience dealing with slime and brown algae. But I think adding enzymes and increasing the beneficial bacteria helped to fix the issue. Also experienced nutrient burn for the first time. My nutrient solution strength got as high as 671 PPMs. So backed it down to about 430 PPMs during the end-of-week reservoir change. Also cut Hydroguard (expired?), CaliMagic, and Superthrive from this grow. Now she's still stunted, but is starting to recover. Hopefully...
[START OF WEEK 02]
Day 01 - Monday - 08/10/20 - Total Days: 008
-----------------------------------
- [0830]: Still looks a bit yellow. But getting larger!
--- Solution strength was at 248 PPMs.
--- Just topped off with a bit of distilled water
--- PH went up to 6.1 so PH'd down to 5.8
--- Ran the top feed for a bit to wet the hydroton.
- [2130]: She's looking even more yellow now.
--- Even the new leaves are really yellow.
--- Decided to add more base nutes.
--- Added 4ml of Sensi A
--- Added 4ml of Sensi B
--- Now at about
--- Solution Strength went up to 304 PPM.
--- PH was at 6,
--- Also raised the water level a bit more.
--- I really hope it's a nutrient deficiency and not an over-watering issue.
--- Please live!
Day 02 - Tuesday - 08/11/20 - Total Days: 009
-----------------------------------
- [0830]: Looking less droopy. But still yellow.
--- Decided to do a reservoir change.
--- 4.5gal of distilled water
--- 8ml of Sensi Grow A
--- 8ml of Sensi Grow B
--- 8ml of Voodoo Juice
--- 4ml of B-52
--- 4ml of CaliMagic
--- 4ml of Hydroguard
--- 4 drops of Superthrive
--- PH'd down to 5.8
--- Solution strength: 302 PPM
--- Since I didn't want to risk over-watering the rockwool, I did not to do a top feed, may do one tonight after the sleep cycle (lights are still set to go off at 10am and back on at 4pm).
--- As I was doing a reservoir change, I noticed that the tubes and bucket were a bit slimy. Didn't really stink or anything. Is this normal? Maybe due to the Hydroguard and Voodoo Juice?
--- I hope she gets better soon!
- [2215]: Getting larger! But still yellow.
--- Also can see a root growing through the net pot! Tiny little thing but it's there! Will have to start dropping water once more appear.
--- After looking over a few DWC diaries using AN nutes, seems like my solution strength is still too low. Most around this stage average around 500 PPMs with about 4ml per gallon.
--- Top fed for a minute to wet the top of the hydroton.
--- Solution strength went down to 263 PPM.
--- Added 8ml more of Sensi A
--- Added 8ml more of Sensi B
--- Now base nutes are at 16ml for 4.5 gal of water.
--- PPMs went up to 411.
--- Still lower than 500 PPMs, but that's okay.
--- PH was at 6. Not sure if I should adjust PH using AN nutes. So going to not ajdust unless PH goes above 6.1.
Day 03 - Wednesday - 08/12/20 - Total Days: 010
-----------------------------------
- [0830]: Looks like more root growth!
--- She still looks yellow. But leaves are perky.
--- PH was at 6.2 so lowered down to 5.8.
--- Solution strength was at 394 PPMs
--- Since roots are still growing, I decide to lower the water level a bit. Now water level is a bit below the net pot.
- [2200]: Root is getting longer!
--- Slime is returning. Not sure why.
--- Solution strength: 357 PPMs
--- PH: 6.1
--- Decided to add an enzyme along with more beneficial bacteria to hopefully cure the slime.
--- Added 16ml of Sensizym
--- Added 5ml of Hydroguard
--- Added 8ml of Voodoo Juice
--- New solution strength: 430 PPMs
--- New PH: 6.1
--- Top fed for a minute.
--- This slimy residue is really freaking me out! I hope the added enzymes will help eliminate the slime.
--- Going to do a full reservoir sterilization/nutrient change over the weekend. Please survive until then girl!
Day 04 - Thursday - 08/13/20 - Total Days: 011
-----------------------------------
- [0930]: I think the enzymes worked! There is little to no slime now!
--- Although I think the root was also dissolved in the process. It's now just a little stub sticking just below the net pot. The enzyme is also suppose to dissolved dead roots too but guess that root was too weak? Not sure what happened there. But I think the slime is cured!
--- Solution strength went down to 395 PPMs. Decided to add more base nutrients.
--- Added 8ml of Sensi A
--- Added 8ml of Sensi B
--- Added 4ml of B-52
--- Solution strength went up to 598 PPMs.
--- PH was at 6.1
--- As long as the PH is between 5.5 and 6.3, I'm not going to use PH Up or Down. But still will monitor PH levels.
- [1715]: Checked up on her after her nap and shes looking alive but stunted. But no slime!
--- Decided to add some sugars to help maintain the enzymes and beneficial bacteria.
--- Solution strength was at 587 PPMs.
--- PH was at 6.2
--- Added 8ml of Bud Candy
--- Solution strength went up to 671 PPMs.
--- PH also went up to 6.3
--- Lowered water level a bit to hopefully promote more root growth.
--- Top fed for a minute.
--- She is getting bigger, but still looks yellow.
Day 05 - Friday - 08/14/20 - Total Days: 012
-----------------------------------
- [0915]: Leaves look a little burnt on the tips. Still no slime.
--- Going to back off on the PPMs to hopefully fix the nutrient toxicity.
--- Solution strength was at 632 PPMs
--- PH was at 6.3
--- Added/Removed water until PPMs were at 536.
--- PH was still at 6.3
--- Raised water up a bit, then top fed for a minute.
- [2200]: Looking better. Still yellow though.
--- Solution strength: 514 PPMs
--- PH: 6.5
--- Added PH down.
--- New solution strength: 518 PPMs
--- New PH: 5.2
--- PH was kind of high. So decided to PH down. Had to use quite a bit to bring it down. But eventually got it to drop down to 5.3. A little low, but so far, the PH has always gone up so wanted to start it really low.
--- Ran the top feed for a minute to re-saturate the top of the hydroton.
Day 06 - Saturday - 08/15/20 - Total Days: 013
-----------------------------------
- [0830]: She looks stunted. leaves are still yellow.
--- Solution strength: 514 PPMs
--- PH: 5.6
--- Top fed for a minute.
--- Not sure what to do at this point. Going to do another reservoir change soon. Hoping she lives until then.
- [2145]: Looking pretty much the same.
--- A bit of slime has returned. Since I've been diluting the nutrient solution, the enzyme ratio has dropped. So I guess this is expected.
--- Also noticed that slime build up was on the air-stones. Never really checked the stones so not sure how long that has been there. Looks brown too, which can't be good.
--- Going to do an H202 sterilization of the system (minus the net pot) tomorrow so did not add anything.
--- Lowered the water level to below the net pot.
--- Then top fed for a minute.
Day 07 - Sunday - 08/16/20 - Total Days: 014
-----------------------------------
- [0900]: STERILIZATION DAY!
--- Decided to skip today's night cycle for a deep clean.
--- I'm hoping that skipping a night cycle won't be too stressful.
--- Temporarily moved her to a new bucket.
--- Used about a half of gallon of straight distilled water to flush out the net pot.
--- Drained the system and wiped up all the brown sludge. Also removed the air stones and cleaned up all the goo.
--- Filled the system with 2 gallons of distilled water and at least 30ml of food grade hydrogen peroxide (35% strength).
--- Yea its a lot, but since I'm not going to sterilize the system overnight, I went with a really high doseage. Basically I kept adding until I started to see little bubbles start to form.
--- Then I ran the water pump.
- [0915]: Boiled the air stones in tap water for about 10 min. Then reconnected them to the airlines.
--- I let the air stones and hose soak in the sterilization solution for about 5 minutes so the peroxide can absorb into the stones. Then ran the air stone to help mix and agitate the solution.
--- Occasionally, I'd repeat the process of turning the air pump off for a few minutes to let the stones soak.
- [1000]: Covered the top two row of holes of the net pot with some aluminum tape. Hopefully this solves the light leaking in through the hydroton.
- [1200]: Used an old toothbrush and scrubbed the pump clean. Then drained the system.
--- Refilled with more distilled water and peroxide. Again added a lot.
--- Ran system again to sterilize even more.
- [1530]: Drained the system and refilled with distilled water to rinse.
--- Ran the system for a few minutes, then drained and rinsed again.
--- Did this a few more times over about an hour.
- [1630]: Added 4 gallons of fresh distilled water.
--- Added 15ml Sensi Grow A
--- Added 15ml Sensi Grow B
--- Added 12ml of B-52
--- Added 16ml of Voodoo Juice
--- Added 16ml Sensizym
--- Solution strength was at 430 PPMs
--- PH was at 5.6
--- I was going to add Hydroguard, but I think the bottle is expired. Since 2017 or 2018!? I think Hydroguard is good for up to 2 years from the date on the bottle or 6 months after opening. So not going to use from now on. I wonder if this could have contributed to the slime build up.
--- Also removed the CaliMagic and Superthrive too. Going to only use AN products to eliminate the chance of incompatible nutrients.
--- Placed her back in the bucket and top fed for a minute.
--- Here's hoping for the best. Going to let it ride until morning! Please feel better!
[END OF WEEK 02]
Processing
Likes
14
Share
@WooderIce
Follow
Great week 5, growth this week was great. Stalks are thick, and did some tie downs to spread out growth. Biggest surprise was today day 35, saw what appears to be pistils on one plant! Very surprised, as this is 10 days earlier than Ive seen in the past. Its late, so i will dig deeper and check every plant tmrw when I feed.


Processing
Likes
2
Share
@Cannibalgardens
Follow
Well not a whole lot to say this week she fading and the smells are more rotten in this bud a bit the over ripe fruit smell is good .. she had lots of resin and the buds are getting dense now.. The strain is very nice and easy to grow with a big for giveness when it comes to overfeeding and she loves training ...


Likes
6
Share
@Muravushka
Follow
text to edit nbvnbvnbvnbvnbvnbvnvnbvnbvbbbbnjbmhgdhgshcnkbvfxvvb,nmmbvcxcvbncxcvbnbvcvbnmtext to edit nbvnbvnbvnbvnbvnbvnvnbvnbvbbbbnjbmhgdhgshcnkbvfxvvb,nmmbvcxcvbncxcvbnbvcvbnm
Likes
15
Share
@The_Stonedbaker
Follow
Welcome to week 7!
Almost time to flower and things are looking good.
Since last week I did some light defoliation and cleaning up of the bottoms over a few days. I also lightly tied some of the branches out to allow a bit more light penetration but also to spread the canopy.
This week (at the end of the week) the plants got one water containing a 2tsp of kelp, and 2 tsp of freeze dried coconut.
The ladies also got one foliar spray with Mountain Organics sprouts, citrus and Rita oil combined with a small amount of Method 1pps (see picture in week 6).
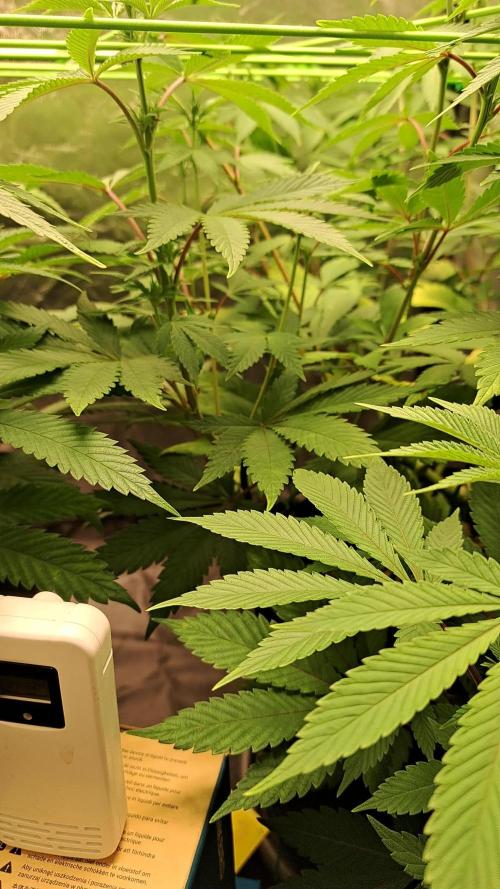
Temperature and humidity has really been steady thanks to the help of my Grow Ratio ESU and fans.
Hoping I can keep this rate of growth into flower.
Strain: Moon Boots bred by Archive Seed Bank
Tent: 2" X 4" @highdrogro
Light: Scyence Dragon S Turbo 450 Watt LED
Light Cycle: 18/6
Soil: Black Swallow Living Soil, KIS organic mix
Air Circulation: AC Infinity Cloudline T6 Inline Duct Fan
7 Gallon Living Soil Bags: Grass Roots Fabric Pots
Likes
8
Share
@GrowingABushWithButch
Follow
It's week 01 Day 02 Of 12/12 For My 02 Kombucha Cream By atlasseed . And For My Snow White & SpliffStrawberry By Spliff Seeds Amsterdam . So Yesterday All 4 Lady's Received there Transition Feed. And Prep For Flower. The Kombucha Cream 3-Part And Snow White. Received 4ml Of Emerald Harvest Nutrients Grow, Micro,Bloom,6ml of Emerald Goddess, 4ml Of King Kola, 4ml of Honey Chome And 4ml of Quad.AG Products Fulonic. pH at 6.3 ppm at 766. On Runoff. My Kombucha Cream 3-Part as a pH of 6.5 and ppm at 932. My Snow White as a pH of 6.4 and ppm is at 723. The Kombucha 2-Part and SpliffStrawberry Received 5ml of Emerald Harvest Cali Pro Grow A&B,6ml Emerald Goddess, 4ml King Kola,4ml Honey Chome And 4ml Of Quad.AG Fulonic. I pH the Kombucha Cream 2-Part at 6.2 Ppm at 613. On Runoff pH is at 6.3 ppm is at 833. My SpliffStrawberry I pH at 6.5 the pH was a little low on my last feed. Ppm is at 613 l. On Runoff pH is at 6.0 ppm is at 756. I like a pH of 6.2 in Flower I will work on getting the pH at 6.2 on the next few feeds.The Plants are really Loving Life Very happy and Perky This Morning.
Happy Growing Growmies 🤘🏻

