


Likes
38
Share


@Zurban_Poison
Follow
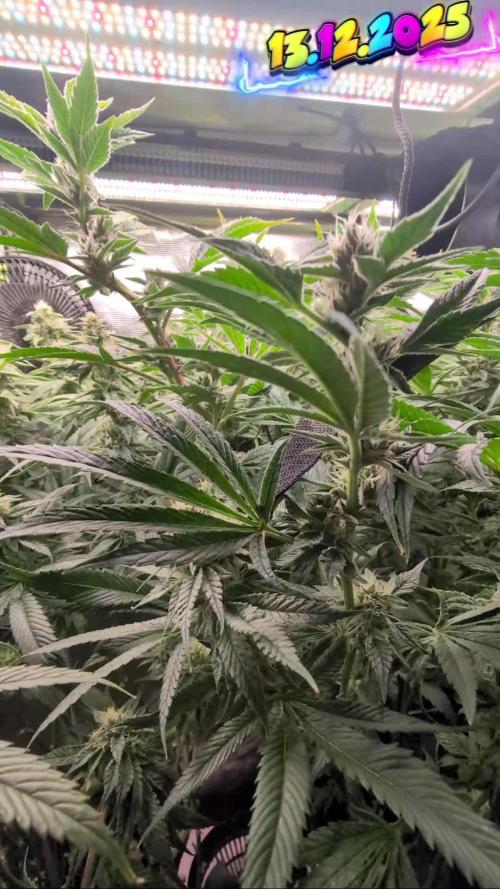
I won't say anything! look at the photos and videos and you yourself will understand everything! namely that this is just a cool bush!

Processing
Likes
8
Share


@organically
Follow
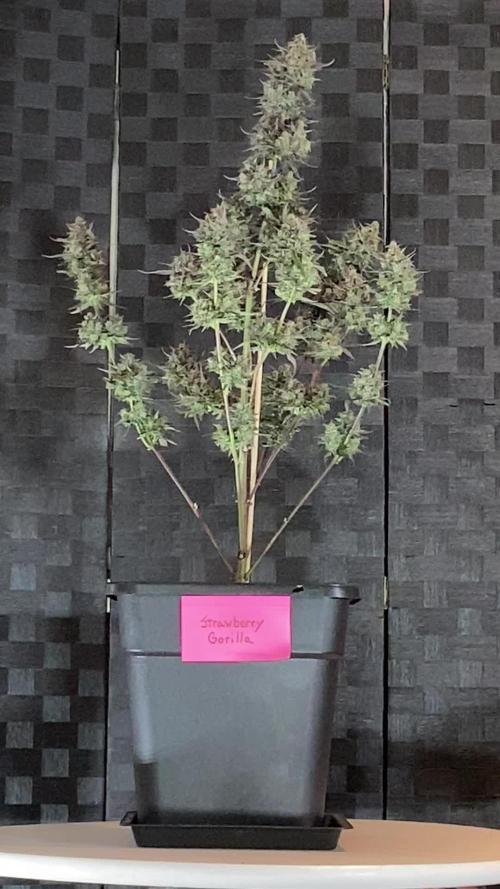
So... the Preflowering is real... we've got immens Plants which just want to Flower.
I'm totally impressed about this Green Gold at Outdoor Conditions.
-
Greetings your organically
» tried and true, since simple is the best!


Likes
86
Share


@JuanHaze_Arg
Follow
18/05 se riega con 2,5L de agua (60% de agua de osmosis inversa + 40% de grifo) + 1ml/L de calmag de top crop, + 0,5gramos de trico+ de namaste nutrientes.
21/05 se riega con 3 litros de agua (50% de agua de osmosis + 50% de ml grifo) + 1,5ml de cal mag de top crop. + 0,5 gramos de monster bloom de grotek PH: 6.4 EC: 1.1

Likes
6
Share


@Moss420
Follow
Purple plant good. Other plants not so good, herming a bit. Glad they are in separate tents. Don't grow bag seeds...

Likes
3
Share


@Trinidad
Follow
20.06 25. Day 30
Took some leaves off lower part of plant. Used plant training clips to bend branches in effort to LST. I will update tomorrow. One love 🏼


Likes
242
Share

@yan420
Follow
Weekly update for Fantasy Feast #5 — and unfortunately, it’s her last one.
The powdery mildew never fully left this pheno, even after airflow adjustments and leaf removal. To protect the rest of the tent, I made the call to remove her today.
This update covers:
• What the mildew looked like this week
• Why I decided on an emergency harvest
• How I removed the plant safely
• What parts are salvageable and what gets thrown away
• How the rest of the tent is doing after the removal
Rest of grow information in week 33
Likes
2
Share


@Ninjabuds
Follow
My Skunk Apple Run plant is still a bit young, but I can see those buds starting to form. It's a bit of a slow starter, with buds popping up all over the place instead of a nice even line. We'll see if adjusting the light cycle or its food might help it along. I'll keep you posted on any changes.
The past few weeks have been so beautiful, watching the plants grow and change. It's amazing how something so small and fragile can turn into something so strong and vibrant. Now that they're getting ready to bloom, it feels a little bittersweet. I'm so excited to see the finished product, but I'll definitely miss having them around while they're growing.
Processing
Likes
14
Share


@CommanderCannabis
Follow
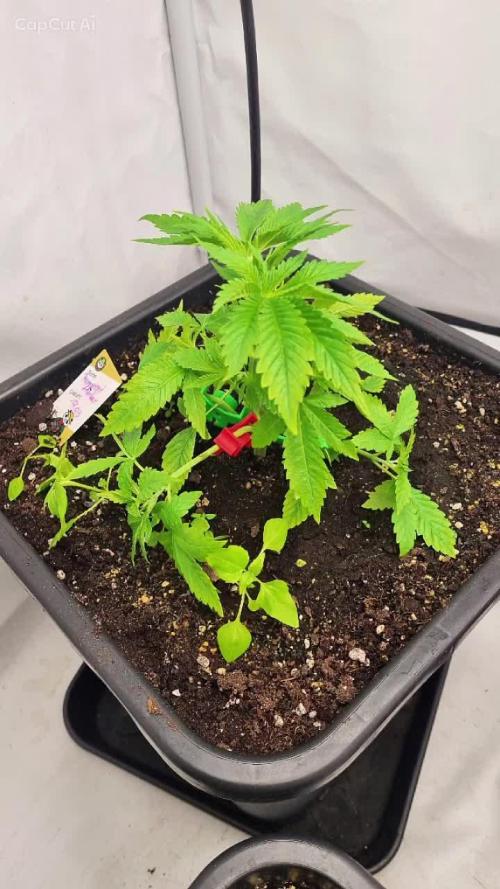
(12-8)Roots are growing. Emily is increasing height everyday. My humidity is really low (low 30's) so I have ordered a small humidifier to put in the A.B.L.E. Grow Chamber. Music selection includes Nirvana, Lou Reed, Joy Division, Fugazi and Led Zepplin. will keep my pH between 5.8 and 6. will also post end of week photos.
(12-9) Added small humidifier to the chamber. It raises the humidity by @ 15% which is OK but I need more humidity for my clone these first weeks. Have ordered a larger humidifier and hopefully that will get me in the high 60's. I'm around 45% at the moment with the small humidifier.
(12-10) The large humidifier did the trick. Got humidity up to 70% and I also installed a drip ring around the top of the container so hopefully that will help the roots grow better.

Likes
3
Share


@Happydays58
Follow
10/02 - DAY 69
- Staying on course. Aromas are getting strong even with the exhaust & filter running 24/7.
- Mo is still drinking 2 Gal every ~36hrs. All buds are getting their purple on without low night temps.

Likes
15
Share


@Kayotic
Follow
* Day 92
* Beautiful plant, still taking her time
*Tiger Bloom/ Recharge/ Compost
Likes
53
Share


@Roberts
Follow
Merlin Mintz Autoflower is doing good. She had got her first lst, and selective defoliation today. Her root tips were pruned. She is looking good, and ready to go. Thank you Aeque Genetics, Athena, and Spider Farmer. 🤜🏻🤛🏻🌱🌱🌱
Thank you grow diaries community for the 👇likes👇, follows, comments, and subscriptions on my YouTube channel👇. ❄️🌱🍻
Happy Growing 🌱🌱🌱
https://youtube.com/channel/UCAhN7yRzWLpcaRHhMIQ7X4g
Likes
6
Share


@Daniel_Tri95
Follow
sorry for the late post this is week 3 She is booming. She’s almost 4 feet tall and the other one is about short and stocky.
It’s 420 somewhere™️
Likes
18
Share


@valiotoro
Follow
Hello everyone week 2 of flower has passed for this Vanilla Latte auto 🍼
Same feeding schedule
Mars hydro FC-E6500 75%
have a great day and wish you all happy growing 😎👨🌾🏻

Likes
4
Share

Likes
15
Share


@Bigmacisback
Follow
the plants also being of the same strain have made three different buds.
The first three photos are of the top left plant, the next three are of the top right plant and the last are of the center plant.
In addition to the marked flavors, there is also a note of pine.

Likes
71
Share


@DogDoctorOfficial
Follow
Hey, everyone! Welcome back to another week of our Anesia pheno hunt journey! We're now in Week 4 of the flowering stage, and things are looking incredible.
Our Anesia ladies are thriving beautifully. Each strain is showcasing its unique characteristics, and the buds are starting to swell up nicely. The trichome production is in full swing, and the aroma in the garden is becoming more pronounced and delightful.
This week, we've made some adjustments to our nutrient regimen to ensure our plants get everything they need for optimal flower development. Here’s the current mix:
Regulator: Ensures strong and healthy growth.
CaMg-Boost: Provides essential calcium and magnesium.
Top Booster: Enhances bud development and density.
P-Boost: Provides phosphorus for strong flowers.
K-Boost: Added this week to support potassium needs for flowering.
TDS: Raised to 500 ppm.
pH: Maintained at 6.0.
Temperature: Steady at 21°C.
The combination of these nutrients is giving our plants exactly what they need to flourish during this critical phase.
Our garden is a vibrant display of life and growth. The canopy is filling out beautifully, and the light penetration is perfect, thanks to the awesome setup from Future of Grow LED. The plants are healthy, with strong stems and lush leaves, thanks to our meticulous care and the excellent products from Aptus Holland.
Exciting News!
We're thrilled to invite you all to check out our YouTube series, Welcome to the Green Oasis! Dive deep into our garden adventures, see the plants up close, and learn all the tips and tricks we use to achieve these results. Your support means the world to us, and we can't wait to share more of this journey with you!
Watch Episode 1 on YouTube and follow along for more updates!
Shout Outs:
Anesia Seeds: Thank you for the incredible genetics.
Aptus Holland: The best in organic and mineral-based nutrients.
Future of Grow: Your LED lights are making our garden shine.
Grow Diaries: The best place to document and share our progress.
Community: You all are amazing! Your support keeps us going.
Stay tuned, stay positive, and let's keep growing together!
Apricot Oreoz = AO
Zoomiez = Z
Future#1 = F
https://anesiaseeds.com/
Plant nutrition - Aptus Holland - https://aptus-holland.com
LED Photons - Future of Grow - https://www.thefuturofgrow.com/
Controls - Trol Master - https://www.trolmaster.eu/
Watering - Autopot - https://autopot.co.uk/
Tent - Mars Hydro - https://marshydro.eu/
Love and attention - Me, myself and i
As always thank you all for stopping by, for the love and for it all , this journey of mine wold just not be the same without you guys, the love and support is very much appreciated and i fell honored and blessed with you all in my life, With true love comes happiness. Always believe in your self and always do things expecting nothing and with an open heart , be a giver and the universe will give back to you in ways you could not even imagine so
More info, the ocasional give-away and exclusive updates from all my adventures can be found - links in the profile description
Friendly reminder all you see here is pure research and for educational purposes only
Growers Love To you All

Likes
9
Share

@Aykos_420Grow
Follow
Montag, 06.04.2026
Tag 18
VEG 2 - Tag 1
Heute war wieder Pflanzengeflüster Montag 😅
Also auch wieder Zeit für ein Update.
Heute bekam die Ladys die 2. Mal pflanzengeflüster nach Anleitung...
Negatives gibt es bist her nicht zu berichten,
Es wurden geld Karten zur Überprüfung und Vorsorge eingesteckt.
Ich bin nun da sie soweit ist ob ich sie tippe, und dann LST einbinde oder sie einfach wachsen lasse ohne toppen jedoch leichtes LST.
Lässt doch einfach mal ne meinung da 😉🐰
Ich wünsche allen grower noch einen schönen weedstermonday
-----------------------------------------------------------------------------
Dienstag 07.04.2026
Tag 19
Veg 2 - Tag 2
Ich muss sagen die kleine legt jetzt aber langsam richtug los, über Nacht hat die Dame wieder etwas zu gelegt
Gegossen wird weiter hin nur mit angepassten Leitungswasser. Den ph Wert steigerte ich max auf 6.5, zur Zeit liegt der genutzte ph Wert bei 6.3.
Einmal die Woche bekommt die cup Pflanze, ihre dusche mit dem pflanzengeflüster, und sie nimmt es super an.
Wer es selbst ausprobieren möchte, einfach selbst bei wizzysgarten.de den living soil und das pflanzengeflüster bestellen. Ich kann es nur empfehlen 😉?
Ich sag erst mal Stay high und bis morgen 😉✌️
------------------------------------------------------------------------------
Mittwoch, 08.04.2026
Tag 20
Veg 2 - Tag 3
Heute war wieder so ein Tag wie man ihn am. Liebsten immer haben möchte, keine negativen Dinge und die Lady hat auch wieder gut zu gelegt. Mehr als grade zu warten und eventuell doch eine Entscheidung bezüglich des toppens zu treffen..
Ich halte euch auf jedenfalls täglich auf dem laufenden.. Aber für heute sag ich mit den Klima Werten bis morgen ?
Klimawerte :
Tages temperatur : 26.4 grad
Nacht temperatur : 22 Grad
Luftfeuchtigkeit : 66 - 68%
------------------------------------------------------------------------------
Donnerstag, 09.04.2026
Tag 21
Hey ihr lieben, heute dachte ich mir einfach mal ich teile ein paar bilder! Heute gab es nur 650ml ph angepasstes Leitungswasser...
Mehr gibt es heute nicht zu berichten ?✌️
Klimawerte :
Tages temperatur : 26.4 grad
Nacht temperatur : 22 Grad
Luftfeuchtigkeit konstant bei 66-68%
------------------------------------------------------------------------------
Samstag.,11.04.2026
Tag 23
Veg 2 - Tag 6
Heute gab es wieder mal etwas Wasser, bisher kann ich ehrlich gesagt nur gutes berichten,
Wassermenge 1L
Ph wert 6.5
Bisher ohne drain und ohne ec Messung, mal sehen wie lange das klappt.
Die Pemanet marker ist doch breiter gewachsen als hoch, das schon mal ein kleine Bonus.
Bodenleben ist echt prima ne einpflanzen wie klee etc wachsen zusachlich, muss sagen noch läuft alles soweit nach Plan.
Klimawerte:
Tagestemperatur : 27.2 grad
Nachttemperatur : 21-22 grad
Luftfeuchtigkeit : 76- 78 da gegossen!
65 - 68 normal
Somit war es das für heute auch schon wieder, ich wünsche euch ein schönes Rest Wochenende ?✌️
------------------------------------------------------------------------------
Sonntag, 12.04.2026
Tag 24
VEG 2 - TAG 7
IMMER WIEDER SONNTAGS 🙈😉
Heute war es mal wieder so weit um nach der Lady zu schauen.
Habe mich heute mal. Entschlossen die Sonnensegel etwas zu entfernen und den Beginn von Lst ein zu leiten. Toppen werde ich sie wohl dieses Mal nicht.
Die Sonnensegel wurde entfernt um den Seiten trieben einfach mehr Licht zu ermöglichen.
Klimawerte sind stabil
Tages Temperatur 26,5 Grad
Nacht Temperatur 22 Grad
Luftfeuchtigkeit 68-73 %
Das war es dann für heute auch schon wieder, somit euch allen noch ein schönen Rest Sonntag!
Donnerstag, 16.04.2026
Tag 28
Veg 2 - Tag 11
Schönen Donnerstag Wünsch ich euch, sorry das ich euch die Tage warten habe lassen, ist aber grade etwas stressig bei mir.
Heute hat die lady wieder nach knapp 3 Tag Etwa 1.5 Liter erhalten... Und ja sie wächst.
Super...
Sie macht mir zwar grade etwas Sorgen aber da ich die lichtleistung auf 50% erhoben habe denke. Ich das sie unter etwas Licht Stress steht oder einfach grade kein bock.
Jedoch die anderen beiden permanent marker super wachsen und schon grün sind.... Aber gut abwarten und zur Not morgen reagieren..
Klein fiecher würden bisher nicht gesichtet..
Gießmenge : 1,5 Liter angepasstes
Leitungswasser (ph 6.5)
Klimawerte:
Tages Temperatur 27,5 Grad
Nacht temperatur 22 Grad
Luftfeuchtigkeit : 75% angepasst an die Temperatur
Dann also bis demnächst 🍀🌼
------------------------------------------------------------------------------
Sonntag, 19.04.2026
Veg 2/3 Tag 14/ Tag 1
Tag 31
Wie man sieht entwickelt sich die Lady Wunsch gemäß, jedoch wird mir bange ob der Platz reichen wird für die plants 🙈
Heute hat die heranwachsene Dame 1000ml ph angepasstes leitungewasser erhalten
Sie steht nun unter Doppelbeleuchtung
Hauptlampe : Lumatek ats 300 pro
Ausleuchtung : spider Farmer 1
Sf-1000 ( vertikal angegangen)
Die Klima Werte wurde etwas angehoben mit der Temperatur da Sie scheinbar die etwas wärmere Option lieben...
Klimawerte :
Tages Temperatur : 27.8 Grad
Nacht Temperatur: 22 Grad
Luftfeuchtigkeit : 62-70%
------------------------------------------------------------------------------


