Likes
Comments
Share


@Njanne
Follow
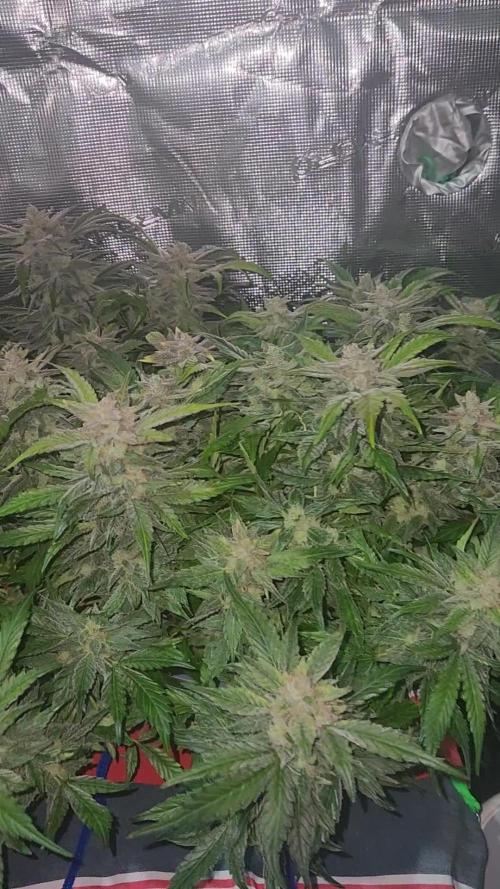
Here is a video tour of my back yard jungle. I am in the process of a huge clean-up now that the plants are ripening up and the buds are getting heavy. I'll post some photos tomorrow once the work is done. Some of the fan leaves are coming down now to promote light penetration and air circulation... don't want mildew.

Likes
38
Share


@Danger90946
Follow
Day 79 11/28/2021- Welcome to week four of flower. Today fed nutrients and did a defoliation to take off the smaller buds that won’t get enough light.
Day 81 11/30/2021- Just water her today.
Day 82 12/01/2021- Trying something new.
Day 83 12/02/2021- Water day for them. Also camera needed update but made it work. IOS/ANDRIOD PAR METER APP. It is very accurate highly recommended this for everyone.
https://apps.apple.com/us/app/photone-grow-light-meter/id1450079523
Day 84 12/03/2021- Last day of the week, and Wow the grow is amazing!

Likes
21
Share


@reirrac1
Follow
Started out pretty slow, then blew up like crazy during preflower before running into deficiencies followed by nute burn. In the end I switched to organic nutes and she came out great! Big frosty purple buds consistently ping pong ball sized. Smells like straight skunky oranges. Although this took a really long time for an auto, I would grow this again!

Likes
7
Share


@BIYEI
Follow
Vegetación (Tiempo estimado 28 días)
Quinta Semana de Vegetación
04/01/2024 - 5:00hrs y 22hrs: Se verifican parámetros básicos del agua, mantener cuidados específicos.
Agua de osmosis: Ph 6.0, PPm 1050-1300, Ec 2.1-2.5, Temperatura 20°C - 24°C, Humedad 75%
Ambiente: Temperatura 22 °C, Humedad 75%, Ventilación 15%, 18 hrs de luz , 6 hrs de obscuridad.
05/01/2024 - 5:00hrs y 22hrs: Se Hace cambio de solución nutritiva y se limpia el recipiente, se verifican parámetros básicos del agua, mantener cuidados específicos, el Ec y PPm Varean por los aditivos.
Agua de osmosis: Ph 6.0, PPm 1050-1300, Ec 2.1-2.5, Temperatura 20°C - 24°C, Humedad 75%
Ambiente: Temperatura 22 °C, Humedad 75%, Ventilación 15%, 18 hrs de luz, 6 hrs de obscuridad.
06/01/2024 - 5:00hrs y 22hrs: Se verifican parámetros básicos del agua, mantener cuidados específicos.
Agua de osmosis: Ph 6.0, PPm 1050-1300, Ec 2.1-2.5, Temperatura 20°C - 24°C, Humedad 75%
Ambiente: Temperatura 22 °C, Humedad 75%, Ventilación 15%, 18 hrs de luz, 6 hrs de obscuridad.
07/01/2024 - 5:00hrs y 22hrs: Se Hace cambio de solución nutritiva y se limpia el recipiente, se cambia la lampara en la madrugada por una de 1000 w, se empiezan a hacer pruebas a 50% de la potencia, pero el calor en la mañana estresa a la planta demasiado y evapora casi toda el agua, se hace cambio de agua por la tarde y de recipiente, se verifican parámetros básicos del agua, mantener cuidados específicos, el Ec y PPm Varean por los aditivos.
Agua de osmosis: Ph 6.0, PPm 1050-1300, Ec 2.1-2.5, Temperatura 20°C - 24°C, Humedad 75%
Ambiente: Temperatura 22 °C, Humedad 75%, Ventilación 15%, 18 hrs de luz, 6 hrs de obscuridad.
Likes
44
Share


@Cogollo_eu
Follow
**Encontrarás la traducción a español al final de la descripción**
From/Desde: 12/04/19 || To/Hasta: 18/04/19
From day/Desde día: 50 || To day/Hasta día: 56
You can find the Money Maker Diary here:
** Podéis encontrar el diario de las Money Maker aquí:**
https://growdiaries.com/diaries/25667-gorillamakingmoney-gorilla-vs-money-m
-----IMAGES & VIDEOS-----
I'm sorry for not having a tlapse video this week, i slaved the cam onto my 60x60 tent to record the first growing week of another plants, next week i will return with more tlapse videos.
-----WEEK SUMMARY-----
To have a visual size of the plants take into consideration that the SCROG net it's fixed 24 cm abobe the top part of the soil.
There's something i want to correct and remark this week. About the question i asked some weeks ago on growers help, about the plant with decoloring problems (Photos 7 & 13), where i've choose the defoliation answer as the correct one. Watching the plant today, I would say that it can be an excess of co2 in the roots caused by a co2 tablet that I used during the first days of growth. You can notice how the part of the plant in the back does not present de decoloration it have in the front.
Also remarking what i've told last week, i must say the SCROG is not a true SCROG, as some colas begin below others, and also colas are of different heights among all plants. Anyway i'm very happy on how everything is going. And insisting again, I have very very few experience growing cannabis, this is my 3rd grow, 2nd indoor, and first time with photo-period at indoors, and of course is the first time too i'm trying to apply growing technics on a serious way. I really don't know if i'm doing things right or wrong.
-----WATERING CALENDAR-----
13/04/19 - 1.250 ml with all week nutrients -(Sensizym, bloom stimulator, bloom nutrition & amino complex) @ PH6.4 & 1.3 E.C.
17/04/19 - 1.250 ml with Silica Power, Pro Active, Bloom Stimulator, Bloom Nutrition, Sensizym & 5 drops of Amino Complex @ PH6.5 & 1.3 E.C.
*****ESPAÑOL*****
-----IMÁGENES Y VÍDEOS-----
Siento no tener vídeos timelapse esta semana, he esclavizado la cámara en el armario de 60x60 para grabar la primera semana de crecimiento con otras plantas que tengo en el.
-----SUMARIO SEMANAL-----
Hay una cosa que quiero corregir y remarcar esta semana. En sobre la pregunta que realicé hace unas semanas sobre la planta que tenía una decoloración (Fotos 7 y 13), en la que escogí la respuesta de la variegación. Viendo la planta a día de hoy, yo diría que es un exceso de CO2 en las raíces causado por una pastilla de CO2 que usé durante los primeros días de crecimiento. Al fijarse bien se ve como la parte trasera de la planta no presenta las decoloraciones y sin embargo la frontal si.
Para tener una idea más o menos certera del tamaño de las partes de las plantas, tened en cuenta que la red está fija a 24 cm de la parte superior de la tierra de los tiestos.
También remarcando lo que dije durante la última semana, he de decir que el SCROG no es un SCROG real, ya que las colas no empiezan desde la misma altura ni son de la misma altura, ni las plantas son de la misma altura. Pero yo estoy muy contento con como va la cosa, vuelvo a insistir que es mi primera vez con foto-dependientes indoor, mi segundo armario indoor y el tercer cultivo de mi vida, y por supuesto la primera vez que aplico o intento aplicar las técnicas de cultivo. Lo estoy intentando realizar bien y de manera eficaz, pero realmente no se si lo estoy haciendo bien o mal, yo simplemente me lio y veo como responden las plantas.
-----CALENDARIO DE RIEGO-----
13/04/19 - 1.250 ml con todos los nutrientes semanales -(Sensizym, bloom stimulator, bloom nutrition & amino complex) @ PH6.4 & 1.3 E.C.
17/04/19 - 1.250 ml con Silica Power, Pro Active, Bloom Stimulator, Bloom Nutrition, Sensizym & 5 gotas de Amino Complex @ PH6.5 & 1.3 E.C.

Likes
7
Share


@Viccrazyweed
Follow
She is surprisingly flowering well!!
4 colas + one principal, don’t know if i have should chopped down any more branches but she is doing nice!
Likes
26
Share


@HowtoBubatz
Follow
In the third week of the cannabis plant growth cycle, significant developments occur that set the foundation for future growth and yield. This stage is crucial for implementing training techniques that ensure even canopy growth, promoting optimal light exposure for all parts of the plant.
To ensure uniform growth and maximize light exposure, LST have been applied
By the end of the third week, the cannabis plants have demonstrated excellent growth, supported by strategic training techniques and effective pest management practices.
Despite the plant's healthy growth, the presence of fungus gnats posed a potential threat. To combat these pests, beneficial nematodes (Steinernema feltiae) were introduced into the soil.
Continued monitoring and adjustments will be essential as the plants progress into the next growth stages to ensure a bountiful harvest.

Processing
Likes
47
Share


@Techpuffin
Follow
I managed to turn the negative heat temperature in to something positive by introducing co2 to the environment.
As a result of the diy co2 method some of branches grew up by 1.5 inches in 2days!
Will continue to utilise co2 in the box for now.
I also had to adopt the defoliation method
Way to many leaves could cause problems by raising the moisture level in the box.
As a result of the defoliation a lot of light is reaching the bottom of the box.
Which means I can grow other small plants in the box.
I switched to bloom NPK ratios.
Slowly introducing the raw mix.
It’s doing fine and as allways no tip burns


Likes
5
Share


@BudsBros
Follow
The two Tropicanna Poisons are truly beautiful for different reasons. One is a beautiful and perfectly normal plant with a 16 topping that has suffered a few deficiencies but is now rehabilitated and ready for flowering. The other is a beautiful mutant plant that at one point threw a polypeptide internode and I took the opportunity to make a very special and unique topping to see, there is an internode at 3 and it will look very strange.
Sun Powered by Viparspectra.
https://www.viparspectra.com/
Sweet Smokes
https://sweetseeds.es/
Likes
31
Share


@The_Doctor_Green
Follow
Esta semana he regado solo con oro negro 2ml x litro de agua y organic power 1ml x litro de agua el resto de la semana solo con agua, he medido las ppm y en el drenaje me ha dado 1040.
Me preocupa un poco el color de los tallos de las hojas que están de color morado, pero solo a las de maceta, a la que esta en tierra la veo bien, es mas le he sacado las ramas bajas para que no gaste energía en criar esos coquitos que salen pequeños.
Likes
69
Share


@Qutro
Follow
Hi there,
Here we go with the 4th week of veg.
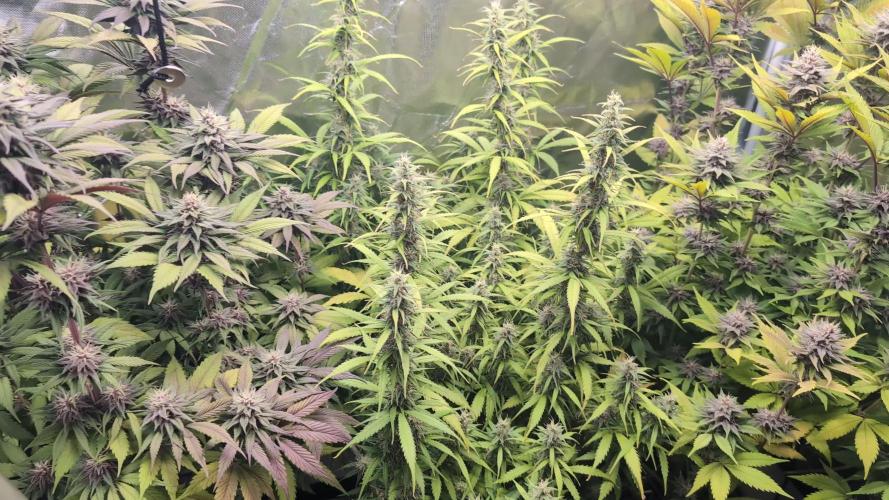
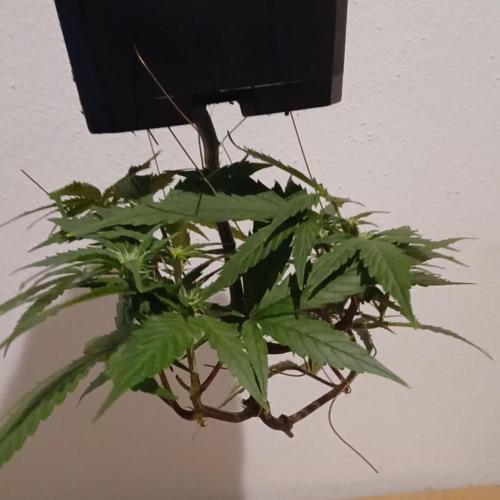
As soon as they woke up from the stress of the transplant, they were given another dose of training session . We topped them on the first day of the week. Not yet, but two days later we removed 4-4 large fan leaves each and it became clear how much the lower branches of Marshmallow OG didn’t develop in the shade. I already had the feeling that this variety was not genetically stable. These shots looked quite mutant. They seem to adapt more slowly to the hard plant trainings I use most of the time. On this day we also bent the branches with a tent hook to allow better light penetration to the lower parts.👨🏻🌾🌱
They show quite strong indica characteristics at this early stage of the vegetation which is also clearly visible in the shape of the leaves.
It is possible that the planned 6-week veg won’t be enough, as they need much more time to regenerate than most varieties I’ve grown so far. Never mind, maybe even this way the possibility of a harvest before Easter can be maintained.
After the hard training session they got only half dosage of nuts as they lost a lot of foliage. On the last day of the week watered them again with full dosage. 💦
All in all, they seem healthy but not very happy. I'm adjusting to them a bit and hopefully we'll be just fine for next week.
Running the Ts3000 on 65% 42 cm above the canopy which means 450-480 ppfd. 💡🌞
Have a lovely weekend everyone!





Likes
27
Share


@Trickybis82
Follow
OK so this week I have officially changed yje light cycle and have been running a 12/12 and will of course carry that on now until the end if we get there.
The food amounts have now changed on to flowering amounts and even though the plants are different in size they both look really well.
I have started to feed them both the following
Micro 32ml
Grow 12ml
Bloom 48ml
Ph is 6.0
These amounts are based on 20 litres of water.
So I am hoping to see changed and some flower heads popping through (I hope).
Let's wait and see what happens as again this is my first 12/12 run. So really hoping for the best here lol.
Peace out growmies
Likes
27
Share


@adam_pawloski87
Follow
Let’s go Day 36 !!! This week went real great, girls built up a lot of structure, and stayed super healthy ! Today they got fed just water phd at 6.5 ! They been really loving that balance! I also removed a lot of under trim since we are going into preflower , so had to shave up those legs lol ! It’s really great for them , the love that airflow , but don’t take off too much or you could shock your plants so be careful ! Can’t wait to see what these girls do this week ! Hope you all enjoy an are ready for another amazing productive week ! Peace , Love , an positive vibes to y’all Cheers LetsGrowwww!!! 😶🌫️💨💨💨💨
Likes
4
Share

@Randagio
Follow
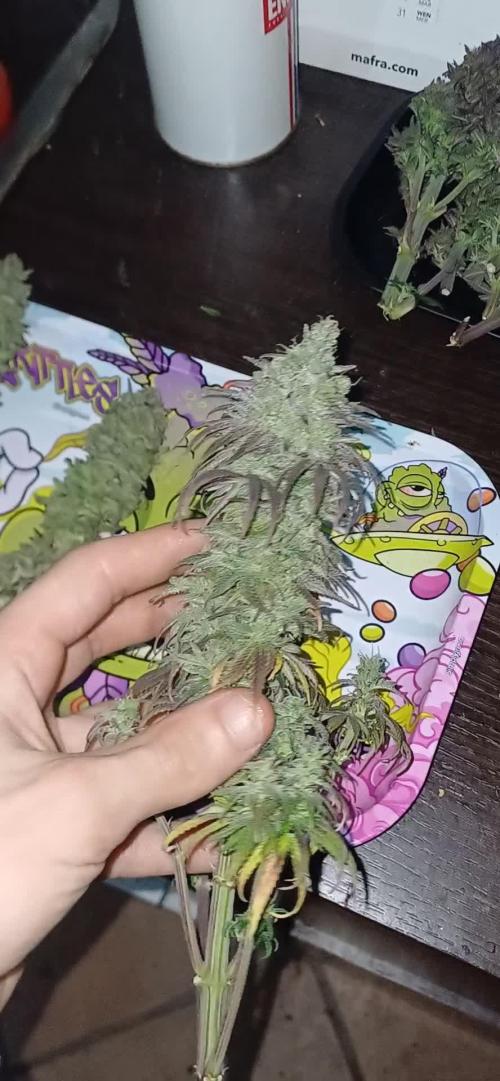
Farò un Aggiornamento del ricavato e dell'efficacia dei fiori appena saranno pronti

Likes
2
Share

@Jabbamo
Follow
_______________________________________________________
Mo. 9.2.
- Pflanzenhöhe 25cm
- Topfgewicht 5700g / 6300g (l/r)
- 2,0 Liter pro Pflanze gegossen ( = 8300g )
_______________________________________________________
Di. 10.2.
- Topfgewicht 7300g / 7600g (l/r)
- Toplight Abstand auf 75cm erhöht
_______________________________________________________
Do. 12.2.
- Topfgewicht 6200g / 6800g (l/r)
_______________________________________________________
Fr. 13.2.
- Topfgewicht 5600g / 6400g (l/r)
- 2,3 Liter pro Pflanze gegossen ( = 8700g )
- 0,3 ml / Liter "Calmag"
_______________________________________________________

Likes
17
Share


@RDWCGrowing
Follow
Week 1 Day 1 - 8/12/2023
1st Water change Day! Such a special time it is when you remove the little bit of Nutes that you gave them as an appetizer and you give them their first real meal.
Added
39 Gallons of Water to my system
SILICA= .5mil/Gal = 19.5 = 20mil
Root Drip = 1mil/Gal = 39mil
Cal Mag= .25mil/Gal = 9.75 = 10mil
FLoraMicro= 3.0mil/Gal = 114mil
FloraGro = 2.0mil/Gal = 78mil
FloraBloom = 2.0mil/Gal =78mil
ORCA= .5mil/Gal = 19.5 = 20mil
Week 1 Day 2 - 8/13/2023
Everything is looking good the roots are making their way to the water and the new grow is looking nice and green.
Week 1 Day 3- 8/14/2023
Everything is right on track, they are looking beautiful and in the praying position all leaves happily lifting towards the light.
Week 1 Day 4- 8/15/2023
A little worried today her birth Twin the BA I am growing out is looking great and is raised towards the light and this one is just slightly under.. Will keep an eye on Her.
Week 1 Day 5- 8/16/2023
Walked in and the humidity was under 60.... ohh noooooo.. So I added 2 humidifiers to the tent and attached them to my InkBird controller which is set to 62.
Also looking at the roots and she has some poking out the bottom but just not in the water yet.. Luckily we are set for 14 days before next water change so the system will stay stable and her sister already has roots in the water so she should only be a day or two behind.. we will just keep tracking but she is delayed.
Week 1 Day 6- 8/17/2023
Roots in the Water!!! Huston, we have a successful launch. This grow is on!
Humidity was a little low this morning so I refilled the humidifiers. Other than that the temp looks great, the PH looks good, the PPM looks good the plant is in the praying position and all damage from the little drowning from over filling the cloning machine seems to have been fixed. Happy Happy.
Week 1 Day 7- 8/18/2023
Yay.. week 1 in the books, roots in the water growth has started. Everything for growth and environment is looking good and on track, there are a couple of mutations with this Lady will keep an eye on those leaves.
IMO this grow is going A lot during this week 1 then week 1 of the last grow when I had them drowning.
Really excited on how this grow is going to come out.