


Likes
Comments
Share



Likes
6
Share


@Notamastergrower
Follow
Veg a 200 grams
Veg b 150 grams
Zerotol 50ml
Silica 25ml
Bleach 10ml
Flex 50ml
About 3 weeks in at this point, I'm kind of off on my days at the moment lol. Dropped the feed this week 1.8 EC, plants definitely don't like the full feed and I added a little flex from drip hydro. Put up the trellis net double layer and removed a lot of plant material. I mainly just keep the dominant tops personally. Excited to see if I get any difference in flower quality and production with these new nutrients, switching to bloom nutrients next week. I'm running 2 different lights and the plants do grow slightly different under each.


Likes
51
Share


@MadeInGermany
Follow
Hey guys :-)
A lot has happened this week :-).
She has developed very well.
Today it was topped on the main shoot for the first time.
How often I will use topping on her, I make it dependent on how everyone else develops.
I want to bloom soon so it won't happen very often :-).
It was poured twice this week with 1 l each time (for nutrients, see table above).
Fast plant spray from GBL was applied 2 times this week.
New was added this week Fast Bud from GBL is preparing her for the coming flowering.
Bio Grow Stay away for a while because the substrate is 30-50 % consists of fresh earth and the ladies are nice and dark green :-).
Today there was another spray with neem oil against the remaining tripse which I will repeat one last time next week.
As always, everything was cleaned and checked.
Have fun with the update and stay healthy 🙏🏻
👇🏼👇🏼👇🏼👇🏼👇🏼👇🏼👇🏼👇🏼👇🏼👇🏼👇🏼👇🏼
You can buy this Nutrients at :
https://greenbuzzliquids.com/en/shop/
With the discount code: Made_in_Germany you get a discount of 15% on all products from an order value of 100 euros.
👇🏼👇🏼👇🏼👇🏼👇🏼👇🏼👇🏼👇🏼👇🏼👇🏼👇🏼👇🏼
You can buy this strain at :
Clearwater Seeds
Water 💧 💧💧
Osmosis water mixed with normal water (24 hours stale that the chlorine evaporates) to 0.2 EC. Add Cal / Mag to 0.4 Ec Ph with Organic Ph - to 5.8 - 6.4
MadeInGermany

Likes
3
Share


@LA2NYGAS
Follow
Thanks to all who’ve supported and viewed this journey with me. You ALL mean so much you don’t even know! With Love & Peace, Signing off ☮️🏿



Likes
4
Share


Likes
6
Share


@DonBlaze
Follow
Der grow nimmt Fahrt auf, die Spitzen werden frosty und sobald das Zelt aufgeht schlägt einem penetranter Cali Geruch entgegen. Die Mental Rainbow ist inzwischen ein Viertel größer als die blue Skunk und doppelt so groß wie die new Money. Letztere wächst so klein, eng und buschig dass ich alle paar Tage entlauben muss, die Nervensäge kommt mir eher nicht nochmal ins Zelt 😄 Licht hängt jetzt auf maximaler höhe und läuft auf 95%. Lüfter ist auch am Anschlag wahrscheinlich mach ich den Trafo noch weg gegen Ende, dann gibt's nochmal 40V mehr power. Möge das bulken beginnen.


Likes
49
Share


@AsNoriu
Follow
Day 77. Harvest day for that amazing plant.
Dry trim chosen.
Will update after drying.
Thank You Zamnesia for that chance !
Day 86. Girls has started curing process.
Happy Growing !!!

Likes
32
Share

@DE_BW
Follow
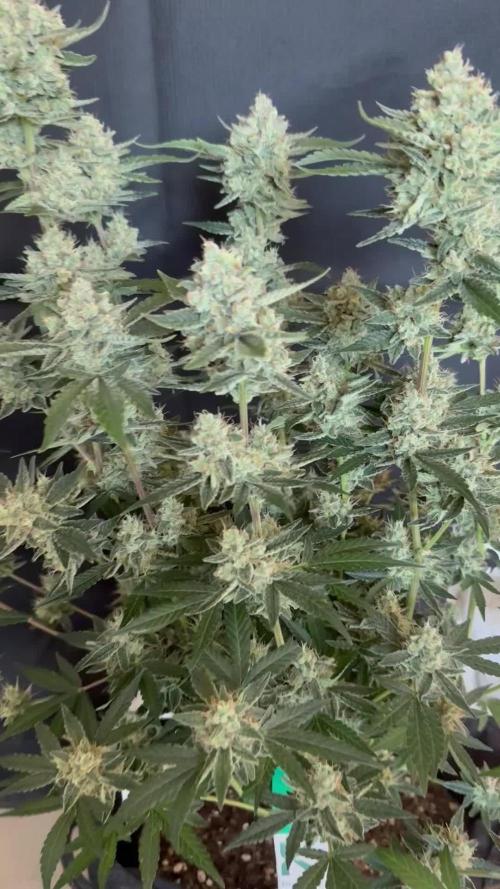
The plant has developed beautifully over the past week. The buds are now stacking very well, with excellent density and an extremely frosty appearance. Overall, the flowers look healthy, mature and very resinous.
She received Overdrive earlier this week and will be flushed today. Since a major heatwave is expected next week, my plan is to harvest her beforehand rather than expose the dense, nearly finished buds to another prolonged period of extreme temperatures.
Likes
44
Share


@Vegetoo420
Follow
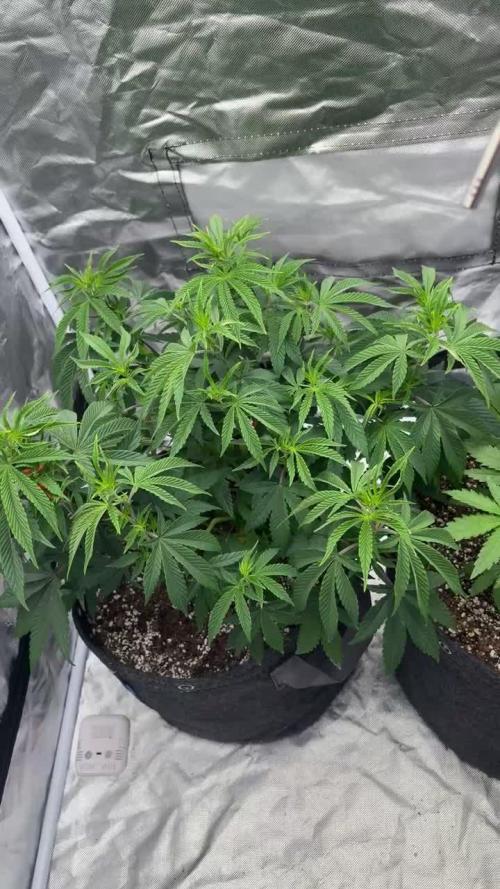
That’s done, harvest! It take me 3,5h to cut all this plant, now she’s drying
I will give you the weight when I’ll put buds in jars



Likes
22
Share


@Aedaone
Follow
We had rain morning Day 1 and the previous night. Early morning Day 2, around 2-3 a.m., we had thunderstorms with strong winds and heavy rain. This was followed by sunshine that afternoon. Despite the 5% rain forecast for day 3, we had a thunderstorm. It produced heavy rain and strong winds. For about a hour in the morning Day 3 and that evening showers. Day 4 was all day sunshine with a lite breeze. That was excellent turn of weather to dry out the soaked soil. Day 5, 6, and 7 we had sunshine and a breeze.
I added 2.5 ml of ferrous sulfate per gallon of soil on day 1. I added a second dose of 2.5ml ferrous sulfate per gallon of soil top dressed on day 5 for a total of 5ml/gallon of soil, top dressed for the week. I added 1.3 ml/gallon of soil(10ml) blood meal, top dressing on day 5. I watered on day 6 and 7.
The ferrous sulfate really began to work on day 6. On day 7 they had a healthy even green color and are rdy for the stretch to begin flower. These plants surviving and thriving through the challenging spring weather and grower proves how resilient these fastbuds genetics are.
Likes
Comments
Share

@DharmaTheDog
Follow
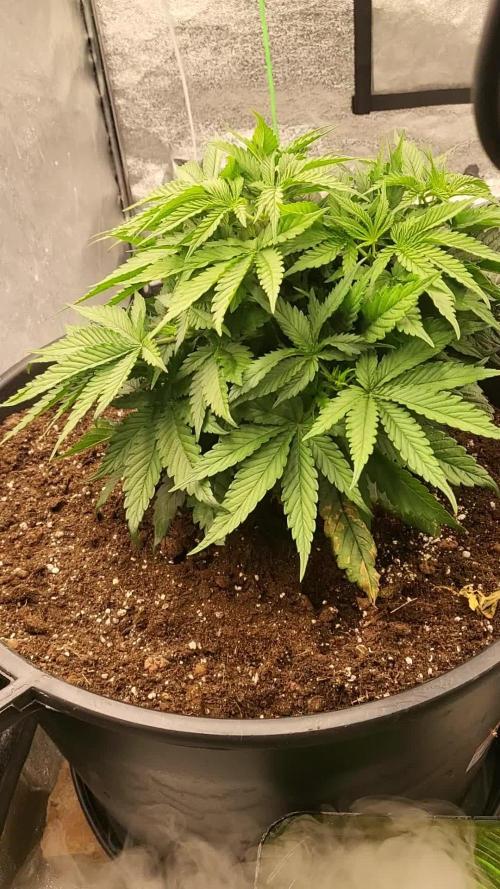
I transplanted the plants into larger pots, the photoperiodic in a 50-liter pot filled with supersoil while the auto fractal by divine seeds in an 11-liter pot hoping there are no problems. Delay on the autoflowering, humidity at 75%, pH of the osmotic water 6.5, air conditioner 25 degrees, marshydro fc4800 .

Likes
1
Share


@I_Identify_As_A_Dan
Follow
Week 7 for AK Triple Haze by SSSC
She's been doing some flower bulking even though she's been in a darkish shed all week due to the rain😐
And as you can see by the pictures the top of the main cola is looking odd... well due to the high humidity/rain she developed some bud rot right on the top of the main cola😭After removing the damage & really having a look at her & all the other flowering plants it seems like it was the only spot thankgod... Will keep checking this plant for more bud rot development just in case i have to chop some more off, but the rain is over so the humidity should start dropping nicely hopefully that's the end of the troubles.
She's fed water only because of @naturelivingsoil beast of autoflower soil mix, still doing its job nicely.

Likes
2
Share


@loomerlope
Follow
Did some lollipoping this week, but not much. Buds start to get bigger, all looking and smelling good, stretch is over. DLI was increased to 36.