Likes
2
Share
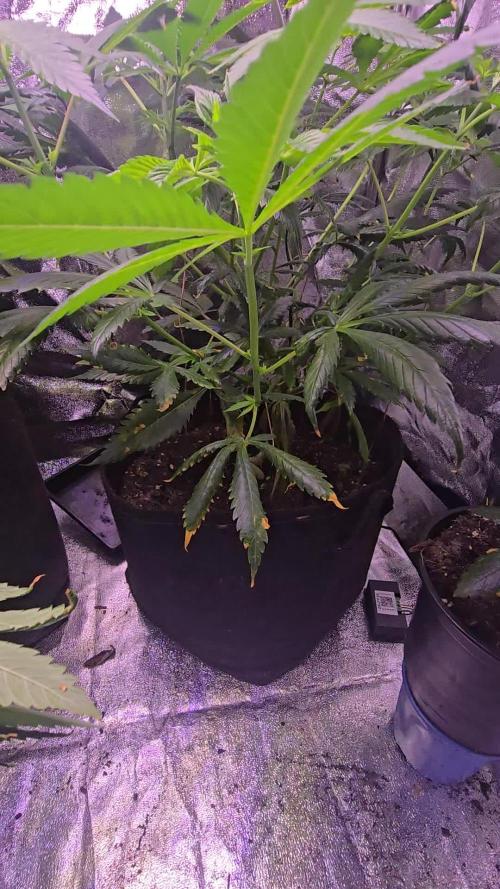
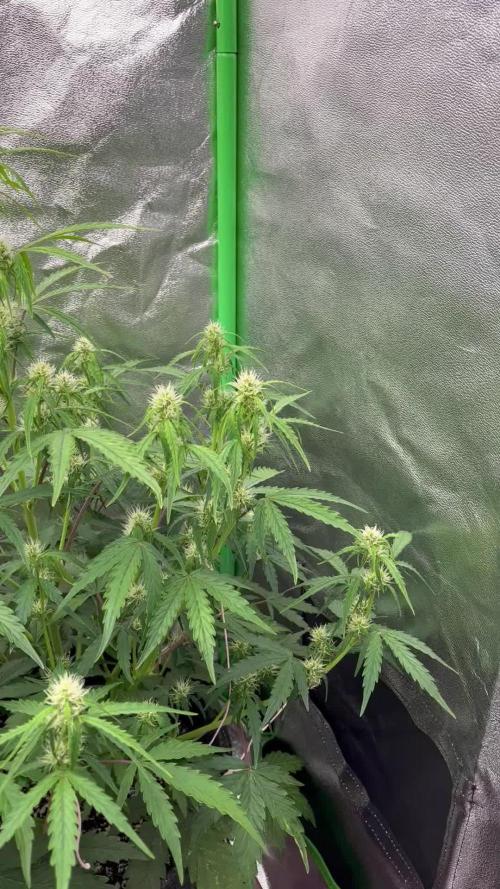
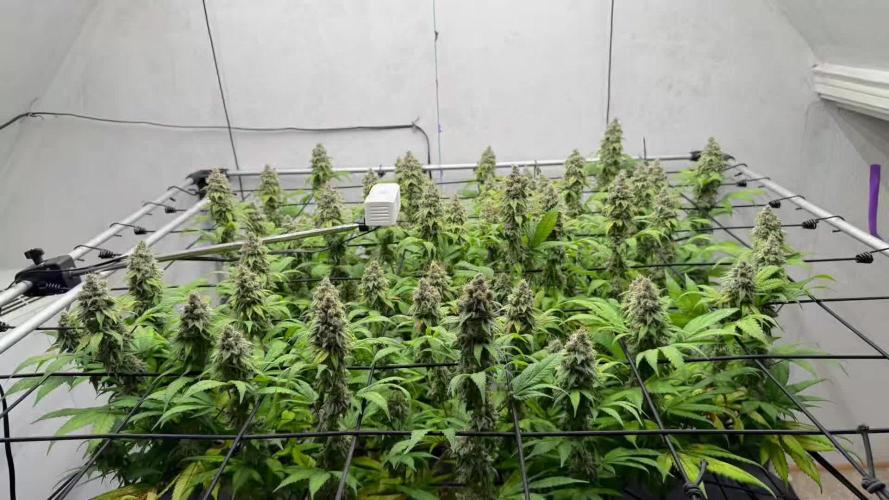
04/11 Another week. I'm not doing good at keeping up on this this time lol watered in full volume with goodies got Blumat dialed in 04/17 watered in full supplentalnfeed with extra will add in later. same stuff I always use at same rates.ntopped off all res will be out of town for 3 days see how they do. did raise vpd a bit and light. 8 days from flip
Likes
10
Share
@InsideAz
Follow
This is my 1st of 4 Banana Purple Punches that was green all the way through, I think the chances of a green plant on that strain about 20% so I hit that almost head on. Also this is the last BPP seed I had, grew 4 and gave 1 away to a friend, which also grew amazing and flavorful. Gotta spread the love (: Loved growing this strain for the last few years one plant at a time. Always a good strain to throw in the mix with some autos. They were free seeds that I will be buying in the future when I run out of buds and begin to miss her distinct effects.
Likes
3
Share
@Combright
Follow
Frosty af, smells like berries or something like that. I need to press rosin from this one.
Likes
16
Share
Critical Kush is a strain that is potent, and with it come a few side effects, although none of them are very serious. This indica-dominant strain can sometimes make you feel parched as it can leave you with a dry mouth, which is usually coupled with a case of dry and itchy eyes.
Likes
53
Share
The Germination Odyssey of Blackberry Auto: A Grower's Diary Chapter 01 Greetings, fellow cultivators! Today, I bring you the enthralling tale of my Blackberry Auto's germination – a journey filled with anticipation, dedication, and a touch of magic. It all began with a tiny Blackberry Auto seed, a potential green marvel waiting to unfold. With the excitement of a horticultural explorer, I delicately placed the seed into the H2O oasis, where the dance of germination was set to commence. The water cradled the seed like a nurturing embrace, awakening the dormant life within. As the seed soaked in the liquid symphony, a subtle transformation took place. It absorbed the essence of life, swelling with the promise of a vibrant future. In those moments, I felt a connection with the very essence of growth – a humble seed evolving into a botanical masterpiece. The time had come to transfer this burgeoning life force into the next stage – the root riot. Placing the seed in this matrix of potential, I marveled at the intricate dance between life and the growing medium. The root riot cradled the seedling-to-be, creating a perfect haven for roots to stretch and explore. With the root riot as a launching pad, I introduced my Blackberry Auto to the dome of dreams. Inside this miniature greenhouse, the seedling began its ascent toward the light. Temperature: a cozy 28°C, humidity: a whopping 95%. The perfect conditions for a germination symphony, a crescendo of life echoing within the dome. Oh, the magic of 28°C! The ideal temperature for my Blackberry Auto to stretch its roots and unfurl its tiny leaves. It's fascinating how this golden number orchestrates the ballet of germination, a symphony of growth playing out in my humble cultivation space. As I stand before the thriving Blackberry Auto, I see not just a plant but a testament to the delicate balance of nature and nurture. The journey from seed to this radiant seedling is a reminder that each step is a chapter in a living story. In the coming weeks, I'll continue this saga – documenting every milestone, every challenge, and every triumph as my Blackberry Auto blossoms into a bountiful harvest. Join me in this horticultural adventure, where the language of plants is spoken, and the dance of growth unfolds. Stay tuned for more updates from the heart of my cannabis cultivation sanctuary! Genetics Blackberry Auto @Fast_Buds Food - @aptusholland @aptus_world As always thank you all for stopping by, for the love and for it all , this journey of mine wold just not be the same without you guys, the love and support is very much appreciated and i fell honored and blessed with you all in my life <3 <3 <3 With true love comes happiness Always believe in your self and always do things expecting nothing and with an open heart , be a giver and the universe will give back to you in ways you could not even imagine so <3<3 <3 #MissBlackberryAuto #fastbuds #aptus #aptusplanttech #aptusgang #aptusfamily #aptustrueplantscience #inbalancewithnature #trueplantscience Friendly reminder all you see here is pure research and for educational purposes only Growers Love to you all
Processing
Likes
17
Share
@Hoodoo
Follow
2020-06-21 DAY 1 of flower! New week, new nutrient schedule, I kept the PPMs high and changed the ratio. I've tried to keep the 2nd plant on the same nutrient schedule but I had to dilute it within 24 hours because PPM was rising. It seems to have stabilized now. Starting EC = 2.0/1.8 and ppm= 930/880 and pH = 6.0. Added a new dehumidifier but it's totally raising the tent temperature almost 4 degrees F!!! I am in the process of setting up my recirculating system so I can take soon put the reservoir/dehumidifer outside in the same closet, just gotta take out the mini fridge. 2020-06-23 The girls are drinking like crazy! They are drinking much faster than normal so I am topping up with 1.1 mL/L calimagic instead as they still have a ton of food! pH still sinks from 6.0 to 5.5 over the course of 4 days or so but that seems normal for my setup. Threw up a video so you can get more perspective! I now have 3 different dehumidifiers running. There's a small 500 mL one inside the tent which raises temp about 2 degrees F at all times. I have a compressor dehumidifier outside the closet pulling in litres of water a day. I also have a big AC unit with a dehumidifier function that is draining into a 5 gallon pail. I am pulling GALLONS of water out of the air in this room and i've had to close the door to maintain it. Sorry, roommate! No AC unit for you. I had to do some SUPER CROPPING and bend some of the main stems down on plant 01. It was growing way too quickly in the last 2 weeks. I'm hoping the change in nutrients will promote flowering instead of such rapid height!! 2020-06-27 I keep having to super crop, the plant is so damn resilient, it fixes itself in 1-2 days!! What the hell!! I have reduced the feed going forward for next week. 1000 ppm was too high, I ended up having to top up with fresh water + calimagic almost every single day because it was drinking far too quickly. I will lower to 800 ppm for next week but maintain the same ratio. Root system is looking ROBUST on both plants!
Likes
7
Share
@cg_grow
Follow
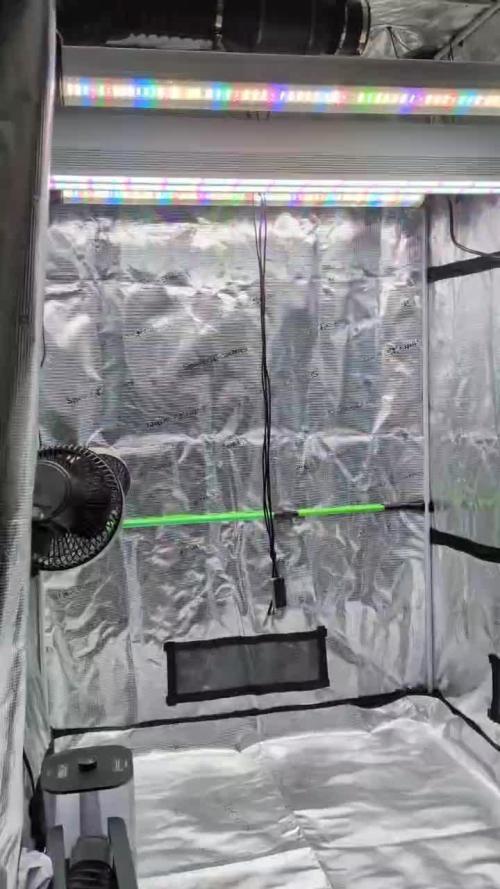
Starting 12:12 at Christmas with my ViparSpect XS3000 @80% (240W) + new 2 additional SpiderFarmer GlowR80 (80W) that turn on 10min before, and off 10min later than the main light
Likes
5
Share
Sorry but I got to much busy on this week that’s why I didn’t make to many videos!
Likes
43
Share
~ FastBuds PAPAYA SHERBET Photoperiod~ Well here we go on another journey together through 'Canna-land' and this one's kinda special... forget that, it's VERY special because this is FastBuds newest surprise for the community, a FEMINIZED PHOTOPERIOD STRAIN!🤯 I was fortunate enough to score these seeds, of which only 1000 were available and can't wait to see what this strain can do! This Papaya Sherbet, according to FastBuds, is a hybrid with a 9-10 weeks flowering period. For a more detailed and accurate description of this strain the following from FastBuds says it best: "Combining the massive stature of Papaya (Oni Selection) with the strength and resilience of one of our best keeper cuts (Sunset Sherbet), this strain develops into a big, expansive bush adorned with numerous bud sites that later transform into a generous harvest of medium-sized buds. Papaya Sherbet flowers deliver a signature flavor of premium cannabis with subtle citrus undertones that emerge upon inhaling. During growth, her aroma makes for a sweet yet pleasantly bitter fragrance, giving you an idea of what the smoke will taste like. Notably stress-resistant, Papaya Sherbet is a great choice for growers working in challenging environments. She is very forgiving and rebounds quickly from any adversity, allowing growers the freedom to experiment with confidence that she will take everything like a champion she is. This strain embodies resilience, flavor, and abundant yields in every grow cycle." Sounds like an epic strain and I personally cannot wait for this lady to strut her stuff!😍 ________________________________________________________________________________________________________________________________________________________________________________________________________________________________________________________________________________________________________________________ The Setup: This is going to be an outdoor grow, but I have started the Papaya Sherbet photoperiod indoors as our weather is still a bit too chilly to put a newly sprouted seedling outside (nighttime temp's dipping regularly into the 40's℉). The plan is simple... let her grow inside under a 19/5 light schedule until the nighttime temperatures are in the mid 50's℉, which shouldn't be long. After which, she'll be moved outside and transplanted into the soil which I have already setup and inoculated with beneficial microbes from BioTabs and slow release dry amendments from Gaia Green. Once she's established herself outside she'll be given periodic top dressings of Gaia Green 4-4-4 and 2-8-4 along with worm castings and Compost Tea's. Her grow area is approx. 5'x5' and I have posts and a trellis net set up already for when she gets bigger to aid in training her. Let the fun begin!🤪💚 ________________________________________________________________________________________________________________________________________________________________________________________________________________________________________________________________________________________________________________________ Weekly Updates: 8/19- Week 2 of flower is here for the FastBuds Papaya Sherbet photoperiod and she is looking fantastic! Our weather has finally cooled down and the daylight has dropped to just over 13 hours now. 8/21- My daily watering campaign continues with me giving the Papaya Sherbet 5-8 gallons of well water from the garden hose. 8/23- Luckily, with it's wide node spacing, there's not a lot to do with the Papaya Sherbet at this point except to keep her watered! She has not required any thinning out and has had only a few lower leaves turn yellow, which I promptly remove. Overall, this lady is a dream to grow, requiring little to no effort or maintenance! 8/25- There's the second week of flower on the books for the FastBuds Papaya Sherbet photoperiod and I have great expectations for how this fine looking lady is going to turn out, as she has exceeded all my expectations so far! Thank you for checking out my diary, your positive comments and support make it all worthwhile! 💚Growers Love!💚😎🙏
Likes
90
Share
@AsNoriu
Follow
Day 127. Chop day !!!! Zkittalicious #6 is my first plant without any airy or small bud !!!! Plus he will be like others in 100g range ... #2 should beat all single plant records ;))) Happy Growing !!!
Likes
16
Share
@nijuana
Follow
I'm mitigate from this experience , the grow was not optimal why ? Maybe because my main thing is not to grow auto flower but femenised , the #3 was hermaphrodite plant ...
Likes
27
Share
1/20/2023- So much to do pre grow and over the next 16 days, absolute first order of business is that I have to take down my current Grow---TIMBER-- Then I have a list of things I have to get done in order to be ready to start this grow 1 Feb. With that said T - 2 days until start 48 hour Flush T - 2 days until Start 48 hours of Light T - 4 days until TIMBER!!! Items that need to be done before 1 Feb 2023 1. I need to clean the tent out 2. I need to clean the equipment- Proper Sanitization between grows in Hydro is a must!!! 3. I need to get the hole in the ceiling above my tent repaired- For my last grow I had a deep sink installed in my grow room, to make Hydroponics a little bit easier and have a water source in the same room. The seals on the pipes they were installing broke and leaked through the ceiling causing some damage all the way across my grow room, I was already weeks into my grow and couldn't risk them working above my tent and it would have been very awkward positon for them to be working in as well, so have to get this done quickly between chop and germination. 4. I have to install my new light- I was using a Vivosun 4000 and for this grow I am switching up to a Spider-farmer SF 7000. 1/20/23- For this upcoming grow I am working with M/F photo seeds so I ordered 4 Sex determination kits. I recieved my my 4 Sex determination testing kits from Rimrock Analytics today. I will be using these to test my plants at week 2 of Veg so that when/if I take clones I know I am taking them off females. As well as I don't want to accidently pollinate my tent during this grow I am looking for big beautiful buds not seeded buds. :-) 1/24/2023- Harvest of current grow- Started at 2:00pm and finshed wet trim and firt batch into the freeze dryer. 1/25/2023- Next batch into the freeze dryer and cleaning all my equipment for this Grow. T-1 Day until the workers are supposed to be here to fix the hole in the Grow Room. T-3 days until I instll my new Gorilla Grow Tent and my New Light Spider Farmer SE-7000 for this grow. T-7 Days until Start of Germination 1/26/2023- Harvest is done ran through the Freeze dryer and dry tim completed. 1/27/2023- Grow Room repairs completed. Hole is gone Letting the paint dry before I install the new tent. T-2 days until Install the New Gorilla Grow tent and the new Light T-3 days until I put the hydro equipment in the new tent T-5 days until Germination 1/29/2023- Day 0- Final Pre Germination activities Germination Start T-3 days The paint on the ceiling was dry and it was time to finish prepping for Germination. I got the following items knocked off my list. New 4X4 Gorilla Grow Tent is up and ready New Spider Farmer SE-7000 Light is installed- Thanks Moony Grows for the suggestion and for the Code that got me some money off and free shipping (Moonygrows)!! I turned the lights all the way up to max and set the timer to 18/6 0600-0000. I will keep an eye on the temperature and humidity without my plants and see how hot it gets with the new light. I put my Hydro system back together and put in 40 gallons of water into it, time to monitor for leaks the next few days. I Setup my cloning machine for Germination Days 3-11 1/30/2023 let me break down the situation, ROOM in the TENT.. Enough said.. No really I tried putting my exhaust system up in the new tent with my new light, The light is so big corner to corner that it really didn't give me enough room for the lights be be raised, with the exahust hanging the buckets my plants are Starting in are 2 and 1/2 feet off the ground, great for plenty of room for roots but not so great for upwards space for the plant to grow. In a 6' 11 tent with the exauhst in side and hanging that only gave me a little over 4 feet of grow room to play with. My last grow if you saw my diary, anyone could tell I was struggling to keep the buds off the lights. No good, Since space was such an issue I was running my carbon filter inside on the ground but It really needed to be up sucking the heat out not shooting the cool out. With that setup I was sucking air through the filter and pushing it out the tent at a bottom exhaust hole cold out. Wasn't doing me any good for my heat. I was hitting temps of up to 85 degrees. I bought a portable AC unit and have been running it in the grow room to try and keep temps below 85 and I have had to lower the power on my lights during grow also not ideal.. With that said a friend of mine MoonyGrows (Check out his diary) took the time to look at my issue send me a picture of my grow tent setup with detailed instructions on how to suck the air out from the top but putting my filter and fan on top of my tent so no room issue and I am sucking the air out from the top where the heat is instead of pushing the air out from the bottom where the cool is... THANK YOU MoonyGrows For taking the time to help me get this straightened out.. Now I have room and I have the exhausts working right and now my temps with everything at 100% are topping out at 80 this dropped the temp by 5 + degrees at 100% max. T-2 days until Start of Germination Prepped my seed tray with humidity dome Prepped my Rapid Rooter plugs. I Used RO water, and I added a few drops of Hydrogen peroxide to Oxygenate the water. I then PH balanced between 5.7-6.0 the same that they will be getting in the Cloning Machine and when they get to thier final grow pod. I perfere the 5.8x range and I hit 5.84 for these rapid rooters. If you want to see a complete video on the process HowWeedGrow has an amzing video that shows step by step how to do it and explains it better than I ever could including how to plant the seeds. Which I will cover when I get to that step on Wed. https://www.howweedgrow.com/how-germinate-weed-seeds-cannabis-rapid-rooters/ 1/31/2023 T-1 day until Germination Start All set and ready have my Rapid Rooter plugs ready to go have my seeds out.. Have my seed tray warming up tonight. Tomorrow morning right into the Rapid Rooter then strait into the tray. I will spray the dome to start the humidity in there. 2/1/2023 Germination Day!! Let the games begin! 0600am Put the seeds into the Root Riots. And then put the seeded Root Riots into their first home the Seed tray. I have them under the light 24/7. Sprayed the dome 7:30pm Sprayed the Dome to keep humidity going on the dome. 2/2/2023 Day 1 of Germination Sprayed the Dome in the morning Sprayed the Dome in the evening 2/3/2023 Day 2 of Germination Roots are starting to come out the bottom of the root riot plugs and the heads are slowly popping out of Number 4 just below the surface. Afternoon- Number 4 has popped up Evening- Number 3 has popped up as well. Happy Dance!! 2/4/2023 Day 3 - Germination Surprise Surprise Surprise- all 4 have now poked their heads up.. Happy day!! 100% Germination succeeded. Now major milestone to track is how many are female and how many are male. I will take look at the roots this afternoon/evening and see if they have enough root to go into the cloning machine for the next 7 days before they go into their Hydro Pods. Day 3 - Germination - Evening.. Roots looked good and they were tall enough to make it into the cloning machine. Now that they are all in the cloning machine I have switched the lighting to veg state 18 on 6 off. 2/5/2023 Day 4 - Germination - Morning All the Ladies (fingers crossed) looking great stretching nicely and look nice and green, Photo synthesis underway.... UPDATE!! After a very interesting POD cast on FSTS by Dr. Bruce Bugsbee from Utah University, I have shifted my lighting to 24 hours on through seedling and then I am going to shift to 20 hours on the rest of Veg. 2/6/2023 Day 5 - Germination While Checking on my conditions inside the new tent last night, I found that the Humidity was down to 39 Percent. I added an AquaOasis Cool Mist Humidifier, the reason I selected this humidifier is that I needed one that could be turned on and off utilizing my Inkbird Humidity Controller IHC200 that I have my Pro Breeze Dehumidifier currently running with. Root structures are starting to get there about 1/4 of an inch. 2/7/2023 Day 6 - Germination Everything seems on track more roots poking out of each today. They are each getting a little taller as well. Checked in the evening and number 3 was drooping the Root riot plug on the bottome was dry and the roots were not in the water yet. I raised the water just enough that the longest root that was sticking out is now hitting the water. 2/8/2023 Day 7 - Germination Everything looked good while checking in on them this morning number 3 is now full up and no droop again. 2/9/2023 Day 8 - Germination T-2 days until Plant into Forever Pods and we start week 1 of Veg .. :-) Surprising thing to me is that number 1 and 2 were later in popping then 3 and 4 but the roots are growing longer in 1 and 2. 2/10/2023 Day 9 - Germination Number 1 and Number 2 are definitely ready for transplant today.. Based on how they were yesterday and where they are today I am hoping by tomorrow 3 and 4 are ready. Today they look to me where 1 and 2 did yesterday.. I really hope 3 and 4 catch up by tomorrow since.. T-1 day until transplant to new/ final home for grow. Need the roots long enough to have some clay down in the basket to keep the root riot out of the water and only roots in the water.. 2/11/2023 Day 10 - Germination Today they got placed in thier forever Home, 7 days from Sprout and 7 days until Week 1 Start. PPM- 180 this is water out of the Tap Temp Water: 70.7 Temp Tent: 77 Humidity: 40% I have a humidifier going 24/7 to try and bring this up.. I also have Humidity Domes on each plant. 2/12/2023 Day 11 - Germination Sprayed the domes, all are looking good.. Nothing much to do at this phase but Keep monitoring the PH level in the system and making sure they have a comfortable home. T-6 days until Week 1 start 2/13/2023 Day 12 - Germination Sprayed the domes, They were looking a little yellow today so I moved the light down to assist. Nothing much to do at this phase but Keep monitoring the PH level in the system and making sure they have a comfortable home. T-5 days until Week 1 start 2/14/2023 Day 13 - Germination Sprayed the domes, They were looking a little Florissant yellow today, with what looks like slight burn on the tips, I talked with a fellow grower and we agreed that It was probably that I was drowning them, Yes you can drown you plants even in Hydro, but only early on.. :-) It usually happens with the water being too high, which soaks not only the roots but the medium (root Riot plug in this case). I lowered the water from touching the bottom of the pot to about 1" away. This will probably take 3-4 days to resolve. I will continue my daily monitoring. T-4 days until Week 1 start 2/15/2023 Day 14 - Germination Sprayed the domes, continue my daily monitoring they look a little darker green instead of lime green now that I lowered the water levels in the system, so I think that I might have resolved the issue but it will take a few days for recovery to happen. T-3 days until Week 1 start 2/16/2023 Day 15 - Germination I looked in on them this morning, 3 and 4 look like they are doing well and recovering nicely. Number 1 not so much it has brown spots on the leaves, this very well can still be a side effect of the overwatering but I decide to go ahead and add Nutes earlier than I was planning just incase. I was going to wait until Saturday but I think intervention is necessary now especially after drowning them early on. I added 1/2 what I am planning on adding for week 1 start. I also think I am going to adjust my chart to add 1/2 2 days after plant from now on. I don't think it would hurt it to have some Nutes to pull from. .25ml/Gal Calmag = 12.5ml 1ml/gal GH FloraMicro= 50ml 1ml/gal GH FloraGro = 50ml 1ml/gal GH FloraBloom = 50ml T-2 days until Week 1 start = I will drain the system and start it over on Saturday with Week 1 Nutes. 2/17/2023 Day 16- Germination I didn't even want to post today after looking in on them this morning, 3 of the 4 are now showing signs of dronwing.. Brown spots on the leaves, the water levels were still too high.. I drained about another inch out of the tanks.. Will see how quick they recover.. I start week 1 tomorrow and will have to ensure my water levels are at least 1" away from the basket on this round.
Likes
417
Share
@yan402
Follow
🌸🍏✨🍭🌸🍏✨🍭🌸🍏✨🍭🌸 Hi and welcome to another Kannabia grow! This time I’m running their Apple Fritter (feminized photoperiod). She’s going to veg under 24hr light and be manifolded. Still cleaning the rest of my Candy Cream GF (11.04.25) — going to sow the seed tomorrow (12.04.25) *been lazy, sowed on 14.04.25 🌸🍏✨🍭🌸🍏✨🍭🌸🍏✨🍭🌸 --- 💭❗💭❗💭❗💭❗💭❗💭❗💭 ❗Events & thoughts worth noting❗ 💭❗💭❗💭❗💭❗💭❗💭❗💭 12.04.25 (GW1) – Cleaning + flushing the old coco coir. Might need to add another brick. *No new brick needed ✅ This is how I recycle my coco coir — fast, cheap, no BS. 🌿 Harvest plant ✂️ Chop roots small — they stay in for structure (organic perlite) 💦 Hot water rinse — remove salts & dust 🍶 Pre-soak with light feed:   Micro 10ml   Bloom 0ml   GreenBuzz 10ml   Cal-Mag 60ml   FFJ/FPJ 10ml (new disgusting batch)   pH down (citric acid) ♻️ Media stays — Roots stay — Back in service. 14.04.25 (GW1) – Planted seed in final pot ✅ 16.04.25 (GW1) – Did last tent clean up + setup ✅📸 17.04.25 (GW1) – Seed germinated 🎉📸 — roughly 48hrs in final pot. Solid start👌♥️ 23.04.25 (VW1) – Minimal burnt tips 📸 — not progressing, not a concern. 26.04.25 (VW1) – Started using the new batch of FPJ/FFJ https://growdiaries.com/diaries/266849-grow-journal-by-yan402 30.04.25 (VW2) – Increased TriPartMicro & GreenBuzzBloom 10ml → 15ml 03.05.25 (VW2) – Increased TriPartMicro again 15ml → 20ml, topped the plant, and added final layer of clay pebbles around the base, trimmed side branches and did LST in preparation for "manifold" 📸 08.05.25 VW3 finished manifold📸 13.05.25 VW4 Increased TriPartMicro to 30ml and GreenBuzzBloom to 20ml. 15.05.25 VW4 Done defoliation and LST 📸 18-19.05.25 VW5 pruned all the shoots bellow my "mains" and did a full defoliation📸 24.05.25 VW6 increased GreenBuzzBloom to 30ml 04.06.25 VW7 did a cleanup📸 11.06.25 VW8 increase TriPartMicro to 40ml 17.06.25 (VW9) – Final structure pass 💈🌿 Did a clean perimeter prune + removed weak shoots. Ended up with 12 tops, was aiming for less, but she made the call Didn’t fight it, just shaped it the best I could Airflow’s good, structure’s stable 🛑 No more cuts until post-stretch Pics coming shortly 😘 Flip coming soon — we’ll see how she handles it. 20.06.25 VW9 Switched lighting to 12 hours, may the stretch begin 🤞 22.06.25 VW10 Did a good LST session,made some pics, and came to some conclusions and a small change of plans: Originally planned for 8 mains — long, spaced colas and maybe a couple stronger “titans” if she wanted to go that way. But she’s showing me something else, and I’m not here to fight her — just guide her. Now after stretch, I’m keeping side shoots only if they: Fill real canopy gaps Don’t crowd neighboring tops (minimum 15cm spacing) Aren’t growing into walls or toward the next plant Anything too close, too low, or heading into shade gets removed. No point forcing it. Looks like I’ll finish with 14–16 solid tops, depending on how she settles. I’m just trying to give each one enough light and space to stack properly. No overcrowding, no larf — just letting her do her thing with a bit of structure. Increased Tri Part Micro to 50ml as well. 28.06.25 VW11 one week since I flipped to 12/12 and she is stretching nicely, a bit shy in showing pistils compared to the Fantasy Feast regulars I have in the same tent. 29.06.25 VW11 increased GreenBuzzBloom 30→ 60ml 06.07.25 FW1 TriPart Micro: 50→ 30ml TriPart Bloom: 0 → 20ml Home-made FFJ/FPJ (Watermelon + Pumpkin): 10 → 30ml 12.07.25 FW1 GreenBuzzBloom 60 →40ml, TriPart Bloom: 20 → 60ml, fpj 30→60ml 🌱💦🌱💦🌱💦🌱💦🌱💦🌱 🌿 Day to day tasks & actions 🌿 🌱💦🌱💦🌱💦🌱💦🌱💦🌱 11.07.25 FW1 – Fed 5l of #1 25% strength → 2l runoff 12.07.25 FW2 – Fed 5l of #1 → 2l runoff 14.07.25 FW2 – Fed 5l of #1 → 2l runoff 15.07.25 FW2 – Fed 5l of #1 → 2l runoff 16.07.25 FW2 – Fed 5l of #1 → 2l runoff 17.07.25 FW2 – Fed 5l of #1 → 2l runoff 18.07.25 FW2 – Fed 5l of #1 → 2l runoff 19.07.25 FW2 – Fed 5l of #1 → 2l runoff (*RUNOFF reused for tomato plants) 🍶💧🍶💧🍶💧🍶💧🍶 💧 Nutrients in 30L #1 – Week 11 Veg 🍶💧🍶💧🍶💧🍶💧🍶 💧 TriPart Micro: 10 → 15 → 20 → 30 → 40 → 50ml → 30ml (1.00ml/L) 🍶 TriPart Grow: 0ml (0.00ml/L) 💧 TriPart Bloom: 0 → 20 → 60ml (2.00ml/L) 🍶 GreenBuzz Bloom: 10 → 15 → 20 → 30 → 60→40ml (1.33ml/L) 💧 Cal-Mag: 60ml (2.00ml/L) 🍶 Home-made FFJ/FPJ (new batch): 10ml → 30→60ml (2.00ml/L) 💧 pH Down: Citric acid (buxXtrade) 📦 TOTAL: 250ml per 30L 🔬 8.33ml/L 🍶💧🍶💧🍶💧🍶💧🍶 ⚙️✂️⚙️✂️⚙️✂️⚙️✂️⚙️ ✂️ Tools & equipment ✂️ ⚙️✂️⚙️✂️⚙️✂️⚙️✂️⚙️ ✂️ 2× MarsHydro SP3000 ⚙️ MarsHydro 150mm ACF Ventilator ✂️ Trotec dehumidifier (big unit) ⚙️ Mini no-name dehumidifier ✂️ Kebab skewers (LST – stainless) ⚙️ Wire + roast skewers (LST assist) ✂️ Scissors (HST) ⚙️ Vacuum (for spills & cleanup) ✂️⚙️✂️⚙️✂️⚙️⚙️✂️⚙️✂️⚙️✂️⚙️ --- 🍏🍪🌬️🍬🍏🍪🌬️🍬🍏🍪🌬️🍬 Apple Fritter (Kannabia Seeds) 🍏🍪🌬️🍬🍏🍪🌬️🍬🍏🍪🌬️🍬 Species: 50% Indica / 50% Sativa Genetics: Sour Apple × Animal Cookies THC: Up to 25% Effect: Euphoric, relaxing, creative Flavor: Sweet, fruity, pastry notes Flowering: 56–63 days Resistance: High Indoor yield: 450–500g/m² Outdoor yield: 600g/plant Structure: Strong, bushy, dense buds
Likes
4
Share
Beginning of week 5 The Plants finished stretching & started producing flowers. I did some more defoliation at the bottom of the plants. The Co2 in the tent is getting a little bit better, but in my opinion still way to less. But overall, the plants are very healthy. These ladies are drinking about 2.5 liters of nutrient solution every day, they thirsty as fuck.
Likes
17
Share
@TAXFR33
Follow
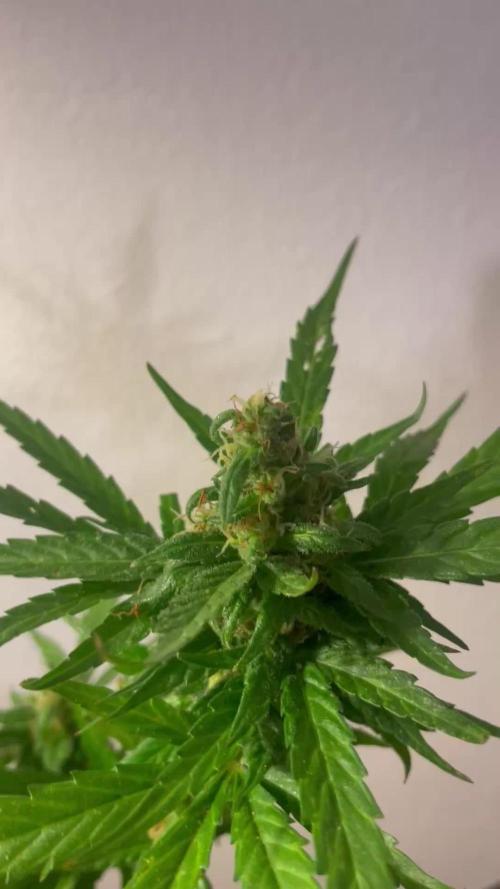
Didn’t manage to get a pic of all my autos this week cos we were in a rush. Will take pics of every strain on the weekend. Crazy smells coming of these plants now and they are getting very frosty. Will start feeding bottled nutes to make the most out of them.
Likes
38
Share
👉Alrighty Then👈 👉Cherry Punch F1👈 week 4 of flower We had some real nice growth this , had to do a little leaf management👈 We be in full flower mode ..... Everything is looking good 👍Having issues due to using my well water , it's hard so I'm having slight issues but I am on it ..... So ive up'd the nutrients to accommodate pre flower ..... Soil by Promix Nutrients by Cronks Lights by MarsHydro.ca FC4800 X UR45 X Adlite Deep Red And Blue Tent 4x4x6.5 & Equipment by MarsHydro.ca High reflectivity inner mylar Thick Oxford fabric Smooth heavy duty zipper Sturdy metal frame Zipper blackout cloth Good anti light leakage performance The 6in Inline kicks ass moves alot of air ●Blue Light Effect: Blue light shortens internodes, resulting in shorter, stronger plants, ideal for supporting fruit development later. During vegetative growth, blue light promotes lateral branch development effectively. Well this should be fun 🙃 Thanks to all my growmies out there for stopping by its much appreciated 👈 👉Happy Growing👈