
Likes
Comments
Share


@Organic_LarF
Follow
High GD community,
Week 9,
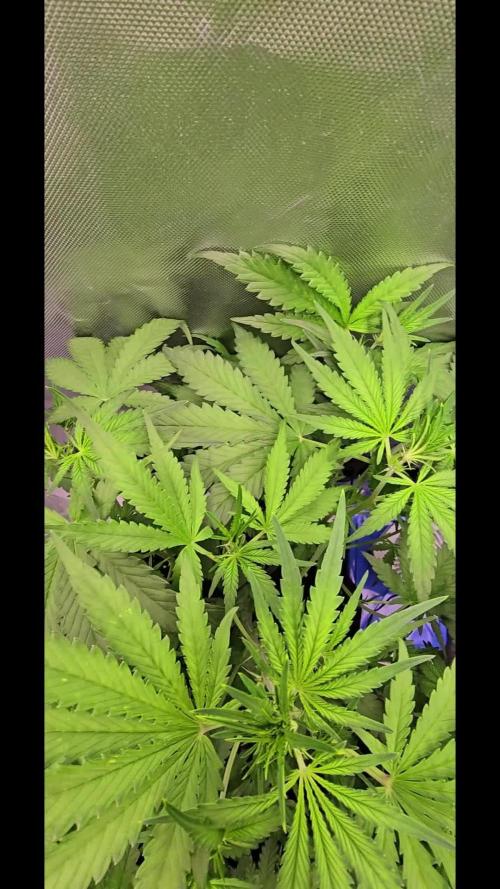
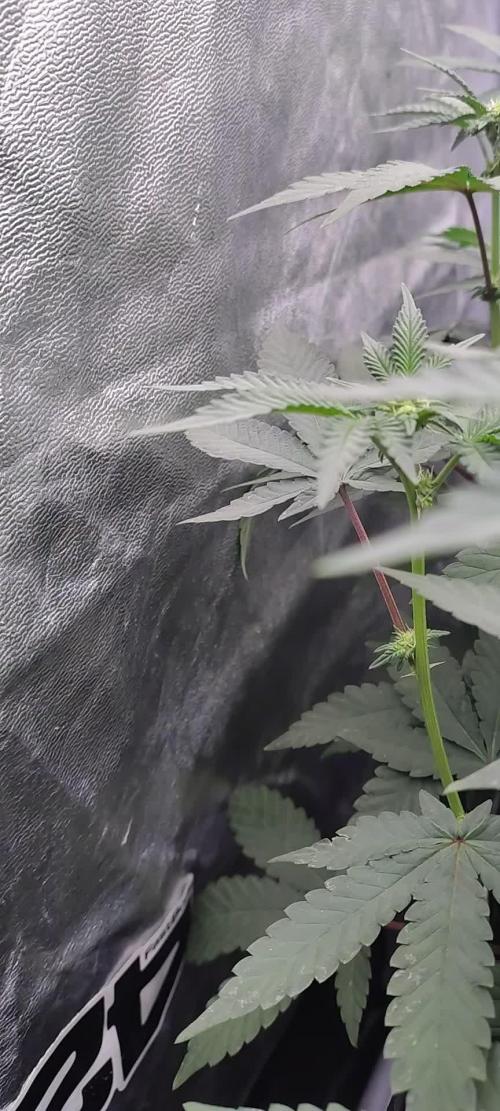
Sweet Thai looking allready better then ĺast week. The topping start to grow gently and a full 13cm in height gained this week.
Since 3 days(friday), the lightcycle changed into 13/11.
Nonetheless spidermites are spotted on this lady, she doesnt back down. After a treathment with orio bugs, who i actually misordered because I didnt had my new microscope yet, trips are definitly gone, and orios do eat/attack spidermites, its not their favorite. So a second army of bugs, this time phyto mytes, its gonna be all about attack and digesting spidermites, Who didnt yet get crowdy so far. But after a check up of some leafs with the new microscope, i can see a lot of eggs and pretty active young spidermites. So the phytos will not come to early. Phytos do eat eggs as orios dont, so thats a big difference.
Thats it for this week boys and girls,
Thanks for reading and passing by,
Grow safe buds and feel free to check out my other ladies doing fine,
🙏🌿🌿🌿🙏

Processing
Likes
Comments
Share


@CityFarmer
Follow
Hello everyone,
Well the greenhouse is packed.and hard to move around in so I did a little video...
See you guys next week.... 🤘🤘🤙🤙👍👍


Likes
38
Share


@LittleBigTrees
Follow
Pulled a few fan leaves, had a house inspection so I had to move them all outside , they went from 26°c to -2°C for ten hours they also had their dark cycle interrupted during the course of moving them.
The smell is very strong now from all 6 pheno

Likes
4
Share


@TwinExotics
Follow
Despite no A/C in the spot temporarily, things are going perfectly fine, no complaints! Thank goodness I’m just vegging. Temps have been around 87 ish, but the plants seem to love it.


Likes
4
Share

@NSABND
Follow
Welcome to Day 36 .... first Day of pre flowering 😍🙏👍
Day 37 .... massive leave cuttingto get space for the queens 😶🙏
Day 38 all strains forgive me the massive leave cutting 😃👌🙏
Day 39 everything seems to be ok 😍🙏👍
Day 40 this will be good i think 😃👌
Day 41 the growtent is really good filled up 😃👌🙏

Likes
12
Share


@Northern_Ent
Follow
Sep 11: field plant is impressively huge and might actually flower in time but there is likely only 3-4 weeks of the season left here.
Other plants in grow area were force flowered in July and are almost done.
Sep 16: took 380 g wet to control some minor bud rot.
Likes
25
Share


@pifflestikkz
Follow
Day 106
14/10/24 Monday
Her colours are really coming through now 🤩
Nearing her end now, possibly another week after this ✌️💚
Picture and video update 📸💚
Day 108
16/10/24 Wednesday
Light watering, she isn't drinking anything, trichomes only just starting to turn amber. I'll leave her now till I chop
Day 109
17/10/24 Thursday
She is starting to dry from 1" now.
Putting her in 24hrs dark 🌑 now.
Will harvest Tomorrow


Likes
2
Share


@Gardens_of_Of
Follow
She is still recovering after fixing the feeding regime and growing visually amazing flowers even though they are quite small. The smell is so unique…

Likes
13
Share


@Canadian
Follow
On the first day of week 4 I did FIM on the plant at 6 node. Not sure if I overdid it and accidentally top her instead of FIM but we will see how it progresses Up to this point the plant has been growing very strong and healthy almost as fast as Autos I have grow before.
Day 22 the plant doesn't seem stressed out at all and in fact is pumping New Growth right away I thought it was going to be sad for a day or two but no way the genetics are very strong the plant is very vigorous .
Day 24 I did some minor defoliation to allow the light to penetrate everywhere in the plant. Also looks like the fim was a failed and end up topping instead
I will continue to update thank you for reading and have a happy grow.


Likes
23
Share


@adam_pawloski87
Follow
It has been another great week for these Fastbuds ~ Wedding Cheesecake Autos!! Today is day 22 from seed and this upcoming week all 5 will be getting Tied down for LST ! All are getting same veg feed just but make sure if you are using rapid start your gonna have to mix in PH up in your feeds! Light is at same height and is at full power just letting the plants grow into it! Well hope you all enjoy, and please let me know if y’all have any questions I’ll be glad to answer! Bless y’all and stay tuned for next week! Peace y’all


Likes
20
Share


@GR0WER
Follow
New week starts!
I will wright updates every day now. Cos I don't want to keep photos on my mobile devise. I'll make new photo of a new day, load it up and delete immediately. Keep it safe, guys.
🌞13.11.2022
I putted some more substrate to cover my flowers to the leaves. It's only 'training' till now.
Also, one of my mini ventilators started to make a creepy noise. I ordered two more cheap mini USB ventilators. I hope they will live longer. That one died after a couple month of work. Sadly...
🌞14.11.2022
Next day morning my ventilator died. I scrued it apart. Then I remembered I have tattoo machine oil in my garage. When I oiled it and turned ON it began to spin like new... Mb I acted stupid buying two new ones, mb not. It's written on the oil tube: 'Oil your tattoo machine every 30 hrs'. So after a few days we'll see. :-)
🌞15.11.2022
The second one plant has a slightly larger second pair of leaves (triple ones). Maybe because it came from her seed one day later. There were a seed peeling problem to both of them and I was forced to help. A difference in germination time was about 8 hrs.
🌞17.11.2022
My ventilator died this evening. Two others I ordered didn't come to me yet. But they should come tomorrow. I don't know will they pass, but it will be better then nothing... 8 hrs difference between growing flowers still noticeable, it's disposed on photos. No feeding for today.
🌞18.11.2022
Today two new air coolers came. They are good quality and power for their's size but too noisy. Not so bad, I say. I installed one of them (it's on photo) and leave the second old one on it's place. It still works and a noise is not so loud. I wunder, why my plants are different by the size. Maybe because one of my old ventilators stopped all the time?
🌞19.11.2022
I watered my girls with 'GHE Pro Roots' and measured drainage today. Input was ph6.0 and outflow - ph6.5. I think we'll be OK in a few weeks. I learned from the grow questions that auto flowers grow better and bigger in pure coco with perlite, but i have mix soil/coco/perlite in my pots. Now I nervous if all will be OK. But my substrate is soft (tapped it with my finger) even when it's watered.
We'll see how it'll go compared to others diaries of the same strain.


Likes
7
Share


@Kagesan
Follow
👋👋👋
➖➖➖➖➖➖➖➖➖➖➖➖➖➖➖
Time marches on and we are already in flowering week three. The lady has stopped gaining height and is now putting all her energy into the buds.
➖➖➖➖➖➖➖➖➖➖➖➖➖➖➖➖
💚💚💚
Processing
Likes
15
Share


@CannabisAprendiz
Follow
Hola con esta semana ya quedamos al dia con el seguimiento ya que estaba atrasado en el tiempo. Se nota una producción de resina notable en esta genética que nos ha gustado mucho por su olor y estructura de las plantas .
hemos creado un video por cada una de las 14 plantas del seguimiento, hay varias muy llamativas que están "pre-seleccionadas" para mantener a futuro, el olor que se llega a sentir es muy florar y dulce, si tienen alguna pregunta no duden en preguntar saludos.
Hello with this week we are already up to date with the follow-up since I was late in time. There is a remarkable resin production in this genetics that we liked a lot for its smell and structure of plants.
We have created a video for each of the 14 floors of the follow-up, there are several very striking that are "pre-selected" to keep in the future, the smell you get to feel is very flowery and sweet, if you have any questions do not hesitate to Ask greetings.
Likes
9
Share


@SuperSmoker
Follow
check out my youTube and show some love!!
www.youtube.com/superiorsmoker


Likes
25
Share


@FabioFobia
Follow
Questa settimana i fiori hanno rallentato la loro crescita ma continuano a produrre copiose quantità di tricomi.
Guardando altri diaries su questa stessa genetica ho notato che in molti casi tende ad aumentare il volume delle cime nella 8 e 9 settimana