Likes
Comments
Share
@BongRip
Follow
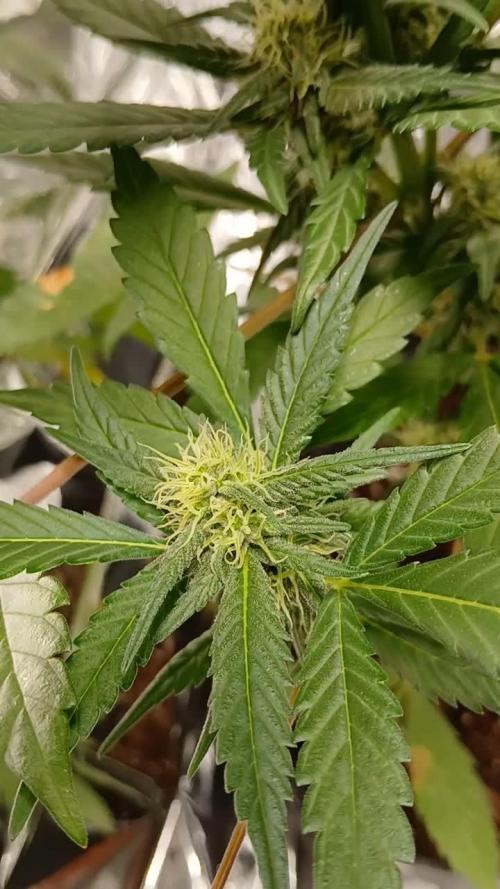
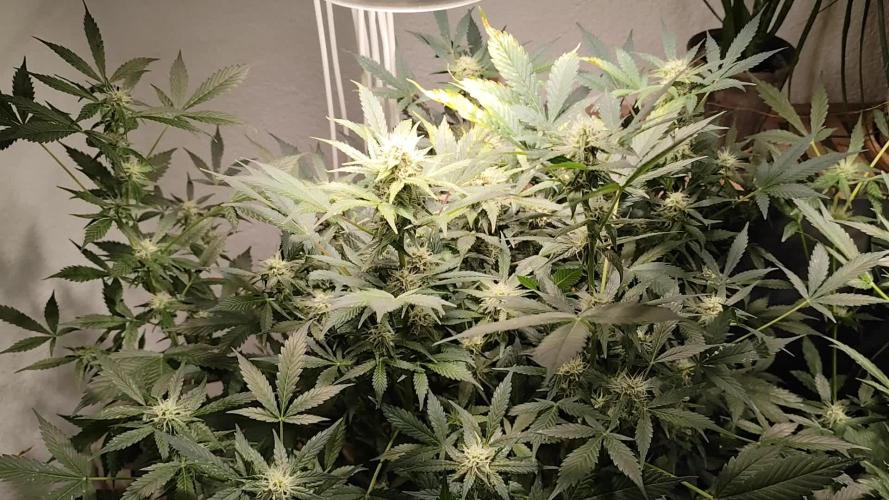
The yield is 1st plant: 23.5g 2nd plant: 60g 3rd plant: 46.5g 4th plant: 56.6g I avg 2ozes/plant for these autos except for the untrained one. It's been a great grow and gotta love the harvest. The nugs are dense and big, esp the last plant. It gives one of the best high, and it suits to smoke during day time.
Processing
Likes
16
Share
This week: air bubbles, air bubbles, and AIR BUBBLES, that's why my growth has been weak lol. AAAAAND I wasn't giving them space between the net pots from the water! VERY IMPORTANT NEW DWC-ers lol Sooo this week I was just letting them be. Until I realize I was messing up, everything in the book EXCEPT those 2 things I state above. I just received my new air pump today as am writing this (everything is installed) very pleased with the new pump. But I gotta replace those airstones they seem clogged up (yes I did wash em, warm water and a firm toothbrush) But I've been checking everything down to my pH that's it's constant at 5.8 My PPM is the same when they drink so let's see the difference a week from now. I do start to see lil pistols coming out on the 1st plants I think shes done veggin let's see next week. Appreciate everybody u guys freakin rock🤘 a toke from me to u guys much love and happy growin'/keif'n
Likes
7
Share
Buenas a tod@s... Octava semana de flora de las runtz x layer cake de barneys farm... Más allá de las marcas de "excesos" en las hojitas( aunque está no tanto como las demás variedades), q no se x q x q no me paso y a pesar de que podría estar más altas y anchas ( fallo mío) la planta está DPM..🔥⚡🤯😱 está y se la ve compactada y tanto está como las demás, se las nota que pesan, que prometen y que yo no subestimaria x su altura, están muy bien y ya en la etapa casi final... Ya no les queda mucho, en verdad el calendario marca que ya está en etapa final, pero les falta aún más días, disfruten del paisaje que en breve se nos va 🙏🏻🙌🏻💪🏻💪🏻😎⚕️ 🇦🇷🤝🏻🇪🇦
Likes
1
Share
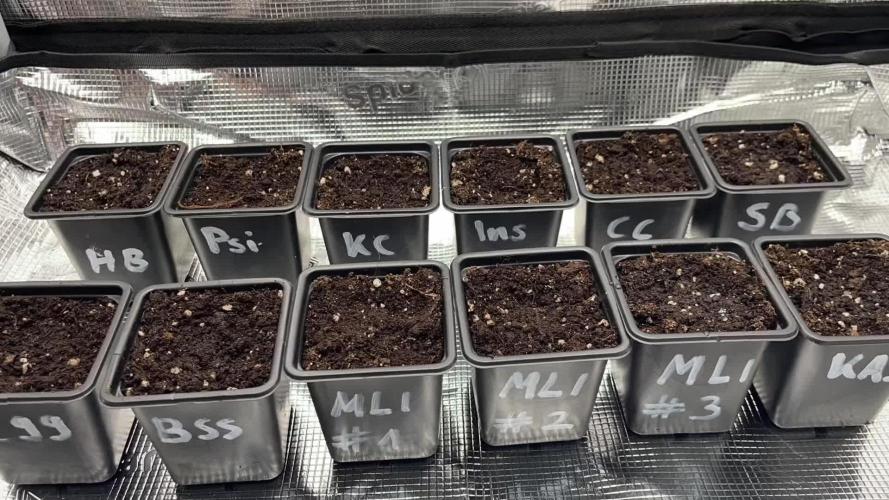
End of week one and seedlings are looking good. Sprouted fast, stretched a bit because the light was too far but that was fixed by the end of the week. Leaves are opening up and spreading out fast. Some roots are already showing up on the sides of the cup. I placed the seeds in 500ml cups with BioBizz Light Mix soil, beforehand I mixed 1 gram of Synergy per 4 liters of soil. These are live microbes called Mycorrhiza which live in symbiotic association with the roots. My idea is to leave them in this container for about 14-21 days until the roots develop correctly then transplant them to their final pot which will be an 11L fabric pot. As the light mix soil comes blended for at least two week of life, no nutrients will be added until after the transplant. Happy Growing!😃 🌱 🌿 🌲
Likes
2
Share
@PalmaGrow
Follow
Hermosa floración mucha resina Defoliación para permitir mejor ingreso de luz 25 - 31 agosto
Likes
54
Share
@Fatnastyz
Follow
11-22 Day 16 Water day! Bpp got around 600ml, everyone else got around 1k. had Silica, cal/mag, yucca and drops of balance. 11-24 Scc is a weirdo. She has 3 leafs, with 3 nodes on a pair? Whatever its weird and cool. Extra node didn't count on? 🤣 Removed the 1st nodes and their single leafs. Also removed the upper most leafs, for light. .
Likes
42
Share
Ell A pas l’air malheureuse
Likes
7
Share
The crops these days never run out. And here's the Fastbuds Skunk. We have said several times that we were convinced it was growing with some handicap and then it broke through but this led us to transfer it a little too late to make it large. She then stayed small and made us a giant cocone full but full of resin and with an unmistakable smell of Skunk Wow. Everyone should bow to Fatbuds for how they make their little girls produce resin. He listened to the M83s and during the pickup took a hipster-style trip after a 60's acid microdot.
Likes
18
Share
June 7 - We ordered some new lights last week, they are 240w kingbrite samsung lm310h with uv/ir, 3000k, and meanwell drivers. We setup the new room and moved the girls into there. After a bit of LST and a watering (with nutrients) at roughly 7ph, they were ready to go under the 2 new lights and the same SF-1000 we have been using in this grow. The new room is a 12 ft enclosed trailer. I moved everything from the small tent into this. I put clear poly on the walls, floor and ceiling. I put poly on the shelf I am going to be keeping in there as well. I bought 50ft of 6mm mylar and lined the floors, roof and sides with it. I plan to get some reflective tape to seal everything and to cover the wood. I did not get much of a chance to watch temp's today as they it was later in the evening after all was said and done. The inline fan blowing in air from outside. June 8 - 9 AM i checked the plants, they were at 25.2 and 50% RH. Late through the day I had checked and we had gotten up to around 32 degrees. So I moved the inline fan to the closer vent, hooked up to that, and had the air blowing out of the trailer with the inline fan sucking it from above the lights. I then added oscillating fan and had it blowing air on the left side of the room so it would somewhat circulate once I closed the doors. I then checked at about 9pm and we were at 22 degrees. Definitely noticed a decent amount of growth already. I have the lights on a 22/2 cycle as I was worried about the heat at night time. June 9 - Some great growth from the girls, still having problems controlling the temps in the afternoon. I decided to prop the door open a bit to have a constant breeze throughout the day while I am at work. Decided to do some more LST and also a bit of defoliation. I took about 25% of the leaf's that were blocking the new growth as it was getting a bit bunched up. I was then told the leaf's are almost solar panels for them. So from now on I will be trying to just do some tucking unless needed. The leaf's I removed were most of the damaged leaf's, I am not to sure if that makes much of a difference. I gave them a watering with only water as there is a potential I am getting a bit of a nutrient buildup along with the PH problem. Or potentially the reason for the ph problem is nutrient buildup. After watering with A PH of 7 I got some run off and tested it. The smaller plant gave me a PH of about 5.5 where the bigger one is around 5.0. June 10 - Plants are looking happy and showing tons of growth. Seems to be trying to stretch outwards. Not a ton of sign of PH issues showing so potentially getting it under control. Still a bit of damage to previous leaf's but it is what it is! The last few days I have been leaving the door open a bit in order to keep the temps down. I decided to test something and turn the lights off (automatically) at 11AM and back on at 5PM so light schedule has now changed to 18/6 and it seems I may have figured out the issue. We haven't had lots of sun the last couple days so it hasn't been to hard and I have yet to know if it truly fixed the heat issue for now. (I will be looking into a ac unit as well since it typically gets to around 30-35 around here. June 11 - Pulled some of the branches back down and added a few more LST spots. Seems we have a good amount of growth from the smaller plant out of the 2 topped spots. Unfortunately it looks like I fucked up on the bigger plant and only one of the nodes seems to have new growth. I will continue to monitor that but I think I cut the node to low and also to soon. Other then that, the girls are doing great. They seem to be absolutely loving these new lights. I gave them some nutrient water today as well. roughly 3L each. They seem to be A hell of A lot more thirsty under these new lights. June 12 - The girls are doing great , they are still just doing growing away. Lots of progress everyday. I am going to be getting a go-pro so I can set-up a time-lapse for the rest of this grow. I received my new inline fan, I got A ac infinity CLOUDLINE T4 with the temperature humidity controller. I am going to be having one fan pushing fresh air in and one fan pulling out the hot air. I will be doing that tomorrow since I have to work today. June 13 - I ordered another 50ft of mylar and that showed up today. I have decided to remove the shelf and add another 3+ feet to the grow space. So today I installed more poly, mylar, the ac infinity fan. I have it set-up to pump in air if it gets to warm. I am thinking of switching it to the output that way if it gets to hot or to humid I can have that air pulled out of the trailer. Right now my other inline fan is the outtake and I just have it set on full. Overall I think everything is set-up a bit better and more accessible. I will be putting my 2x2 tent in there at the left of the doors so I can have a veg room when these 2 are in flower. I plan to have 4 in veg and 4 in flower for the next grow. Still waiting on JOTI seeds, ordered 3 weeks ago and still have not been shipped. I will be getting those going the moment they arrive. The girls seem to be happy still, did a bit more LST to try to keep everything even, mainly I'm just pulling down on the spots I already have tie wire on.
Likes
17
Share
Day 42 350ml plain rain Well sh*t - prob moved to next set lower fans - to be expected - don't take leaves off a sick plant! anyhoo - only took 5 off - so: Def got calmag probs - overfed that - def got potassium prob - Q is still "Over or Underfeed" A is still F knows Mitigating factors are [A] that she has a lot of flower and could be crying out for nutes [B} I did misread nutes and for first 6wks was overfeeding in conflict w premix soil [C] Stardawg had exact same nutes schedule and is NOT showing signs and [D] mycorrhizal addition to soil caused probs in bot Forbidden Runtz and Stardawg - so it could be chemlock - which would be the worst coz flush only solution and I don't flush! pH 6.9 rH 45-55 Temp 22-27C Solutions: 1] H2O diet for wk and monitor - check - (day2: lower leaves further displaying calmag/potassium/phosphorous signs) 2] Nitrates to solve potassium - top dress may help - but again, I think I've overfed in conflict with soil premix, so... 3] Calmag burn is almost certainly overfeed - minimize and monitor that when nutes reintroduced << OK - basically I must have a chemlock because I have overfed but almost as importantly - the watering schedule [I water every morning under 24hr] does let the soil dry every day - some plants can handle it - Stardawg can as well as Big Bud - FR can't. So Will give her double H2O for cpl days and see. Will also pH adjust - she is in range for everything for absorption but nit if getting repeated daily chemlock - so might as well pH adjust if semi-flushing >> << Decision >> Right, I have got some serated edge tip burn in next level fans - these being last indica factory leaves - those of the lower level I left on are sick as and will come off, but leaving everything else on. She didn't seem to mind the flush - put gallon through in two goes (one was her daily water) - not much leaf twisting - buds looks good and I think that is the point ... they're doing fine from the over nute - but the veg material not so. Going to repeat flush tomorrow am but only 1/2 gal and leave her to dry out and then back to her h2O diet till Day 7 [tomorrow am will be day 3] btw flush pumped rH up to 60 so had to leave doors open all day 😕 <<<<<<<<<<<<<<<<<<<<<<<<<<<<<<<<<<<<<<<<< AAAAAARRRRRRRGGGGGGGHHHHHHH 😞😠>>>>>>>>>>>>>>>>>>>>>>>>>>>>>>>>>>>>>>>>>>>> Just been going over leaves after defoliating and found.... spider mites .... not nutrient based and not WPM thank the stars. Referring to the grow diaries collective - need advice Well - defoliated heavily - now know - it is wk 2/3 flowering and I was holding off on defoliating Just in Case it was chemlock BUT now I know I would be removing the most infested leaves - I went nuts and did a full sativa stage defoliate - irony is if I did it straight away this might not have happened. Gotta give props to BraveHeartGenetics - genius solution and will be borrowing my friends little handheld vacuum - she is a clean freak so will be perfect, Wind power very clean solution. Video in honor of BraveHeartGenetics - I need a joint now. Day 43 Well the spider mites are def under control. Vacuumed plants. was fine - used a dyson handheld with wide hose so could get whole leaf in without it flailing around against sides and getting damaged. Got her hands to the sky for first time in ages - good to see. Hopefully the defoliation also helps get her back in the groove - now know it's not totally nutrient based - that said of course mites screw with transpiration and chlorophyll levels so you know - not great - but hopefully over. Further to this I added a fan and a dehumidifier w 600ml capacity -should be enough to make the climate tough for mites. The last 24hrs can go screw themselves, but got some great advice so grateful as 😊 No water and suspended flushing - she looks happier I will still keep theH2O diet going and of course check for mites regularly Day 44 350ml plain rain water. Hands to the sun! omg she hasn't looked this good in wks! thank the stars 😅 Day 45 300ml plain rain - - pic she's a bit droopy but she's still having transpiration probs and has just been watered - she'll manage Day 46 300ml plain rain she still looked a little forlorn so I got the loupe out and sure enuff - more beasties. <<SO>> Got my vacuum out and cleaned the nozzle - it is an unregulated (sssshhh not v green) 1700W monster about twenty yrs old - Vacuuming your Bud [METHOD] I found it necessary to go at the buds from the side as well as top down (don't vacuum from underneath even though that's where the beasties are - I didn't even try - you will damage the plant) The nozzle was big enough to encapsulate a whole bud and it's leaves - so I repeated this motion [ahem] 1/2 dozen times and moved onto next bud I vacuumed every bud in this manner After, I checked known sites with my loupe I saw no mites - but some larvae still there So I vacuumed all again in same manner After final check I saw no larvae - I'm sure there are some remaining [RESULT] Leaf damage - very little - any heat/nute damaged tips got frayed, but the leaf veins / structure / stomata - underside leaf hairs / trichomes / pistils - no damage at all. OVERALL health condition of plant after vacuuming compared to as found: 9/10 AMMNDMNT << 6/10 >> FEED HER AFTER! Very few mites on plant & bonus: all the leaves are now conveniently 'hands to the sky'. OVERALL effectiveness in removing mites: 8/10 [CONCLUSION] I think the plant thoroughly loves this - provided it is not a routine affair, it is left in it's healthy pose - with most of a parasite removed. That said, I think it is a process that requires repeating, like a course of antibiotics; twice a day for a number of days - or spaced over several days between vacuuming, perhaps in accordance with / dictated by... spider mite life cycle. Finally - I know it sounds counter intuitive but DO use a POWERFUL Vacuum - The handheld Dyson 300 Whilst ok, just didn't do as well as my full size 1700W - result being I didn't significantly affect the mite numbers - thus a waste of time 8 hrs later she is looking fine - will repeat tomorrow Day 47 No vacuuming today - ADDED CONCLUSION - I f you have to do this - FEED her afterwards - with maybe a protracted dark spell She is looking so sick - the upside of the leaf damage you can't see but also expect she robbed her leaves of nutes as she has got lock out Going to put her in the dark for a bit - got photos will update after She had 3:1000ml Big Bloom 2:1000 Tiger Bloom Grow Big 1:1000 Calmag in 400ml plain rain water Day 48 No watering to day She actually looks good - checked her over for mites again - all clear - in evening thought maybe even a bit more color to her - maybe just lights were dimmed lol
Likes
14
Share
Info: Unfortunately, I had to find out that my account is used for fake pages in social media. I am only active here on growdiaries. I am not on facebook instagram twitter etc All accounts except this one are fake. Harvest day 73 since the time change to 12/12 hrs. Hey guys :-) Finally the time has come . The lady was harvested. After the trichomes have been checked (70% milky 30% amber) as always, it was left in complete darkness for 48 hours before it was neatly trimmed by hand. After trimming, she was put back in the drying tent on nets. There they are allowed to dry for the next 8-12 days at 62% humidity before they are put into the jar to ferment with 62% boveda packs. After about 4-6 weeks in the jar I will swap the 62% boveda pack for a 58% boveda pack where it can be ready for another 4-6 weeks to enjoy :-). As always, the remains of the leaves are used to make Ice o Lator and oil. Of course, as always, there is a final update during the fermentation process. Until then, I wish you all a lot of fun with this update. Stay healthy 🙏🏻 and let it grow 👍. You can buy this Strain at https://www.amsterdamgenetics.com/product/super-silver-haze/ Type: Super Silver Haze ☝️🏼 Genetics: Haze x Skunk #1 x Northern Lights Type: 70% Sativa – 30% Indica 👍 Vega lamp: 2 x Todogrow Led Quantum Board 100 W 💡 Bloom Lamp : 2 x Todogrow Led Cxb 3590 COB 3500 K 205W 💡💡☝️🏼 Soil : Canna Coco Professional + ☝️🏼 Fertilizer: Green House Powder Feeding ☝️🏼🌱 Water: Osmosis water mixed with normal water (24 hours stale that the chlorine evaporates) to 0.2 EC. Add Cal / Mag to 0.4 Ec Ph with Organic Ph - to 5.5 - 5.8
Likes
Comments
Share
@UrbanBoer
Follow
In case you wondering why do I have three different temperature readings, well, before getting a thermometer I used the general atmosphere weather reading from humidity to temperature, however from day one of getting a thermometer I noticed my greenhouse different temperature readings depending where you place it, from moderate to cold in the shaded areas and hot, warm, moderate in areas where sunny, I had to erect my greenhouse in a secluded(out of sight corner of the yard) spot. This being a reason I need some solar lights, and fans for internal air flow, as self cooling as this house is, I need a stronger flow of air to stress my ladies to strengthen vertical growth.I still document the outdoor temperature and I take pictures of the indoor(greenhouse’ internal temperature) temperatures, to show the how the greenhouse is amplifying the heat and depending on which part of the greenhouse(shaded or direct sunlight), believe it or not the thermometers differ in reading even at night. The red mercury thermometer reading indicate temperatures in which my ladies are tanning in. Super Skunk I have a feeling she will be my biggest plant amongst the sextet I was wrong when I said Monday’s Blue would be the biggest… however I might be wrong again, all I need to do is remain consistent with watering, and I need to bite the bullet and buy a fan by the end of this month, the sunlight iSight not be direct on the plants however conditions keep these ladies healthy, nothing a solar flood would not fix, I will just need to get an yellow, orange, and red gels to cloak the light during flowering, yet my other problem is they will not flower at the same time, which I will fix in my next cycle, I’ll just get those gels for future grows, and I should not forget a blue gel for veg stag.
Likes
43
Share
START OF WEEK 4 FLOWERING. NUTRIENTS SAME 4 ML PER LITER RO WATER OF BOTH A & B. 2 ML PER LITER BIG BUD. MIXED UP 8 LITERS OF NUTRIENT SOLUTION --------------------------------------------------------------------------------------------------------- Day 64 April 18th - 2019 Both ladies had a little trim to get rid of thick interior. Day 64 April 18th - 2019 Both Jessica Rabbit & Elly May were fed 1.5 liters of nutrient mix. Day 64 April 18th - 2019 Temp in tent is @ 78.4° F. Day 64 April 18th - 2019 Humidity in tent is @ 51%. Day 64 April 18th - 2019 Jessica Rabbits Coco temp is @ 70.2° F. Day 64 April 18th - 2019 Elly Mays Coco temp is @ 70° F. --------------------------------------------------------------------------------------------------------- NOTE - Day 65 April 19th - 2019 The Lady in the coffee can is a clone from the Blue Cookies. The clone was 2 weeks old put in soil in the coffee can It was put in the tent straight to flower No Veg time at all the clump of leaves at the bottom was how tall it was. I have been feeding Her the same Nutrients I am using for Coco flowering with the Big Bud for Coco. --------------------------------------------------------------------------------------------------------- Day 65 April 19th - 2019 Both Ladies are looking good after their little trim. Day 65 April 19th - 2019 Temp in tent is @ 81.1° F. Day 65 April 19th - 2019 Humidity in tent is @ 55 %. Day 65 April 19th - 2019 Jessica Rabbits Coco temp is @ 71.8° F. Day 65 April 19th - 2019 Elly Mays Coco temp is @ 71.6° F. Day 66 April 20th - 2019 Ladies are looking good coming alone. Day 66 April 20th - 2019 Temp in tent is @ 79° F. Day 66 April 20th - 2019 Humidity in tent is @ 40 %. Day 66 April 20th - 2019 Jessica Rabbits Coco temp is @ 69.3° F. Day 66 April 20th - 2019 Elly Mays Coco temp is @ 69.4° F. --------------------------------------------------------------------------------------------------------- Day 67 April 21st - 2019 Both Ladies received 1 liter pre-mixed solution --------------------------------------------------------------------------------------------------------- Day 67 April 21st - 2019 The girls are looking fine. Day 67 April 21st - 2019 Temp in tent is @ 79° F. Day 67 April 21st - 2019 Humidity in tent is @ 47 %. Day 67 April 21st - 2019 Jessica Rabbits Coco temp is @ 70° F. Day 67 April 21st - 2019 Elly Mays Coco temp is @ 70° F. Day 68 April 22nd - 2019 Ladies are looking good no issues. Day 68 April 22nd - 2019 Temp in tent is @ 71.2° F. Day 68 April 22nd - 2019 Humidity in tent is @ 57 %. Day 68 April 22nd - 2019 Jessica Rabbits Coco temp is @ 67.6° F. Day 68 April 22nd - 2019 Elly Mays Coco temp is @ 66.6° F. Day 69 April 23rd - 2019 Both Ladies looking good. Day 69 April 23rd - 2019 Temp in tent is @ 69.4° F. Day 69 April 23rd - 2019 Humidity in tent is @ 61 %. Day 69 April 23rd - 2019 Jessica Rabbits Coco temp is @ 65.7° F. Day 69 April 23rd - 2019 Elly Mays Coco temp is @ 64.8° F. Day 70 April 24th - 2019 Both ladies are coming alone. Day 70 April 24th - 2019 Temp in tent is @ 67.1° F. Day 70 April 24th - 2019 Humidity in tent is @ 61 %. Day 70 April 24th - 2019 Jessica Rabbits Coco temp is @ 65.2° F Day 70 April 24th - 2019 Elly Mays Coco temp is @ 64.0° F.
Likes
5
Share
@coolesrat
Follow
Missed a watering one week , sorry for the small amount of yellow leaves but it all smells amazing :) . Hoping by adding magnesium sulphate in the feed I’ll be able to bring back some of the colour in the foliage, but other then that everything looks and smells great ;) enjoy!
Likes
17
Share
@JamCam87
Follow
yesterday I did a major defoliation of the mid and upper canopy, getting noticeably more light penetration. I also visited my local hydroponic store this week and purchased me a liter of power si bloom. overdrive and moab. not going to start the MOAB or overdrive till week seven. I’m very curious to what my overall harvest we will be seeing that this is my first grow and all. hopefully everything is going good so far I can’t notice any deficiencies myself if anybody else sees anything feel free to let me know, thank you
Likes
4
Share
@Naujas
Follow
35 days!!! When I returned from vacation, I found her a little tired:) as far as I know, the weather wasn't very good, but the last 3 days we've had really sunny weather, so even though the girl lives on the north side of the house, she's still maturing there:) she looks really good :) good luck to everyone.
Likes
1
Share
@Mars8_8
Follow
Did a strong build a bloom, seabird guano, and recharge tea. Brewed 48 hours. Added some rain water to make about 3 gallons and each plant got 3L in there 3 gallon pots. Smell is super fruity and sour. Almost like a lemon hard candy with a hint of piney fresh earthy tone. Starting to stack 🤙🏻 I got the light at around 20 inches level 8 setting. They getting around 1000 par all around. Really diggen the new mammoth light with the green diodes added in. Supposed to help with penetration. Probably give them their last top dress in the next week and coast to the finish. I normally use 5 gallon pots so still trying to dial in 3 gallon. If I don’t have any deficiencies I’ll probably stick with 3 gallon pots from here on out. 2 gallons to water every few days is a lot easier than 3-4 gallons. Night time temps falling to 58-60 the last few nights. Probably a tad to cold but was watching a mrgrowit video and this guy was saying he flowers in 69 degree light on and terp production and preservation is optimal so going to enjoy the winter months before I have to worry about an 80 degree tent and fighting the heat.
Likes
5
Share
Very happy with how this lady has performed, amazing quality buds, very sticky and dense flower with a concrete smell that I love so much, which is that kind of fruity sweet flavor that this lady is able to produce, it's been a beautiful journey, I'm gonna enjoy a lot this flowers. Very recomended guys!
Likes
28
Share
3/3 Gelat.OG are doing great. One is a bit taller than the other (which is in the top). Makes sense since the lights are focused in the middle... I will grow only 3 plants next time instead of 4. They’re also drinking about 2.5 gal of water every 5-6 days. They look very healthy and I’ve somewhat defoliated and lollipopped slightly. I do little by little as I go to prevent shock.
Processing
Likes
3
Share
@Dico29
Follow
Day 128 it’s good smells sweet and every time I walk into my room it smells like gas Even though quantity is lower then I expected, the trichomes are crazy
Likes
1
Share
Sidecar Strain description from breeder: Genetic Background: Strawberry#13 x Mimosa Type: Feminized Sativa 60% Indica 40% THC: CBD: Yield Indoor : gr/m2 Height Indoor: 0 - 0 cm Flowering time: 8 - 9 weeks ( 58 - 65 days) Aroma: 
Effect: Expectations and training method: I know these genetics are a bit delicate so I’ll be taking things very easy. The breeder suggests topping and training the branches because she can grow fast and tall. By what I’ve seen from the local growers, she can produce some savory chunky buds which is what I’m aiming for. I’ll follow the breeder’s suggestion and Top/LST which is what I’ll be doing to almost all my other strains as well on this run. As for the yields I’m not expecting much given the numbers I got from local growers. No more than 40 grams per plant but always aiming for more. I’ve already smoked this strain grown by the breeder and other local breeders, which is what made me want to grow it myself. I expect nothing but trichomes and terps from these ladies. Equipment used in this cycle: Tent: Dutch Masters 120x240x220cm Lights: 1 x EasyGrow S800v2 1 x Mars Hydro TSW2000 1 x Mars Hydro FC3000 Ventilation: Garden HighPro - ProFan TT Extractor Fan - 150mm Garden Highpro - ProActiv Carbon Filter - 150mm Garden Highpro - ProFan Oscilating Clip Fans - 25cm Blauburg - Inline Fan - 125mm Humidifier: Garden Highpro - Humipro Digital Humidifier - 4 liters Pots: Garden Highpro 11L Fabric pots Medium: Biobizz Light Mix Nutrients: Grotek - Mycrorizo Plagron- Alga grow, Alga Bloom, green sensation and royal sugar. PH down Calmag Measuring instruments: Hygrometer/Thermometer - Govee: EC Meter - HM Digital: COM-80S Hydrotester PH Meter - Vanguard Hydroponics Happy Growing! 😃