
Processing
Likes
Comments
Share


Likes
14
Share


@Jazzvet
Follow
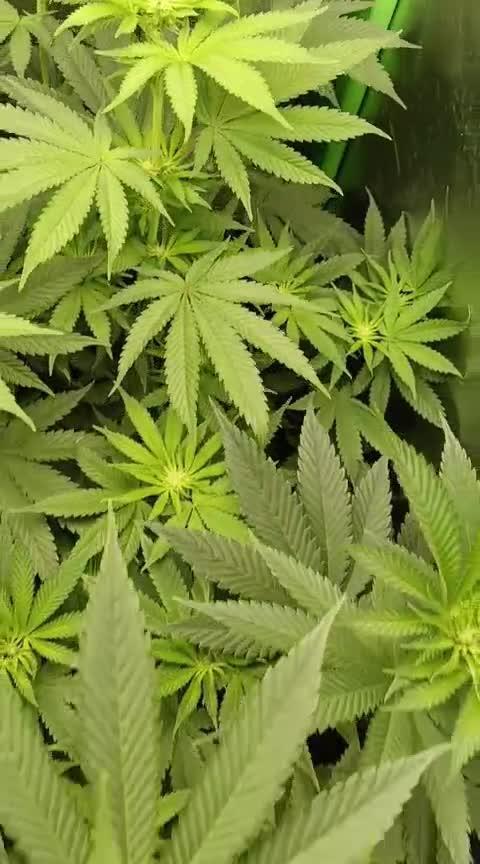
This week was very well, the girl showed her first pistils and she's stronger and healthier than ever, so:
Day 30 sprayed with bioprotect
Day 31 watered with 3l of water with 6 ml of bh, bg an a-v
Day 33 The first pistils are appearing sign that blooming phase has begun.
Day 34 water with the mix
Day 35 I've turned on the dehumidifier trying to decrease the humidity and starting to defoliated some lower leaves, 3/4 leaves per day stress the plant to much.
See you next week
Happy growing

Likes
81
Share


@LockDownGrow
Follow
Although the yellow appearance this lady has still been growing at the same rate as the rest and shooting out the side branches nicley , she is a week behind the rest due too the first seed not germinating but week by week progress has been the same as the others

Processing
Likes
2
Share


@Vet4weed
Follow
Taking it slow with the veg state to develop larger, stronger plants and it seems to be paying off. I've trimmed the lower leaves at least 3 times this week. I think I'm going to extend it out at least one more week before switching to flower state.
Early in the week I switched from blue to purple to allow the branches to push through the screen more. Then mid-week blue, to rebuild the fan leaves, then back to purple once I rearranged everyone into their optimal positions for capturing light. I see a lot of potential for multiple colas. Each time I switched to purple, I raised the light up a few inches to help them stretch. As noted last week, lamp distance is being measured from top of net (not top of plant).
I continue to add compost tea every Tuesday, which they love :-)

Likes
8
Share

@Gabgrow
Follow
Not much on this week besides a strong streech and the set-up of an aquabox system to manage some days I'll be out for holidays. Mantaining the same nutrition and feeding through acqua box. Almost any gnats on the tent on this week. Not doing much besides trying to avoid disrupting their streech period.
Good growing to everyone!
Ps. Almost forgot: AK moved to a smaller tent with another plant I'm reporting in a separated diary since she is an autoflower and I belive it would be most beneficial a 18/6 light schedule
Likes
13
Share


@Rungood
Follow
Début de la 8eme semaines de floraison 😁 elle boit de l'eau depuis 6 jours je pense coupé dans la semaine 😍😍 J'ai hâte !!!
Likes
16
Share


@borneogrower
Follow
Recovery from pruning n 2nd topping. Waiting for 3 weeks for 3rd topping.
Planning to transfer the plant for flowering


Likes
5
Share


@VfB752
Follow
Beleuchtung auf 100%
Düngen bei jedem zweiten gießen
Sind alle 3 die gleichen samen aber die vordere ist gegenüber den anderen zwei sehr dunkel wieso auch immer aber sieht verdammt schön aus 😍


Likes
4
Share


Likes
20
Share


@Hashy
Follow
Week 5
Light cycle=18/6
Light Power=120w
Extractor controller settings
High temp= 25c
Low temp= c
Temp step=0c
High Rh= 58%
Low Rh= %
Rh step=0%
Speed max=7
Speed min=1
Smart controller settings (during lights on).
Lights on=06.00am
Radiator on= below 21c
Radiator off= above 22c
Smart controller settings (during lights off).
Lights off=00.00am
Radiator on= below 18c
Radiator off= above 19c
VPD aim=0.6-1.3
DLI aim=28-34
EC aim=1.7
PH aim=6.3
Thur 25/1/24
💧💧💧💧💧💧💧💧💧💧💧💧💧💧💧💧
Method= automatic
Feed=water
Neutralise=0.1ml/L
Roots=0.2ml/L
Easy Ph down=0ml/L
Ec=0.25 PH=6.4/6.6
Time start=12.00pm
Finish time=13.05pm
(7×5 minute runs with 5 minute gaps)
Total flow rate=200ml/min
Flow rate per plant=50ml/min.
Total volume made=12L
Total volume left=5.5L
Total volume used=6.5L
Volume per plant=1.6L (Est)
Runoff.
Total runoff=0L
Ec= PH=/
Did not work properly so need to sort it out.
Total flow rate=185ml/min
Flow rate per plant=46ml/min.
Ran for an extra 15 mins while sorting out system. Should be about 200ml/min now (50ml/min each plant).
💧💧💧💧💧💧💧💧💧💧💧💧💧💧💧💧
#2 (Day 29)
📋 didn't quite get the amount of water it was supposed to.
Extractor controller settings
High temp= 25c
Low temp= c
Temp step=0c
High Rh= 56%
Low Rh= %
Rh step=0%
Speed max=8
Speed min=2
Smart controller settings (during lights on).
Lights on=06.00am
Radiator on= below 21c
Radiator off= above 22c
Humidifier on= not in use.
Humidifier off= not in use.
Dehumidifier on= not in use
Dehumidifier off= not in use
Smart controller settings (during lights off).
Lights off=00.00am
Radiator on= below 18c
Radiator off= above 19c
Humidifier on= not in use
Humidifier off= not in use
Dehumidifier on= not in use
Dehumidifier off= not in use
VPD aim=0.6-1.4
DLI aim=35-40
EC aim=1.9
PH aim=6.2
Fri 26/1/24
#2 (Day 30)
📋 defoliate lower leaves that hardly get any light.
Sat 27/1/24
#2 (Day 31)
📋 H=44cm D=38cm DLI=33.5
Raised light about 10cm
Increased light power to 140w
H=44cm D=47cm DLI=29.5
Sun 28/1/24
I have decided today is going to be the last day of veg before I flip to flower.
Lights will have come on today at 6.00am and go off at 10.00pm, they will get 14hrs light today and tomorrow will be day 1 of 12/12.
💧💧💧💧💧💧💧💧💧💧💧💧💧💧💧💧
Method= automatic
Feed=Veg nutes.
Neutralise=0.1ml/L
Silicon=1.0ml/L
Calmag=1.0ml/L
Terra grow=4.0ml/L
Roots=0.2ml/L
Easy Ph down=0.125ml/L
Ec= 2.05 PH=6.1/6.3
Time start=12.00pm
Finish time=13.45pm
(11×5 minute runs with 5 minute gaps)
Total flow rate=181ml/min
Flow rate per plant=45ml/min.
Total volume made=12L
Total volume left=2L
Total volume used=10L
Volume per plant=2.5L (Est)
Runoff.
Total runoff=1L
Ec=2.7 PH=6.1/6.3
💧💧💧💧💧💧💧💧💧💧💧💧💧💧💧💧
#2 (Day 32)
📋 With no information for flower time I'm going to have to guess she will be finished in 45-60 days. I removed quite a few lower nodes that probably won't break through the canopy, they where ideal candidates for clones.
Light cycle=12/12
Light Power=140w 58%
Extractor controller settings
High temp= 25c
Low temp= c
Temp step=0c
High Rh= 56%
Low Rh= %
Rh step=0%
Speed max=8
Speed min=2
Smart controller settings (during lights on).
Lights on=10.01-21.59
Radiator on= below 21.5c
Radiator off= above 22.5c
Smart controller settings (during lights off).
Lights off=22.00-10.00
Radiator on= below 18c
Radiator off= above 19c
Mon 29/1/24
Lights on at 10.00am off at 22.00pm
#2 (Day 33)(Day 1 flower)
📋 H=49cm D=42cm DLI=23.0
At 9.00pm increased light to 150w
H=49cm D=42cm DLI=24.0
Tue 30/1/24
#2 (Day 34)(Day 2 flower)
📋
Wed 31/1/24
#2 (Day 35)(Day 3 flower)****
📋 H=54cm D=37cm DLI=27.0
🚿 foliar sprayed (Sumo Boost 2ml/L).
She got flipped into flower on day 32, has caught up to the others in height and even overtook one plant. The cola I stuck back on is a lot shorter then the other 4.
Back soon.
Take it easy.


Likes
10
Share


@SgtDoofy
Follow
3/6:
Yesterday I fed half strength nutrients ph'd to both. Amnesia's runoff ph was 5.5. So I made another half gallon of half strength and ph'd it to 7.5 to get Amnesia's runoff to be 6.5. If only I had done this sooner and didn't mess up with the PH testing drops as opposed to using a ph meter, Amnesia's leaves could have still been green. I've been removing all of the dried, crispy ends as I find them, leaving the rest of the leaf intact to suck up as much light as possible. Timelapses are showing that the buds are fattening up well though. Trichome production has kicked in and is covering the leaves. Beautiful colors all around.
3/8:
I don't think I can wait any longer to feed Amnesia. Vacation starts midday tomorrow, Thursday, and I'll be away until Monday evening. I'm mixing up a half strength nutrient mix with molasses and epsom salt. I'm also going to try to set up a timer/pump system to water sunday night.

Likes
15
Share


@Buddyboy_03
Follow
End of Week 4 (for those following along at home) and there are trichomes everywhere! Both of these plants are putting out sugar like there is no tomorrow. Velvet Moon is smelling a lot like tropical punch drink (Holy Punch x Dosi Dos) and it’s delicious. The Black Apple has a much weaker smell which isn’t really defined for the nose yet.
I stripped a few more side branches this week as things were tangling up as there was too much going on. Both look very happy and have plenty of air flowing through them now.
BAH is slightly taller than VM. Both stretched approximately double their height and not much more. That may have been due to me topping the plants 3 days before flip to try and keep heights limited. It worked well as i am at the exact distance to the light i wanted to be for 100% power (50cm).
BAH has has some stems go a pink/res colour but no other plant changes.
It’s hot here due to summer so been running the girls at night and they sleep during the day.
Looking forward to documenting the bud development over the next few weeks as these stack weight and start maturing.
I think this will be a 10 week flower minimum.


Likes
5
Share


@CreoWeed
Follow
Hello nice people!
This week number 6 went pretty good... Colas are building up and bringing out gorgeous colours as you can see in the pictures, purple mixed with pink and orange makes this plant the most beautiful I ever grown.
The smell started very softly and it had a kind of pine arome, sublime.
I've started giving her some Bloombastic and will keep doing so for the whole week.
Stretching seems over and she kept a quite compact size, at 62 centimeters.
That's all lads, I cannot wait to update the next weeks of this marvelous plant.
Ah, I also just harvested and rated my other diary, come and have a look if you have done it yet!
Stay tuned and stay high peeps!


Likes
29
Share


@nonick123
Follow
Día 48 (10/06) Riego con 1 Litro H2O + Regulator 0,15 ml/l + CaMg-Boost 0,25 ml/I +TopBooster 0,2 ml/l - pH 6.2
Día 49 (11/06) Riego con 1 Litro H2O + Regulator 0,15 ml/l + P-Boost 0,5 ml/l + K-Boost 0,5 ml/l + CaMg-Boost 0,5 ml/I +TopBooster 0,2 ml/l - pH 6.2
LCCA tiene unos colores espectaculares con tonos morados 😍
Subo el CalMag a 0,5 ml/L porque BPPA no se recupera, y el resto muestran inicio de deficiencia
Día 50 (12/06) Está lloviendo mucho por aquí. Menos mal que tengo el techo de policarbonato en mi invernadero casero. Hoy no necesitan riego
Día 51 (13/06) Riego con 1 Litro H2O + Regulator 0,15 ml/l + K-Boost 0,5 ml/l + CaMg-Boost 0,5 ml/I + TopBooster 0,2 ml/l - pH 6.2
Día 52 (14/06) Riego con 1 Litro H2O + Regulator 0,15 ml/l + CaMg-Boost 0,5 ml/I + TopBooster 0,2 ml/l - pH 6.2
Tiene un aspecto espectacular, con su cogollo central muy muy gordo y con unos reflejos morados preciosos
Me parece increible que esta planta pueda ser capaz de acabar en las 8 semanas (menos de 60 días). Voy a empezar a mirar sus tricomas con el microscopio
Día 53 (15/06) Riego con 1 Litro H2O + Regulator 0,15 ml/l + K-Boost 0,5 ml/l + CaMg-Boost 0,5 ml/I + TopBooster 0,2 ml/l - pH 6.2
En el microscopio se ven las antocianinas subiendo por los tricomas 😍
Día 54 (16/06) Riego con Té de Floración - 750 ml / planta
💦Nutrients by Aptus Holland - www.aptus-holland.com
🌱Substrate PRO-MIX HP BACILLUS + MYCORRHIZAE - www.pthorticulture.com/en/products/pro-mix-hp-biostimulant-plus-mycorrhizae
Likes
24
Share


@MrPott
Follow
love seeing all the buds getting thicker and thicker by day. Tempted to harvest it early but I HAVE to be patient. Just a few more weeks and they'll be solid. Bottom leaves are dying so there's quite a bit to clean up but overall, really happy with how the ladies are turning out.


Likes
12
Share


@GREENPHOENIX6262
Follow
*Early Flower 09/10*
(2) Fastbuds - Mimosa Cake Auto
Aggressive LST was applied for even light coverage.
Smaller-Lagging budsites and bigger fan leaves under net have been removed.
Slight increase in nutrient feeds, thus far 0 signals of deficiencies.
*Mid week update - 09/13*
Both plants have grown approximately 6 inches in height
Early flowering continuing to progress accordingly
Half a gallon increase in water feed (Nutes included)
*End of week recap 09/16*
Mimosa Cake (Auto) - Both in week flowering accordingly
Small increase on nute feeds - Moderate increase in filtered plain water feed (1.5 gallons )
*SEE END OF WEEK RECAP VIDEO*