Likes
Comments
Share
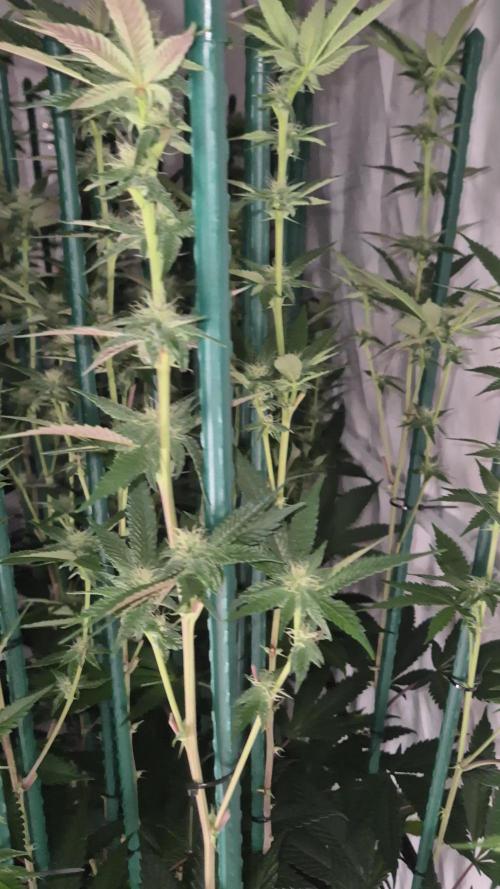
February 23, 2021 (Week 7, Day 50, Flower 1): It's the first day of flower! The plants slept for 12 hours last night and will keep that up until harvest. Still seeing pretty crazy growth even for the 12 hours of darkness they went through. Grew about another .5". Excited to see how much these things stretch. Soil was very dry this morning so I watered with 4l of water per plant with 3ml/l pH Perfect Bloom + 2ml/l pH Perfect Grow + 2ml/l Sweet Raw + 1ml/l Big Bud + 1ml Cal-Mag Plus + 1/4 tsp/gal Humboldt Nutrients Big Up Flower Powder with a pH of 5.8. Runoff pH of 6.3. I will start watering with a 6.0 solution going forward. I also top dressed with about an inch of fresh Roots Organics Lush soil. Plants are looking great. Not seeing any problems currently. I'll keep a close eye on them as they transition. Turned down humidity another 5% today. Averaging 50% rH and 73℉. February 24, 2021 (Week 7, Day 51, Flower 2): Plants look great. Soil still moist from watering. Tilled half inch of topsoil. Averaging 50% rH and 73℉. Nothing else for today. February 25, 2021 (Week 7, Day 52, Flower 3): No complaints at all. These plants are as healthy as they can be from what I can tell. The growth sites are starting to do some funky stuff and everything is kind of starting to "clump" together. Really interesting to watch this process happen, as I've always wondered exactly how the buds begin to form. I was greeted with a very sweet smell when I opened my tent this morning, nothing strong yet. To encourage further vertical growth I've removed all LST ties except for two from Gelato 1 and Unknown 2. I adjusted the ties on Unknown 1 because it's already starting to stretch and I need it to slow down just a bit while the others catch up. Soil is semi-moist this morning but the pots are still pretty heavy, so I'll water in a day or two. Averaging 50% rH and 72℉. February 26, 2021 (Week 7, Day 53, Flower 4): Pots were light today so watered with 4l per plant with 3ml/l pH Perfect Bloom + 2ml/l pH Perfect Grow + 2ml/l Sweet Raw + 1ml/l Big Bud + 1ml Cal-Mag Plus at 6.0 pH. Runoff sitting at 6.4 pH. Defoliated one more node on each growth stem - the lollipop look is coming around. It will probably be my last defoliation like this. From now on I'll only pluck fan leaves that get in the way of bud sites. Unknown 1 grew over 2" in the last 24 hours. The stretch is getting real. I removed all remaining LST ties from Gelato 1 and Unknown 2. I redid the LST ties on Unknown 1 in an attempt to control its growth, but at this point I feel like it's just going to be a lanky plant and there's nothing I can do about it. I'll do my best to keep them as level as I can. Also, I took off Unknown 2's stem cast today and it healed really, really well. I have never seen a plant do this, but it filled itself in with tissue that is soft to the touch, and there's only a slight split at the top. It's looking really great. My wife noticed the smell of the plants this morning for the first time - so that's a good sign! Plants are starting to put off a lot of their own humidity, so I haven't refilled my humidifier in days. Averaging 50% rH and 72℉. Happy Friday everyone! 👻 February 27, 2021 (Week 7, Day 54, Flower 5): Soil is still moist - tilled half inch of topsoil. Overnight it appears Gelato 1 and Unknown 2 are doing their damnedest to catch up with Unknown 1 - they both grew about 2". Plants are looking great and are definitely starting to stretch! Averaging 50% rH and 70℉. February 28, 2021 (Week 7, Day 55, Flower 6): Top soil is pretty dry, but the pots are still heavy. I'll hold off watering for a day or two. The last 24-hour period I think I saw the biggest difference in the plants so far. Each growth stem stretched a ton on each plant, but at varying degrees. The canopy is suddenly uneven, but I think trying to keep everything even at this point will be futile. I will let them go and install the SCROG net soon if the colas start growing too differently from one another. The stipules on every plant tripled in length overnight so I think the plants are definitely getting with the new 12-hour schedule. All the plants are starting to shoot off tons of pre-flowers and pistils now. They're in the swing of things now. Averaging 50% rH and 70℉. March 1, 2021 (Week 7, Day 56, Flower 7): Soil is dry but pots still have some weight. Will probably water tomorrow. Plants are looking fantastic. Canopy is stretching all over the place. Averaging 50% rH and 70℉. Looking forward to next week! Hopefully we'll start to see some flowers poking through soon!
Likes
167
Share
🗓️ 5° WEEK FLO // DAY 29-35 (from switch) // DAY 106-112 (from dry seed) ⚡- Light: 30 cm / 250 watt; ⌛- Schedule: 12/12; 🌡️- 22° C - 65% RH average. Unfortunately the last month has been very cold and this has slowed things down a bit, next month should be cold anyway so I don't expect an exceptional yield this time. I'm worried about the root zone: cold is good, too cold means problems; 📑- PH 5.9 - EC 2.3; 💧- That's the 2° week with the same solution. I'm just doing some top up when needed. The phenotype #1 is drinking about 2.5 LT/day, PH is swinging between 5.9 and 6.2. The phenotype #2 is drinking about 1.5 LT/day, PH is swinging between 5.6 and 5.9; ✂️- A new big haircut for them on day 29 flo. Removed a lot of leaves and a few lower branches. Due the lack of stretching I removed something under the net but not everything, so I let at least 30 cm of buds. That's my goal, as always! 🌱- We are in full flowering stage, let's see how things develop. Pheno #1 is doing great so far, a way better than pheno #2. I think we need 4/5 weeks to harvest. 🆕- This week I got the TrolMaster TCS-1 (@TrolMaster_Europe) and I started to track my grow box data. I will add these info once I harvest!
Likes
19
Share
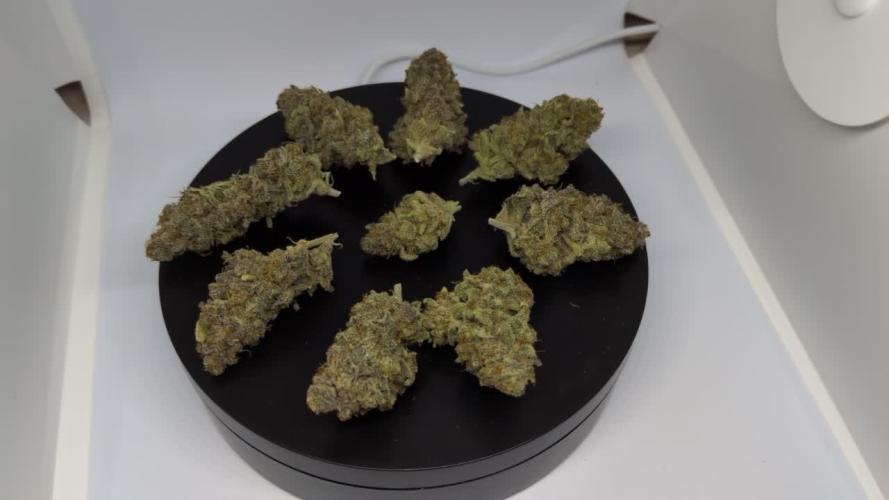
Die Buds liegen jetzt leicht vorgetrimmt in einem DryFermBag imZelt mit folgenden Werten Temp.: 21°C RLF.: 62 % Aus der Erfahrung kann ich die Buds nach 7 bis 10 Tagen entnehmen und final trimmen.
Likes
8
Share
@Skully
Follow
🇩🇪 Alles sieht gut aus 👌🏻 🇺🇸 Everything looks good 👌🏻 🇪🇸 Todo se ve bien 👌🏻
Likes
21
Share
Apparently you can give your plant nitrogen burn with an organic fish emulsion. Live and you learn LOL
Likes
4
Share
ya se ven las flores, riego cada tres días , y corto las hojas que están caídas solo .último día de la semana 9 ya se aprecian las flores
Likes
Comments
Share
Week 3 . Buds start forming and stretching. Watering with Bioenhancer every week 1g/l of dechlorined water. Normal watering just with pure water w/o PHing
Likes
237
Share
Oct 3rd, - start of week 9 in flower; Panama Red, Honduras x Panama get a visit and a feeding tomorrow - (ford) Pink Kush (Bahia black head) get a visit and phood tonight as well. (Bahia Black Head is being Flushed this week, no food) - Alaskan Purple is simply putting on a Huge display after being so quiet all year long. Pictured bottom branch is over 9’ long… 4th - applied the Milk treatment as planned. White Powdery Mildew has been knocked out on this plant; Alaskan Purple. Its also completely stalled Mildew on two other grows. (2-part Milk / 3-part Water. 3.25% fat content is what the Gardener references used for hard vegetables: 7-10 days as req’d 5th - fed Panama Red and Honduras x Panama. (Black Tuna gets Chopped Sunday) 6th *** its a great story, and I’ll keep it short here. - LEGACYMARKETFARM gave me an opportunity earlier this year, and I want to give a shout out to them so people can see the High-Level that they are working-on. Andrew bought some seeds at auction that were created and bred by a Famous and Notorious grower; Charles Scott. aka the original Reeferman. Andrew provided me with a wonderful palette of seeds to work with, as I adopted many of his growing targets and patterns into my own efforts this year. One of the Seeds I could only shake my head at; “TOM FORD Pink Kush x Vanilla Frosting” wtf is this was probably really close to a direct quote. There was Nothing online beyond Pink Kush… and One of the seeds was Germinated. Here we are 6 month’s later, I’m planning a harvest, and looking up tentative flowering times, and Lo and behold, the exact Seed I am growing, is now on-sale from Reefermans former employer: Old School Breeders Association. The exact Strain… Kinda freaks me out that I’m at the head of the Line, but there was lots of useful info on the site, and she stays outside for another week or two now thats for sure… Please help me celebrate this great discovery of info, and give Old School Breeders a Look, they have some amazing Genetics at work there. I’ve reviewed their Black Willie, thats why there is a second one growing outside right now! Cheers people, super happy with tid-bits of info - And a huge Thanks to Sarah and Andrew from LegacyMarketFarm for truly being Larger than Life, and for all the time you two spend really helping other Growers through day to day stuff ! https://oldschoolba.com/tom-pink-kush-by-monster-breeders/ https://growdiaries.com/grower/legacymarketfarm Oct 7th - harvested Alaskan Purple, it was time and she is beautiful. Rain persisted and was forecast so it shot my final photo-shoot in the foot. And I chopped her down; 16 lbs 8 oz whoa that was a surprising number. Weighed her 3x, alls good 9th - end of week 9 in Flower
Processing
Likes
29
Share
Likes
49
Share
@Ferenc
Follow
Day 64, 22nd of November 2021: Hi there! Here we go..... so basically pistils are appearing stronger this is the 2nd weeks since they started producing pre flowers. The plants getting a bit light might be some air circulation problem? However they look good and of course closer to the end the gettin' older so the leaves also die. Set up and timing is the same since flower season started. ViparSpectra XS2000 is on full power which is 240W so 100% capacity. Ventilation: 12 hours period when the lamp is on it switches 1 hour on and after one hour off mostly to keep the temperature and of course because of fresh air flow. When the lamp is off it switches on in every 2 hours for 15 min at the same time with the extraction fan. The extraction fan is on 12 hours when the lamp is, and then it switches on in every 2 hours for 30 min. That's all a bit more water for them from today also. Humidity quite the same approx 50%, temperature as well approx 26-27 Celsius. Fertilization remains the same since last week, the BioBizz family raised up to be 2ml/L each so it is like 2ml/L of BioGrow, 2ml/L of BioBloom, 2ml/L of TopMax... see the ratio above. The schedule of the fertilization has not changed happnes 2x a week except epsom salt just 1x a week.
Processing
Likes
28
Share
I wish I would of taken pics of them before I trimmed them up because they were a massive bush!!! At this point im satisfied with the number of potential cola's and size of the branches. I can already see preflowers coming from some of the nodes which is crazy because i've never seen any of plants in history doing this. Its also the first time i've taken veg past 3-4 weeks but mainlining does extend the veg time some. Today i've switched to 12/12 so next week will be the first update of flowering!!! quite excited to finally get to this stage.
Likes
27
Share
1/20/2023- So much to do pre grow and over the next 16 days, absolute first order of business is that I have to take down my current Grow---TIMBER-- Then I have a list of things I have to get done in order to be ready to start this grow 1 Feb. With that said T - 2 days until start 48 hour Flush T - 2 days until Start 48 hours of Light T - 4 days until TIMBER!!! Items that need to be done before 1 Feb 2023 1. I need to clean the tent out 2. I need to clean the equipment- Proper Sanitization between grows in Hydro is a must!!! 3. I need to get the hole in the ceiling above my tent repaired- For my last grow I had a deep sink installed in my grow room, to make Hydroponics a little bit easier and have a water source in the same room. The seals on the pipes they were installing broke and leaked through the ceiling causing some damage all the way across my grow room, I was already weeks into my grow and couldn't risk them working above my tent and it would have been very awkward positon for them to be working in as well, so have to get this done quickly between chop and germination. 4. I have to install my new light- I was using a Vivosun 4000 and for this grow I am switching up to a Spider-farmer SF 7000. 1/20/23- For this upcoming grow I am working with M/F photo seeds so I ordered 4 Sex determination kits. I recieved my my 4 Sex determination testing kits from Rimrock Analytics today. I will be using these to test my plants at week 2 of Veg so that when/if I take clones I know I am taking them off females. As well as I don't want to accidently pollinate my tent during this grow I am looking for big beautiful buds not seeded buds. :-) 1/24/2023- Harvest of current grow- Started at 2:00pm and finshed wet trim and firt batch into the freeze dryer. 1/25/2023- Next batch into the freeze dryer and cleaning all my equipment for this Grow. T-1 Day until the workers are supposed to be here to fix the hole in the Grow Room. T-3 days until I instll my new Gorilla Grow Tent and my New Light Spider Farmer SE-7000 for this grow. T-7 Days until Start of Germination 1/26/2023- Harvest is done ran through the Freeze dryer and dry tim completed. 1/27/2023- Grow Room repairs completed. Hole is gone Letting the paint dry before I install the new tent. T-2 days until Install the New Gorilla Grow tent and the new Light T-3 days until I put the hydro equipment in the new tent T-5 days until Germination 1/29/2023- Day 0- Final Pre Germination activities Germination Start T-3 days The paint on the ceiling was dry and it was time to finish prepping for Germination. I got the following items knocked off my list. New 4X4 Gorilla Grow Tent is up and ready New Spider Farmer SE-7000 Light is installed- Thanks Moony Grows for the suggestion and for the Code that got me some money off and free shipping (Moonygrows)!! I turned the lights all the way up to max and set the timer to 18/6 0600-0000. I will keep an eye on the temperature and humidity without my plants and see how hot it gets with the new light. I put my Hydro system back together and put in 40 gallons of water into it, time to monitor for leaks the next few days. I Setup my cloning machine for Germination Days 3-11 1/30/2023 let me break down the situation, ROOM in the TENT.. Enough said.. No really I tried putting my exhaust system up in the new tent with my new light, The light is so big corner to corner that it really didn't give me enough room for the lights be be raised, with the exahust hanging the buckets my plants are Starting in are 2 and 1/2 feet off the ground, great for plenty of room for roots but not so great for upwards space for the plant to grow. In a 6' 11 tent with the exauhst in side and hanging that only gave me a little over 4 feet of grow room to play with. My last grow if you saw my diary, anyone could tell I was struggling to keep the buds off the lights. No good, Since space was such an issue I was running my carbon filter inside on the ground but It really needed to be up sucking the heat out not shooting the cool out. With that setup I was sucking air through the filter and pushing it out the tent at a bottom exhaust hole cold out. Wasn't doing me any good for my heat. I was hitting temps of up to 85 degrees. I bought a portable AC unit and have been running it in the grow room to try and keep temps below 85 and I have had to lower the power on my lights during grow also not ideal.. With that said a friend of mine MoonyGrows (Check out his diary) took the time to look at my issue send me a picture of my grow tent setup with detailed instructions on how to suck the air out from the top but putting my filter and fan on top of my tent so no room issue and I am sucking the air out from the top where the heat is instead of pushing the air out from the bottom where the cool is... THANK YOU MoonyGrows For taking the time to help me get this straightened out.. Now I have room and I have the exhausts working right and now my temps with everything at 100% are topping out at 80 this dropped the temp by 5 + degrees at 100% max. T-2 days until Start of Germination Prepped my seed tray with humidity dome Prepped my Rapid Rooter plugs. I Used RO water, and I added a few drops of Hydrogen peroxide to Oxygenate the water. I then PH balanced between 5.7-6.0 the same that they will be getting in the Cloning Machine and when they get to thier final grow pod. I perfere the 5.8x range and I hit 5.84 for these rapid rooters. If you want to see a complete video on the process HowWeedGrow has an amzing video that shows step by step how to do it and explains it better than I ever could including how to plant the seeds. Which I will cover when I get to that step on Wed. https://www.howweedgrow.com/how-germinate-weed-seeds-cannabis-rapid-rooters/ 1/31/2023 T-1 day until Germination Start All set and ready have my Rapid Rooter plugs ready to go have my seeds out.. Have my seed tray warming up tonight. Tomorrow morning right into the Rapid Rooter then strait into the tray. I will spray the dome to start the humidity in there. 2/1/2023 Germination Day!! Let the games begin! 0600am Put the seeds into the Root Riots. And then put the seeded Root Riots into their first home the Seed tray. I have them under the light 24/7. Sprayed the dome 7:30pm Sprayed the Dome to keep humidity going on the dome. 2/2/2023 Day 1 of Germination Sprayed the Dome in the morning Sprayed the Dome in the evening 2/3/2023 Day 2 of Germination Roots are starting to come out the bottom of the root riot plugs and the heads are slowly popping out of Number 4 just below the surface. Afternoon- Number 4 has popped up Evening- Number 3 has popped up as well. Happy Dance!! 2/4/2023 Day 3 - Germination Surprise Surprise Surprise- all 4 have now poked their heads up.. Happy day!! 100% Germination succeeded. Now major milestone to track is how many are female and how many are male. I will take look at the roots this afternoon/evening and see if they have enough root to go into the cloning machine for the next 7 days before they go into their Hydro Pods. Day 3 - Germination - Evening.. Roots looked good and they were tall enough to make it into the cloning machine. Now that they are all in the cloning machine I have switched the lighting to veg state 18 on 6 off. 2/5/2023 Day 4 - Germination - Morning All the Ladies (fingers crossed) looking great stretching nicely and look nice and green, Photo synthesis underway.... UPDATE!! After a very interesting POD cast on FSTS by Dr. Bruce Bugsbee from Utah University, I have shifted my lighting to 24 hours on through seedling and then I am going to shift to 20 hours on the rest of Veg. 2/6/2023 Day 5 - Germination While Checking on my conditions inside the new tent last night, I found that the Humidity was down to 39 Percent. I added an AquaOasis Cool Mist Humidifier, the reason I selected this humidifier is that I needed one that could be turned on and off utilizing my Inkbird Humidity Controller IHC200 that I have my Pro Breeze Dehumidifier currently running with. Root structures are starting to get there about 1/4 of an inch. 2/7/2023 Day 6 - Germination Everything seems on track more roots poking out of each today. They are each getting a little taller as well. Checked in the evening and number 3 was drooping the Root riot plug on the bottome was dry and the roots were not in the water yet. I raised the water just enough that the longest root that was sticking out is now hitting the water. 2/8/2023 Day 7 - Germination Everything looked good while checking in on them this morning number 3 is now full up and no droop again. 2/9/2023 Day 8 - Germination T-2 days until Plant into Forever Pods and we start week 1 of Veg .. :-) Surprising thing to me is that number 1 and 2 were later in popping then 3 and 4 but the roots are growing longer in 1 and 2. 2/10/2023 Day 9 - Germination Number 1 and Number 2 are definitely ready for transplant today.. Based on how they were yesterday and where they are today I am hoping by tomorrow 3 and 4 are ready. Today they look to me where 1 and 2 did yesterday.. I really hope 3 and 4 catch up by tomorrow since.. T-1 day until transplant to new/ final home for grow. Need the roots long enough to have some clay down in the basket to keep the root riot out of the water and only roots in the water.. 2/11/2023 Day 10 - Germination Today they got placed in thier forever Home, 7 days from Sprout and 7 days until Week 1 Start. PPM- 180 this is water out of the Tap Temp Water: 70.7 Temp Tent: 77 Humidity: 40% I have a humidifier going 24/7 to try and bring this up.. I also have Humidity Domes on each plant. 2/12/2023 Day 11 - Germination Sprayed the domes, all are looking good.. Nothing much to do at this phase but Keep monitoring the PH level in the system and making sure they have a comfortable home. T-6 days until Week 1 start 2/13/2023 Day 12 - Germination Sprayed the domes, They were looking a little yellow today so I moved the light down to assist. Nothing much to do at this phase but Keep monitoring the PH level in the system and making sure they have a comfortable home. T-5 days until Week 1 start 2/14/2023 Day 13 - Germination Sprayed the domes, They were looking a little Florissant yellow today, with what looks like slight burn on the tips, I talked with a fellow grower and we agreed that It was probably that I was drowning them, Yes you can drown you plants even in Hydro, but only early on.. :-) It usually happens with the water being too high, which soaks not only the roots but the medium (root Riot plug in this case). I lowered the water from touching the bottom of the pot to about 1" away. This will probably take 3-4 days to resolve. I will continue my daily monitoring. T-4 days until Week 1 start 2/15/2023 Day 14 - Germination Sprayed the domes, continue my daily monitoring they look a little darker green instead of lime green now that I lowered the water levels in the system, so I think that I might have resolved the issue but it will take a few days for recovery to happen. T-3 days until Week 1 start 2/16/2023 Day 15 - Germination I looked in on them this morning, 3 and 4 look like they are doing well and recovering nicely. Number 1 not so much it has brown spots on the leaves, this very well can still be a side effect of the overwatering but I decide to go ahead and add Nutes earlier than I was planning just incase. I was going to wait until Saturday but I think intervention is necessary now especially after drowning them early on. I added 1/2 what I am planning on adding for week 1 start. I also think I am going to adjust my chart to add 1/2 2 days after plant from now on. I don't think it would hurt it to have some Nutes to pull from. .25ml/Gal Calmag = 12.5ml 1ml/gal GH FloraMicro= 50ml 1ml/gal GH FloraGro = 50ml 1ml/gal GH FloraBloom = 50ml T-2 days until Week 1 start = I will drain the system and start it over on Saturday with Week 1 Nutes. 2/17/2023 Day 16- Germination I didn't even want to post today after looking in on them this morning, 3 of the 4 are now showing signs of dronwing.. Brown spots on the leaves, the water levels were still too high.. I drained about another inch out of the tanks.. Will see how quick they recover.. I start week 1 tomorrow and will have to ensure my water levels are at least 1" away from the basket on this round.
Likes
16
Share
The solstice. Here we go! I hope to start seeing some action soon and pulling out males. I have my hunches, but haven't confirmed any pollen sacks. The plants got over watered so I have laid off the watering for now. I will be preparing my last transplants soon so I modified pot size to show 30 gallon. So far so good. No changes yet. Considering LST for the 4 plants growing together. I indicated weak smell, but you can begin to get subtle hints of lemony/orangey aromas. Happy Growing grow-mies.
Likes
26
Share
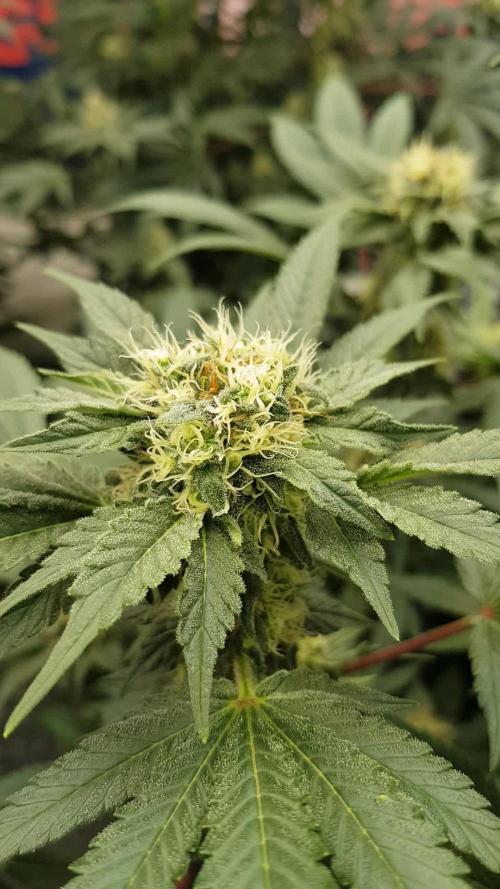
Day 79 (First Grow, Flowering Phase): Hey everyone! It's the start of a new week, and we're now on day 79 of our first grow. The flowering phase is progressing beautifully, with the buds getting bigger and frostier day by day. 🌸✨ We've started to see the formation of orange hairs, which is a promising sign of the buds maturing. The plants are looking healthy and vibrant, and the SCROG net is helping to keep everything well-supported and evenly exposed to light. Humidity issues from last week are still being monitored, and we're considering adding a dehumidifier to ensure optimal conditions as we move closer to harvest. Thanks for all your support and suggestions. Any tips for these final weeks of flowering are always welcome!
Likes
3
Share
Well been a interesting week to say the least. The one problem plant looked worse than ever so had the experience of a lifetime trying to take that springy net off of the plants ! Don't know who's more traumatised me or the plants ! But got there in the end and did a big flush through the ph was out of ballance at the root zone reading 5.0 /5.1 should of done it a little sooner I suspect. Unsure what caused it as there both of the same res ! But here we are, frosts really starting to build had to supper crop the other more sativa she was looking for taking off through the roof haha! Hopefully that's the end of the drama. These are some tough plants thats for sure and the potential as you can see is huge as I'm only just a begginer in coco and autopots ! See you all next week
Likes
3
Share
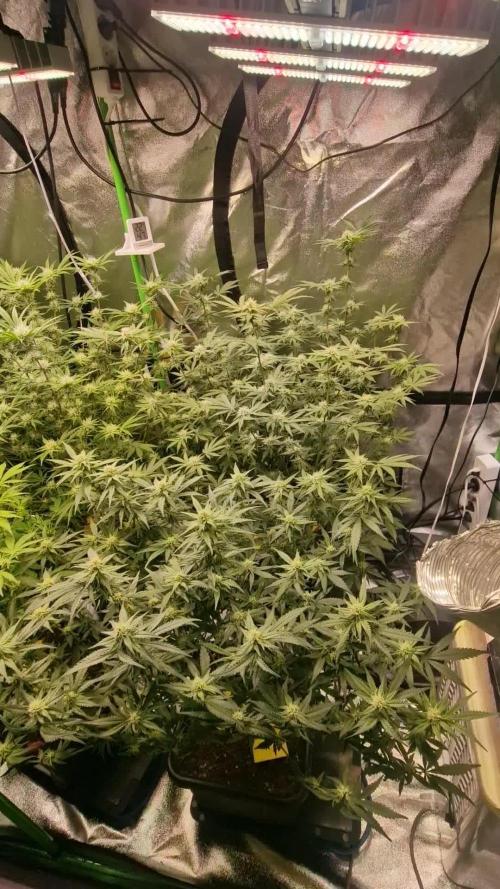
Week 3 is going as planned and it looks like the left side stacked better but its only 2plants on the right what are smaller I might take a few tops off try avoid larf I dont use and never end up blasting it or making bubblehash 😂 Top dressed with Dr Organics 2-8-10 40g per 20L pot and weekly doses of microbes and a combination of Organic growth reg and Trace + Flourish during every watering
Processing
Likes
16
Share
@Marceleco
Follow
The buds are gaining mass really fast now and even the smaller plant looks good. I decided to take them inside because there is supposed to be a thunderstorm with heavy rain today. Really happy how they are turning out so far.
Likes
14
Share
ALL THE PHOTOPERIODS ARE IN THE 8X8 NOW. DID SOME MAJOR DEFOLIATION BECAUSE THEY ARE TOO BIG NOW. THEY ARE SWITCHED TO FLOWER AND THE STRIVE NUTRIENTS IS INSANE.. BEST FERTILIZER PRODUCTS EVER MADE. I USED IT 4 TIMES IN 13 DAYS AT FULL STRENGTH AND THERE IS NO NUTRIENT BURN AT ALL AND THEY EXPLODED. AND I HAD A FEW THAT WERE TURNING YELLOW, I THOUGHT IT WAS ROOTBOUND OR CALMAG DEFICIENCY BUT THE STRIVE NUTRIENTS BROUGHT THEM BACK AND THEY ARE SUPER HEALTHY AGAIN.... ATTENTION GROWERS:::::: YOU MUST TRY STRIVE NUTRIENTS. BY FAR THE BEST FERTILIZER PRODUCTS EVER.. I PROMISE YOU THAT AND IF YOU USE IT YOU WILL NEVER USE ANYTHING ELSE FOR EVERYTHING MARS HYDRO VISIT: www.mars-hydro.com www.marshydroled.ca PROMO CODE: rocknroll VISIT THE ALIEXPRESS STORE: @marshydro_aliexpress Instagram: @marshydropenny https://youtube.com/channel/UChU5ZWwNi-DvnO3oWVU3ceA (NEW) STRIVE NUTRIENTS 💪 https://strivenutrients.com/ Thanks for taking the time to read and check out my diary🤜🤛 FC-E6500 LED GROW LIGHT: FC-E6500 grow light with 3978pcs OSRAM BridgeLux Diodes & Moso Driver, market-leading PPF 2.7 µmol/J, Max 2.5g yield/watt with 30% higher Average PPE, more cost-effective when compared to same style type lights. Only consumes 650W, perfectly cover 5x5ft (personal), 4x4ft (commercial) grow space. Innovative Precise Uniform Lighting-Built-in removable bars interval & dimmability enable the exact & dynamic PPFD control over each of the plant growing stages, FC-E6500 detachable bars deliverSuperior Heat Dissipation: Real Aluminum heatsink together with 6 slim profile passive cooled bars (THINNER & LARGER surface) and detachable Meanwell Driver, create less heat. save 50% hydro than other old grow lights! Driver can be mounted remotely on the side of a grow tent/rack or on an adjacent wall to remove heat from grow space. Full Spectrum UV IR LED: With Yield Max spectrum (660nm Osram enhanced Deep Red,2800k-5000k,730-740nm IR,380-410nm UV LEDs), Average PPFD the FC-E6500 LED grow lamp enables cultivators to produce BIG FAT Dense Buds, perfect for full-cycle hydroponic, soil, grow tent/grow room. Dimmable Commercial Grow Light: Cost-efficient, easy dimming & daisy chain With a max up to 20 lights, IP65 Waterproof, master light easily controls the rest. Perfect for commercial & home horticulture. FC4800 LED GROW LIGHT: GET THE MAX FROM MARS👍: Welcome one of  the newest members of the Mars Hydro family🤜🤛🤘. The Mars Hydro FC 4800 480W LED Grow Light can accommodate up to a 4' x 4' area for flowering. It has OVER 2000 LED chips consisting of the best selling Samsung LM301B diodes which has a Luminous Efficacy of: 220 lm/W 0.2 W, 3 V mid power, Osram 660nm Diodes, Infrared light and UV LIGHT👍. It boasts the incredible efficiency of 2.8 µmol/J, maximum 2.5gram yield per watt with 30% higher Average PPFD. This High-intensity spectrum is beneficial for plants at all stages - from veg to bloom, and creates Big dense Buds👍. achieve 50% higher yields & quality compared with the old lights! Only consumes 480W for 4x4ft personal grows, and 3x3ft for commerical grow. It comes with a dimmer and daisy chain function with a  maximum of up to 15 lights, the master light controls the rest👍. Wide 6-bar design offers even & wide canopy coverage and can maximizes your grow space. slim 180° FOLDABLE DESIGN... YES I SAID FOLDABLE🤘🤣 , making it compact and easy to install, it's IP65 WATERPROOF and will give you no worries while growing in a humid environment and makes it a flexible high performance commercial grow light for enormous  SUPER FROSTY yields.😛😛😛. MARS GETS EM FROSTY BOYS👍 AWESOME HEAT DISSIPATION: The Low energy consumption FC4800 growing light has 6 passive-cooled bars and an aluminum heat-sink a removable driver  you can upgrade later or have it outside your tent. with zero noise  you can save up to 50% in your electricity bill compared to HID's or HPS lights! It also has a removable driver so you can upgrade it in the future or have it outside your grow space for better heat control in your growroom👍 UPGRADED FULL SPECTRUM: Yield Max Spectrum with enhanced red (Top-Bin Samsung 3000k-5000knm, Osram 660nm Deep Red), speed up blooming & fruiting, perfectly suited for full-cycle growing. The FC4800 LED grow lamp was born for Big Buds, perfect for commercial, grow tent, grow room, hydroponics, and all soil grows.👍 THE BEST SAMSUNG DIODES: THE FC4800 has Top Bin genuine Samsung Osram Diodes, combined with remarkable 2.8 µmol/J Efficacy, 30% higher Average PPFD, 50% less energy consumption, to maximize your yields. They give you a TRUSTED 3 years warranty 100% Satisfactory guaranteed!!! TSW2000 LED GROW LIGHT: INCREASE YIELD AND CROP QUALITY WITH MARS HYDRO LED GROW LIGHTS: NEWEST SMD LED technology provides the highest PAR/LUMEN output (1122umol@18") and can make you get 30% higher yield compared to OLD blurple led lights.  Max 2.5g yield per wattage and achieve maximum quality and quantity, much better than traditional HPS grow systems LOW ENERGY CONSUMPTION LED GROW LIGHT: Consuming only 300W true output with 684 LEDS! It saves up to 50% energy than other led grow lights. Perfect for 3.5x3.5ft bloom stage, 4x4ft veg stage. Over 90% light energy can be absorbed by plants, it will have higher intensity in a MARS HYDRO grow tent with diamond design mylar, or by crossing over using multiple TSW2000 HIGH EFFICIENCY FULL SPECTRUM INDOOR GROW: 3000K 5000K and IR 660nm 760nm RED, makes it close to natural light, highly engineered to provide improved growing performance for plants at all stages of growing, rapid plant response from seed to flower; Uniform and wide-beam light distribution for your plant's optimal growth 8x8 1680D GROW TENT The MARS HYDRO 8x8 Grow Tent interior is made of a unique diamond design mylar which is highly reflective. (Other companies mylar and reflective rate is as low as 50%, and it won't provide efficient light. They use thick 1680D oxford canvas, and being double stitched, it is tear proof and perfect for locking in the light. Their grow tent keeps 100% of the light inside the tent and helps your plants absorb more light. EXTRA-THICK material means No light leaks or rips at all.👍 Strong Stable metal corner adapters and poles are the trustful supporters of the tent. It's very sturdy, neither rusting or paint flaking off. quick and easy tool-free setup. They use heavy-duty metal zippers, with double layer black lining, by far the best on the market which creates a light-proof seal. The Easy observation windows are made by double layers of cloth. Observe the growing conditions of your plants without opening the tent and avoid disturbing your plants. The observation windows also serves to dissipate heat and ventilate the air. The tent includes 2 removable waterproof floor trays to hold soil and water. The removable tray can be taken out to wash easily. They guarantee the grow tents are easy to install even if you've never done something like this before. Clear Instructions and no tools needed! They also offer 30-day unconditional refunds for quality problems. Just contact their friendly 24 hours customer service 👍
Likes
149
Share
Hi all the happy people here in GrowDiaries. This is my second cultivation ever and it will be fun to try a bigger space than my closet grow. First, I'm just going to say I'm done with the construction of my new growroom. I put some pictures on the construction here in week one. The room is 2.14 meters by 1.7 meters and has a ceiling height of 2 meters. It provides a floor area of ​​3.6 square meters. I use a 54 Watt Lightwawe T5 for germination and 2 Pcs 400 Watt HPS lamps. I have a channel fan that replaces the room air about 40 times an hour to get a comfortable theme in the room, the air enters a fresh air intake from the outside. The air is purified through a carbon filter to then leave the room to the rest of the basement. Then I use that heat to heat the rest of the basement. I will use 8 pcs 15 liter Autopots to grow with and a 100 liter water tank that supplies the pots of water and nutrition. I will grow completely organically in soil and will watercure my buds to get the best possible medicine for me. But there are no cultivation rooms to be displayed here, so I continue with what is most important. I am very excited to see how the new growroom will work and how this Blue cheese Auto from Royal queen seeds will turn out. Blue Cheese automatic cannabis seeds are a cross of Blueberry Automatic and Cheese Automatic that has been perfected over five years of breeding and careful selection. The result is a feminized, autoflowering strain with superior yield, flavor, and effects to either of its distinguished parent strains. THC: 16% CBD: Low Yield Indoor : 325 - 375 gr/m2 Yield Outdoor: 60 - 110 gr/plant Height Indoor: 40 - 70 cm Height Outdoor: 60 - 110 cm Flowering: 7 - 8 weeks Harvest month: 9-10 weeks after planting Genetic Background: Blueberry x Cheese x Ruderalis Type: Sa 35% In 40% Ru 25% Effect: Cerebral and uplifting Climate: Mild ----------------------------------------------------------------------- 2017-09-18. Week 5 starts and the girls are doing fine. Girl Nr 1 is 37 cm high, Nr 2 is 88 cm and Nr 3 is 23 cm. Did a lot of defoliation. --------------------------------------------------------------------------------------------------------------------------------------------------------- 2017-09-19. 2 new fans is installed in the grow room. Added pic and video. --------------------------------------------------------------------------------------- 2017-09-20. Kl 10.00. New pics and video. Girl Nr 1 is 39 cm high, Nr2 is 99 and Nr 3 is 21 cm. Kl 23.00. Did some massive defoliation, added video and pics ------------------------------------------------------------------------------------------------ 2017-09-22. The girls have recovered well after my massive defoliation. Girl number 1 is now 40 cm high, number 2 is 105 cm and number 3 is 25 cm. It is strange that 3 plants from the same strain, with the same care and environment, can distinguish so much in appearance and size. It separates 80 cm in numbers 2 and 3. In 4 days Nr1 has grown 3 cm, Nr 2 has grown 17 cm and Nr 3 has grown 4 cm. They have received 7 liters of water and nutrition today.