
Likes
Comments
Share


@quigley
Follow
Day 15: 3 nodes now visible on both plants.
Day 16: Lights lowered. Canopy now at 20000 lux. At 22" from the canopy, my light is hanging lower than recommended by HLG but I am using a lux meter to ensure the amount of light isn't too much for my plants. I'm at home almost all day almost everyday so it's the perfect time for daily lowering of the lights and monitoring carefully.
Day 17: Lowered light to increase LUX readings by another 50%. Canopy now at 30000LUX. One more lowering should bring us into optimal amount of light. Noticed a slight amount of curling on leaves last night so upped the ProCal just slightly. I make my mix using pre dosed calmag & potassium silicate water. I adjusted the final EC with this water to ensure calmag levels remain high enough to prevent the coco from "stealing" it in its own cation exchange points. Ended up adding Green Planet GPH Uptake to the lineup today for the PM feeding. Will continue at recommended dosage going forward. Also picked a foliar calmag. Made a foliar spray with recommended dose of GP Ocean Magic as well; adjusted pH to appropriate level. Did one application then ditched the Ocean Magic as you're only to use this as a foliar once weekly. Made calmag foliar spray and am now regularly using this in my mister. This will allow me to adjust with plain water as to keep the EC down and my nutrient mix stronger. Also had a revelation! Root Guard and GPH Uptake have very minimal impact on EC so therefore can be added after dilution as to insure a full dose of each of these are being applied at each feeding.
Day 18: Ladies doing so great now in veg phase of growth. Calmag and Ocean Magic foliar application yesterday and continued Calmag applications throughout the day seem to have really given them a boost. Adding GPH Uptake seems to be a great addition to the lineup. It will take a few more days to truly notice the results.Looking like only a few more days until the Lamb's Breath sees its first round of LST. Noticing a bit of leaf curl on both plants. I have been fertigating with a litre of solution twice daily. I am going to reduce to once daily for at least today. Will try for smaller feeding tomorrow morning and see if I can still achieve the required 10-20% runoff with an EC no higher than 300 points more than inflow. Ceasing foliar calmag applications until plant stops showing signs of oxygen deficiencies, especially the Blue Diesel. Added a Wyze cam to the setup which is awesome. I can check the ladies all the time with out opening up and disturbing their environment. (THIS IS THE POINT WHERE LIGHT BURN WAS FIRST VISIBLE BUT I WASN'T AWARE!)
Day 19: EC rose dramatically as i skipped evening fertigation (Day 18). This is NOT a recommended course of action. I was trying to adjust for what looks like oxygen deprivation to the root system of the Blue Diesel (IT WAS ACTUALLY TOO MUCH LIGHT!). I think this plant is lagging behind the Lamb's Breath a bit due to being bleached (TOO MUCH LIGHT!). I believe this may be the root problem (hahahaha!) and why it is a bit behind the Lamb's Breath. Droopy leaves are usually indicative of an over saturation of water in your media. I will fertigate 3 times today to correct EC issues. Still keeping EC to just under 1000 microsiemens. Reducing volume of solution given to the Blue Diesel by half.
Day 20: Started LST on the Lamb's Breath. Slowly raising EC back up to ~1000 for the Blue Dream. Lowered the light by about an inch and shuffled the plants just a bit to get optimal light saturation. Everything chugging along at this point now.
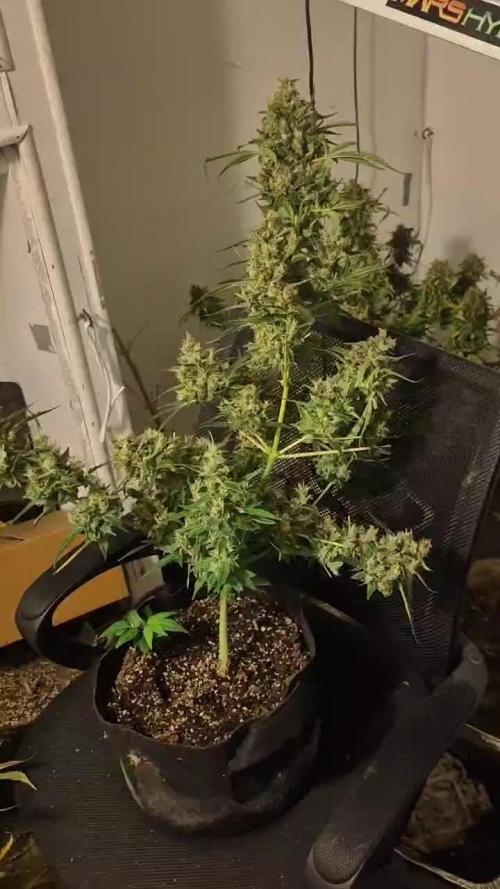
Day 21 & 22: Soooo I lowered my light too much. Started noticing signs of light burn on the LB. Watched some videos, read some articles then found my manufacturer's recommended hanging height. This HLG 100 V2 should be at 24" for veg stage. So thats where it got put back up to. Measured 20000LUX on the meter still which is within optimal range. I'm sure with the light up higher, the penetration to the lower canopy will be better due to the reflective walls of the tent. I removed the first pipe cleaner of LST on the LB to let it grow up toward the light a bit more. The one day of being tied down has had a dramatic effect on the production of branches lower down. I'll (probably) let it ride out for this week to allow unfettered growth before starting to tie down new branches.
Days 23-26: Everything rolling. Figured out optimal EC is around 800 for inflow for both plants. Thinking this may be the optimal inflow EC for the Green Planet Line. Decided to pick up an HLG 65 V2 4000K light as well as an HLG 135w RSpec. Both are KILLER lights for sure. The 65 has really helped in veg phase. I would highly recommend it! Optimal light hanging height ended up being around 24" for the 65 which is manufacturers recommended height. Can't wait to see what the 135w fixture can do.
Day 27: Switched lights to the HLG 135w RSpec today. Lowered light down to 90 watts so the lights aren't too much of a change from one day to the next. They are about 50% brighter than the HLG 65 V2 4000K when hung up to the maximum height my tent will allow. It looks to be a sweet light and the plants are getting new hues of green showing almost immediately.


Likes
1
Share

@ReallySavoy
Follow
Final dry weight report (details later):
Final chop was on day 88.
First harvest was 184g of top-shelf from 5 colas. Then another 5 colas brought it up to 300g of top-shelf on sticks — all from the tent.
On the second-to-last harvest I took the rest, which added up to another ~300g including leaves.
Flushed with Terra Aquatica FlashClean (before that I was running Overdrive + honey with the base bloom nutrients).
In total: 3 days on water + FlashClean, followed by a step-by-step harvest and another 6 days just on water.

Likes
6
Share

@TerpTurtle
Follow
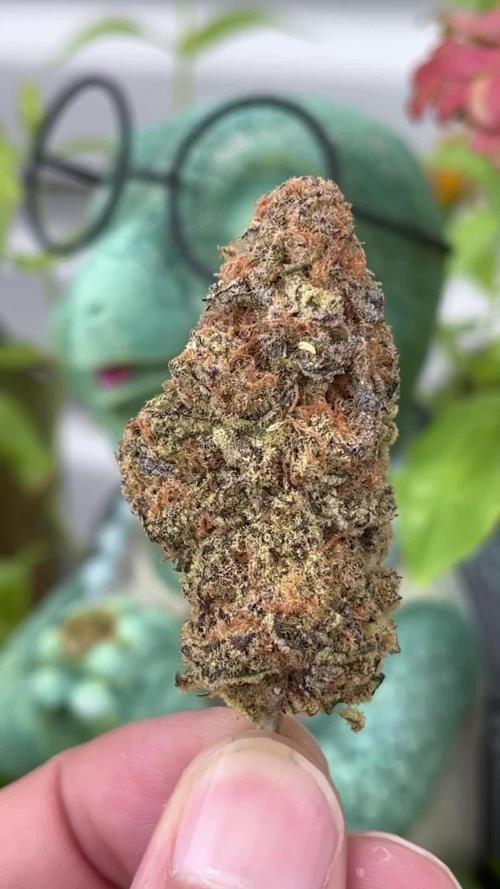
12 day dry @ 58-63RH & 60-66F in blacked out dry tent | Glass Jar Cure with Inert gas
Early taste test and I actually love this bud, is the best in house strain I've grown so far & the second Platinum cross. Flavorful Funky Sweet Orange cream cereal terps, the texture of the bud is buttery smooth, fluffy and pink/orange color when ground up. Bud has deeply potent effects that is IMO the perfect amount of heavy on the body but still euphoric and creative.. it makes you calm and happy! is checking off so many boxes not even cured, just smelling this batch makes a true connoisseur grin and bag appeal is insane

Likes
20
Share

@Cauli
Follow
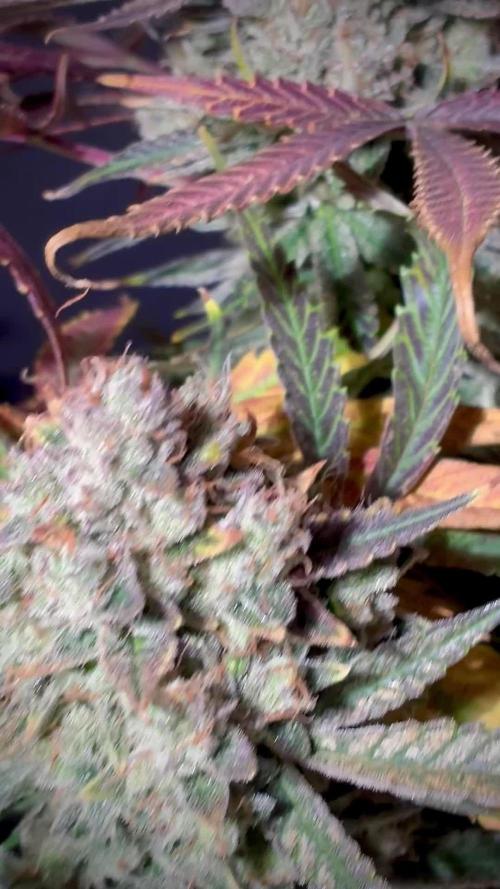
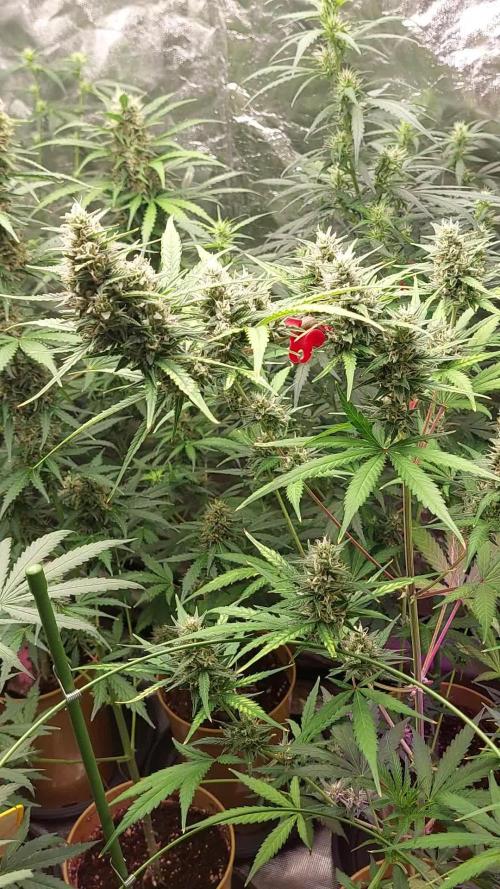
Week 13 for Chemical Candy.
This will be a hard farewell … that lady became so beautiful, it'll be a pity to chop her.
Despite the problems (grown super near to the lamp, broken main stem while tying to bend her down) she really performed outstanding in a short time.
Buds are dense and covered in trichomes, smell is gassy with a very chemical touch – very special one. loved her 💚


Likes
13
Share


@smokeycropping
Follow
Regando solo con agua ya 2 semanas, sin necesidad de lavado el cultivo probiotico me lo permite las flores ya están maduran y se nota una densidad enorme en las special queen y en las green gelato de royal queen seeds

Likes
Comments
Share

@LeosLivingSoil
Follow
Eine ein Fuß Bud an einer auto ist schon Wild, dadurch das Sie die Anfangszeit aber draußen war hat sie Blattläuse mit reingeschleppt, das war arsch. Semi Outdoor kann ich also nicht 100% weiterempfehlen :D

Likes
8
Share


@Sur_cannabico
Follow
Estas niñas dieron un “estirón” bien bueno. Después de que empezamos a subir la dosis de alimento se noto el crecimiento vegetal más acelerado.
Además aplicamos king crab ( bacterias de greatwithemyco) para potenciar el desarrollo de raíces ! Y se nota 👌🏻
Ya están con un pan de raíces bien fuertes por lo tanto, se van de trasplante a maceta de 7L.


Likes
11
Share

@Samsationalseeds
Follow
Like the other strain, I believe all three autos will be coming down at about the same time.My dad pointed out all their pistons, turned amber, and we normally go based off of that.And the flower size and the amount of water that they are drinking.
Typically, a plant will drink less water in the last two weeks of life.Letting you know that it's starting to die.
This was the auto that was just going to keep going.And keep making white hairs without stop.So we're gonna harvest now. Hopefully, this plant would be ready to sample when I return
My dad sent me a video showing that the plant is getting so heavy that it can't support itself anymore.Normally, it would be supported by little plastic triangles.
Because I started that plant, all I did was do one or two men and let them perform
Likes
28
Share


@DreamIT
Follow
-Sponsored by:
🎭ZAMNESIA SEEDS🎭-💡VIPARSPECTRA💡-💐GREEN BUZZ LIQUIDS💐-🛠️WEDRYER🛠️
🏁18/6 hello growerz, with today I start the resumption of diaries on GD. I have 13 new genetics in germination and as many diaries. I start by putting the seeds in water for 24 hours, after a day I will put the two seeds in two different jiffies, one with humic acid from greenhouseseeds and the other with just plain water. Get comfortable and follow the updates 😉👋🦄
19/6 The seeds were divided and placed in two different jiffies, one with humic acid and one with water only.
21/6 after another 24 hours in the dark the jiffies were moved under the lamp. let's start the dances!
23/6 the seed in the jiffy with only water has already sprouted and is about to open, while the one in the jiffy does not want to know yet, but we are in no hurry
24/6 the seed in jiffy with humic acid begins to show, I trust it will fully emerge by evening. the other looks a little tired but is fine
25/6 still nothing on the second suit, I'm starting to worry
30/6 despite not being in great shape, the born seed proceeds with its life, while the second one that does not want to be born will give way to a lava cake always of zamnesia
__________________________________________
Personal advertising (contains affiliate links)
__________________________________________
🦄Zamnesia boasts the most complete and accurate site where you can find everything related to cannabis and the "psychedelic" world. Autoflowering, feminized seeds, mushrooms, salvia divinorum, afrodisiacim of everything, and more! ( no affiliate link)
✅https://bit.ly/Zamnesiaseeds
__________________________________________
Did you know that Green Buzz Liquids fertilizers are 100% vegan? A complete line of products ready to give the best to each of your plants! Visit the site and see my journals to see how they work 🦄
🤯 And with the code "dreami t" you will immediately receive a 15% discount on your purchases
✅https: //bit.ly/GreenBuzzLiquidsPro
__________________________________________
👀 Are you looking for a good lamp to start with? 👀
🌞Viparspectra has something more than the others, take a look at their site.
⏩ Use "GDVIP" for an extra discount or "DREAMIT3" for an extra 5 %% discount
👀 Search for it on Amazon
✅Amazon USA: https://amzn.to/30xSTVq
✅Amazon Canada: https://amzn.to/38udUVe
✅Viparspectra UE: bit.ly/ViparspectraUE
✅Viparspectra USA: bit.ly/ViparspectraUS
______________________________________________
🌈 Tired of blowing on your weed hoping it dries quickly? Check out the Wedryer website! You will find a well-made accessory that will help your weed dry in just 8-10 days without the annoying risk of finding mold or other annoyances! (no affiliate links)
✅https: //bit.ly/Wedryer_
______________________________________________
📷🥇Follow the best photos on Instagram 🥇📷
https://www.instagram.com/dreamit420/
Backup
https://www.instagram.com/dreamit4200/
🔻🔻Leave a comment with your opinion if you pass by here🔻🔻
🤟🦄💚 Thank you and good growth 💚🦄🤟

Likes
5
Share


@Deltatigrou0169
Follow
Bonjour à tous, voici quelques vidéos de mes fifilles pour l'instant elles poussent bien. Après j'en n'ai qui pousse bizarrement à voir par là suite. Bonne journée à tous 😉

Likes
6
Share


Likes
3
Share

@Z420Organics
Follow
Fastbuds Auto Update – Week 7
One of the autos is really standing out already — beautiful frosty buds forming and an amazing fruity aroma filling the space! 🍓✨ It’s definitely the star of the group so far.
I had to switch the light schedule down to 12/12 because I’m running a shared space with my photoperiod plants. This caused a bit of a step back in their growth pace. ⏳
Honestly, if I had kept them at 18 hours of light, I think they’d be much closer to harvest by now. 🌞.
Still, they’re pushing through nicely, and I’m excited to see how these buds fatten up over the next weeks! 💪🌿
Likes
3
Share


@Miketama
Follow
Quick update on Northern Lights!
This week:
• Stretching phase complete ✅
• Flower development and bulking up nicely
• Fed with Thicker & Bigger Flowers at 1/3 dose
• Light defoliation - keeping it wild and natural
• Climate control stable with open Tent (door stays open 24/7 as always)
• Light leaks during dark period? Don’t care! 😎

Likes
9
Share


@Cannanna
Follow
Hey Leute, 🌞
Diese Woche melde ich mich etwas Später. Die Drei Ladys 🥦 sind in der ersten Blüte Woche auf ca 70cm gewachsen. Der Dünger wurde umgestellt und es fängt so langsam an zu Duften. 😁
Der Filter läuft auf kleinster Stufe und die Luftfeuchtigkeit liegt zwischen 55 % - 51 %.
Heute wurden die Damen mit ca. 40ml B.A.C Folia spray besprüht.
Wünsche euch einen schönen Sonntag 🍀✌️🙏

Likes
Comments
Share

@Kardo
Follow
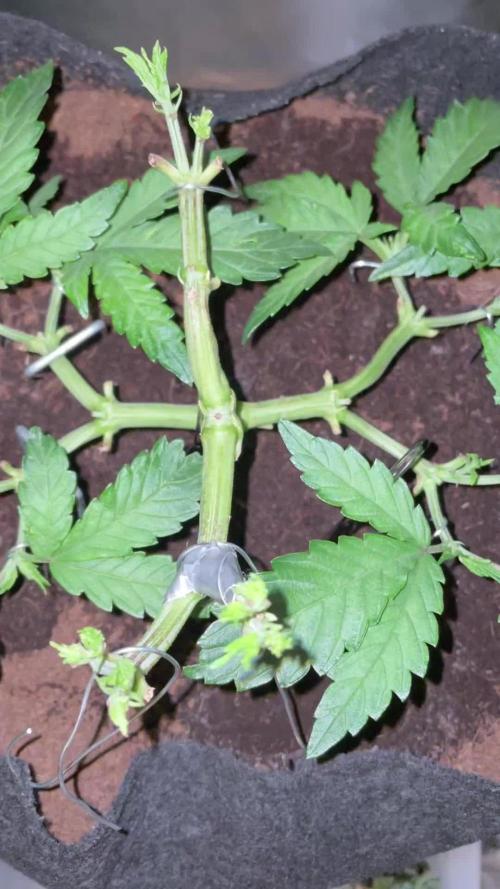
Die Purple wird nicht mehr getoppt wir schauen jetzt was die Triebe für eine Kraft bekommen


Likes
46
Share


@Mrs_Larimar
Follow
What a Journey,
I enjoyed this "Egghunt " so much
Last Decemmber @Silky_smooth, wrote me, if i want to participate into a Challenge
called " Egghunt"
That means growing a Plant from Seed into 50g Of Soil// Medium
That means as much as fit into an Eggshell.
So i did not think a lot and said yes. And the " EGGHUNT" begun.
I started looking for funny // sweet little Growcontainers, and I found some Fancy ones.
Black Sheeps, white Sheeps, ( Eggcups) , and some Tealightholders, one like a Rabbit, and a " Bridge"
i filled Soil into the Cups, and Into the Sheepcups were under 10 gram of Soil. The " cups" from the Bridge had 35 g
Sooooo... challenge accepted!!
In the Beginning it was hard to me not to overwater them.But they Mastered my drownings very well
After 14 Days i had to manage the Feeding of the Girls. Until that time they only got Beneficals and the Nutes from the 10g Soil.
But i got some help from my Growmies, how to feed them , ( not over and underfeed).....Stoney gave me the Hint for an EC of 1000-1200
And so i did it
I mixed bigger amounts of Feedingsolution, and the little Cups were diving into the Feedingsolution daily.
I could see they got nice color and look fresh again.
The bigger they got, the more they liked to drink
Then i switched after 5 Weeks from Vegetation into Floweringmode.
So they were diving 2 times in the Day into the Feedingsolution. not every Day, but very often..
From there on, it became much easier to me. Because i could see what they need.
And the Fun began.
Buds were swelling, and Flowers were smelling.
In the last 2 Weeks i topdressed with laygranules, to keep humidity into the Cups
Until we reached Today..
So Today i cut them and ooked into the cups, and i got to say,,, i could snot see any sooil, only ROOTS....
Solid , totally woven Roots. Most of the Soil was flushed away from the divings.
But Plants looked good until last Day
CONCLUSION:
I learned so much in this Challenge.I learned so much about Watering/Feeding.. and having Fun on the Little Things
I feel like i have Grown, together with my little Plants. I feel very confident to do Soilless/ DWC or any other grow
hahaha... I feel like i can grow everything...
I hope you had the same Fun like me into that " EGGHUNT"
And thank you @Silky_smooth, for asking me to paricipate
Legalize that wonderful Plant!!!
Likes
42
Share


@iLoveGoodWeed
Follow
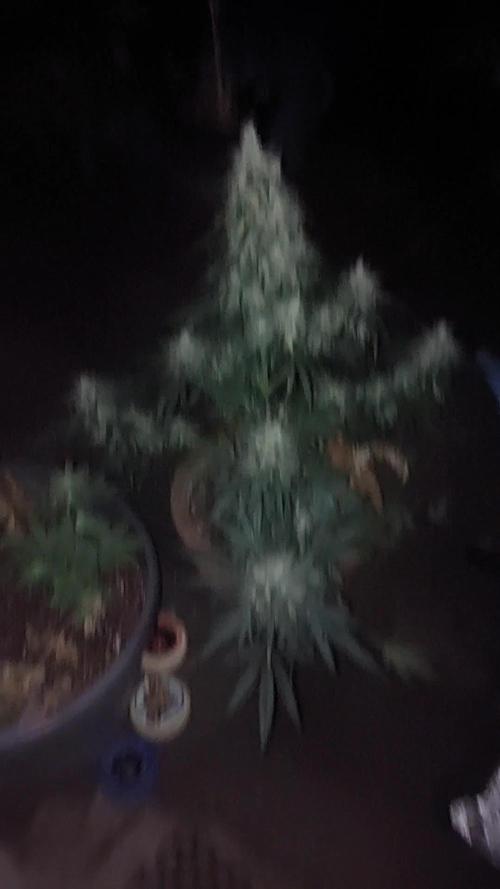
WEEK 12 - Both girls looks amazing covered in crystals
9L Pot is reciving the Final Part (Ripen) nuts for past 7 days, 3 more days and 3 days flush and harvest
12L Pot is getting there, today start I giving the Final Part Nuts (Ripen) and will harvest in 1.5 week