
Likes
Comments
Share


@BeanCrop420
Follow
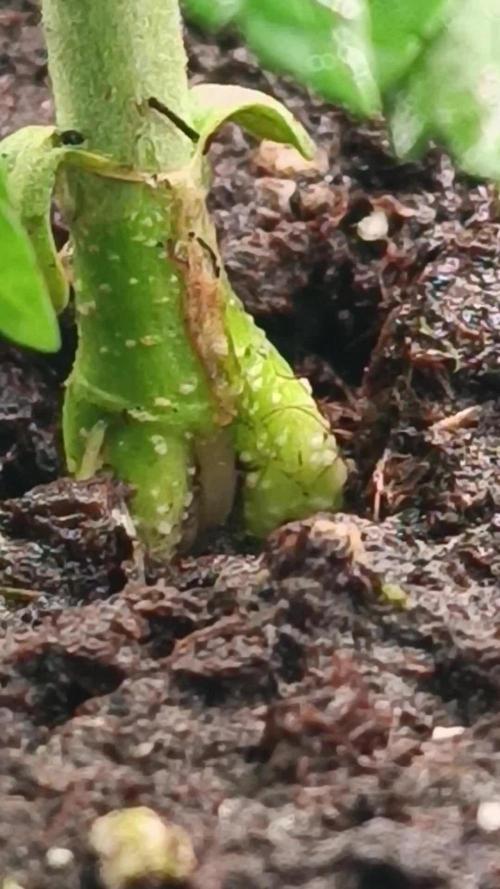
This is my first ever grow! I have decided to try Cash Crop from Cream Of The Crop Seeds and I have made my self a little DIY Aero/Hydroponic system looking forward to seeing how she turns out.
Happy growing 🌱

Likes
17
Share

@Salokin
Follow
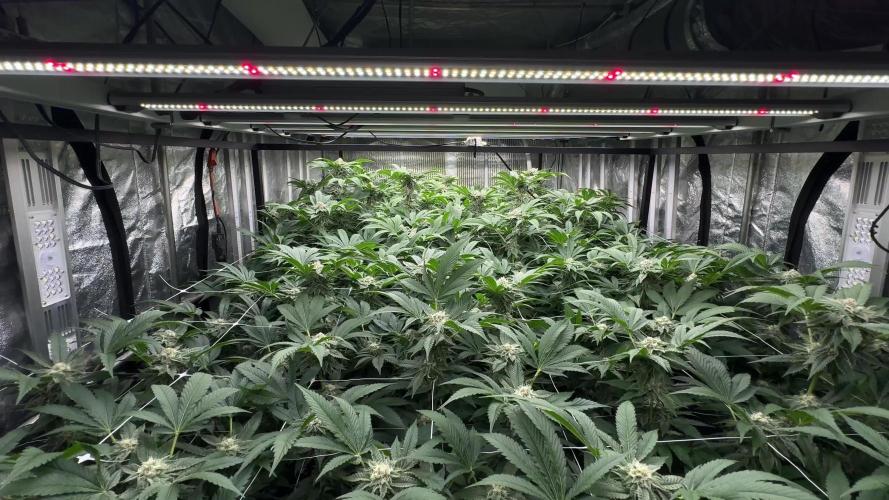
Week 5 Flower | GMO × Triangle Mints BX
Week 12 overall — halftime, and everything is going according to plan. This is the point in the run where the work put in during veg and early flower either shows or doesn’t. In this case it’s showing. The buds are forming nicely across the board, every site that was kept is stacking, and the canopy is sitting exactly where it needs to be. No drama, just execution.
The structure on this cut continues to impress. The tight internodal spacing that defined her in veg is now translating into dense, compact bud formation along every retained site. The trichome coverage is already visible to the naked eye and building fast — a good early sign of what the finish line is going to look like. The GMO influence is clearly present in the calyx stacking and overall density, while the Triangle Mints BX contribution is showing in the frost and the way the sites are filling from the base up rather than just at the tips.
Height holding at 110cm, lamp still at 30cm distance — maxed out, pushing every photon into the canopy. Watering steady at 3.3L per plant per 24h, the ladies are drinking consistently now. pH locked at 6.2, EC pushed up to 2.0 mS/cm to keep pace with the escalating demand of the bulking phase. Humidity tightened down to 50% — botrytis prevention becomes the priority from here, no compromises. Day temp 27°C, nights up slightly to 25°C to keep the differential managed without stressing the plants.
Smell has stepped up to strong. The GMO × Triangle Mints BX is making itself known — the room has a presence now that wasn’t there last week. A candy gas profile is developing, exactly the kind of nose you’d expect from this cross, and it’s only going to intensify from here as the resin production ramps up through the back half.
Nutrient stack: Canna CalMag Agent 1.1 ml/l, CANNA Aqua Flores A+B at 4.6 ml/l each, CANNA PK 13/14 stepped up to 0.5 ml/l continuing the gradual increase in line with demand, Aptus Regulator 0.1 ml/l, Green Planet Rezin 1 ml/l — and Plagron Green Sensation introduced at 0.5 ml/l, right on schedule. The full flower programme is now running. Feed rotation stays unchanged — two full feeds with the complete stack, third is 50/50 osmosis and tap, pH’d, carrying only CalMag.
The second half starts now. Let’s see what she’s got.
Next update Sunday. Stay tuned.


Likes
3
Share


@LAShugars
Follow
Can’t wait to run the other seeds in the mix pack! Wish I would have grown them all for my outdoor. She’s a beautiful plant with thick sticky smelly buds.


Processing
Likes
61
Share


@Cannibalgardens
Follow
Well the people at fastbuds have some amazing dam genetics . These things take stress, heat, water lack of and just general newbie mistakes . The smells coming from my tent are insane that carbon filter is being out in to good use . I never thought I would grow a auto flowering plant but after seeing so much positive feed back I had to try. To anyone looking for a tasty and frosty strain I would recommend the blackberry as she is just my absolute strain to have grown yet. The aroma the frosty buds and the colour (bag appeal is good ) . If I could have done one thing it's given the blooming additives sooner .4 days ago they all got there final nutrients and have begun to flush them . Can't wait to see how these babies look at harvest time .. cheers grow family .
Likes
2
Share

@GoodTimesOrganics
Follow
Welcome Back!💚
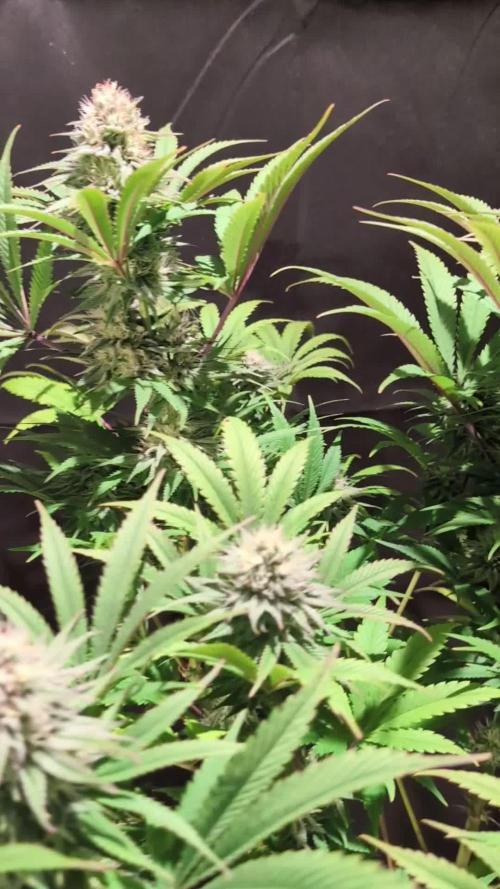
Die fünfte Blütewoche ist vorbei und die Blütenentwicklung ist in vollem Gange.
Es zeichnet sich eine schöne, Dichte Blütenstruktur ab, mit immer weiter ansteigendem Trichom Anteil.
Das Aroma nimmt ständig zu und es sind fruchtige und süßliche Aromen wahrnehmbar.
Die Sonnensegel wurden nochmal ausgedünnt.
Außerdem gab es diese Woche noch einen leckeren PK Komposttee, mit eigenen zusätzen.
Da es aktuell so kalt draußen ist, sind die Werte auch etwas anders. Die Luftfeuchtigkeit ist sehr gering und die Temperatur ging auch etwas runter.
———————
🌞 Temp: 22°C
🌚 Temp: 20 °C
💨 RH: 46%
VPD: 1,21 kPa
😎PPFD: 830 mqm
———————
Stay Tuned! 💚


Likes
86
Share


@CANNASIM
Follow
------GENERAL COMMENT------
We arrived pass mid flowering as we are now starting week 5 of flower. No issues, bumped up a bit the Sensi Bloom to 2.5 after 3ml, and have seen the girls darken a bit, so i decided to go down a bit to 2ml this week, maybe stick to this dosage depending how the girls react.
The tent have become small for or two ladies, no way to train them more, there is no space. Decided to move forward without a mid grow flush.
Still on the 1.5l of water every other day, one base + recharge + pk booster, other with pk booster + natures candy + velokelp alternating.
Today was the last Pk booster - Big Bud dose, now we will cut the Big Bud and enter with the Overdrive, the rest will be as is.
------GG. AK47 COMMENT------
I'm loving to grow this strain, so curious about the smoke, and the outcome, this one exceed my expectations a lot seen that it was a gift seed...
She is less dark than the BB but still a little dark, and a bid very bid of tip burn, so -1ml of sensi /l should be fine.

Processing
Likes
1
Share


@nausicaahime
Follow
week 7
first flowering week
when I finally discovered my princess was actually a prince.
12/12
flowermind ferts (6ml + 0.5g)
LST + defoliation
started seeing some thrips again, but just a few, nothing to worry
so, the plant stayed for 4 weeks in the tent, under COB LED 200W.
Likes
9
Share


@VIPgrower
Follow
Day 37 of flowering week six lsd look good tips a little burnt but I’m not to worried keeping nutrients low about 3/4 strength 1.4 ex 770 to 800 ppm drinking lots watering about every four days feed water feed water

Likes
11
Share


@CanabisLoverHobbyGrower
Follow
Well I've done a final tie down going to give them 5 days to a week and then flip them into flower, they react to training so well and are so flexible, think these are going to be one of the best looking ones the training on the bigger plant looks ace, roll on next week, flower time

Likes
6
Share


@Herbz_Unkraut
Follow
another week of great growth
check www.sr-organics.com for some topnotch 5 in 1 fertilizer!
root, growth, bloom, micro-organisms, enzymes & vitamins all in one!
CODE: "Unkraut10" for 10% Discount! 😊

Likes
17
Share


@BUDSBOY97
Follow
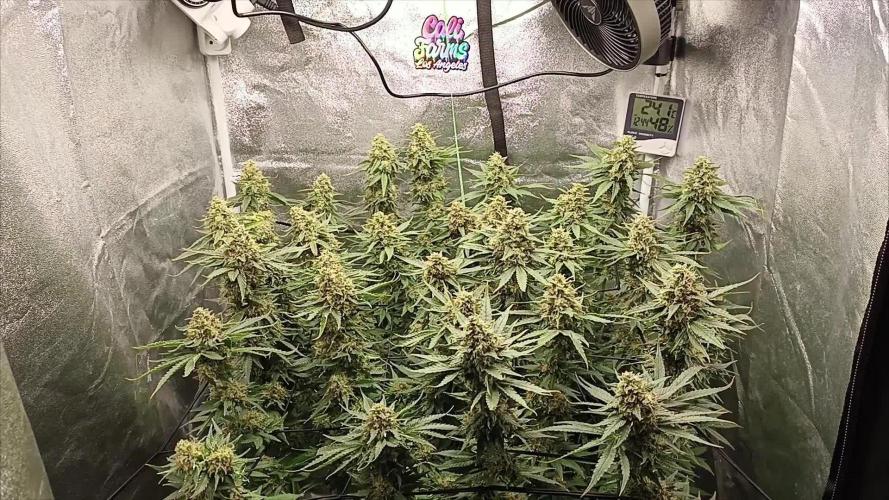
So we are already in the 10th week I had little problem whit the temperature but now is under control, but they look veery good, the bud's are big and dense.
The harvest will be less or more at the 25th December so it will be a frosty Christmas this year and a stoned new year🎅🏻❄️❄️


Likes
10
Share


@Canadian_Steelheader
Follow
Week 6, Day 41 of Flower and all is going well, a little crowded in there but she is coming along nicely. Using yo yos to support branches. Removed a couple of lower branches, only larf taking up energy, I included some trichome picks from them. Only a few more weeks to go to harvest, can’t wait.

Likes
12
Share


@HIAZ_urbanbudfarmer
Follow
Hi gromie's welcome to week 8.
These girls are going great, started flushing on Monday 11/11/24 with plain ph'd water and Resin from Green Planet Nutrients at 2ml/ltr.
I also reduced watering to just 2 times a day for 15 minutes on each time.
Just trying something different as I usually do high fertigation . 15 minutes on watering cycle every 2 hours.
From what I've read, I was hoping they would draw moisture from within themselves to help with drying but also some people believe it can increase THC??
It has worked at bringing out some more of that beautiful colour with in the buds but you can really notice the back plant has started canabilising itself!
Starting to see some really nice fading of colours on the vegetation of the plant at the back, which is something I don't usually get with hydro because you usually feed them right to the end & Only need to flush for 2 to 3 days. Gave them a long flush this time.
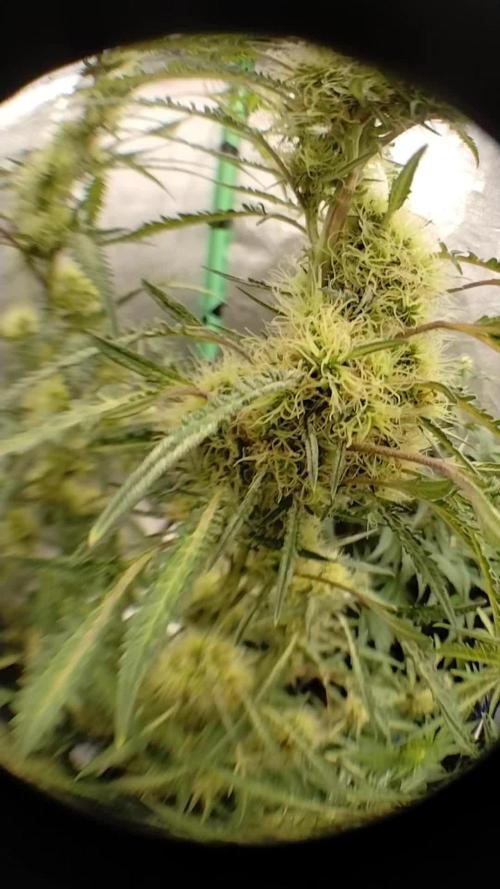
I've been waiting on a new microscope to arrive to check trichomes, but these girls are looking about done going off pistills turned orange/brown & curling in , Calyx closed & swelling up, looking really frosty!!! Will harvest this week! As I need to get veging plants into Flower
Come on Grow diaries get your act together!!!
I'm tired of updating my
Diary only to see it's all wrong, things have been changed, put my day temp at 28°c save it & it shows -2°c & it's like that All through the diaries????


Likes
5
Share

@JeyGanesha
Follow
questa frostbanger auto dopo uno stress iniziali si è ripresa super bene.......