


Likes
Comments
Share


Likes
9
Share


@HIAZ_urbanbudfarmer
Follow
Busy week getting the new setup going. GG is going really good has taken to training well. Expecting a bit of stretching off her in flowering. Can notice the sativa traits in her with more distance between nodes, and her slimmer sativa type leaves . Have noticed how sticky she's starting to get when training her, left with sticky resin coated fingers😋 she's a nice plant
Likes
93
Share


@Roberts
Follow
Auto Opium is growing good. I lollipopped the canopy, and did some selective defoliation today I did a solution change on her about 4 days ago. Everything is looking on track. I am sure she will do some stretching this next week. Nothing more to report at this time thank you Divine Seeds, and Medic Grow. 🤜🏻🤛🏻🌱🌱🌱
Thank you grow diaries community for the 👇likes👇, follows, comments, and subscriptions on my YouTube channel👇. ❄️🌱🍻
Happy Growing 🌱🌱🌱
https://youtube.com/channel/UCAhN7yRzWLpcaRHhMIQ7X4g

Likes
9
Share


@eldruida_lamota
Follow
Vamos familia actualizamos la cosecha de las kritical.
La verdad que el secado muy bien 7 días en Malla y a los botes, 40% humedad y 24 grados es la temperatura ambiental que han tenido en el secado.
Por lo demás de miedo os la recomiendo.
Gracias a Agrobeta y Mars hydro , sin ellos este proyecto no sería igual 🙏.
Agrobeta:
https://www.agrobeta.com/agrobetatiendaonline/36-abonos-canamo
Mars hydro:
Code discount: EL420
https://www.mars-hydro.com/
Buenos humos.

Likes
23
Share


@Master_weeda
Follow
Bonjour à tous les padawans et maîtres jedis
Pour la germination j'utilise la technique du sopalin
Pour faire germer vos graines dans du sopalin, vous aurez besoin :
Un Tupperware avec couvercle
Du Sopalin, ou autre quel papier de cuisine qui soit épais et qui retienne l’eau
Un verre d’eau
Si c’est l’hiver, vous placerez le Tupperware près d’une Box ou d’un Modem pour donner un peu de chaleur
Étapes de la germination:
faire germer vos graines de cannabis dans du sopalin
La première chose à faire est de tapisser le fond du Tupperware avec du sopalin, 2-3 feuilles suffiront. Si vous ne mettez qu’une feuille, elle captera peu d’eau et pourra sécher, vous mettrez donc plus de feuilles que pas assez.
Une fois les feuilles placées, versez l’eau du verre dessus, mais pas trop, juste de quoi imbiber toute la surface couverte par les feuilles. Vous aurez ainsi l’eau suffisante pour faire germer les graines sans avoir besoin d’essorer la feuille de papier.
Une fois les feuilles humidifiées, mettez vos graines par-dessus, et recouvrez le tout avec une autre couche de quelques serviettes. Une fois en place, humidifiez cette nouvelle couche.
faire germer vos graines de cannabis dans du sopalin
Lorsque vous graines seront placées entre les 2 couvertures de feuilles, fermez le Tupperware hermétiquement pour que l’eau reste bien dedans et que l’ensemble ne sèche pas malgré la chaleur.
Si vous êtes en hiver lorsque vous mettrez vos graines à germer, ou que les températures sont inférieures à 20°C, vous placerez le Tupperware sur votre Box ou modem jusqu’à germination, mais toujours en évitant le contact avec la lumière. Si vous êtes dans une zone au climat tempéré ou chaud, vous n’aurez qu’à placer le récipient avec les graines à l’ombre dans une armoire ou une caisse de rangement. Toutes les 24h, vous devrez vérifier l’état d’avancement de la germination. Si quelques-unes sont sorties mais pas d’autres, prenez celles qui ont germé pour les planter, laissez les autres dans le Tupperware et vérifier de nouveau le lendemain.

Processing
Likes
43
Share


@Jack_Greenstalk
Follow
ladies have started to take off much more this week. I added heavy 16 finish to schedule of nutes. may be adding fire and roots also over next weeks. no huge issues this week, felt pretty dialed in for most part. using grow room glasses ive found i can get decent video of the girls under lights vs having to take them oit find ok lighting and taking a pic.
noticed smell coming off the plants this week, its weak right now, but definitely starting to stink!
going to top at the 3rd node once they reach 8 inches tall. after day 28, I transferred into 3 gallon fabric pots, which will be their final homes til harvest!
(bottom leafs on plant #1 got some spotting, one side was windburn from earlier in grow, the other side I got a few drops of nutrient mixed water on them, and even after wiping away it left spots on leaves, its all good they are going to be removed after topping)

Likes
2
Share


@Chucky324
Follow
Hello. This is the end of week 9 and the beginning of week 10 of veg.
Got this plant repotted and out to the greenhouse.
Put in the tomato cage for training, and pulled the top branches down under the rung to spread it out.
The plant is doing good and growing well.
OK. Have Fun.
Chuck.


Likes
10
Share


@Chubbs
Follow
Week 6 update:
What up Grow family. These testers are growing fast and strong. Where in week 6 now and the swelling and ripening of flowers are going amazing. Still feeding 500ml/16oz daily as I've found that's the sweet spot for 3gal fabric pots for these. I'd say these probably have about 2 weeks left until they'll be finished.
All in all Happy Growing.
Likes
84
Share


@Doc_Homegrow
Follow
My plant is growing pretty well. She has developed many new nodes, since I used fertilizer last wednesday. I want to top her next wednesday or so, becuase of my limited tent-height. I also put the light from 14 DLI to 20 DLI. I want to increase the intensity every day a bit more to let her slowly adapt.
Edit: I rotated her so that she can absorb light evenly and therefore grow evenly.
Update 08.04.24:
Some roots have reached the surface, so I decided to cover them with some new soil. I also decided to top her today and bend some of her leafes down.
Update 09.04.24:
I actually didn't want to start LST until next week. The topping is actually intended to strengthen the growth of the secondary branches, but a few of these branches received little light. That's why I decided to start with LST now and continue to enable the growth of the secondary branches.

Likes
7
Share


@x_grower
Follow
Last week the plants grew looking very healthy although I still have a feeling the low humidity is slowing their growth, by the end of the first week I started raising the EC to make the increasing for this week smoother, run-off EC is substantially increasing so I will start to fertigate them twice a day for this week.


Likes
22
Share


@millerman543
Follow
Looking much better here after recovering and proper water. I was definitely giving nutrients here but not a lot
Likes
2
Share
@eldruida_lamota
Follow
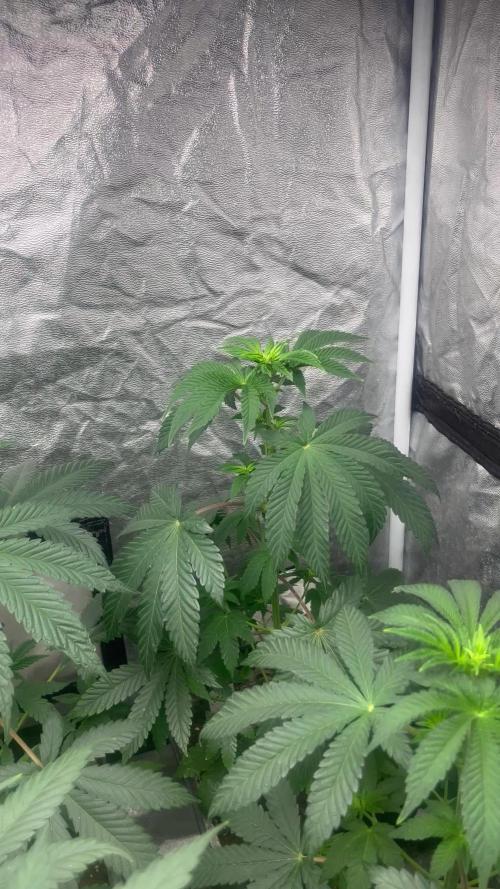
Que pasa familia, vamos con la primera semana de floración de estas F.U.H. feminizadas de Seedstockers.
Vamos al lío, las plantas se trasplantaron a macetas de 7 litros.
El ph se controla en 6.5, la temperatura la tenemos entre 24/22 grados y la humedad ronda el 50%.
El ciclo de crecimiento puse 12h de luz, el foco está al 50% de potencia.
Me gustaría estar más encima este cultivo pero la salud me está impidiendo un poco este 100% con el proyecto. Con suerte la semana que viene andaré mejor.
- os dejo por aquí un CÓDIGO: Eldruida
Descuento para la tienda de MARS HYDRO.
https://www.mars-hydro.com
Hasta aquí todo, Buenos humos 💨💨💨


Likes
18
Share


@Grower_Of_Persia
Follow
week intel:
everything is perfect!
stresses :
just a little E.C stress around 1.7 once a week
feeding:
i feed them 3 times this week with this order :
day 1 : i feed them heavy with silicate +base nutrients(calcium & micros + Bloom) about 818 ppm - 1.7 e.c to cause a little stress.
day 3 : i feed them low dose of Feeding Booster + Karbo Boost around 382 ppm - 0.7 e.c to let them recover a little but not fully recover still a little stress will caused.
day 5 : i feed them with low dose of Top-Max + B-52 around 250 ppm - 0.5 e.c to let them recover the stresses to get ready for another stress next week.
guide of the week :
know your plant tolerance limit of E.C stress once you saw the very very little yellowing on tips of leaves , that's the sign to don't go further , never reach that limit if you want a high quality buds, in my case tolerance is 1.8 and i'll reach to that level only once a week to cause precision stress , love your plants and have a happy growing!

Likes
13
Share


@TrialAndErrorGrows
Follow
Final and longest week lol
I dried these lady’s for 7 days in the tent I grew them in. The tent was around 73F-75F temperature. I used a humidifier to keep the humidity in between 55 and 60. I hung them on the trellis netting. Once they dried I trimmed and put them into jars.

Processing
Likes
6
Share

@Jack_Greenstalk
Follow
Germination: Started regular 10 seeds.
5- Sour 76 (sour diesel x 76 Afghani)
5- Platunum Yeti F3 (Platinum cookies x Yeti Og)
These are "tester" seeds given to me free courtesy of Humboldt Seed Organization. They are testing to see what phenos and germ rates testers have before deciding to launch a line or not. Here we go!
Of 10 started, 6 survived. 4 out of 5 sour 76 successfully germinated. 2 out of 5 Platinum yeti successfully germinated. 1 yeti never cracked and I probably could've taken scissors to rough the shell and get it to germ, but it didnt pop in root riot after days so I tossed it! one plat yeti germed and as it rise up got a white furry fungus of some kind. I tried to save it but it ended up dying off. despite it actually germinating initially. 6 lived in their rooter plugs and got transfered to 3.5 x 3.5 inch square pots with coco coir / perlite (70 /30 mix) at 4 days old.
I start week 1 with germination which isn't truly veg for time sake, but with a short veg indoors (34 days before flip this run) I'm uploading these all one after another as I've just harvest. I started off