Likes
45
Share


@PotCasso
Follow
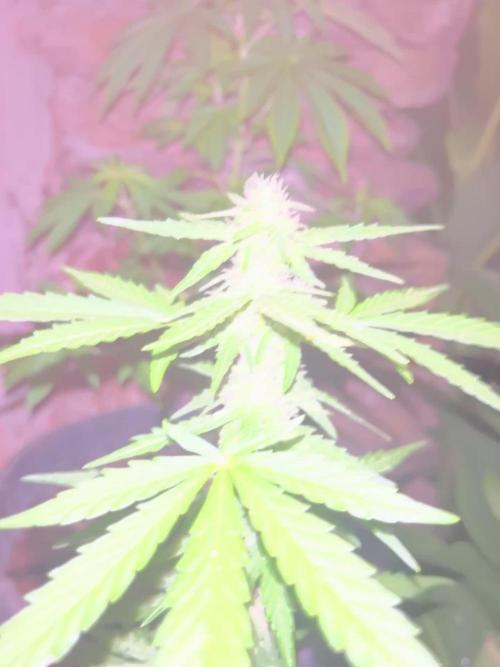
Week 3 of Flower: HLG Diablo at 90% 20in from canopy.
Watered in at 800ml top dressed 2tbs bloom, 1tbs grow, 3 tbs barley a recharge day and a silica day. I think we are about finished stretching


Likes
2
Share


@High_Grade_Dadli
Follow
So end up losing the first set (guess that's how you know it alive n real) never the less week was great...will do some transplanting nxt week also wanna get some more gelato cuts to get the numbers up but will see how that

Likes
18
Share

@Wondrej
Follow
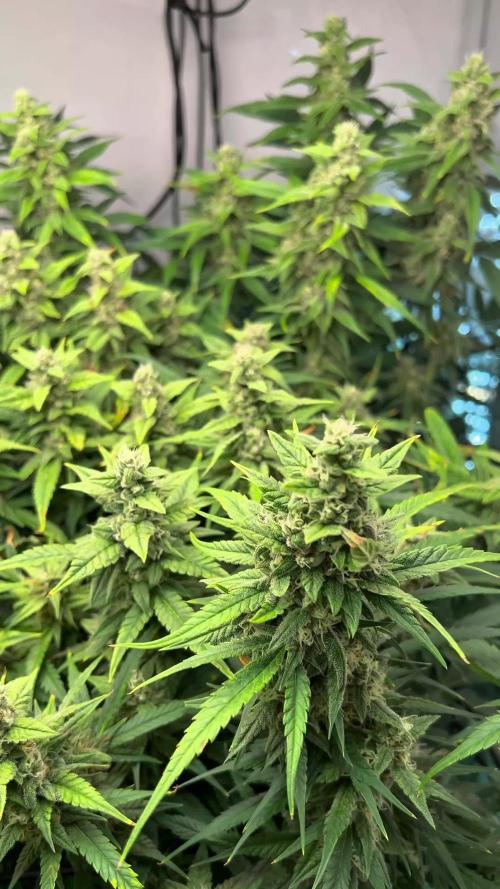
🌿 Week 12: Symphony of Growth (Flower Week 7)
We’ve officially entered Week 7 of bloom, and the energy in the tent has shifted. The plants are no longer growing tall for the light; they are focusing all their remaining power into hardening those colas and finishing the resin production.
🎼 The Vltava Ritual
I’ve introduced a new element to the grow this week. Every morning, as the lights roar to life, I play "Vltava" (The Moldau) by Bedřich Smetana. They say plants react to vibrations, and what’s better for a flow of life than a classic masterpiece? It’s become a ritual—the rising sun of the LEDs accompanied by the rising strings of the symphony. The girls seem to love the high-class treatment!
❄️ Status: The Final Ripening
The Banana Purple Punch Auto is looking world-class. The frost has moved from the buds onto the sugar leaves, and the density is getting serious.
• Trichome Report: I'm seeing a sea of milky white heads. We are very close. I’ll be watching for that first 5-10% of amber to decide on the final flush.
• The Fade: The nitrogen yellowing we discussed last week has progressed, which is perfect. The plants are naturally depleting their stores, ensuring a clean, smooth smoke without that "chemical" green taste.
🛠️ Maintenance & Environment
• Defoliation Check: The air is moving freely through the canopy after my previous heavy leaf-stripping. No signs of moisture traps or stagnant air.
• RH: Kept strictly at 40-45%. In this stage, humidity is the enemy.
• Smell: Overpowering. A thick, sweet, fruity scent that hits you the moment the tent zips open.
One love growmies 💚🇯🇲
Wondrej

Likes
21
Share


@Siriuz
Follow
Day 37
We started with nutes today
Then all day long outdoors
From 6AM to 6PM
Plus CFL afterwards
They rest for 3 hours and then CFL again
Btw accidentally snapped one part of one big leave but that okay
Since we don't do defoliation on her
We guessing it's okay she will recover soon
Day 38
Since she's such a queen we wanted to upload a video showing how she starts flowering for the record, thanks a lot
You can Always follow me at Instagram
@cannagrowersiriuz
Also don't forget to add your comment below, it is important to us!
We want to learn, any tips, suggestion, more than welcome my friends
Happy Growing
Day 39 Some mins before installing ScroG
Day 40 Wonderful, she's out of there already so huge, full of buds
Day 41 she's actually doing great full of buds but those 2 first leaves are a little bit sad looking weird plus those black dots idk and it's turning yellow in between I decided to remove it and well, I'm hoping she's doing well what else I could think of guys any help or concerns?
At the end of the day, she's overall healthy and strong
Day 42 Time to feed the babies, so we added 900PPM (300ml) floranova grow
Followed by 1590ppm (300ml) flora nova bloom to make sure she's got all nutrients balanced well, also added 400ml of plain water after that so they could get a nice run off.
I think they're happy and we gonna check on them in a couple days to see how they go, Ph is around 6.2
which is great
Temp outdoors from 7-@
1pm around 25C to 36C
Then back indoors
Temp is 28C and drop to 22 at night and dawn so they're good and comfortable
Keeping humidity lvls around 40/65% top
Nice AC and Fan for air circulation
Thank you all for your support

Processing
Likes
41
Share


@MadeInGermany
Follow
Hi everyone 🤗.
It was rinsed slightly 3 days ago and now only gets water with 0.4 EC.
From tomorrow on she won't get any Canna Boost anymore, because I'm not the fan of giving it to the end :-)
It always looks more beautiful and more beautiful 😍. You can see how she removes the last nutrients from the leaves and slowly comes to an end 😇.
From next week the trichome pictures will also be added 👍. I can't wait to try them 🤣
I wish you all a nice week, stay healthy 🙏🏻 and let it grow 🌱
You can buy this Strain at :
https://sweetseeds.es/
Sweet Seeds Cup 🏆
Type:
San Fernando Lemon Kush
☝️🏼
Genetics:
OG Kush x Kosher Kush
👍
Vega lamp: 2 x Todogrow Led
Quantum Board 100 W
💡
Bloom Lamp : 2 x Todogrow Led
Cxb 3590 COB 3500 K 205W
💡💡☝️🏼
Earth: Canna Bio
☝️🏼
Fertilizer: Canna Bio
☝️🏼🌱
Water: Osmosis water mixed with normal water (24 hours stale that the chlorine evaporates) to 0.2 EC. Add Cal / Mag to 0.4 Ec Ph with Organic Ph - to 6.0 - 6.3
💦💧


Likes
14
Share


@MrJones
Follow
Fastbuds Smoothie Auto
🔸🔸🔸05/03/2023🔸🔸🔸
Day 73 - Above Ground
📝Sunday 07.02.23 - The girls are very small but doing very well for their size, not sure why sometimes autos get stunted, the buds are hard as rocks and have an amazing smell!
📝Wednesday 06.28.23 - The buds continue to pack on weight and ripen, the smell in the tent is amazing, fed with a Mayan tea from Humbolt Nutrients, loved the way it looked, they have great products.
🔸🔸🔸🔸🔸🔸🔸🔸🔸🔸
▪️Grown By: MrJones
▪️Medic Grow Smart 8 LED / Settings 60% & F1
▪️@medicgrow420
▪️@fastbuds_genetics_official
▪️@gaiagreenorganics
▪️Soil - ProMix HP
🔸🔸🔸🔸🔸🔸🔸🔸🔸🔸
📝Smoothie Auto is the result of a cross between Somango and Blueberry, and really brings out the best of both worlds; a well-statured plant ideal for all types of growers. Reaching up to 23% THC, this strain delivers an uplifting giggly high. Not to mention its exceptionally fruity taste making it an ideal choice for extractions.
▪️Bud Appearance Fruity, sticky, resinous buds, as potent as they are tasty. Rock-solid nugs that’ll crumble when touched.
▪️Smoke Report Balanced, yet Potent. This strain blends a euphoric head high with relaxing body effects. A great strain for a sun-time smoke, a weekend getaway, or a relaxed afternoon with friends.
▪️Plant Appearance A well-structured plant that will grow a large main cola accompanied by some lower side branches, somewhat resembling an Indica, yet still with a good average inter-nodal spacing. During the later weeks of growth, some can expect purple hues to appear on the leaves.
🔸🔸🔸🔸🔸🔸🔸🔸🔸🔸
Likes
77
Share


@Puffdamagikchillum
Follow
Day 56) 11/18 is the end of another week. I measured her today and she's 15” but not done stretching yet. Week 8 day 56 pic 2 btw is a pretty good indication she's a she. I had some bumps along the way this week. My work schedule changed a bit all of a sudden and I lost touch with this girl and she suffered some drought time. Then if that wasn't enough I was shooting video of her and turned the fan system off so it wouldn't record the noise and accidentally left it off (just took a hit of gelato #33) for around 30+- hrs and wife told me the ceiling of the tent was sweating big droplets when I called her from work. Came home/ next day off / cleaned it all up/ wiped it with a light bleach water/ aired it all out and now she is very happy and my schedule is back on track 😅👍
Happy Growing and
Happy Harvesting
Likes
26
Share


@Ilovekush17
Follow
Week 6. Im watering every 2 days. Fish shit and mammoth p every 3rd water. Rest just ph'd water. Alot of tricombs on the Purple Punch. Getting fat and juicy. Probably gonna ha4vest the Purple Punches in a week. GMOs finally coming along starting to fatten up and become a bit crystally. They still got 4 weeks or so left.
Likes
3
Share


@Bluemels
Follow
Tag 75: Die Pflanze sieht echt schlimm aus 😱 Ich hoffe das meine Rettungsmaßnahmen bald Wirkung zeigen 😕
Tag 80: Auf anraten habe ich mir eine ph pen usw. gekauft. Der Ph wert liegt bei 8 😱 ! Deshalb werde ich keinen Calmag Dünger mehr verwenden. Und den Ph wert einstellen müssen und abwarten...

Likes
53
Share


@cheetah844
Follow
Dirty Aquarium Water:
6.43 pH
381 PPM
73.4⁰F
They've gotten both bushier & taller, I needed to create more room in the tent for the clones that I will make seeds from, so I moved the extra clones I'm uncertain of what I'm going to do with it into a makeshift grow area.
I'm waiting for temperatures to stay consistently warm outside so I can get these soon to be forced female outdoors to start making feminized seeds.
Likes
7
Share


@Lucyfer
Follow
Site is broken, can barely upload anything and it's sad because I'm really proud, of what we've achived here and i tought this may be the place to sahre it but it seems this palce is more for self promotions for brands and so on.
regardless, with all the effort that it took to select pictures heres some of a PARTIAL harvest, i did not harvest the whole plant as the cannopy did not allow lower bud sites to have light and i mean, theres at least 700 grams more waiting from those 2 plants (and thatsd a low ball estimate), currently "only" harvested 672 grams from the top colas, and not all of them were chopped, left some of the auxiliary bud sites that the MASSIVE colas had, im honestly shoked at one of them that weighted on its own 145.4 grams, and still had 4 auxiliary bud sites that i decided to leave for them to rippen, alltogether pretty sure this cola wouldve been 250 g's with all the other bud sites that it developed.
yesterday i decided to chop based on the fact that i felt nugs were moist and was afraid of them developing botrytis. none did and while im suspisicious on some of the nugs no definite answer as of right no nug shows it, but they were moist and better be safe than sorry, still would've given them another week if it was possible, but also i need GMO to rippen, so thats why i decided to do a stage chop, in one week will be chopping everything or maybe more, perhaps 2 weeks more, who knows now. one thing I know is that my house smells DANK, that it was 700 g's a partial harvest and that I still have more than half to chop and harvest, this will be plenty, im really happy with how they're turning out, ocne they dry I'll write here how they smoke and add some nug photos.
THERES STILL WORK TO DO, THIS IS NOT OVER YET. and I'm all for it :)



Likes
6
Share


@Cannibalgardens
Follow
Wow and wow the stench coming off of these flowers is too notch stuff you guys .. They were so easy to grow from start to finish and were very good at growing with minimal water, under feeding and anything else I threw at it . It's great at taking your training and doesn't mind cropping either . They have so many great strains I'm eager to try some more after this one because they are suck treats to grow anymore ..
Likes
Comments
Share


@DogDoctorOfficial
Follow
🌹 Pink Rozay Auto B - Week 4 | Early Flowers, Big Dreams 🌹
Some plants quietly follow the rhythm of the room.
Others decide to write their own timeline.
Pink Rozay Auto B is proving to be one of those special girls.
While the entire 8×8 Adventure is progressing beautifully under our 12/12 From Seed experiment, she and her sister have clearly decided they aren’t waiting for anyone. Both have entered flowering noticeably earlier than many of their neighbors, already stacking fresh white pistils and showing that unmistakable transition from vegetative growth into reproductive mode.
Whether they’ll ultimately finish well ahead of the others or simply settle back into the group’s pace remains to be seen—but that’s exactly what makes phenotype hunting so fascinating. Every day brings another lesson.
This diary is another chapter in documenting that unique journey.
⸻
🌱 Life Inside the 8×8 Adventure
The room continues to evolve into exactly what I hoped this experiment would become.
Multiple cultivars…
Multiple phenotypes…
One environment…
…all responding in their own completely unique ways despite receiving identical treatment.
Watching these differences emerge is one of the greatest rewards of this project.
Pink Rozay Auto B isn’t the tallest plant in the room, nor the widest, but she carries herself with incredible confidence. Every day the structure becomes a little more refined, with new flower sites appearing throughout the canopy while maintaining a compact and manageable shape.
She may not demand attention…
…but she certainly earns it.
⸻
🌿 Gentle Training, Better Light
Training continues to be extremely light and intentional.
Rather than forcing the plant into unnatural shapes, I’m simply guiding her architecture little by little.
Low Stress Training continues to spread the branches outward while preserving the natural growth momentum.
Combined with regular leaf tucking, more light now reaches the lower developing shoots without removing healthy foliage unnecessarily.
It’s amazing how much difference simply moving a few leaves can make.
Every exposed node becomes another opportunity for a future flower site, helping create a more balanced canopy while allowing airflow to penetrate deeper into the plant.
Sometimes the smallest adjustments deliver the biggest results.
⸻
🌸 Racing Into Flower
One thing is becoming increasingly obvious.
Pink Rozay Auto B is moving.
Fast.
The top flowers are already producing beautiful clusters of bright white pistils, and several lower branches have joined the race as well.
Compared with many of the surrounding plants, she’s clearly a step ahead in flower initiation.
Whether this means she’ll ultimately finish earlier or simply started blooming sooner is impossible to know at this stage—but that’s part of the excitement of documenting every single week.
Nature always has the final word.
⸻
🌡️ Summer Challenges Continue
Summer growing always keeps us humble.
Even with the air conditioning working around the clock, keeping temperatures under complete control during the hottest days remains one of the biggest daily challenges.
This week the environment averaged:
• 🌡️ Day Temperature: 33°C
• 🌙 Night Temperature: 25°C
• 💧 Relative Humidity: 63%
• 🌱 Root Zone Temperature: 21°C
• 💦 Nutrient Solution: 26°C
• ⚡ EC: 1.35 mS/cm
• pH: 6.1
• 🌿 CO₂: 639 ppm
Considering the outside temperatures, I’m genuinely pleased with how stable the room has remained.
The plants certainly don’t seem to mind.
Healthy color, vigorous growth and strong turgor continue to suggest they’re adapting very well.
⸻
Feeding Program
This week the feeding schedule remained simple and consistent using the Plagron Terra line:
• Terra Grow — 1.8 ml/L
• Power Roots — 1 ml/L
• Pure Zym — 1 ml/L
• Sugar Royal — 1 ml/L
The combination continues to promote vigorous vegetative growth while providing plenty of support as flowering begins.
No need to complicate things.
Healthy roots continue to build healthy flowers.
⸻
🔬 Looking Forward
Over the coming week I’ll continue monitoring her carefully.
If she keeps flowering at this pace, she could become one of the earliest finishers inside the entire 8×8 Adventure.
Or…
She might simply be an early bloomer before settling into the same finishing window as everyone else.
Either outcome is exciting.
That’s exactly why I love running multiple genetics together—every phenotype tells its own story.
Pink Rozay Auto B has definitely captured my attention.
Now it’s her turn to show us what she’s truly capable of.
⸻
💚 Thank You
As always, thank you to everyone following this adventure.
Every like, every comment, every question and every bit of encouragement makes these journals even more enjoyable to create.
A huge thank you to GrowDiaries for providing a place where growers from all over the world can share knowledge and learn together.
Massive appreciation as well to Plagron for supplying the nutrition driving this entire run, and to Zamnesia for providing the genetics that make this project possible.
Finally…
Thank you to everyone following the entire 8×8 Adventure from seed to harvest.
Every week brings us one step closer, and I can’t wait to see where Pink Rozay Auto B decides to take us next.
Growers Love and happy growing! 🌱💚
Likes
5
Share


@Englandshigh
Follow
This week they are both starting to pre flower and stretch, very good structure and smell ,have loved growing this strain can’t wait to see her go beast mode and swell up

Likes
44
Share


@TragicTerps
Follow
Harvest was sad I didn't want to cut them down. That said, these baby's are dense as hell and smoke amazing. The water cure worked out well and pulled them out when the PPM dropped back to below 50.
Not the best yeild but for what I'm going for it's] effect I already planted my next garden lol.
Smoke report will have all the other details.

Likes
20
Share


@PREPPYPUNK
Follow
The first grow this summer was the finest i have ever produced however, the shit got moldy and i could have prevented that had i known hi heat and humidity makes it happen. You never think it will happen to you untill it does. Critical purple and gorilla glue just beautiful buds 100% worthless. So i got the 2 barneys farm seeds from a neighbor and i believe i let these 2 down. I just finished a heavy watering harvest and forgot these young ones werent drinking the way the last ones were so i over watered and maybe theres some nute lock out going on. I thought of just digging them out and examining the roots and possibly some attempt at root surgery but these are freaky deaky autoflowers and nobody can predict what these fuckers may or may not do. So, if its 80 and 50% humidity or less, they go in the yard if the sun is out. At night i check for bugs and critters and put them back in the 3x3 with the marshydro tsw2000 which is about 400 watts for a sleepless night of fake sun then repeat to death do us part! I hope i dont bring some shit into my tent from outside. I had a bad nightmare or more of a dillusion that i saw a shrew running across the silver floor. Being perpetually stoned will make you fuck up the whole grow. I have to admit i had 5 different strains in jars, labeled, dated notes etc..plus i can always look back here to see what i did but i took some from each and put a bit of each into a bag and wrote on them with marker the details. I was going to gift them to the guy who gave me the seeds to check it out and give me an honest opinion. Havent heard a word from the guy but whatever. Bottom line, i mixed up the lids that had the notes and mixed them all together by accident somehow. I have enough left to survive another harvest so at least i got that going for me and some seeds hopefully on there way. Excited about new seeds. I have enough decent lights to put my self in a good spot but need 2 more tents though i have a closet grow area set up that i hate to say does as good as good a job with no tent. Plus i sort of like the comforting light leaking out from the edges of the tarp i havec covering the opening and the whir of the fans. I have been growing 24/7 light schedule on auto flowers for 3 years now and it has never been a problem. Only thing i have to focus on is the 1000 different things you need to pay constant attention to and i have a serious problem with drying/curing. Everything ends up not smelling awesome at all. I keep 50% humidity and 70 degrees and adjust as they dry as different strains and grows just dry differently and thats it so there is no exact science but a pretty good outline to follow. However after watching video 2500 and looking more importantly at other grows right here, i believe the fact that i have been drying for 4 years in a closet with stagnent air and absolutley no ventilation at all. Thats the only thing i can think of thats seperating me from a green blazer with gold buttons. So whenever these 2 bitches decide to treat me better, i will be xtra attentive to the dry. esp with ventilation and of course i have discovered a new chemicle that i think i absolutley need. its called terpinator and im hoping that will give ne that 5 star bag apeal everybody wants. meantime, i have plenty of this shit that doesnt smell much, though its definatley weed when you smell it burn and its all mixed together and its a pretty trippy high though i cheat for some variety on occasion and hit the dispencary but the quality just isnt there anymore. I dont know if it ever was. I was getting much better weed that was home grown hydro bud and the shit was 250 for a freaking quarter ounce! 250! Top shelf best shit ever though. Thats my freaking goal in life. I have to clean the freaking bathroom as my moms comming over and she walks right past the weed and goes straight to the freaking bathroom and makes all sorts of claims about a 50 year old man who grows weed and keeps house like a 15 year old. Thing is, you really need to keep the environment as clean as possible and i just thought of something horrible. The bags i have waiting for the new seeds are all mixed up and i have no idea which ones had the moldy buds in them. Ill ask a grow question but nobody will know for sure and the safest bet will be to sterilize the tent after i finish up my Barneys Farm abortion, which may still turn out some decent buds, the fuckers refuse to die!!!!! and buy new grow bags and just start over to be safe. Or can i bring them to a laundrymat and wash and dry them? Ill ask.
Likes
13
Share


@DeepRootsGrowTrees
Follow
JOANNE'S CBD / ROYAL QUEEN SEEDS
WEEK #13 OVERALL
WEEK #1 FLOWER
This week she was flipped to 12/12
starting her first week of flower she's almost caught up to the other plants she's still a little smaller but doing her thing!! Stay Growing!!
Thank you for stopping by and taking a look it's much appreciated!!
THANK YOU ROYAL QUEEN SEEDS!!
BUDTRAINER.COM BUD CLIPS
ROYAL QUEEN SEEDS / JOANNE'S CBD