
Likes
Comments
Share


@barlobruz
Follow
8/22/2021
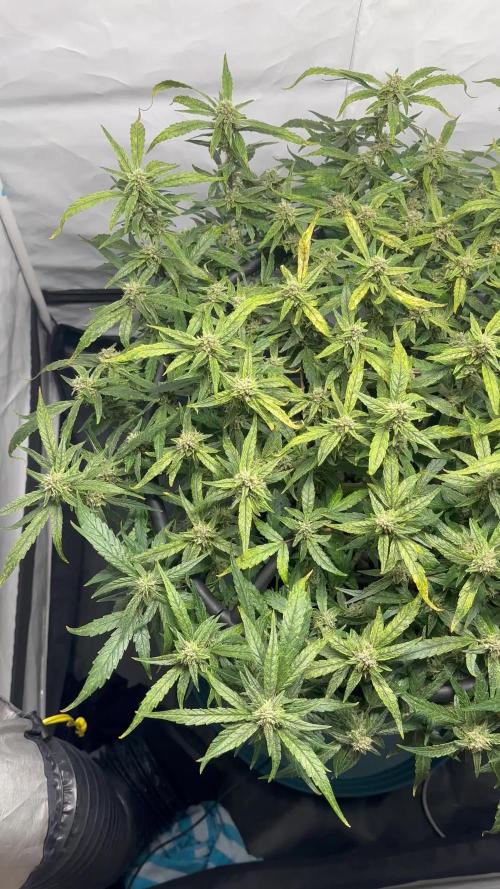
- Did some mid-flower defoliation to increase airflow and to prevent mold and mildew.
- Split the top right main from trying to train her down and spread out the canopy, supporting with tape and twist ties.
8/23/2021
- Top right main is still vigorous after split.

Likes
23
Share


@Kynareth
Follow
Day 35 - Flowering started with a weak smell, i have put in place the scrog cuadrant with the ¡intention to obtain around 15 tails The plant looks happy in general terms. I will mantain the nutrient solution until next week
day 38 - the plant looks good, no more comments for now


Likes
5
Share


@CalGonJim
Follow
3/3 MONDAY 12 am. They are doing great, the supplemental lights are helping. they cost about 60 for the AC Infinity germination kit. I think the 2 lights are enough so it’s cheaper to get another Germination setup with the lights for my 2.8x2.8 tents. 3pm they all took quite a bit of water. feeding into the bottom of the container is very beneficial to the plants. Wish I would’ve known about that sooner I made a video of how I do it.
3/4 4am looking good. 130pm

Likes
5
Share


@Pechu420
Follow
The cold significantly stunted development. I cut it 20 days too early because I was afraid of botrytis spreading from other plants, but that was my mistake, as botrytis never reappeared on subsequent plants.
8 days drying with indirect wind and dark place.
Small 3-liter vase, just a few grams, the crop still had more time to mature.

Likes
3
Share


Likes
14
Share


@GodZilla_Owner
Follow
Week 7 Update – Recovery and Growth 🌿
Sorry for the late update—I was completely out of commission the past few days 🤢, but luckily, my girlfriend stepped in and took care of the plants.
The good news? The stretch is finally over! But note to self—never again 9L pots for plants this size! 😅
BioBizz#1 – BT23
Despite a “drain” pH of 7.8, she’s doing okay overall. However, this will be my last run with BioBizz. While I’ve managed the CalMag issue this time, Advanced Nutrients has completely won me over. AN#4 has thicker stems and looks more vigorous, and AN#3 bounced back quickly with AN nutrients.
AN#4 – BT23
She’s praying to the light every day and is officially the largest and healthiest plant I’ve ever grown—no deficiencies so far! 😍
AN#3 – BT19
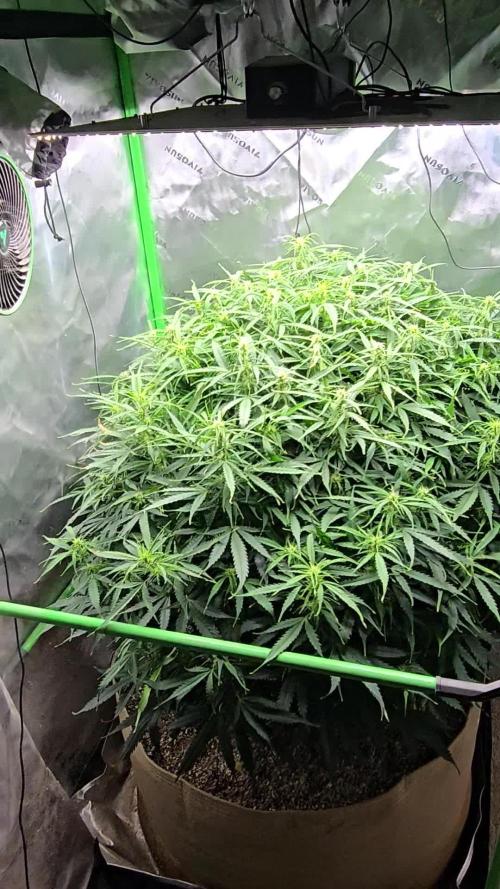
I had to defoliate heavily, but you can barely tell. Height is becoming a challenge, so I’m hoping it just barely fits—because it has to! 😅
Likes
61
Share


@UnorthadoxDude
Follow
Welcome to the start of week 5 for Queen Citronella. She has developed a thick stem and really short internodal spacing. She responds willfully to LST.
Day 29.5: Repotted. Look at those roots!! This is a special plant.
Day 30: There was brief transplant shock as I forgot to flush the medium to correct PH... she's bounced back today. Queen Citronella has almost outgrown Karen who is 2 weeks older.
Day 31: Happy one month birthday your majesty! Swelling in every direction. Starting to gain height.
Day 32: I've noted a sudden uptick in thirst. In an unrelated note I have added a little 15w LED above her at about 10cm. I doubt it'll make any noticable difference but it's in there anyway as I use it for photos, so it may as well be on.
Day 32.5: Have removed approx 20 fan leaves and performed further LST.
Day 33: Look how fast Queen Citronella responds to LST and defoliation. She has gained 1cm in the last 24 hours and now stands at 25cm.
Day 34: 26cm.
Day 34.5: Fertigated. Added pot risers and adjusted pot. Performed further LST on lower nodes. Performed HST on some higher nodes just for practice.
Day 34.75: Fertigated 4l
Day 35: She didn't gain any height at all that I can tell, but she has put on a lot of leaf growth in the last 24h. So here we are at the end of week 5, and Queen Citronella is starting to take her regal form. Slightly alarmed by the yellowing new growth but her growth rate has stepped up again so it may be just normal. I'll keep an eye on it. Once I can take enough clones I'll cut her back a lot. For now she can grow as much as she wants. Citronella now smells citrusy, if you brush against her it's quite strong. Defoliated approx 6 fan leaves.
Likes
4
Share


@musashi_miyamoto
Follow
Used RootMax mycorrhizae- bacillus + glomus: good root growth
Top dressed with compost

Likes
22
Share

@DapperDabber
Follow
What an absolute monster!
70 Days ago I sown the seeds into the ground and she has become a whole a** 🌲tree! 🌲
She was given Big 6 Micros from Buildasoil and
Bio-catalyst from Root-wise today. A few days ago I innoculated the 65 gallon pot with about 100 red wigglers to kick start some life in there and get some nutrient cycling going for the next run.
I might have to do a staggered harvest as it's too late for me to comfortably lollipop again!
Thanks for reading and take care!
Likes
27
Share


@Jungle_James_Grows
Follow
Chopped tonight so not weighed them yet will do tomorrow if I can.
Ended up with 290g for 5 plants
But 5 same seeds and 5 different pheno's.
Judging by the looks the heaviest weight is from the one I topped .
Already weighed one plant got 28g dry weight. Got 4 more babies chopped tonight


Likes
8
Share


@DrJoint
Follow
This is more than 21 weeks now, there was a time when I was not updating as she was a very slow, most probably due to inappropriate care :) I was very upset when completely broke my young plant in week 5 but now I’m very happy that I didn’t give up on her and cloned her :)

Likes
12
Share


@Socal6pak
Follow
Received TWO 5packs of rhino Ryder as freebies. Gonna grow these outdoors and see how they do. Gonna take advantage of socal sunshine. Only 4 out 5 sprouted. It’s old beans I think. So that’s a good pop rate. I think.
Likes
27
Share


@Major
Follow
hello everyone I had a very positive week on my Barney’s Tropicana banana colas are forming and hardening full of resin are on the flowers and leaves the harvest is coming soon I am very happy good luck everyone😘👍👍👌🙏🏻


Processing
Likes
43
Share


@Eyeduno
Follow
Day1 of flower defoliated them some more never took a photo of them after tho should have really, and last week uploaded a pic on accident nothing to do with this grow obviously lol
Likes
53
Share


@Schnabeldino
Follow
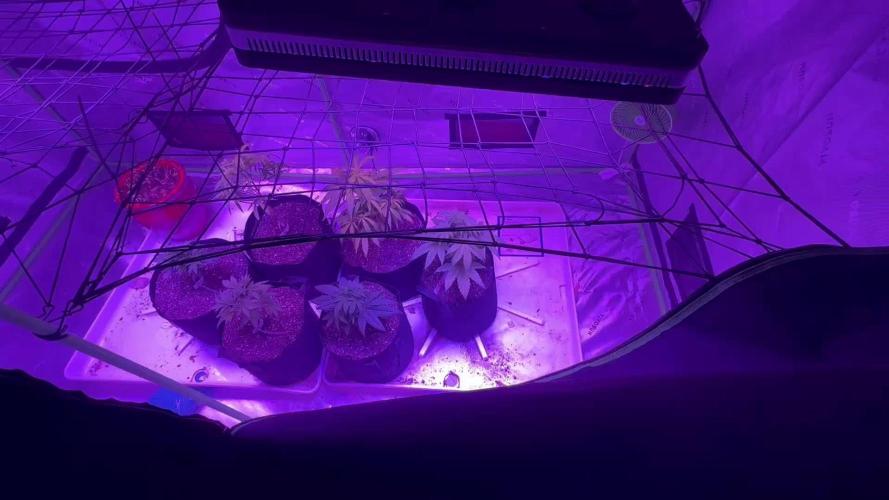
end week 8.
------------
this week only water
from all Gorillas the buds look very sticky and frosty. when I open the tent, it smells very strong.
The 1 and 2 smelled pretty strong, chemically, the 3. more like citrus.
I will harvest
Gorilla 1 20.10.
Gorilla 2 22.10
Gorilla 3 23.10
I made videos and pictures of the trichomes.

Likes
44
Share


@SooSan
Follow
Mars Hydro m'a sponsorisé, je vais donc tourner à 100% en Mars Hydro !
J'ai donc une nouvelle tente, la 2in1 90x60x140 Mars Hydro !
Et le FC-E 4800 est arrivé ! 😍
J'ai divisée la 90x60x140 en 3 parties (et donc 3 Diaries) :
1️⃣
🏠 60x60x140
☀️ FC-E 4800
🍁
1x Black Bomb / Philosopher Seed
2x Amnesia Lemon / PEV Seeds
1x Blueberry / PEV Seeds
1x Blueberry / 00 Seeds
1x Wappa / Paradise Seed
1x Dark Phoenix / Green House Seed
1x Quick Sherbet / Exotic Seeds
1x Mango Cream / Exotic Seeds
1x Banana Frosting / Sensi Seed
1x Hindu Kush / Sensi Seed
1x Fast Mix / Sweet Seed
📎 https://growdiaries.com/diaries/122084-grow-journal-by-soosan
2️⃣
🏠 30x60x90
☀️ TS1000
🍁 4x Fast Mix - Sweet Seed
📎https://growdiaries.com/diaries/124052-grow-journal-by-soosan
3️⃣
🏠 30x60x50
☀️TS1000
🍁 4x Quick Sherbet
📎 https://growdiaries.com/diaries/122080-grow-journal-by-soosan

Likes
51
Share


@MadeInGermany
Follow
Info:
Unfortunately, I had to find out that my account is used for fake pages in social media.
I am only active here on growdiaries.
I am not on facebook instagram twitter etc All accounts except this one are fake.
Flowering day 22
since time change
to 12/12 h.
Hey guys :-)
A wonderful week goes by and the lady is developing well :-).
The buds begin to develop and give off a delicious smear through the tent.
It was poured 3 times with 1 l each time (for nutrients, see nutrient table above).
Otherwise everything was cleaned and checked.
Stay healthy 🙏🏻
A thank you for this wonderful strain goes out to
Herzog
https://instagram.com/herzog030?utm_medium=copy_link
and the Exotic Seeds team
You can buy this Nutrients at :
https://greenbuzzliquids.com/en/shop/
With the discount code: Made_in_Germany you get a discount of 15% on all products from an order value of 100 euros.
You can buy this Strain at :
https://www.exoticseed.eu/
Type:
Herz Og
☝️🏼
Genetics:
Larry OG X Kosher Kush
Indica 60 % / Sativa 40 %
👍
Vega lamp:
2 x Todogrow Led
Quantum Board 100 W
💡
Bloom Lamp :
2 x Todogrow Led
Cxb 3590 COB 3500 K 205W
💡💡☝️🏼
Soil :
Canna Coco Professional +
☝️🏼
Nutrients :
Green Buzz Liquids :
Organic Grow Liquid
Organic Bloom Liquid
Organic more PK
More Roots
Fast Buds
Humic Acid Plus
Growzyme Big Fruits
Clean Fruits
Cal / Mag
Organic Ph - Pulver
☝️🏼🌱
Water: Osmosis water mixed with normal water (24 hours stale that the chlorine evaporates) to 0.2 EC. Add Cal / Mag to 0.4 Ec Ph with Organic Ph - to 5.8 - 6.4
