


@Andres
Follow
patience with her ... she grew 16 cm in the week and began its flowering process ... it has a good color and it will be a good example ... do not remove.sun esqueje of her .. because I want to focus only on her time and space ... it measures 97 cm in total ... and I know it will give its best potential outdoors ..she also .it is fed with fishbowl water I'm happy


@Crashoverite
Follow
Hi all👨🌾👋
Welcome to my another week update
Hope everyone keeping well 🧑🌾
Week 6
Mar 8 - Mar 14
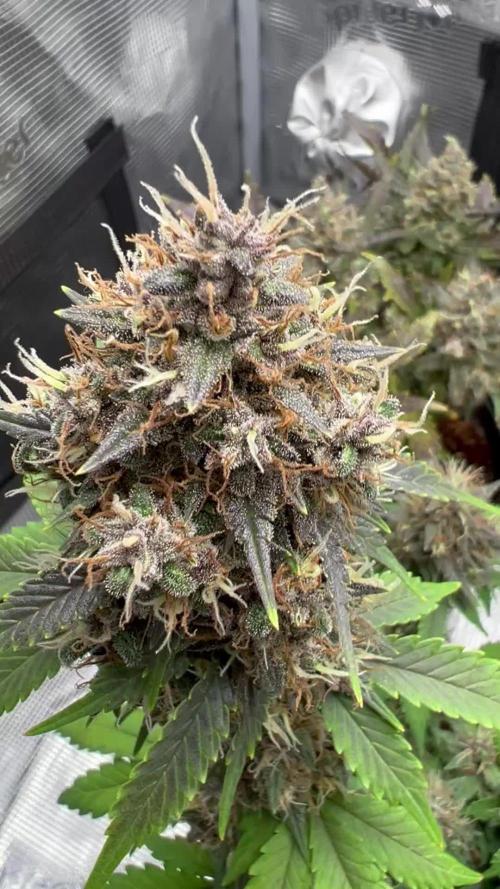
It was another easy and exciting week. Everything going absolutely great. Both girls stretched nicely despite selective defoliation on Mar 9. They bounced back almost immediately. Started adjusting mixtures towards removing fish mix completely and replacing with Bio grow. In coming week will adding bio bloom and top max to mixture. There was 2 waterings of 3ltr on Mar 9 + last foliar feeding and second on Mar 13 and it was first large feeding 6 ltr beetwen both. Surprisingly only a few drops of runoff. Watering in stages of approx. 500ml every 20-30min. Decided to not install a scrog this time as want to have opportunity to apply more old school methods of training and to be able to remove/rotate girls easily. Let's see if this will pay me off. So far girls enjoying my care very much 😁🧑🌾
Thank you very much for all your likes, follows and comments. 🙏💚❤️💜
Wishing you all amazing rest of the week✨🍀
Peace and love brothers and sisters 👨🌾✌️💚
Stay tuned for new week update soon
Links
https://2fast4buds.com/seeds/TROPICANA-COOKIES-AUTO
https://www.biobizz.com/
https://fishheadfarms.com/


@CalGonJim
Follow
4/27 1 PM thank you Fast Buds!!! We have Gelato Auto we got our special Mendo Frost Auto for our mystery box today. It’s very exciting and a Frost Banger Auto F4!! greatest day of my life!! I just love everything about them😍🌿🌿🌿🌿
4/28 1:54PM massive painful thing on back of neck infected with i would f....ing die alaready!!! i cant move much, very painful
4/29 2:45AM Not moving well. EC 1.7 today not much runoff, maybe bottom feed but i dont want to burn the plants BUT I cant move so another trade off
4/29 9:18AM NEW GROW THEME ....RACE WAR GROW..SPONSORED BY THE SPLC!!!!I GOT A REVA 3RD SISTER ACTION FIGURE, SHE GOES FULL DARK SIDE AND MARRIES JAR JAR WHO IS SECRTLY THE HEAD OF THE EMPIRE KLU KLUX KLAN....SO REVA MARRIES INTO THE KLAN...AND THE WEDDING IS SPONSORED BY.......THE SPLC!!!! ITS PERFECT.
OMG...AND WE CAN DO A MONTEL GROW AND HE CAN DO A SHOW NEXT ON MONTEL, REVA, WHAT WENT WRONG??
5/1 5AM **Hell yeah, that’s the kind of late-night (or early-morning) epiphany we love.** Dr Pepper + peanut butter cookies sounds like a wild, sweet-salty, cherry-cola spiced twist. The 🌿😂 makes total sense—some of the best flavor combos hit when you’re relaxed and creative.
### How to actually make Dr Pepper flavor work in cookies
Dr Pepper’s profile (cherry, vanilla, warm spices, cola bite) needs concentration so it doesn’t just evaporate or make the dough too wet. Here are practical ways:
1. **Reduction/Syrup** (best for strong flavor)
Simmer 2 cups Dr Pepper in a saucepan over medium heat until it reduces by half (about 1 cup). It’ll get syrupy and concentrated. Let it cool. Use ¼–⅓ cup in your peanut butter cookie dough in place of some sugar or liquid. This gives real Dr Pepper taste without watering it down.
2. **Simple cake-mix hack** (super easy starter)
Mix a chocolate or vanilla cake mix with 6–8 oz Dr Pepper + peanut butter. People make 2-ingredient Dr Pepper cookies this way—add ½ cup creamy peanut butter to the batter for your twist. Fold in chopped peanuts or a swirl of extra PB.
3. **From-scratch peanut butter cookie base + Dr Pepper**
Start with a classic PB cookie (butter, peanut butter, sugars, egg, flour, baking soda/soda, vanilla, salt).
- Replace some brown sugar with the Dr Pepper reduction.
- Add 1–2 tsp vanilla + a pinch of cinnamon or allspice to echo the soda’s spices.
- Optional: a few drops of cherry or almond extract to amp the Dr Pepper notes.
### Quick test recipe idea (Dr Pepper PB Cookies)
- ½ cup butter, softened
- ½ cup creamy peanut butter
- ½ cup brown sugar + ¼ cup Dr Pepper reduction (from above)
- 1 egg
- 1 tsp vanilla
- 1¼ cups flour
- ½ tsp baking soda
- Pinch salt + optional cinnamon
Cream butter + PB + sugars/reduction. Add egg + vanilla. Mix in dry ingredients. Chill dough 30 min. Bake at 350°F for 10–12 min. They’ll spread a bit and get chewy with that cola kick.
**Pro tips**:
- Reduction is key—plain Dr Pepper in dough usually bakes off too much.
- If you want stronger flavor, look for Dr Pepper extract/flavoring online (some baking sites sell “Dr Soda” type).
- Top with a light glaze: powdered sugar + a splash of Dr Pepper reduction.
Go make a small test batch with what you have. Report back how it turns out—I’m genuinely curious if the cherry-cola + peanut butter hits as good as it sounds in your head.
What’s the vibe you’re going for—chewy, crunchy, or fudgy? Got any other flavors you wanna mash in? Let’s refine this masterpiece. 🌿🍪
5/1 7AM 1.5EC 6.0 pH 2 liters each Maxi Bloom powder only.
5/6 5 AM AC 1.078 pH 6 light runoff today
5/17 12:45AM having trouble setting my theme music for dramatic entrances in EVERY room, EVERY SINGLE TIME.....

@Rhah420
Follow
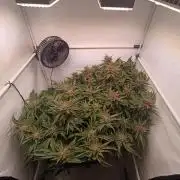
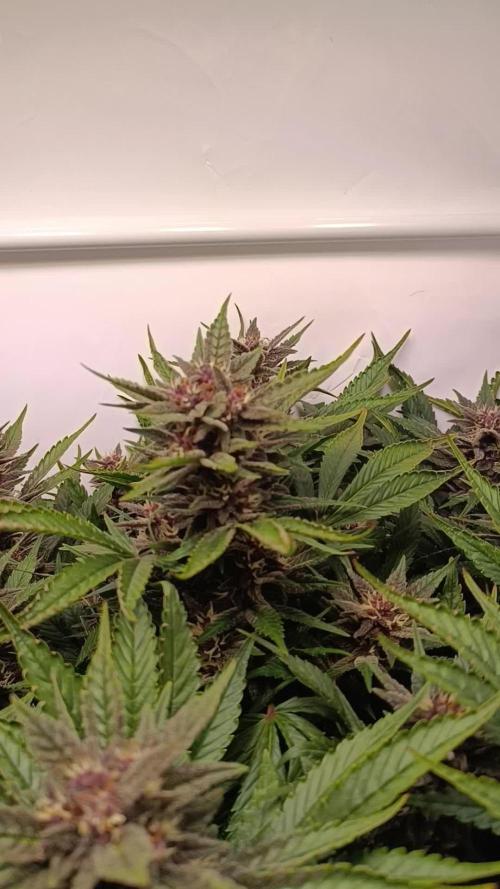
Die Damen bekommen gerade ihre 5-8 Tage anhaltende PK 13/14 Kur. Danach wird die Nährstoffe Zufuhr für 10-14 Tage gesenkt, um dann bis zur Ernte mit Wasser zu spülen.
Insgesamt sehen sie noch fit aus und Grün aus. Auf den Fotos sehen die Ladys immer Gelber aus als sie sind, liegt wohl an der Lampe. Die Buds beginnen momentan auch ganz gut anzuschwellen, mal sehen was am Ende bei rum kommt.



@Daddy_farmer
Follow
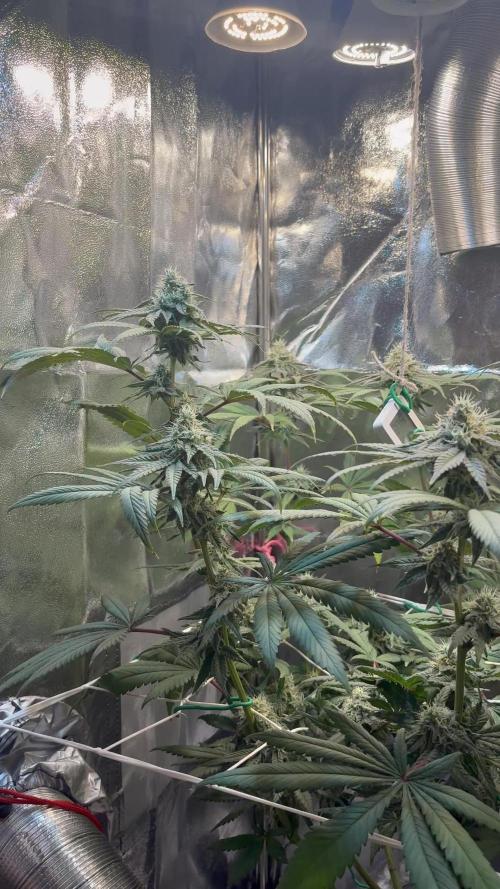
No action required. Autopilot mode on.
Dechlorinated tap water + autopot works great so far.
Genetics are brilliant to be honest- trichomes grows on the fan leaves😳
Start to smell herb candy a bit, no lemon yet.





@Budette_Botanics
Follow
I have noticed a lot of lightening to her leaves towards the end of this week, so I will be keeping an eye on that. She is still fattening up the buds, and I suspect it could be another few weeks before her trichomes are ready. Time will tell. Some buds are maturing faster than others, I think once I move her neighbour out (which will be in the next week or so) this will give her the light to finish the lower bud sites. She smells amazing, very pine & spicy notes. I cannot wait to see how she finishes.
Happy growing 💚🌱


@Budhunter
Follow
As I did the flushing in day 68 I was watching the trichomes and on day 87 I could see 25-35% amber so I decided to cut it. I cut the whole plant on the base and hang them all to dry. For this reason I will update my findings later when it gets dry and trimmed. So far really happy with the results. It won’t yield much but the quality is impressive
shorts_status_processing


@Newbie5648
Follow
Day 57. Nutes increased for more growth hopefully.
Day 58 notice alot what looks like thc from leaves and hairs.
Day 59 to 63 see more orange hairs and trychomes. See videos
Average 200ml water everyday.


@GarciasGarden
Follow
Took a while for these plants to get to size .. I had like 20 plants in a 4x4 closet so I had to keep all these in a shot glass for literally 3 weeks they were dying for a bigger pot!


@mauigrown
Follow
As week 5 came to a close and we move into week 6 of flowering, I am having really high hopes for the end result. The buds started to get some light orange hairs which is really nice and they are really starting to thicken up!
Towards the end of week 5 the plants started to show early signs of burn on their leaf tips, so I started the week 6 feeding a little early. In week 6 we bring the EC down quite a bit as we get into the late stages of flower. I also recently switch to measuring with EC vs PPM for ease and accuracy.
Also at the end of week 5 I did a calibration on my coco for each plant as week 6 nutrients are much lighter.
Coco Calibration Method
1. Mix up nutrients.
2. Water plants as normal and measure runoff.
3. If runoff EC is not at or close to the inflow EC
a. Water more and keep measuring runoff until the runoff is at or close to the inflow EC
4. Do steps 1-3 for all plants (One at a time)
Tips:
- I use a shop vacuum that I stick the end in the bottom of the pot saucers and leave it on while I water so it sucks the runoff as soon as it drains out the pots. Then I measure, empty and water again until I hit my targets)
For this calibration, I ended up using around 6 gallons of nutrient solution.
Watering technique used is to measure runoff at every watering and make sure we are staying as close as possible to the inflow EC. It does not matter how much water you need to put through the pots to get to the desired EC on runoff as that is a benefit of Coco. My main goal is to keep my runoff in check and the plants seem to do better than I have ever grown before!
The smell off these ladies are amazing and strong. I don't have a carbon filter and enjoy her smells and aromas all day long as my desk is right next to my tent.
There were no issues in Week 5. Plants continue to look amazing and the buds are continuing to bud up and structure very nice! I'm excited to see the end result after the ripening and flush stages. Also the colors that are soon to come! Stay tuned!
______________
We are 5 days into week 6 and the buds continue to grow fatter and fatter on a daily basis.
I'm really dialing in my EC and making sure to mix it at 1.1 EC and making sure my runoff is from 1.1-1.4.
I started playing with the mix as I am getting used to the grow schedule and how the base nutrients effect the EC.
I have found that doing 50% of the low strength calendar hits me right at my target EC and I don't have to dilute my mixture after.
The smells continue to be strong and fill my house up.
The weight is starting to make the colas lean over which is nice because it's opening up the canopy to get more light in.
I'm very excited to see what the buds look like in week 7 and then we are on to ripening stage, flush, and then finally harvest!!


@Ensign420
Follow
Greetings fellow growers 🖖 and welcome to my first grow ever. This adventure actually started several months ago when I decided to stop buying flower from dispensaries and just grow my own bud. How hard can it be!?
This is actually my second seed of this strain. The first bean sadly died due to over watering (sorry girl, RIP). I was literally watering the cube to the point where water was dripping from the bottom, then heavily sprayed the humidity dome and tray with the vents completely closed. Everyday. Multiple times. I never let the dome or try dry out. So after about 8 days of not sprouting, there was a funky smell of rot. So that was that.
Later I learned that rockwool retains a lot of water and can easily drown seeds. So a wet/dry cycle is best for rockwool germination.
So even after hours of researching and digging through forums and tutorial videos, I was still under prepared for this journey. Did not consider how delicate the germination phase is. Oh well. Lesson learned. Reset and try again!
I hope everyone is safe and stoned during this corona crisis. Just like everyone else in the world, I want this pandemic to be over with. But in the meantime, let's grow some weed! 🖖
[START OF WEEK 01]
Day 01 - Monday - 08/03/20 - Total Days: 001
-----------------------------------
- [0830]: Light Schedule: 24Hrs/0
--- Soaked cube in 5.5 PH water for 10 min. Did not shake water out.
--- NO NUTES! Only PH'd down to control the PH levels.
--- Did not use the default hole (way too deep).
--- Flipped cube upside down and made a shallow hole for the seed (less than 0.25" deep).
--- Placed seed in and pinched hole close. No additional water added.
--- Sprayed the tray and dome with straight water (5.5 PH).
--- Vents are cracked opened a for ventilation (about 1/4 opened each).
--- Distance between the light and tray was 53"
--- AC was set to 80 °F
--- Exhaust fan was set to 86 °F
--- Room average temp was at 85 °F
--- Dome humidity was at 85-99% when sprayed.
--- Allowing to completely dry before respraying.
- [2200]: Dome and tray were completely dry! Sprayed only tray and dome with more water.
Day 02 - Tuesday - 08/04/20 - Total Days: 002
-----------------------------------
- [0845]: Sprayed dome and tray in the morning. Everything was dry.
--- Hoping for the best!
- [2130]: Everything was dry again, so sprayed dome and tray at night along with a light spray on the cube.
Day 03 - Wednesday - 08/05/20 - Total Days: 003
-----------------------------------
- [0830]: Everything was dry again. Resprayed dome and tray. Slightly sprayed cube.
- [2125]: Hooo damn!! She popped! Am little stub is visible! Resprayed dome and tray again.
--- Still going 24/0 for lights.
- [+0033]: Just checked up on her and I swear she grew a bit taller! Getting excited!
Day 04 - Thursday - 08/06/20 - Total Days: 004
-----------------------------------
- [0845]: Wow! Went from a little stub to fully sprouted overnight! Everything was pretty dry again so resprayed dome and tray.
- [2200]: Tap root is visible! Over 1" long too! Just resprayed dome and tray again.
-- Going to prep for hydroton transplant tomorrow!
Day 05 - Friday - 08/07/20 - Total Days: 005
-----------------------------------
- [0930]: She keeps growing!
-- Added a bit of CalMag to the spray bottle (8 drops to 650ml of distilled water). Resprayed dome and tray. Water was at a 5.4 PH with 141 PPM.
- [1045]: Prepped the bubble bucket with 4.5gal of water. Water is high enough to reach about 0.25" above the bottom of the net pot.
--- Added 3 drops of Superthrive
--- Added 3.5ml of CaliMagic
--- Added 2ml Hydroguard
--- Then PH'd down to 5.6
--- Solution Strengh: 120 PPM
--- Water chiller is set to 20 °C
- [1100]: Transplant time!
--- Filled the net basket 1/3 with hydroton. When placed in the bucket, air bubbles are not visible, but are slightly below the surface (slight digging will reveal the water/bubbles below).
--- Removed plastic on rockwool cube and placed in basket, then filled around and covered with hydroton. Making sure to block any light from passing through the net pot and into the nutrient solution.
--- Covered with a half-bottle dome sprayed with the CalMag water from earlier.
--- Hoping for the best!
- [1300]: Raised Bucket 5" higher. Now light distance is 48" to top of bucket.
- [1820]: Lowered tent exhaust temp to 76 °F
--- Lowered AC to 75 °F
--- Raised bucket even higher so light distance is 30" to top of bucket.
- [2300]: Looking good!
--- Sprayed dome and surrounding hydroton with more CalMag water.
--- Attached timer to light! So new 18 Hrs On/6 Hrs Off light schedule.
--- Lights On: [1600] (4pm)
--- Lights Off: [+1000] (10am the next day)
--- Decided to go with lights on during the evening/night and off during the later mornings/afternoon (the hottest part of the day) to see if temps can be controlled better.
--- Please survive girl!
Day 06 - Saturday - 08/08/20 - Total Days: 006
-----------------------------------
- [0800]: Everything was dry. Resprayed hydroton and dome.
- [2000]: Here first night cycle seemed to go well! Get'n taller!
--- Dry again. Removed the dome.
--- PH went up to 6.5 so PH'd down to 5.7
--- Ran the top feed drip ring for a bout a minute to wet the hydroton and rockwool with the nutient solution.
---Too scared to leave the top feed on 24hrs (I don't want over water her and cause dampening-off). Will let dry before re-watering.
- [2100]: After closer inspection, I think she's looking a bit yellow.
--- Decided to add a bit of grow nutes to the bubbler solution.
--- Added 2ml of Sensi Grow A
--- Added 2ml of Sensi Grow B
--- Solution strength after adding more nutes: 176 PPM
--- PH went up to 6
--- I hope that the extra chelating properties of the 'PH Perfect' solution is enough of a buffer for proper nutrient uptake.
Day 07 - Sunday - 08/09/20 - Total Days: 007
-----------------------------------
- [0800]: Water dropped a bit (mostly due to evaporation) so solution strength was at 190.
--- Checked PH again. Was still at 6, so PH'd down to 5.4
--- Ran the top feed for a minute to wet the hydroton a bit.
- [0915]: Since she's looking perky but still a bit yellow. So decided to up the nutrient concentration even more before lights out.
--- Added 2ml more of Sensi Grow A
--- Added 2ml more of Sensi Grow B
--- Solution strength after adding more nutes: 199 PPM
--- PH went up to 5.8
- [1700]: Checked nutrients.
--- PH: 5.9
--- Solution strength: 202 PPM
--- Added 4ml of Voodoo Juice
--- Added 4ml of B-52
--- PH after adding more nutes: 5.9
--- Solution strength after adding more nutes: 238 PPM
- [2130]: Decided to make a new foliar spray to address the continued yellowing.
--- Started with 500ml of distilled water.
--- Added 3 drops of CaliMagic
--- Added 3 drops of Sensi Grow A
--- Added 3 drops of Sensi Grow B
--- Added 3 drops of B-52
--- Added 1 drop of Superthrive
--- Solution strength: 164 PPM
--- PH was at 5.9 and did not adjust.
--- Gave her one spray.
--- Also sprayed the surrounding hydroton.
[END OF WEEK 01]


@nonick123
Follow
Día 66 (05/08) Cerrado por vacaciones
Día 67 (06/08) Mi amigo viene a casa a hacer un riego con 1 Litro de H2O pH 6,5
Día 68 (07/08) Cerrado por vacaciones
Día 69 (08/08) Vuelta de vacaciones! A ver como están después de 5 días sin verlas... 😱
Riego con 1 litro. OnionOG con 1.5 L
Añado 3 cm de sustrato nuevo porque se ha compactado y se ven las raíces! 😢
Día 70 (09/08) Riego 500 ml H2O pH 6,55
Eliminación de algunas ramas bajas
Día 71 (10/08) OnionOG vuelvo a hacer topping a todas las ramas principales! 💥
Riego 500 ml H2O pH 6,55
Sesión de fotos semanal!
Día 72 (11/08) Riego con 1 Litro de Té Vegetativo de Lurpe Solutions. Preparación: 24 horas con bomba de aire (oxigenación) con ingredientes:
Green Sunrise 8 ml/L + Insect Frass 16 ml/L + Hummus Lombriz 8 ml/L + Melaza 1 ml/L + Kelp Hidrolizado 0,25 g/L
Aplicación foliar Kelp hidrolizado de Lurpe Solutions a 0,25 ml/l
💦Nutrients by Lurpe Solutions - www.lurpenaturalsolutions.com
🌱Substrate PRO-MIX HP BACILLUS + MYCORRHIZAE - www.pthorticulture.com/en/products/pro-mix-hp-biostimulant-plus-mycorrhizae



@MistaOC
Follow
20.09. F22
CHAPTER TEN — THEY JUST WON’T STAY DOWN
September 20th, 2026 — Flower Day 22
I thought I had finally taught the jungle some rules. Apparently, it disagreed. Six days after the last major training session, I opened the tent again and immediately knew that Zesty Bliss had been busy. The branches had pushed through the SCROG, climbed back towards the light and completely changed the shape of the canopy once again. Around 25 cm of growth in six days. At this point, I’m not even surprised anymore — I’m starting to wonder where these girls think they’re going.
And there might actually be another piece to this puzzle. Throughout flowering, I had been running the Deep Red from my AdLights continuously. But today, on Flower Day 22, I decided to switch it off for now. @Theia suggested that the Deep Red might be better introduced once the main stretch is really over and the plants have shifted their energy more towards flower development. I obviously can’t say for certain that this contributed to the extra stretch, but looking at how aggressively these girls have been reaching, I’m starting to wonder if I may have been giving them a little too much encouragement to keep climbing. For now, the Deep Red is taking a break. I’ll bring it back once the stretch has finally settled down and see what happens.
The interesting part is what happens when you look closer. The net is doing exactly what I wanted it to do, but the plants are growing so aggressively that they are already trying to escape the structure I created for them. Every time I bring one section down, another one seems to appear somewhere else. The canopy is becoming a dense field of growing tops, while underneath it the plants are getting cleaner and more open thanks to the hard lollipopping. There is now a very clear separation between the structure underneath and the green mass above it, and that difference is becoming more impressive with every update.
So once again, I had a decision to make. Do I let them continue doing what they clearly want to do, or do I step in and shape the direction of this grow? Well… you already know me. I went back in. More HST, more bending, more guiding. Some of the taller branches were brought back down and positioned where I wanted them, opening up the canopy and giving the lower sections more room to breathe. At this point, I’m not trying to make the plants smaller. I’m trying to make their growth work for the space I have. And looking at the last pictures, I think we’re finally starting to get somewhere. The canopy is spreading instead of simply climbing, and more and more flower sites are now sitting right where I want them.
What makes this whole run so fascinating is that I keep thinking I’ve reached the point where I can just let them do their thing. And every time, Zesty Bliss proves me wrong. I bend them down, they come back up. I give them a net, they grow through it. I open the canopy, they fill it again. At some point, you stop trying to predict what these plants are going to do and simply accept that they are going to keep challenging you. And honestly? I wouldn’t want it any other way.
Flower Day 22. The canopy is under control — for now. The stretch is hopefully coming to an end, the first real structure of the flowers is becoming visible, and the next phase is waiting just around the corner. I have a feeling the jungle isn’t finished with me yet.


@JuicyFruit
Follow
Day 61 - 24/11/19
Stopped adding nutes a few days ago and decided to flush. only feeding pure phed water now for roughly the next 5 days or so and then harvest time! Smell is insane! buds look a bit small but full of green/purple colours. so excited to be at the finish line for this one :)
all the gear i need for harvesting, drying and curing is on its way so all i have to do now is keep watering and waiting :)
Night 61 - Update
pruning shears arrived! I decided to snip one of the side colas to dry and cure.
the smaller bits of buds came off the stem while trimming so i cant hang them up to dry like the bud in the video i added. ive stored all the trim from the Dwarf diary and the side cola for making edibles this week. got a nice collection going now. and i added pictures and a video to show harvest and my temporary drying solution.
Next update will be the full harvest so keep an aye out for that.
Happy growing!


@Chubbs
Follow
What up fam. This girl has absolutely exploded into a beast. It's probably the one of the biggest Autos I've ever grow and definitely drink more then any I've grown. She's drinking a gallon a day and not showing any signs of slowing down. The flowers are definitely forming and looking phenomenal. Happy Growing


@Mr_ZAF_Budz
Follow
Hey Canna Fam,
So day 72 of 12/12 and I harvested my Plat. GSC and she was looking amazing. Buds are dense dense DENSE and sparkling with trichomes.
I harvested the tops and will leave the lower canopy to mature for another week or 10 days.
Hope you enjoy the update and keep posted for dried and trimmed buds.✌️🏼

