
Likes
Comments
Share


@Drgreenthumb627
Follow
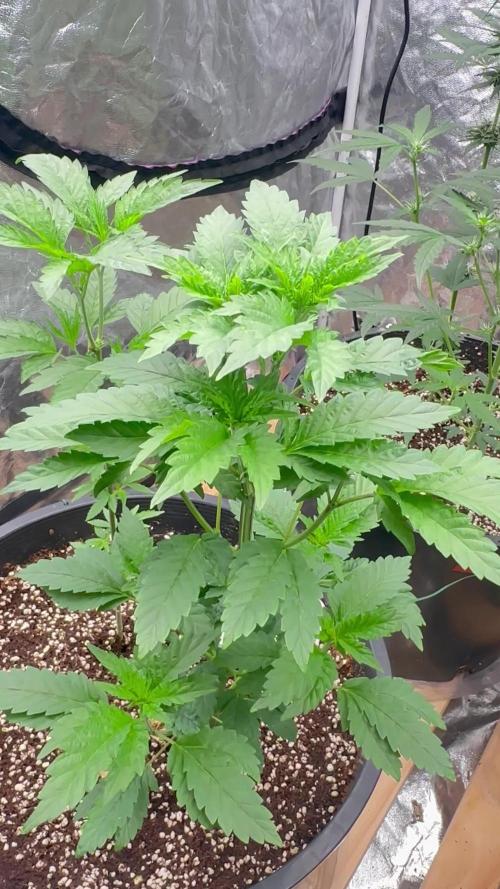
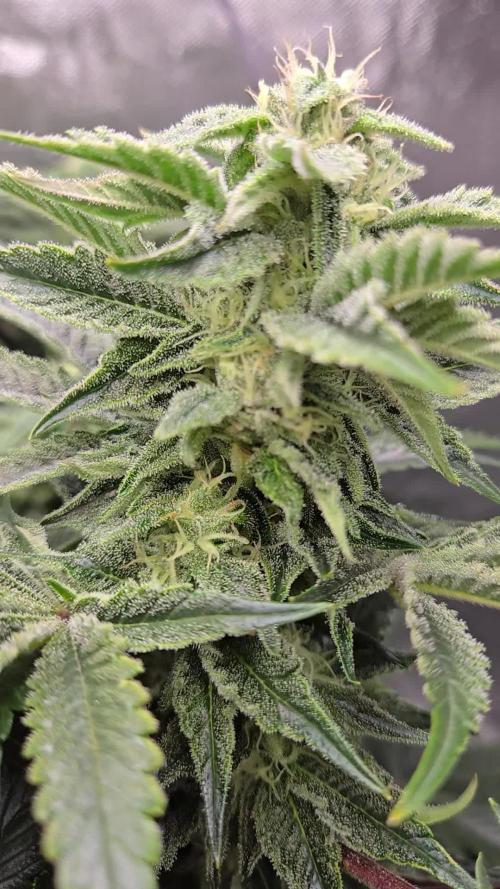
we are on the first day of week 3 and everything is looking really strong!
day 18 of flower and wow the growth is accelerating so so fast! pineapple express grew 6 inches in the past 2 days. they all seem to be responding really well to the defoliation i did a couple days ago, all the lower buds seem to be catching up in size

Likes
9
Share


@NewNewbie
Follow
CHOP DAY! Sadly, due to the laws, most if it wont even get dried...
Enjoy the pictures and
get ready for the next grow, exotic things and new tec comming :)

Likes
16
Share


@TerpTurtle
Follow
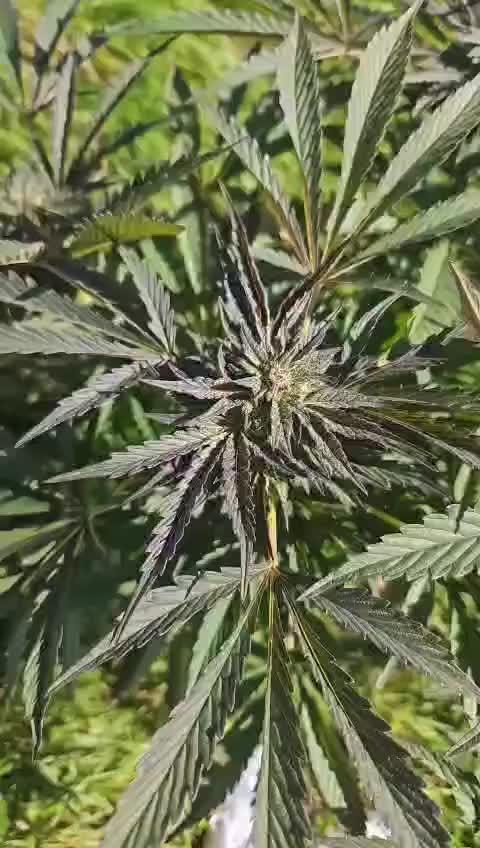
Buds & frost stacking and fattening, See a little purple hue coming in.
Vibranium enriching everything, terp profile already biting deep 🤯
I Love making cannabis media, capturing everything all with my beat up iPhone on iMovie so far. I'm saving till holiday season & will get a nice camera that I can connect with.. really liking the Sony a6700

Likes
15
Share


@Dirty_rich
Follow
Entró en plena floración, destacan los pistilos por sobre toda la planta, de las ramas bajas hasta la copa principal, mucha diferencia a la semana anterior.
Creció más de 10 cm esta semana

Likes
17
Share

@Flavors
Follow
🗓️ Week 7 Grow Journal Update 🌱✨
✂️ This week was all about defoliation! I removed the older leaves to help the plants focus their energy on fresh new growth 💪🌿 — and they’re loving it!
🍋 Fast Buds Lemon Zkittlez is smelling incredible — a sweet, fruity mix with that sharp lemon zest punch 🍬🍋🔥
🍇 Grape Wedding Force is stacking up with a strong, solid structure — it’s looking like a powerhouse in the making 💒🌲💥
🌶️💜 Red Hot Violet is coming along beautifully with a structure perfect for LST — can’t wait to see her stretch and train

Likes
13
Share


@MrPott
Follow
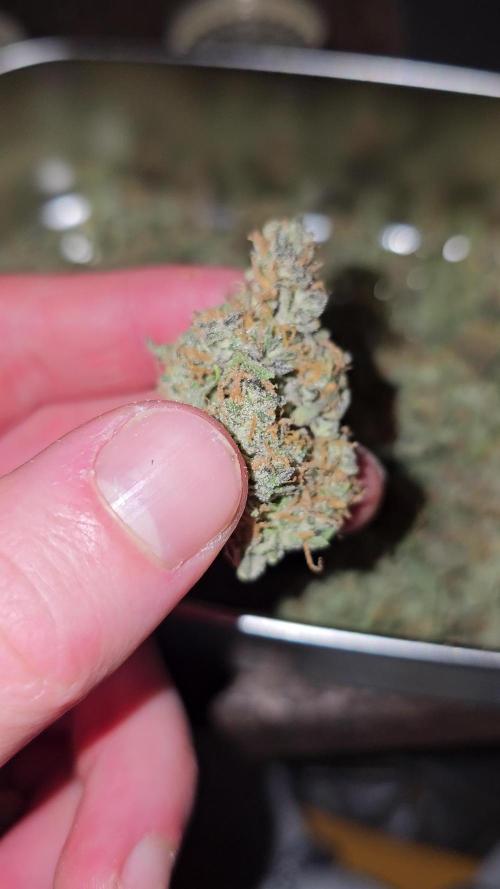
She started out tiny but definitely surprised me halfway through. She doesn't really smell as a plant but in the jars and paper bags, she smells like berries and watermelons. Only been a week since I dried her in the fridge but I can't wait so I'm going to try to smoke some of her tonight. I also had to harvest partially as some of the lower buds are not quite ready yet which means I'm not done yet as of now. Will update more soon.

Likes
11
Share

@NoProbation4Weed
Follow
last 3 days no watering and last 48 no light.
drying conditions are RH 50% and temp 14°C.
Likes
9
Share


@barrychopsticks
Follow
Almost ready to harvest (Day 53)
The are labled with 55-65 days of flowering
Started to only give water with calmag from day 51
Smells are really nice

Likes
6
Share
@NoProbation4Weed
Follow
One of them has been harvested at 8,5 weeks because she looked ready to go. While harvesting i recogniced some Nanas coming out of many lower buds.
The other one is more appealing and has one week more to go.


Likes
7
Share


@kanabise
Follow
Rinçage a l'eau de ville 1 semaine avec juste un ajustement du ph
0.6 ec et bientôt les récoltes les boyzz
la pulvérisation de purin d'ail pour prévenir les acariens
j'ai du accroché des ficelles parce que les têtes étant trop grosses


Likes
67
Share


@GanjaReaper
Follow
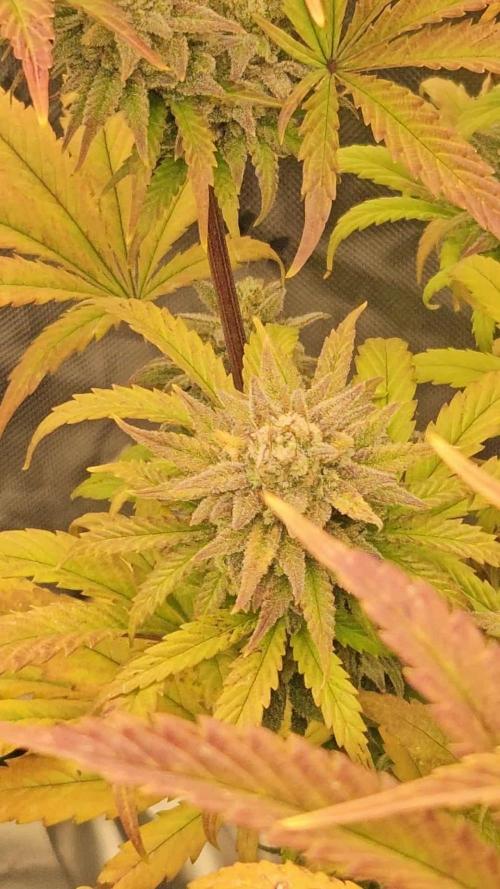
Day 69:
As you can see, lucky the buds gone bigger but because of these intense feeding to fix the grow, they start to get nutrient burns. So for the new week i might only give water until the end with maybe some Regulator, enzymen, humic-blast...
They also don't drink fast anymore. Another indicator that they having a hard time taking all the nutrients and that they are at their end of their stage.
Some smaller plants, that finished growing and flowering faster, are already done and will get cut down in the comming days.
These plants are some Gorilla's and some are cherry cola's.
As you see, some have been foxtailing because i had to raise the lamps everytime. I personally don't like fox tail buds but i know some people that love them, pure flower to smoke.
I really liked to make those photos in the dark, It shows many flowers and thc.


Likes
14
Share

@MrGrowDiarie
Follow
Day 106
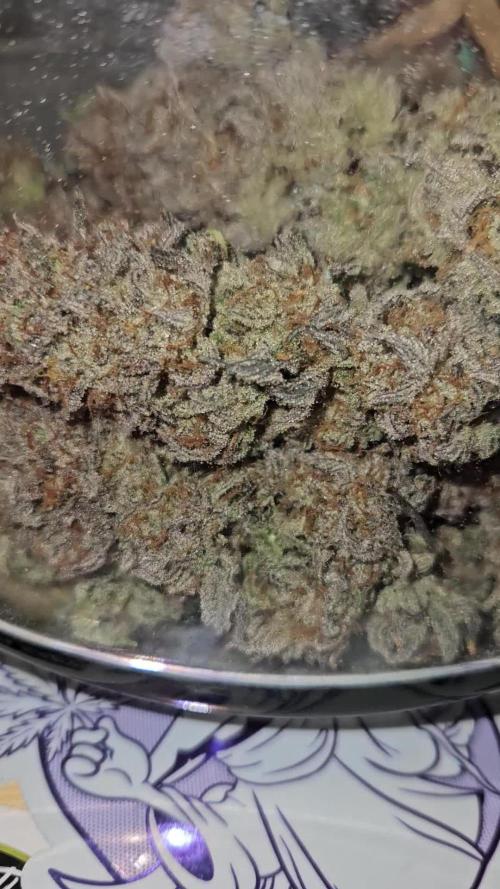
The close-up view shows very healthy flowering development. Buds are stacking up nicely with dense clusters forming and plenty of white pistils still visible, showing that the plant is still actively flowering. The trichome production is already significant, giving the buds a frosty appearance. The sugar leaves around the buds are coated with resin, a good indicator of potency.
Likes
2
Share

@pareto
Follow
Looks so nice... lets see what she brings in weight!
-------------------------------------------------------------------------------------------------------------------------------------------------------------------------------
Set up cost (fixed costs)
-Lamp: 40€
-Timer: 3,5€
-Pot: 4€
-Total fixed costs: 47,5€
Given 5 years (or 15 grows) usage time translates to around 3,17€ per grow in materials.
Variable costs:
-Seed: free (own cross)
-Soil: 4,5€
-Fertilizer: 3,50€
-Power: 15,51€
-Total variable costs: 23,05€
-Total costs per grow: 26,68€ or 1,07€/g


Likes
8
Share


@Smokwiri
Follow
Welcome to my ICE cool Auto diary by Sweet seeds
Leaf is normal now, last week was a bit cold
better weather started today and will stay that way for some time
let's wait for coming weeks development
12.6.2020: Received some new seeds from Sweet seeds, looks great
Likes
7
Share


@Babs9407
Follow
Week 8 doing well I think.
Doubled up the bloom feed.
Temperature has been lower but nothing horrible for the ladies.
Likes
6
Share


@Thckaos
Follow
No se cambia la solución solo se corrige el de 6.7 a 5.8 con solución ácida.
28-07-20 se vuelve a corregir el PH de 6.3 a 5.9
30-07-20 PH 5.9 conductividad 1,75

Processing
Likes
13
Share


@Canadian
Follow
Finally I discovered why is my critical girl and my blue cheese having such a hard time is because we have more gardening in this property tomatoes and other vegetables and my brother decided to add bat guano to all of the plants including the cannabis plant this happened a few months ago without me knowing so I continue to feed liquid nutrients without realizing they was already food in it and not any food slow-release fertilizer so after seeing my critical going south I was worried for the blue cheese cookies but they seem to be more resilient to higher doses of nutrient nevertheless I was scratching my head trying to figure out where she's getting nutrients from and boom that my brother told me by the way I add bat guano to all of the plans some months ago and I guess now is becoming available to the plans and causing all sort of problems hopefully with water only she can make it through to the end of the season but she is actually holding on pretty good still stretching and still growing .so for everybody out there please do not mix slow-release fertilizer with liquid fertilizer because you going to cause yourself so much headache and problems because there is no way to control what is in the soil.
And the reason you use Liquid Fertilizer its to have complete control in their intake of nutrients and customize it to their need something my brother does not understand yet thank you for reading I will continue to update have a happy grow.
