Processing
Likes
Comments
Share
@Flora
Follow
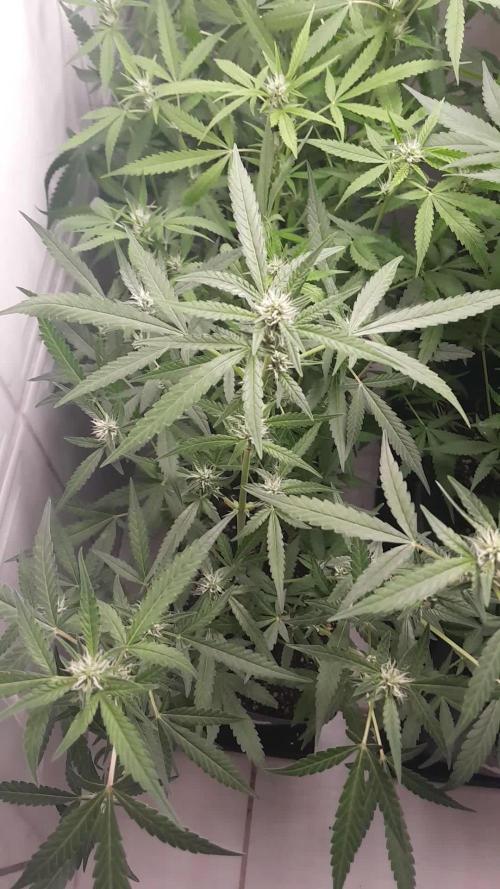
04/09/2018 switched to 660 watt light. Gave the girls a last feeding. Planning to flush them and shorten their light time.
Likes
3
Share
@valiotoro
Follow
Easy trim✂️ The buds are solid like a diamond 💎💍 The smell : citrus pine & rosemary🍋🌲absolutely divine super fresh it’s a one way to the Mediterranean Sea☀️✈️
Likes
5
Share
So this lady has started Flower on December 22nd that I have changed the light cycle to 12-12 so I'm gonna let flower begin and see what shape ends up with.
Likes
43
Share
Bonjour a tous les padawans et les maîtres jedis Pour cette semaine 4 je surveille comme à mon habitude hygrométrie et arrosage. Je peaufine mon LST en stressant ma plante le moins possible. Je combine mon LST avec un pincage d'Apex cela me permettra d'avoir une canopé plus homogène donc une meilleure pénétration lumineuse et par conséquent un meilleur rendement. Petit rappel sur le pincage d'Apex: Le pinçage des plantes de cannabis Proche de la taille d’apex sur le principe, cette technique possède cependant plusieurs avantages, le principal étant de conserver le gros bud central de la plante, d’une production et qualité maximale. Pinçage des plantes de cannabis Le pinçage d’apex (tête de la plante) consiste simplement à pincer délicatement la tige du dernier étage de la plante, entre le pouce et l’index, jusqu’à sentir la fibre s’écraser sous les doigts avec un petit bruit critch caractéristique. Si l’espace disponible sur la tige du dernier étage ne permet pas d’y placer confortablement ses doigts, il faudra plutôt pincer l’étage du dessous. Le pinçage ralentira fortement la croissance verticale de la plante, tout en stimulant le développement des branches secondaires, donnant ainsi à la plante une forme de buisson. La plante mettra quelques jours à réparer ce pinçage, formant un nœud à cet endroit, et poursuivra ensuite sa croissance de façon normale. Le pinçage peut alors être répété si nécessaire, sur l’étage suivant nouvellement formé, ainsi que sur les éventuelles branches secondaires qui pourraient dépasser l’apex. Le pinçage est donc une excellente technique pour avoir une belle canopée uniforme de type marée verte. En pinçant régulièrement l’apex des plus grandes plantes de votre espace, durant la croissance et en début de floraison (stretch), vous obtiendrez ainsi facilement des plantes de hauteur homogène en pleine floraison, ce qui facilitera la culture et augmentera la production finale, surtout si vous cultivez simultanément de multiples variétés de marijuana. Avec un peu d’habitude le pinçage pourra être réalisé aussi rapidement qu’efficacement. En cas de pinçage trop violent qui se traduirait par un apex arraché, cela produira simplement les mêmes résultats qu’une taille classique de l’apex, ce qui ne sera donc pas dramatique. Que la force soit avec vous💪
Likes
9
Share
Title: 100% ChatGPT-Guided Grow – 12/12 Fast Flower Test (With Supervision) Hey growers! This grow is an experiment: I'm letting ChatGPT guide my entire grow cycle, from lighting to nutrients to environmental tweaks. It’s all based on AI suggestions. Of course, I’ll still be keeping a close eye on things — if I see something going wrong or the plants aren’t vibing with the plan, I’ll step in. But the idea is to test how far AI can take a grow under controlled conditions. Strains – All from @Sweet_Seeds (F1 Fast Version): Mental Rainbow F1 Fast Version Tropicanna Poison F1 Fast Version S.A.D. Sweet Afgani Delicious F1 Fast Version Gorilla Girl F1 Fast Version Setup: Coco in 20L @MarsHydroLED SmartPots Grow tent: @SecretJardin DR240W Lighting: 2x 720W LM301H EVO LEDs 12/12 from seed Germination: May 14th / Main grow starts May 20th Nutrients: Hy-Pro Coco A/B CalMag Pro, @BAC Silica Power, F1 Extreme Booster Irrigation: Week 1 hand watering, then Blumat pH starts at 5.8 CO₂ supplementation via natural gas system (Spider Farmer GGS) Goal: Complete a full grow cycle in 10 weeks or less, from seed to harvest. Updates will be posted in a personal yet informative style — a hybrid of stoner chill and data-driven grow logs. Let’s see what AI can do in the grow tent. Stay tuned! 🤖🌿 🌱 Weeks 1–3 (May 20 – June 9) – Seedling to Early Flower (Stretch Phase) Goals: Strong root development, firm stem structure, controlled stretch Light: 12/12, start at ~500 PPFD → ramp up to 800 PPFD (day 14–21) CO₂: 1500 ppm (only active when lights are on and temps 26°C) Temperature: 26–28°C day / 22–24°C night RH: Start at 70% → gradually lower to 60% Nutrients (EC ramp-up): Start EC: 1.0 → increase to 1.4 Plagron Cocos A+B + CalMag Pro (0.2 EC tap water) Always mix Silica Power first (0.1 ml/L) Actions: Week 2: Start light defoliation on lower leaves Week 3: Begin LST if desired pH: 5.8 throughout the veg phase 🌸 Weeks 4–5 (June 10 – June 23) – Flowering Phase 2 (Bud Set) Goals: Initiate flower formation, maintain healthy leaf mass, stimulate bloom EC: 1.5–1.7 (monitor Blumat watering rate carefully) RH: 55–60% Nutrients: Plagron Cocos A+B CalMag Pro Silica Power (0.1 ml/L – only until end of week 5) Start B.A.C. F1 Extreme Booster at half dose, watered manually twice a week Light: 900–1000 PPFD if plants can handle it 🌼 Weeks 6–7 (June 24 – July 7) – Flowering Phase 3 (Bud Building) Goals: Develop dense flower structure, maximize flowering potential EC: Up to 1.8 max RH: 45–50% Nutrients: @Plagron Cocos A+B + CalMag Pro @BAC. F1 Extreme Booster at full strength Actions: Final defoliation at beginning of week 6 Inspect leaves regularly for airflow and mold prevention 💧 Weeks 8–9 (July 8 – July 21) – Ripening Phase Goals: Maximize terpenes, trichome maturity, flush medium Week 8: EC: taper down to 1.4 Stop using booster Optional single flush with enzymes (manual watering) Week 9: Only plain tap water through Blumat (~0.2 EC) Temperature: 24–26°C Dim lights to ~600 PPFD for final 3–4 days ✂️ Week 10 (July 22 – July 28) – Harvest Trichome check: Aim for 10–20% amber with a loupe Optional: 48 hours darkness before harvest Temperature: Keep low (20–22°C) to preserve terpenes Deadline: Harvest no later than July 28 Powered by the new 2025 @SpiderFarmerLED GGS system.. Detailed setup (only SF parts mentioned here): SF GGS Grow Light Controller (1x) SF GGS AC10 Kit (1x) SF GGS 6 Inch Clip Fans (2x) SF GGS 6 Inch Inline Duct Fan (1x) SF GGS SensorPro Kit SF Ultrasonic Humidifier May 20 – CO₂ moved outside, lighting dilemma, and a warm future ahead Moved the CO₂ generator outside the tent today. Immediate win: steady 700 PPM from just the pilot light, no active burn needed. When turned off, it drops neatly to 400 PPM, matching the calibration point. Double-checked with the Dimlux CO₂ sensor—readings line up perfectly. Still no tracking info for the originally ordered lights, so out of impatience I grabbed two new 720W LM281B fixtures from Germany this afternoon. Should arrive Friday/Saturday. It's a Trade Assurance order, so in theory, I'm covered. Now the question: let the seedlings coast at 259 µmol for two more days, or hang the old lights to boost them to 500 µmol? Eight out of twelve are already above soil, and honestly, I’d rather not mess with the current vibe. Leaning toward leaving them be—low stress, happy sprouts. Best part: temps dropped to 27.9˚C inside the tent now that the CO₂ generator’s out. Room itself is 24˚C, so all in all pretty chill. Curious what’ll happen once those dual 720W monsters fire up… it’s gonna get toasty, no doubt. 24/05: Stocked up on new Plagron nutes—finally. Now I can lock back into the full 10-week feeding plan (Plagron Cocos + B.A.C.). Flushing the res tonight and going full reset. Mixing fresh soup right after, dialed in to match this schedule: Week 1: Plagron Cocos A/B: 2 ml/L B.A.C. Silica Power: 0.2 ml/L Plagron CalMag Pro: 0.5 ml/L B.A.C. F1 Extreme Booster: 0 ml/L EC: 0.9–1.0 pH: 5.8 PPFD: 500 DLI: 22 RH Day: 70% RH Night: 65% CO₂: 700 ppm
Likes
4
Share
@pzwags420
Follow
On the 5th week of flowering day 1 the girls are chugging along, growing bigger by the day and smelling excellent :). On day 5 the girls are putting on a lot of weight. I'm very excited about harvest:). On day 7 The girls are doing well. I had a small clog in my bluat system on one of my carrots. I have fixed the clog by massaging the small pipe that was clogged. it has been tough using powdered nutrients with this system as there has been a few clogs. I will be switching to water soluble nutrients with drip clean to keep lines clear on my next grow. I just need to make it through the next few weeks to harvest :)
Likes
7
Share
@Treesus01
Follow
Massive amounts of defoliation, increased water and feed regimens by 3x I take this plant outside for every morning sunrise just bc the name might help with the cooler climate here in colorado
Likes
31
Share
Keifer brewed out for 72 hours for the b complex viatmins and all the microbes. Did you know that your gut flora. I.e your gut bacteria is generally the same as the soil microbes. Anyway microbes are making these plants grow so fast.
Likes
22
Share
Likes
28
Share
Going to be harvesting the plants this week. I've been flushing the hydro plants with water and FloraKleen but flushing the coco plants with water and blackstrap molasses, excited to see the difference. I am trying the 24 hours of darkness before cutting them down, this will be my first time doing this but again, I'm excited to try new things and find my growing style. Took the plants out to breathe and took some pics of the BW's and the clones. More to come ***Cut the plants down on day 60 of Flower. I think I could have spread the harvest out over the week but my tent doubles as my drying tent. 😂 I will post my final harvest once my buds are fully manicured and ready for jars.
Likes
70
Share
@Roberts
Follow
Big Fat Wedding Cake is bulking strong right now. She has a nice frosty layer on her, and is maturing in smell as she goes. She is growing great under the Spider Farmer G5000/UVR40 lights. The solution got really low and strong causing her to have a bit of burn. She is heading to a finish in about 3 weeks. Thank you Spider Farmer, Athena, and DutchFem Seeds. 🤜🏻🤛🏻🌱🌱🌱 Thank you grow diaries community for the 👇likes👇, follows, comments, and subscriptions on my YouTube channel👇. ❄️🌱🍻 Happy Growing 🌱🌱🌱 https://youtube.com/channel/UCAhN7yRzWLpcaRHhMIQ7X4g Spider Farmer Official Website Links: US&Worldwide: https://www.spider-farmer.com CA: https://spiderfarmer.ca UK: https://spiderfarmer.co.uk EU: https://spiderfarmer.eu AU: https://spiderfarmer.com.au G5000 Light Amazon Link: amzn.to/4643esa UVR 40: https://www.amazon.com/dp/B0BR7SGTHS Discount code: saveurcash (Stackable)
Likes
12
Share
*Week 4 Flower 09/24* Both Mimosa girls appear to be running fine with Mimosa (1) running a little behind but is catching up accordingly. Small oversight in early growth resulted in a minor stunt but she is improving dramatically. Water Feed has increased by half a gallon ( 1gallon clean - .5 gallon nute feed) *Week 4 Flower 09/28 - Mid week update* Both plants are flowering accordingly - Mimosa (1) is a bit taller then Mimosa (2) Buds are becoming dense and covered in trichomes. No deficiencies - No areas of concern - Potassium and Phosphate feeds continue *Week 5 Flower end of week recap - 09/30* Both Mimosa's are flowering nicely - Budsites covered in frosty trichomes. Mimosa (2) looks shorter but that is because her COLA was tied down to expose bottom budsites.
Likes
71
Share
The Hobbit Hole Outdoor Grow 2026 Woche 4 – Der Sommer ist angekommen… und die Natur zeigt ihre Zähne. Diese Woche fühlte sich an wie der eigentliche Beginn des Hobbit Hole. Nach den regnerischen und kühlen Tagen der vergangenen Wochen zeigte sich endlich der Sommer. Drei Tage Sonne am Stück reichten aus, um den kleinen Autos einen sichtbaren Wachstumsschub zu verpassen. Fast so, als hätten sie nur darauf gewartet, endlich loslegen zu dürfen. Besonders auffällig war die Entwicklung der Blätter. Alle vier Pflanzen bildeten inzwischen ihre ersten fünffingrigen Blätter – für mich immer einer der schönsten Momente im frühen Wachstum. Ab diesem Punkt wirken sie nicht mehr wie kleine Sämlinge, sondern wie richtige Cannabispflanzen. Natürlich blieb das Hobbit Hole auch diese Woche nicht völlig verschont. Wie gewohnt bekamen alle Pflanzen vorsorglich eine Behandlung mit Neem, um Schädlingen möglichst früh den Appetit zu verderben. Die Kupferringe verrichteten weiterhin zuverlässig ihren Dienst – zumindest dachte ich das. Dann kam der Rückschlag. Die Guava Runtz, die bis dahin sogar zu den stärksten Pflanzen gehörte, wurde komplett von einer Schnecke erwischt. Vermutlich nutzte sie genau die Stelle aus, an der ein Wühltier zuvor den Kupferschutz beschädigt hatte. Der Stängel wurde einfach durchgeknabbert und der Rest lag dann daneben😓 Genau solche Momente gehören leider zu einem echten Outdoor-Grow dazu. Ärgerlich? Absolut. Aber genau deshalb dokumentiere ich auch solche Rückschläge. Nicht jeder Grow verläuft perfekt, und die Natur schreibt ihre eigenen Regeln. Als direkte Konsequenz bekam die Cinderella sofort einen zweiten Kupferring als zusätzliche Absicherung. Lieber einmal zu vorsichtig als eine weitere Pflanze zu verlieren. Der kleine Zwischenfall hat gleichzeitig das Feld neu sortiert. Die Gelato übernimmt inzwischen die Führung und entwickelt sich aktuell am kräftigsten. Direkt dahinter folgt die Cinderella, die weiterhin ihren Ruf als schnelle und vitale Sorte bestätigt. Auch die Purple Punch hat sich nach ihrem missglückten Start erstaunlich gut erholt und holt langsam auf. Mit jeder Woche wird deutlicher, dass die eigentliche Arbeit unter der Erde längst erledigt wurde. Die Wurzeln scheinen sich inzwischen fest im Boden etabliert zu haben und das oberirdische Wachstum zieht nun sichtbar nach. Outdoor bedeutet eben nicht, jede Situation kontrollieren zu können. Man arbeitet mit dem Wetter, mit Insekten, mit Schnecken, mit Tieren und manchmal auch gegen sie. Genau das macht dieses Projekt für mich so spannend. Drei Hobbits stehen noch im Hobbit Hole. Und jetzt beginnt der eigentliche Kampf.
Likes
1
Share
@Krissci
Follow
Day 1 - repotting and watering with nutrients for 1st time
Likes
13
Share
Día 75 y último de vida para esta hermosa nena. Me encuentro disfrutando de la manicura y hermosa cosecha que estoy obteniendo con esta planta, mi casa está impregnada por una fragancia dulce con toques tangie. Ahora cortaré por ramas y colgaré en la carpa de cultivo donde se secará por aproximadamente 10 días con humedad y temperatura controlada. Esperaré a curar y probar bien todos esos terps para poder dar un buen informe de cosecha pero hasta ahora todo se ve muy bien! Buenos Humos 👽
Likes
40
Share
@BudXs
Follow
Coconuts. What aren't they good for? Perhaps the most versatile nut in the world. But "its not a nut" you say, "its a legume" you say. Dont even know if thats true, but thats when I smash you across the stomach with my coco/perlite hempy buckets, cuz I got that rage in me... that burning rage.... Welcome to my Hulking Harvest Bruce Banner #3 diary, gonna kill this grow. If you dont know about this strain, just take a look at @Astroboy's recent finish, absolutely epic. Original Sensible Seeds was kind enough to gift me these seeds back in November 2019, back when things were normal. You will see I pay homage to them by having the OSS logo watch over my 4x8 table, thank you to a wonderful breeder, I am quite excited Sooooo much light in here, and all the required electrical work done to run it safely running 3 quantum boards, all 480w, all lm301b diodes. On another table running another 480w. Kaboom Holla at me, love to meet new growers and share ideas. And follow my son Budxless on his adventure into the worlds greatest hobby. This is his first year growing and he's still figuring out GrowDiaries Insta is budxsmedical. I go live on Sunday nights 930pm EST
Likes
32
Share
Another few weeks left in this lady so will continue too feed her until she starts too ripen , No problems at all too this point and she has had two weeks of more PK , I really do love these purple kush plants they look unreal So she has started too foxtail this week and coming along nicely , I've started too flush now on day one of week 9 I hope she will be done around week 10 This is the second time I have grown a blackberry kush strain and I really have too say for me I love these plants not only because of the colour but more so the trimming is very minimal as these plants are all thick dense buds , so after you have picked off the main large fan leaves there really isn't much more too it , I like too keep on the sugar leaves for drying and cure because I can put the whole thing into my magical butter machine too make oil and get all the goodness possible , Should be ready right on Dutch passions flower time ,
Likes
12
Share
@thonhash
Follow
Sorprendido gratamente del resultado final tanto de producción como de sabor/efecto.
Likes
10
Share
Plants look very strong and healthy, the first signs of flowering are manifested. I add Advanced Nutries Nirvana for larger plants and Bud Ignor for more flower spots