




Likes
16
Share


@Esoteric_growing
Follow
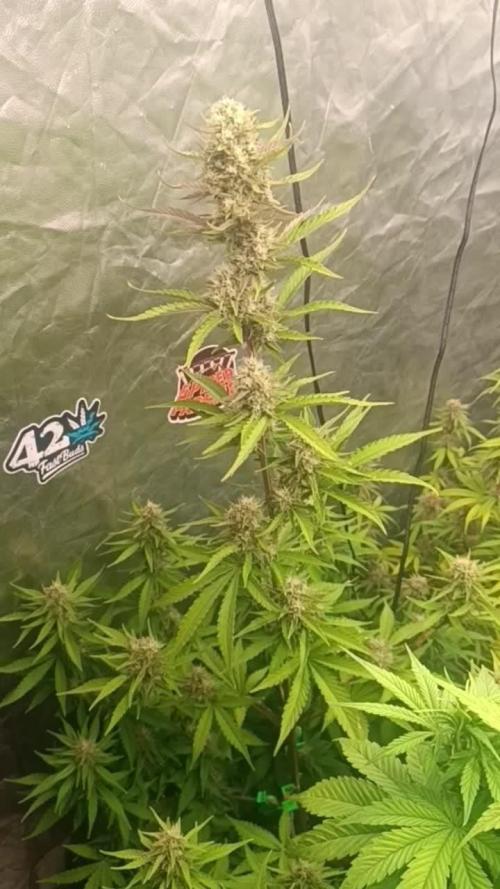
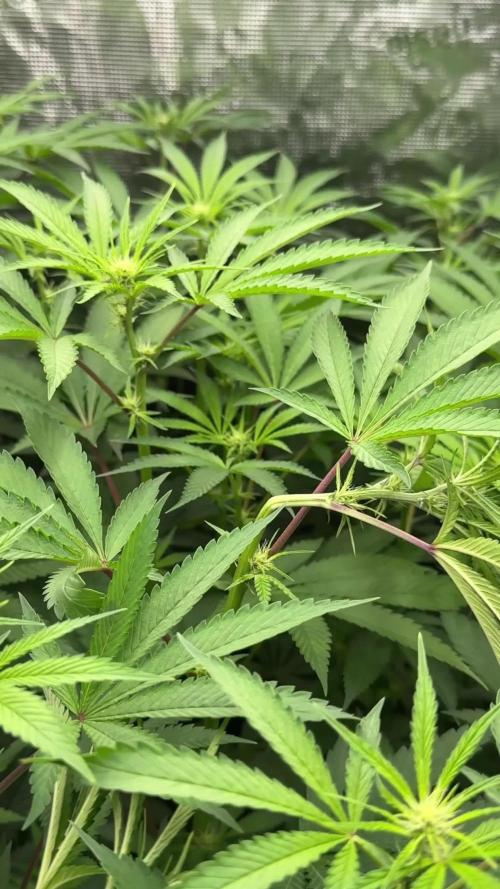
Perfect height I wanted to obtain after the three week stretch, both strains performing well with two of the orange punch requiring a extra 0.2 ec above the all the other plants.
Canopy is very busy so did some defoliation to get better light penetration and increased air flow around the plants.


Likes
13
Share

@DogDoctorOfficial
Follow
🌿 Nectar Drip – Week 6 Report
Early–Mid Vegetative Development (12/12 from Seed)
Zamnesia Seeds x TICAL – Pack #268
Timing clarification (as always):
This is logged as Week 6 on GrowDiaries, while in real plant development we are closer to Week 5 of vegetative growth.
The offset comes from an early, photo-heavy germination phase. We’ll continue clarifying this weekly for consistency.
⸻
🌱 Growth Overview – Divergence & Character
This week, the Nectar Drip really began to separate into personalities. Same genetics, same room, same feeding — but very different expressions depending on training intensity and structure guidance.
We’re now clearly working with multiple plant strategies inside the same tent.
⸻
✂️ Training Breakdown – Plant by Plant
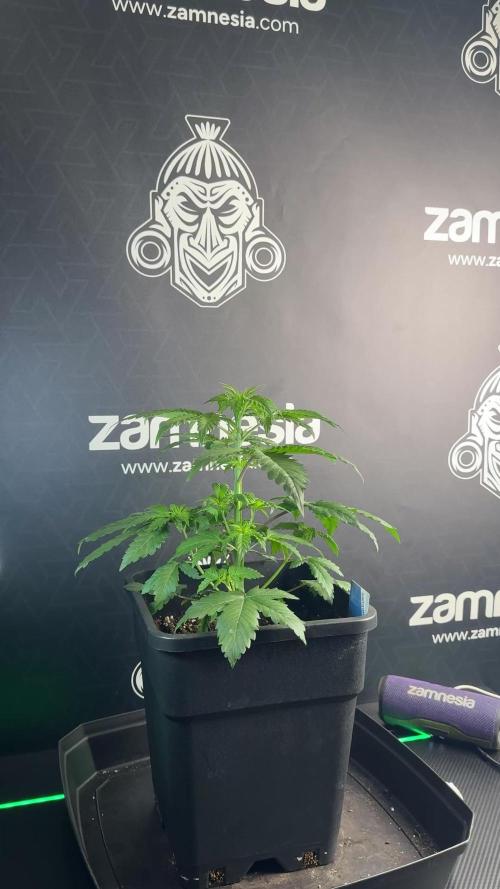
🌿 Plant A – Leaf Work & Gentle Guidance
This plant is trained using leaf bending and leaf tucking only.
• Large fan leaves are tucked under neighboring leaves
• Growth tips are exposed naturally
• No clamps or hard bending
Response:
Absolutely thriving. She’s growing tall, wide, and fast, now reaching roughly 8–9 nodes, with beautiful branching and strong vertical momentum. This is a great example of how far simple leaf management can take a healthy plant.
⸻
🌿 Plant B – Aggressive Opening with Plastic Clamps
This plant started similarly to Plant A, but quickly outpaced the rest in size.
This week, we:
• Introduced plastic clamps
• Opened her aggressively
• Focused on redistributing energy from top dominance to lower branches
Response:
Outstanding. She accepted the harder intervention without stress, opened up beautifully, and continues to push growth across the canopy. Her size advantage is now being converted into structure, not just height.
⸻
🌿 Plant C – The Heavy LST Experiment
This is the plant we’ve been focusing on since last week — the smallest of the group, but the one receiving the most intensive training.
• Strong horizontal bending
• Continuous opening of leaves
• Structural redirection from early on
Response:
She’s thickening, branching, and responding incredibly well. While she is still behind in height (which is expected), she’s building a dense, intentional structure. This plant is also the most delayed in showing pre-flower signs, which is completely normal under 12/12 from seed when subjected to stronger training.
She may never be the tallest — but she is quickly becoming one of the most interesting.
⸻
🌸 Pre-Flower Signals
Some plants are now showing early pre-flower signs. Nothing dramatic yet, but the transition is clearly approaching.
As expected:
• The most heavily trained plant is the most delayed
• The more upright plants are moving faster
This confirms that structure and stress management play a significant role in timing under a 12/12-from-seed regimen.
⸻
🌡️ Environment – Weather-Driven Adjustments
This week brought real-world challenges.
Outside conditions:
• ~5 °C
• 92% relative humidity
Inside the tent:
• Temperature: ~21.8 °C
• Relative Humidity: ~58%
Despite cooler and more humid ambient conditions, the plants are showing no complaints whatsoever. This range is manageable, and the canopy looks relaxed and happy.
⸻
💡 Lighting – Letting Plants Decide
We are now running approximately 700–850 PPFD, depending on plant height and canopy position. Smaller plants receive less, taller ones naturally receive more.
This is intentional.
The plants are:
• growing into the light
• dictating their own intensity
• transitioning naturally toward flowering
I’m not pushing — I’m responding.
This run is about listening, especially under 12/12 from seed.
⸻
🌬️ Airflow – Vortex Method
Airflow is dialed in using a vortex-style circulation:
• Fresh air enters from below
• Warm air exits higher up
• Side fans encourage circular movement
• Central fans gently disrupt stagnation without collapsing the vortex
This creates:
• even temperature distribution
• stable humidity
• strong gas exchange
• minimal microclimates
Air is moving around the plants, not blasting them — exactly what we want at this stage.
⸻
Nutrition – Adjustment for Water Quality & LEDs
💧 Water Source
We are now using a mix of:
• rainwater
• dehumidifier-collected water
Starting EC is extremely low (~0.2), so supplementation became necessary.
CalMag Introduction
We introduced Plagron CalMag Pro at 1 ml/L as a preventive measure, especially important under high-intensity LED lighting, where calcium and magnesium demand increases.
Current Hand-Watering Parameters (Nectar Drip Plants)
• EC: ~2.29
• pH: ~6.0
• Water Temperature: ~22.8 °C
🚰 Reservoir / Autopot Clarification
The tent contains six plants total, not all Nectar Drip.
• Autopot reservoir currently runs Terra Grow + CalMag only
• Organic inputs are excluded from the reservoir (not compatible)
• Reservoir EC: ~1.43
• Reservoir pH: ~5.9
Autopot plants are occasionally top-fed by hand to receive the full recipe. For future runs, the feeding strategy will be simplified and better aligned with autopot systems.
⸻
Special Guest – Mr. Baggy Joins the Team
This week we were joined by Mr. Baggy, a fluffy inspector and proud GrowDiaries “Diary of the Month” prize winner.
He’ll be making more appearances from now on — every good grow needs an official supervisor.
⸻
🔮 What to Expect / What Not to Expect
Expect:
• more pronounced pre-flower expression
• increasing structural differences
• trained plants staying shorter and wider
• untrained plants stretching sooner
Don’t Expect:
• uniform behavior
• identical flowering times
• forced transitions
This run is about letting plants speak.
⸻
🤝 Gratitude
Huge thanks to:
• Zamnesia Seeds
• TICAL
• Plagron
• Future of Grow
• Lumiflora
And to the entire GrowDiaries community — supporters, critics, silent readers, and longtime friends.
Everything shared here reflects my personal experience, philosophy, lessons, and mistakes. The goal is learning — together.
⸻
🌟 Week 6 Summary
• Training is defining structure
• Plants are choosing their own rhythm
• Light intensity is earned, not forced
• Environment is stable despite harsh outside conditions
• The 12/12-from-seed experiment continues to teach
A lot of files.
A lot of data.
A lot of learning.
And we’re just getting started.
Growers love always 💚
Community Note
Due to YouTube community guidelines, our educational channel was taken down.
While we firmly believe the content was purely educational, we respect YouTube’s decision and are actively exploring alternative platforms to continue sharing this work.
📡 Please stay tuned.
🙏 Thank you for your patience and continued support.
FOR DISCOUNT CODES AND MORE JUST FOLLOW THE LINK https://website.beacons.ai/dogdoctorofficial
📲 Don’t forget to Subscribe and follow me on Instagram and YouTube @DogDoctorOfficial for exclusive content, real-time updates, and behind-the-scenes magic. We’ve got so much more coming, including transplanting and all the amazing techniques that go along with it. You won’t want to miss it.
GrowDiaries Journal: https://growdiaries.com/grower/dogdoctorofficial
Instagram: https://www.instagram.com/dogdoctorofficial/
YouTube: https://www.youtube.com/@dogdoctorofficial Deleted by Youtube
Vimeo : https://vimeo.com/dogdoctorofficial Under construction stay tuned ⸻
Explore the Gear that Powers My Grow
If you’re curious about the tech I’m using, check out these links:
🔆 Lighting & Environmental Control
• Future of Grow — Advanced LED lighting technology
https://www.futureofgrow.com/
DISCOUNT CODE: DOG20
• Lumiflora — Under-canopy LED lighting
https://lumiflorade.com/
• TrollMaster — Environmental controllers and automation gear (past collaboration)
⸻
Genetics
• Zamnesia Seeds — Genetics used in this project
https://www.zamnesia.com/
⸻
🌱 Soil, Substrates, Boosters & Root Support
• Plagron — Substrates, bio mixes, and supportive products
https://plagron.com/en/
⸻
🎒 Storage, Curing & Preservation
• Grove Bags — Curing and storage solutions
https://grovebags.com/
⸻
📸 Photography Equipment & Tools
(Not sponsors, but part of my creative toolkit)
• Sony A6700
• Sony full-frame macro lens + few more
• Stacking photography workflow - learning
• iPhone (for behind-the-scenes shots)
We’ve got much more coming as we move through the grow cycles. Trust me, you won’t want to miss the next steps, let’s push the boundaries of indoor horticulture together!
As always, this is shared for educational purposes, aiming to spread understanding and appreciation for this plant. Let’s celebrate it responsibly and continue to learn and grow together.
With true love comes happiness. Always believe in yourself, and always do things expecting nothing and with an open heart. Be a giver, and the universe will give back in ways you could never imagine.
💚 Growers love to all 💚
📸 P.S. – The Eye Behind the Lens
All photos in this diary (for now — except for the ones showing the camera, which I took with an iPhone) are taken with a Sony A6700 paired with a Sony full-frame macro lens and a few more.
Photography is part of the story — it’s how we share the fine textures, the glow, and the quiet details that words can’t always capture.
I’ve also started experimenting with photo stacking — a technique where multiple images, each taken at a slightly different focus point, are layered together to create one perfectly sharp image from front to back.
It’s not digital enhancement or AI; it’s pure photography — a way to reveal the plant’s beauty in microscopic depth, from trichome to petal.
You’ll even see a few shots of "ghost me" capturing the shots — camera, lens, setup — because every grow deserves not just to be cultivated, but documented like art.
FOR DISCOUNT CODES AND MORE JUST FOLLOW THE LINK https://website.beacons.ai/dogdoctorofficial
NEW DISCORD - Official Server Invite Link : https://discord.gg/ksjAkA5T74

Likes
5
Share


@Reaper
Follow
next time i will veg this longer as i am very happy with the buds from top to bottom. very dense and dank. i cant explain the smell, i reccomend this strain to every pro and beginner even small plants yield very good buds and no much stretch during flower. very easy to control 🤙🏻 def one of my top 3 favorites !

Likes
22
Share


@Smith420
Follow
It doesn’t look so good. Can someone tell me if i under-watered or over watered? They look sad?

Likes
1
Share


@Xpie77
Follow
Verslag derde week bloei – Purple Punch
De derde week van de bloeifase bij Purple Punch is een cruciale periode waarin de planten een aanzienlijke ontwikkeling doormaken. Hieronder vind je een overzicht van wat je kan verwachten
1. Plantengroei
Bloemvorming: De eerste tekenen van echte toppen worden zichtbaar. De bloemkelken beginnen op te zwellen en trichomen ontwikkelen zich.
Stretch: De planten zijn nog steeds bezig met hun "stretch"-fase. Dit is vaak het laatste moment waarin ze aanzienlijk in hoogte groeien. Zorg dat de afstand tot de lamp optimaal blijft om verbranding te voorkomen.
2. Verzorging en voeding
Voedingsschema:
Fosfor- en kaliumrijke voeding (PK-boosters) wordt belangrijker om de bloemontwikkeling te ondersteunen.
Blijf stikstof in balans houden; te veel kan de bloei vertragen.
pH-waarden: Houd de pH van het voedingswater rond de 6.0 voor optimale opname.
Watergift: Regelmatig water geven, maar voorkom overbewatering.
3. Licht en temperatuur
Lichtcyclus: Houd de cyclus op 12/12 uur. Controleer dat er geen lichtlekken zijn tijdens de donkere periode.
Temperatuur en luchtvochtigheid:
Dag: 22-26°C.
Nacht: 18-21°C.
Luchtvochtigheid: 40-50%. Een te hoge luchtvochtigheid kan schimmelvorming veroorzaken.
4. Controle en monitoring
Trichomen: Begin de ontwikkeling van trichomen te monitoren. De toppen zullen meer glinsteren naarmate ze rijpen.
Plagen en schimmels: Inspecteer de planten regelmatig op tekenen van plagen, zoals spintmijten of meeldauw.
Luchtcirculatie: Zorg voor goede ventilatie om hotspots te vermijden.
Resultaten derde week
De toppen van Purple Punch zouden nu meer volume moeten krijgen en de kenmerkende fruitige aroma's beginnen zich te ontwikkelen. Dit is het moment waarop de genetische kwaliteiten van de soort echt naar voren komsn

Likes
8
Share


@DankStank
Follow
Sour diesel and northern lights are ready to be chopped. I will put them in the basement in the dark for at least a day before I cut them down. The clone from the expert haze had to be tossed because I found spider mites on it and then found them on my expert haze plant outdoors. I shouldn’t have brought the clone inside, oops I will not be making another clone of this plant. I have found caterpillars all over everything and didn’t want to spray the buds with pesticides so every day a couple of times a day I would remove them. They eat a lot so I don’t have as much production at harvest. I will be more aggressive with the expert haze with pest control.


Likes
7
Share


@Jungle_James_Grows
Follow
Just water and molasses as the trichomes are cloudy but no amber's yet
17/1 chopped her tonight she had 24 hours of dark.

Likes
Comments
Share

@MyLittleGarden
Follow
Vegetationswoche 8 - 08.06. – 15.06.2026
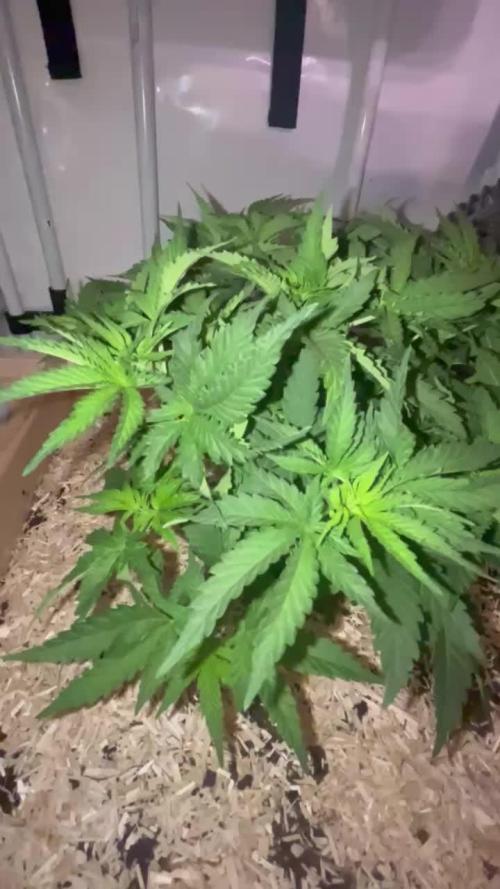
In der achten und gleichzeitig letzten Vegetationswoche wurde nur noch wenig an der Blue Sunset Sherbert gearbeitet. Ziel war es, die Pflanze möglichst stressfrei wachsen zu lassen und ihre natürliche Entwicklung zu beobachten.
Im Verlauf der Woche wurde sie einmal mit etwa fünf Litern Wasser gegossen. Zusätzlich kam leichtes Low-Stress-Training zum Einsatz und einige größere Blätter wurden entfernt, um die Pflanze etwas auszulichten und den unteren Trieben mehr Licht zugänglich zu machen.
Die Blue Sunset Sherbert entwickelte sich in dieser Woche ausgesprochen gut. Sie blieb zwar weiterhin eher kompakt, baute dabei jedoch eine sehr schöne und gleichmäßige Struktur auf. Besonders auffällig war die runde, buschige Wuchsform mit zahlreichen Seitentrieben und einer dichten Verzweigung. Insgesamt wirkt die Pflanze gesund, vital und sehr ausgewogen aufgebaut.
Ursprünglich war geplant, die Pflanze über ein SCROG-Netz weiter zu trainieren. Im Laufe der Vegetationsphase fiel jedoch die Entscheidung, auf das SCROG zu verzichten und stattdessen den Grow etwas kompakter und schneller abzuschließen. Da die Pflanze bereits eine schöne Form entwickelt hatte und die verfügbare Fläche zunehmend einnahm, erschien der Zeitpunkt für die Umstellung passend.
Am 15.06.2026 wurde schließlich der Lichtzyklus von 18/6 auf 12/12 Stunden umgestellt, um die Blüte einzuleiten.
Damit endet die Vegetationsphase nach insgesamt acht Wochen und die Blue Sunset Sherbert startet in ihre erste Blütewoche. Nun wird sich in den kommenden Wochen zeigen, wie sie auf die Umstellung reagiert und welchen Stretch sowie welche Blütenstruktur sie entwickeln wird

Likes
3
Share


@HereWeGrowAgainYO
Follow
It's here, Week 5 Day 39 from seed. Busy this week but we have officially started flowering boys and girls! Week 6 updates will be more in detail. See ya soon!

Likes
33
Share


@BudXs
Follow
Ok, so photos are finally in flower, autos will have to do with 12/12 till finish. A batch of 15 more photos is brewing outside the main door, all primo. Plan is to veg em out there for 4 weeks and then in the flower room. Will fill in missing spots with more autos and then a late auto run as batch 2 of photos finishes. Will get my 7 lbs or so
@peakyplanters - slide in my dms

Likes
29
Share


@GrownwithLED
Follow
The KRITIKAL-K from Kannabis Seeds grew very well with lots of side-branching and developed HUGE buds. The plant KK#1 had the BIGGEST harvest amount from any single plant, this one plant harvested 92,1 gram of dry bud! Unfortunately the plants also develop a huge amount of leaves on the buds, therefore she is lot of work during harvest time. The dried buds have mildly spicy aroma to it and smoke very smoothly. The potency is above average and helps well against my back-pain. All in all a nice daytime smoke and a HUGE HARVESTER!


Likes
47
Share


@PEAKYPLANTERS
Follow
Hello, gardener brothers
Welcome back with us again in the gardens smelling of weed
My girls have just announced that they feel like flowering considering the opening of their buds ....aaaa... how much I love these bitches😎
Obviously we tried to spread his legs with a little lst🤗
Likes
9
Share

@RBG
Follow
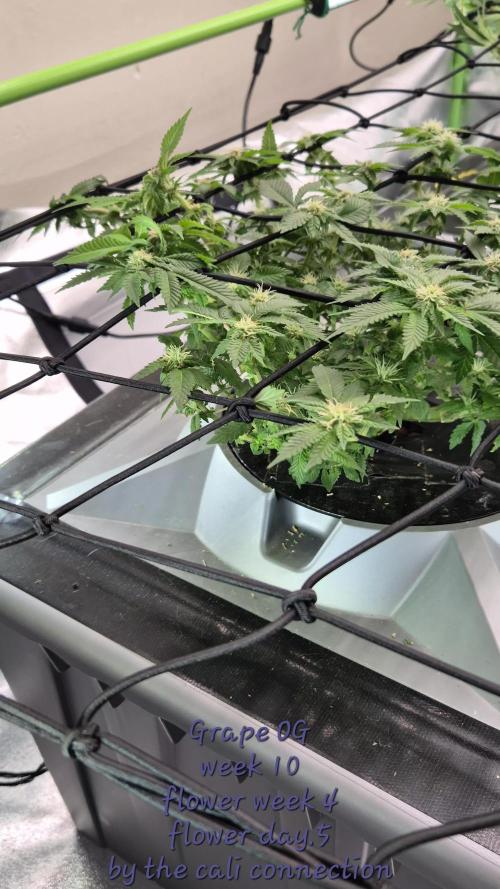
Week 10
Flower week 4
Flower-day 1
05/11/2025
Nutrients change
Floramax veg1
Floramax Organabud
Floramax flowering enhancer
Floramax Rezin
Cyco platinum series silica
Green planet bud booster
Complete grow cal mag
( sensi unfortunately got refunded so got this instead today )
Sleeps with the fishez ( hocI )
Ladies are looking good overall, let the fun goodness begin i guess 😂
7/11/25
Blockage within systems finally fixed after 4 flushes. Not exactly sure what it was but whatever ive done has fixed it for now 🤷♂️😂 take it as a win for now i guess
11/11/25
Unfortunately I hate scrogg so took it off but once I had spread her out again with lst, I noticed that shes struggling with lower growth. I saw this with my autoflowers. I'm not too sure if its from too many budspots,colas or if it's just from being overpacked. So her pisitils showed up on the 25th, some people count from that date as flower and some count as soon as you flip, I've decided to go of the 25th as first pisitils so its only 3 n a half weeks currently.
I decided to take a few branches and a few of the lower budspots to try and help her even herself on where shes taking her sugars and growth.
No Defoilation, just 10 or so budspots n only 3 branches. I DONT NOT RECOMMEND doing any of this, I'm only reattempting this because it worked on autos I had going. I do think I've made the right choice
Grape og is meant to be a pretty hearty and forgiving strain, so she should bounce back pretty quickly
Oh well. I'll definitely be rerunning her again later in future but trying a different method

Likes
2
Share


@Luuciano78
Follow
En la primera etapa de vegetación el resultado considero que es muy bueno ya que es mi primera vez.

Likes
10
Share
@DogDoctorOfficial
Follow
💙 Project Blue Tent – Week 9
Blue Waffle F1 – Pheno A
🌿 Too Much Stretch, Then a Big Reset
Hello everyone, and welcome back to another chapter inside Project Blue Tent! 💙🌱
If you're new here, Project Blue Tent is our little experiment with four individual Blue Waffle F1 plants from Zamnesia, each documented separately from seed to harvest.
All four girls share the same environment, lighting, irrigation, nutrition and general cultivation philosophy.
And yet, as always...
they each have their own personality.
Last week I was wondering just how much these girls were going to stretch after seven weeks of vegetation.
Well...
I got my answer. 😂
They stretched.
A lot.
And this week became one of those weeks where the grower has to stop watching and start acting.
The plants were getting simply too tall.
With the height of the pots and substrate, the drainage system underneath them, and the distance between the canopy and the LED fixtures becoming increasingly limited, some of the tops were getting dangerously close to the lights.
So we made some changes.
A fairly big reset, actually.
And looking at the room now?
I'm very happy with where we landed.
🌿 Pheno A – She Took the Invitation to Stretch Seriously
Plant A is now approximately 145 cm tall.
😂
Yes.
One hundred and forty-five centimetres.
And when you add the height coming from the pots, substrate and drainage arrangement underneath the plants, that number becomes even more relevant when you're working inside a relatively limited vertical space.
Last week she was already moving quickly.
This week she basically said:
"Hold my nutrient solution."
😂💙
The structure she built during those seven weeks of vegetation gave her an enormous amount of material to work with.
The SCROG distributed that growth beautifully.
But once flowering stretch really kicked in, all of that established structure began pushing upward.
And eventually...
we simply ran out of comfortable vertical room.
So rather than fighting the plants continuously, we changed the room around them.
🕸️ The Second SCROG – Because These Girls Are Getting Big
One of the biggest changes this week was the installation of a second SCROG net.
This wasn't done because the first net failed.
Quite the opposite.
The first net did exactly what we wanted during vegetation:
It helped distribute the plants horizontally and build an even canopy.
But now these girls have become much taller.
And as flowering progresses, those branches are going to become heavier.
So the second net is there for something different:
support.
We're essentially creating another layer of structure through the upper portion of the plants.
This gives the flowering branches something to lean against as the flowers develop and gain weight.
And with plants this tall, I would much rather organize that structure now than discover later that a heavy flowering branch has decided to take a dramatic trip toward the floor.
😂
The second net also helps keep the canopy organized after the major defoliation.
And looking at the room now...
I think it was absolutely the right decision.
✂️ The Big Defoliation
And then came the other major event of the week.
Defoliation.
Not a little cleanup.
Not removing three leaves and calling it a day.
We went deep.
The room had become extremely dense, and with the plants stretching this aggressively, we needed to open everything up.
We removed leaves where they were creating unnecessary congestion and took out foliage from stems where appropriate, leaving the productive growth and flowering structure we wanted to carry forward.
This wasn't about making the plants look naked.
It was about making the structure functional again.
And there's an important distinction here.
We're not defoliating because removing leaves magically creates more flowers.
That's not the objective.
Leaves are valuable.
They're part of the plant's photosynthetic machinery.
The objective here was to manage excessive congestion, improve visibility through the canopy, increase air movement through the plant and reduce the amount of unnecessary foliage competing for space around the developing flowers.
We're trying to create a better working environment for the plant.
Not punish the plant.
Not stress it for the sake of stress.
And certainly not remove every leaf we can find.
🌿 What We Expect From This Defoliation
Now comes the interesting part.
After a significant cleanup like this, I don't expect the plants to immediately look like they're growing faster.
Quite the opposite.
There can be a period where they need to settle.
They've lost a considerable amount of leaf area.
We've physically changed their architecture.
So I expect the plants to spend some time adjusting and continuing their transition into flowering.
What I'm hoping to gain is something different:
better structure.
Better airflow.
Better light penetration.
Better access to the flowering sites.
Less congestion.
And a much easier canopy to manage as the flowers continue developing.
Will it completely stop the stretch?
No.
I wouldn't expect that.
The plants are already well into their flowering transition, and genetics, plant maturity and environmental conditions still have a huge influence on how much they stretch.
But by removing excess congestion and adding the second SCROG, we've made the remaining structure considerably easier to manage.
Now we watch.
🔥 A Few LED Burned Tops – And We Caught It
There was another little lesson hidden inside all that stretching.
Some tops had gotten too close to the LEDs.
And we saw a few leaves and flowering tips showing signs of LED stress/burning.
Nothing catastrophic.
Nothing that concerns me at this point.
But definitely something we needed to address.
And honestly?
I'm glad we caught it now.
Because once the plants were getting that close to the lights, we were already running out of room to work with.
So we attacked the problem from several directions.
We moved the ventilation equipment outside the tent.
We raised the LEDs.
We opened the canopy.
We installed another SCROG.
And suddenly...
we gained some valuable vertical breathing room.
That little bit of extra space can make a huge difference inside a tent.
🌬️ Moving the Carbon Filter & Extractor Outside
Another major change was moving the carbon filter and extractor outside the tent.
Previously, having that equipment inside the tent was consuming precious vertical space.
And with these girls reaching toward the lights, every centimetre suddenly became valuable.
So we moved the filter and extractor to the top of the tent.
The system now pulls air from the tent through the carbon filter and extractor and then exhausts it outside.
This gave us the space we desperately needed.
And that allowed us to raise the LED fixtures closer to the top of the tent rather than having the ventilation equipment occupying that valuable ceiling space.
It sounds like a relatively small modification.
But in a tent with plants this tall?
Huge difference.
Sometimes the solution isn't changing the plant.
Sometimes it's changing the room around the plant.
😂💙
💡 More Room for the Lights
And this is one of the most satisfying results of the whole operation.
Once the ventilation equipment was moved outside, we could bring the LEDs higher.
That immediately created more separation between the flowering tops and the fixtures.
The few areas that had experienced LED stress were addressed before things could become serious.
And now we have much more room to work with.
That's exactly what I wanted.
Because I don't want to spend the remainder of flowering constantly fighting the ceiling.
I want these girls to have somewhere to finish.
They already have plenty of height.
Now we need them to put their energy into the flowers.
🌬️ Two Fans – Creating a Vortex
We also added a second Zamnesia clip fan, positioned underneath the canopy.
So now we have:
One fan above.
One fan below.
And the goal isn't simply to make the leaves move.
We're trying to create a more complete circulation pattern through the tent.
With one fan moving air across the upper canopy and another helping move air underneath, the airflow can circulate through different levels of the room rather than leaving the lower portion relatively stagnant.
The idea is to encourage a kind of vortex-style circulation through the canopy.
Air moves.
Circulates.
Changes direction.
And continues moving through the plant structure.
This is particularly important now because we've spent the week opening the canopy and creating space.
There's no point creating all that space if the air simply sits there.
So now we've got airflow working from above and below.
And looking at the room?
It feels considerably more alive.
🌿 The Room After Defoliation
I have to say...
I love the way the room looks now.
Before the defoliation, it was an absolute jungle.
Beautiful.
Healthy.
But incredibly dense.
Now?
You can see the architecture.
You can see the branches.
You can see the flowering sites.
You can see the second SCROG.
You can see the airflow equipment.
And most importantly...
you can see the plants.
😂💙
The room feels organized again.
And that's exactly what we needed.
These girls have been growing extremely aggressively.
Now we're giving them a structure in which that growth can actually be managed.
✂️ A Word About Scissors
I also want to mention something that might seem insignificant but is actually very important to me.
The Zamnesia curved scissors.
I really like these.
For much of my defoliation, I actually use my fingers.
If a leaf can be gently removed without cutting anything else, that's often my preference.
But that's not always possible.
Some leaves are tucked into awkward places.
Some are smaller.
Some are delicate.
Some require a precise cut.
And that's where the scissors come in.
But there is one rule I don't compromise on:
Clean scissors.
Always.
Even when they're brand new, I still like to make sure the scissors are clean before using them.
When you're moving from plant to plant and making multiple cuts, cleanliness matters.
We're working with living tissue.
So there's no reason to introduce unnecessary contamination into the process.
Clean tools.
Gentle hands.
Deliberate cuts.
And don't cut something just because you happen to have scissors in your hand.
😂
💙 Pheno A After the Reset
And now...
let's come back to our girl.
Because despite all the work this week, Pheno A looks fantastic.
She's still one of the larger structures in this tent.
She's tall.
She's vigorous.
She's got plenty of flowering sites.
And after the cleanup, her architecture is much easier to appreciate.
The plant has gone from:
"How the hell are we going to fit all of this in here?"
to:
"Okay. Now we have a plan."
😂💙
The flowers are there.
The structure is there.
The health is there.
And now she has additional support underneath her developing flowering branches.
This is a very good place to be heading into the next stage.
🌸 From Building Plant to Building Flowers
This is the transition I'm most interested in now.
Up until this point, so much of the conversation has been about growth.
Height.
Branches.
SCROG.
Canopy.
Stretch.
But now?
The plant has done enough building.
I want to see her start putting more of that energy into flowering.
The architecture is established.
The second net is installed.
The canopy has been opened.
The lighting has been raised.
The airflow has been improved.
The room has been reorganized.
Now we let her work.
And hopefully...
the next photographs will show us exactly what all that preparation was for.
Beautiful flowers getting bigger.
💧 Nutrition – The Girls Are Hungry
Another important development this week is nutrition.
The girls are absolutely loving the feeding.
So we've increased the Hydro A and Hydro B recipe slightly.
We're now running:
Plagron Hydro A — 2.2 ml/L
Plagron Hydro B — 2.2 ml/L
Plagron Hydro Roots — 1 ml/L
Plagron Power Buds — 1 ml/L
pH adjustment as required
That small increase has brought the EC up accordingly.
Current recorded EC is approximately 2.49 mS/cm.
And again, this wasn't some dramatic change.
It was simply a small progression because the plants are consuming aggressively and showing us that they are ready for it.
They're growing.
They're flowering.
They're drinking.
They're hungry.
So we listen.
And we adjust.
That's the whole philosophy.
Don't feed a number.
Feed the plant.
🌡️ Week 9 Environment
The current recorded conditions are:
🌸 Flowering: Week 9
📏 Height: approximately 145 cm
💡 Light schedule: 12/12
☀️ Day temperature: 27°C
🌙 Night temperature: 27°C
💧 Relative humidity: 67%
⚗️ pH: 6.01
⚡ EC: approximately 2.49 mS/cm
🌡️ Solution temperature: 25.3°C
🌱 Substrate temperature: 24°C
🌬️ CO₂: approximately 666 ppm
? Pot size: 8 L
💦 Watering: approximately 1.6 L per plant / 24h
The environment remains remarkably stable.
And that's especially valuable after a week where we've physically changed so much of the room.
The plants have enough to deal with simply adapting to their new architecture.
I don't want environmental instability adding another variable.
So now...
stability.
Consistency.
Observation.
🔬 Same Room. Same Conditions. Four Different Girls.
One thing that's fascinating about this particular project is how uniform the room remains despite the plants being so vigorous.
The four Blue Waffle F1 girls are remarkably similar.
They all went through the same long vegetative period.
They all experienced the same lighting.
They all received the same irrigation.
They all received the same nutrition.
They all experienced the same environmental conditions.
And now they're all showing that same general flowering transition.
There are individual differences, of course.
That's what we're documenting.
But overall?
They are behaving like sisters.
And that's making this experiment incredibly interesting.
🌿 What I'm Watching Now
After this week's reset, there are several things I'm going to be watching closely.
First:
How quickly does the stretch settle?
Second:
How do the plants respond to the heavy defoliation?
Third:
How does the second SCROG hold the flowering branches as they gain weight?
Fourth:
How does the new airflow pattern perform under a developing flowering canopy?
And finally...
How much of that beautiful vegetative structure is going to turn into flowers?
Those are the questions now.
We've done the work.
Now we observe the results.
🌸 The Big Lesson From This Week
If there's one thing this week reminded me of, it's that a grow isn't always about having a perfect plan.
Sometimes you make the best plan you can.
Then the plant laughs at you.
😂
We knew they might stretch.
We didn't know they'd stretch this much.
So we adapted.
We moved the ventilation equipment.
We raised the LEDs.
We cleaned the canopy.
We installed another SCROG.
We added another fan.
We adjusted the nutrition.
And now?
The room is looking better than it did before the problem appeared.
That's what I consider a successful grow.
Not avoiding every problem.
Recognizing them early and adapting intelligently.
🔭 Looking Ahead – Now We Let Them Flower
And this is where things get exciting.
The girls have been through a major reset.
The canopy is open.
The second SCROG is in place.
The LEDs are higher.
The ventilation system has been moved outside.
Airflow is now working from above and below.
The plants are receiving their updated nutrition.
And Pheno A?
She's standing there at 145 cm, looking at me like none of this was particularly dramatic.
😂💙
Now I want to see what she does with the room we've created for her.
Hopefully the aggressive vertical growth begins to calm down.
Hopefully the flowers start becoming the dominant story.
Hopefully the second SCROG gives us the support we need as those flowers gain weight.
And hopefully those few LED-stressed tops recover without further drama.
I think we caught that issue early enough.
Now we watch.
💙 Final Thoughts – The Room Is Back Under Control
What a week.
Seriously.
😂
We went from:
"They're stretching a little."
to:
"Okay, these girls are going to hit the LEDs."
And then we went to work.
The carbon filter and extractor moved outside the tent.
The LEDs went higher.
The canopy received a serious cleanup.
A second SCROG was installed.
A second Zamnesia clip fan went underneath the canopy.
Airflow now works from above and below.
The nutrition was increased slightly.
A few LED-burned leaves and tops were cleaned up.
And after all of that...
I look at the room and smile.
Because it looks beautiful.
The plants look healthy.
The structure is organized.
The flowering sites are everywhere.
And Pheno A is absolutely shining.
She's tall.
She's vigorous.
She's beautifully developed.
And now she's finally got some breathing room.
🌿💙
The defoliation wasn't about making her smaller.
It wasn't about forcing her to flower.
It wasn't about chasing some magical yield increase.
It was about taking an overly crowded flowering structure and making it more functional.
The second SCROG isn't there because we expect failure.
It's there because these girls have become substantial plants and we want to support them properly.
The second fan isn't there simply to make the leaves dance.
It's there to help create better circulation through the entire canopy.
Moving the ventilation equipment wasn't cosmetic.
It gave us precious vertical space.
And raising the LEDs gave us more room between the fixtures and the flowering tops.
Every change had a reason.
And now...
we wait.
The girls have done their part.
We've done ours.
Now let's see what Blue Waffle F1 Pheno A does with this new chapter.
Because I have a feeling the next few weeks are going to get very interesting.
💙🌸🌿
🙏 A Huge Thank You
A huge thank you once again to Zamnesia for making Project Blue Tent possible and for giving us the opportunity to explore these beautiful Blue Waffle F1 genetics phenotype by phenotype.
Thank you to Plagron for the Hydro nutrient line and everything supporting these girls through this very vigorous cycle.
A massive thank you to Zamnesia for the Phytonaut LED lighting and for the curved scissors and clip fan that have become part of the practical side of this project.
Thank you to Mars Hydro for the irrigation and drainage system that continues keeping these girls supplied while they absolutely demolish their water.
😂💙
And thank you to GrowDiaries for giving us the platform to document all of this craziness and share it with growers around the world.
Most importantly...
thank you to everyone following Project Blue Tent.
This week was definitely one of those chapters where the plants reminded us who's actually in charge.
We planned.
They stretched.
We adapted.
😂
And now the room is ready for the next phase.
Four Blue Waffle F1 girls.
One room.
One environment.
One very ambitious flowering canopy.
And a second SCROG ready to catch whatever these ladies decide to throw at us next.
Let's see how they finish.
Until next week...
More room. More airflow. More support. And hopefully a lot more flowers. 💙🌸🌿
Growers Love, happy growing, and take care everyone! 🌱💙


Processing
Likes
2
Share


@XoticGROW666
Follow
GSC 4/5wk in flower
COVERED IN CRYSTALS
LOOK AT THE CRYSTAL DANCIN
NO BOTTLES NO NUTES
ALL ORGANIC COMPOST TEA N SST TEA


