Fordsie I have decided my next run will be an attempt at a supersoil. I added quite a few pics, maybe I didn’t need to put them all up but I wanted to share the process I am using.
I mixed all components and sealed in a large tote on 6/26. I tilled/ rotated the mix for the first week and then let it sit for about 3 weeks. I should have given the soil another week or so, but starting something outside in my neck of the woods this late in the year is risky…just my thoughts. I already had to scrap doing 4 more photos and have settled with running autos due to remaining growing season. This will be a test run for next year.
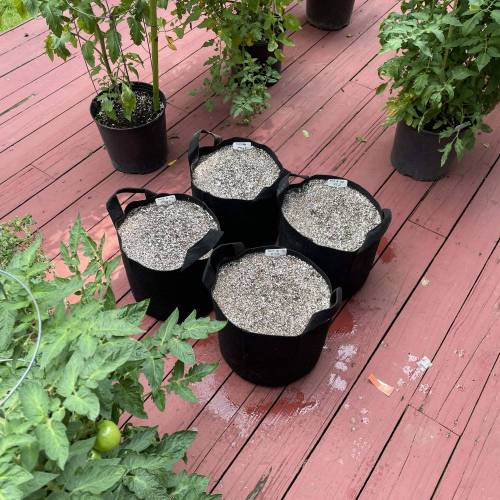
I will list out what I used and quantities below. Once the soil cooled for 3 weeks I mixed lightly on last time and filled four 5-gallon pots to about 50%. I topped each off with straight coco and perlite mixture. By the time these autos are getting hungry their roots should be right into the good stuff!
Supersoil recipe was an amalgamation of a few sources, including a little from subcool. Fingers crossed this works, if I did it right then I should only have to give a compost tea every 3-4 weeks and that’s it.
Base ingredients:
1. Coast of Maine, stonington blend potting soil; 1.5 cf
2. Roots Organics LUSH potting mix; 0.75 cf
3. Orchid, Black Gold Mushroom Compost; 0.25 cf
4. Malibu Compost, Biodynamic/BU’s Blend; 12 qt
5. Clay pebbles; 3 cup
Amendments (All from Down to Earth):
1. Blood Meal; 1 cup
2. Ground Oyster Shell; 2 cups
3. Alfalfa Meal; 2 cups
4. Azomite; 2 cups
5. Crab Meal; 2 cups
6. Bio-Live; 1 cup
7. Neem Seed Meal; 2 cups
8. Feather Meal; 2 cups
9. Bone Meal; 2 cups
10. Kelp Meal; 2 cups
11. Rock Flour; 4.5 cups
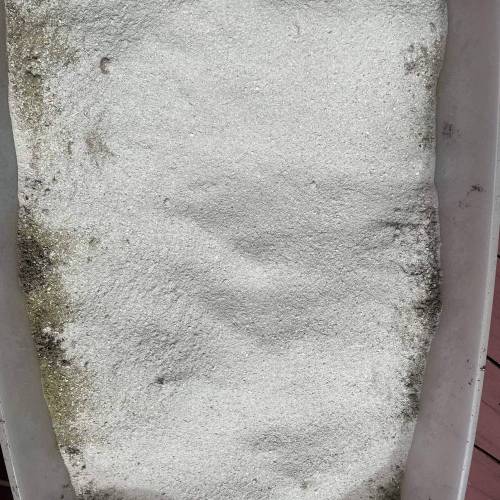
Mixed bases, then added amendments, mixed throughly, watered intermittently to wet mix, but not saturate.
10 likes
13 comments
Share
Used method
Directly In Substrate
Germination Method
1
Week 1. Vegetation
5y ago
1/13
3.81 cm
Height
27 °C
Day Air Temp
80 %
Air Humidity
18 °C
Night Air Temp
18.93 l
Pot Size
Fordsie Week one…only report is that 3 of 4 popped. I planted another Big Yield, fingers crossed she germinates…I’d like to have two of each of these autos that should be on the bigger side!
I picked up some new macro lenses for my phone…I’m still dialing them in, but I’ve been able to get some pretty cool shots.
That’s all I have for now…take it slow my people!!
9 likes
6 comments
Share
2
Week 2. Vegetation
5y ago
1/11
10.16 cm
Height
26 °C
Day Air Temp
65 %
Air Humidity
21 °C
Night Air Temp
18.93 l
Pot Size
Fordsie The girls are doing great, no issues to note. Though one of the magnums looks like it’s missing one of the upper most nodes…it’s just not there…only one side and the apical meristem and that’s it! Very strange…I’ll keep an eye on it.
Just been watering when dry and that’s it. No pH’ing to the water, just straight from the tap. I have been watering near base of plants and then soaking the very outer perimeter of pots so that supersoil mix below is getting some moisture.
So far things are status quo for this stage and age.
Thanks all, take it slow!!
8 likes
4 comments
Share
3
Week 3. Vegetation
5y ago
1/13
20.32 cm
Height
15 hrs
Light Schedule
27 °C
Day Air Temp
65 %
Air Humidity
21 °C
Night Air Temp
18.93 l
Pot Size
Nutrients 7
Mushroom compost
20.833 mll
Worm castings
20.833 mll
Alfalfa Meal 2.5-.5-2.5
1.302 mll
Fordsie The girls have started to stretch quite a bit in last several days, which is good because I started this outdoor setup a little late in the year for my neck of the woods. If I planned it out right, should be good to go…it’s going to be close.
I started first round of light LST today, I’ll give them a few days to acclimate then I’ll be a bit more aggressive to really spread canopies out.
Also gave first compost tea today as well. We are around the 3 week mark, those roots should already have been dipping down into supersoil mix, so it’s time to start managing the microbial community so plants can benefit from nutrients down there.
Next watering I’ll add in a little myco, other than that it’s just watering, LST’ing, and watching until next tea is due…maybe in 2 weeks when they have transitioned over to flower.
I tossed in a pic or two of my saguaro cactus babies…been growing them for almost two years from seeds I got from an airport shop if you can believe it. They are barely a cm, takes about 10 years to grow to an inch, 20-30 to make a foot, and another 70-100 to reach max height of over 20 feet! I’ll be compost in the ground for someone else’s outdoor grow by then!!
9 likes
2 comments
Share
Used techniques
LST
Technique
4
Week 4. Vegetation
5y ago
1/21
25.4 cm
Height
15 hrs
Light Schedule
27 °C
Day Air Temp
65 %
Air Humidity
21 °C
Night Air Temp
18.93 l
Pot Size
Nutrients 7
Worm castings
2.344 mll
All Purpose
1.562 mll
Power Bloom
1.562 mll
Fordsie Today I started some aggressive LST. It is difficult to see from photos, but after a light round or two I either force the main stem into a stair step shape or twist and bend to start a corkscrew shape. I let the plants dictate which is best. A lot of times it’s an amalgamation, so maybe I should label as a specific and definite finished shape.
Anyone that has looked at my blueberry photo knows I have been struggling with some issues…I bring this up because the smallest BY#1 has developed a very faint discoloration at the apical meristem…so I was convinced it was a pest or virus. I will give a more detailed breakdown on IPM treatment in next blueberry update. Short end of it is that it is indeed a pest and I am treating everything right now.
The autos got their first top dress today, I used 2 tbsp of Gaia Green all purpose and power bloom, 3 tbsp of castings, and a tbsp each of bird guano, langbeinite, been meal and bio-live. I also sprinkled a little myco on top before watering at a pH of 6.9. My goal is to add as many more microbes as possible to keep the colony robust…I will give a simple mix of seaweed extract and molasses in next few days.
I see pistils popping on the 2 magnums, nothing yet on the big yields, but I suspect very soon all will be through transition and into flower…where the teal fun begins.
Thanks!
Interesting experiment! Curious about the final results and considerations 😁
Maybe you could also plant a seed in a universal soil to better notice differences! No?
Wish you friendly weather and mild temperatures! 🤞💪
#OUTDOORGANG
-DD
It’s going to be interesting for sure…I have slight reservations this is going to go off without a hitch, but you never know…maybe this will be a personal best! That’s why I dig this stuff! (No pun😂)