Check the winners The Grow Awards 2026 🏆
Start My Diary
Start My Diary
Log In
Start My Diary
Home
Diaries
Strains
Shorts
Questions
Contests
Growers
Seeds
Breeders
Nutrients
Equipment
Blog
English
Log In
Sign Up
Following
Follow
Brands
&
Growers
to get updates
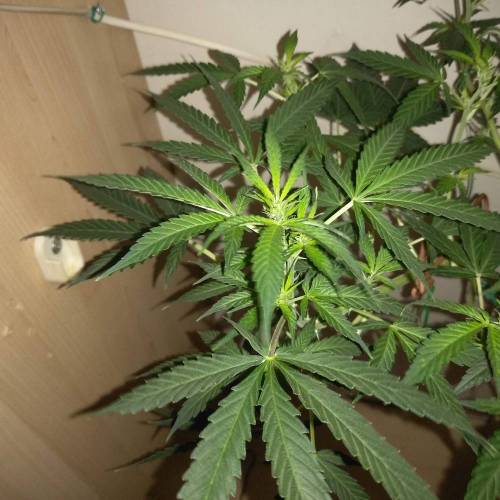
Skunk#1 Auto 150w hps
thegreekhydro2
1
2
397
4y ago
sporadiko.gr - Skunk#1 Auto
Custom Breeder & Strain
BioBizzWWO
Nutrients
Advanced Nutrients
Nutrients
VEG
Custom High-Intensity Discharge/150W
Custom
FLO
Custom High-Intensity Discharge/150W
Custom
Coco Coir
Custom
Indoor
Room Type
12-12
weeks 1-13
150w hps
weeks 7, 13
HST
weeks 3
LST
weeks 4-8
Start at Harvest
1
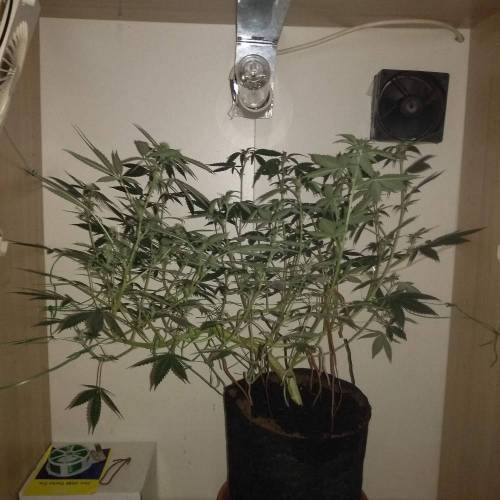
Week 1. Vegetation
4y ago
1/2
thegreekhydro2
—
likes
comments
Share
Used techniques
12-12
Technique
2
Week 2. Vegetation
4y ago
1/3
thegreekhydro2
—
likes
comments
Share
Used techniques
12-12
Technique
3
Week 3. Vegetation
4y ago
1/2
Nutrients
1
Bio-Grow
1 mll
thegreekhydro2
—
likes
comments
Share
Used techniques
HST
Technique
12-12
Technique
4
Week 4. Vegetation
4y ago
1/4
Nutrients
1
Bio-Grow
2 mll
thegreekhydro2
—
likes
comments
Share
Used techniques
LST
Technique
12-12
Technique
5
Week 5. Vegetation
4y ago
1/3
Nutrients
1
Bio-Grow
2 mll
thegreekhydro2
—
likes
1 comment
Share
Used techniques
LST
Technique
12-12
Technique
6
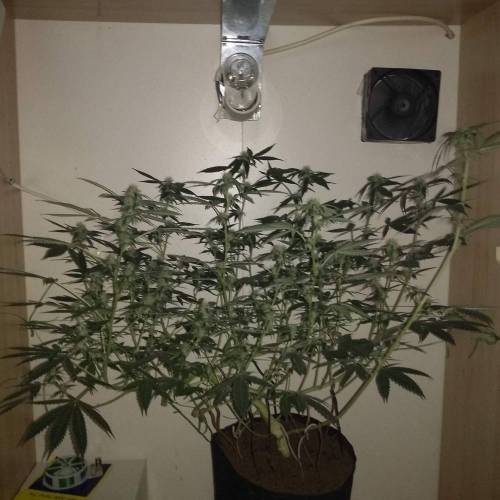
Week 6. Vegetation
4y ago
1/7
Nutrients
1
Bio-Grow
2 mll
thegreekhydro2
—
likes
comments
Share
Used techniques
LST
Technique
12-12
Technique
7
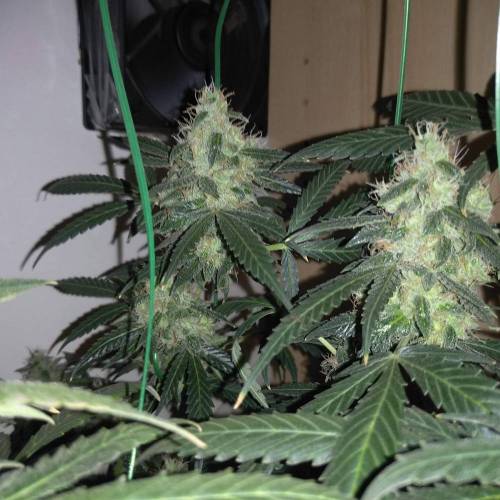
Week 7. Flowering
4y ago
1/5
Nutrients
2
Bio-Grow
2 mll
Bio-Bloom
1 mll
thegreekhydro2
—
likes
comments
Share
Used techniques
LST
Technique
12-12
Technique
150w hps
Technique
8
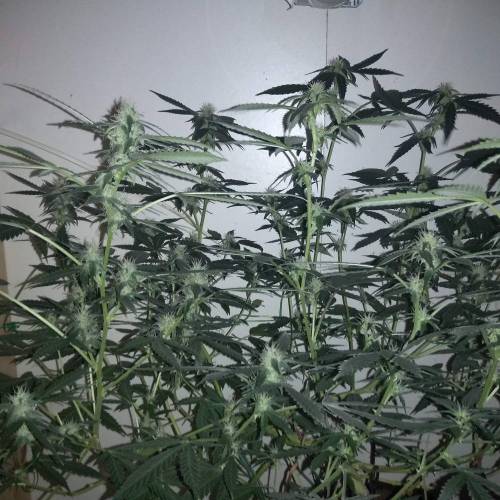
Week 8. Flowering
4y ago
1/7
Nutrients
3
Big Bud Coco
2 mll
Bio-Grow
2 mll
Bio-Bloom
2 mll
thegreekhydro2
—
likes
comments
Share
Used techniques
LST
Technique
12-12
Technique
9
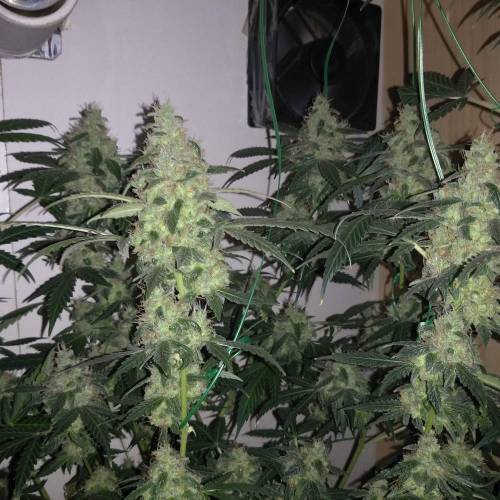
Week 9. Flowering
4y ago
1/8
Nutrients
3
Big Bud Coco
2 mll
Bio-Grow
3 mll
Bio-Bloom
3 mll
thegreekhydro2
—
likes
comments
Share
Used techniques
12-12
Technique
10
Week 10. Flowering
4y ago
1/4
Nutrients
3
Big Bud Coco
2 mll
Bio-Grow
3 mll
Bio-Bloom
3 mll
thegreekhydro2
—
likes
comments
Share
Used techniques
12-12
Technique
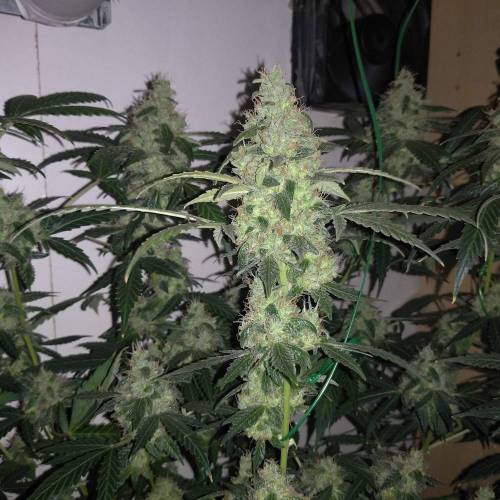
11
Week 11. Flowering
4y ago
1/5
Nutrients
3
Big Bud Coco
2 mll
Bio-Grow
3 mll
Bio-Bloom
3 mll
thegreekhydro2
—
likes
comments
Share
Used techniques
12-12
Technique
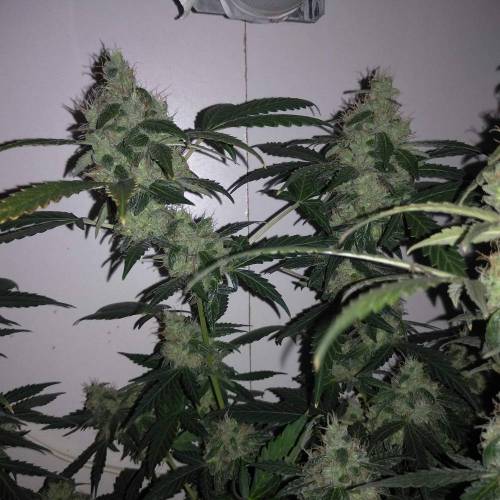
12
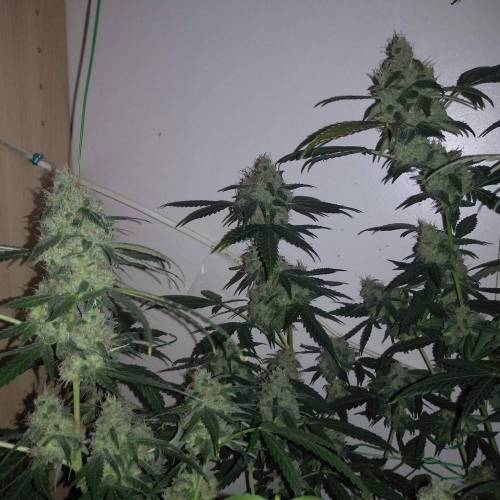
Week 12. Flowering
4y ago
1/8
Nutrients
3
Big Bud Coco
2 mll
Bio-Grow
3 mll
Bio-Bloom
3 mll
thegreekhydro2
—
likes
comments
Share
Used techniques
12-12
Technique
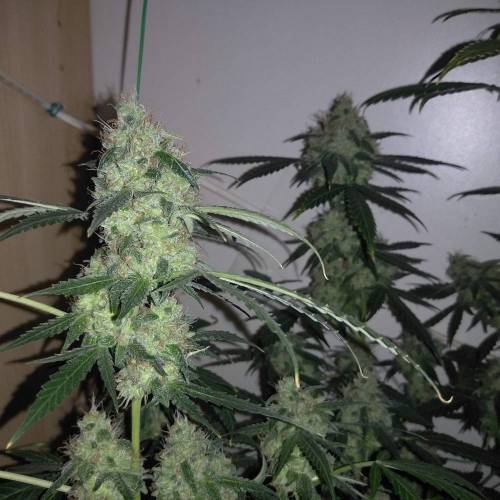
13
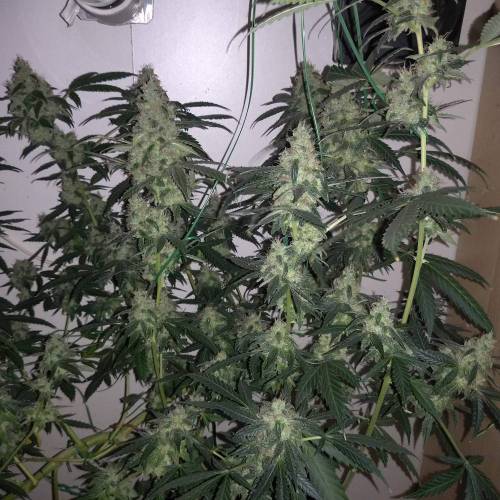
Week 13. Flowering
4y ago
1/17
Nutrients
3
Big Bud Coco
2 mll
Bio-Grow
3 mll
Bio-Bloom
3 mll
thegreekhydro2
—
likes
comments
Share
Used techniques
12-12
Technique
150w hps
Technique
13
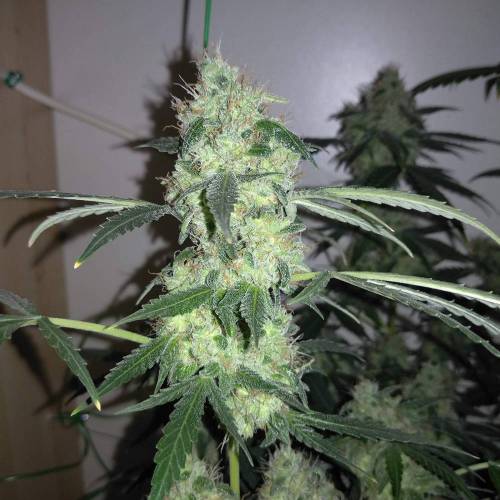
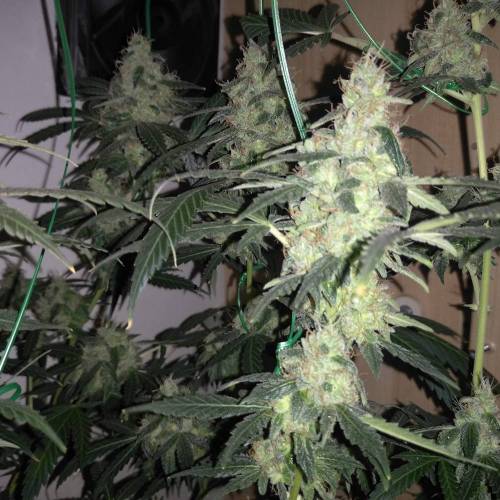
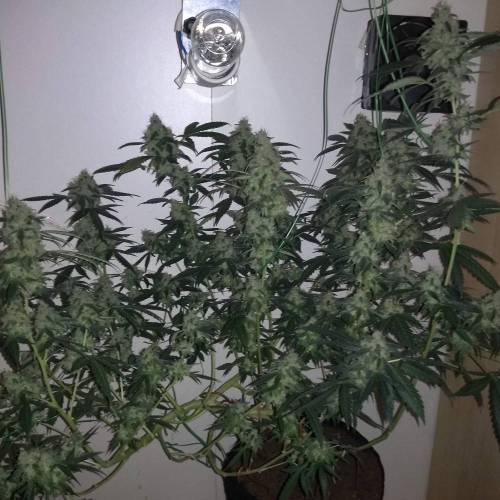
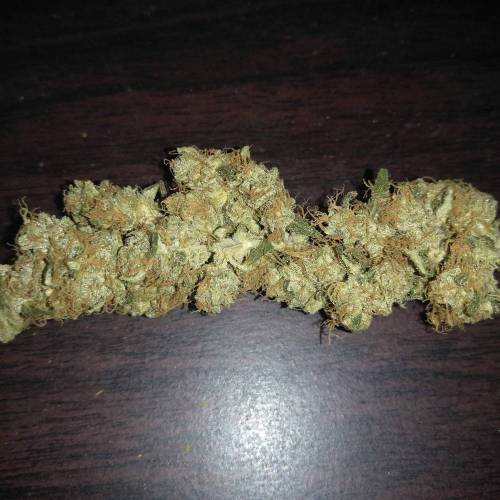
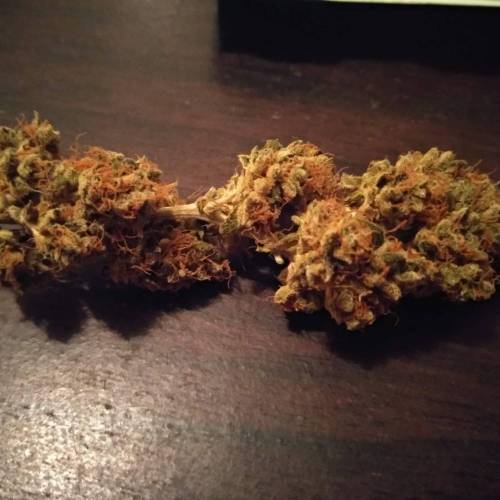
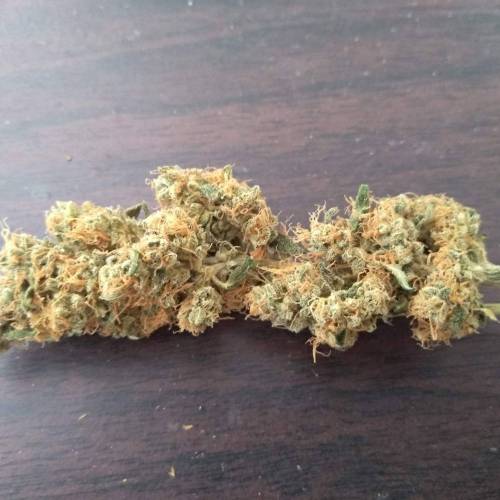
Week 13. Harvest
4y ago
Happy Harvest Day!
sporadiko.gr - Skunk#1 Auto
Custom Breeder & Strain
10/10
Rated
Spent 92 days
Ger
Veg
Flo
Har
44 g
Bud wet weight per plant
44 g
Bud dry weight per plant
1
Plants
Easy
Difficulty
Creative, Energetic, Euphoric
Positive effects
Diesel, Sweet
Taste
Sleepy
Energy
Indica
Hybrid
Sativa
1/11
thegreekhydro2
—
1 like
1 comment
Share
Equipment Reviews
Bio-Bloom
BioBizzWWO
10/10
Rated
Big Bud Coco
Advanced Nutrients
10/10
Rated
Login
1
comment
Sort by
popularity
popularity
newest
oldest
GreenAutoConsumo
commented
4y ago
Muy buen trabajo, felicitaciones
likes 3
the end.
Enjoying this diary? Follow for more updates!
thegreekhydro2
Follow Author
OR
Skunk#1 Auto 150w hps
Follow Diary
Prefer the old Diary view?
Go back to the old Diary view