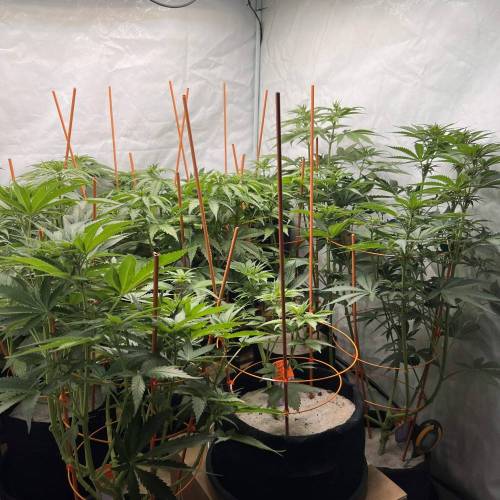
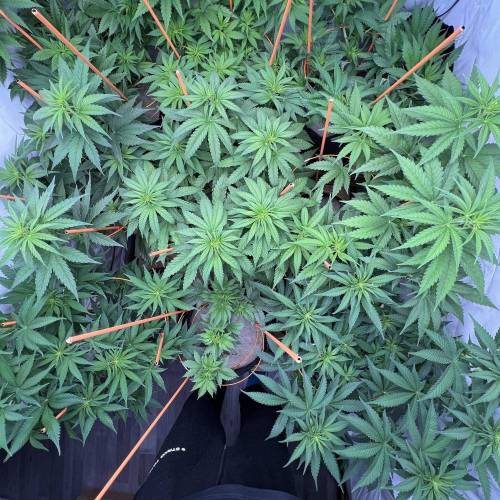
Von Wachstumsphase übernehmen Light Emitting Diodes/440W
Von Wachstumsphase übernehmen
FLO
Von Wachstumsphase übernehmen Light Emitting Diodes/440W
Von Wachstumsphase übernehmen
Soil
Custom
Coco Coir
Custom
Florganic Other
Custom
Indoor
Room Type
LST
weeks 1-5
Topping
weeks 2-5
10 liters
Pot Size
1 liters
Watering
Start at 5 Week
G
Germination
3y ago
Tuetenkleber Welcome to a new strain.
I haven't found much about this plant, so I'm even more curious about what it will turn into. Banana Boogie Split is a sativa-dominant cross between the famous Tangie and Banana Sherbert. Banana Boogie Split offers a clear, balanced high that's perfect for anyone looking to have a productive and happy day.
We should be excited.
3 likes
3 comments
Share
Used method
Glass Of Water
Germination Method
1
Week 1. Vegetation
3y ago
6 cm
Height
18 hrs
Light Schedule
24 °C
Day Air Temp
No Smell
Smell
70 %
Air Humidity
20 °C
Substrate Temp
20 °C
Night Air Temp
10 liters
Pot Size
0.2 liters
Watering Volume
40 cm
Lamp Distance
Tuetenkleber Hey friends and welcome to the run of a Banana Boogie Split.
I wasn't familiar with the company Monkey Genetics and saw them at a trade show. Since I'm a huge Banana fan (as long as they're good), this strain caught my eye.
This little one will also indicate when the tent will generally go into flowering.
According to several reports I've read, one thing becomes very clear: growth until week 4 of flowering. This means in our case, she'll get a maximum of 2 weeks of growth and then go into flowering. With an expected indoor height of 2m, I have no other choice. But that's also the reason why this little one was planted last. The supposed flowering time is about 9-10 weeks, but I assume we'll take a bit longer. I'm very curious.
See you next week, friends :)
3 likes
comments
Share
Used techniques
LST
Technique
2
Week 2. Vegetation
3y ago
1/6
6 cm
Height
18 hrs
Light Schedule
24 °C
Day Air Temp
No Smell
Smell
70 %
Air Humidity
20 °C
Substrate Temp
20 °C
Night Air Temp
10 liters
Pot Size
0.2 liters
Watering Volume
40 cm
Lamp Distance
Tuetenkleber Hello and welcome back to the Weekly Update!
So, are you ready for the latest, most exciting developments? 😁 Let's kick things off with a LIGHT UPDATE. Those who have followed my recent grows know that I've been juggling multiple lights - DIY here, off-the-shelf there. It looked like a cable salad artwork and was as unwieldy as a giraffe doing the limbo. Achieving even lighting in the 1.44 sqm was an impossible task. But hold on tight, friends, because that's all about to change! 😍 I've got myself a 4ch combo light.
Here are the facts:
220W Growlight (high blue content)
220W Bloomlight (high red content)
35W Deep Red light
35W UV
Starting next week, the light will be controlled by a fancy controller. This will allow us to set fixed times and meticulously control all parameters via app and controller. A light with a mind of its own, basically. Currently, it's running at 70% Growlight and 30% Bloomlight. Why, you ask? Well, the vertical growth is rather modest at the moment. We have such a bushy plant that it deserves its own ZIP code. But since we want it to grow taller, it's getting a bit more red light for a week. Let's see what this little gem does with that, 😁.
And did you see that in the tent? It looks like I accidentally booked a ticket to the Caribbean instead of watering my plants, 😍 but no, it's not a tropical vacation vibe, 😂. We've really had trouble with fungus gnats in the last grows. Sure, that sounds like a case for the gnat police, but it's actually a serious problem. And since we rely on natural methods, all chemical gnat killers are off the table! Those little pests weren't impressed by neem oil either, so a clever solution was needed. I got some bird sand, which is mainly made of quartz. When you spread it over the soil, fungus gnats and other pests can't lay their eggs in the top "dead soil layer." The larvae just starve and die. Before that, we also gave the plants a neem shower. And lo and behold... all gone! No more gnats in sight. Now we're curious to see what the long-term test will yield.
But now we have the problem that I can't see the soil anymore to gauge the right time to water. So we need to find a way to recognize the plants' water needs without being able to see the soil. There will be an update on that next week. Something is already in the works, 😜.
I also ordered some supports for the ladies, as we want to skip the net this year. Very sturdy metal rods are now sticking into the ground and can be fitted with a total of 3 rings in 3 sizes. This will make tying them up a breeze.
And now, drumroll, to the plant...
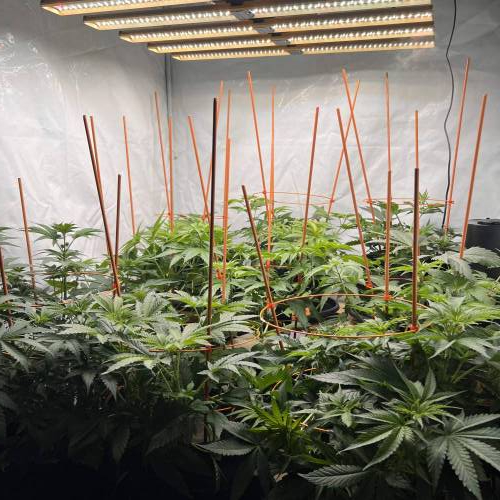
Since I'm such a banana fan, this lady has gotten the "VIP seat" in the middle of the tent. The little one will eventually outgrow them all. We really need to make sure to send her into flowering "early enough," as this specimen is likely to stretch until week 4 of flowering. We shall see.
Until next week!
5 likes
3 comments
Share
Used techniques
LST
Technique
Topping
Technique
3
Week 3. Vegetation
3y ago
1/5
15 cm
Height
18 hrs
Light Schedule
24 °C
Day Air Temp
6.0
pH
No Smell
Smell
70 %
Air Humidity
20 °C
Substrate Temp
20 °C
Night Air Temp
10 liters
Pot Size
0.4 liters
Watering Volume
40 cm
Lamp Distance
Tuetenkleber Hey there, dear friends.
Let's start with the updates before we get to the good stuff.
Soil sensors and green thumb:
Last week, we couldn't see the soil because of the bird sand. It was like we were wearing a blindfold! But don't worry, I'm kind of a plant whisperer and I still have a good eye for when my plants are thirsty.
To improve my "skills," I got myself two soil sensors that tell me what my plants need - temperature, pH level, soil temperature, soil moisture, and light intensity. It's like a fitness tracker, but for plants! After a few days, I can say: I have a knack for watering, it's as good as having a green thumb!
Goodbye, fungus gnats:
Drumroll! The fungus gnat problem is history! Bye-bye, you little pests! Thanks to the bird sand method, they are almost gone. A 99 percent success! A few stubborn ones are still trying to take their chance, but they have no idea what's coming. Bird sand is just magical. It acts like a fancy coat for the soil and keeps the gnats away. And because we water from the bottom, the sand stays nice and dry and untouched.
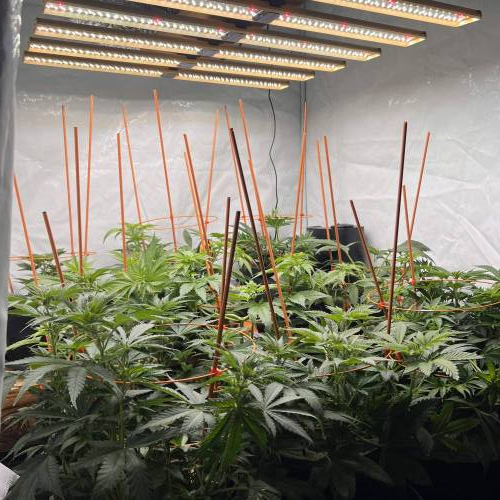
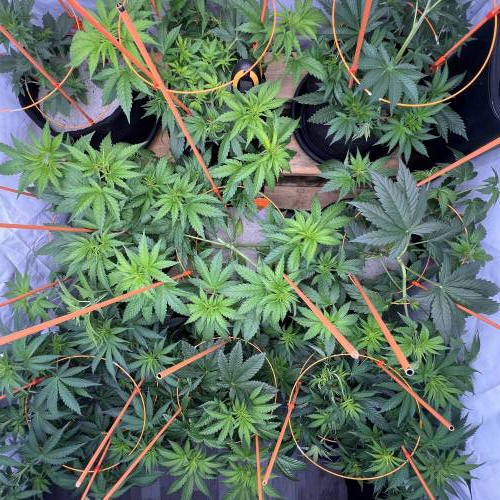
The Banana Boogie is also making a really, really nice impression. The topping has been wonderfully handled here as well. Juicy color and neat growth. We just have to be careful to go into flowering soon because the stretch is supposed to be incredibly intense. Next week will decide when we go into flowering.
Until then, friends.
2 likes
comments
Share
Used techniques
LST
Technique
Topping
Technique
4
Week 4. Vegetation
3y ago
1/14
15 cm
Height
18 hrs
Light Schedule
24 °C
Day Air Temp
6.0
pH
No Smell
Smell
70 %
Air Humidity
20 °C
Substrate Temp
20 °C
Night Air Temp
10 liters
Pot Size
0.8 liters
Watering Volume
60 cm
Lamp Distance
Tuetenkleber Light, humidifier, and power meter - the full program!
Guys, hold onto your green hats because this week we had a plant upgrade festival! Here’s the whole thing in a fun and entertaining format:
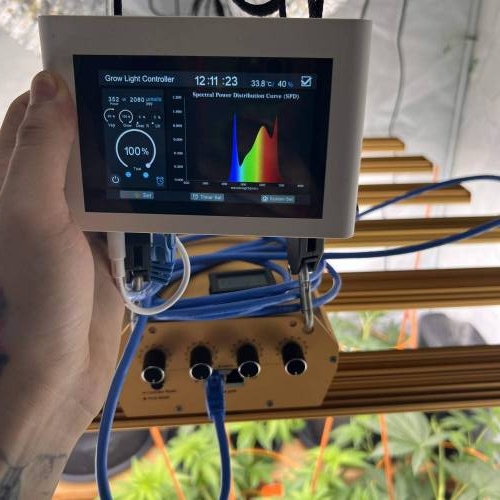
Upgrade 1: THE NEW LIGHT CONTROLLER
Drumroll, please! The light controller is finally here! I tell you, this thing is so beautiful that it boosts the overall picture by 10,000%. With this gem, I have full control:
Dimming function for all 4 channels
Individual scheduling and dimming for each channel
Sunrise and sunset simulation
Spectrum control
Temperature and humidity measurement
There are many more features, but these are the really RELEVANT ones. After spending some time with the device, I am absolutely thrilled. The operation is super easy, and once you understand the menu, the rest is a piece of cake. We now have all the data always at hand on a display, including control. A dream! We’ll be doing quite a few experiments in the future. Stay tuned, it’s going to be exciting!
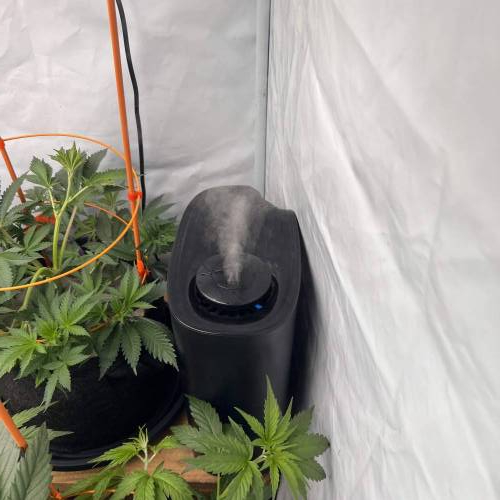
Upgrade 2: THE NEW HUMIDIFIER
Hello, new humidifier! With a capacity of 6.5 liters and automatic humidity control from 50 to 90%, this little guy is just great. And it’s also very quiet! It does its job really well and makes life easier not just for my ladies, but for me too!
Upgrade 3: THE NEW POWER METER
I got power sockets with power meters to finally find out how much electricity is actually being used here. After 4 weeks, I will present the data to you. Thanks to these Wi-Fi sockets, I can calculate everything perfectly, and they measure quite accurately. My phone always shows me the current consumption and load. Very handy to see what the lights are really pulling.
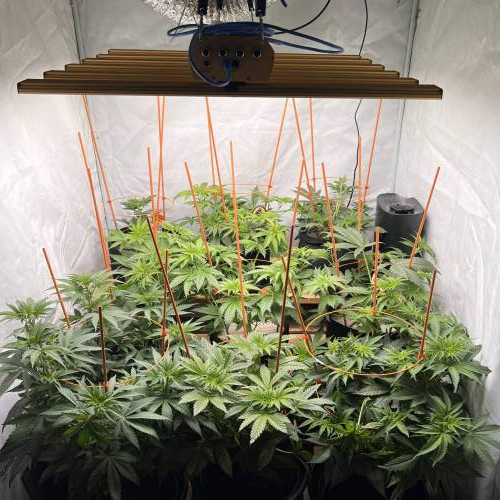
Upgrade 4: THE NEW PALLET CONSTRUCTION
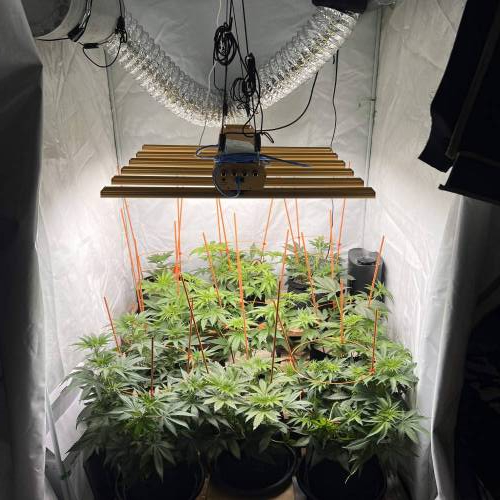
Since my ladies have grown differently, they logically have different heights to the light. So, I built a small pallet construction to bring them all to the same height. Now it’s getting a bit difficult to take photos. Let’s see how long I can still take individual photos. But now to the best part...
THE BABIES 😁
That’s my little favorite in there. It doesn’t flinch at all. It presents itself from its best side. Strong shoots, good growth, plenty of space and air, and all in all very accurate. I’m super excited about the final result 😍
See you next week for the first flowering update 😁
4 likes
comments
Share
Used techniques
LST
Technique
Topping
Technique
5
Week 5. Flowering
3y ago
1/8
50 cm
Height
13 hrs
Light Schedule
24 °C
Day Air Temp
6.0
pH
No Smell
Smell
55 %
Air Humidity
20 °C
Substrate Temp
20 °C
Night Air Temp
10 liters
Pot Size
1 liters
Watering Volume
60 cm
Lamp Distance
Tuetenkleber Moin Moin dear friends and welcome back to the Last Update 2023!
This week we had a very relaxed week. The renovations were well received and keep the ladies nicely in the light.
There’s no update on equipment or renovations this week. So we can dive straight into the plant.
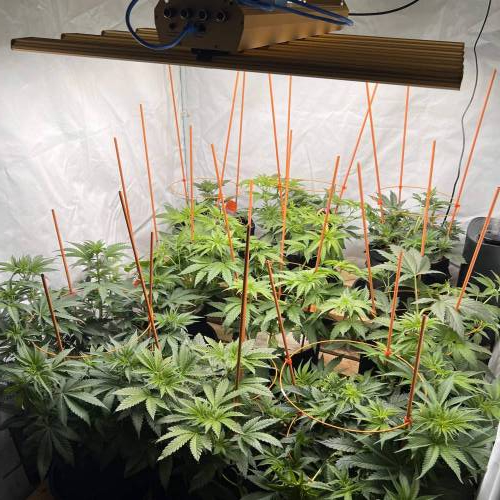
This week we did the lollipopping. All plants in the tent were pruned quite radically. Everything that doesn’t get light or is just vegetating in the lower regions was removed.
All the plants handled it very well. No signs of deficiency in the entire tent!!
The little one is also happily growing. Considering she was the last to start her life run, she has caught up nicely. I’m really looking forward to the stretch. It’s supposed to be quite intense. Well, we’ll see.
Until next year, my friends :)
@GrowWithFlow,
That's exactly what I already got. I got a digital device that measures several parameters to find the right time. It could work that way too, but better safe than sorry.