The Grow Awards 2026 🏆 





Tropicana Cookies Easy way
Soil
Custom
Indoor
Room Type
LST
weeks 2-4
Defoliation
weeks 6-8
8 liters
Pot Size
1 liters
Watering
Start at Harvest
G
Germination2y ago
Seedler Tropicana Cookies Step by Step: My Way 🌱✨
Here we are, diving into a Sponsored Fastbuds Run, and I'm taking you through the steps! The mission? Growing top-tier weed with simplicity and on a budget. Each step aligns with a numbered picture for your easy reference.
1. Free Buckets from Lidl
Grab some free flower buckets from Lidl (just ask if you are unsure).
2. Drilling Holes
DIY time: Drill holes in the buckets or poke them with a knife if you have to.
3. Emergency Pot Fix
Impatience led to damaged pots—oopsies (haha).
4. Hole Adjustments
Get yourself something to block the holes OR size down the holes to prevent spillage.
5. Optional Drainage Addition
Trying something new: add hydroton/clay pebbles for drainage. Clean them if from outside. Drainage is crucial, It ensures the roots have access to oxygen and helps maintain optimal moisture levels, fostering a healthier overall growing environment for your plants.
6./7./8./9. Earth Mix Magic
Mix up the earth, add myco for robust roots, and TNT Bactorr for that extra life in the soil. Clean up the mess u leave behind.
10. Net, Drainage, Soil Mix
Place the net, add drainage, fill the pot with soil and mix in the Bactorr and myco
11./12. Ready for Planting
Earth prepped, seeds popped, and now it's time to plant!
13./14. Taproot Glory
Behold the sweet little taproot! Plant it 0.5cm deep, cover with earth, and give a SLIGHT watering.
15. Tiny Plant, Tiny Watering
Watering regimen: one bottle cap in the morning, and if dry in the evening, another. Remember, the plant is tiny.
16. DIY Humidity Dome
Get creative with a humidity dome. Use anything round and transparent, poke a few holes, and voila—an early-stage humidity haven.
17. Strain of Choice: Tropicana Cookies
I've chosen Tropicana Cookies as the tutorial strain. There are three others in the tent: Apricot, Ztrawberriez, and Cherry Cola. I'll showcase them in flower, keeping things diverse.
18. Soil Life Encounter
A delightful surprise: a cute little springtail. Soil's alive and ready for action!
3 likes
4 comments
Share
Used method
Paper Towel
Germination Method
1
Week 1. Vegetation2y ago
8 cm
Height
18 hrs
Light Schedule
23 °C
Day Air Temp
6.5
pH
300 PPM
TDS
83 %
Air Humidity
20 °C
Night Air Temp
8 liters
Pot Size
70 cm
Lamp Distance
Nutrients 2

Root-Juice
1 mll

Calmag
1 mll
Seedler December 4, 2023, marks my start, and technically, week 1 of veg spans days 7-14 of the plant's life.
Consistency is the game; stability in temperature, humidity, and lighting is crucial.
Stay vigilant; your plant talks. Quick response to signs like pH issues or instability is a must.
Mine boasts vibrant green, robust leaves, and balanced growth—an emblem of health.
No overstretching, no stress signs; all checks out.
The LED light is spot-on, maintaining ideal plant height and internode spacing.
Favorable indicators say our conditions are golden. In conclusion, the plant thrives, and our journey is right on track, with VPD in check. 🌱✨
16.3 DLI
206 PPFD
3 likes
2 comments
Share
2
Week 2. Vegetation2y ago
8 cm
Height
18 hrs
Light Schedule
25 °C
Day Air Temp
6.0
pH
83 %
Air Humidity
23 °C
Night Air Temp
8 liters
Pot Size
0.13 liters
Watering Volume
70 cm
Lamp Distance
Nutrients 4

Calmag
0.5 mll

LA SIRENA - VITAMIN POWER
2 mll

LA CALAVERA - MICROBIAL GROW
2 mll
Seedler Monday 18.12.2023-24.12.2023 Week 2: Maximizing Growth Potential
Nutrient Boost:
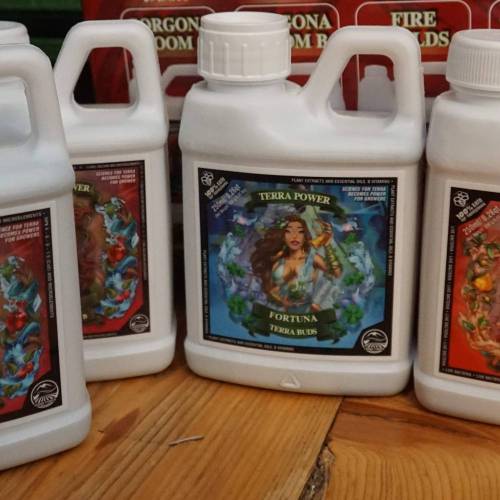
This week, I introduced CalMag and two Terra Power products: La Sirena Vitamin Power and La Calavera Microbial Grow and Fire yields. These products promise enhanced root growth, nutrient absorption, and stress reduction. A big shoutout for the samples—much appreciated!
Lighting Optimization:
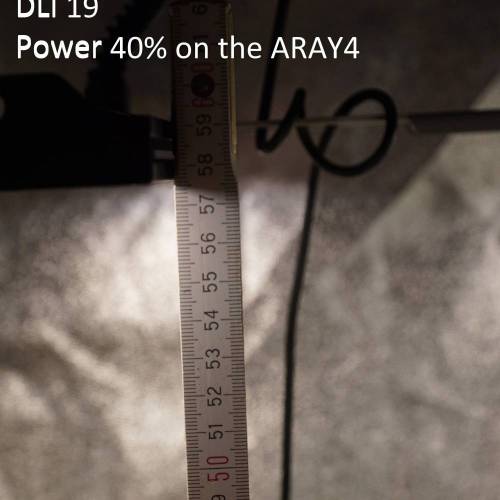
I've upped the ante with lighting, reaching 290 PPFD and a DLI of 19. Achieving this involves running my ARAY 4 at 40% power with a 57-59 cm light-to-plant distance. Aiming for a DLI of 20 in the 2nd veg week, I'll carefully monitor the plant's health to avoid any signs of light burn.
Training Strategy:
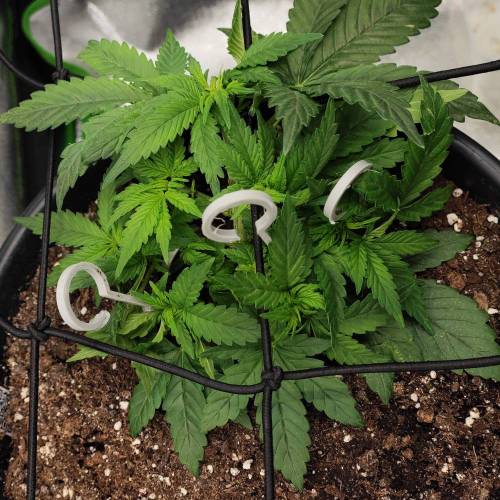
Opting for simplicity and efficiency, I've employed an uncomplicated method for training. Using a hook anchored to the ground (you can use wire too), I'm gently spreading the plant laterally. This low-maintenance technique ensures even light distribution to every branch, fostering balanced growth. Trim any large leaves hindering light access—each branch deserves its fair share!
Future Growth Blueprint:
My plan is to continue lateral training to maximize light exposure. The goal is an even canopy, promoting uniform bud development. This not only optimizes space and light but also aims for consistently sized, well-developed buds. For me, it's a goal worth pursuing.
Closing Thoughts:
This week marks a dynamic phase, with our plant thriving under optimized conditions. Remember, the journey is as crucial as the destination. Share your thoughts and strategies
2 likes
comments
Share
Used techniques
LST
Technique
3
Week 3. Vegetation2y ago
8 cm
Height
18 hrs
Light Schedule
27 °C
Day Air Temp
6.3
pH
550 PPM
TDS
80 %
Air Humidity
23 °C
Night Air Temp
8 liters
Pot Size
0.2 liters
Watering Volume
100 cm
Lamp Distance
Nutrients 4

Calmag
0.5 mll

LA SIRENA - VITAMIN POWER
2 mll

LA CALAVERA - MICROBIAL GROW
2 mll
Seedler Monday, December 25, 2023, marks the beginning of Week 3 in my automatic cannabis grow.
Mid-week, I provided 400ml of nutrient solution, following a simple finger test to gauge soil dryness. I alternate between nutrient-rich water and plain water with CalMag, bacteria, or enzymes, excluding additional fertilizer.
CalMag continues to perform well, complemented by consistent Low-Stress Training (LST) to effectively spread out individual nodes.
Maintaining a 75% relative humidity (RH) to control the environment, I eagerly await a substantial stretch or an extended vegetative phase.
Regarding lighting, I've adjusted the ARAY 4 to maintain a 100cm distance and run it at 80%, resulting in a DLI of approximately 25 and a PPFD of around 400. These values remain consistent throughout the tent.
Observing other FastBuds strains, there's a consistent trend of significant stretching, leading to impressive yields. Excited for the upcoming growth!
3 likes
comments
Share
Used techniques
LST
Technique
4
Week 4. Vegetation2y ago
15 cm
Height
18 hrs
Light Schedule
24 °C
Day Air Temp
6.2
pH
Normal
Smell
550 PPM
TDS
70 %
Air Humidity
23 °C
Night Air Temp
8 liters
Pot Size
0.5 liters
Watering Volume
100 cm
Lamp Distance
Nutrients 6
neem oil
0.5 mll

Calmag
0.5 mll

TNC BactorrS13
0.1 mll
Seedler Entering Week 4, starting on Monday, January 1, 2024, and ending on January 7, 2024.
With 100% light intensity at a 100cm distance, the plants are now receiving approximately 29-30 DLI and around 450 PPFD. Employing extensive Low-Stress Training (LST), I've secured each branch by tying knots around the pot. The goal is to maximize the canopy area, ensuring optimal light exposure for the development of robust and resinous nugs.
Though there's a slight concern about potentially having too many branches, possibly resulting in smaller buds, I remain hopeful.
Nutrients, light, and space are all abundant. I must admit, I miss the superiority of fabric pots in this run! I watered 750ml and this should be enough for a few days!
I try to defol as little as possible. Not more than 5 a Day.
As we transition into the flowering phase, this marks the last week of "Veg," despite clear signs of budding. I introduced bloom nutrients for the first time this week.
Excitement brews as we progress, and I must say, growing FastBuds genetics is proving to be immensely enjoyable!
Cheers
2 likes
2 comments
Share
Used techniques
LST
Technique
5
Week 5. Flowering2y ago
20 cm
Height
18 hrs
Light Schedule
24 °C
Day Air Temp
6.2
pH
Normal
Smell
750 PPM
TDS
60 %
Air Humidity
18 °C
Night Air Temp
8 liters
Pot Size
0.5 liters
Watering Volume
100 cm
Lamp Distance
Nutrients 3
neem oil
0.5 mll

Calmag
0.5 mll

GORGONA POWER BLOOM B - PH BALANCE
1 mll
Seedler will be updated
4 likes
comments
Share
6
Week 6. Flowering2y ago
20 cm
Height
18 hrs
Light Schedule
24 °C
Day Air Temp
6.2
pH
Strong
Smell
500 PPM
TDS
60 %
Air Humidity
18 °C
Night Air Temp
8 liters
Pot Size
1 liters
Watering Volume
100 cm
Lamp Distance
Nutrients 4

Calmag
2 mll

GORGONA POWER BLOOM B - PH BALANCE
1.5 mll

LA CALAVERA - MICROBIAL GROW
1.5 mll
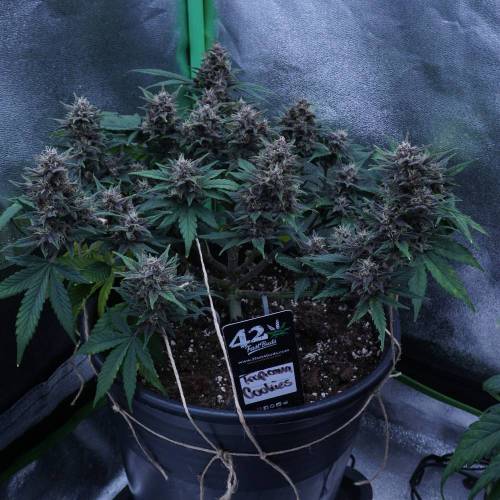
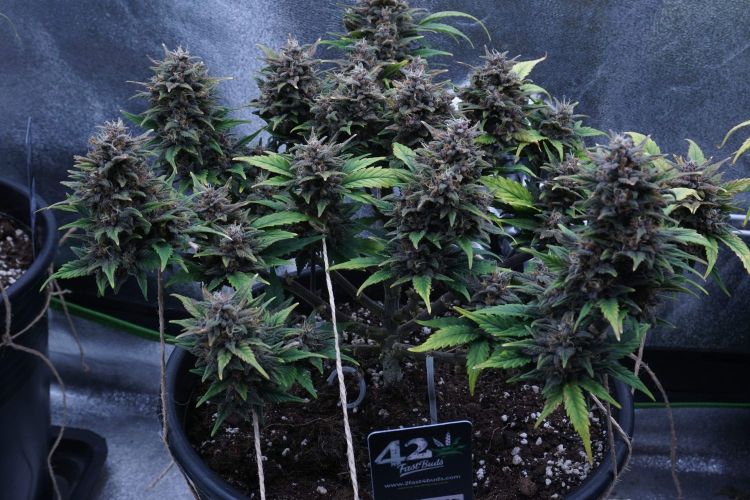
Seedler Week 6 in flower, and the plant is looking stunning! Sporting a beautiful purple hue and emitting a delightful aroma. Regular tying down of branches keeps the canopy open for maximum light exposure.
Adjusted the light to 80%, now 45cm away, providing a DLI of 40 and PPFD of 600. A bit of defoliation was necessary to clear the bud sites.
idk if its just FastBuds genetics or autos in general but they bring a unique touch to the journey. Despite the differences, the experience is immensely enjoyable. Managing stress factors for the plants is a strategic game and i like that. You need to have things figuered out or try to make the best out of it, maximizing what i can and thats a lot of fun!
I can only dream about the finished buds,
Cheers!
Over the past week, I noticed a nutrient deficiency worsening, and I wasn't sure what could have caused it. Now, I'm sure they still don't have enough CalMag from me, and they craved it because of the intense lighting I mentioned earlier. I gave them a good dose. I came to that conclusion because I observed stems that were exposed to the light turning purple, and the part right next to that, where a leaf covered it, was still green. So, that said to me the light is too intense. I got them there slowly, and I'm not going over 40 DLI, so I know they CAN manage it. That would mean I gave them not enough CalMag, right? At least for me, that made sense. So, I will not reduce CalMag in flower like I wanted. Let's see what the plants do with that.
3 likes
comments
Share
Used techniques
Defoliation
Technique
7
Week 7. Flowering2y ago
20 cm
Height
18 hrs
Light Schedule
28 °C
Day Air Temp
6.3
pH
Strong
Smell
550 PPM
TDS
45 %
Air Humidity
18 °C
Night Air Temp
8 liters
Pot Size
1 liters
Watering Volume
100 cm
Lamp Distance
Nutrients 4

Calmag
2 mll

GORGONA POWER BLOOM B - PH BALANCE
2 mll

FORTUNA - FIRE BUDS
2 mll
Seedler They still show some signs of deficiency but i upped the calmag a little and hope they like it (: (fun fact, the Apricot auto never had a calmag deficiency, i actually feared a calmag toxicity but she seems fine!)
i defol not more than 2 leafs per plant per day and if needed i tie them down a little so i can open the plant wider
2ml/l terra power is too much for the the plants. unfortunate but i just had trying to max it out but now i know for the next run haha. In my expercience its usually better overall being on the lower nute end. no stress, no burns afterwards you're always smarter.
3 likes
3 comments
Share
Used techniques
Defoliation
Technique
8
Week 8. Flowering2y ago
20 cm
Height
18 hrs
Light Schedule
28 °C
Day Air Temp
6.3
pH
Strong
Smell
550 PPM
TDS
45 %
Air Humidity
18 °C
Night Air Temp
8 liters
Pot Size
1 liters
Watering Volume
100 cm
Lamp Distance
Nutrients 4

Calmag
2.5 mll

GORGONA POWER BLOOM B - PH BALANCE
1.5 mll

FORTUNA - FIRE BUDS
1.5 mll
Seedler they got a problem, not much growth anymore im not exactly sure yet what happened
7 likes
1 comment
Share
Used techniques
Defoliation
Technique
8
Week 8. Harvest2y ago
Happy Harvest Day!

10/10
Rated
Sweet, creamy, citrus, sandalwood smell, purple buds, super sticky and frosty
for me she feels like a medical strain that doesn't get you dead. you can smoke her, get a nice "sativa" head rush and later on kicks the "indica" effects, if you lay down at this critical moment you maybe stuck there for a second
good strain, nice high but not my personal favorite
I like the Ztrawberriez as all day strain more
i just got 32g from this one plant but thats all in me, the genetics are crazy and capable of A LOT once you understood how to grow automatics
I can recommend everyone trying this, its easy to grow and fun!
Show more
Translate
Spent 58 days
Ger Veg Flo Har
53 g
Bud dry weight per plant
1
Plants
0.72 m²
Grow Room size
Easy
Difficulty

Creative, Relaxed, Uplifted
Positive effects

Dry mouth
Negative effects

Pain, Insomnia, Stress
Medical effects

Sweet, Cream
Taste
Height
Day air temperature
Air humidity
PPM
PH
Light schedule
Night air temperature
Pot size
Lamp distance
Seedler Easy grow. Pretty much 8 Weeks from germination until harvest, fast growing and its 100% user error i don't got more yield. This Auto grow kindled my will to master growing autos. i want BIG plants with big yields, lets see how that will work out in the future!
9 likes
1 comment
Share
Equipment Reviews

the end.
Enjoying this diary? Follow for more updates!
Prefer the old Diary view?
Go back to the old Diary view


