


Skunk Autoflower Outdoor middle Germany



Start at Harvest
G
Germination2y ago

haschischhelmut On April 15th, I put seeds into the soil indoors. By April 19th, the seedling was visible. Due to the weather, the seedling spent the first few days inside in front of the window. For the growing medium, I used Composana tomato and vegetable soil, shaped a small hole in the pot, and filled it with old soil from last year as the seedling's growing medium.
2 likes
5 comments
Share
Used method
Directly In Substrate
Germination Method
1
Week 1. Vegetation2y ago


7 cm
Height
13 °C
Day Air Temp
No Smell
Smell
haschischhelmut The first three days, the plant was only inside due to the weather, behind the glass. However, because of the strong stretching, I put it outside and placed a cut plastic bottle over it to generate a bit more warmth while still getting real daylight. The temperatures during the day were mostly between 10 and 15 degrees. It only started to get warmer and sunnier on the last day of the week. At night, it was always brought back inside.
likes
comments
Share
2
Week 2. Vegetation2y ago


7 cm
Height
22 °C
Day Air Temp
No Smell
Smell
haschischhelmut This week it finally got sunny and warm, up to 27 degrees! First, I buried the long stem of the plant a bit so that the stretching wouldn't have too negative of an effect, then it was time for the plant to go outside. The plant was happy and has grown well compared to the previous week. You could really see the new leaves growing. Since day 9, it has also been outside at night (around 10 degrees).
2 likes
comments
Share
3
Week 3. Vegetation2y ago


7 cm
Height
18 °C
Day Air Temp
No Smell
Smell
10 °C
Night Air Temp
haschischhelmut The third week begins with bad cloudy weather. Unfortunately, the plant hardly grew over the weekend and is relatively small for the third week. It still stays outside the whole time, slightly protected from the rain. At night, it doesn't get colder than 8-9 degrees, which is why I leave it outside. From Thursday or Wednesday, it should become sunnier again, and I hope it quickly gains mass then, as it is an autoflower and will soon start flowering.
1 like
comments
Share
4
Week 4. Vegetation2y ago


7 cm
Height
18 °C
Day Air Temp
Weak
Smell
10 °C
Night Air Temp
haschischhelmut Unfortunately, there are no pictures from days 21-23 as I wasn't around at that time. However, the weather was perfect, and the plant grew really well during this period. The first 5-bladed leaves are now more or less fully developed, and the next layer of leaves is already peeking out. The side shoots are also starting to grow now. If you hold your nose close to the plant, you can already smell it a bit :), which adds to the anticipation. With the last day of the 4th week, unfortunately, worse weather is starting again - so slower growth :(
5 likes
4 comments
Share
5
Week 5. Vegetation2y ago



7 cm
Height
20 °C
Day Air Temp
Weak
Smell
10 °C
Night Air Temp
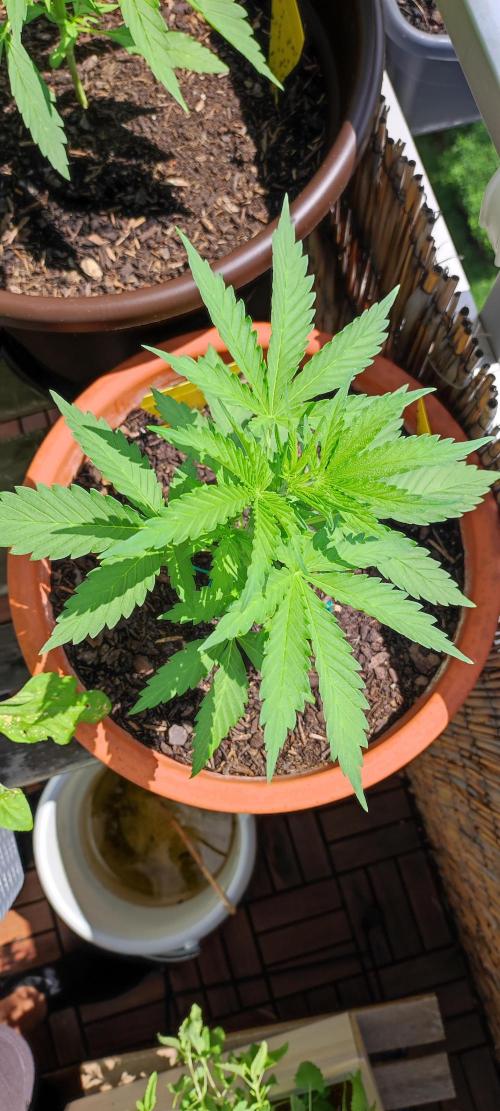
haschischhelmut The 5th week has now started. The weather was mixed this week, a lot of rain and clouds. Still, it was able to grow a bit. I also started fertilizing on 05/18, but only with Rossmann Guano fertilizer (NPK 4-1-2), I will do this about once a week. On 05/19, I then started to tie down the side shoots a bit with LST so they can get more sun later. On 05/21, I could see the first little hairs - so the pre-flowering has begun.
3 likes
comments
Share
Used techniques
LST
Technique
6
Week 6. Flowering2y ago


7 cm
Height
22 °C
Day Air Temp
Weak
Smell
12 °C
Night Air Temp
haschischhelmut The first pre-flowering week has begun. On May 24th, there was Guano 4-1-2 fertilizer and a lot of rain. The following days had some sun. The first pistils are now also visible in other places :).
2 likes
comments
Share
7
Week 7. Flowering2y ago


7 cm
Height
20 °C
Day Air Temp
Weak
Smell
12 °C
Night Air Temp
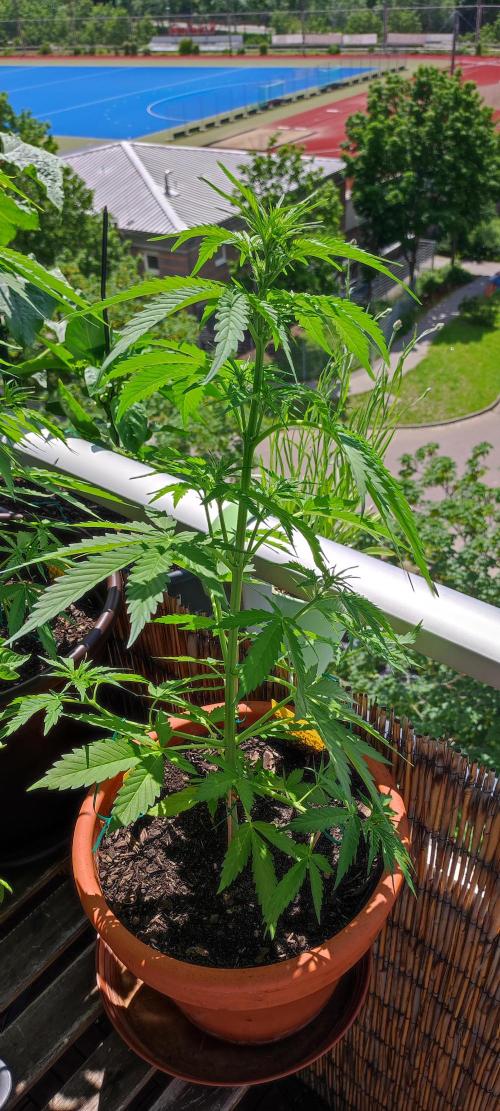
haschischhelmut On May 31st, I used the same fertilizer again. There are now more pistils showing in other spots as well. Over the weekend, there was hardly any sun, and because of the bad weather, I moved them closer to the house wall, which made the light even weaker. Towards the end of the flowering week, the weather is getting better :)
3 likes
2 comments
Share
8
Week 8. Flowering2y ago


7 cm
Height
20 °C
Day Air Temp
Weak
Smell
10 °C
Night Air Temp
haschischhelmut The buds are growing now. The smell is still only present when you hold your nose close to the plant. There were two feedings this week. On the 11th, she let the leaves droop pretty directly after watering. I think I might have watered too often??? But after 2 days, everything was okay again. There was quite a bit of sunshine during that time.
likes
comments
Share
9
Week 9. Flowering2y ago


75 cm
Height
22 °C
Day Air Temp
Weak
Smell
12 °C
Night Air Temp
haschischhelmut This week, the first trichomes were visible on the sugar leaves. Unfortunately, the plant and the others have had these dark spots on the leaves for about 1-2 weeks. Additionally, the yellow leaves at the bottom are turning yellow. Does anyone know what the problem might be?
5 likes
7 comments
Share
10
Week 10. Flowering2y ago


75 cm
Height
10 hrs
Light Schedule
28 °C
Day Air Temp
Weak
Smell
16 °C
Night Air Temp
haschischhelmut This week there was a lot of sunshine and it got really warm. On the 25th, I also used flowering fertilizer from Compo Grow Blüte. The discoloration of the leaves is slowing down again.
2 likes
comments
Share
11
Week 11. Flowering2y ago


75 cm
Height
10 hrs
Light Schedule
28 °C
Day Air Temp
Weak
Smell
16 °C
Night Air Temp
haschischhelmut The leaves have changed color, I think it was a nitrogen deficiency. I then fertilized and it didn't get worse.
likes
comments
Share
12
Week 12. Flowering2y ago


75 cm
Height
10 hrs
Light Schedule
28 °C
Day Air Temp
Normal
Smell
16 °C
Night Air Temp
haschischhelmut Lots of sun and warmth. Gave flowering fertilizer mixed with some 4-1-2 fertilizer twice.
likes
comments
Share
13
Week 13. Flowering2y ago


75 cm
Height
10 hrs
Light Schedule
28 °C
Day Air Temp
Normal
Smell
16 °C
Night Air Temp
haschischhelmut A lot of sun and heat. The buds are getting thicker and releasing a nice smell. Ventilation is becoming difficult since the smell is seeping into the apartment :'D. But definitely bearable. Unfortunately, it seems like it will take at least another 2 weeks before they can be harvested. So definitely longer than advertised on the website.
2 likes
comments
Share
14
Week 14. Flowering2y ago


80 cm
Height
10 hrs
Light Schedule
28 °C
Day Air Temp
Strong
Smell
16 °C
Night Air Temp
haschischhelmut The buds look great already, just the trichomes need another week. The weather was sunny and hot. During rain, the plant was usually placed in a somewhat dry spot. It smells pretty strong by now.
likes
comments
Share
15
Week 15. Flowering2y ago


80 cm
Height
10 hrs
Light Schedule
28 °C
Day Air Temp
Strong
Smell
16 °C
Night Air Temp
haschischhelmut On August 1st, I harvested in the morning. Unfortunately, I had to throw away at least 3-4 grams from the buds because there were quite a few aphids, and I really don't want to smoke those 😳. Otherwise, the buds turned out beautifully; I'm curious about the dry weight. My guess: at least 18-20 grams. 😇
2 likes
comments
Share
16
Week 16. Harvest2y ago
Happy Harvest Day!


8/10
Rated
Wunderbare Pflanze, hat auch gut dem schlechten Wetter stand gehalten. Am Ende jedoch sehr hoher Nährstoffbedarf (vielleicht war auch die Erde misst) und viele Blattläuse.
Show more
Translate
Spent 107 days
Ger Veg Flo Har
1
Plants
Normal
Difficulty
Height
Day air temperature
Light schedule
Night air temperature

haschischhelmut see week before. Here I will only post the dried end product with weight.
4 likes
comments
Share
7 comments
Sort by
popularity
popularity
newest
oldest

HonoluluBob commented2y ago
If you've only fertilized a little, the yellow leaves at the bottom could indicate a nitrogen deficiency, while the brown edges would be typical of potassium deficiency. Unfortunately, too low pH and over-fertilized plants look quite similar 😈. From personal experience, I would blame the soil as the culprit. Two years ago, I got the most expensive organic peat-free tomato soil from Compo and bitterly regretted it. The biggest problem for me was actually watering properly. They mix some kind of chemicals into this soil so that it behaves like the "good old" stuff after purchase, but after a few weeks, that binding agent is gone, and the water just runs right through. Maybe it helps if you water a bit with some aloe vera juice (either from the plant or the drugstore) once a week. It helped me; I just did it too late.
likes

haschischhelmut commented2y ago
@HonoluluBob, I think it might be that I over-fertilized (at least when it comes to nitrogen, because after I fertilized twice a week, the leaf tips turned color and curled up on one of them. The new leaves on the buds are very dark though. I doubt the pH is too low since our tap water has a pH value of 7.9.
So I used the same soil... maybe that's really the issue, even though the soil can hold water well...
likes
haschischhelmut commented2y ago
@Marmelade, our tap water has a pH of 7.9, and I've been unsure about the pH value the whole time. I always let the water sit for at least 2 days and have read that soil buffers the pH well, but I can still imagine it...
As for the fungus, I don't know because on Google images, there's usually a yellow edge around the brown spot, which isn't really there on mine.
like 1
HonoluluBob commented2y ago
@haschischhelmut, I think the "rust spots" are from watering. It looks like something nutrient-heavy got splashed on it. It could also be bird droppings. If it doesn't spread further, I would leave it as is. You wouldn't immediately amputate your leg for a scratch on your thigh.
The issue with the pH level needs to be reassessed in combination with liquid fertilizers. The value gets significantly shifted because of that. When I was still using liquid fertilizers, I always treated the water with a Brita filter.
Since I got the feeding powder from GHS, I can completely ignore that. I can only recommend it!
Edit: there's also a difference between "over-fertilized" and "fertilized with too strong a solution.
likes
Show More (2)

the end.
Enjoying this diary? Follow for more updates!

Prefer the old Diary view?
Go back to the old Diary view