


Mein Erster Grow.. und wie es nicht laufen sollte :/



VEG
GardenHighPro LEDMAXPRO 150+UV Light Emitting Diodes/150W
GardenHighPro LEDMAX PRO 150W SuperBloom + UV

Tent
Selfmade Ver. I 80x80x180
Grow Tent
Tent
Selfmade Ver. II 80x80x180
Grow Tent

Fan
PC Lüfter 140mm
PC Lüfter 200mm
Fan
Corsair
PC Lüfter 200mm

BioBizz LightMix Other
Custom

Perlite
Custom
Wurmhumus Other
Custom

Indoor
Room Type
Topping
weeks 4
FIMing
weeks 4
LST
weeks 5-8, 10
Defoliation
weeks 5, 7
11 liters
Pot Size
1 liters
Watering
Start at Harvest
G
Germination2y ago

DIY95 Hey dear broccoli friends^^
After a long preparation, I've finally decided to start my first grow and, of course, document it as best as I can. To learn from it for future runs and also to share my first impressions with you.
For starters, I chose 3 Royal Skywalker and 2 Chocolate Haze from Royal Queen Seeds. Which later turned out to be a bit of a space issue xD
To germinate, I placed the seeds in glasses of water. Just 24 hours later, all the seeds had germinated and were happily floating in their glass... until the first problem came my way. The soil I ordered was stuck somewhere in the package center... So the seeds (yes, I know, shame on me) floated in water for 5 days until I could plant them. The taproots on none of the seeds were longer than 1.5cm... I could have also just laid them in a kitchen towel, yeah... but hindsight is always 20/20 😅
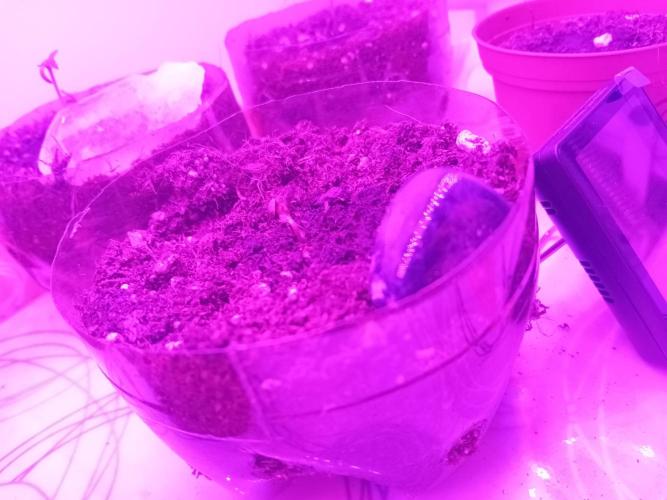
I made about 300ml seedling pots from old plastic bottles and filled them with a mix of 90% BioBizz Light Mix and 10% perlite, along with 0.7g of mycorrhiza and 0.3g of rhizobacteria, sprinkled directly into the planting hole. I activated the rhizobacteria with a light honey/water mixture and carefully planted the seeds.
The next day, it was time. The little ones saw their first light. However, I noticed the next morning... it was way too little. Those seedling LED strips were absolutely useless, as the measurements showed. So, earlier than expected, I moved the little ones into the tent under the Aglex K1000. Before that, I buried the stems of the plants a bit deeper to correct the mistake.
After the move, they felt right at home 😁
3 likes
1 comment
Share
Used method
Glass Of Water
Germination Method
1
Week 1. Vegetation2y ago


23 °C
Day Air Temp
No Smell
Smell
42 %
Air Humidity
18 °C
Solution Temp
18 °C
Night Air Temp
0.3 liters
Pot Size
0.05 liters
Watering Volume
50 cm
Lamp Distance
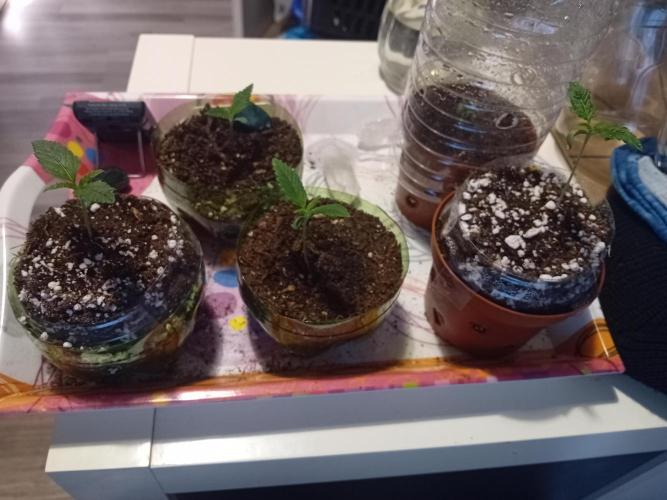
DIY95 The first week went well in my opinion. Everyone except the little Choco is making a very solid impression .. as far as I can tell 😅
Other than watering, there wasn't much on the agenda. I found the different growth rates at this point really interesting even though they are the same seeds.. I only found out later that this doesn't mean much at all ... like so many things I wish I had known beforehand .. 😓😅
1 like
comments
Share
2
Week 2. Vegetation2y ago


18 hrs
Light Schedule
23 °C
Day Air Temp
No Smell
Smell
250 PPM
TDS
42 %
Air Humidity
18 °C
Solution Temp
18 °C
Night Air Temp
0.3 liters
Pot Size
0.05 liters
Watering Volume
45 cm
Lamp Distance
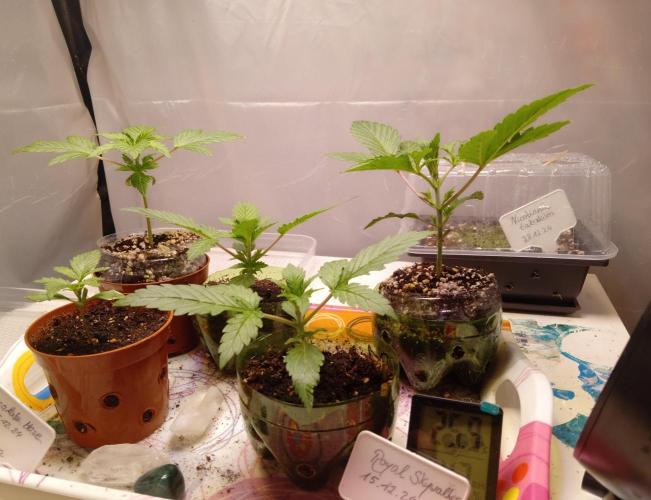
DIY95 Week 2: Everything is growing, thriving, and looks somehow happy 😁 they are stretching up so beautifully as if they are excited 😅 Except for the little Choco.. she's really having a tough time. How would I feel if everyone around me was so much further along 😒😅.. but luckily, the plant cares less about that ^^ I believe in the little one.. No one gets left behind. I'm just proud of each of the little ones 😁
1 like
comments
Share
3
Week 3. Vegetation2y ago




18 hrs
Light Schedule
26 °C
Day Air Temp
No Smell
Smell
300 PPM
TDS
40 %
Air Humidity
18 °C
Solution Temp
18 °C
Night Air Temp
3 liters
Pot Size
0.05 liters
Watering Volume
45 cm
Lamp Distance
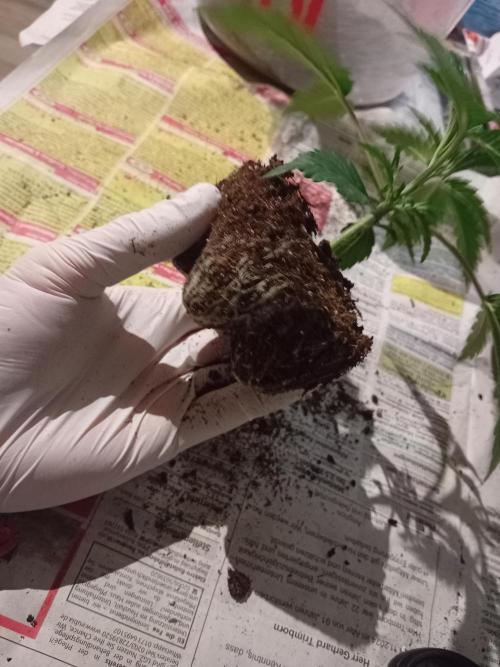
DIY95 Week 3: Finally, the time has come.. the little ones have felt cramped in their seedling pots for way too long. Now it's time for the long-awaited move to the 3L pot to finally grow properly :)
For the coming weeks, I thought it would be wise to adjust the soil mix ratio. They need nutrients for the upcoming time 😬
I added these in the form of worm humus.
Together with BioBizz Light Mix, perlite, and coconut fiber. Specifically, 70% soil, 18% perlite, 7% worm humus, and 5% coconut fiber.
This time, I also filled the planting holes with mycorrhizal spores and rhizobacteria before planting. I activated the bacteria again with a little honey water and shortly after, placed the plants in their new home. I was just incredibly excited to see how the roots of the plants were completely covered with hyphae 😁 I'm happy that they all became friends so quickly 😁😅 Hopefully, the symbiosis continues like this, then everything will be just fine 🙏
After I had properly watered the little ones with worm tea, it was time to rest in the tent 😇
The next day, the plants greeted me joyfully and stretched out.. I call that gratitude.
I'm just proud of my girls 😁 Especially of the little Choco, who has really caught up. I always believed in her, and she didn't disappoint me 😊
1 like
comments
Share
4
Week 4. Vegetation2y ago




18 hrs
Light Schedule
25 °C
Day Air Temp
Weak
Smell
400 PPM
TDS
40 %
Air Humidity
18 °C
Solution Temp
18 °C
Night Air Temp
3 liters
Pot Size
0.5 liters
Watering Volume
40 cm
Lamp Distance
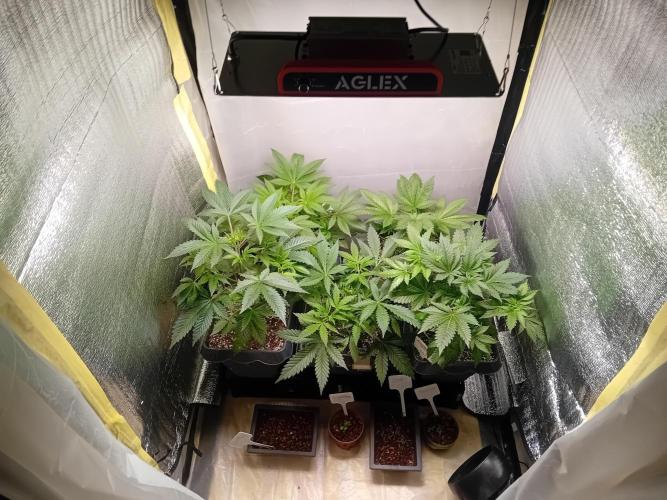
DIY95 Week 4: After the plants were able to establish themselves nicely and settle in, it was time for the next step. Ending the apical dominance to have more than just one main shoot. So far, so good, and I understood that part... but then I read about FIMing 😏 Less stress for the plant and even more side shoots than with topping... That sounds too good to be true 😅 so let's do it.
Honestly, no matter how and where I applied the scissors, it just didn't feel right. I kept thinking I was doing something wrong... pretty silly when you have no experience but would rather act like you’ve already gathered every experience in the growing field... 😐
After completing the cuts, I sealed the cut sites with a thin layer of honey and cinnamon, put them back in the tent, turned the light down a bit, watered the little ones once, and then it was time to rest again.
I was sure the plants would look a bit worse for wear the next day... But nope 😅 Once again, I looked more tense than any of the girls did at any point 😅😅
Everyone was doing well and just wanted one thing... to grow 😁
2 likes
comments
Share
Used techniques
FIMing
Technique
Topping
Technique
5
Week 5. Vegetation2y ago


18 hrs
Light Schedule
25 °C
Day Air Temp
Weak
Smell
450 PPM
TDS
40 %
Air Humidity
18 °C
Solution Temp
18 °C
Night Air Temp
3 liters
Pot Size
0.5 liters
Watering Volume
35 cm
Lamp Distance
DIY95 Week 5: Things are getting a bit bushy in my grow box .. At first, I think it's a really nice sight.. But considering that the flowering phase is still ahead and I was told that some plants can stretch up to 150% in size, I started to feel a bit uneasy 😵😕 I already had the feeling here that I might have left the (now not so little xD) girls in the veg stage a bit too long 😓.. At least based on the space I have available.
But it doesn't change anything, what's done is done. So now it's up to me to make smart decisions.. If only I knew what would be smart in this situation... that would be much more convenient 😅😓
Internally, the tension was rising and I decided to quickly put the plants into their final pots to avoid wasting any more time in veg. After all, they need to get used to the new pots undisturbed and digest the stress first.
It was a stressful time for me too. You know how it goes when life wants to mess with you again.
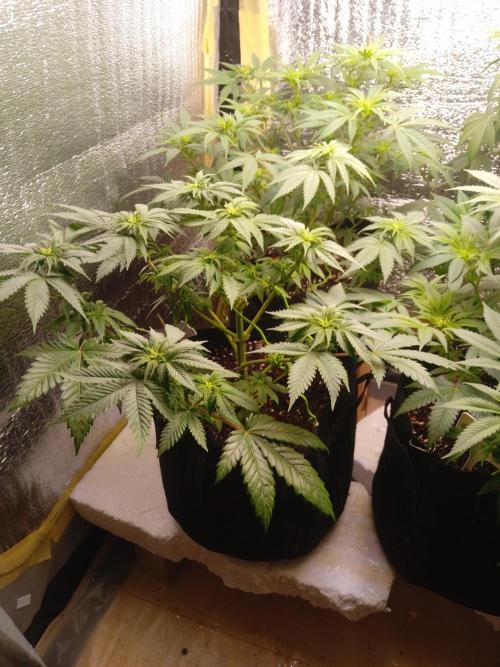
I didn't take any photos while repotting.. just like I didn't take any during defoliation and the LST, which I applied for the first time on the plants.
But you can still see the difference very well in the pictures. It looked okay at first, I thought^^
But I was also struggling with something else.. A Skywalker that just wouldn't stop growing and wants to reach for the sky..😐 ..Through LST, I tied this beast down multiple times and kept bending the main stem down, creating an S shape in the stem 😅..
I eventually gave up the fight and leveled the other ladies to the same height.
The FIMing worked on 3 out of 5 plants as I had hoped. Instead of 2 new shoots, there were directly 3 or even 4 😁 I felt like I had tricked the system 😎 4 shoots = Double yield 😎😋😍.. at least that's what I thought. We'll see how the tricked system responds to that. 😅
However, the pressure is building.. It needs to start flowering soon.
3 likes
comments
Share
Used techniques
LST
Technique
Defoliation
Technique
6
Week 6. Flowering2y ago


12 hrs
Light Schedule
24 °C
Day Air Temp
6.5
pH
Normal
Smell
550 PPM
TDS
40 %
Air Humidity
18 °C
Solution Temp
16 °C
Night Air Temp
11 liters
Pot Size
1 liters
Watering Volume
30 cm
Lamp Distance
Nutrients 2
Selfmade Tee
50 mll
Selfmade Blütedünger
100 mll
DIY95 Week 6: Introduction of the flowering phase by switching to 12/12. I’m so excited and proud of my ladies 😬😁
Now I can really imagine where the individual buds will grow.
I water about every 2 days with approximately 1 - 1.5L per plant. I add a mix of homemade worm/guano tea and a brew of bananas, kelp, and some other stuff to the water. However, it's diluted in a ratio of 1:20, 1:10.
I'm completely in the dark here and just hope that my plants are happy with it.
You wouldn’t believe the smell when one or another fermentation attempt of the materials didn’t go so well and spilled 😩😅😉
But all of this is an experiment. So, take notes, make adjustments, and learn from it 💪
1 like
comments
Share
Used techniques
LST
Technique
7
Week 7. Flowering2y ago




12 hrs
Light Schedule
23 °C
Day Air Temp
6.5
pH
Normal
Smell
550 PPM
TDS
50 %
Air Humidity
18 °C
Solution Temp
16 °C
Night Air Temp
11 liters
Pot Size
1 liters
Watering Volume
30 cm
Lamp Distance
Nutrients 2
Selfmade Tee
50 mll
Selfmade Blütetee
100 mll
DIY95 Week 7: The second week of the flowering phase, I went after the leaf mass first so the buds could get some light 😅
At first, I thought I might have taken off a bit too much. But in hindsight, I could have defoliated the lower part of the plants much more radically. I was a bit hesitant 😅 Otherwise, I continued to try to keep the big Skywalker at least somewhat under control.. But since she is almost twice the size of her sisters, I'm already planning a second grow box. In this one, she can go wild all by herself when the time comes.. but she still has to be a little patient.
1 like
comments
Share
Used techniques
LST
Technique
Defoliation
Technique
8
Week 8. Flowering2y ago



12 hrs
Light Schedule
23 °C
Day Air Temp
6.5
pH
Normal
Smell
550 PPM
TDS
50 %
Air Humidity
18 °C
Solution Temp
16 °C
Night Air Temp
11 liters
Pot Size
1 liters
Watering Volume
30 cm
Lamp Distance
Nutrients 2
Selfmade Tee
50 mll
Selfmade Blütedünger
100 mll
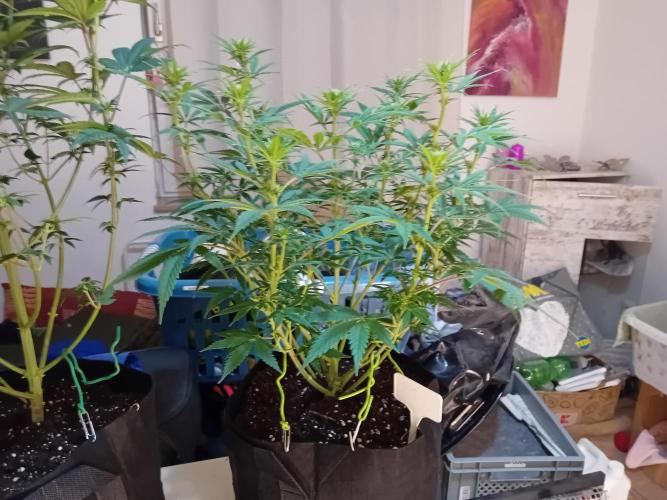
DIY95 Week 8: In the third week of the flowering phase, I was actually more busy building the second grow box than with the plants themselves.. 😅
Because as the size difference in direct comparison and the hardcore LST version in the tent showed.. it's time for them to unfold.
1 like
comments
Share
Used techniques
LST
Technique
9
Week 9. Flowering2y ago




12 hrs
Light Schedule
23 °C
Day Air Temp
6.5
pH
Normal
Smell
600 PPM
TDS
50 %
Air Humidity
18 °C
Solution Temp
16 °C
Night Air Temp
11 liters
Pot Size
1 liters
Watering Volume
30 cm
Lamp Distance
Nutrients 2
Selfmade Tee
50 mll
Selfmade Blütedünger
100 mll
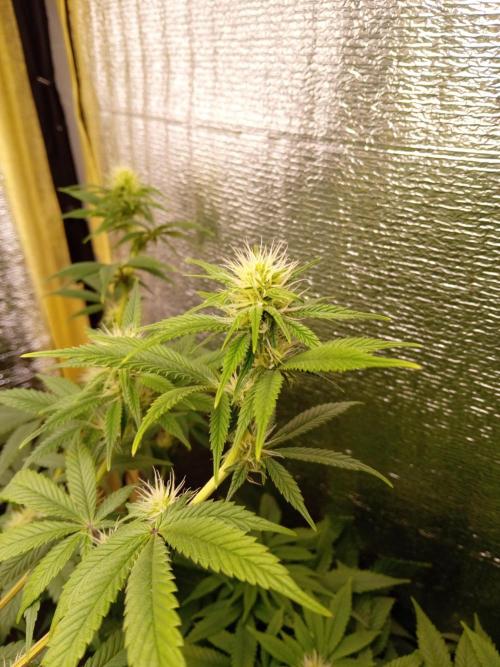
DIY95 Week 9:
It's the same feeling every day when I open the tent.. Pride and joy when I see the ladies like this 😁 The big plant does stress me out a bit when I see her overshadowing the others.. but that will soon come to an end 😅
So nice to see how the buds are developing 😁
2 likes
comments
Share
10
Week 10. Flowering2y ago






12 hrs
Light Schedule
23 °C
Day Air Temp
6.5
pH
Normal
Smell
650 PPM
TDS
50 %
Air Humidity
18 °C
Solution Temp
16 °C
Night Air Temp
11 liters
Pot Size
1 liters
Watering Volume
30 cm
Lamp Distance
Nutrients 3
Selfmade Tee
50 mll
Selfmade Blütedünger
100 mll
Bio-Grow
4 mll
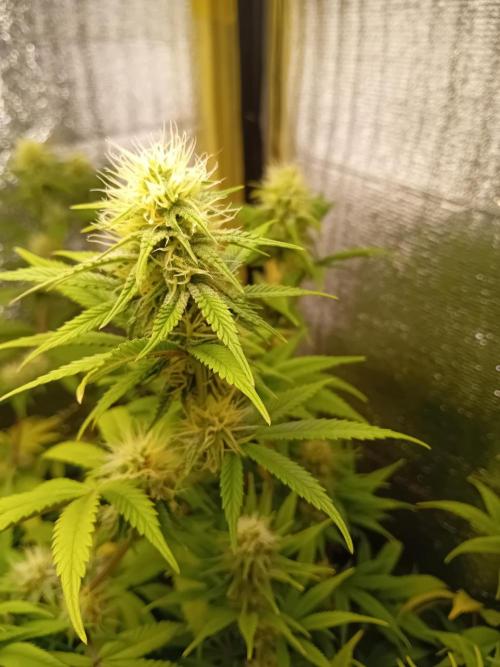
DIY95 Flowering week 6: The scent in my apartment changed and intensified from day to day 😁 It smelled like I would soon finally be rewarded for my work, effort, worries, and fears with beautifully fragrant buds 😊😁 And to create the right conditions for that, it's finally time for the second grow box to be finished. But you know how it is... something is missing, and that doesn't fit... and on and on 😒😅
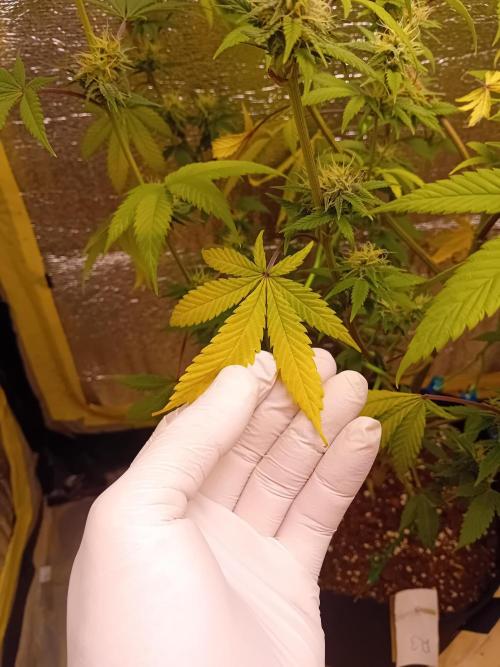
But I also had a second issue that I was racking my brain over every free minute and researching. The yellowing of the leaves led me down every possible avenue, depending on whom I asked 😅 5 people, 5 different answers... For my inexperienced part, I first suspected a pH irregularity in the substrate leading to nutrient blockages... My pH test kit arrived, and I took some samples. I tested the tap water, the substrate, and the drain. Everything was exactly at 7.0. So far, so good, I thought. Although at the upper limit, everything was still fine. Then, based on what I had read and heard, the only thing left to consider was a nitrogen deficiency.
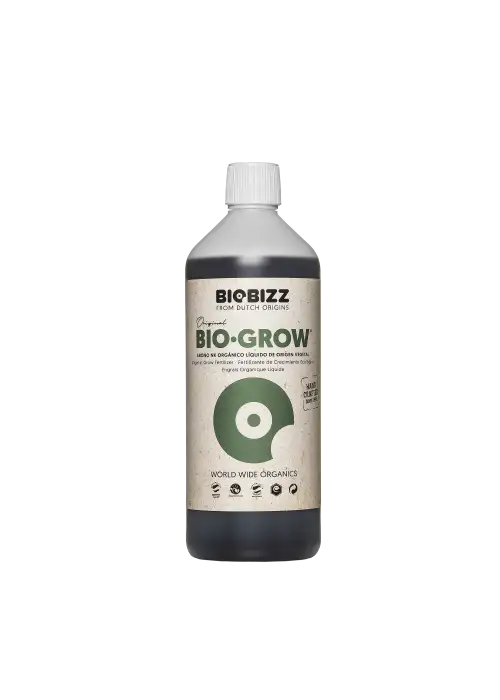
So, to not waste any more time, I organized some BioBizz Grow... and from now on, 4ml/L with my homemade organic fertilizer. It feels wrong to add nitrogen in the advanced flowering stage since I was actually trying to reduce it. But if the deficiency remained untreated, it could get tight with the remaining foliage by harvest time 😕 The plants were most affected by the deficiency in descending order of size. The "smallest" one had just started to show it.
Day 85: The excuses are over, all problems provisionally sorted out, and I've already proactively adjusted the electricity bill upwards 👍 Now, one last time, tie the plant to maximize its width so it can fully utilize its new 80x80cm comfort paradise 😁
It's time to move 😁 She didn't have much to pack, so it finally went over quickly 😅 150W of sunshine and 0.66m² just for her alone 😎 Finally space. Also for my other girls, who no longer have to stand half in the shadow.
I think anyone who deserves their own tent also deserves a name. So, I honored my deceased cat Skuffy once again and named the plant after her... Flora Skuffya 🙏😌
3 likes
2 comments
Share
Used techniques
LST
Technique
11
Week 11. Flowering2y ago







12 hrs
Light Schedule
23 °C
Day Air Temp
6.5
pH
Normal
Smell
700 PPM
TDS
50 %
Air Humidity
18 °C
Solution Temp
16 °C
Night Air Temp
11 liters
Pot Size
1 liters
Watering Volume
30 cm
Lamp Distance
Nutrients 3
Selfmade Tee
75 mll
Selfmade Blütedünger
100 mll
Bio-Grow
4 mll
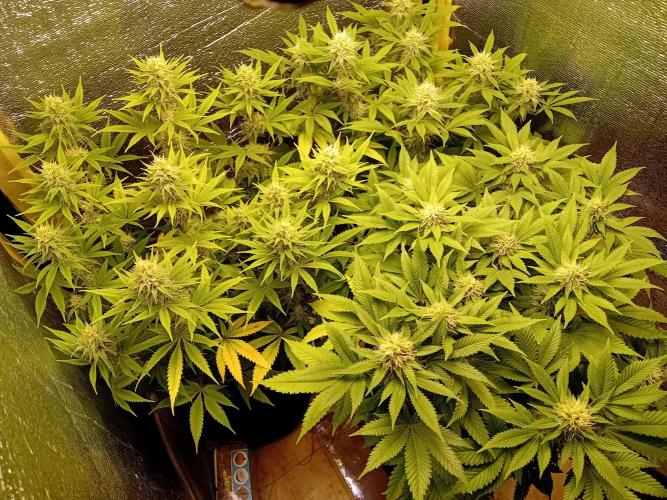
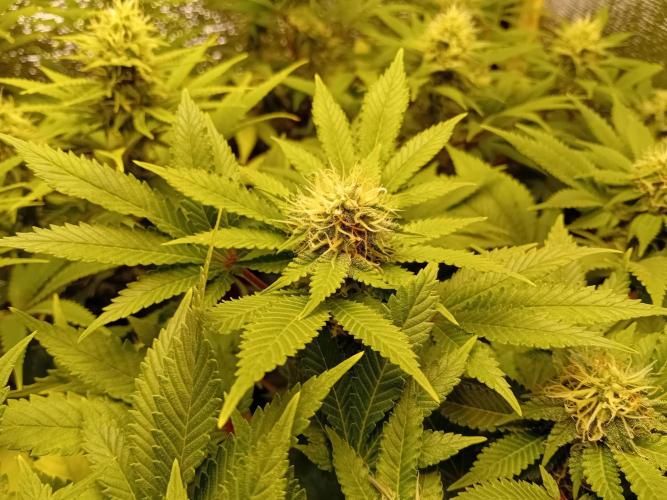
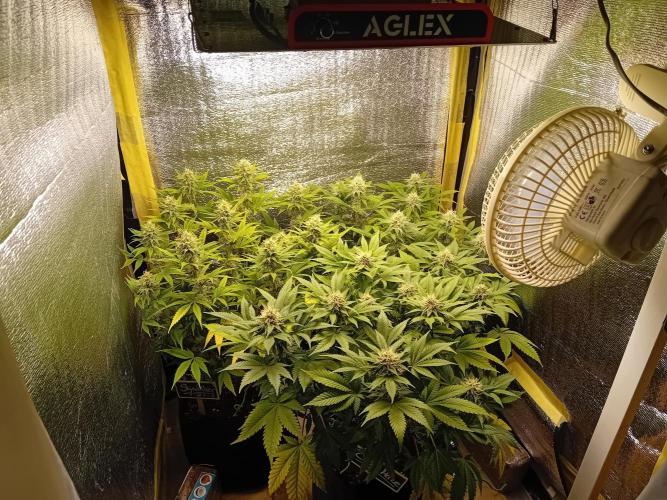
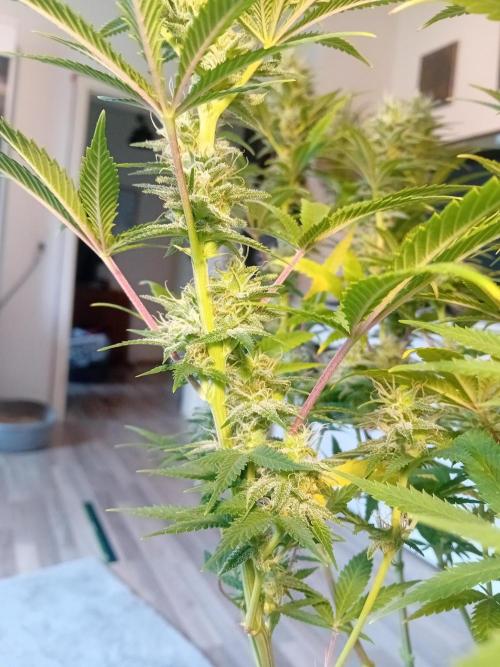
DIY95 Flowering week 6: The week started okay. The yellowing hasn't gotten significantly worse.. 🙏 So hopefully it will last until harvest 😁
.... However, I felt like it wasn't really progressing.. The buds didn't get much thicker, and 3 out of 4 plants hardly stretched at all.. So I asked someone who knows what they're talking about.
The next day, my colleague came over to check out the grow for the first time. He looked at the plants a bit more closely... and said that one spot looks suspicious...
After further inspection, it was clear. There are 2 visible pollen sacs hidden on the back left plant...
He calmed me down and said not to freak out.. we'll take a look at it in the morning light and carefully remove the sacs..
The problem with staying calm is that... it's not really my thing when I suddenly see all my hard work in jeopardy... 😓😐😶
The next day, it turned out my panic was not unfounded... long story short, I unfortunately messed it up despite all my efforts 😓😓😓
Everything is full of seeds.. every plant was pollinated by the little Skywalker. From the bottom to the head buds...
But hey, stay cool, it happens, you learn from it and that's that... That's what you want to hear in moments like this 😠
The conclusion is... That's just how it is. It can happen. You can't know everything from the start. You can't do everything perfectly without having practiced or made mistakes first... It's just too much that you should just know.
I'm a perfectionist through and through.. But this time it was faaaar from perfect 😩
All the time, nerves, effort, anticipation, and especially the money... all gone for now..
But I've learned a lot... Hopefully, next time I can apply more of it correctly 🙏
For me, this grow is to be considered emotional and economically a failure. 😴
All plants will now be placed together back in the first grow box under 200W to hopefully get through their last weeks quickly.. so they can disappear from my sight 😕
The new seeds have already been planted and hopefully will bring me a bit more luck! 🙏
Thank you for reading. I hope everything is going great for you all 😉🙏
I'll check in again for the "harvest"... Ciao Ciao 👋
1 like
2 comments
Share
12
Week 12. Flowering1y ago




12 hrs
Light Schedule
20 °C
Day Air Temp
6.5
pH
Strong
Smell
700 PPM
TDS
50 %
Air Humidity
18 °C
Solution Temp
17 °C
Night Air Temp
11 liters
Pot Size
1 liters
Watering Volume
30 cm
Lamp Distance
Nutrients 1
Selfmade Vorbereitungstrunk
200 mll
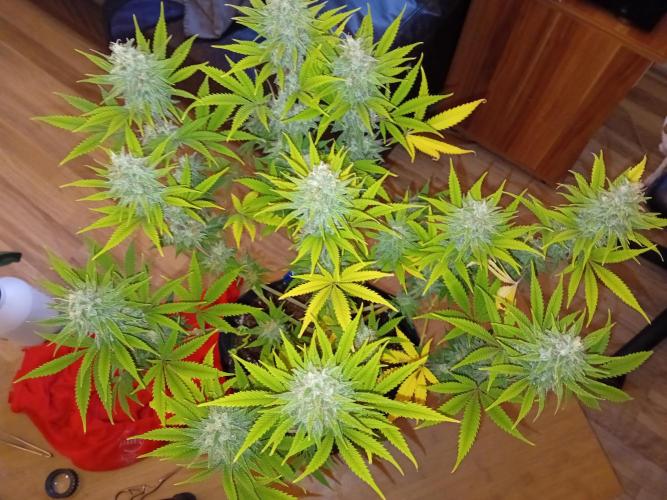
DIY95 Flowering Week 7: After processing most of my frustration over the failure, I decided to rethink the plan and separated the hermaphrodite culprit into the empty side tent to send it on its final journey. As you can see in the pictures, I checked the plants again on day 100 for pollen sacs. They didn't take long to show up, and there were actually more than I thought. But when I looked at the terpenes and noticed that most of them are already milky and the plant looks relatively untouched compared to the ChocolateHaze, I asked myself the following question... Is it not more sensible under these circumstances to take the plant as it is and minimize the risk of breeding even more seeds?
Of course, I would prefer to let it flower for another 2 weeks, but who knows how much pollen could come in 2 weeks... I don't want to find out 😒😅
So I prepared a final potion that should "calm" the plant a bit for the coming days.
- To be Continued -
4 likes
1 comment
Share
13
Week 13. Harvest1y ago
Happy Harvest Day!


9/10
Rated
Stark different growth behaviors and not particularly beginner-friendly in terms of stress sensitivity
The smell has been really pleasant and not too intense throughout the entire flowering phase.
In terms of taste and resin profile, absolutely dreamy
Show more
Original
Spent 86 days
Ger Veg Flo Har
162.5 g
Bud wet weight per plant
4
Plants
0.66 m²
Grow Room size
Normal
Difficulty
Day air temperature
Air humidity
PPM
PH
Light schedule
Solution temperature
Night air temperature
Pot size
Lamp distance
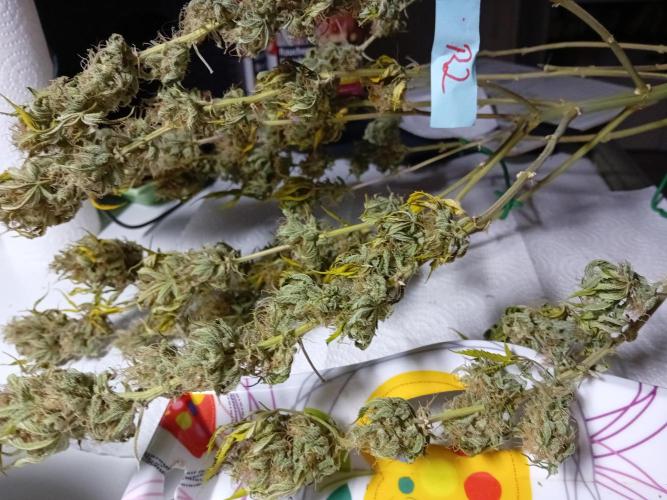


DIY95 First grow finally completed 😁
After the ladies spent another 8 days upside down in the dark at 50% humidity and pretty constant 20°C to dry, it was time for trimming.
The smell is absolutely incredible 😁 Slightly earthy, lemony but also creamy.. absolutely genius 😁
Stored dark and dry in jars with Boveda 62%, it's now maturing 😏
The taste is already unique and despite the incredible amount of seeds that some buds carry... my initial love for this educational grow has returned 😍😁
Now it's time to decontaminate the tents.. and soon I'll report on the ladies who are already waiting for their big debut 😉
Cross your fingers for me that next time there won't be any unwanted pollination or spontaneous gender change wishes from the ladies 😅🙏
Thank you all for your attention and see you soon, friends of the sun 😉😎
2 likes
1 comment
Share




2 comments
Sort by
popularity
popularity
newest
oldest

James  commented2y ago
Looking delicious buddy! Keep up the good work 🌱
likes 2

DIY95 commented2y ago
@James, Thx ^^
likes

the end.
Enjoying this diary? Follow for more updates!

Prefer the old Diary view?
Go back to the old Diary view