
LIVING SOIL | Mimosa Cake + Gorilla Z


Tent
Trafika Grow Tent 60x60x160
Trafika

Box
-/-
-/-

Fan
P12 Pro
Arctic

Filt
-/-
-/-

Cond
-/-
-/-

Contr
Timer
Bauhaus

CO2
-/-
-/-

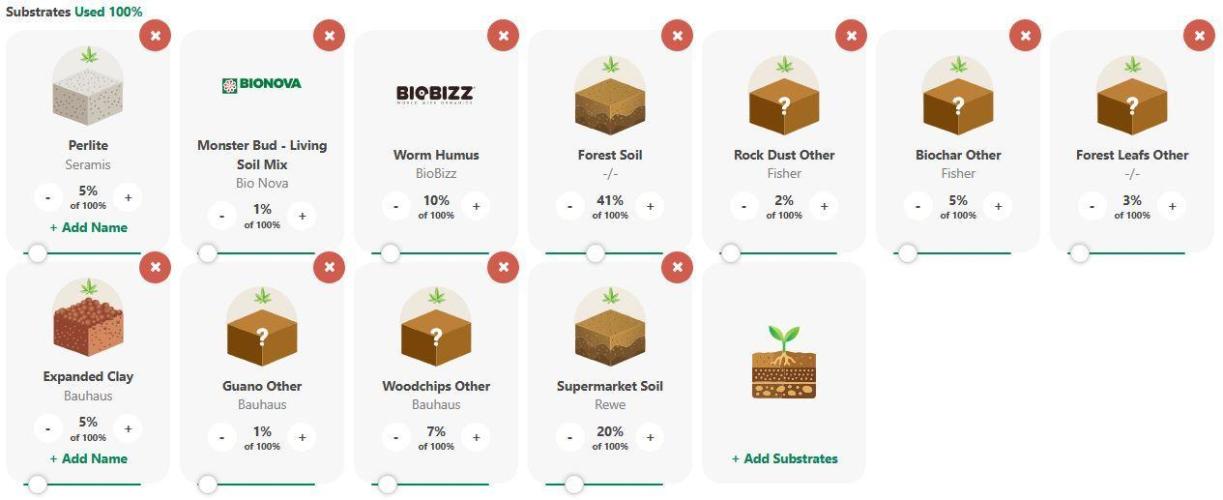
Perlite
Seramis

Monster Bud - Living Soil Mix

Forest Soil
-/-

Rock Dust Other
Fisher
Biochar Other
Fisher
Forest Leafs Other
-/-

Expanded Clay
Bauhaus
Guano Other
Bauhaus
Woodchips Other
Bauhaus
Supermarket Soil
Rewe
Indoor
Room Type
56 l
Pot Size
0.15 l
Watering
Start at Harvest
G
Germination5mo ago
poloq _Germination
I germinate with the classic 'seeds in a glass of water'-method for 12 - 24 h and put them right into soil directly after.
Water contact
Mimosa Cake = 01.12.25
Gorilla Z = 04.12.25
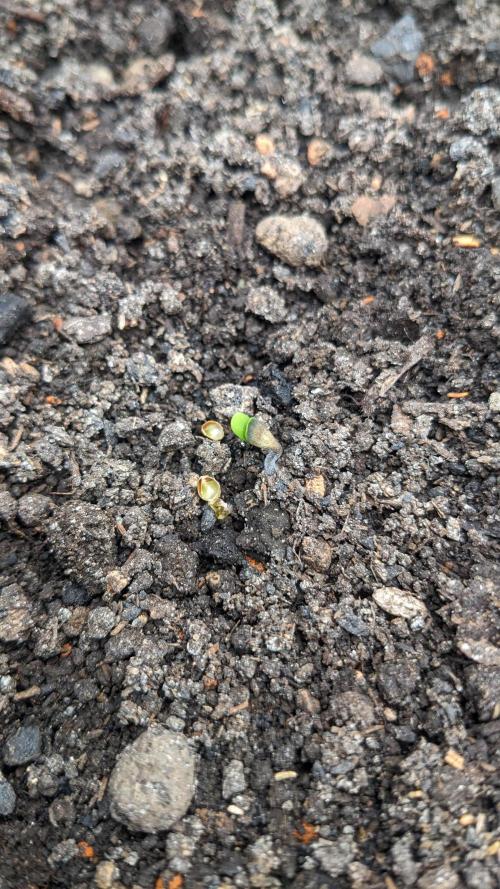
Broke through soil
Mimosa Cake = 04.12.25
Gorilla Z = 07.12.25
The documentation starts at 04.12.25 (so you have to add about 3 days to the Mimosa Cake to get the real age including the germination).
*Sadly didn't take photos in the germination process.
_______________ About this grow _______________
_Introduction
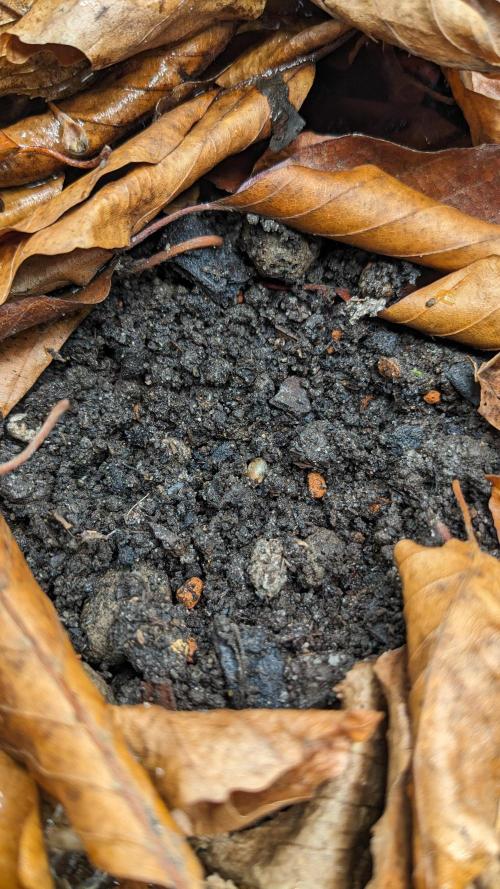
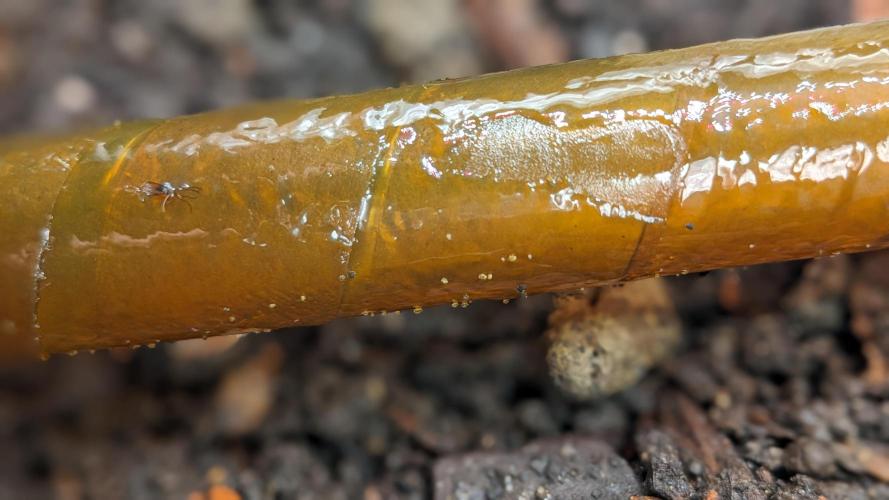
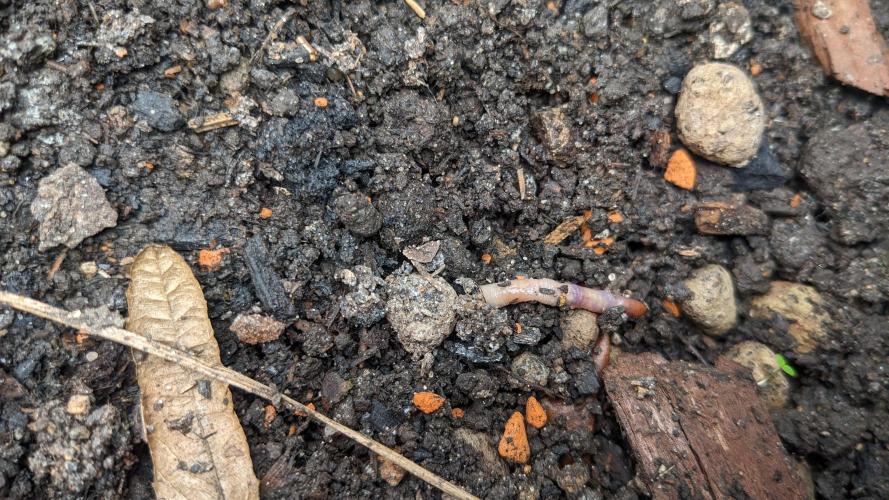
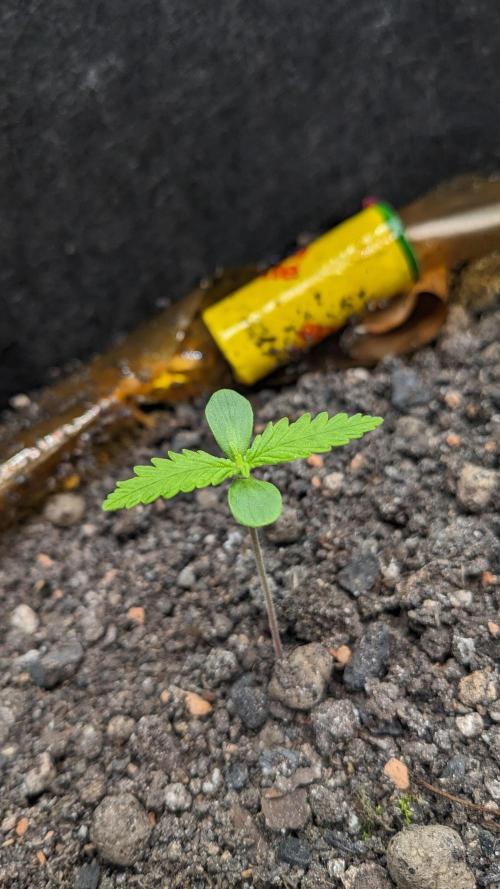
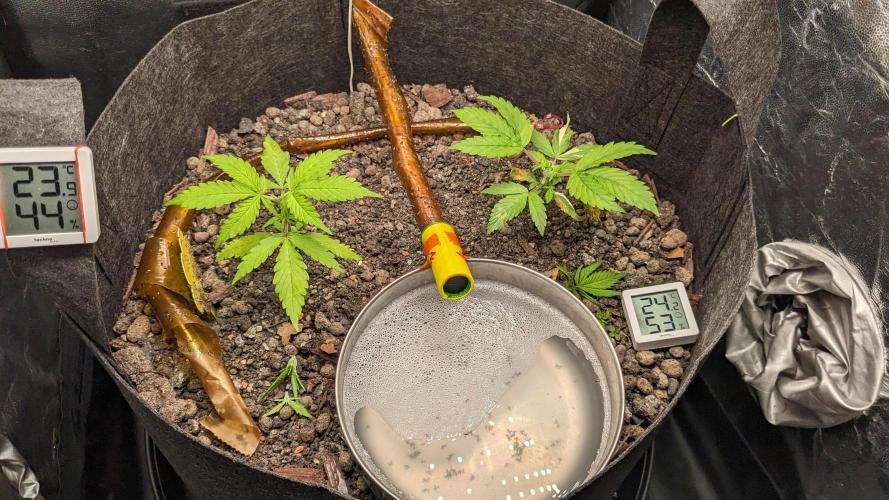
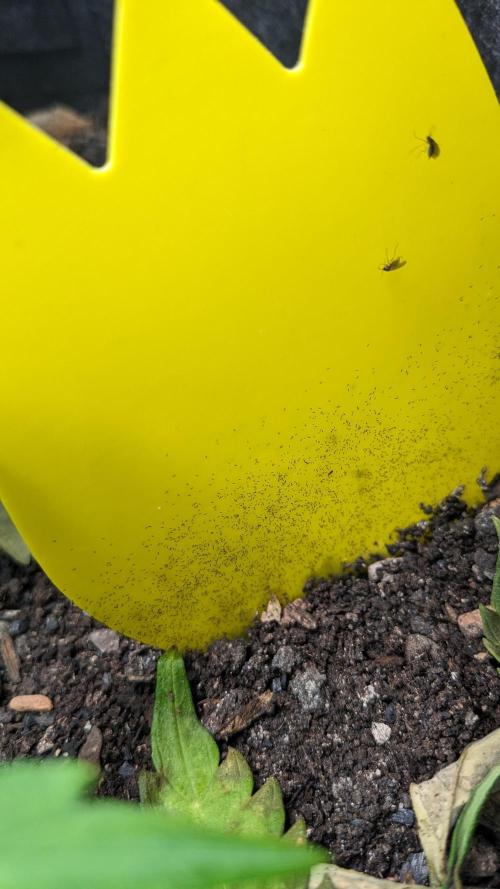
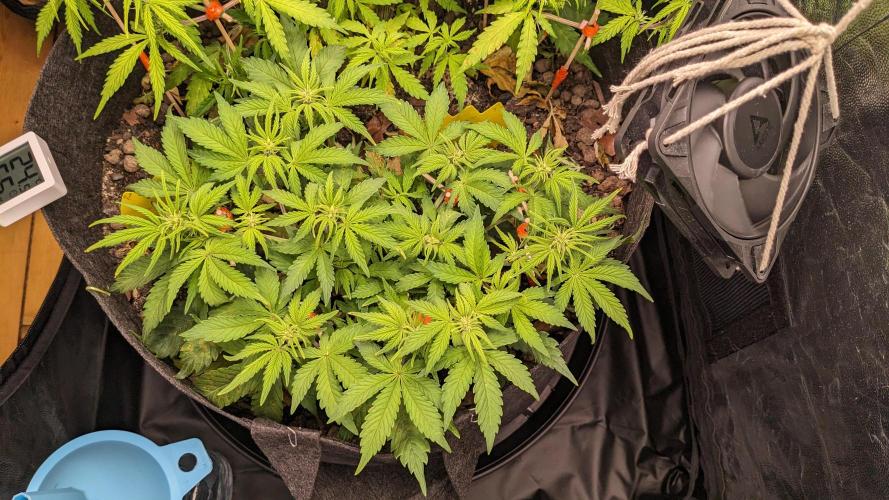
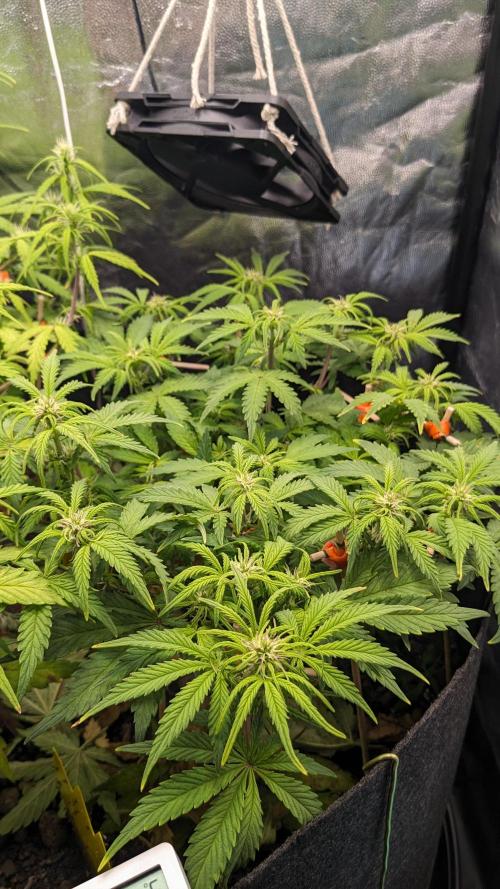
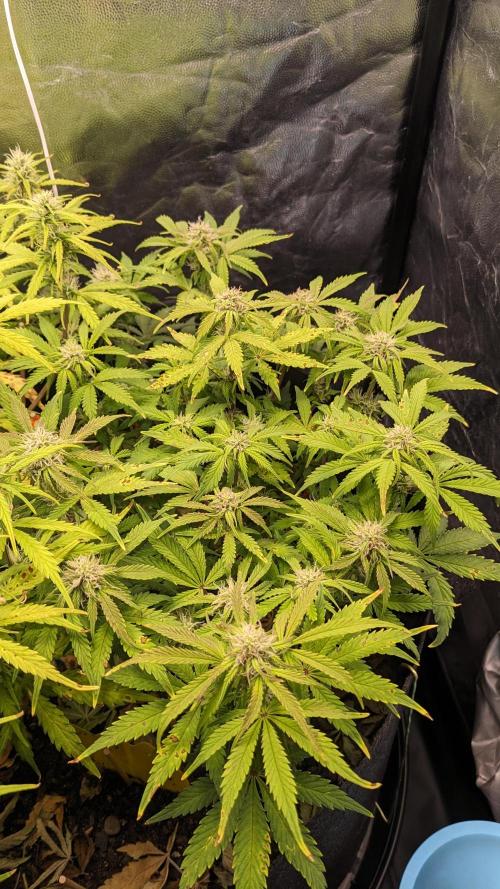
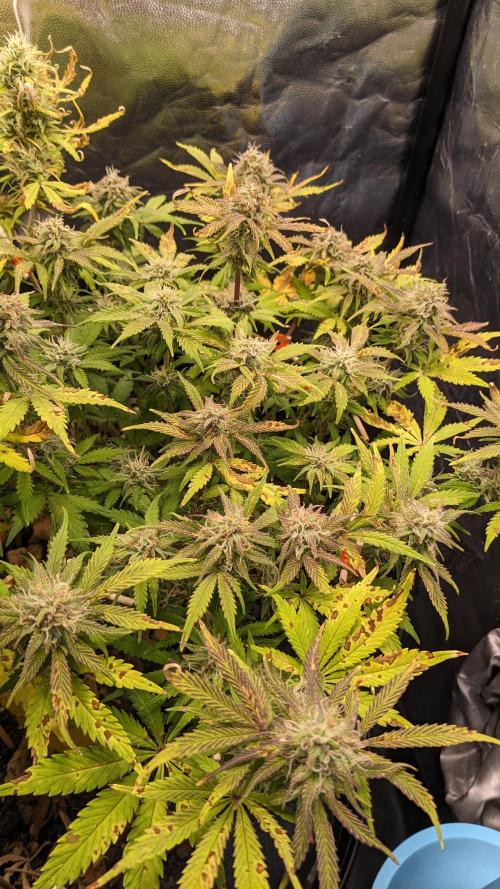
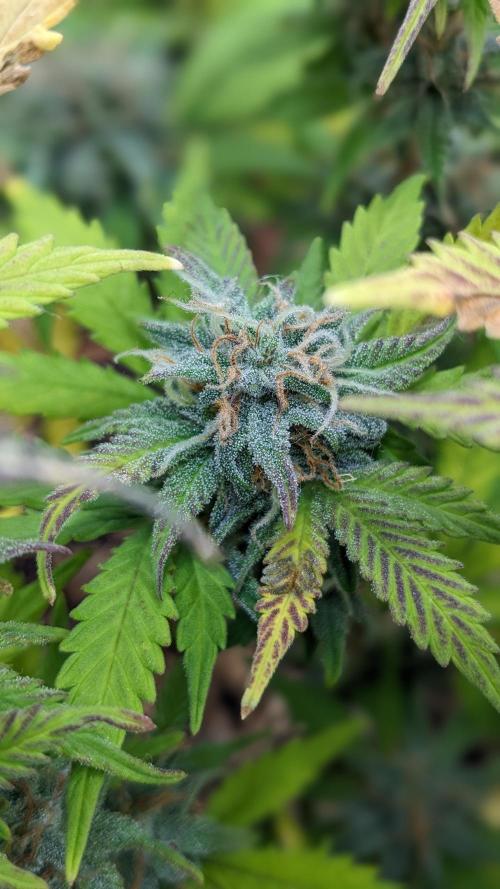
I took a lot of precautions because my last run got eaten by slugs (probably because of the top dressing (leaves) you can see in the very 1st image).
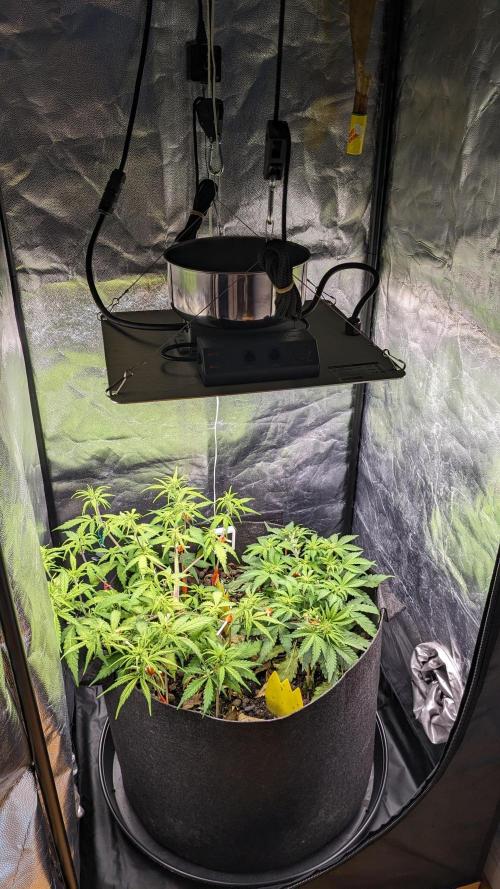
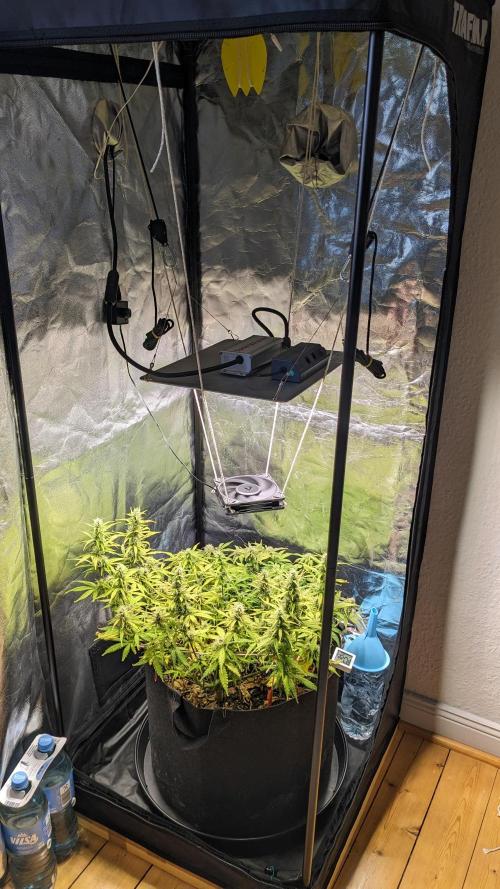
_Setup
This is a low-noise, low-budget grow (331 € acquisitional cost (including fails and abundance of substrate for the next runs), 17 € for electricity per month, max. 28 dB). I don't use an air filter and try to minimize every use of electricity (the system can't draw more than 110 W).
I used the nutrients tab to show the light intensity (ml/l) (I will rarely fertilize because of the living soil).
The PPFD measurements are performed using the PHOTONE app. I calibrated it by using the PPFD data sheets for my lamp as reference + experimenting with the app settings until I obtained values that matched those specified by the manufacturer (+/- 10%).
The lamp distance is always for the closest branch - the height differences can be seen within the text for the '_Plants'.
_Living Soil
The goal is to learn how living soil (and nature really) works - healthy plants are just a side effect. To this end, I am intensively engaged with the biological functioning of plants (which is also an important part of my profession as a product designer focused on biomimicry).
_'Optimal' values (I try to reach)
Soil temp.: 24 °C
Air temp. : 26 °C
RH veg.: 95 - 65 % (lowering while time goes on)
RH flower: 40 - 55 %
Temp. Gerneal min. 16 - 18 °C, max. 28 - 30 °C
Soil: 20 - 80% saturated
Exhaust air: ~ 1 tent volume per minute
Circulating air: as high but 'chaotic' as possible
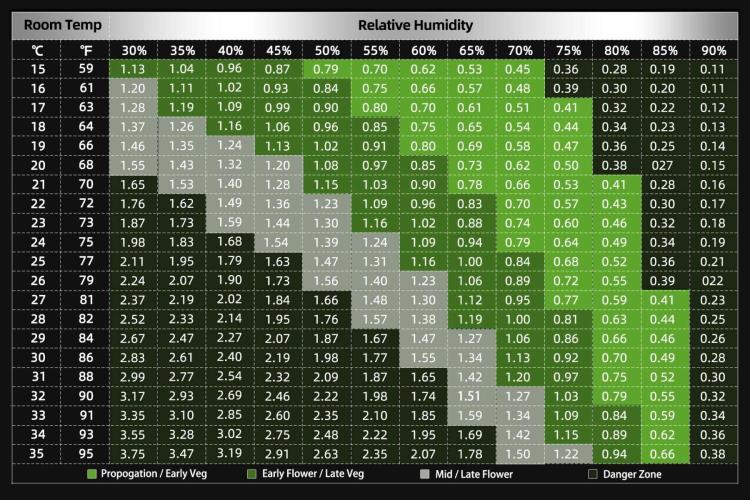
VPD Vege. = 0.7
VPD Preflower = 1
VPD Flower = 1.3
* I'm just starting to get a feel for VPD, but I think these values are a good starting point (they also match my general knowledge and experience with plants).
_Philosophy
I take what I learned, compare it with knowledge from a wide range of disciplines, and try to develop a system that is as durable and as efficient as possible. I also wanted said system to be as modular and simplistic as possible to actually learn and feel what every components does - not just have a controller that I don't understand and can't manipulated to the point I'd like. So the leeway I have with these components can be used to influence other values.
In the end: Yes, I could use higher PPFD + increase the substrate temperature to 26°C, but that would be inefficient (in my setup) because none of the values are in a critical range right now and stay like that naturally because of the ambient environment (just so that you understand my reasoning for this experiment).
_Further Info
It's best to look at this diary on a computer (mobile version seems bugged/ does not show everything).
In most cases, I took the pictures with a smartphone. This is why the colour values, especially the white balance, sometimes vary significantly.
Please disregard the hygro-thermometer, which can be seen in some of the pictures. The values shown here appear to fluctuate greatly, but this is because I do not always take the pictures immediately after opening the tent.
This documentation is pretty much freestyle (didn't make a plan what exactly i wanted to observe et cetera), so please excuse any inconsitencies (e.g. in the way i wrote everything down) or logical gaps.
_______________ Lessons learned for the next run _______________
_Pests
Act faster and more aggressively when dealing with pests. (I was too hesitant and ended up prolonging the process - which wouldn't be a big problem with photoperiod plants, but is with autos. Also: Always keep the system in balance (dont fight Sciaridae e.g. with draught, cause it will create new stress.)
Nematodes (+ sticky fly traps) worked incredibly well to battle the Sciaridae - quartz sand on the other hand is a lot of work and didn't seem work very wellin my setup.
_Light
Provide more light directly. (I had the theory that the plants' metabolism could develop more naturally if the increase in light intensity was simulated as it occurs in nature (iterative increase until summer, then decrease until winter)). I still support this theory, but in a different spectrum: e.g., directly 500 PPFD propagation - 800 veg. - 1000 flower - 800 late flower. However, since my lamp can only reach a maximum of approx. 800 PPFD, and I wanted to be cautious in this first run, I adjusted the scale accordingly.
_Environment + Setup
With that much substrate in such a small tent, the amount of moisture the soil has is the biggest and most consistent influence on the RH. The activation of an exhaust fan drops the temp by about 2 K and the RH by up to 20% (in my setup). The light can generate up to 1-4 K (20 to 100% intensity, depending on the distance and exhaust fan).
In particular, the recirculation fan must be more powerful to ensure the full transpirational rate of the plants.Plants + Training
With a 60x60x160 cm tent and 2 plants, utilizing just 4 or even only 2 offshoots instead of 6 will be more efficient (less complex but 'enough' to fill the space).
Next time, I would prefer to grow the seedlings in smaller pots so that I can arrange them directly according to my LST plans (x vs. +) when repotting them into the Living Soil bed. [To much bending can result in the stems cracking while growing and should be avoided.]
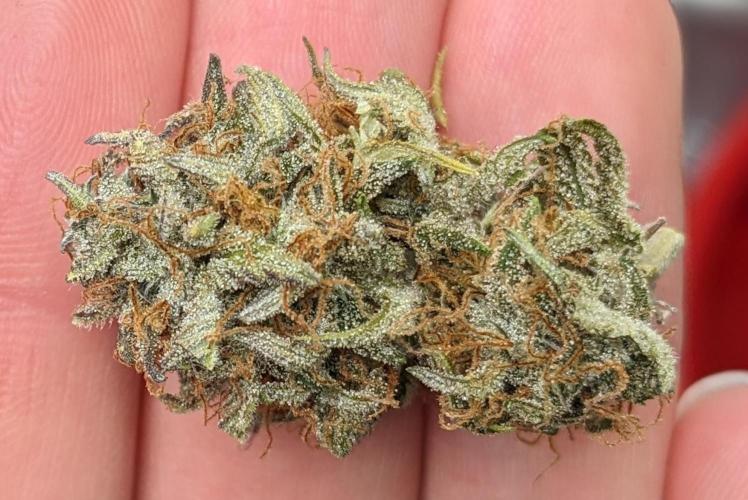
Do NOT use plastic containers. I literally have fine fibers all over the buds and have to hope that they fall off on their own.
_Living Soil
Even though it's a nice idea to take rich soil directly from nature, I definitely won't be doing that again. Even though it may work in the environment in which it developed, the chances are pretty slim that the same soil will work in different circumstances. In my case, the soil was most likely infested with sciaridae and contained too much clay/sand, making it too dense for cannabis plants (it was, after all, a 100-year-old orchard). The savings are definitely not worth the extra effort.
...but even if I would, I definitly need to put even more focus into creating an airy substrate (much more perlite + cocos et cetera).
_Genetics
All in all, auto-genetics certainly have their uses (fast, can be finished outdoors in summer, etc.), but they're not for me. I want to have full control, do what I want with the plant and not be stressed by an internal clock. I also like the living soil approach, which requires high genetic resilience. In fact, I actually wanted to test a single photoperiodic genetic, but decided on the 'new, modern, fancy’'varieties simply because they were there.
_Training
My general believe was, that it's best for the plants, if you defoliate continously, not aggressivly every other month/ twice per grow or so. At least for autoflowering genetics I can definitly say that this is not true, because instaed of stunting the growth for 1-2 days, its solwed down siginifcantly the whole time (as far as I can tell). [A friend of mine started with similar geneitcs and setup about 1 month before me so I got a good comparison.]
_Fertilization (natural)
Magnesium: Epsom salt
Calcium: calcium lactate (selfmade: 1 Eggshell - heat treatment (180°C for 20 min) - turn into powder - add table vinegar 5% (until everything's covered / about 50 ml) - wait 24h (until no bubbles) - 1ml for 1 l of water)
likes
comments
Share
Used method
Glass Of Water
Germination Method
1
Week 1. Vegetation7mo ago
3 cm
Height
18 hrs
Light Schedule
23 °C
Day Air Temp
No Smell
Smell
85 %
Air Humidity
19 °C
Substrate Temp
19 °C
Night Air Temp
55.99 l
Pot Size
35 cm
Lamp Distance
420 PPM
CO₂ Level
Nutrients 1
PPFD
220 mll
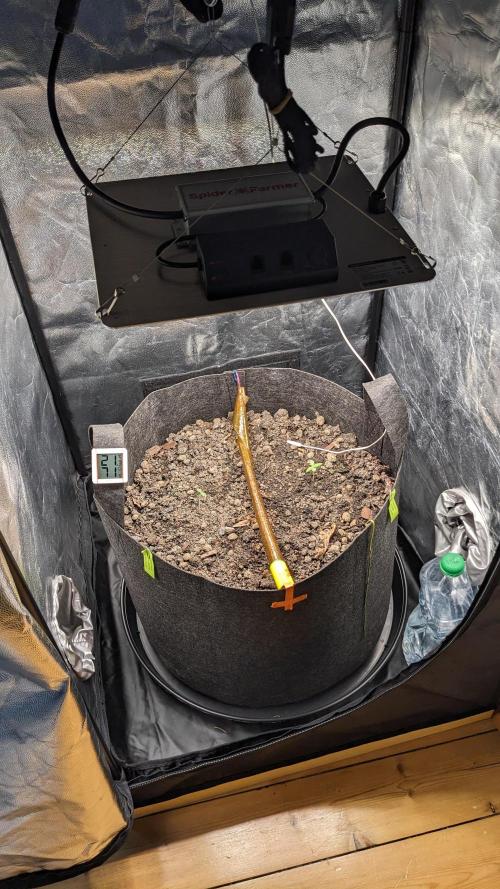
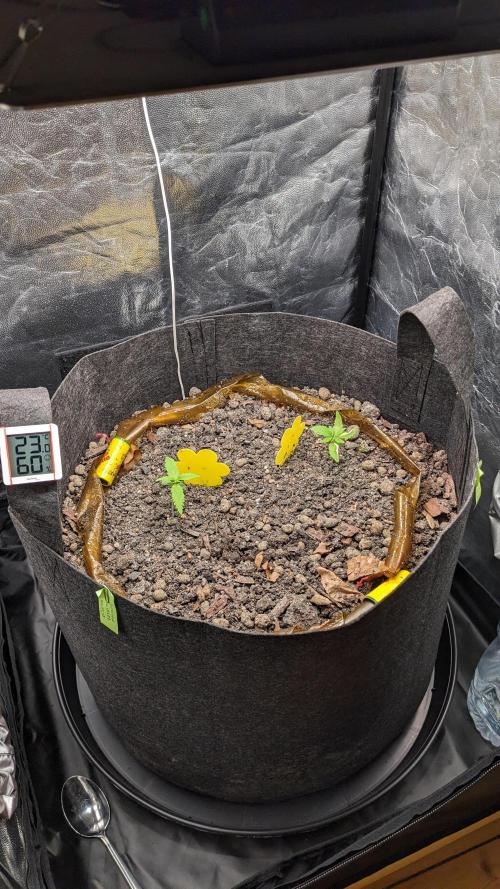
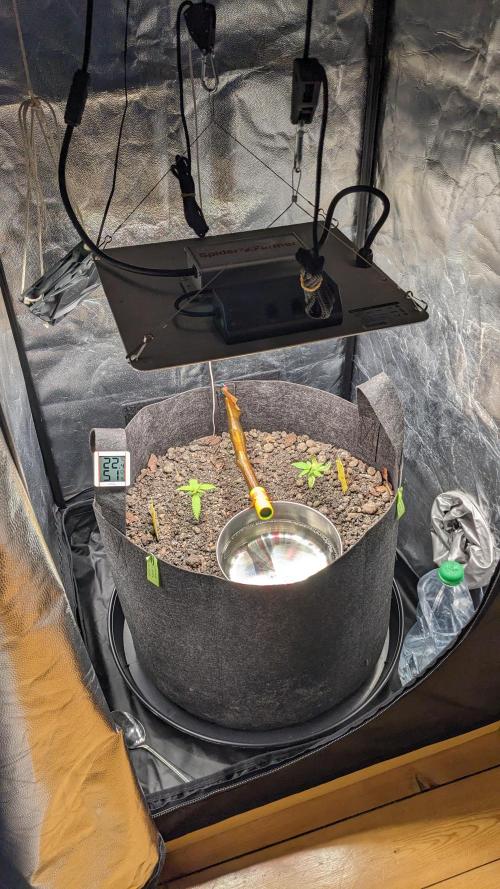
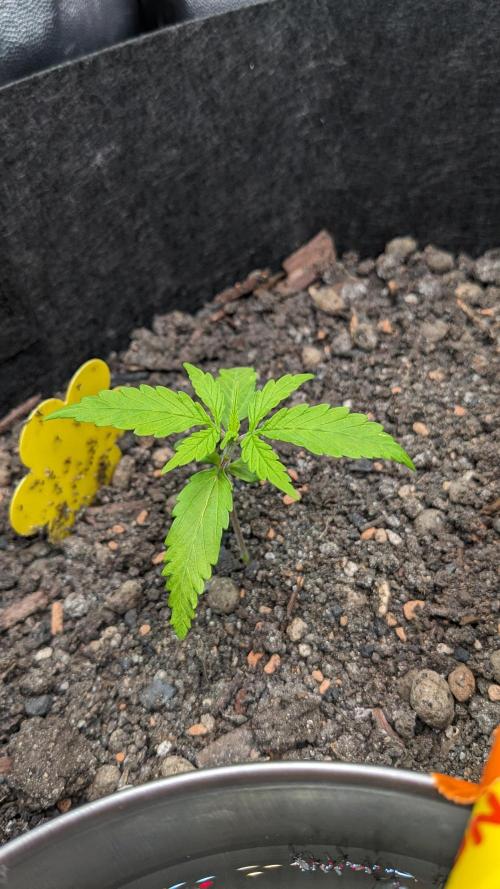
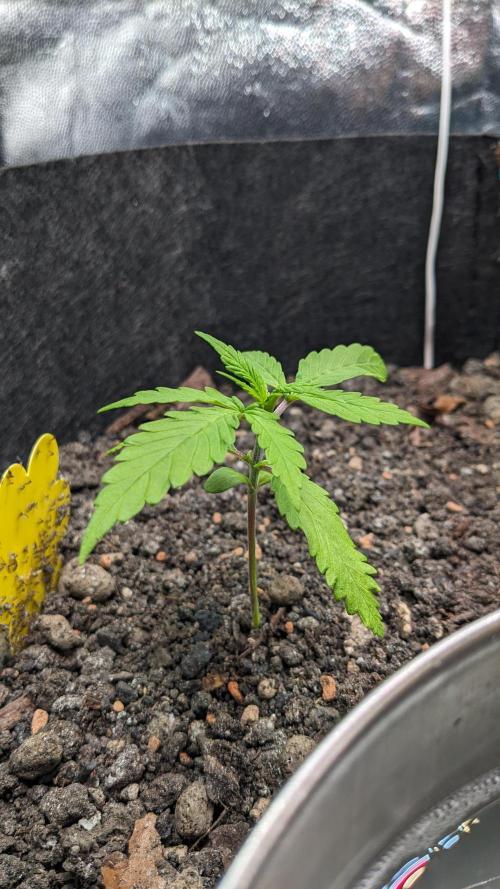
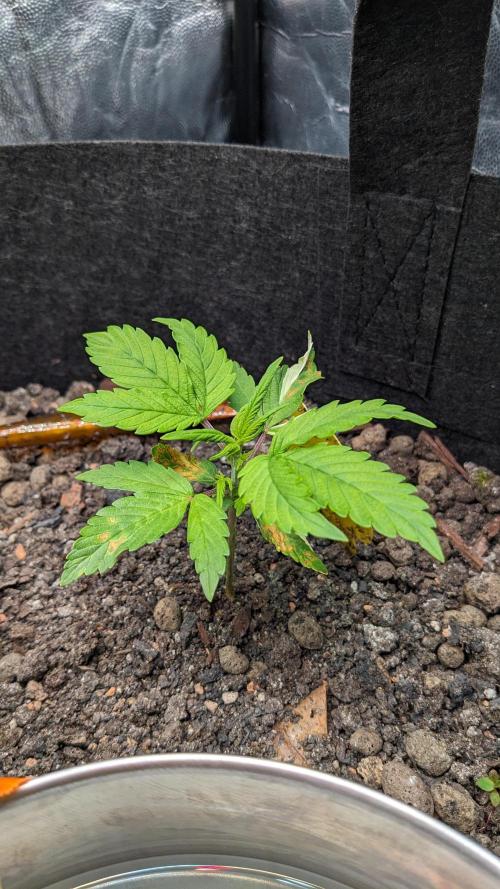
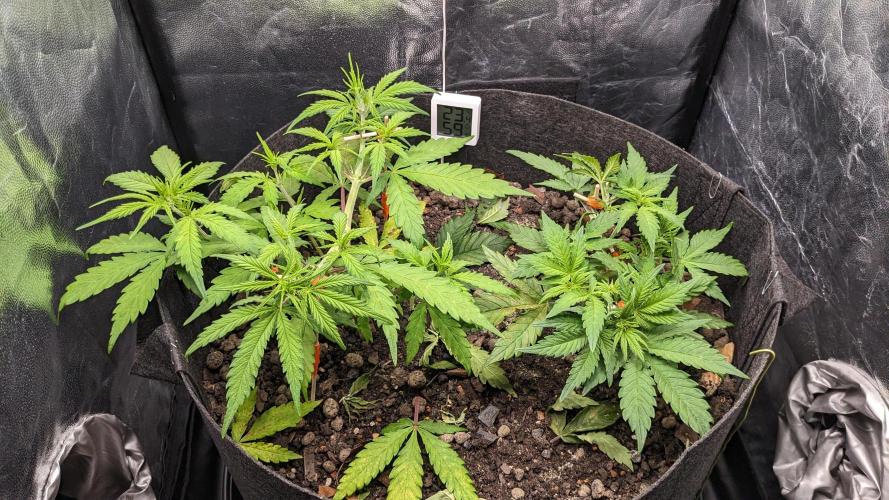
poloq _Environment + Living Soil
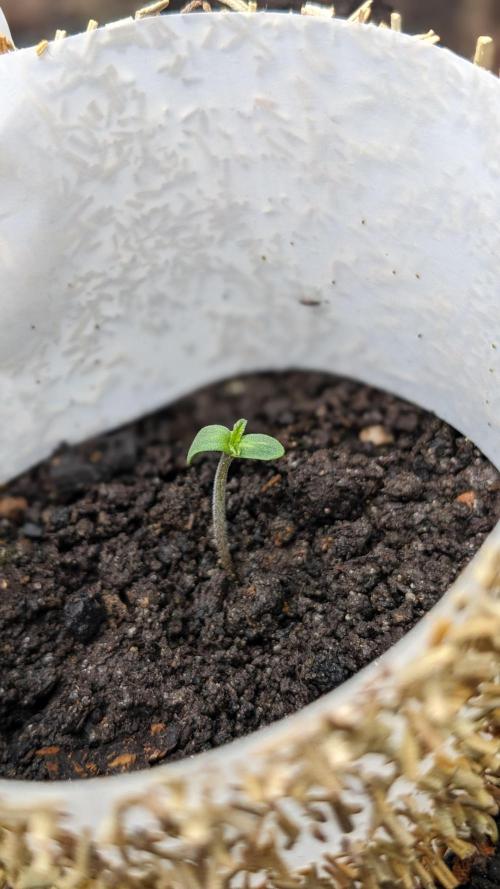
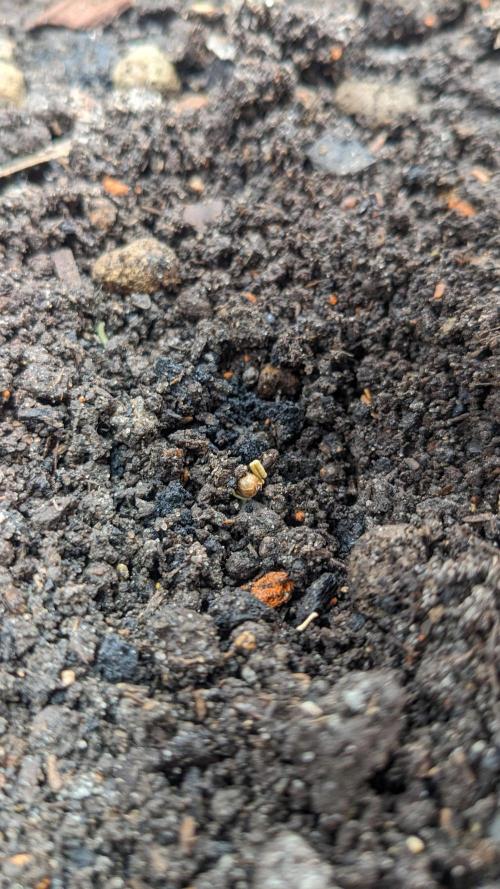
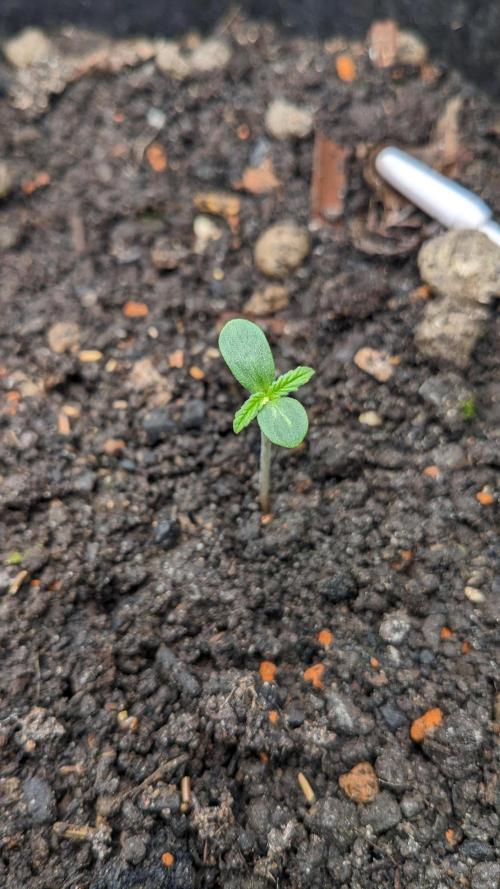
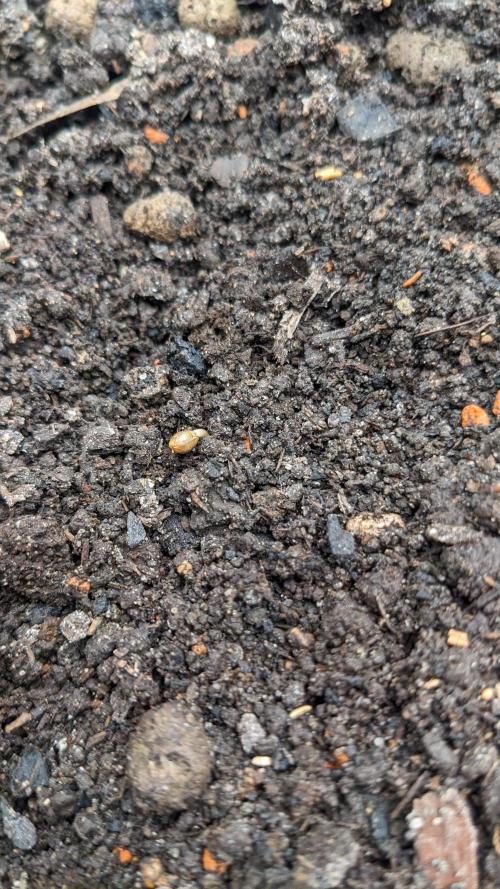
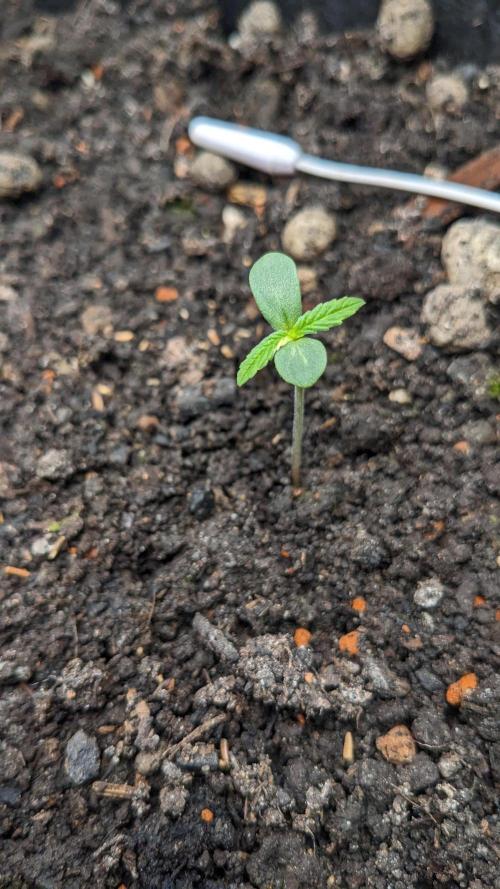
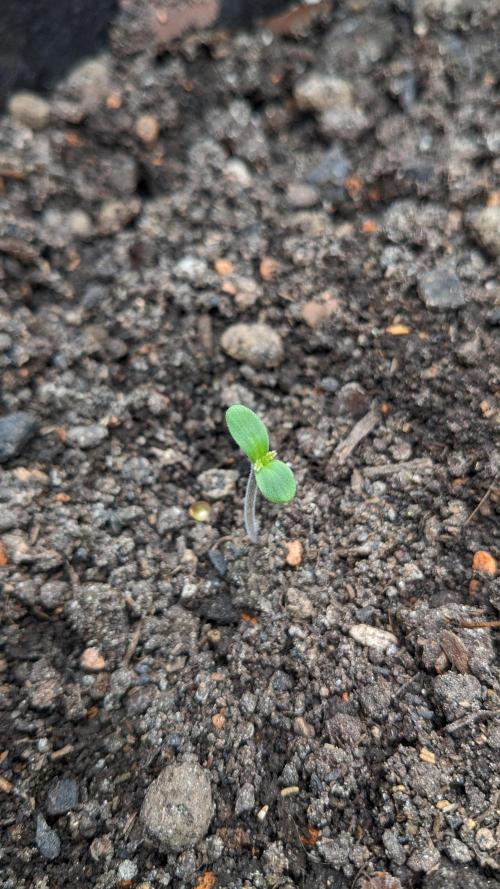
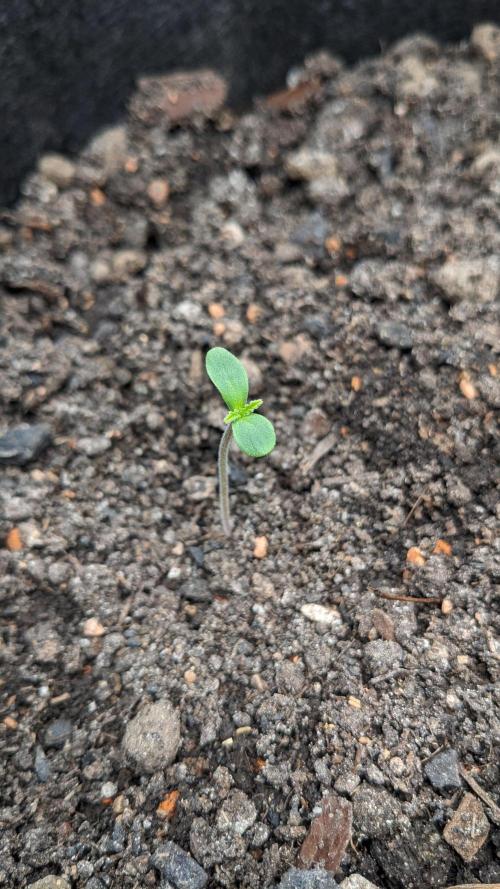
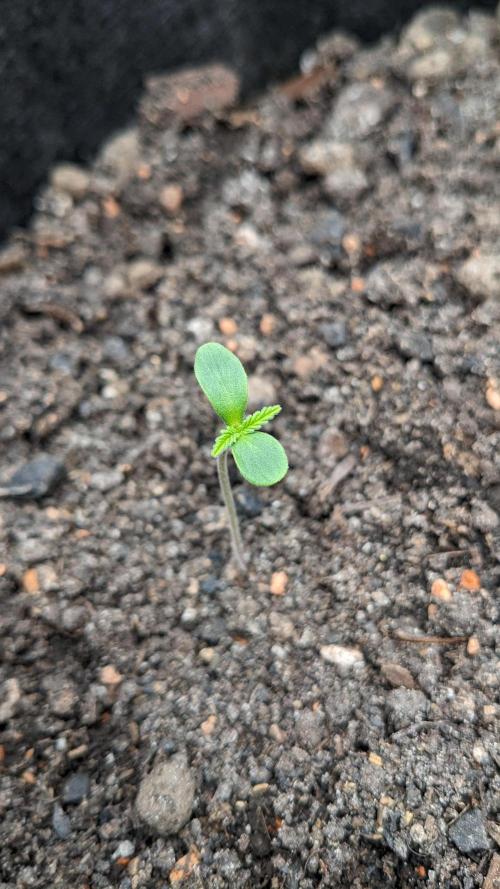
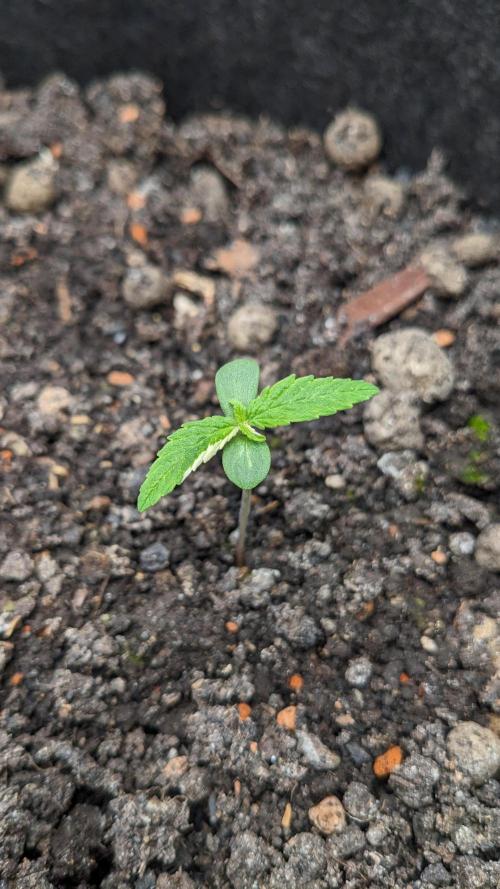
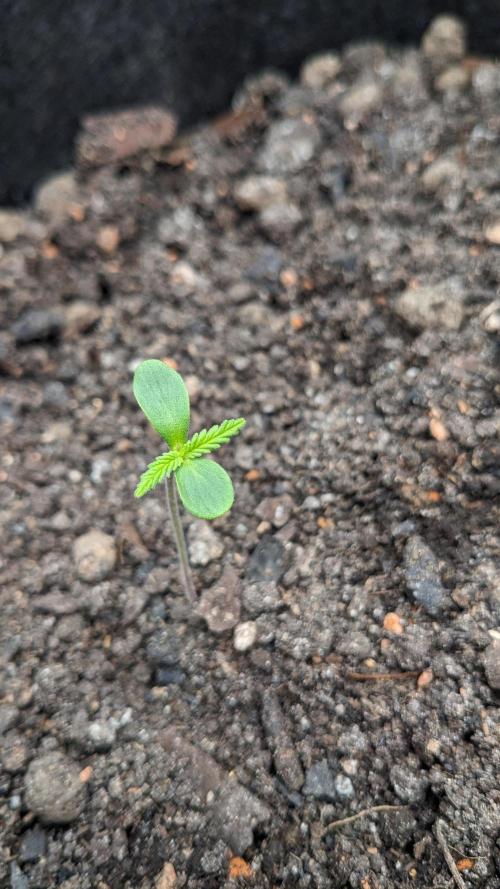
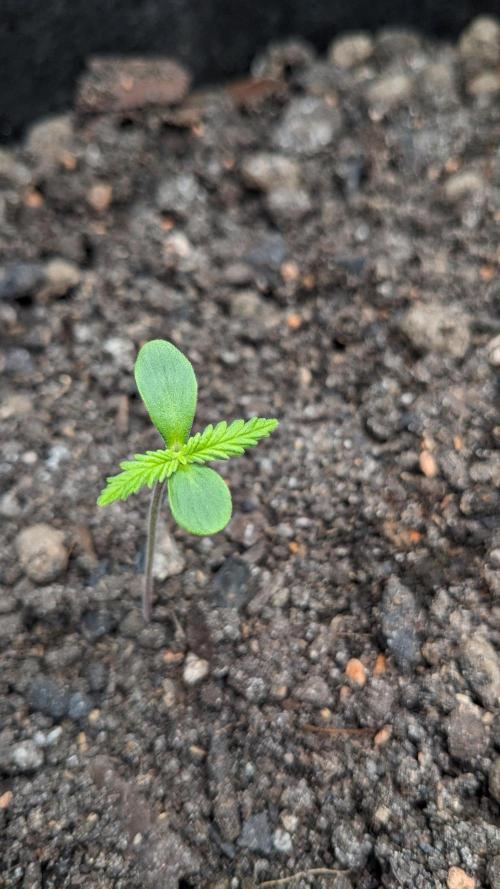
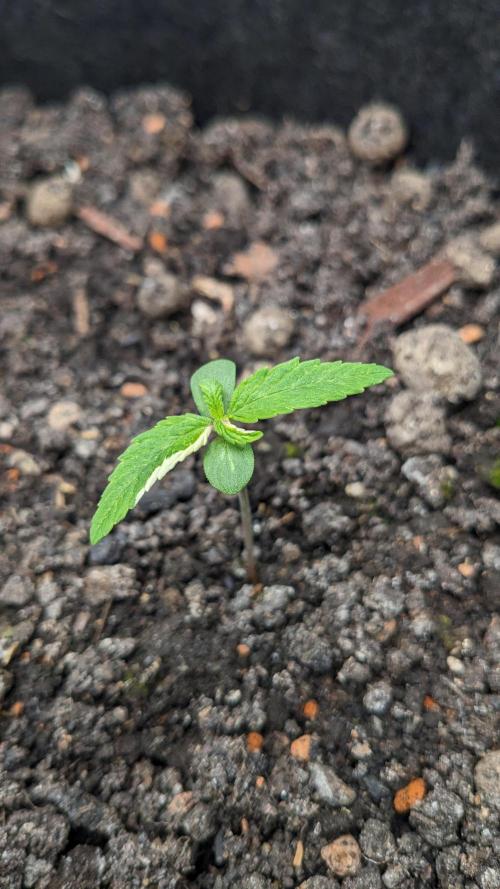
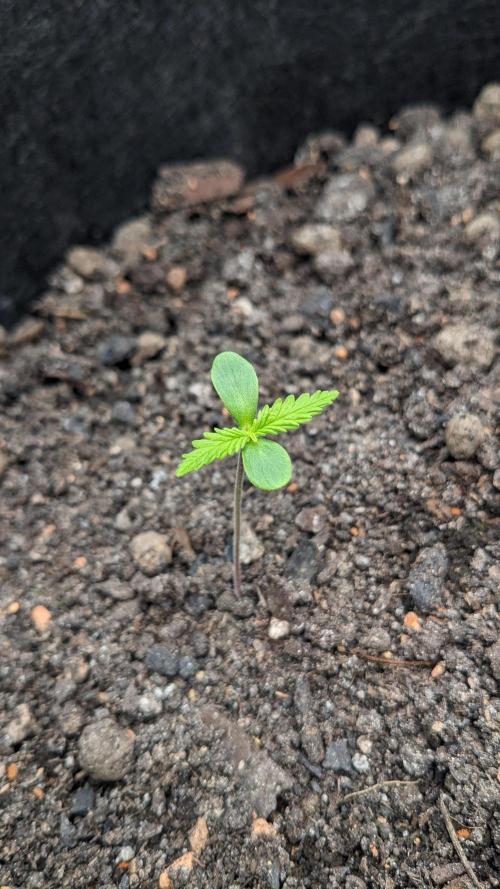
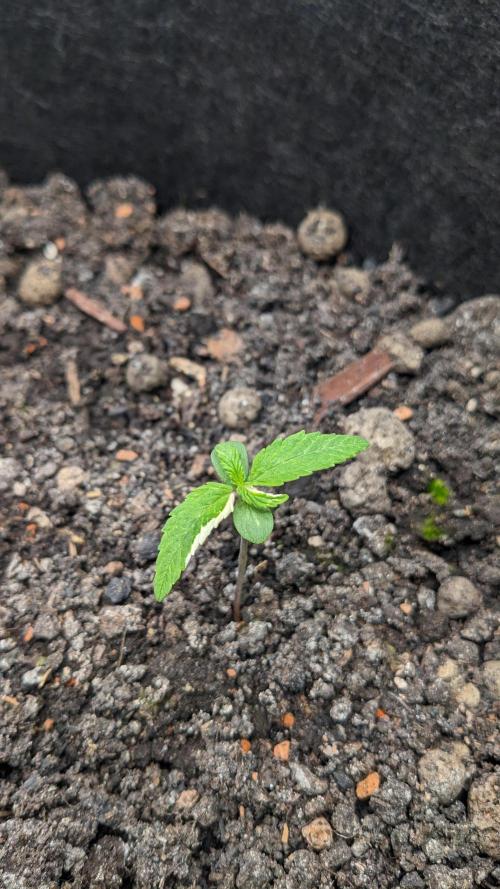
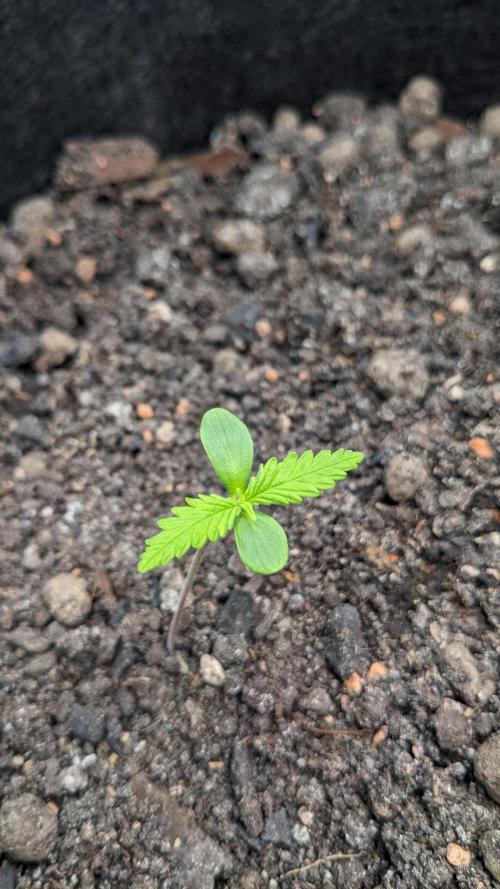
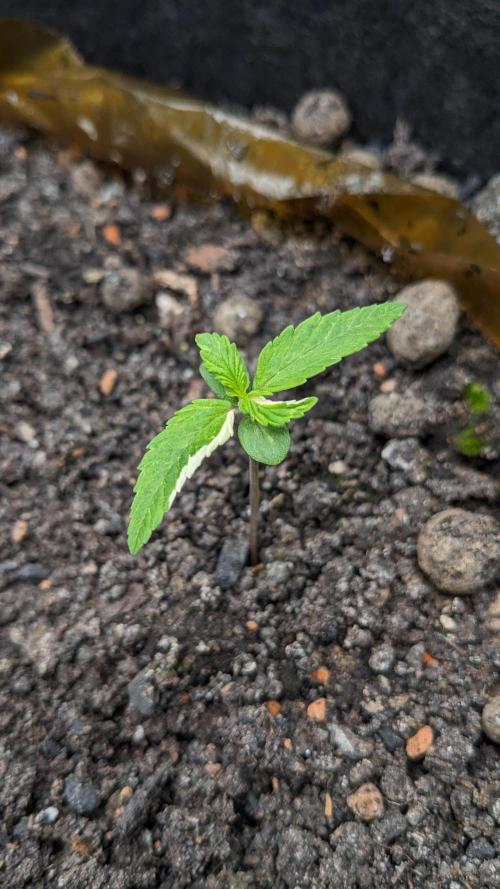
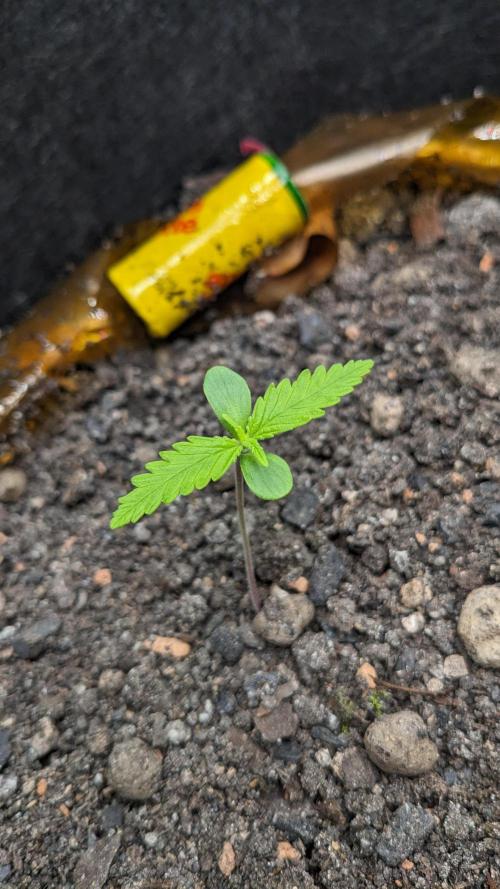
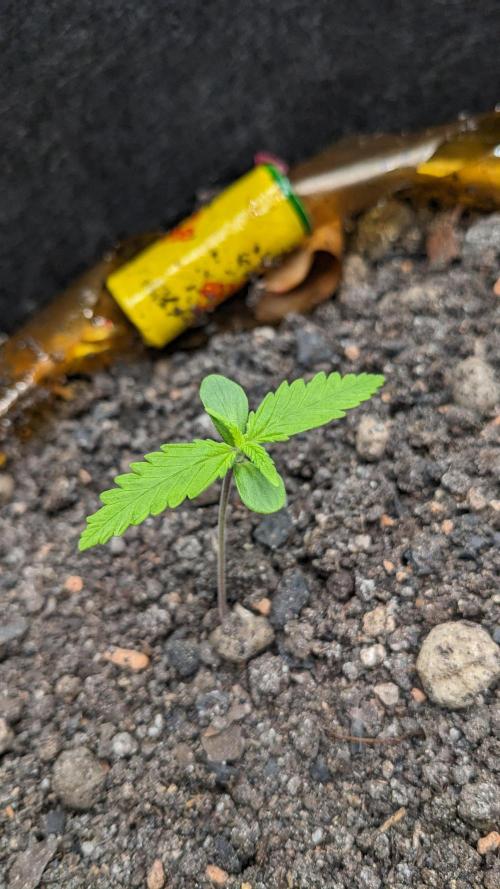
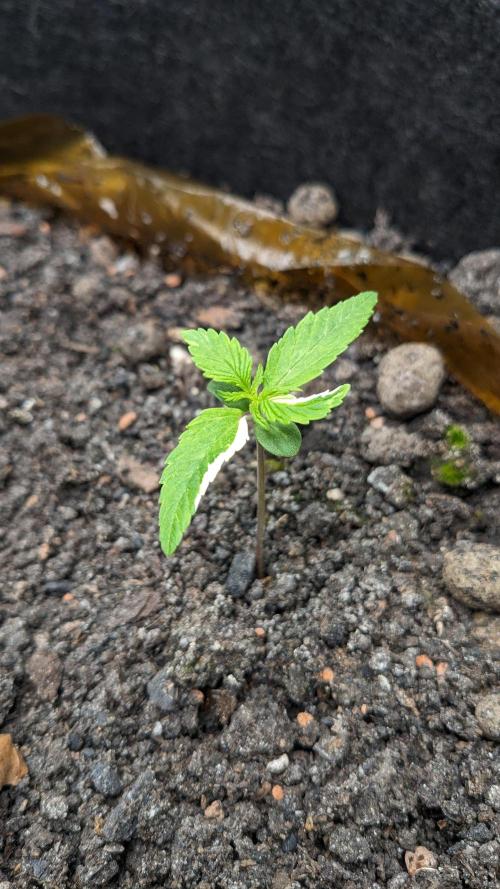
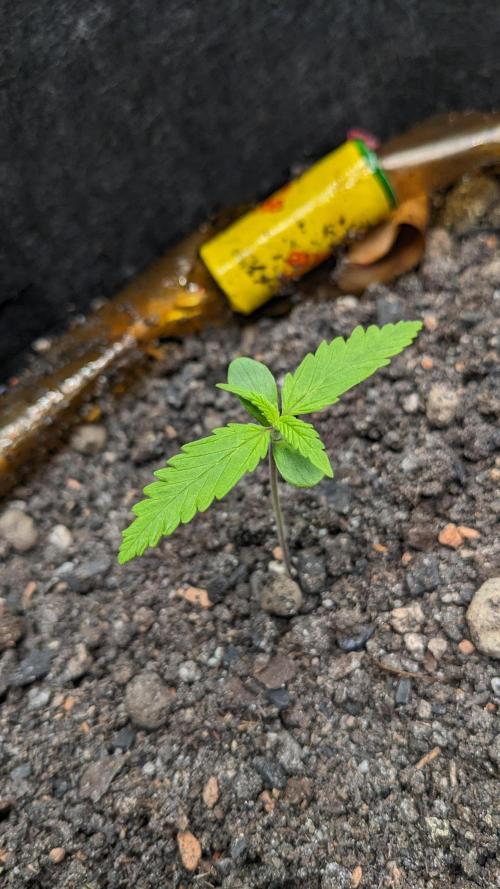
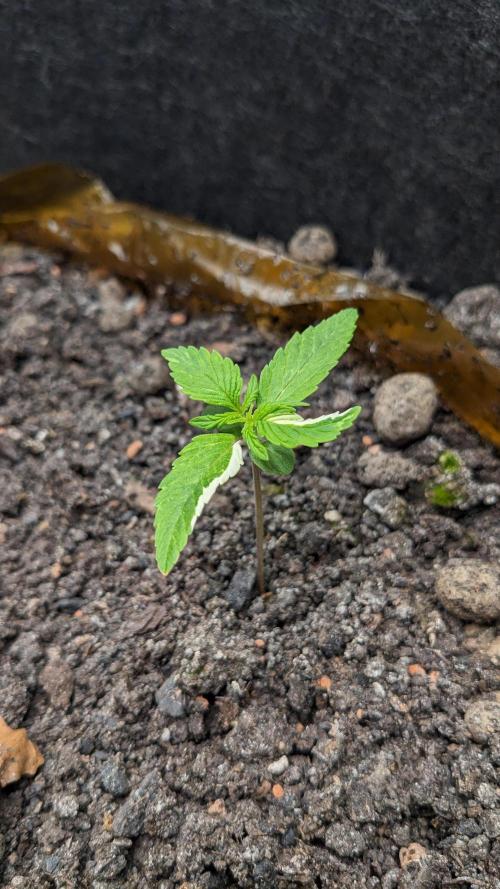
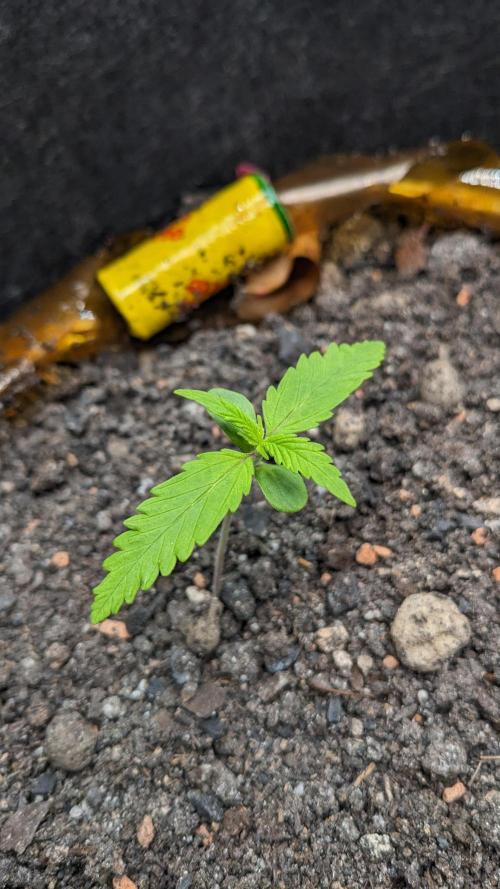
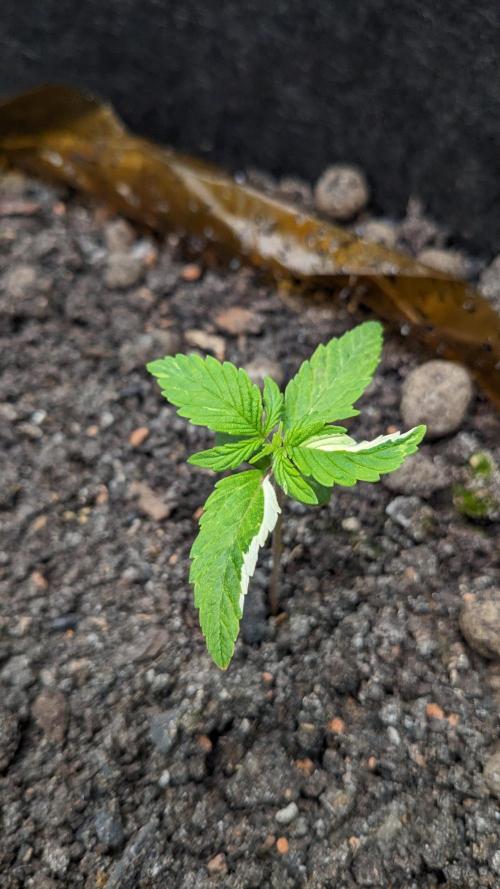
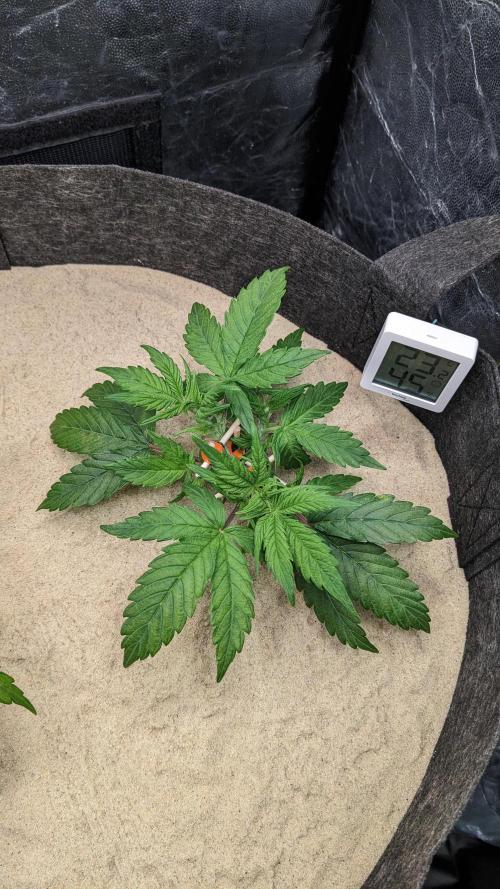
At the beginning, the focus was exclusively on providing a mild but humid environment so that the seedlings could establish themselves.
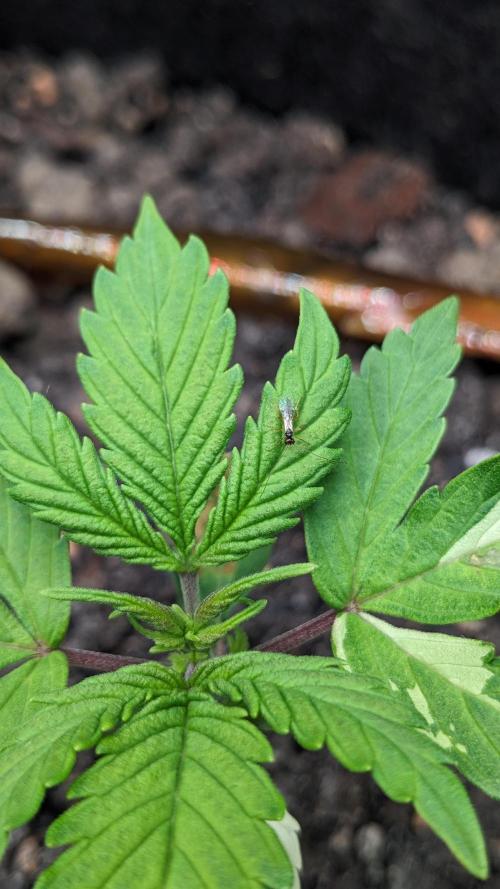
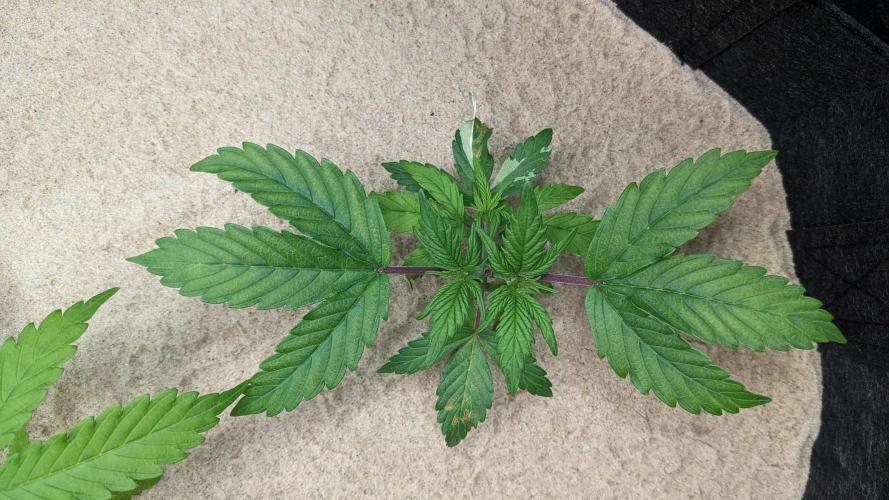
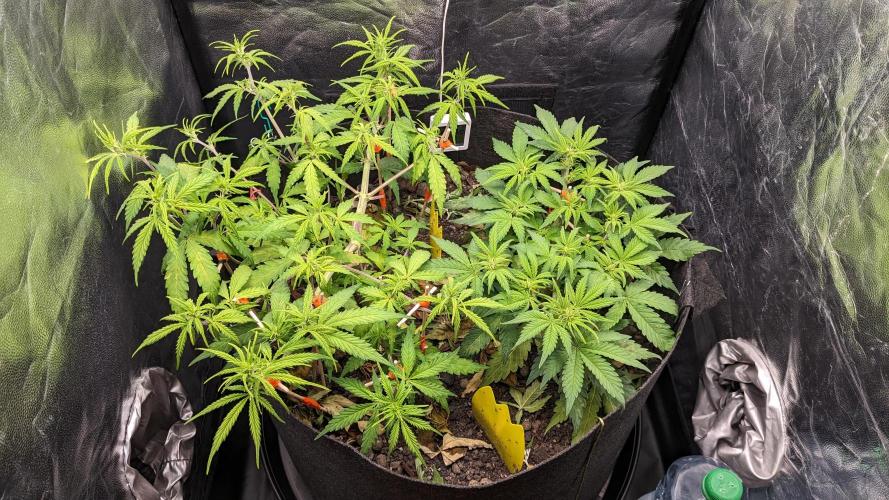
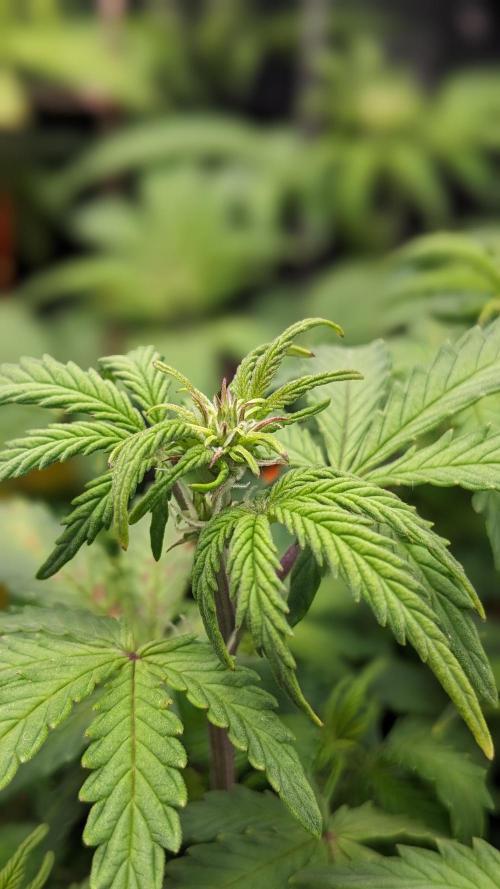
See how there are random little plants coming up, as well as mycelium, moss, et cetera? The system already starts to stabilize and creates a breeding ground for all sorts of organisms that - in the end - will benefit the symbiosis and longevity of said system.
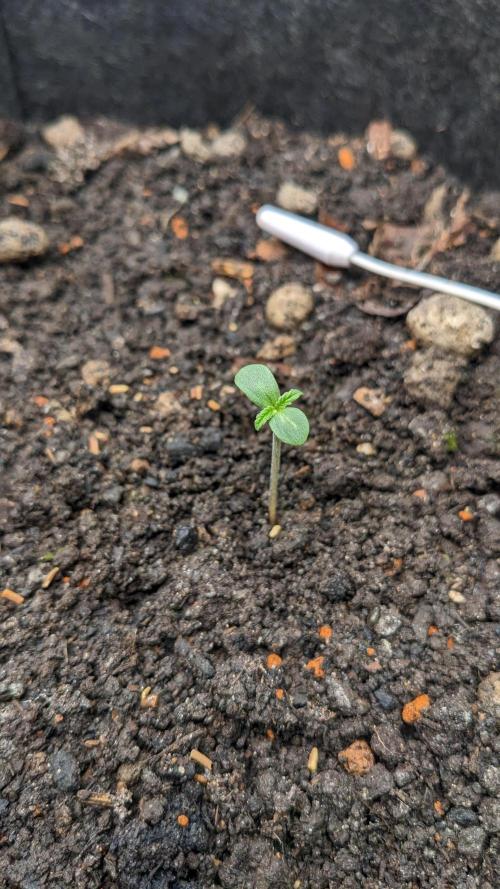
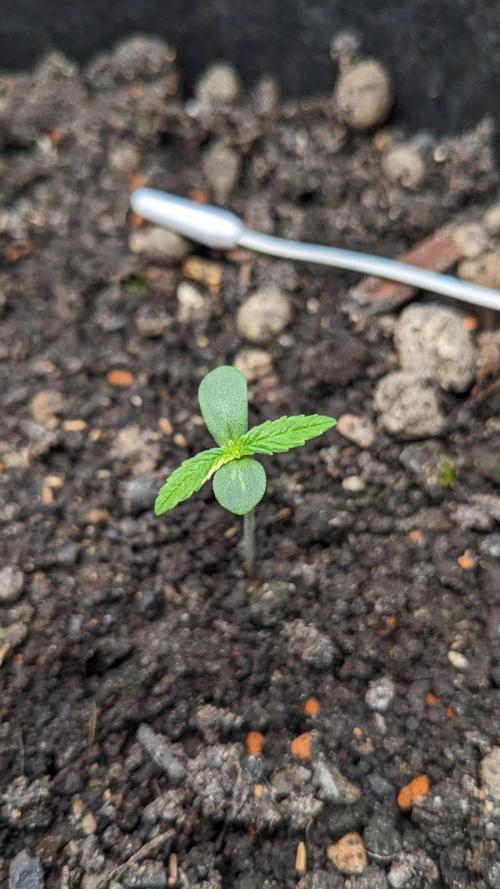
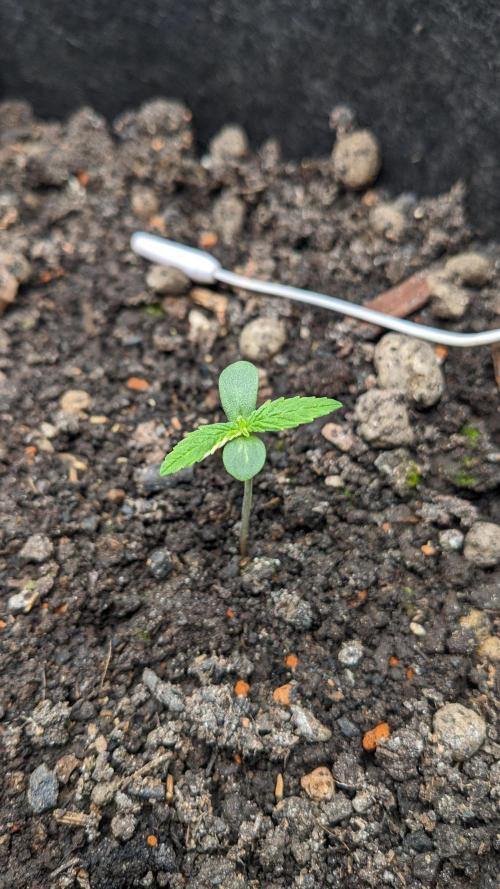
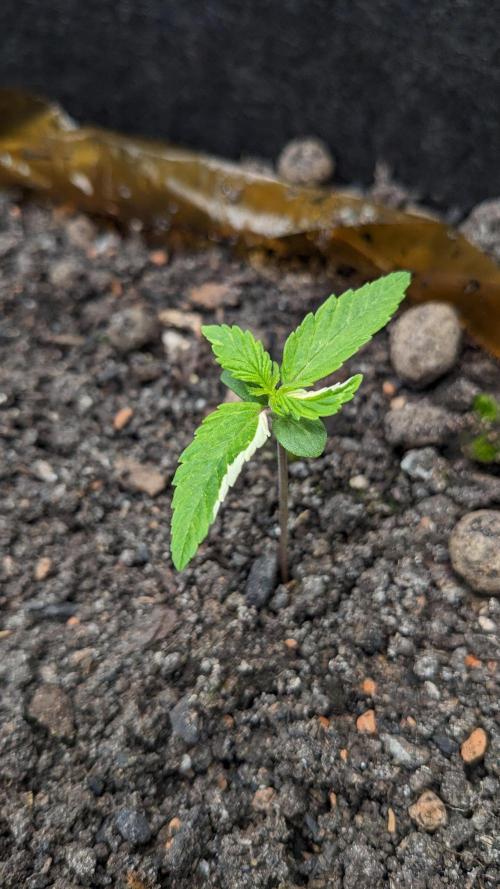
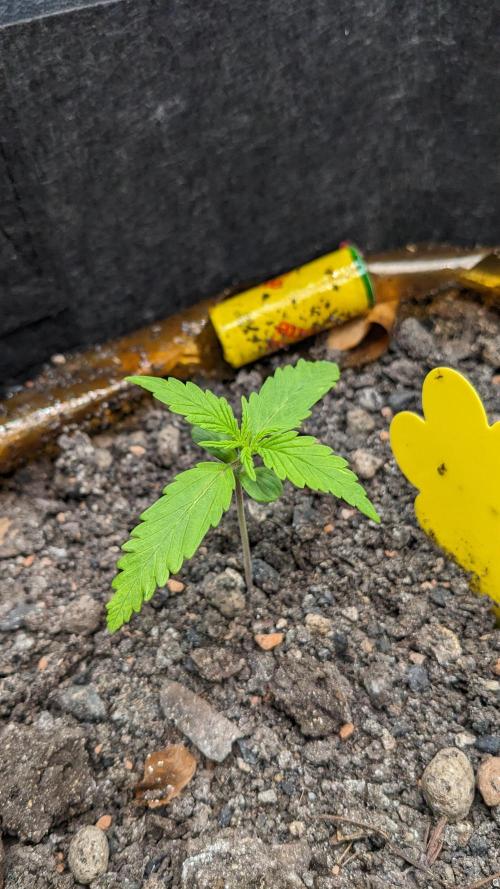
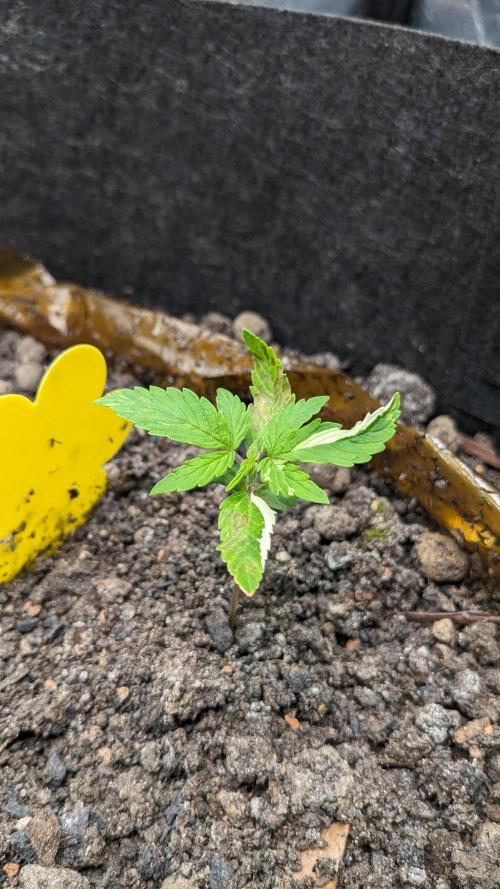
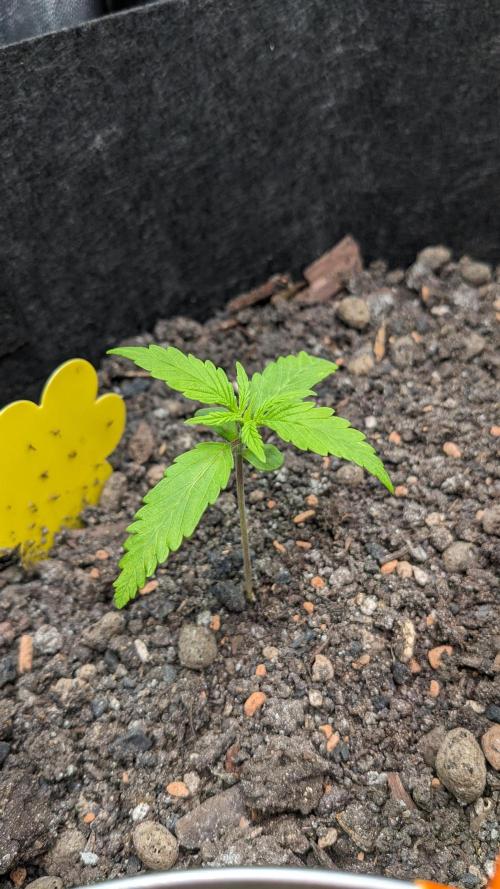
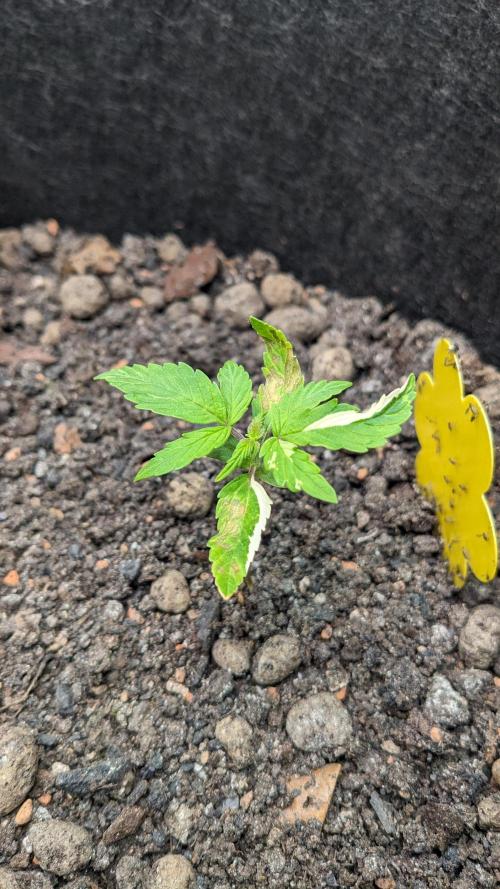
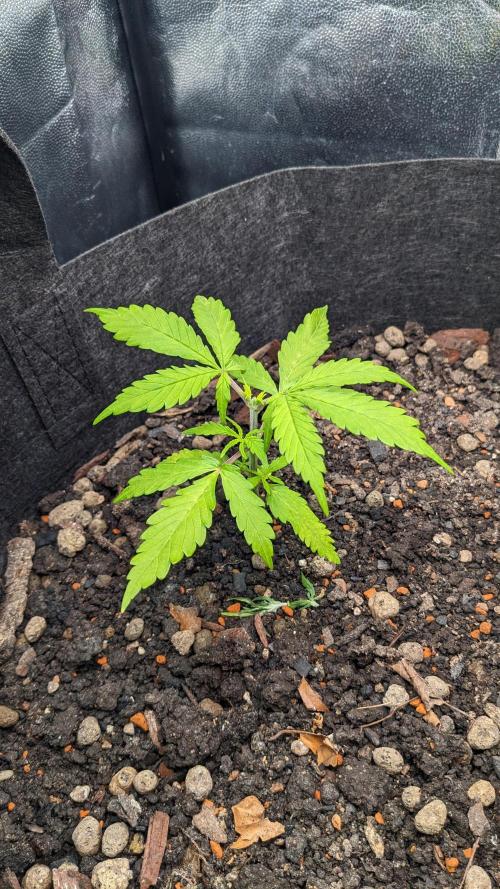
_Plants
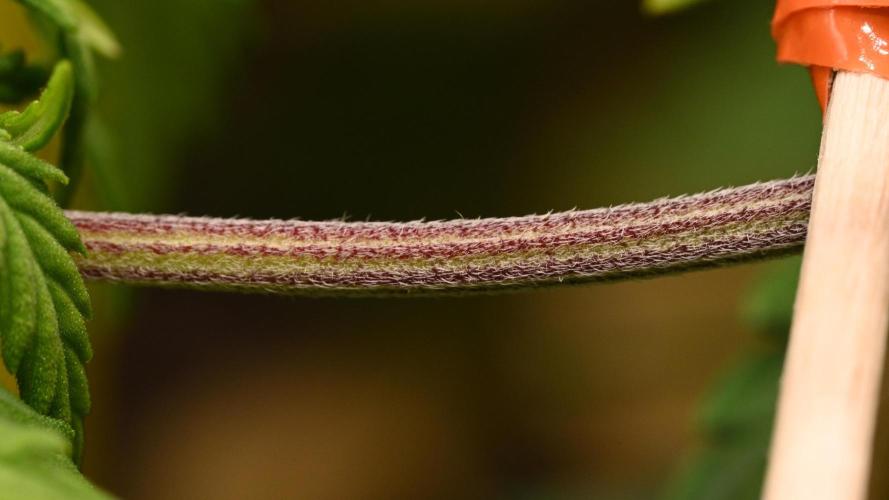
A very exciting aspect is that I noticed a variegation on the Mimosa Cake Auto right from the start!
4 likes
comments
Share
2
Week 2. Vegetation7mo ago

5 cm
Height
18 hrs
Light Schedule
22 °C
Day Air Temp
No Smell
Smell
75 %
Air Humidity
19 °C
Substrate Temp
19 °C
Night Air Temp
55.99 l
Pot Size
35 cm
Lamp Distance
420 PPM
CO₂ Level
Nutrients 1
PPFD
280 mll
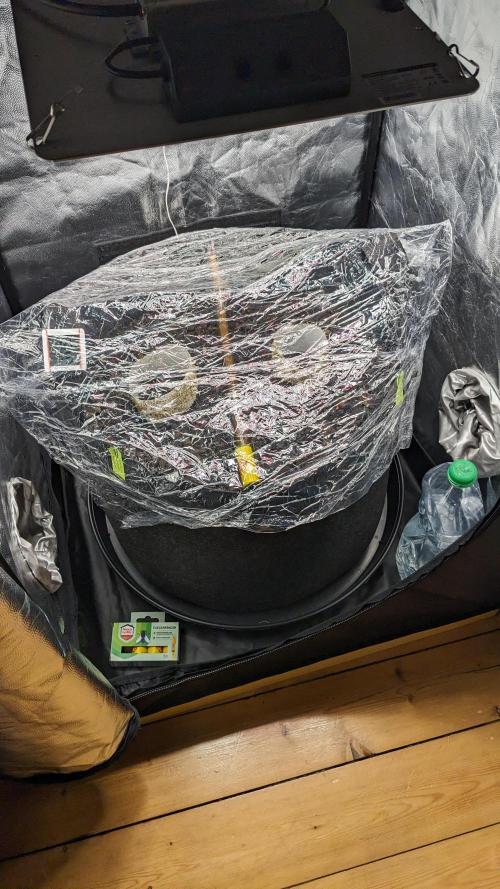
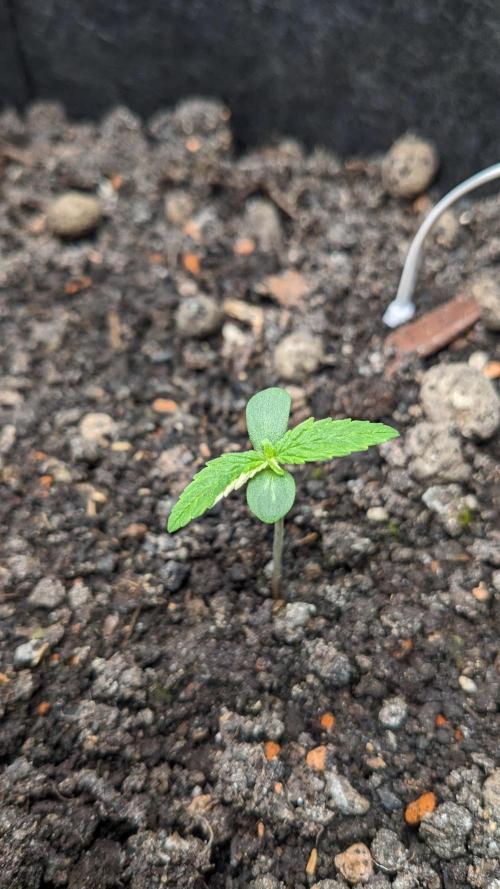
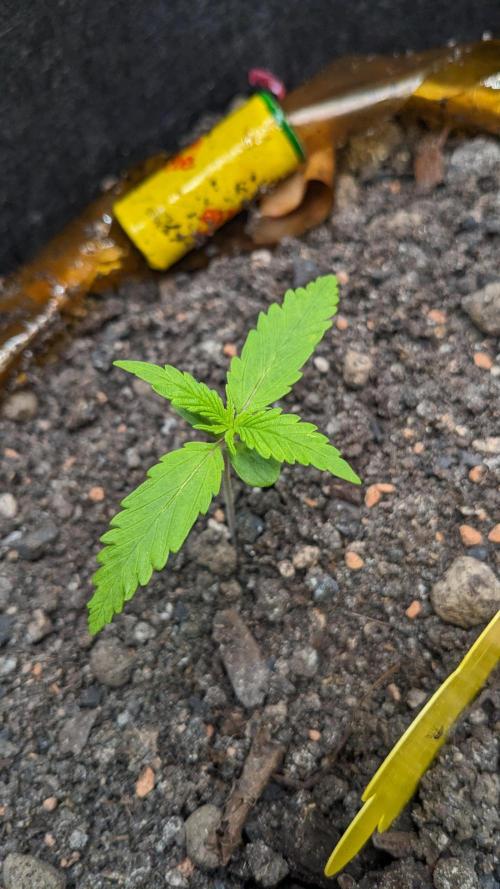
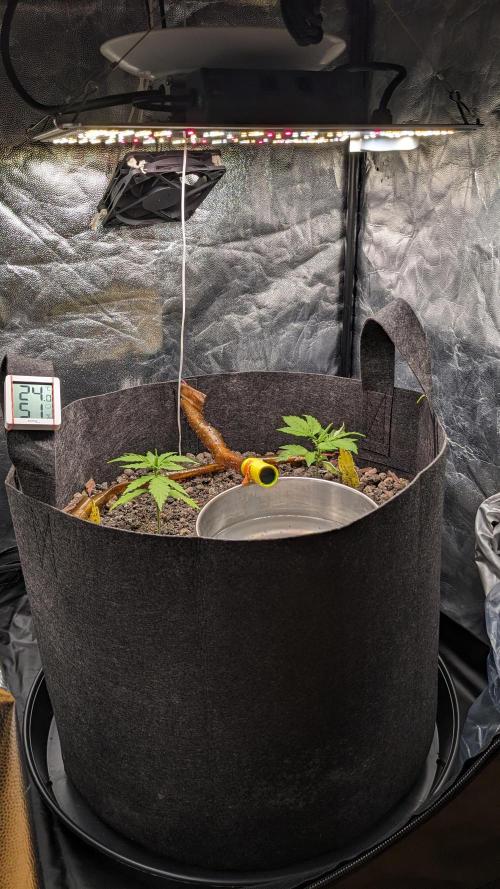
poloq _Setup + Environment
With the seedlings stabilizing, I slowly and gradually lowered the humidity to about 75% RH by removing the cling film.
_Environment
Removing the foil while increasing the PPFD also decreased the temperature by about 1K, which will be compensated for with an increase of light intensity over the upcoming weeks.
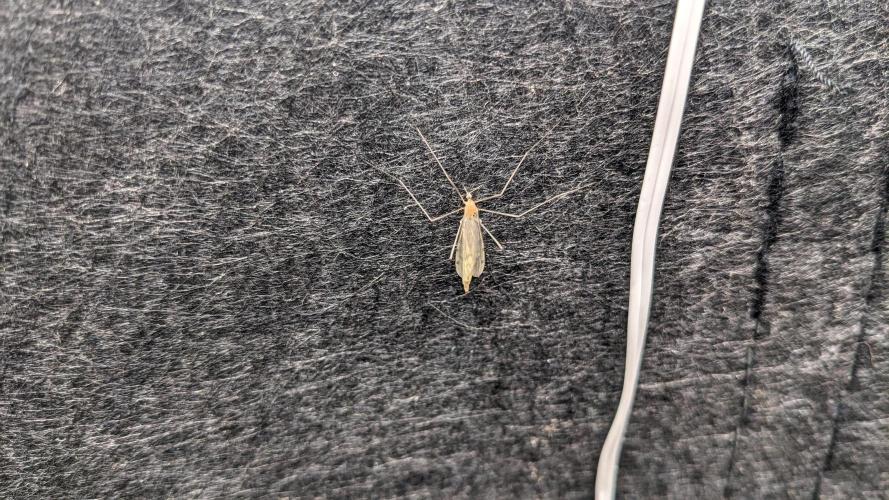
_Pests
Because I started to see Sciridae, I also focused on a reduction of the moisture content within the first few centimeters of the substrate. This - in combination with more sticky fly traps - should disable the sciridae's ability to lay eggs.
3 likes
1 comment
Share
3
Week 3. Vegetation7mo ago
7 cm
Height
18 hrs
Light Schedule
22 °C
Day Air Temp
No Smell
Smell
65 %
Air Humidity
19 °C
Substrate Temp
19 °C
Night Air Temp
55.99 l
Pot Size
35 cm
Lamp Distance
420 PPM
CO₂ Level
Nutrients 1
PPFD
340 mll
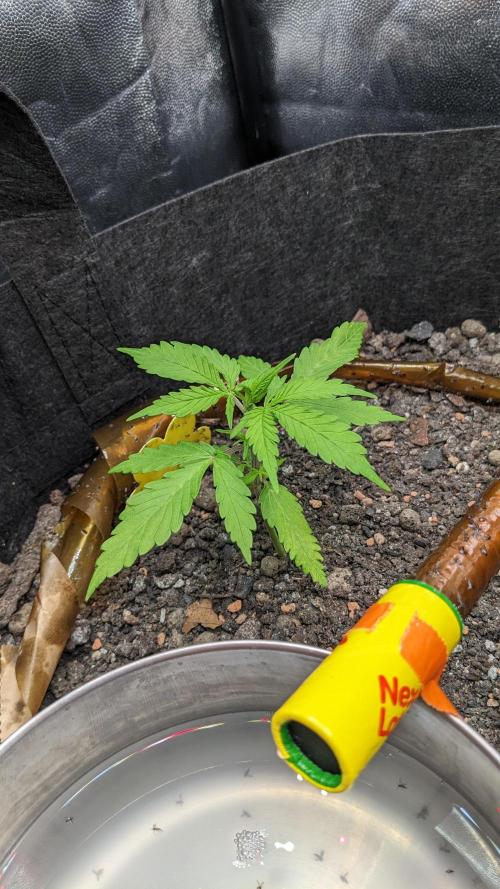
poloq _Pests
The amount of sciridae increased a lot (as expected, because the population should be about to collapse), but I also noticed that they were being accompanied by exactly 1 premature spider mite (drop in RH). Because my environment seemed to fall out of an equilibrium, I thought about using fine quartz sand (0.1 - 0.4 mm) and nematodes to hinder the adult Sciaridae from laying eggs and also actively hunt for their larvae, while being able to get back on watering regularly... In the end I actually ordered those - but decided not to use them because the process of drying out the substrate was already in its final stage (foreshadowing: bad idea).
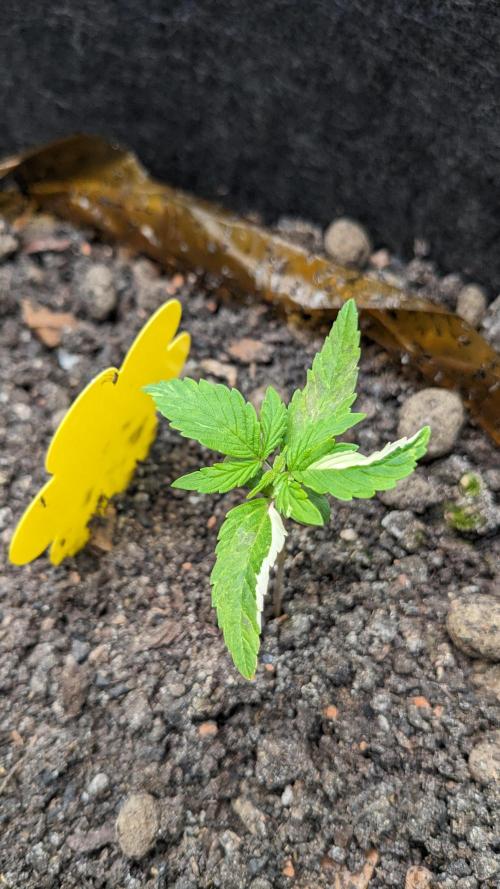
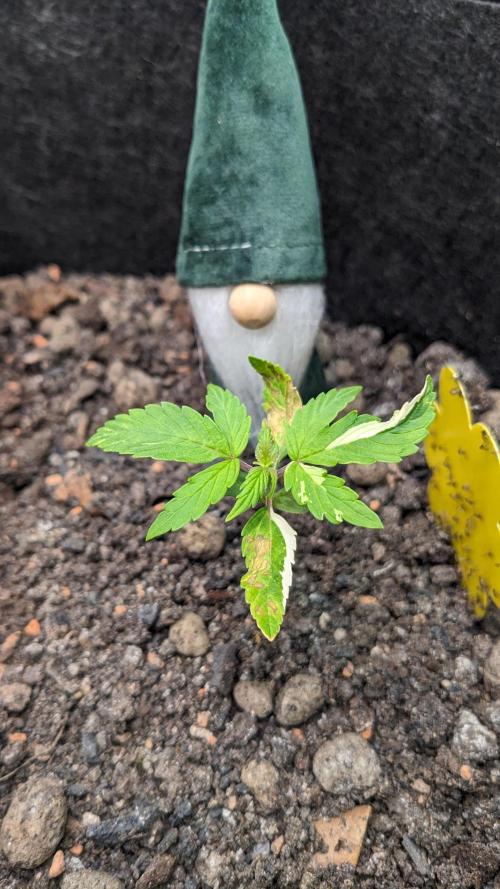
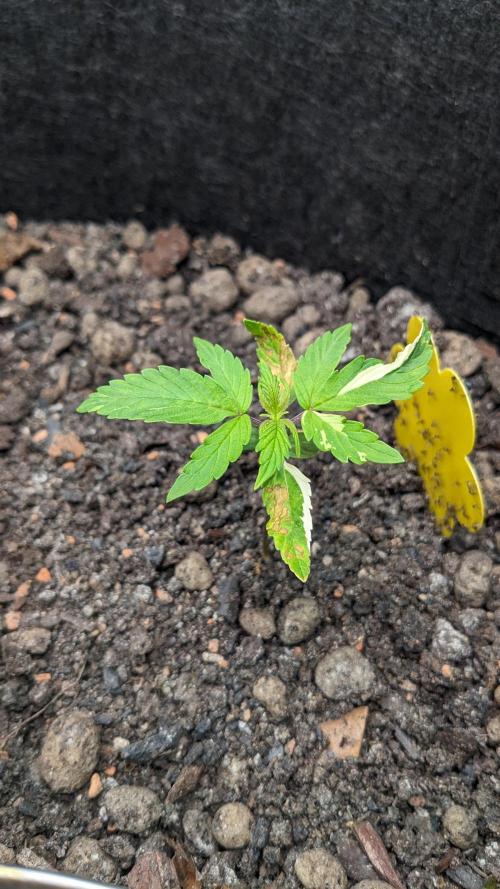
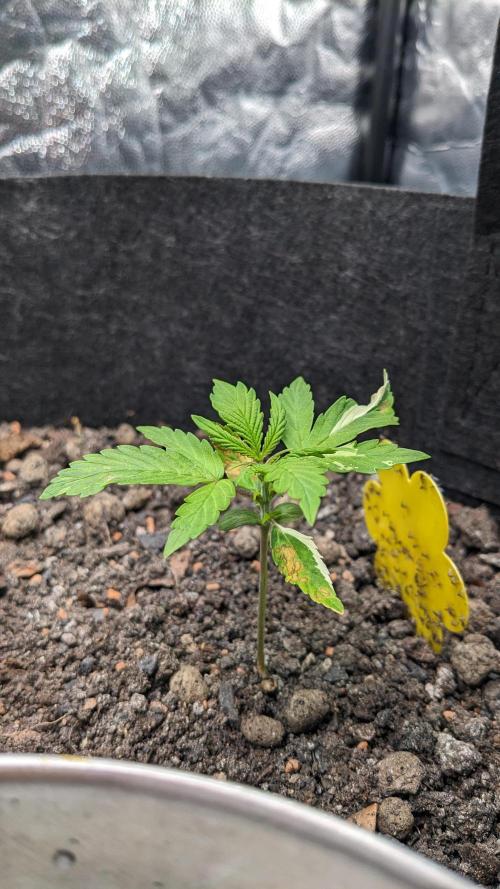
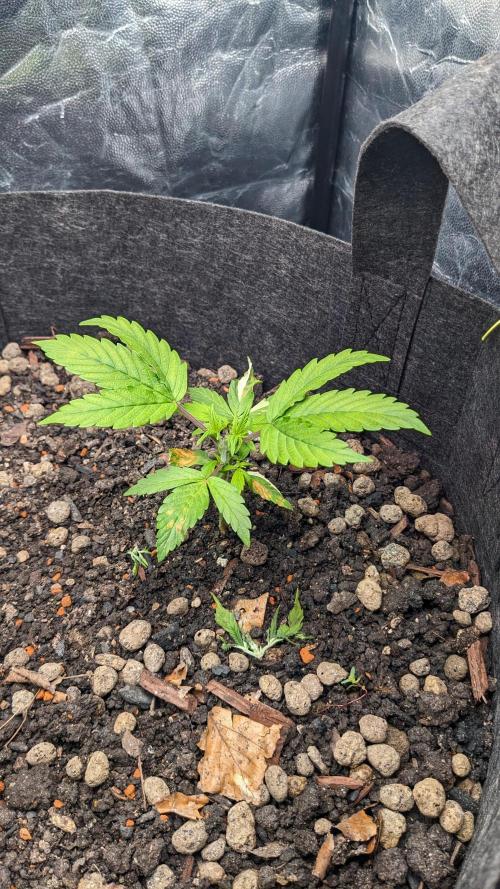
_Plants
Also, the variegated plant got cellular damage... most likely because my temp. and RH varied too much (VPD and temp. spikes were too extreme and rapid). [Variegated plants in general are less resilient and need a more stable environment].
_Setup
Until now, I didn't use any fan so that I could keep the moisture and temperature up, but from now on, I will start to activate an exhaust fan at about 0,5 -1 air exchanges per minute. This should homogenize the environment but also decrease the temp. by 1-2 K, and the RH yet again by another 10%. It also allows the plants to transpirate more efficiently, and with that, normalize the VPD.
_Living Soil
In general, when the pests are in control, I will yet again focus on the 'right' environment rather than battling those pests. With this approach, I can keep the moisture content in the tent the way I want to without worrying about anything else.
3 likes
2 comments
Share
4
Week 4. Vegetation7mo ago
9 cm
Height
18 hrs
Light Schedule
23 °C
Day Air Temp
No Smell
Smell
55 %
Air Humidity
19 °C
Substrate Temp
18 °C
Night Air Temp
55.99 l
Pot Size
30 cm
Lamp Distance
420 PPM
CO₂ Level
Nutrients 1
PPFD
500 mll
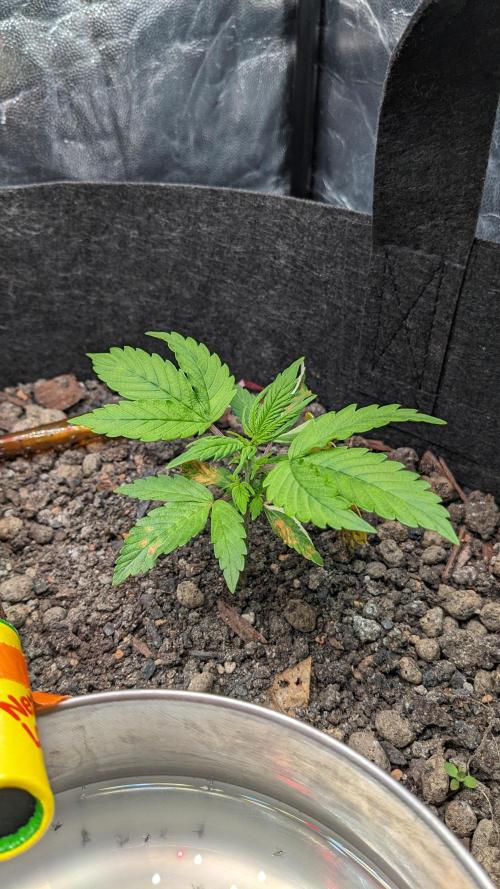
poloq _Pests + Setup
As expected, the RH dropped - but below 45%. To counter this, I actually exchanged the exhaust fan with a circulating fan. This allowed the RH to climb up again, while giving the plants the same VPD-benefits from the setup before. It's just strong enough to get the air inside the tent moving but is not adding too much stress to the plants (it's giving them more resilience while allowing them to transpirate and also makes it harder for the sciaridae to lay eggs). The change in the setup + the increase of light intensity yet again raised the temperature by more than 1 K - although I chose to not increase it by only 60 PPFD yet again, but by about 160. This is due to the observation that the plants are a little bit behind, and I still have a little 'room for improvement' left (especially for the flower).
_Pests
At this point, I decided not to use the nematodes and sand (for now). The drying process seemed to work, because I got a lot more adult sciaridae at first but ([foreshadowing] what seemed like...) a continuous drop over the next days. At the end of week 4 there were still a few left, so I decided to wait until I don't see a singular one for 1 whole day until I get back into watering - and with that, giving the nematodes to prevent another colony from inhibiting the substrate. The sand, on the other hand, can be stored and used next time or for other projects.
4 likes
comments
Share
5
Week 5. Vegetation7mo ago


10.5 cm
Height
18 hrs
Light Schedule
24 °C
Day Air Temp
No Smell
Smell
55 %
Air Humidity
19 °C
Substrate Temp
18 °C
Night Air Temp
55.99 l
Pot Size
35 cm
Lamp Distance
420 PPM
CO₂ Level
Nutrients 1
PPFD
600 mll
poloq _Environment + Pests + Setup
This week (at day 31) I decided to end the battle against fungus gnats. Even after almost three weeks of dried-out soil, dozens of adult insects could be seen, which told me that there were pockets of moisture that I couldn't influence. Accordingly, I went back to the original plan I had outlined earlier: bring the system into balance and use sand and nematodes. Since I should no longer have any problems with low RH, I have also reactivated the exhaust fan, which lead to the values you can see above.
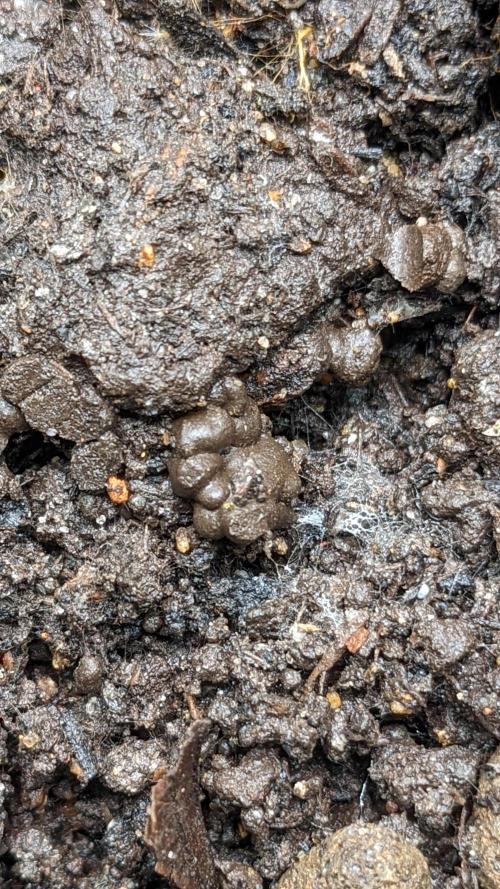
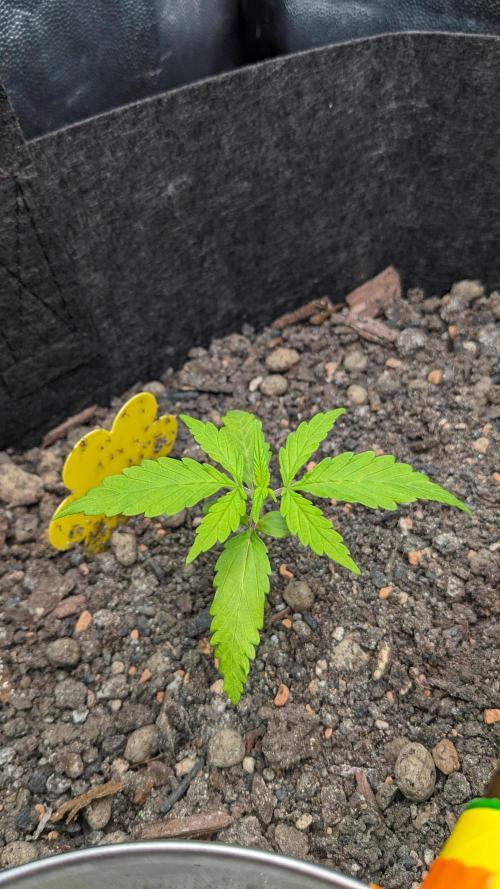
_Living Soil
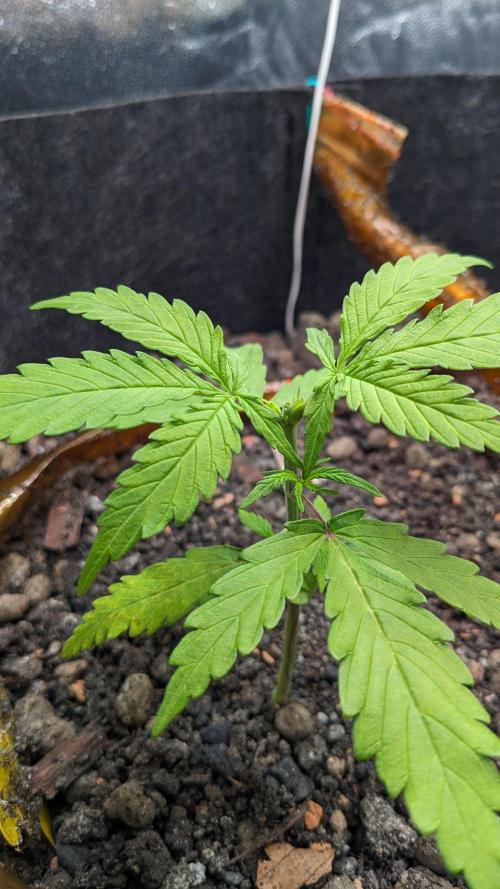
From the outset, the plants showed a slight nitrogen deficiency, which was evident in their rather pale, light green color. This is probably due to the fact that the substrate (until now) did not contain enough moisture to allow metabolic and decomposition processes to proceed efficiently. Directly after watering I got reassured that my choice was right and the soil still alive, healthy, and ready to 'get back to work': Look at the amount of springtails and how fast new growth appeared!
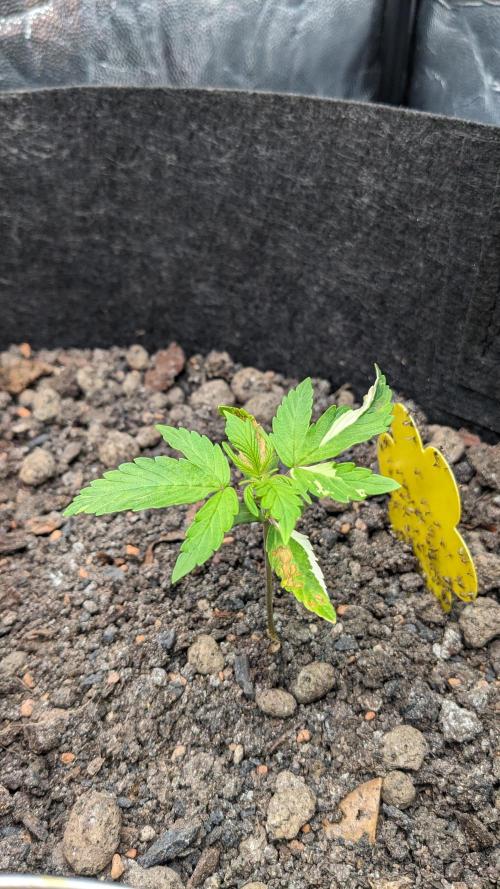
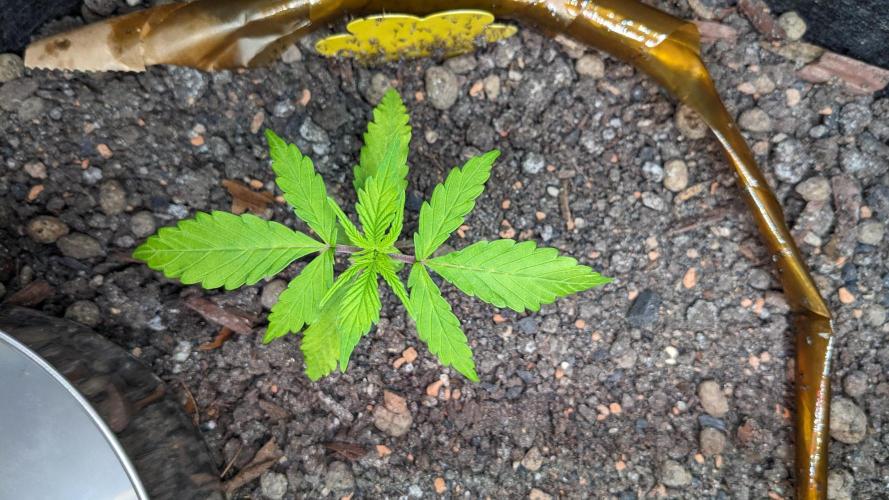
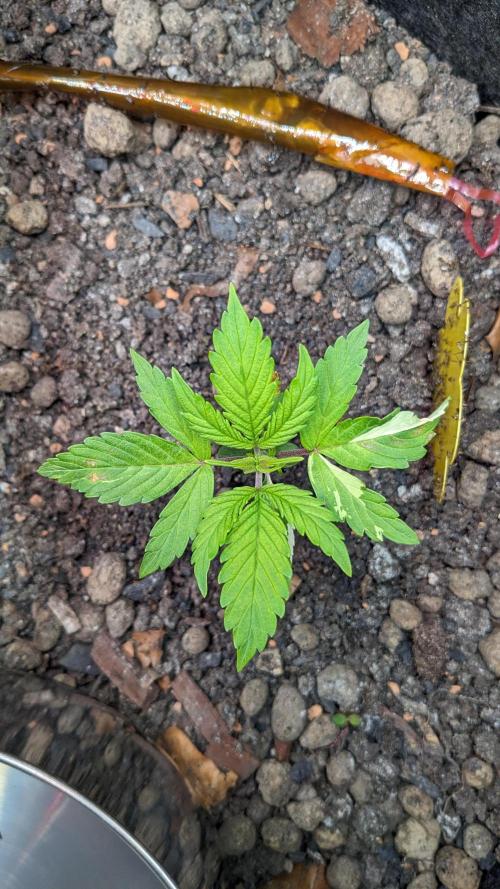
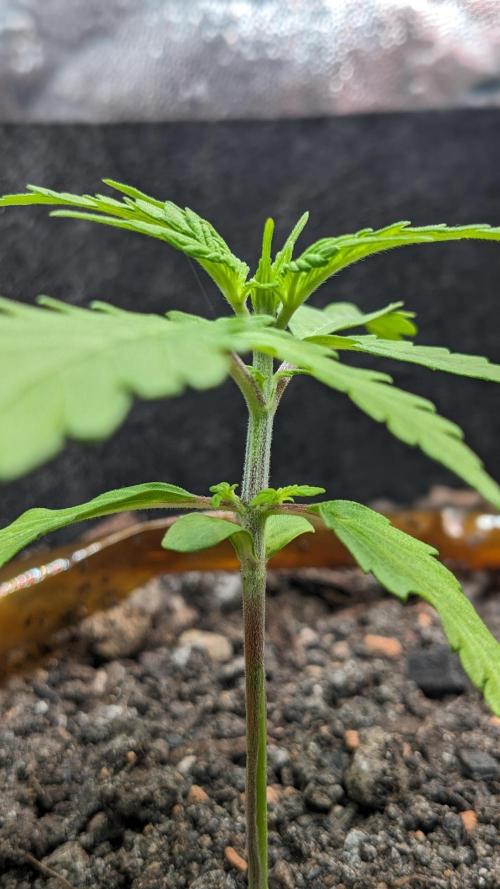
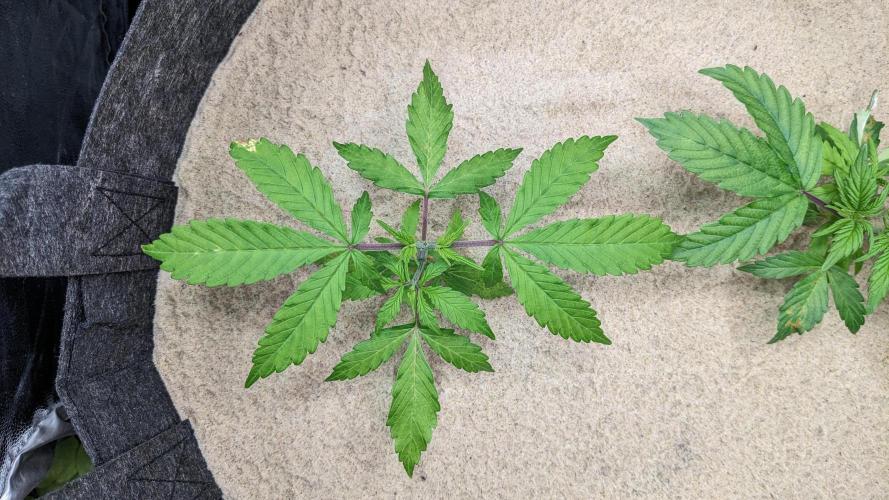
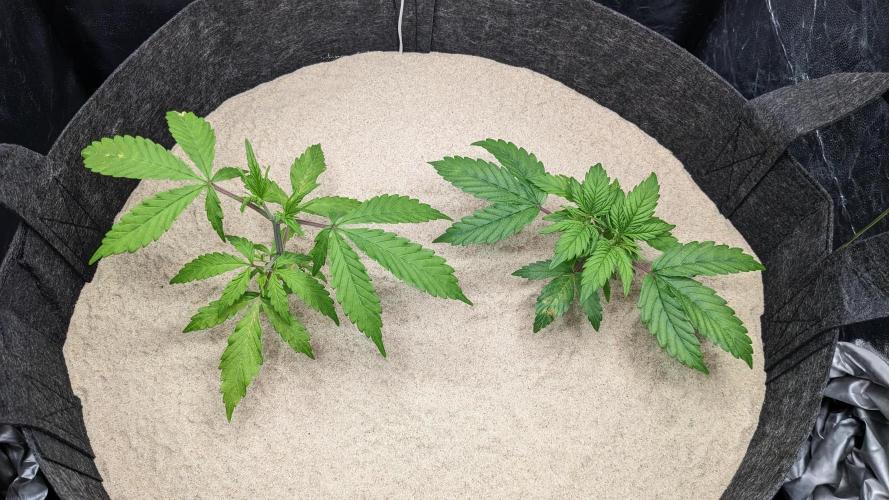
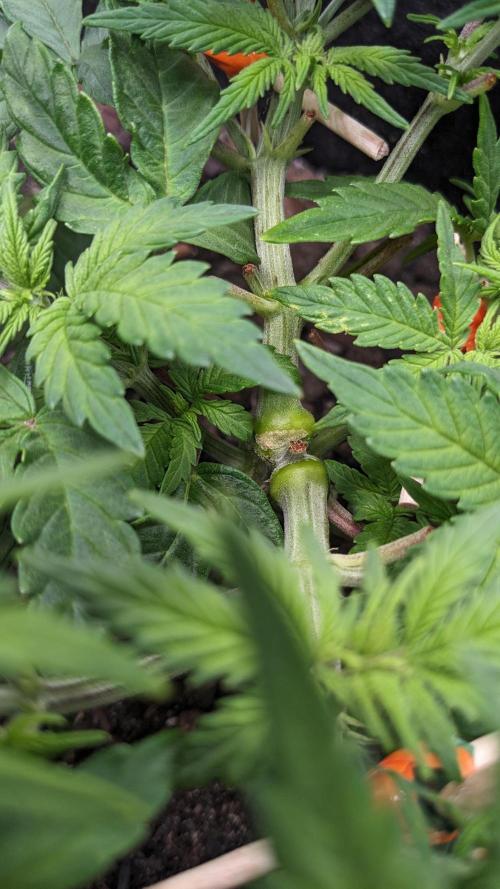
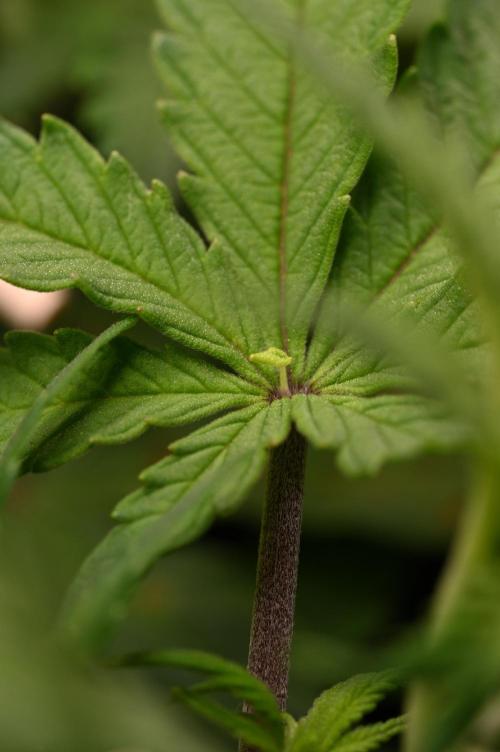
_Plants
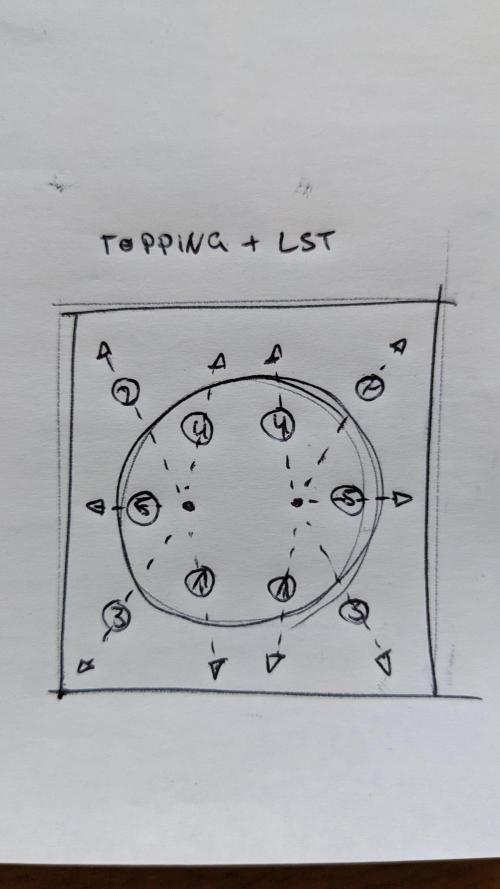
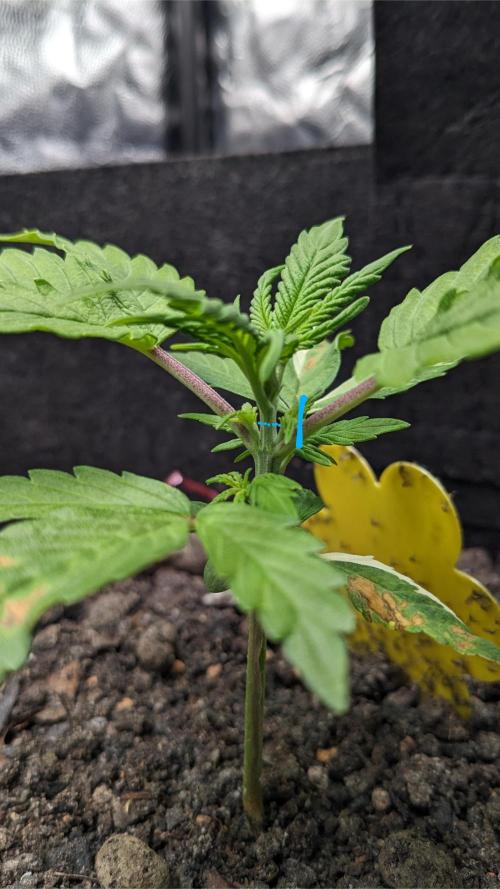
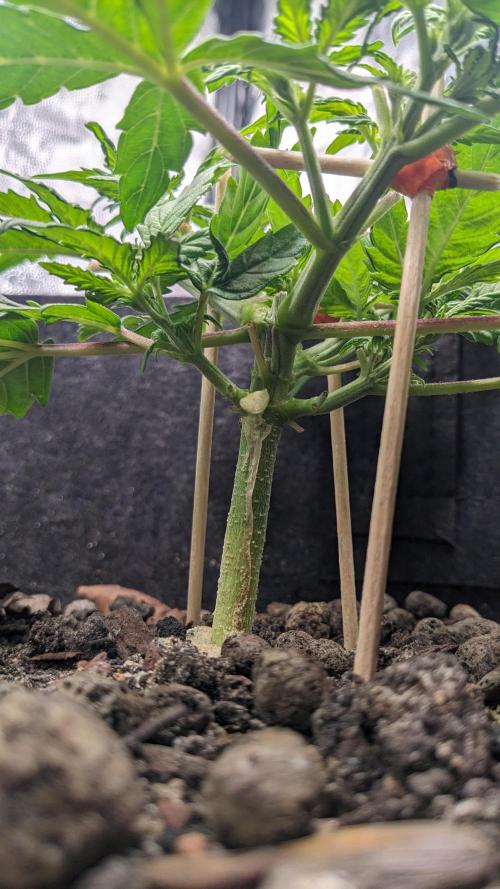
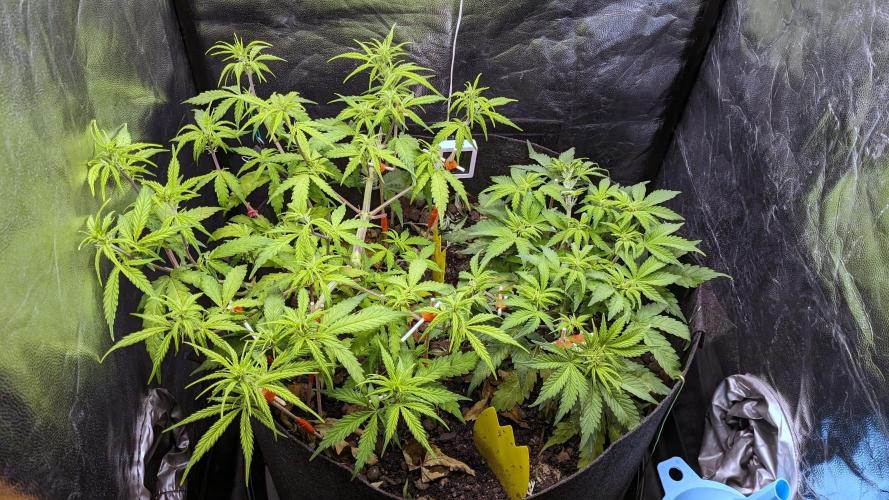
On day 30, I topped the plants. Both had already formed three nodes and started to develop healthy side branches at all of these nodes. So, according to my plan, I removed the main shoot, leaving enough space for the stump to encapsulate without damaging the healthy plant. I also removed one shoot from each of the middle nodes, as I don't want branches that already grow towards the center (the branches will grow towards the light anyway, and this way I can ensure that there is enough air circulation and room for expansion).
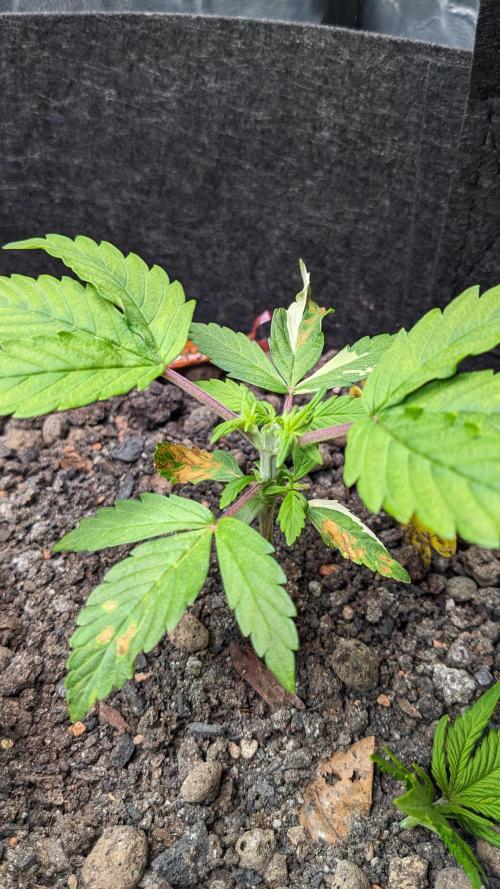
Besides that, I sadly feel like the variegation - and genetic really - ain't stable. By the end of week 5, you could see that the offshoots differed a lot in their 'quality' (asymmetrical, some very weak, etc.), and the variegation didn't appear again.
*Gorilla Z Auto was 14 cm tall, Mimosa Cake Auto 7 cm (both after topping).
3 likes
1 comment
Share
6
Week 6. Vegetation7mo ago


16 cm
Height
18 hrs
Light Schedule
24 °C
Day Air Temp
No Smell
Smell
50 %
Air Humidity
18 °C
Substrate Temp
18 °C
Night Air Temp
55.99 l
Pot Size
0.11 l
Watering Volume
35 cm
Lamp Distance
420 PPM
CO₂ Level
Nutrients 1
PPFD
700 mll
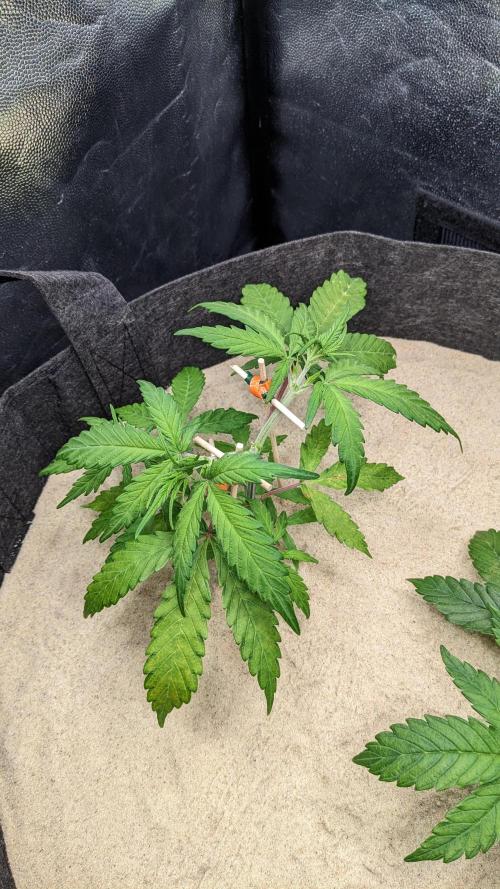
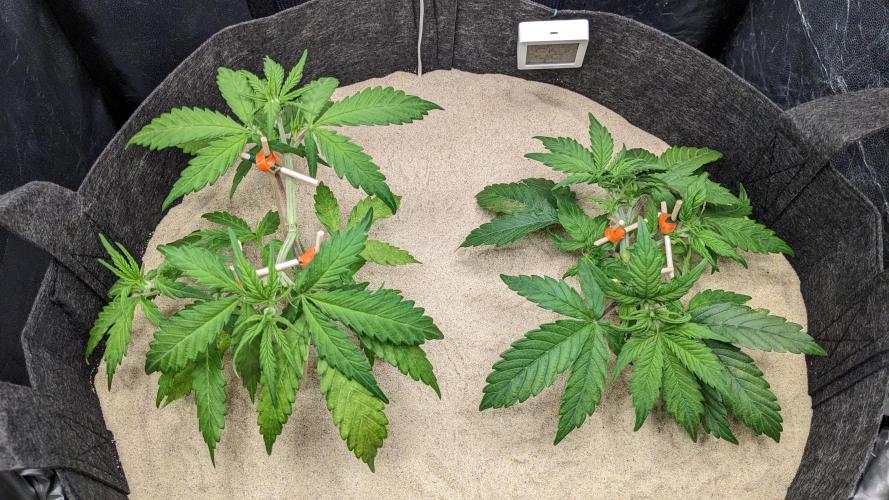
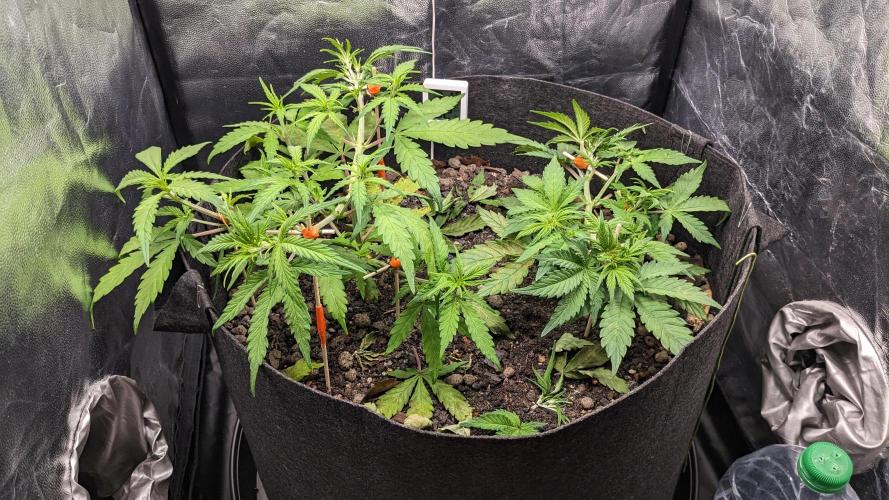
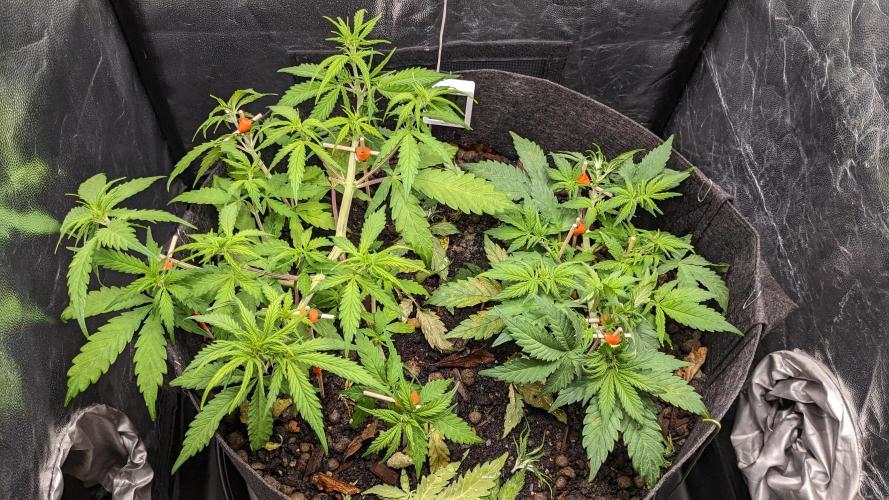
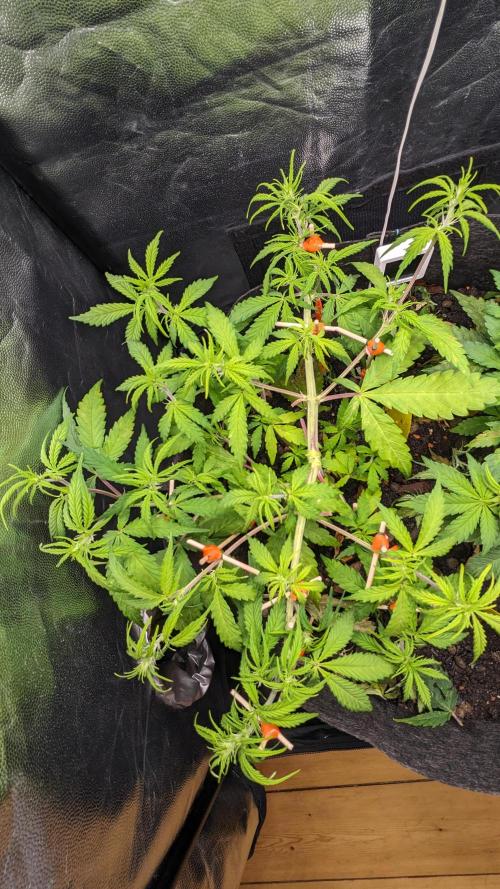
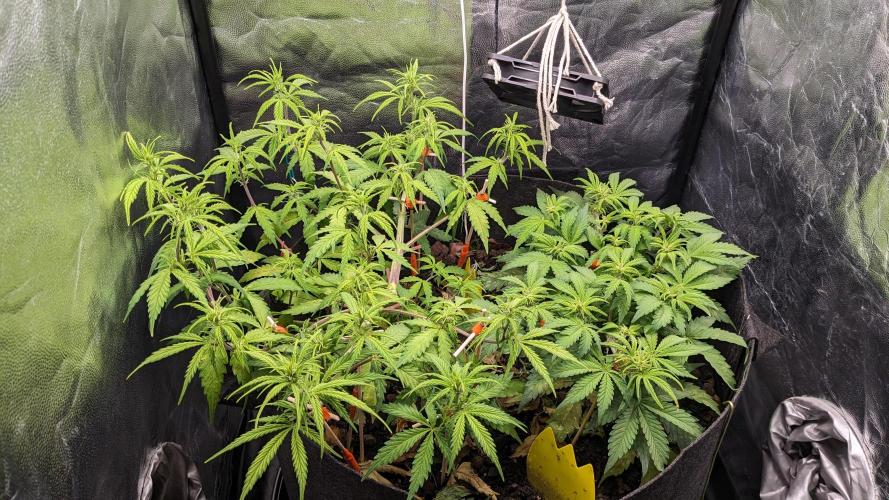
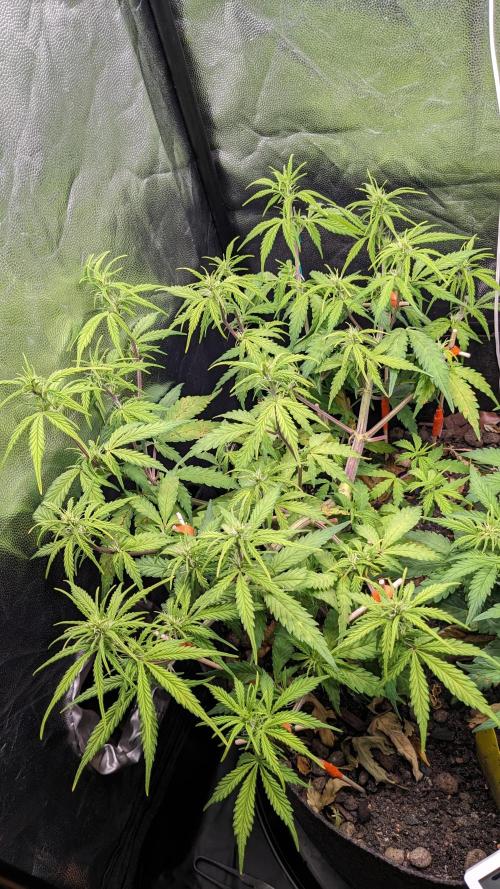
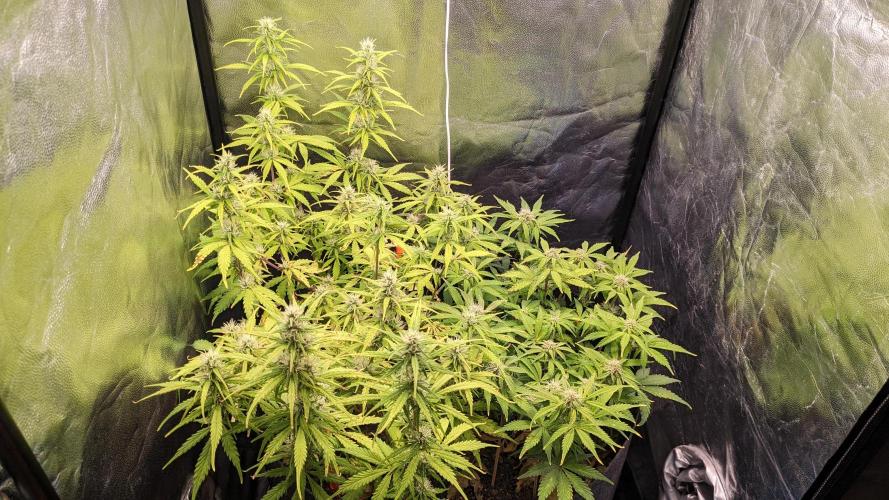
poloq _Training
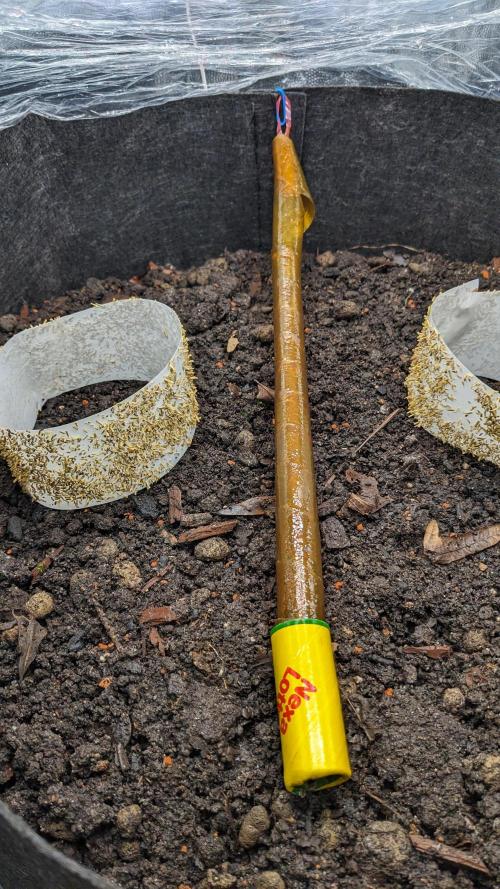
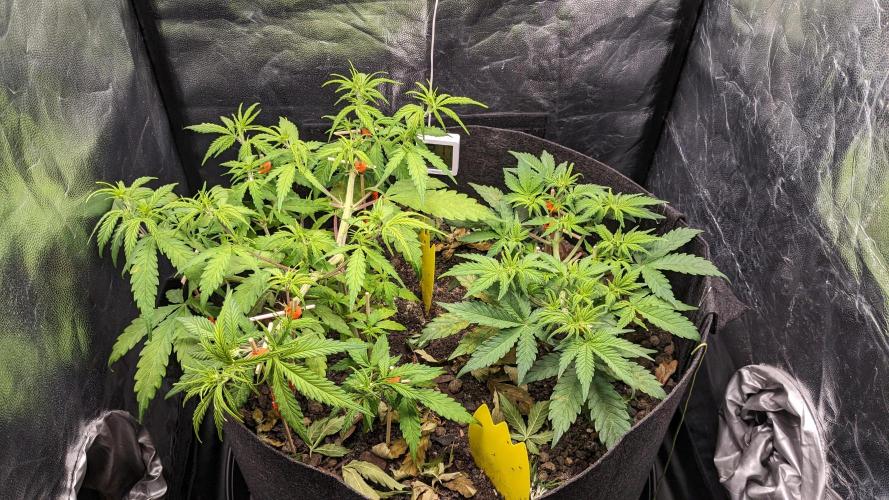
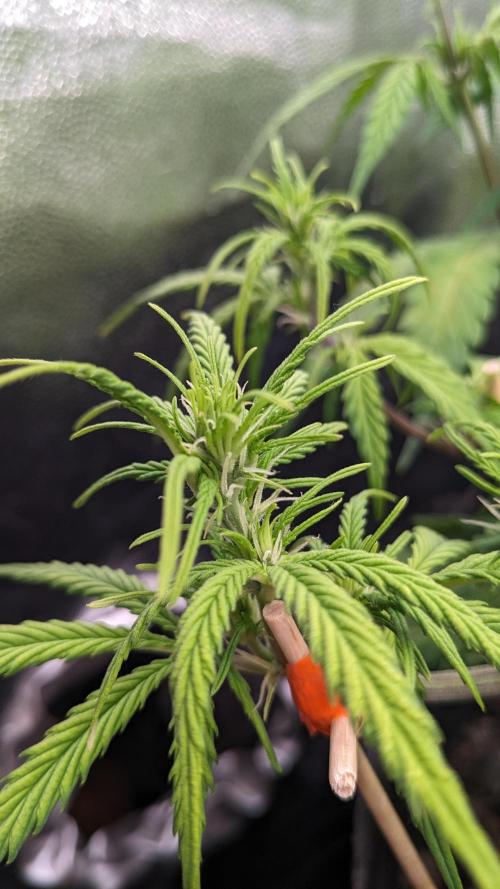
This week was the start of the LST and, with that, a continuous gentle defoliation to ensure that the new shoots are getting a lot of direct light. Leaves (especially sun sails) growing over new shoots are either pressed down or, if necessary, removed. When LSTing, I always focus on gently bending the branches in the desired direction every day, without disregarding the natural structure of the plant. Once they reach a length of about 5 cm, I start to secure them with training stakes(*1). This way, the risk of damage (as well as overall stress for the plant) is kept to a minimum.
_Setup
The lamp is now at max. intensity and min. distance (35 cm) at around 650 - 700 PPFD.
(*1) I built the training stakes myself to match my needs (enough length, natural material, no sharp edges, slightly downward facing angle).
_Pests + Living Soil + Environment
The combination of nematodes and sand seemed to work immediately, because the number of Sciaridae quickly dropped to about 2 - 3 adult flies per day. Still, on day 40 (8 days after adding the sand) I removed it again, because:
1. It was rather intended to support the nematodes (fewer new larvae),
2. The Sciaridae had fallen to a level that seemed acceptable,
3. It would keep the soil too anaerobic and moist in the long term.
The decision also had a positive effect on the RH(*2) (approx. 10% increase).
(*2) Relative humidity fluctuated slightly from day to day, but generally remained around 50%. Although removing the sand (at the end) of this week increased the RH, I only evaluated this ‘new average' RH from the following week onwards.
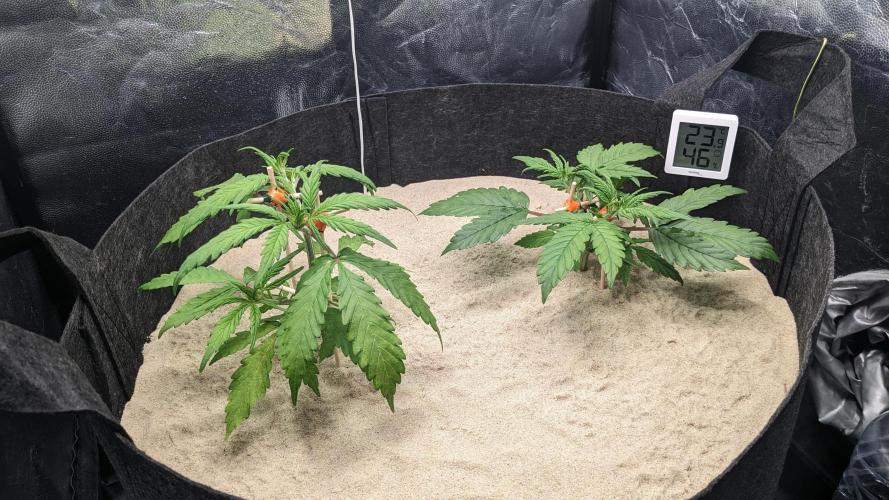
_Environment + Plants
The stabilization of the environmental conditions and the increase in light, have allowed the plants to grow intensively this week. In the beginning, the relative humidity was still a little lower than I would like, but acceptable since the plants were still quite small and didn't need to be watered as often. [Large amount of substrate with corresponding buffering effect to keep the plants healthy.]
During the seedling phase, I observed slight deficiency symptoms that at first glance looked like a nutrient problem (potassium, calcium, ...?). Since I cannot control the nutrient content as precisely as I could with a hydroponic system e.g., and the damage was manageable and occurred during a phase in which I also stressed the plants by allowing them to become too dry, I simply ignored it in hope that the system will stabilize itself.
*Gorilla Z Auto was 20 cm tall, Mimosa Cake Auto 12 cm.
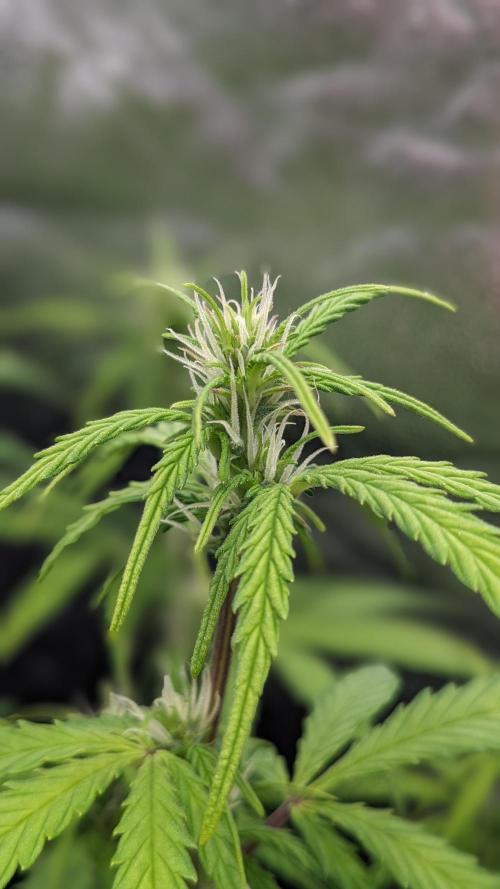
_(Pre-)Flower
In the middle of this week I have also been able to observe pre-flowering in Gorilla Z, which is consistent with my other observations - especially the fact that my plants grow slower than what would be typical. [Autoflowering genetics in particular do most of their growing during the preflowering phase, which should last just under two weeks, roughly starting from week 3 - 5.]
4 likes
5 comments
Share
7
Week 7. Vegetation6mo ago
16 cm
Height
18 hrs
Light Schedule
23 °C
Day Air Temp
No Smell
Smell
60 %
Air Humidity
18 °C
Substrate Temp
18 °C
Night Air Temp
55.99 l
Pot Size
0.11 l
Watering Volume
35 cm
Lamp Distance
420 PPM
CO₂ Level
Nutrients 1
PPFD
700 mll
poloq *Growdiaries deleted this section (don't ask me why). So everything in this week is from the top of my head (like 2 weeks later):
_Environment
This week, I went back to watering (gently) to get the soil used to a ‘normal’ assimilation rate again. As a result, the temperature dropped slightly, while the relative humidity increased at the same time (which was of course elevated by the fact that I removed the sand at the end of last week).
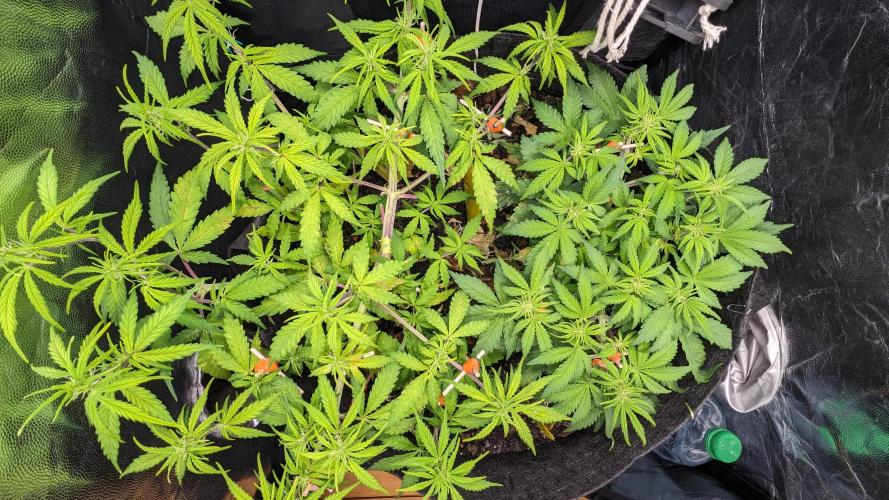
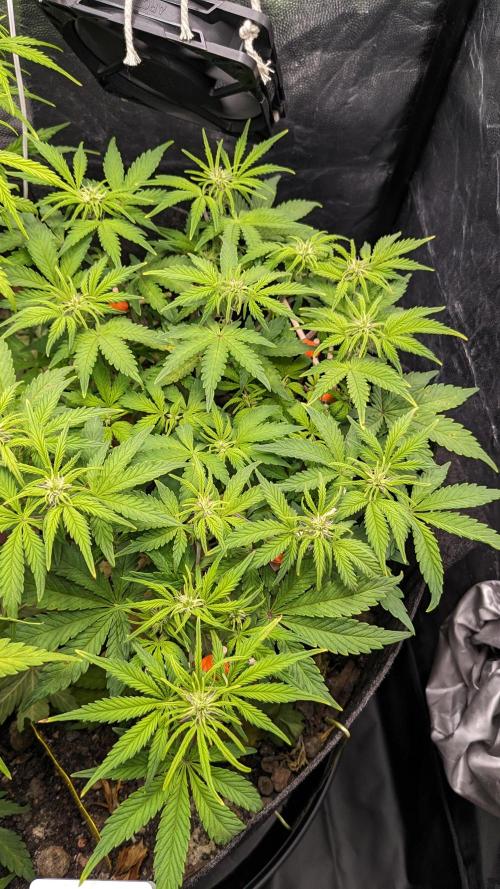
_Plants + Training
Gentle defoliation continued this week. However, it became apparent that Mimosa Cake Auto requires significantly more attention than Gorilla Z Auto, as it grows incredibly densely and intertwines. It also seemed like the Mimosa Cake Auto was about to crack due to the high forces (no space to bend and stretch because everything is just nodes and side branches).
*Gorilla Z Auto was ??? cm tall, Mimosa Cake Auto ??? cm.
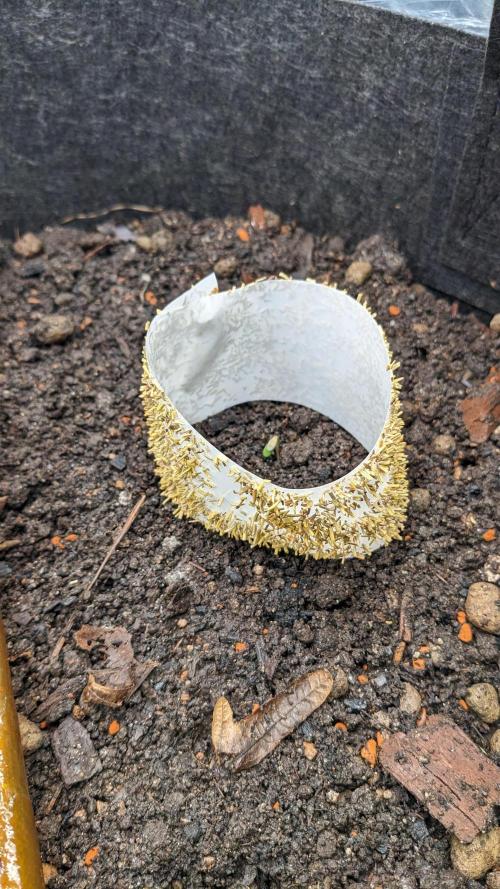
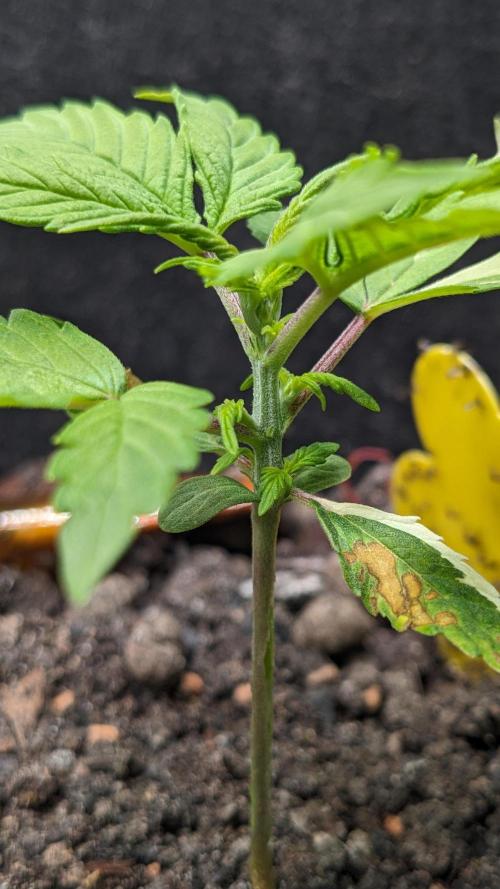
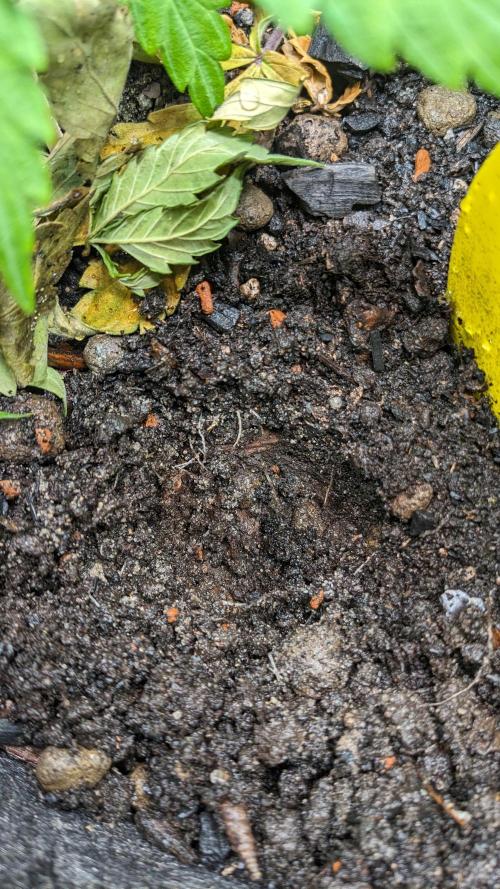
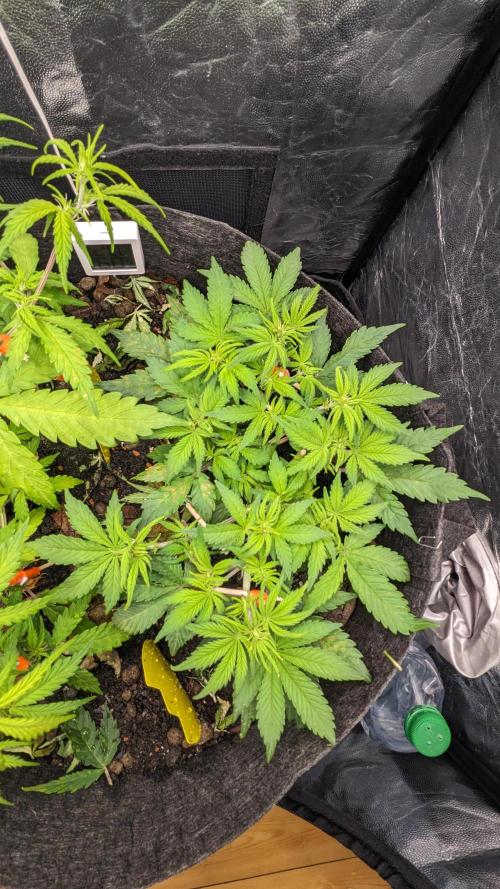
_Organisms
As you can see, microbial life is still in full swing. Numerous springtails can be seen (yellow sticky traps), Oribatida are decomposing organic material, etc.
_Living Soil
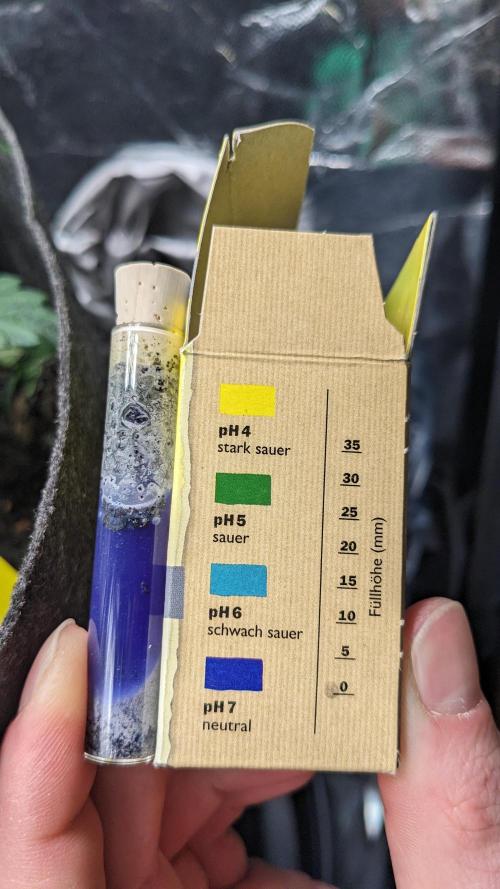
To check the most important indicator of healthy soil life, I carried out a pH test this week. This showed a value of 7, which is slightly too high but definitely within an acceptable range. [Living soil should be between 6 and 7, ideally 6.4–6.6.]
_(Pre)Flower
Mimosa Cake also started showing its first pistils (it seems like both plants are 5 - 10 days apart).
2 likes
comments
Share
8
Week 8. Vegetation6mo ago

1 cm
Height
18 hrs
Light Schedule
23 °C
Day Air Temp
No Smell
Smell
60 %
Air Humidity
18 °C
Substrate Temp
18 °C
Night Air Temp
56 l
Pot Size
0.75 l
Watering Volume
35 cm
Lamp Distance
420 PPM
CO₂ Level
Nutrients 1
PPFD
700 mll
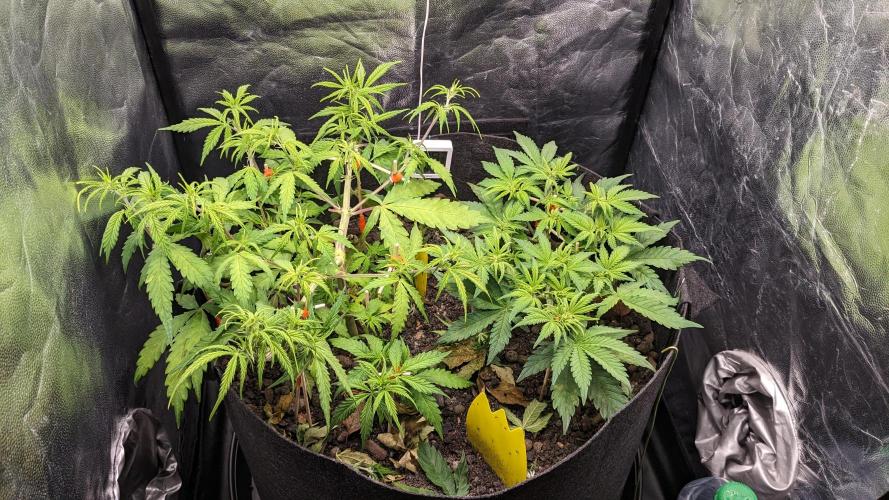
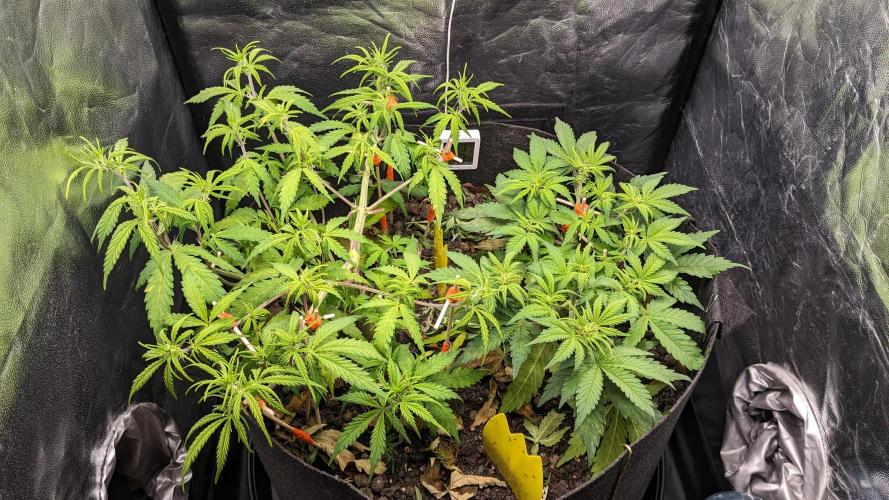
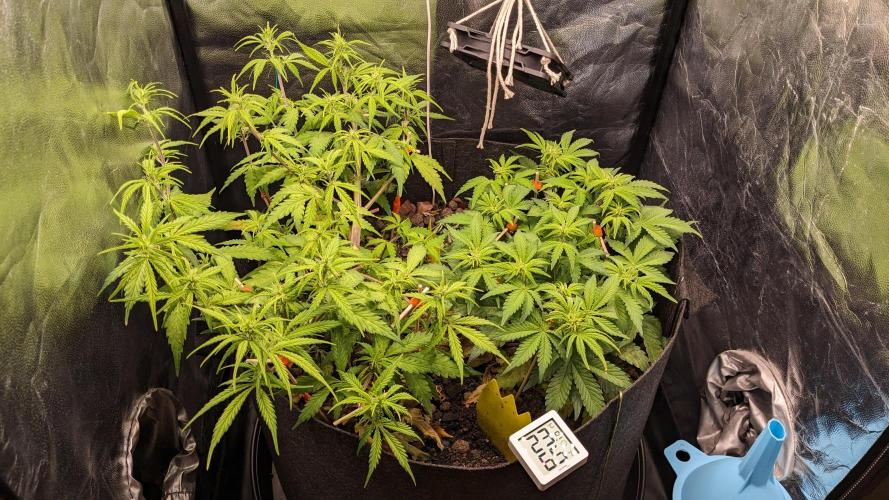
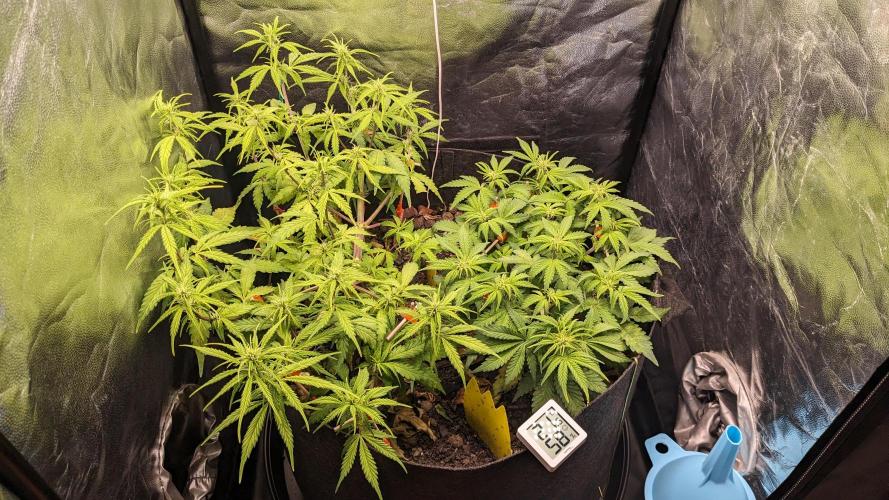
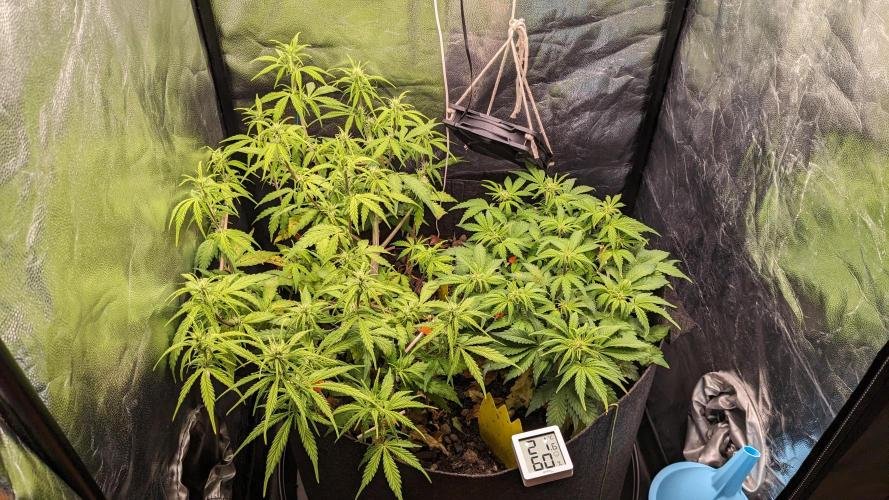
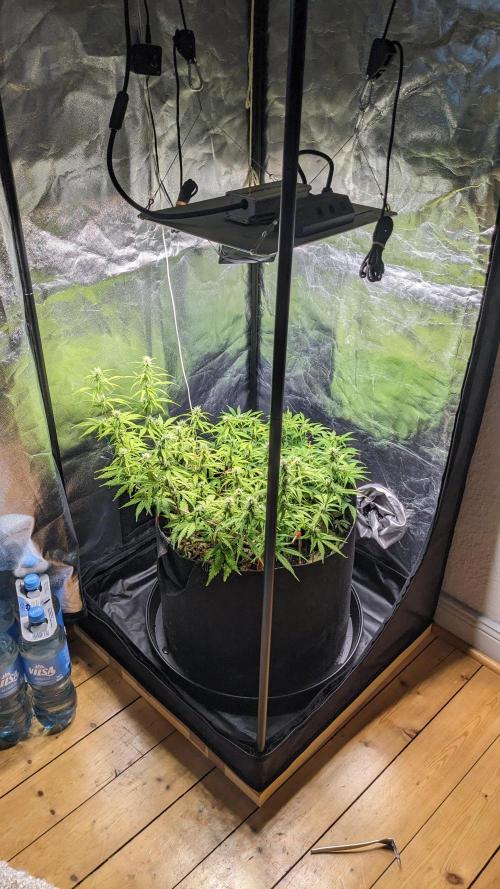
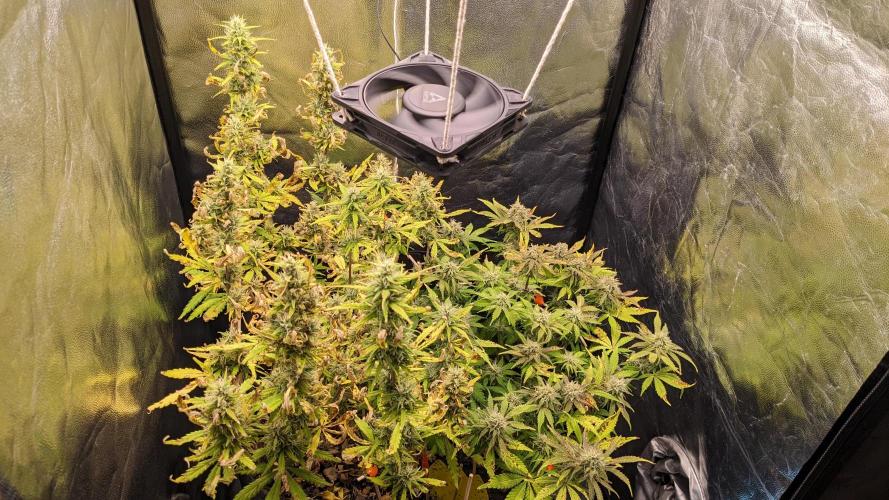
poloq _Setup + Environment
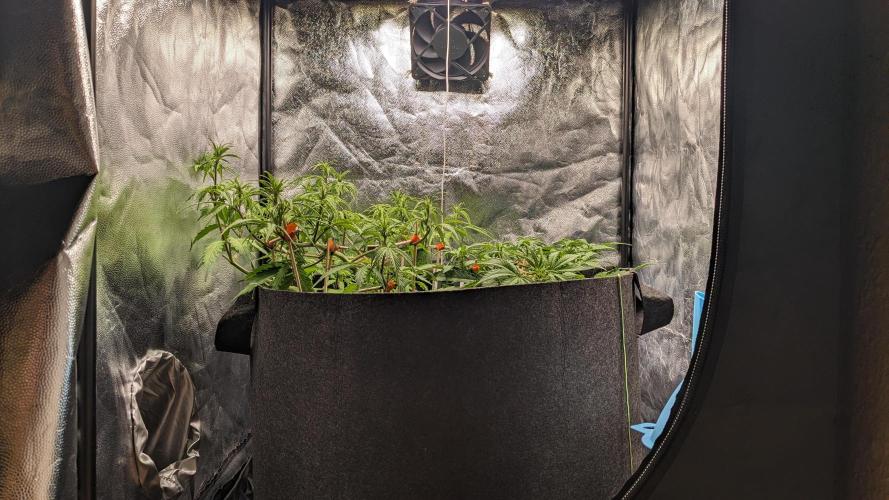
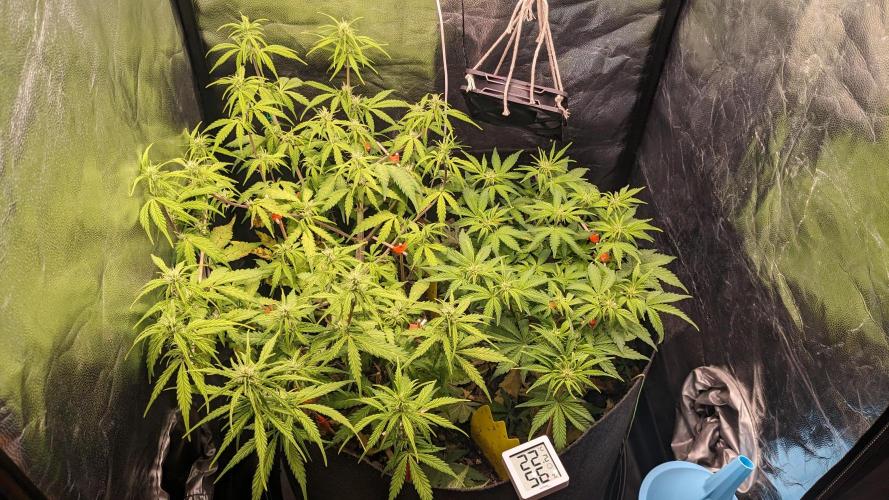
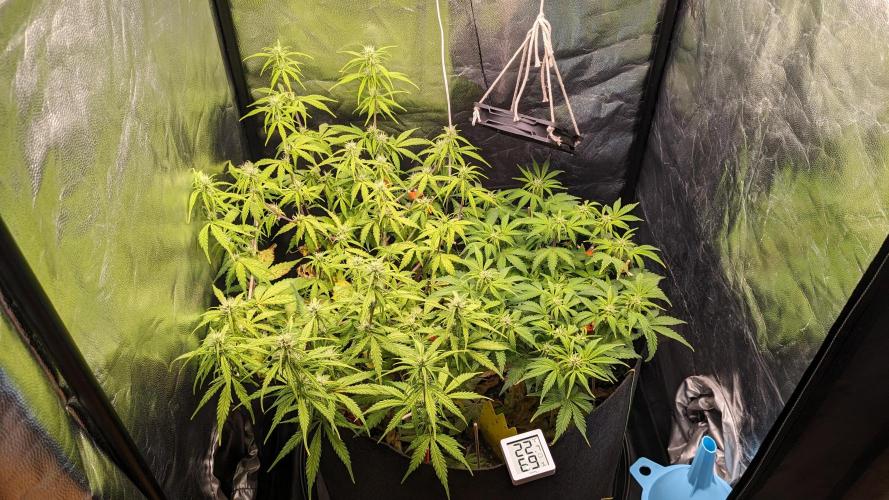
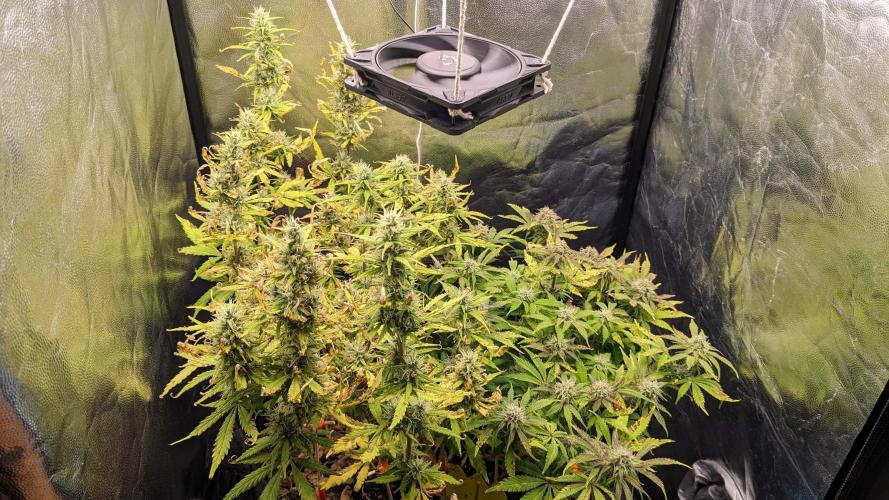
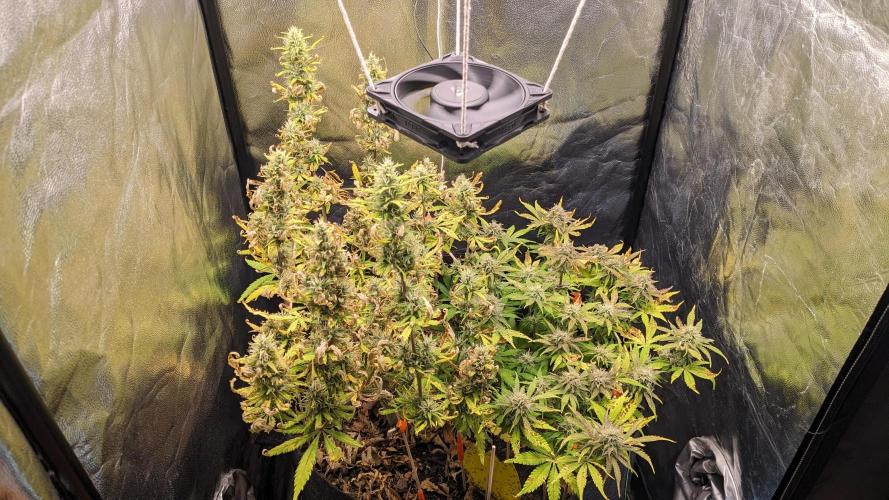
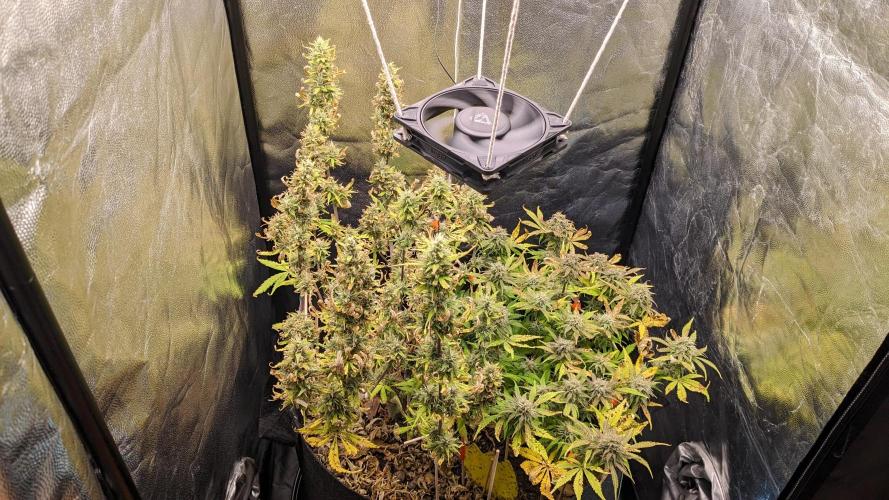
This week, I adjusted the height of the lamp slightly to ensure that the distance to the plants is always at least 30 cm (and optimally no more than 40 cm). The growth of the plants is also causing the temperature to drop slowly but steadily (more cooling effect form evaporation) - to just under 23°C now. At the end of this week, I also repositioned the recirculation fan and the hygrothermometer to ensure that the air is coming from the bottom of the plants and draws upwards, taking the humid air with it (+ that the hygrothermometer displays overall correct values).
_Pests
The adult Sciaridae have now stabilised at a level that does not require further treatment (approximately 3–5 adult flies per day).
_Living Soil
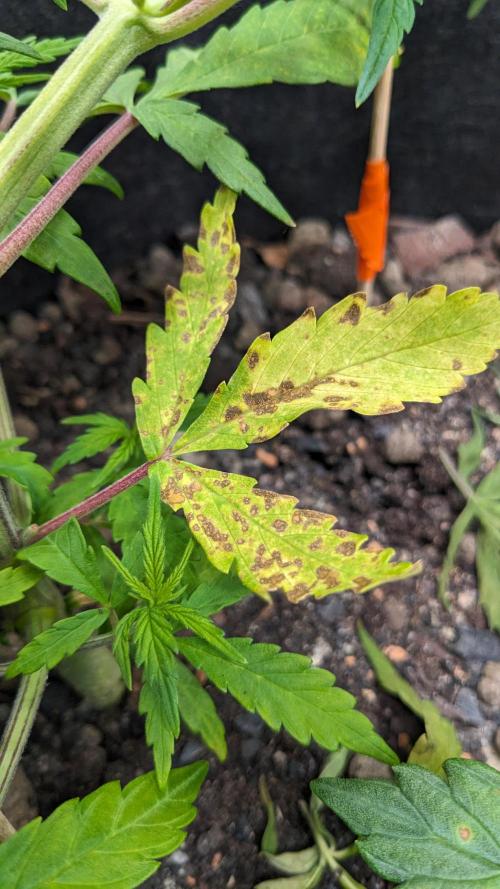
Update: I have looked into the issue with the necrotic leaves again and believe that it is a CalMag problem, for the following reasons:
1. Although CalMag has been added via the rock flour, it takes a very long time to become bioavailable.
2. The prolonged drying out of the substrate has further slowed down the assimilation of these minerals.
3. Autoflowers need as stable an environment as possible and are therefore not particularly well suited to living soil – especially when additional stress is added.
4. ... such as constant topping and removal of leaves (the plants need additional calcium to close the open wounds).
5. In addition, I water with relatively low-mineral water, which also does not provide any readily available calcium or magnesium.
6. And last week's top dressing initially removes minerals slightly, but stabilises in the long term.
So everything I have done stabilises the living soil in the long term, but causes short-term stress - for genetics that are not very resilient.
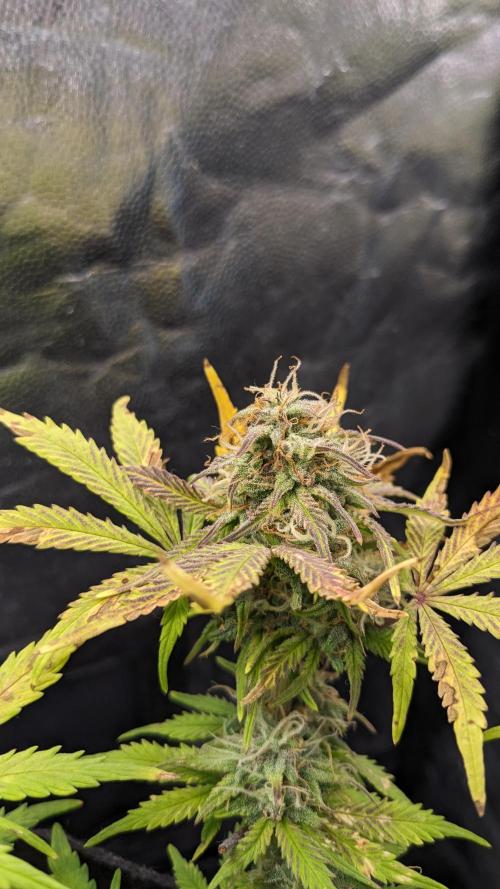
_Plants
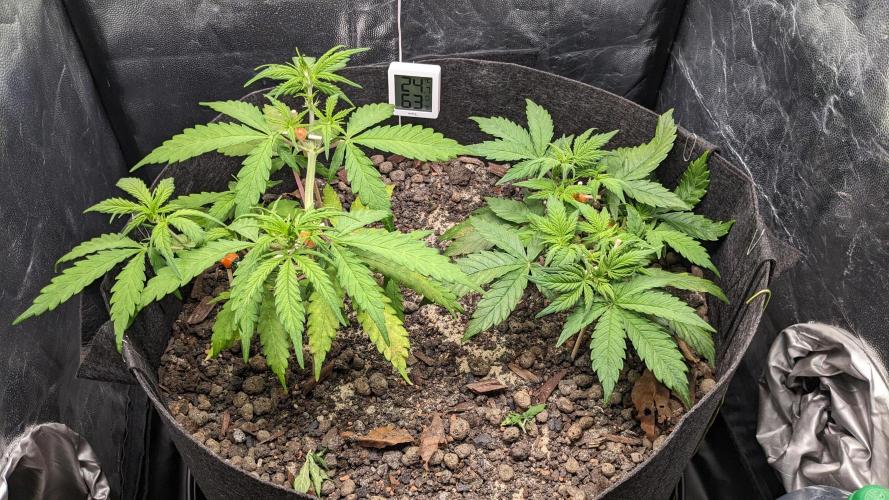
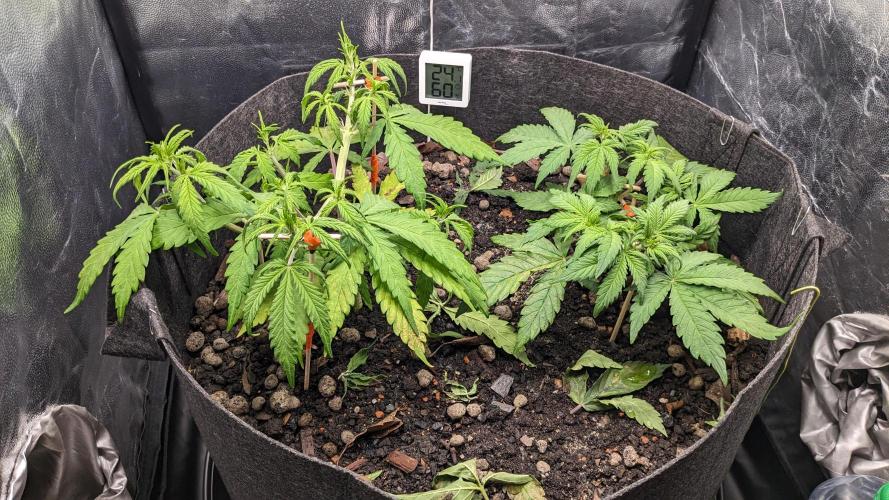
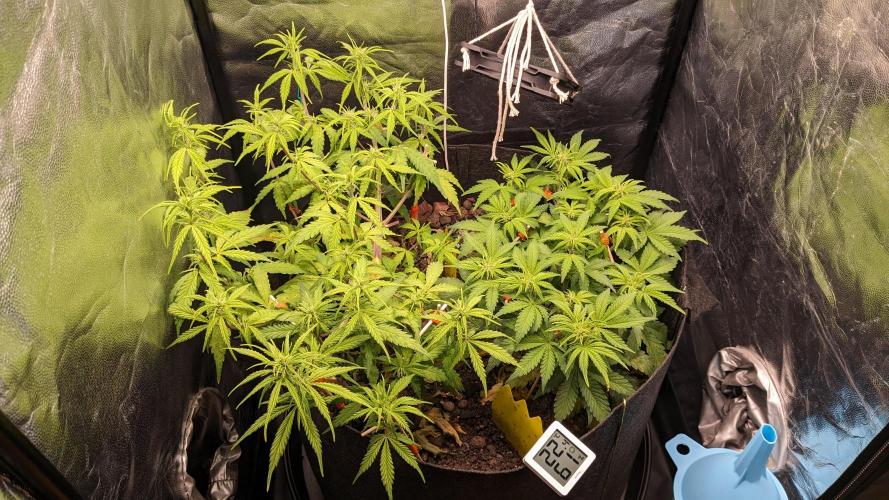
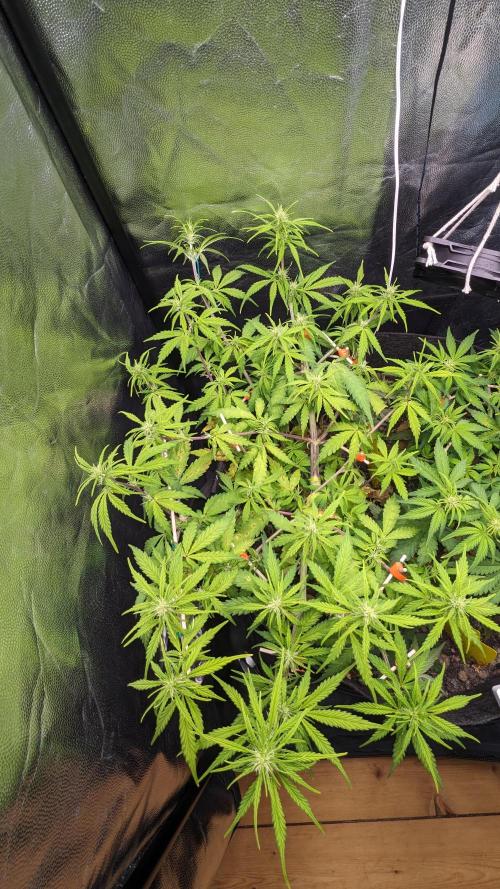
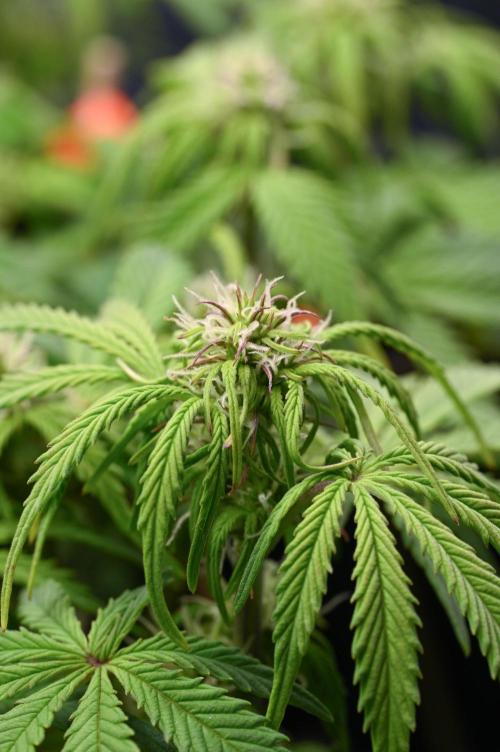
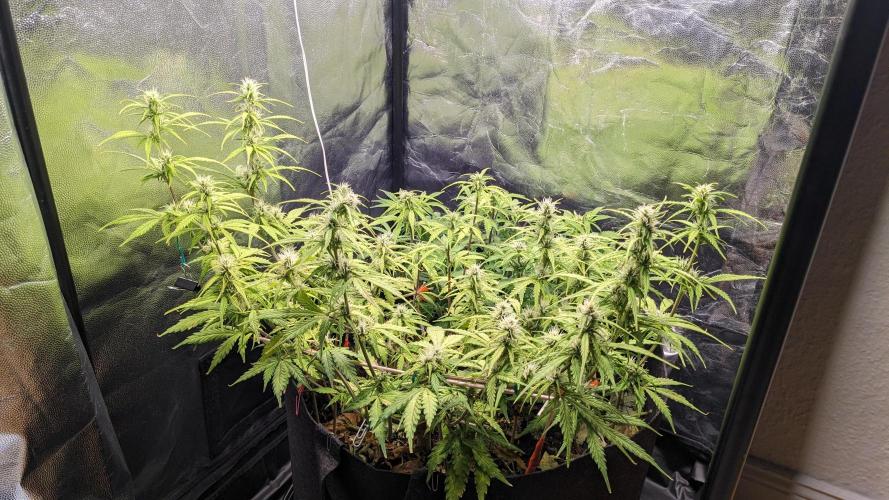
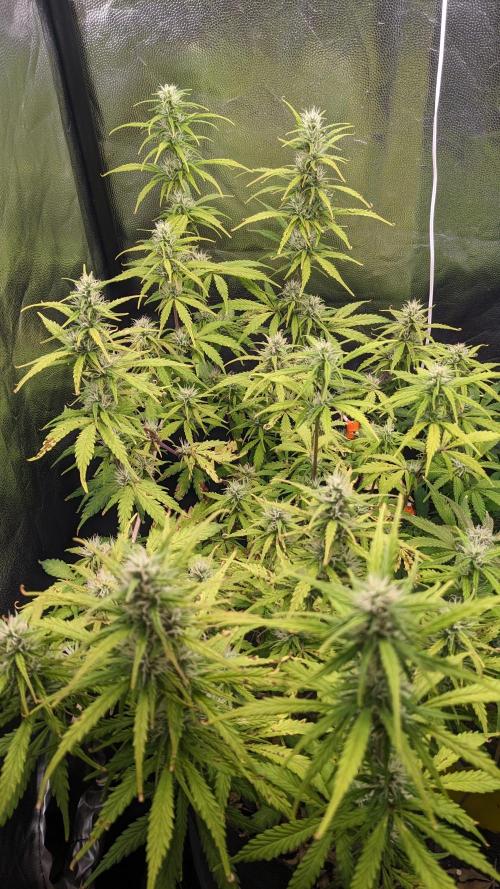
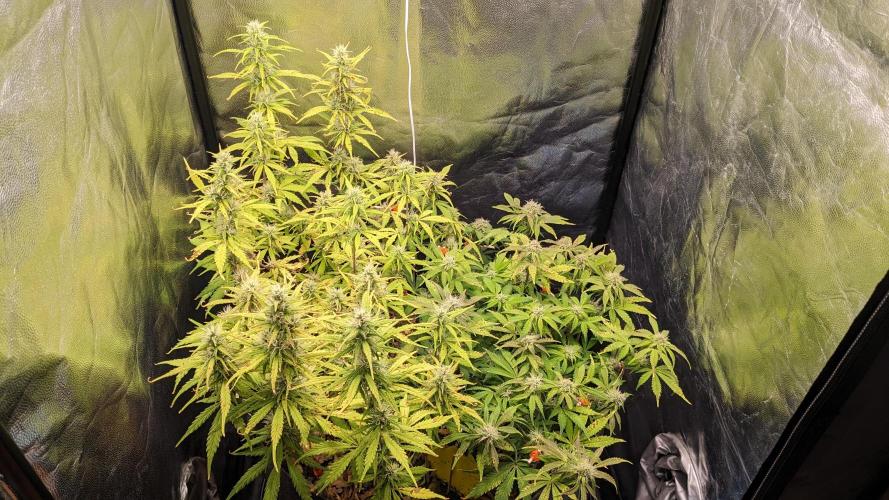
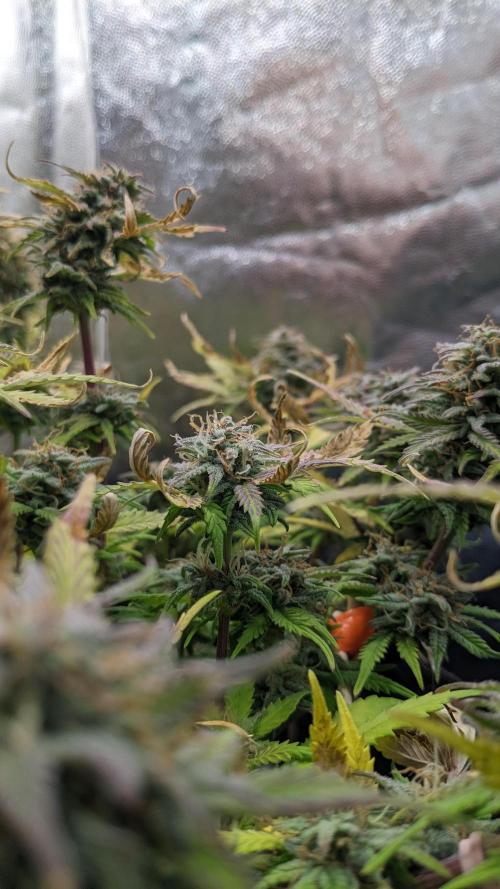
While Gorilla Z Auto continues to develop its very pleasant structure and slowly begins to align its tops, Mimosa Cake Auto is becoming denser and bushier every day - which is a problem. If its structure continues to develop in this way, the flowers will literally grow over and into each other, leaving no room for air circulation.
*Gorilla Z Auto was 29 cm tall, Mimosa Cake Auto 17 cm.
_(Pre-)Flower
Even though it looks as if Gorilla Z is already in the flowering phase, closer observation reveals that there is still one pair of stigmas per leaf axis. But I expect the plants to start shifting into flower at the end of this/ beginning of next week (2 - 3 weeks after noticing the first pistils).
2 likes
comments
Share
9
Week 9. Flowering6mo ago

28 cm
Height
18 hrs
Light Schedule
22 °C
Day Air Temp
Weak
Smell
60 %
Air Humidity
18 °C
Substrate Temp
18 °C
Night Air Temp
56 l
Pot Size
0.5 l
Watering Volume
30 cm
Lamp Distance
420 PPM
CO₂ Level
Nutrients 1
PPFD
700 mll
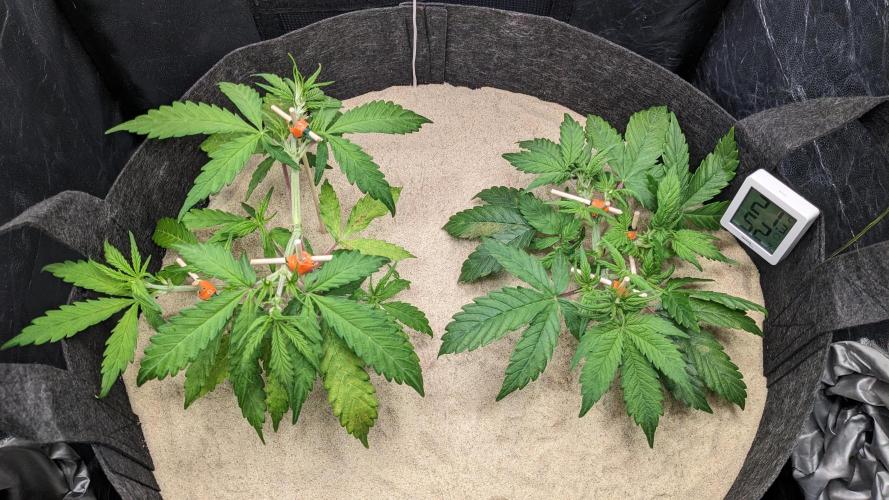
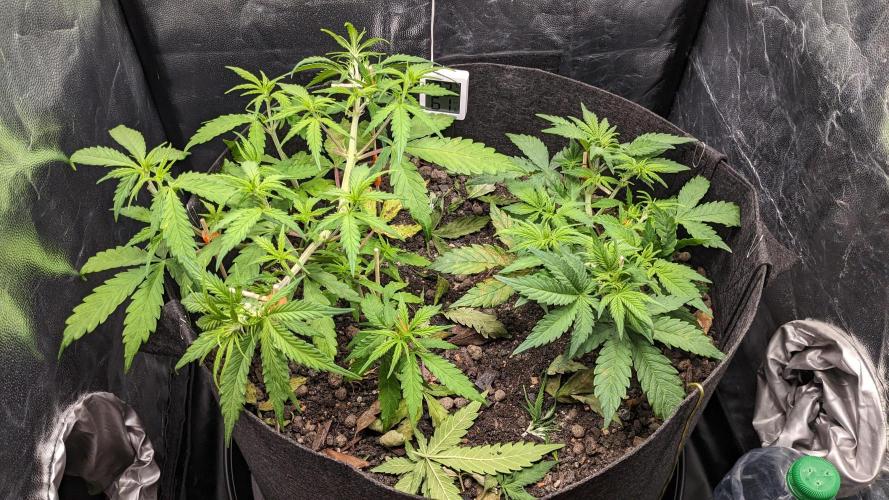
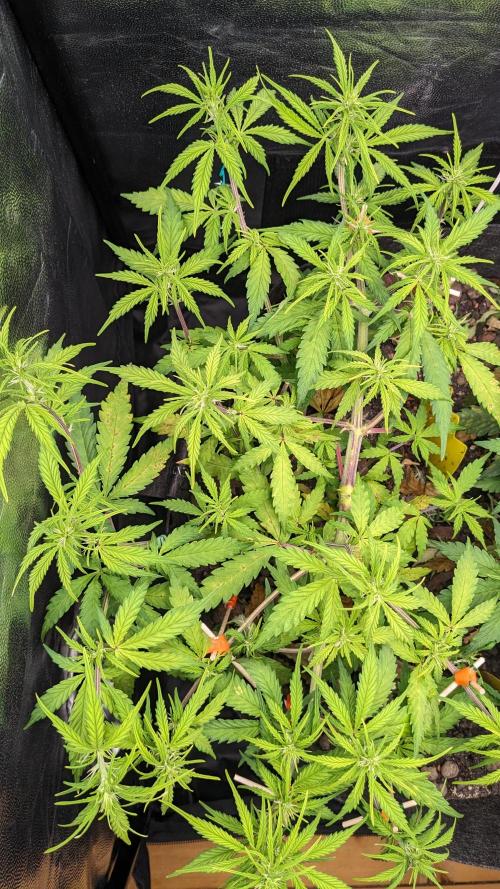
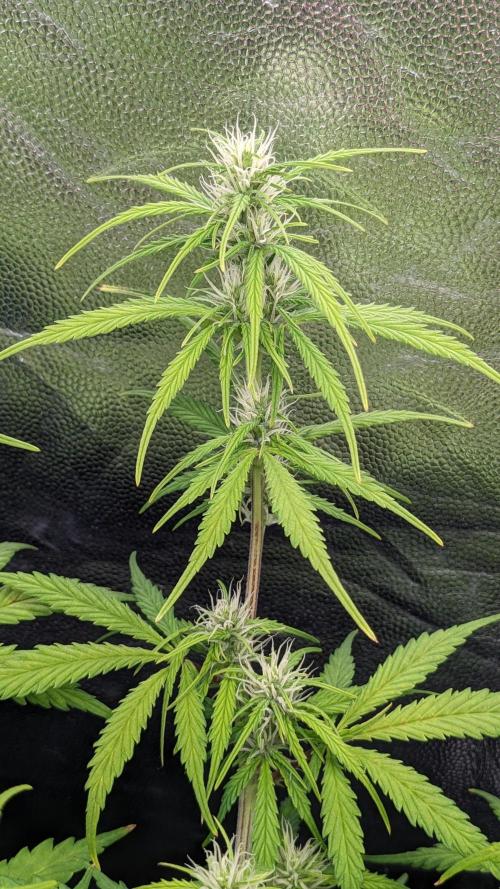
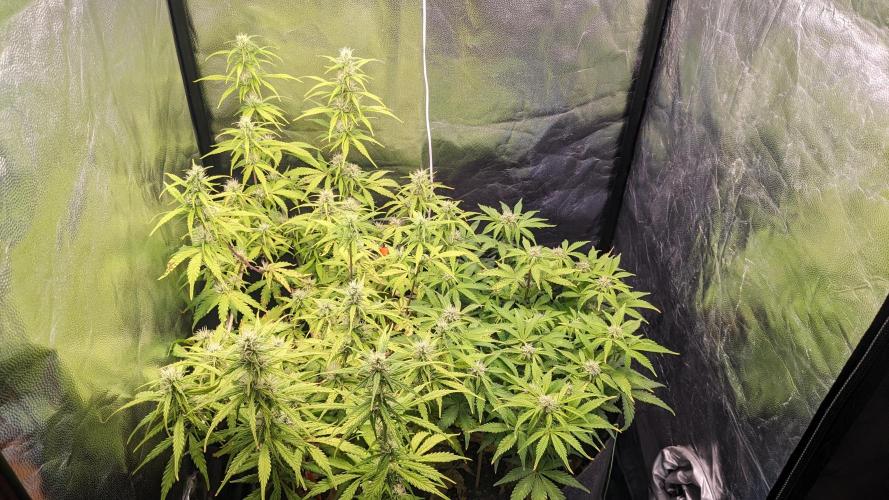
poloq _Plants
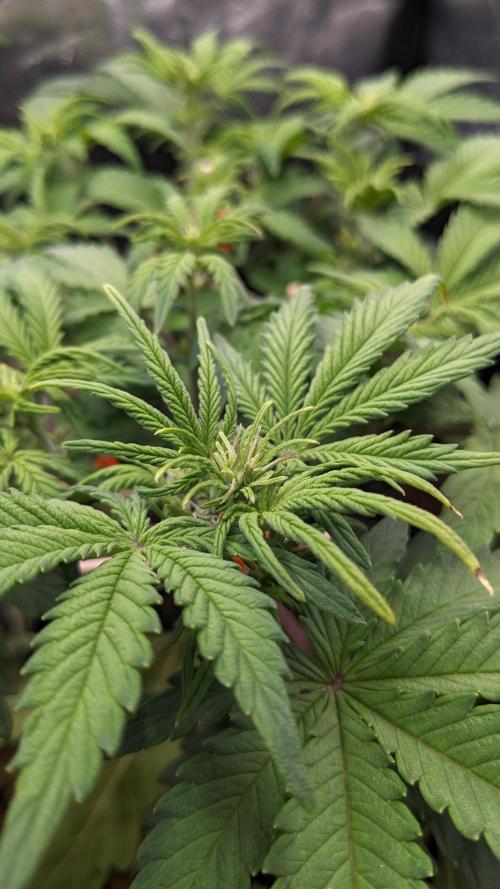
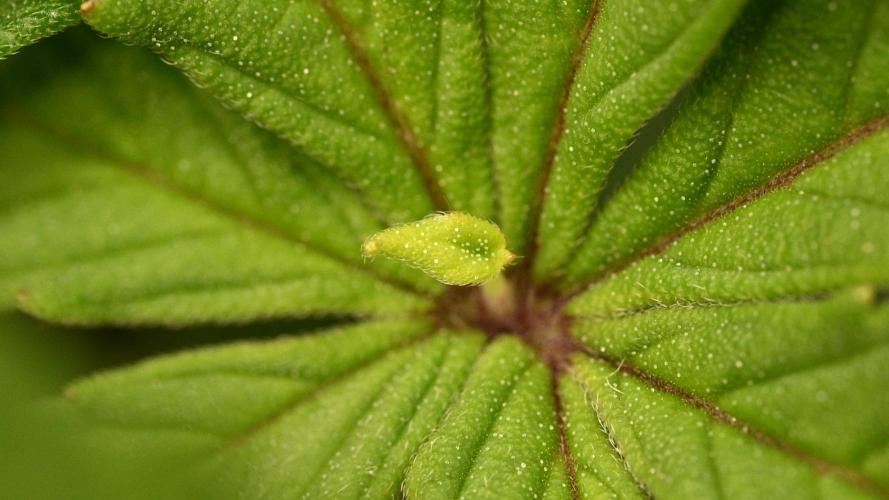
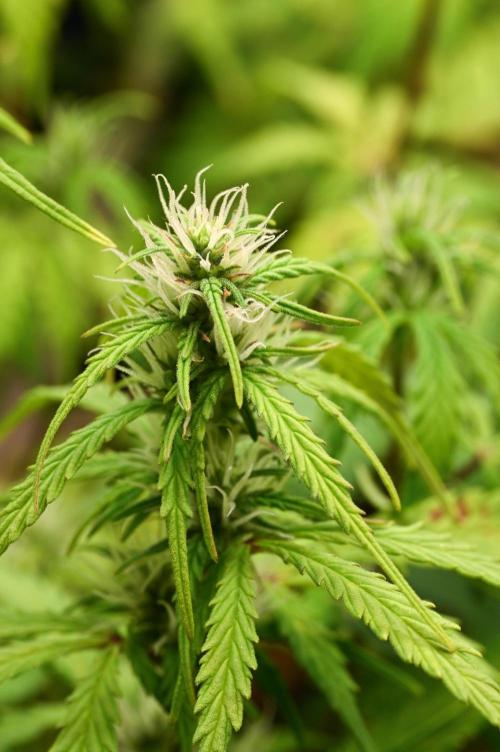
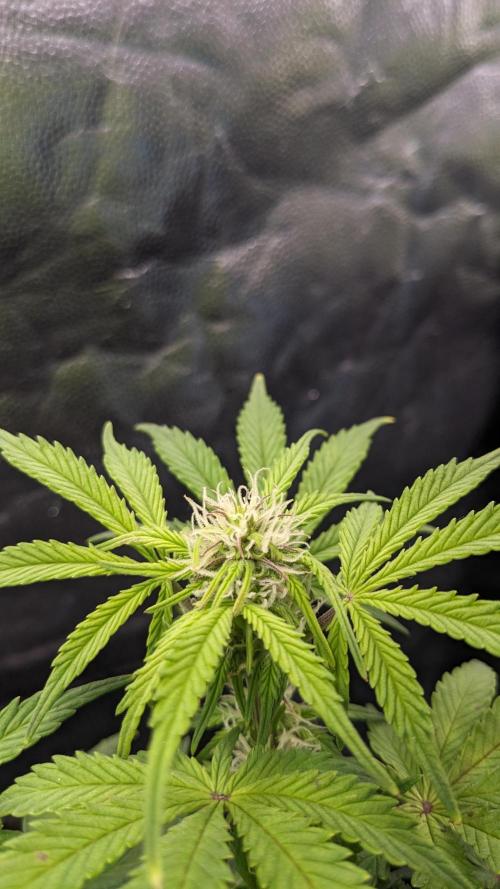
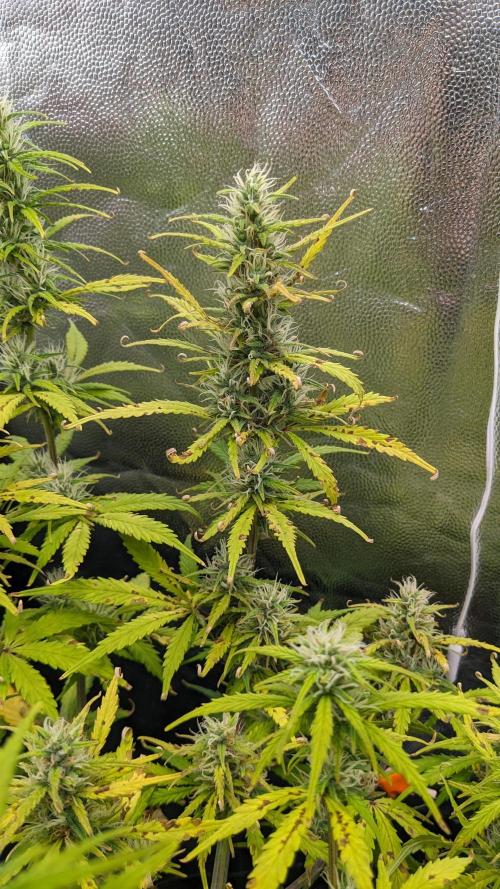
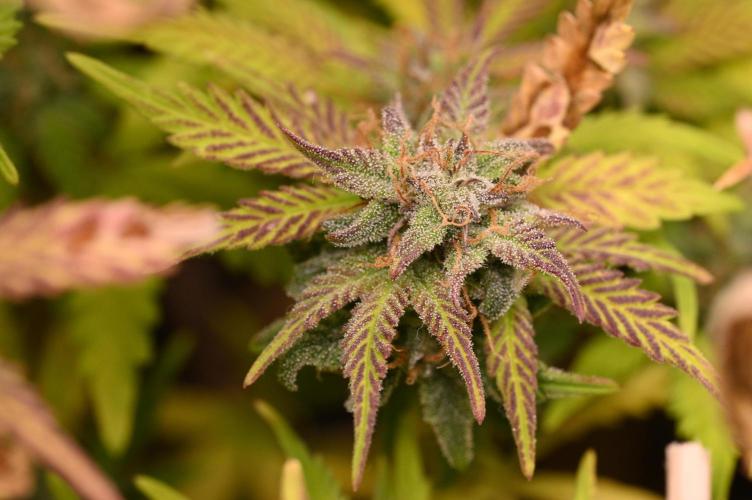
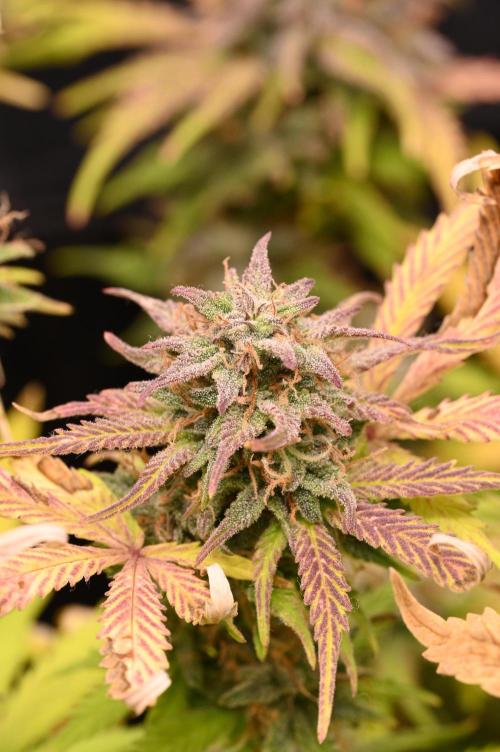
On day 57, I noticed something really exciting that fits with the unstable genetics of Mimosa Cake Auto. Even though its variegation is no longer visible, it has begun to mutate in other ways: with epiphyllous growth, i.e. the formation of structures that should not actually occur, such as the growth of leaves from other leaves.
*Gorilla Z Auto was 35 cm tall, Mimosa Cake Auto 21 cm.
_Training
Around Day 60 I decided to do yet another slight defoliation on the Mimosa Cake Auto (so that the offshoots are getting enough light again). Besides that, I obiously used stakes to train the plants in the desired shape.
_Flower
Gorilla Z shifted into Flower (a little later than what would be considered normal)! Besides that, the plants start to smell ever so slightly because the production of trichomes is finally about to get started. Now you can definitly see that the Gorilla Z Auto is indeed a little faster (about 7 days) and already starts developing more and more stigmata.
_Setup
I didn't need to change much this week - just a slight repositioning of the circulating fan. I also got a slight drop in temp. because of and decrease in ambient temperature.
6 likes
4 comments
Share
10
Week 10. Flowering6mo ago

35 cm
Height
18 hrs
Light Schedule
22 °C
Day Air Temp
Weak
Smell
60 %
Air Humidity
18 °C
Substrate Temp
18 °C
Night Air Temp
56 l
Pot Size
0.75 l
Watering Volume
30 cm
Lamp Distance
420 PPM
CO₂ Level
Nutrients 1
PPFD
650 mll
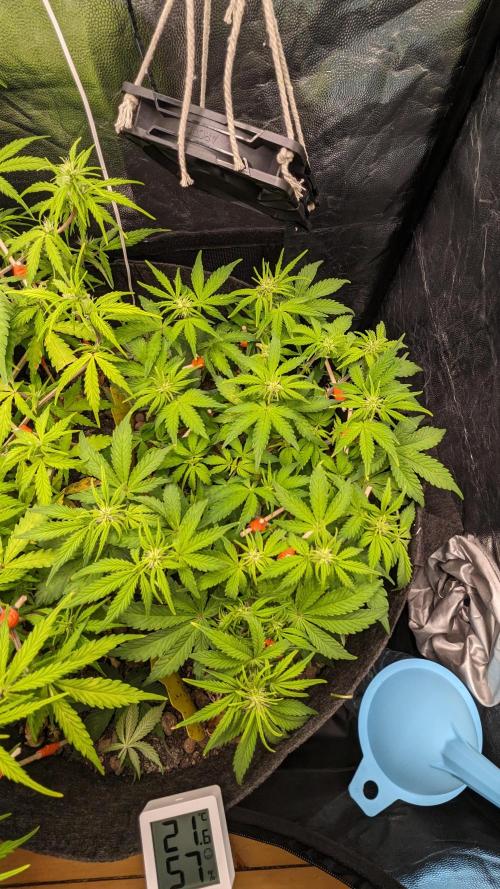
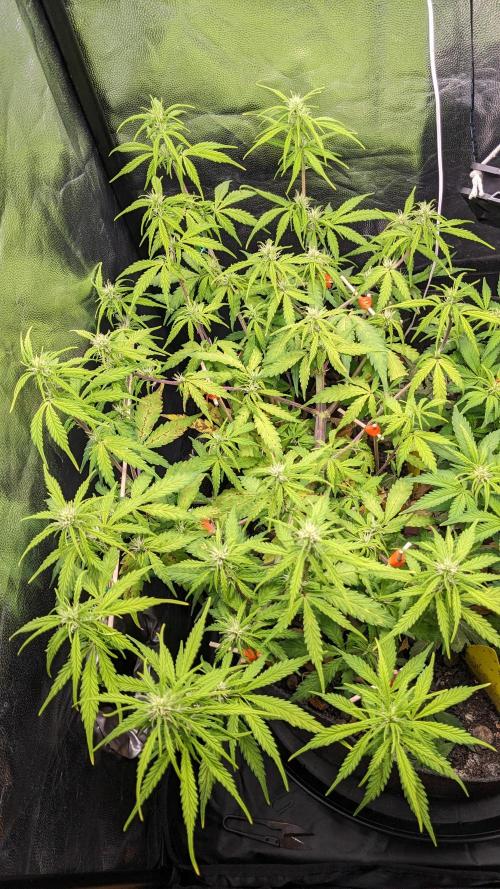
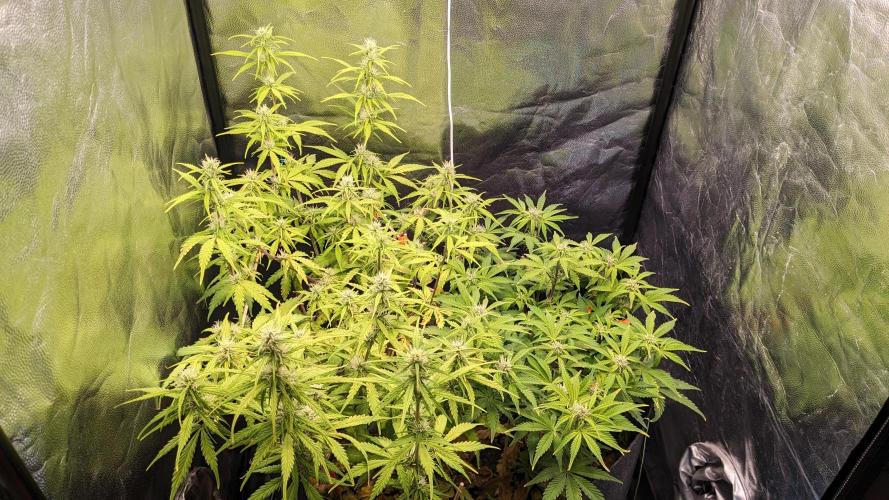
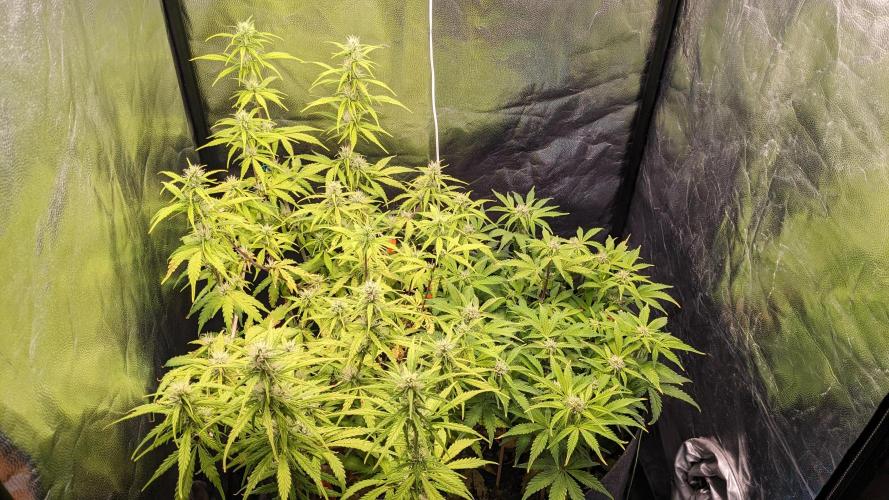
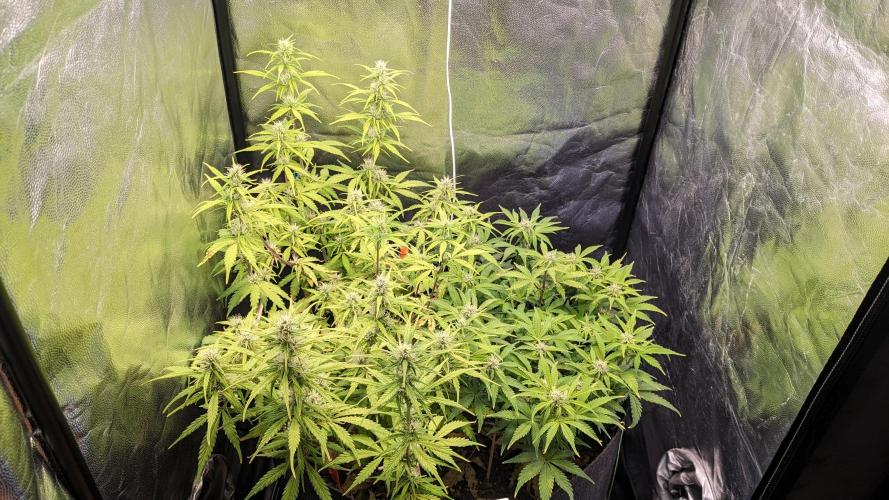
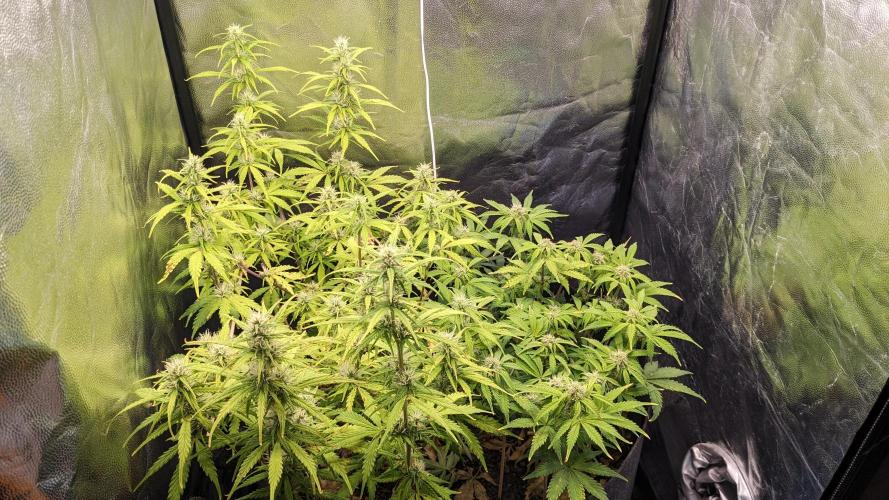
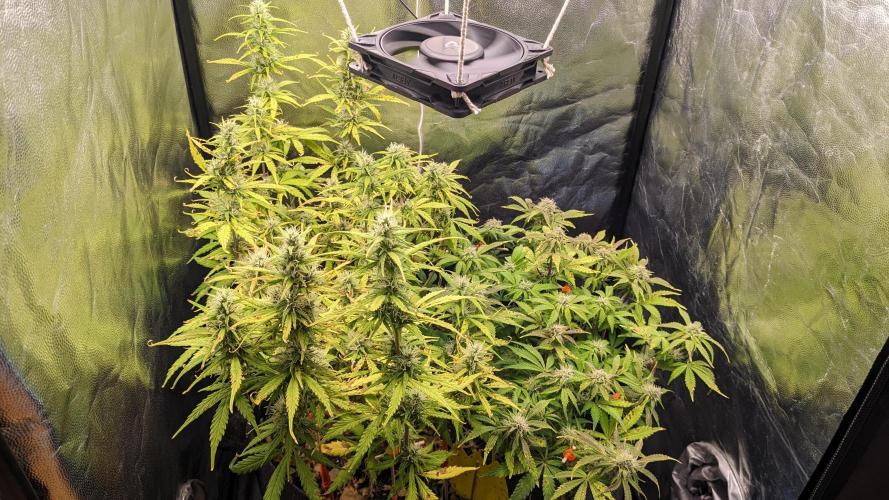
poloq _Plants
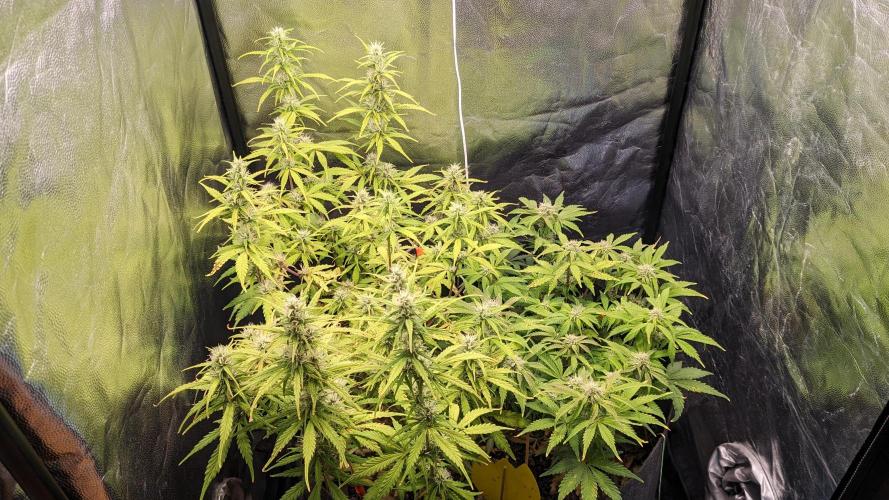
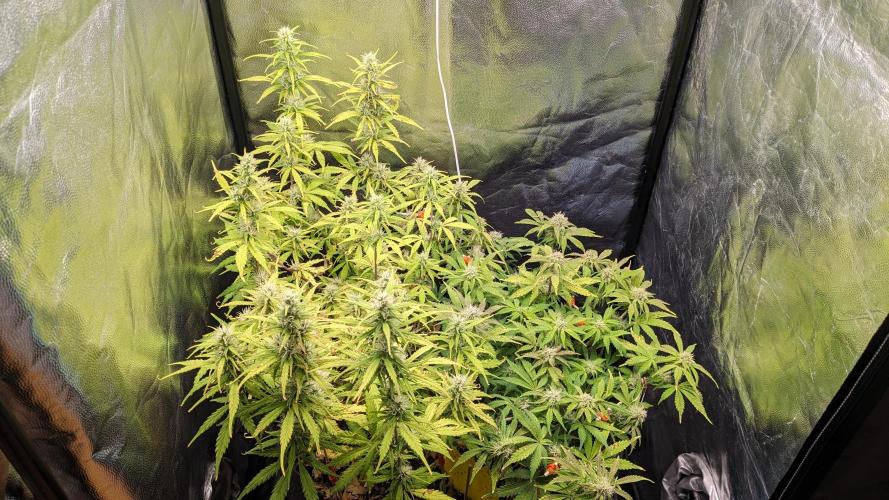
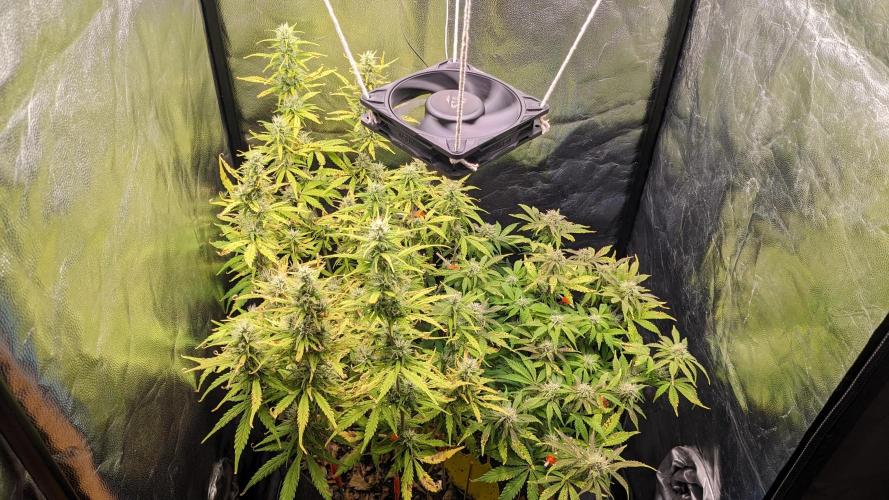
This week in general, the plants have continued to grow vigorously – Gorilla Z in particular seems to be growing at least 1 to 2 cm per day.
*Gorilla Z Auto was 41 cm tall, Mimosa Cake Auto 28 cm.
_Setup
The lamp distance is now 30 cm (Gorilla Z) to 45 cm (Mimosa Cake), which has reduced the PPFD to an average of 650, but it is much more homogeneous (around 750 for the highest parts, 550 for the lowest parts, at least 450 in the furthest corner).
_Flower
At the beginning of this week, Mimosa Cake Auto also completed its transition from pre-flowering to flowering.
_Environment
I was still trying to figure out how much water the living soil really needs – and what is optimal. [It should not dry out under any circumstances, as this would kill most organisms, but it should not be too moist either (otherwise anaerobic organisms would take over)]. I have the feeling that the plants do not (yet) have the necessary foliage to really use up the moisture in the soil in less than a week, which is why I can allow a little experimentation. So in contrast to giving about 3-4 l every other day, I just watered once this week (about 3 l), but added a handful of wormcastings as topdressing before.
_Pests
I have not seen a singular Sciaridae for at least 5 days, so I can confidently say that the nematodes worked incredibly well.
_Living Soil
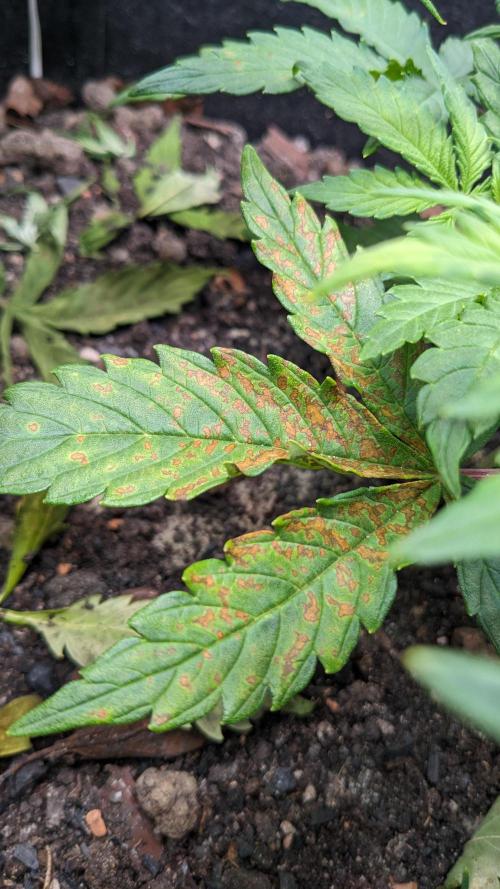
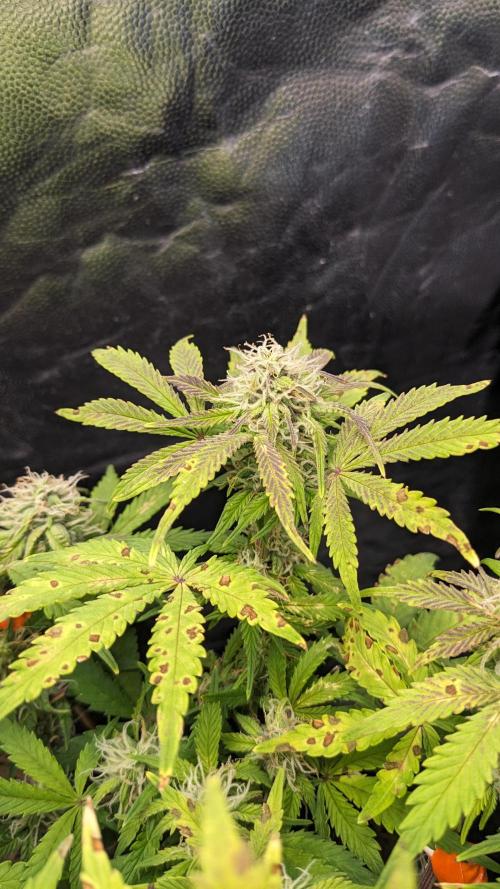
Update: I have taken another look at the problem with the necrotic leaves and have come to the conclusion that it is a multifactorial problem. The following can (most likely) be ruled out:
1. Fungal infestation, as according to new findings, spores should be visible on the undersides of the leaves (which is not the case).
The following is still possible:
1. Potassium/ Magnesium deficiency or reduced uptake.
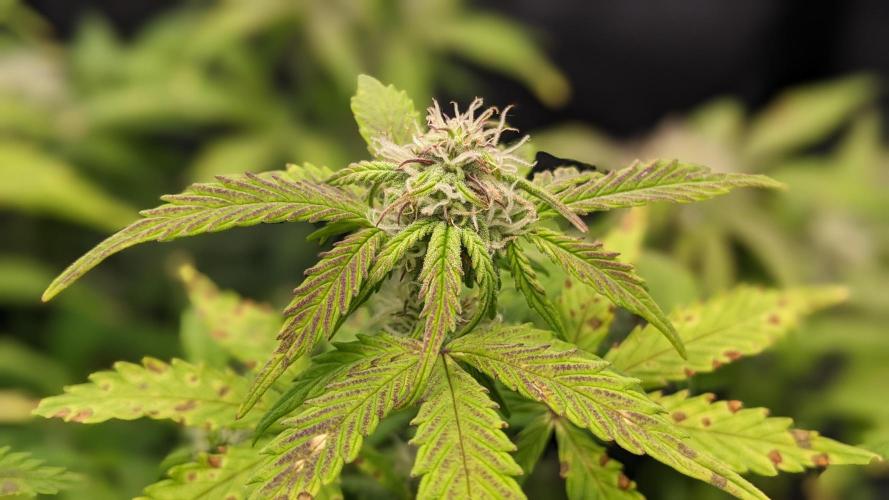
2. Calcium deficiency (no deformed leaves, but pattern of brown spots matches).
However, as new symptoms have also appeared, a new theory has emerged that would explain all the observable signs: nutrient imbalance + systemic stress:
1. Soil that was too dry in an important stage...
2. .. with growth that was too slow for the gentics.
3. Potential root damage due to fungus gnats.
4. Magnesium deficiency.
5. Too much moisture/too little oxygen in the substrate (the plants never seem to ‘need’ water).
6. Possibly to intense fluctuations in temperature and relative humidity (the tent is in my living room, which I air out at times), as well as
7. Insufficient air circulation (PC fan is static and probably not powerful enough).
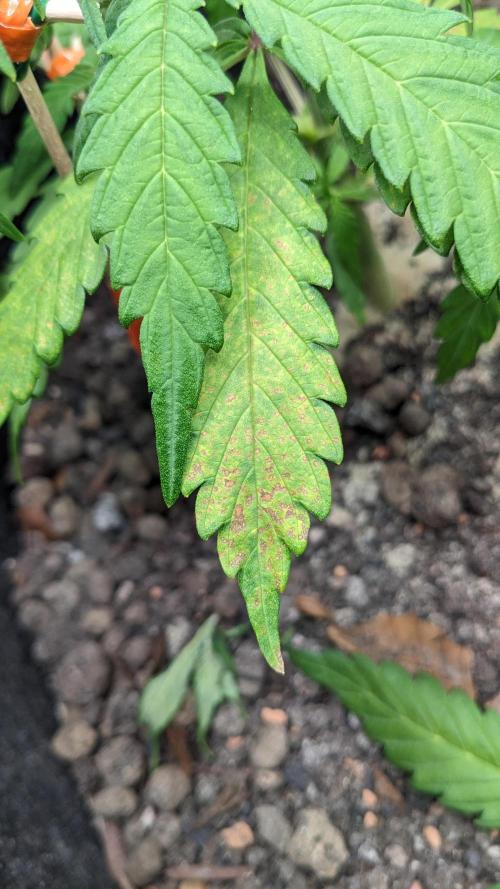
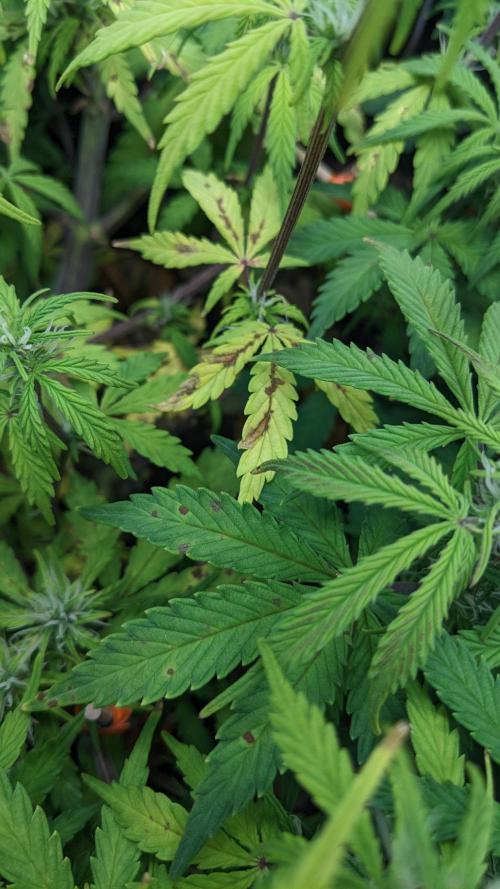
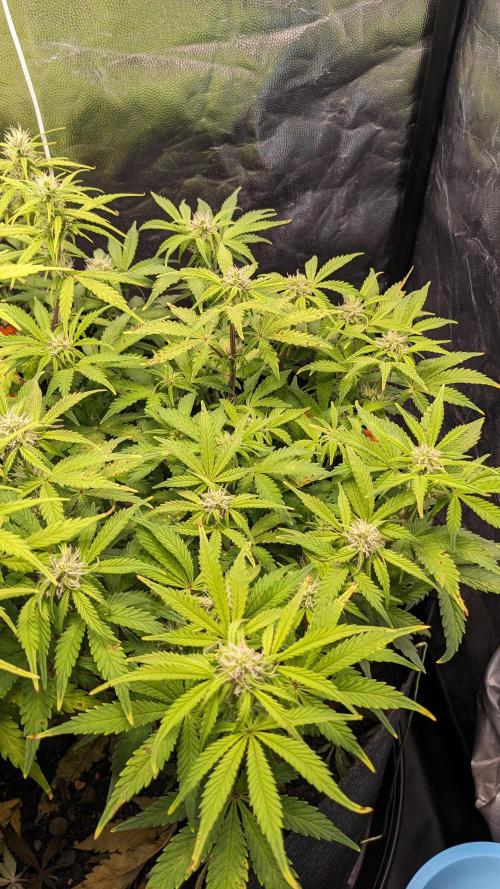
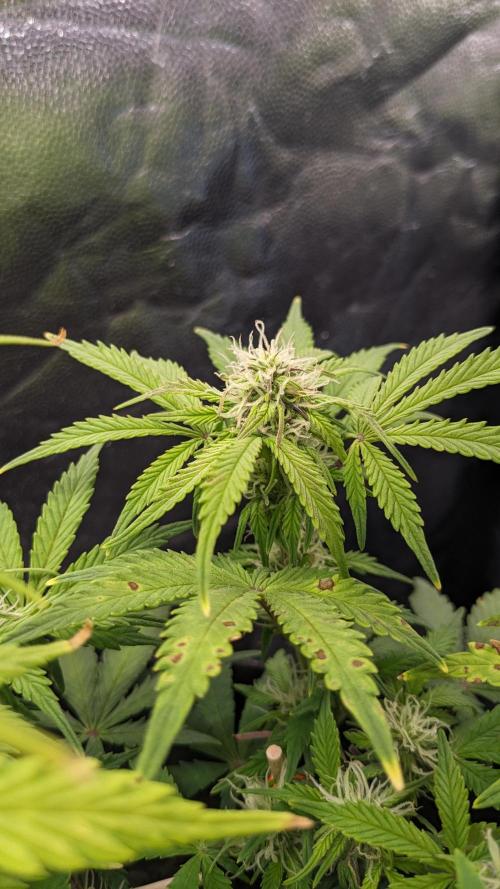
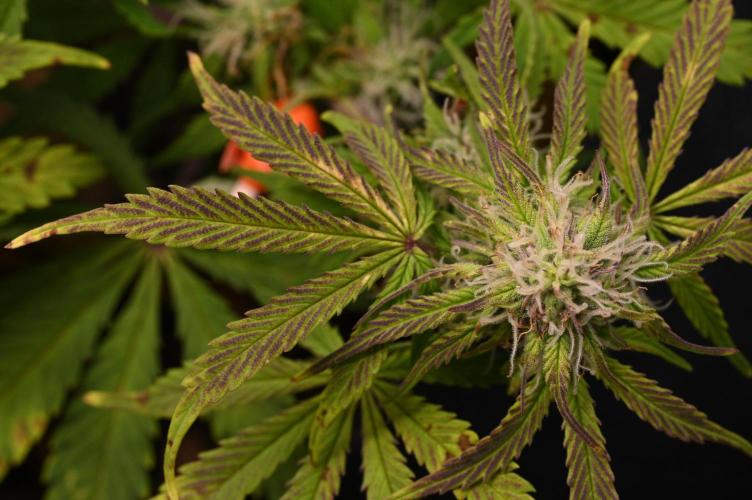
This would also fit with the new damage pattern (and my general 'feel'), as for several days now the tips of young leaves have been slightly yellow or even brown, while the leaves themselves are slightly pale. So the soil may have everything it needs, but either not in the right proportions or not in the required availability.
1 like
comments
Share
11
Week 11. Flowering5mo ago


36 cm
Height
18 hrs
Light Schedule
21 °C
Day Air Temp
Normal
Smell
55 %
Air Humidity
18 °C
Substrate Temp
18 °C
Night Air Temp
56 l
Pot Size
0.5 l
Watering Volume
30 cm
Lamp Distance
420 PPM
CO₂ Level
Nutrients 1
PPFD
500 mll
poloq _Living Soil
I noticed that my substate is actrually too dense (most likely because of the amount of sand the soil I took out of nature had) - and because of that too moist.
_Setup + Environment
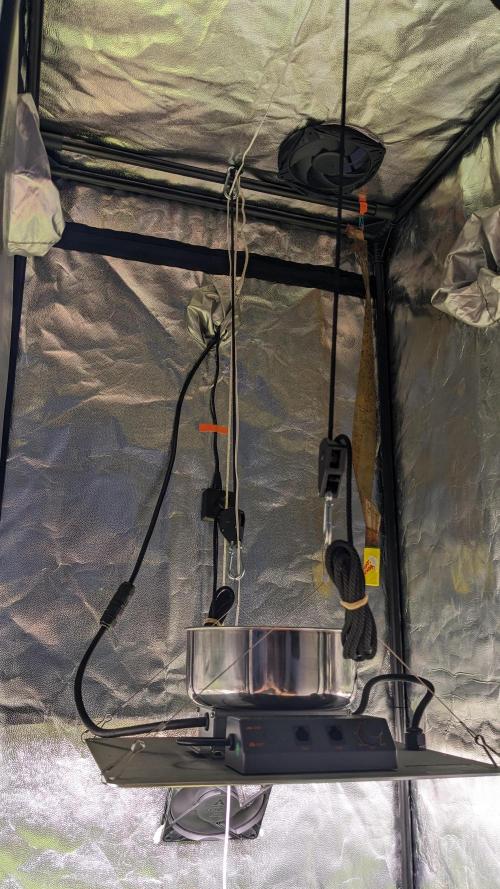
I am currently also focusing on increasing the VPD from 1.0 to around 1.3. To do this, I have ramped up the circulating fan speed from 25% to 40% [more circulation = better transpiration] and removed the water-filled tray from the lamp.
_Setup
With the start of this week, I began measuring light intensity more precisely. So instead of just evaluating the lowest and highest points of the plants in the middle of the tent (and perhaps taking an approximate value from only one of the four corners), I tested about every third potential top cola separately and adjusted everything so that the light is as homogeneous as possible [greater distance = more homogeneity but less intensity]. This is to ensure that the light stress is not too great and that all parts are supplied with sufficient but gentle light. As a result I raised the lamp to a distance of 30 cm (Gorilla Z) to 50 cm (Mimosa cake) to support, but also straighten the growthpattern the plants have right now. [30 cm should be used as the minimum distance for lamps of this design, as otherwise the light intensity and temperature become too high and too concentrated].
Gorilla Z
Top Cola Middle = 600 PPFD
Top Cola Corner = 450 PPFD
Top Cola Left = 550 PPFD
- avrg. ≈ 525 PPFD
Mimosa Cake
Top Cola Middle = 450 PPFD
Top Cola Corner = 400 PPFD
Top Cola Right= 400 PPFD
- avrg. ≈ 425 PPFD
_Training
Although I usually like to do lollipopping after about two to three weeks of flowering, I decided against it this time because the system was already under enough stress. So, on day 72, I ‘only’ defoliated about 10 to 20% of the plants (mainly Mimosa Cake) to ensure air and light permeability within the plants.
_Flower
This week the smell also really started to develop, so that I can start rasterizing the characteristics:
Gorilla Z
Creamy, fruity, lime, 'lime sorbet', slightly sweet, slightly fresh/ minty
Mimosa Cake
creamy, berry, sweet, herbal, slightly spicy/ peppery
_Plants
*Throwback to week 7 - Mimosa Cake actually did not crack.
*Gorilla Z Auto was 45 cm tall, Mimosa Cake Auto 26 cm.
_Pests
Damn... the fungus gnats are back. -.- I'm pretty sure there were still a few in the room where the tent is and that they somehow found their way back into said tent. I'll try to combat them with sticky fly traps alone, but already ordered another pack of nematodes. Until they arrive, I'll monitor what's going on.
4 likes
comments
Share
12
Week 12. Flowering5mo ago


37 cm
Height
18 hrs
Light Schedule
22 °C
Day Air Temp
Normal
Smell
55 %
Air Humidity
18 °C
Substrate Temp
18 °C
Night Air Temp
56 l
Pot Size
0.5 l
Watering Volume
30 cm
Lamp Distance
420 PPM
CO₂ Level
Nutrients 1
PPFD
500 mll
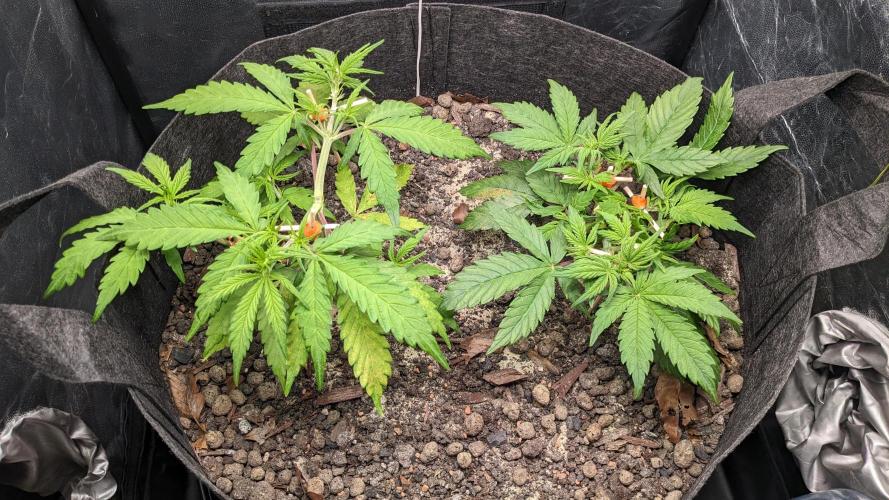
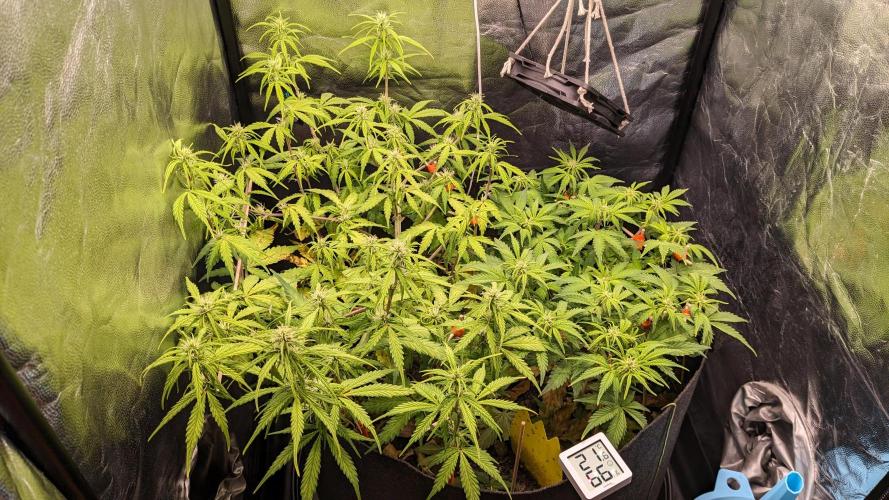
poloq _Living Soil
After taking another closer look at the soil, I am now fairly certain that what I said in week 10 is largely correct - as is my finding from week 11; the substrate is too dense, which means that:
1. the oxygen supply is insufficient.
2. there is too little moisture exchange.
3. and with that, nutrients cannot be provided adequately.
All of this is exacerbated by the potential root damage caused by fungus gnats.
I can't change the current situation too much, but I know for next time that I need to add significantly more drainage to the substrate. (I am well aware of the importance of drainage/airy substrate, but I simply misjudged it here.)
_Pests
I used the nematodes at day 81.
_Setup
I decided to yet again reposition the circulating fan so that it can blow directly through the plants onto the soil and with that, take away the moisture right were it is.
_Environment + Setup
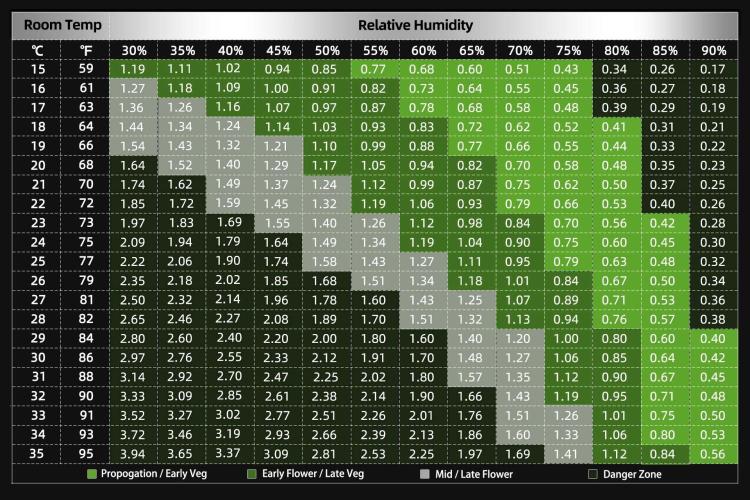
I got the RH down about 5% and with that, the VPD up by 0.1. Besides that, Mars Hydro seems to have updated their VPD-Chart - so now I'm at 1.2.
*I am fairly certain (based on numerous observations) that the temperature inside the tent is about 3°C higher and the relative humidity is 5% lower than in the room where it is located (at 100% lamp intensity and 40% fan speed). This will make it much easier to influence these values in the future.
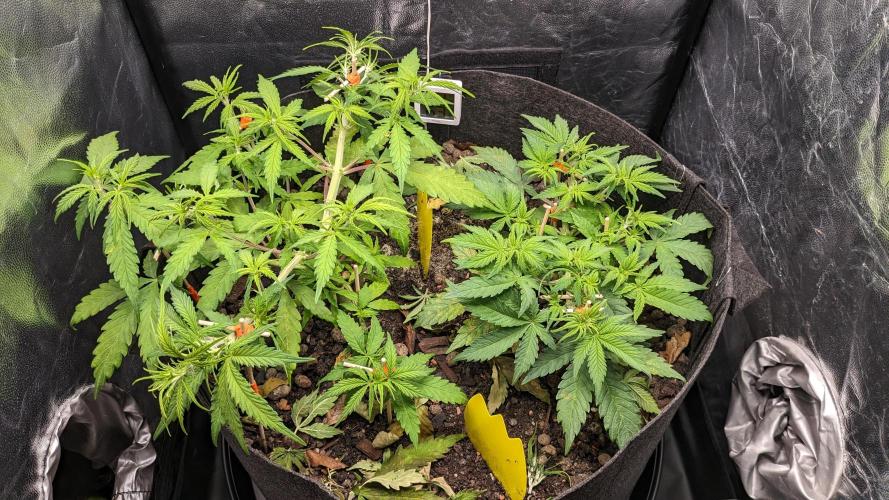
_Plants
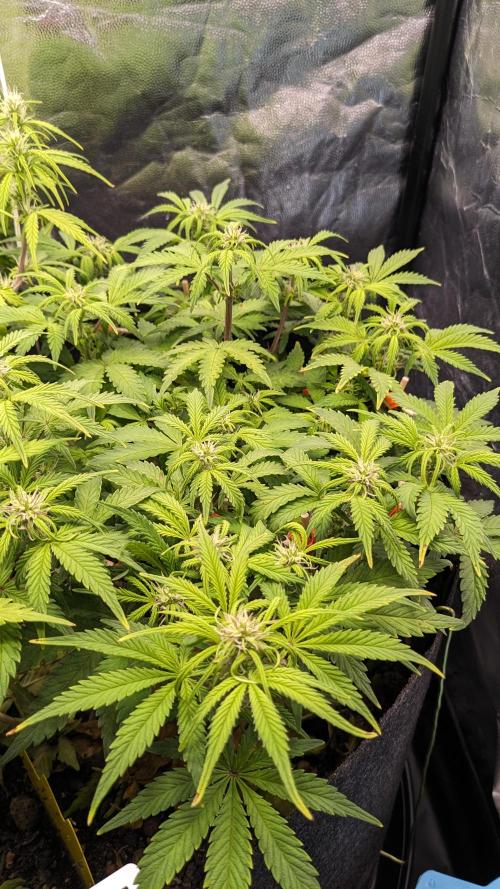
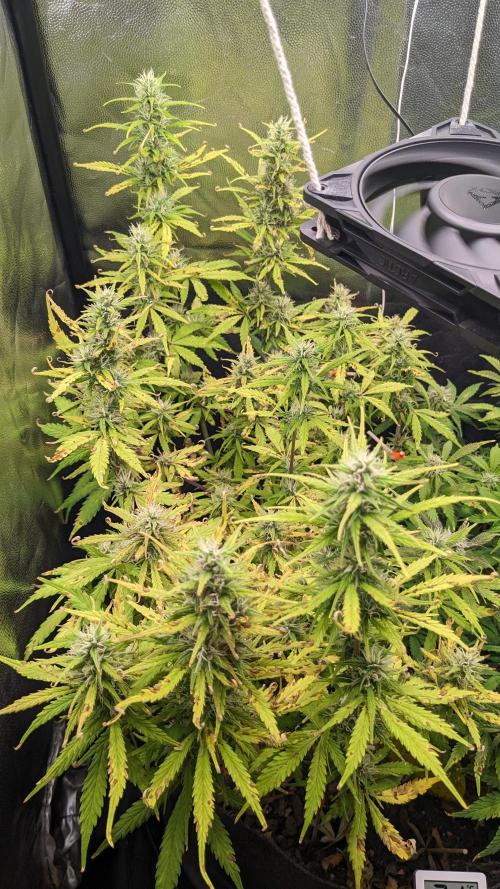
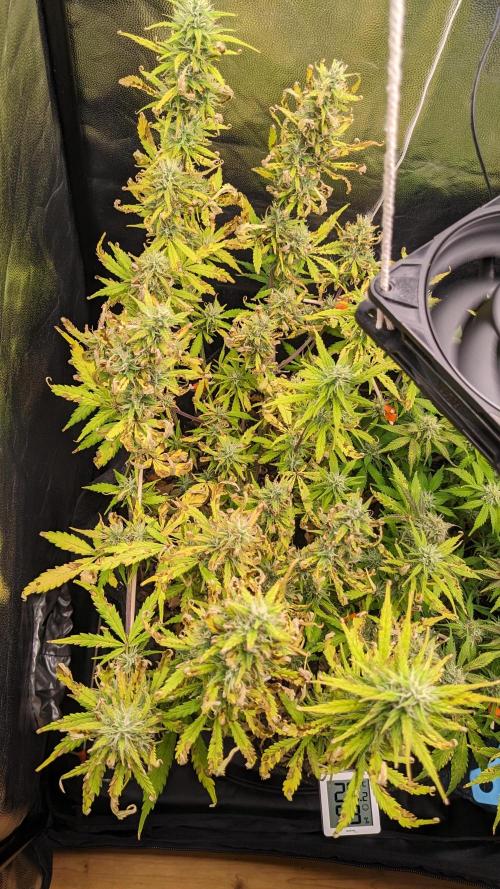
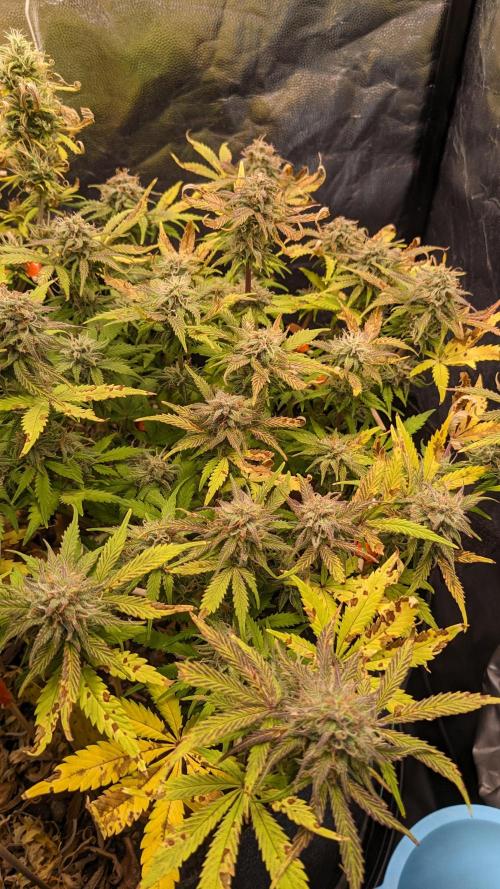
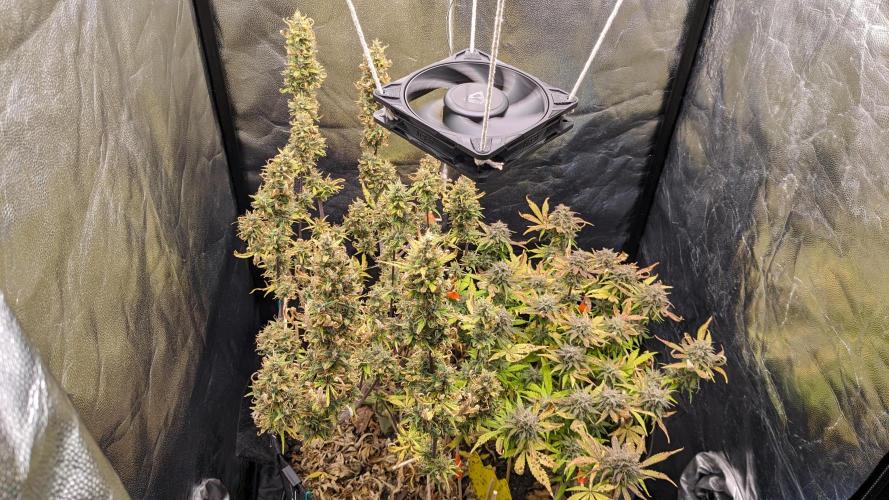
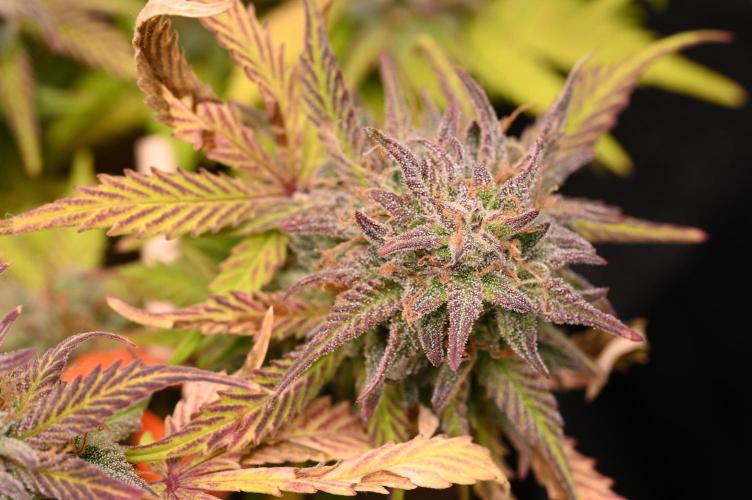
I decided to give Mimosa Cake another slight defoliation at day 82. Gorilla Z on the other hand needs every last bit of healthy leaf there is, so I just leave it as it is. Besides that, the plants obviously start to get into their final stage: Leafes are dying off, Colas get frostier and denser by the day, et cetera.
*Gorilla Z Auto was 46 cm tall, Mimosa Cake Auto 27 cm. [The hight not really changing is another sign that the plants are going into their final stage: Terpene production over everything else.]
4 likes
comments
Share
13
Week 13. Flowering5mo ago
37 cm
Height
18 hrs
Light Schedule
22 °C
Day Air Temp
Strong
Smell
50 %
Air Humidity
18 °C
Substrate Temp
18 °C
Night Air Temp
55.99 l
Pot Size
0.15 l
Watering Volume
30 cm
Lamp Distance
420 PPM
CO₂ Level
Nutrients 1
PPFD
500 mll
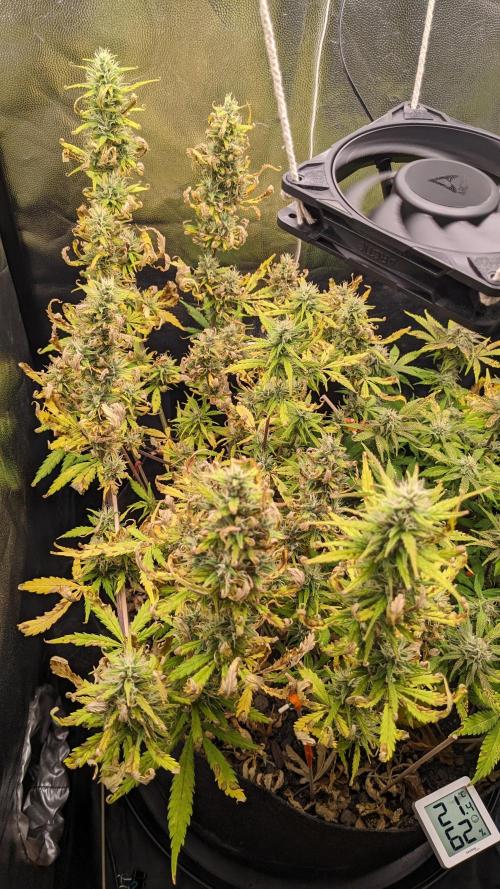
poloq _Environment
I got the VPD to 1.3 - rather by luck (watering less frequently + ambient temp. rising/ ambient RH dropping (spring around the corner)).
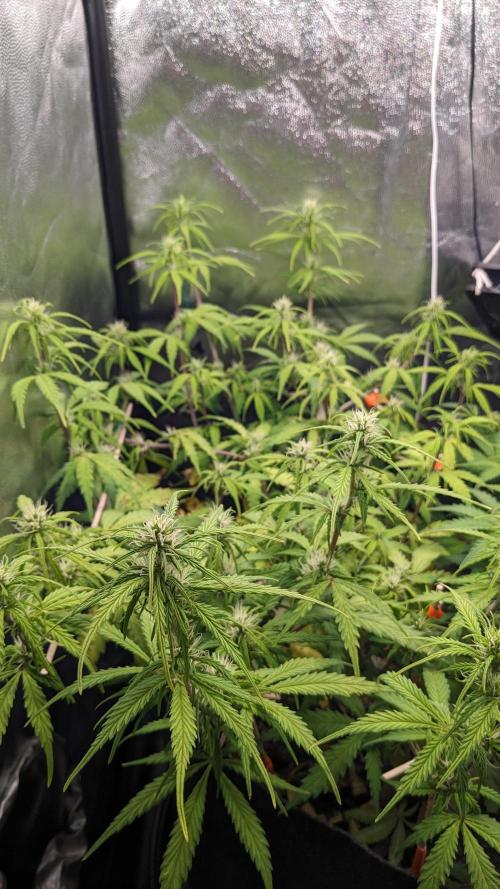
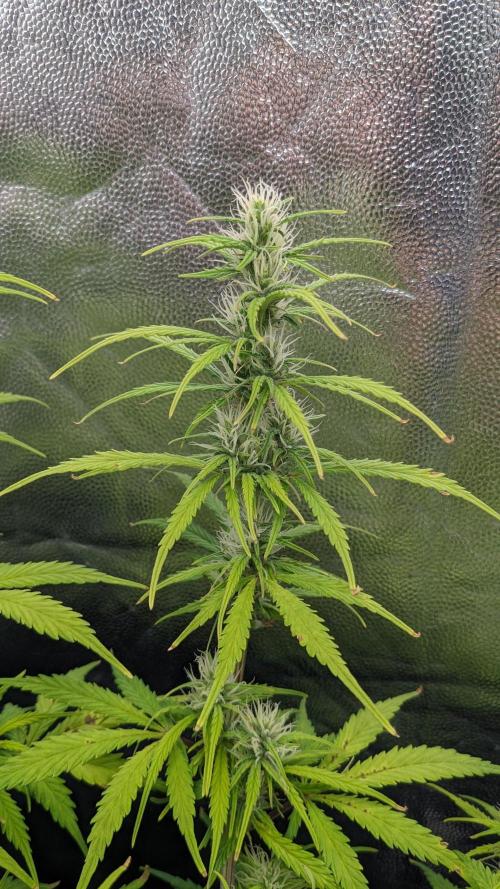
_Flower
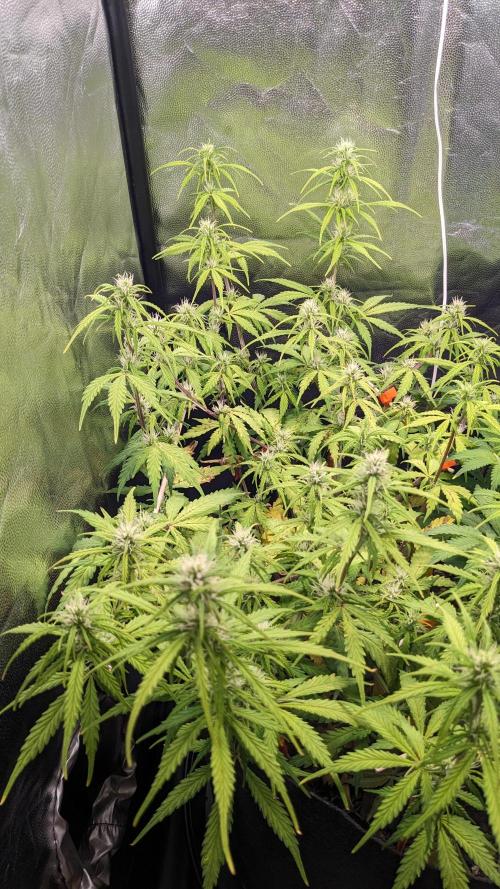
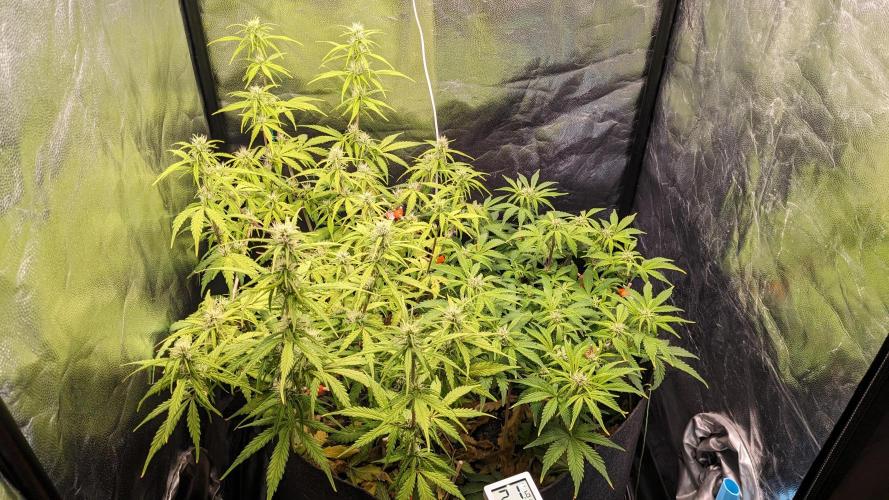
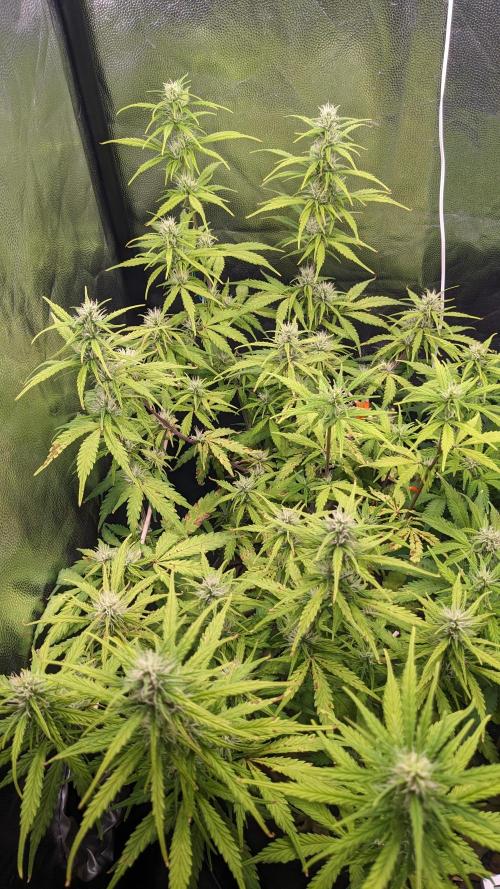
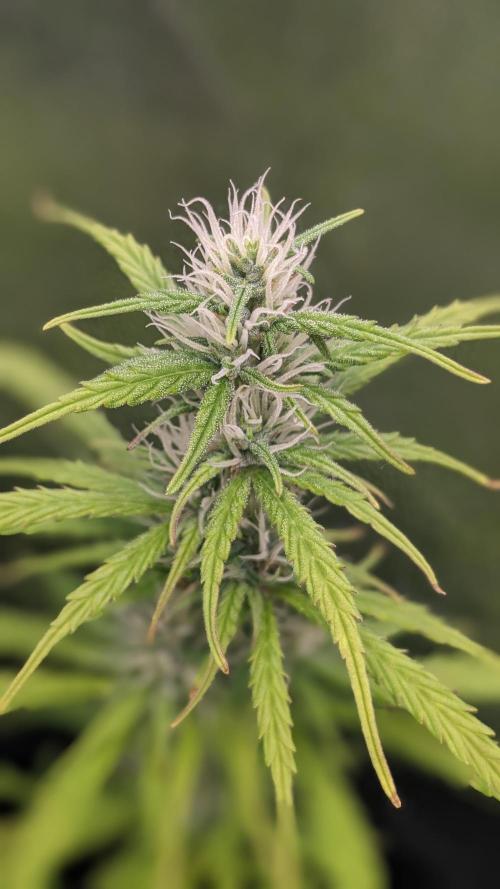
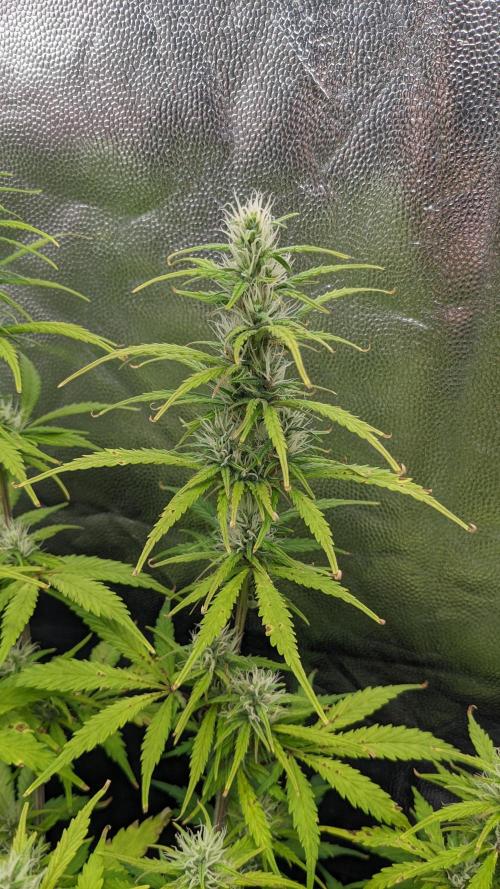
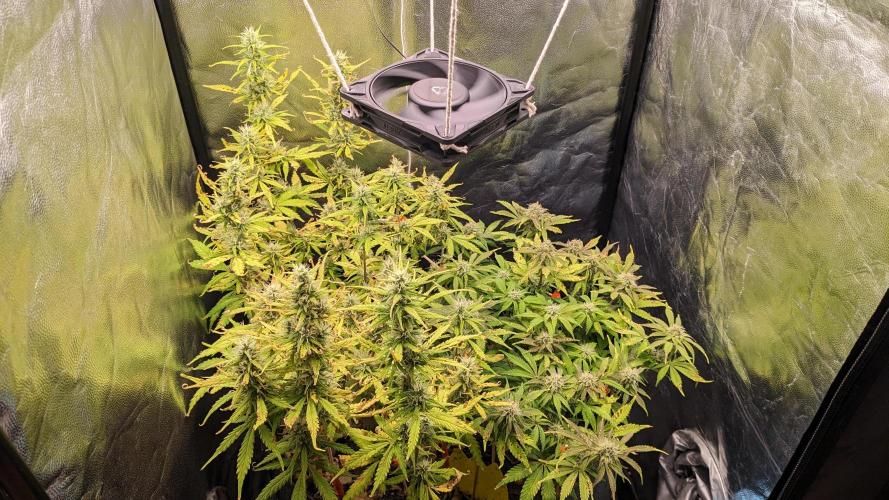
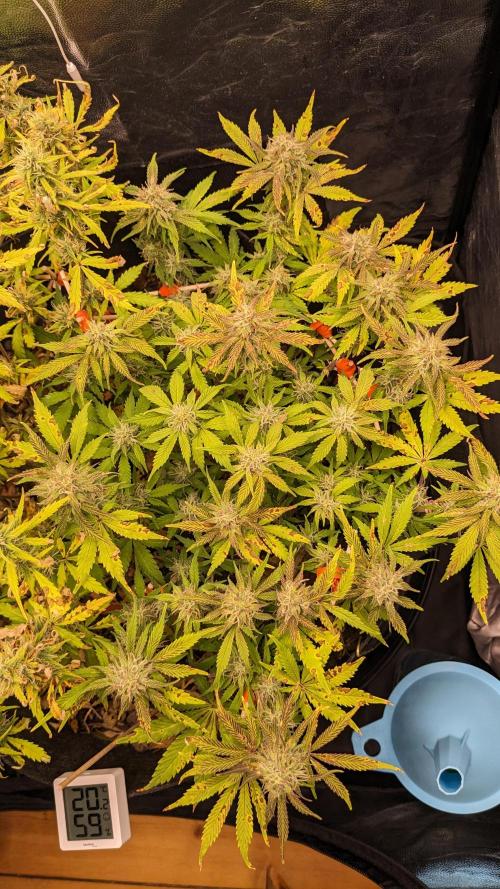
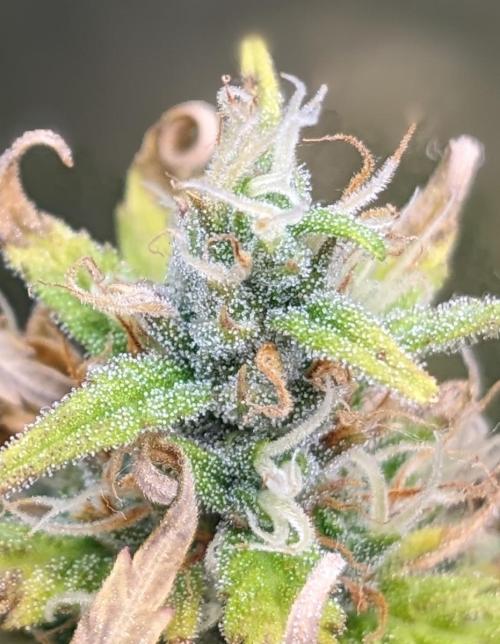
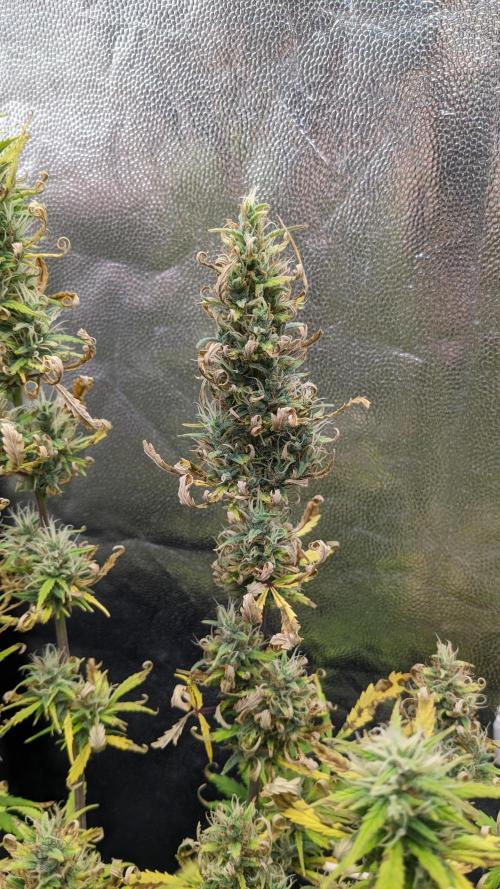
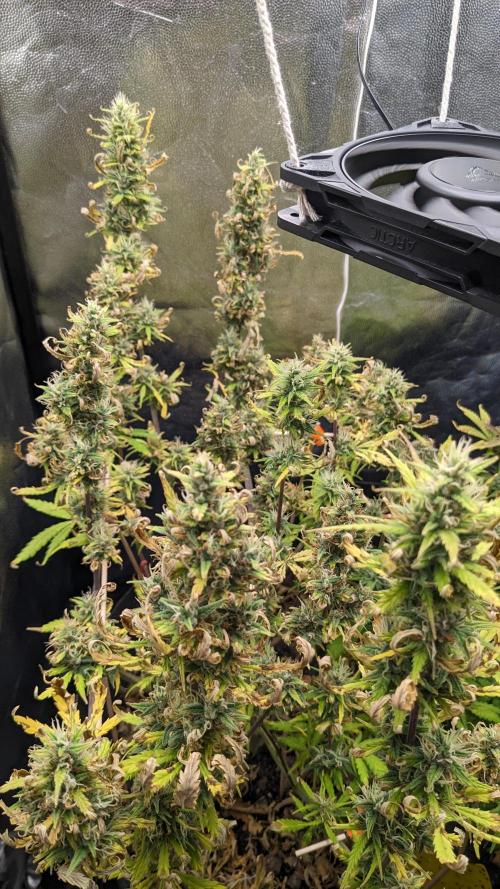
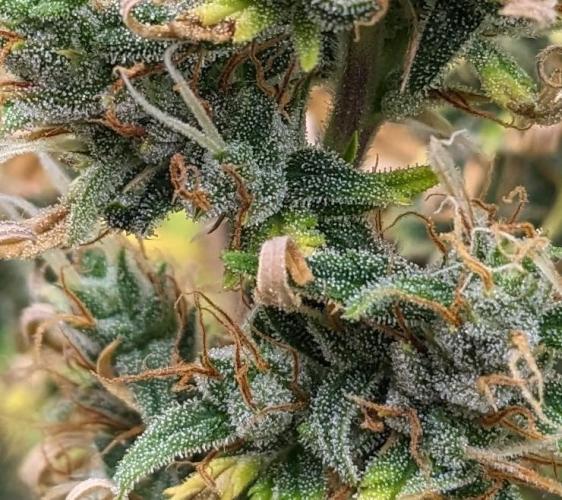
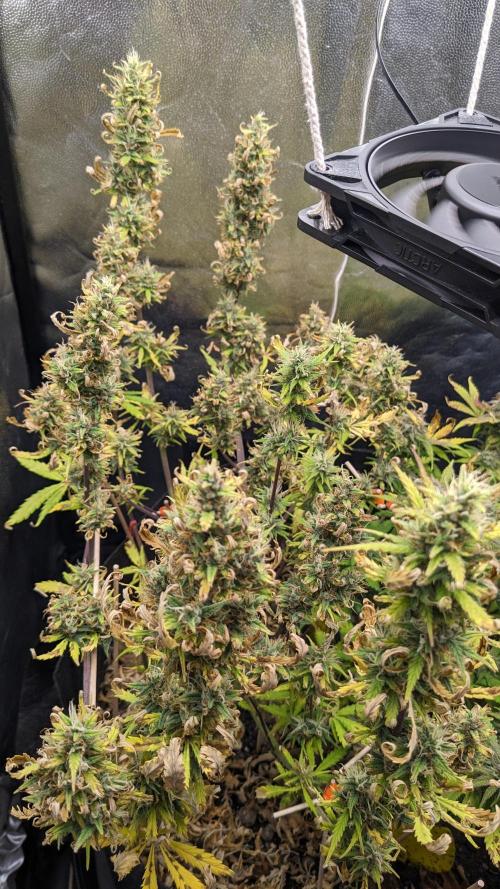
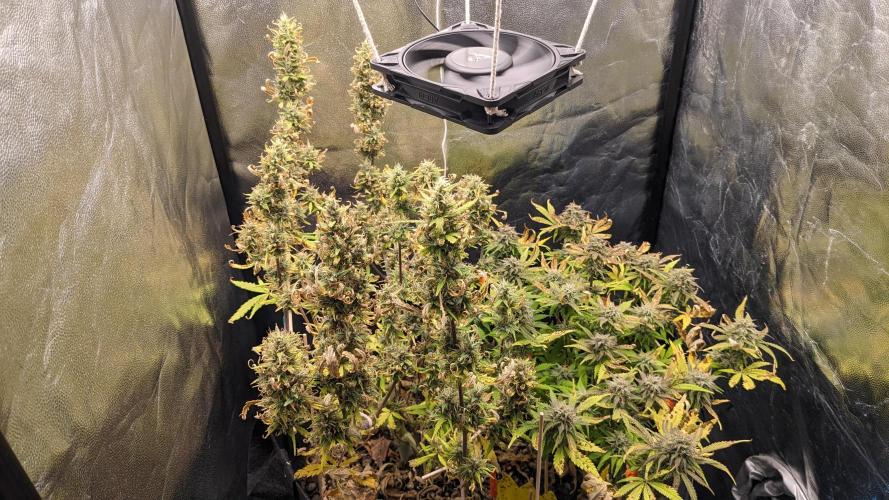
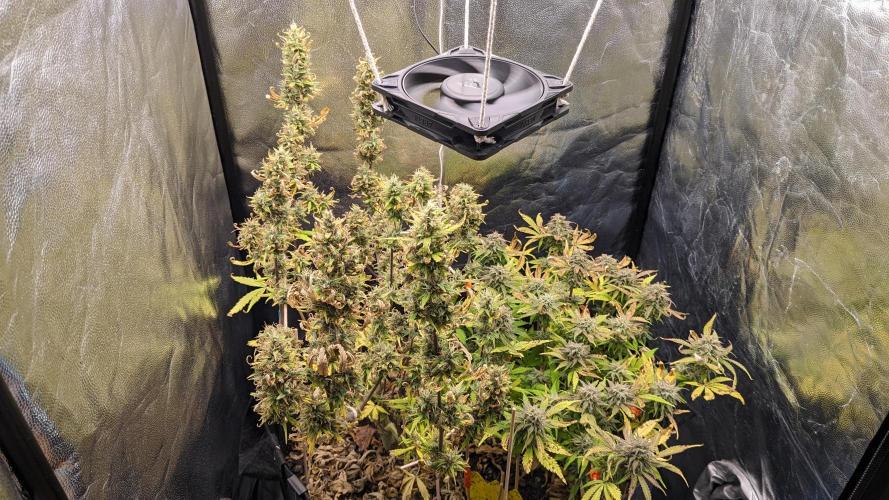
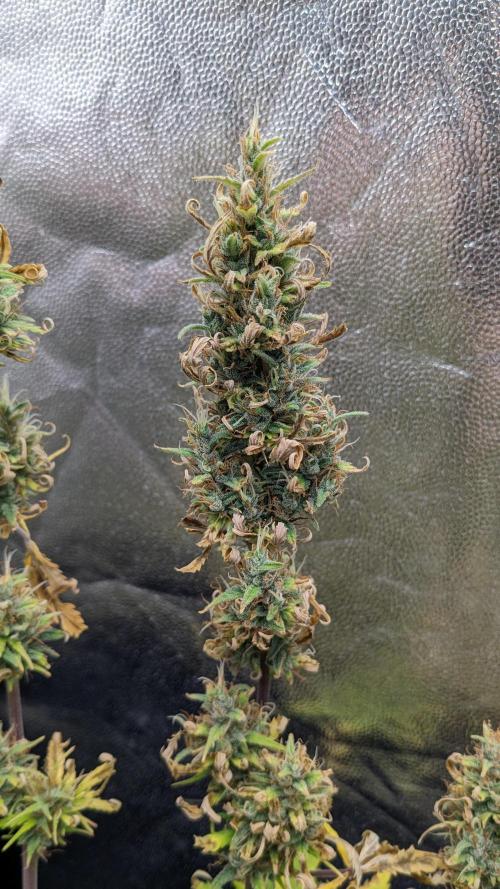
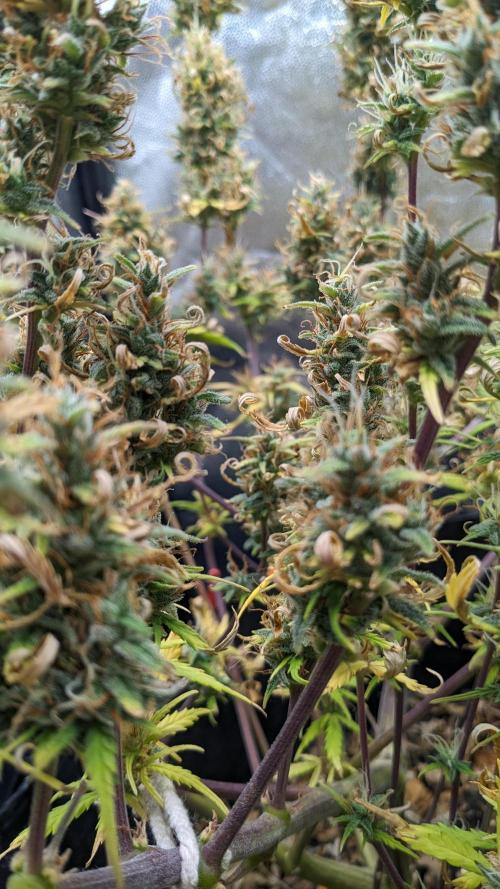
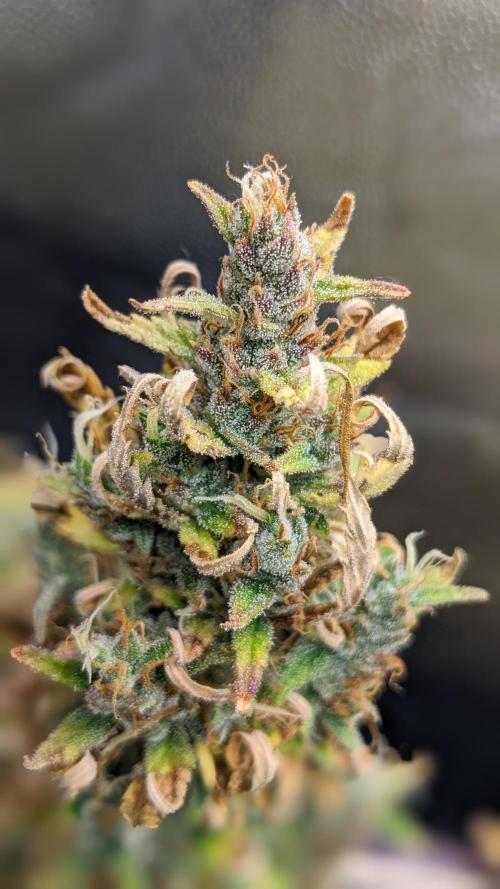
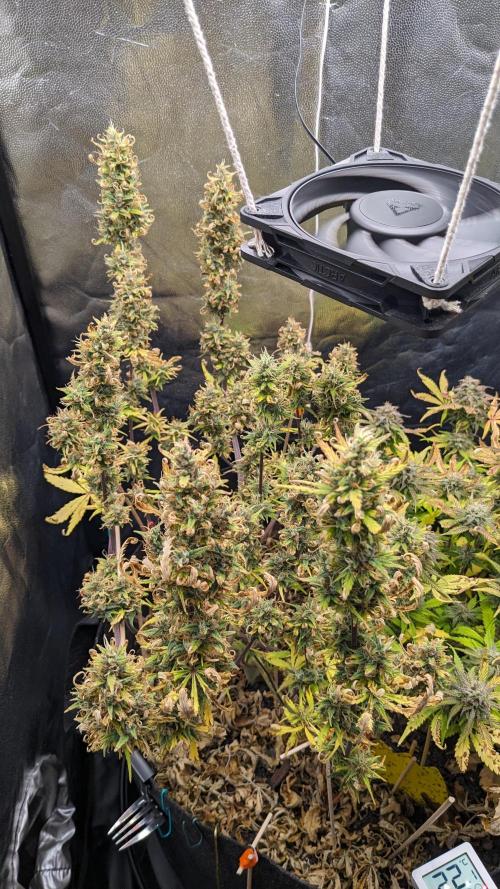
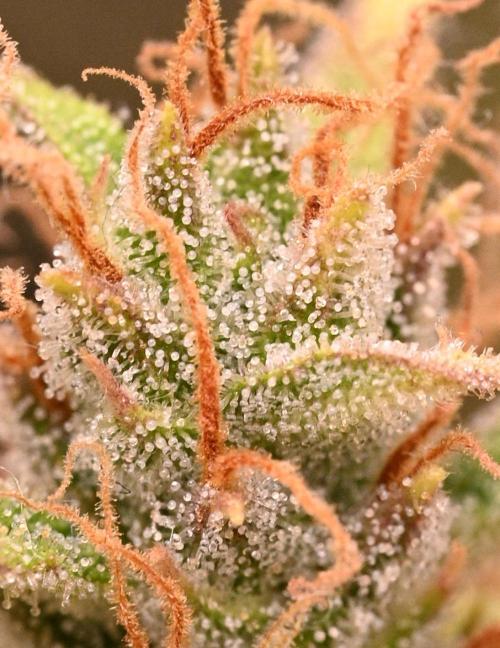
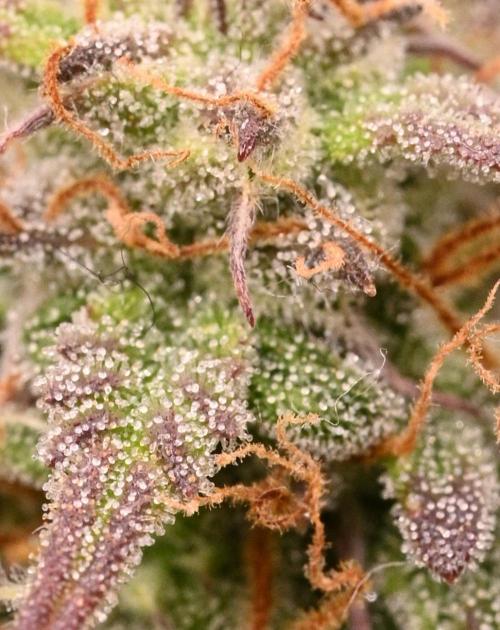
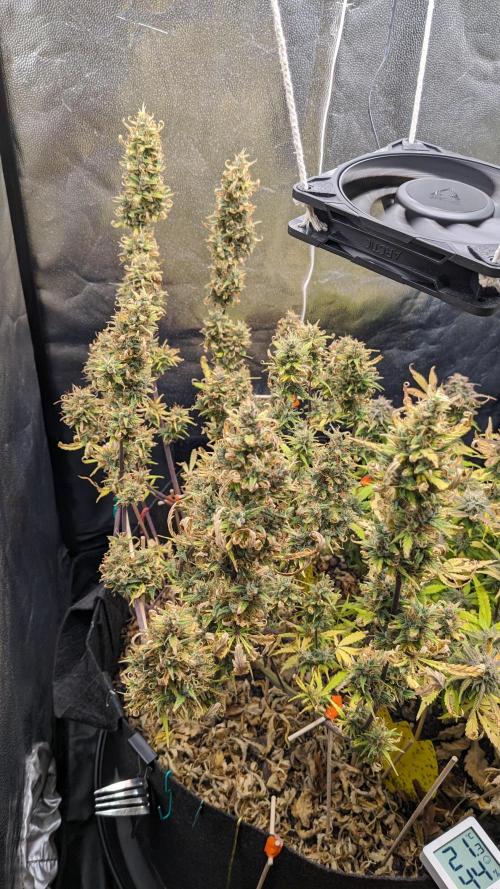
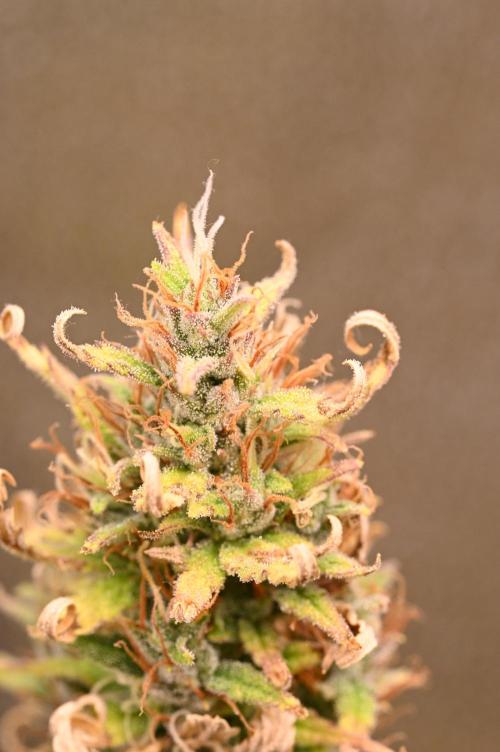
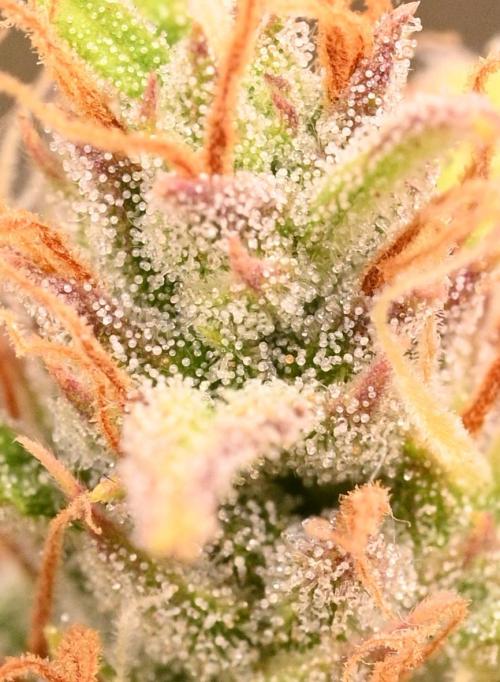
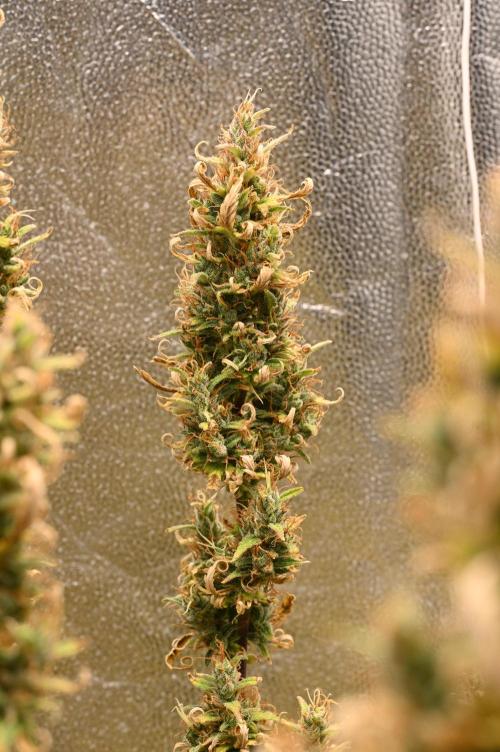
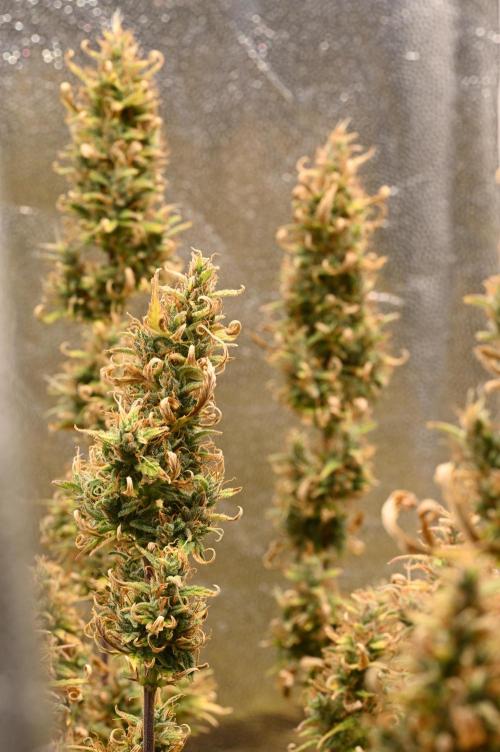
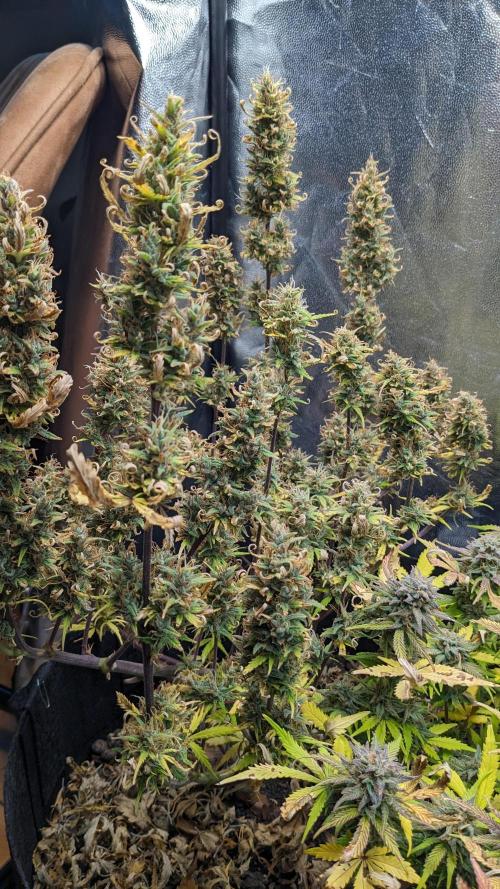
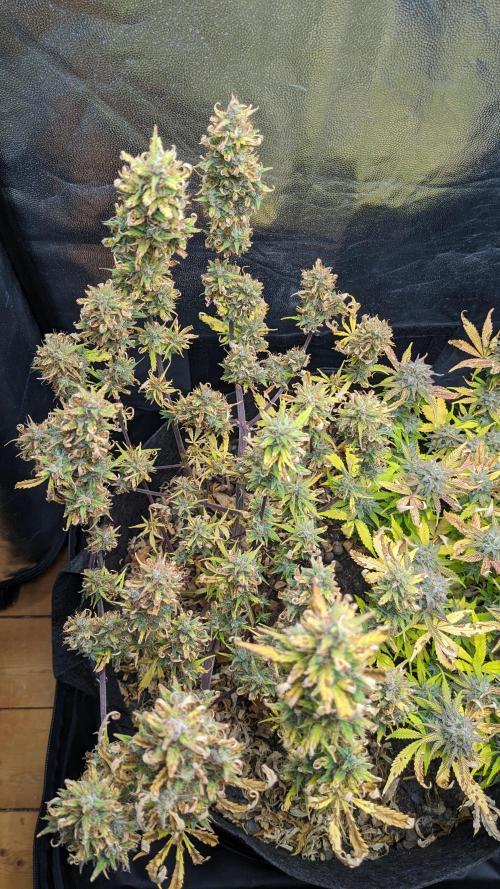
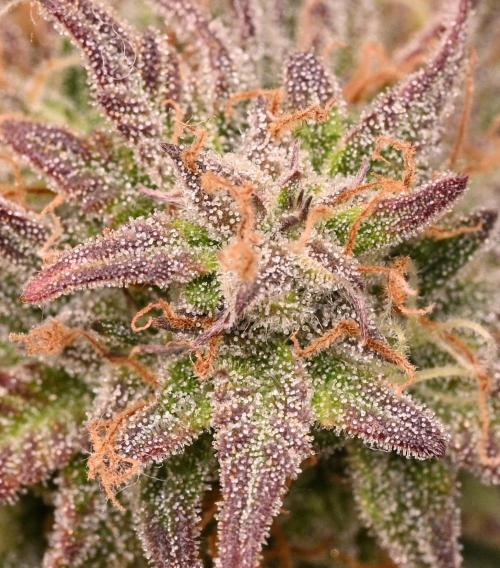
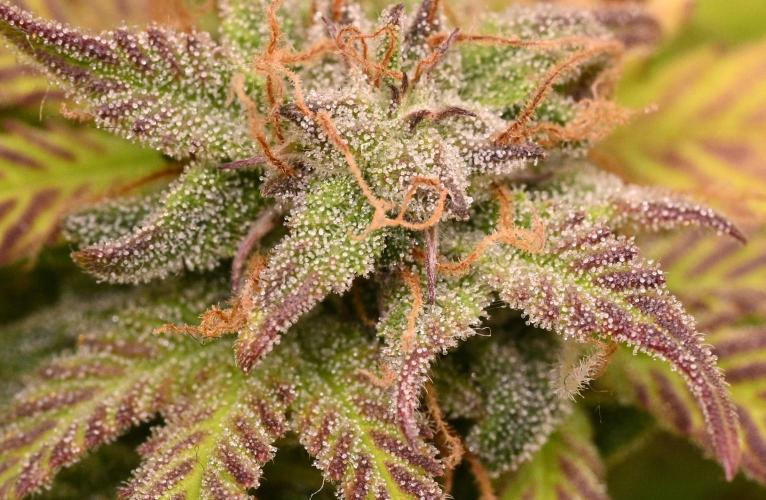
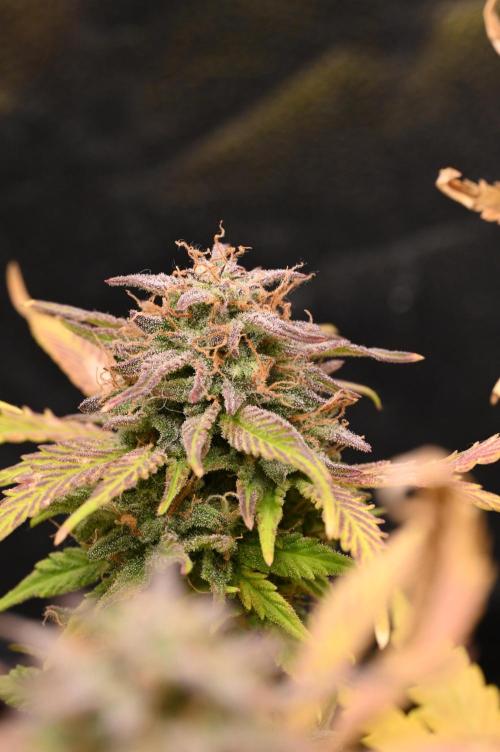
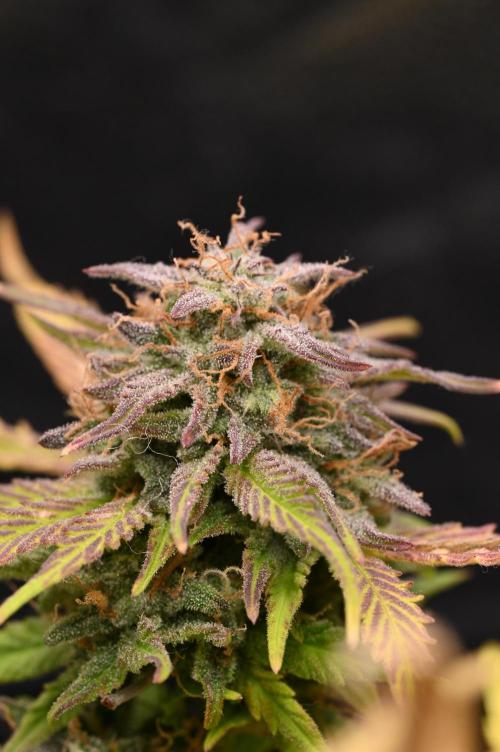
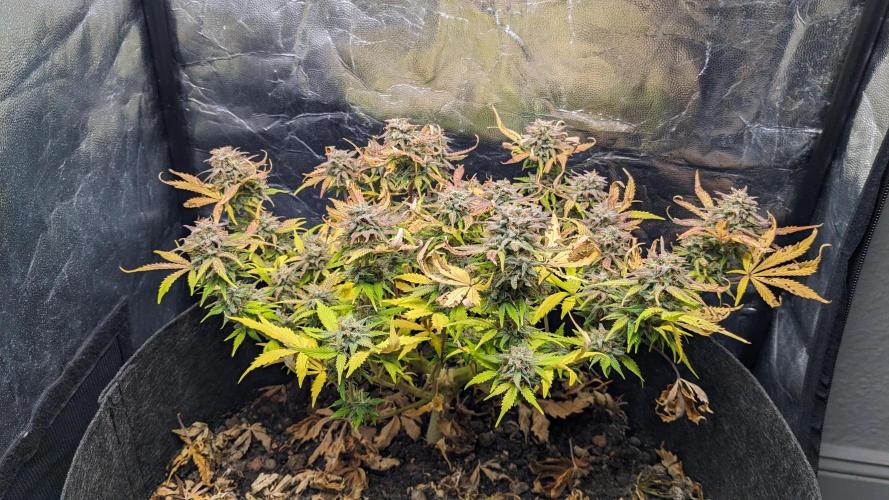
Gorilla Z starts to develop it's trichom stalks, showing that the plant is pretty much done (I'm literally just waiting for the heads to turn milky/ amber). Besides that, the structure is really airy (foxtail). Mimosa Cake on the other hand has still mostly transparent trichomes; it's stucture is much more what you'd expect.
The smell also started to increase to a point where you can definitly sense it within the whole room.
_Harvest
I expect Gorilla Z to be done around early week 15; Mimosa Cake should need 1 week extra, so I'll try to hit the sweet spot in between.
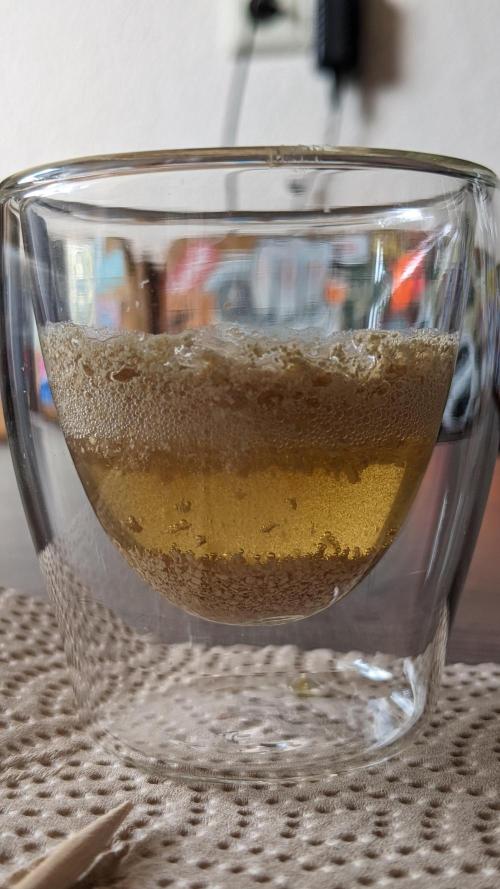
_Fertilization
On day 88, I gave about 2 tbl spoons (10 ml) of selfmade calciumacetat-suspension (mixed with 2 l of water) to the plants. This was the only watering they got during this week. [1 cleaned eggshell, sterilized at 180 °C (oven) for 20 minutes, then ground into powder, added about 50 ml of 5% apple cider vinegar, left standing until the reaction is complete (no more bubbles rising), mixed with water 1:200 ratio] This is rather an experiment to see if 1) this works and more importantly 2) the plants need/ can take more calcium in their current stage (anaerobic, dense soil).
_Plants
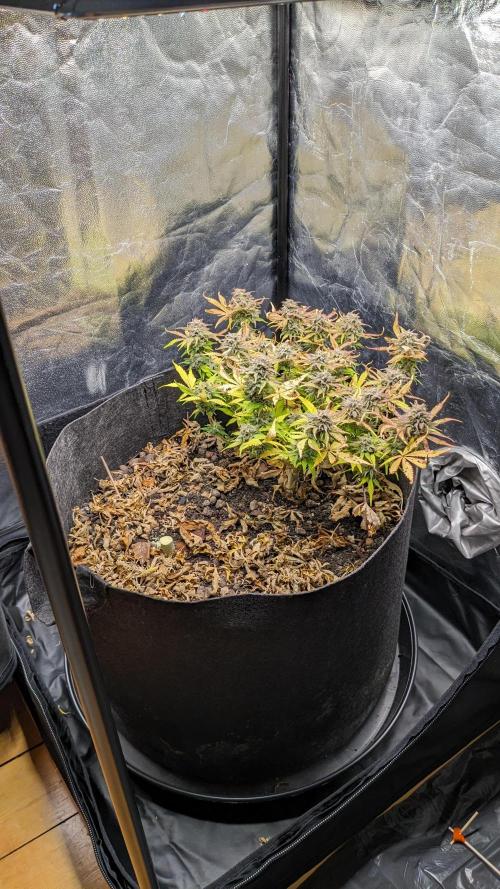
At first, Gorilla Z shedding all its leaves (sun sails) seemes like a problem, but it's turning out to be an absolute stroke of luck! The leaves literally fall off by themselves (video), which means that a) I have little to no trimming to do, and b) there's almost no chance of mold.
*Gorilla Z Auto was 46 cm tall, Mimosa Cake Auto 27 cm.
5 likes
2 comments
Share
14
Week 14. Flowering5mo ago

37 cm
Height
18 hrs
Light Schedule
22 °C
Day Air Temp
Strong
Smell
45 %
Air Humidity
18 °C
Substrate Temp
18 °C
Night Air Temp
55.99 l
Pot Size
30 cm
Lamp Distance
420 PPM
CO₂ Level
Nutrients 1
PPFD
500 mll
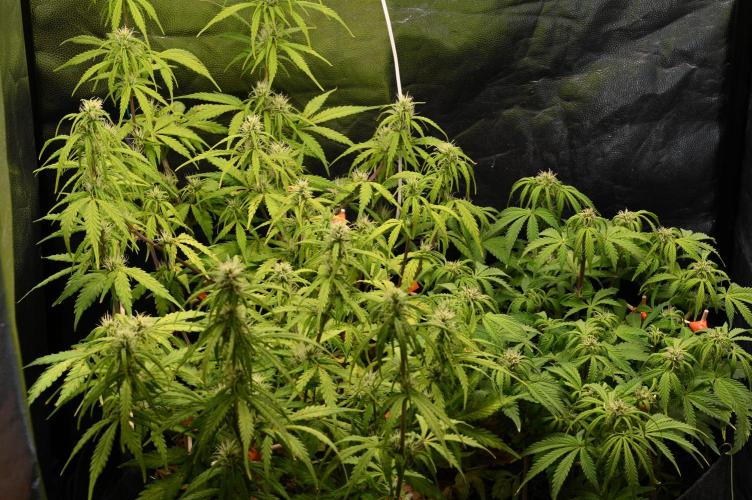
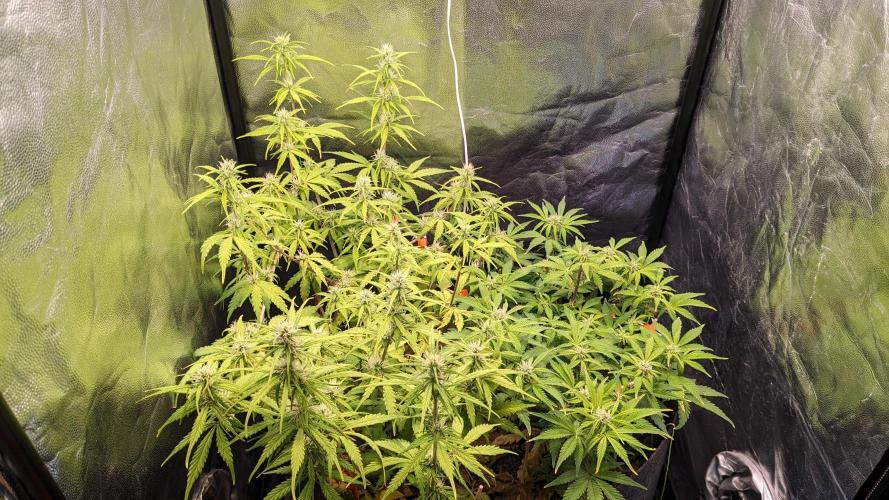
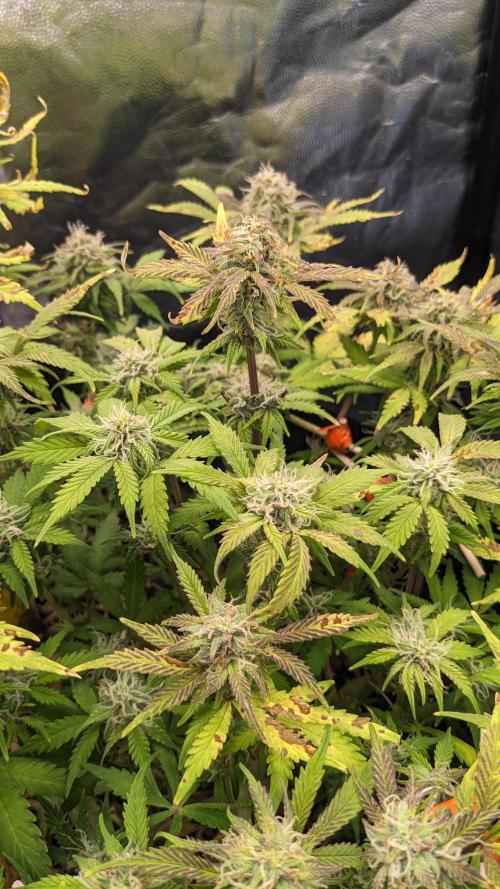
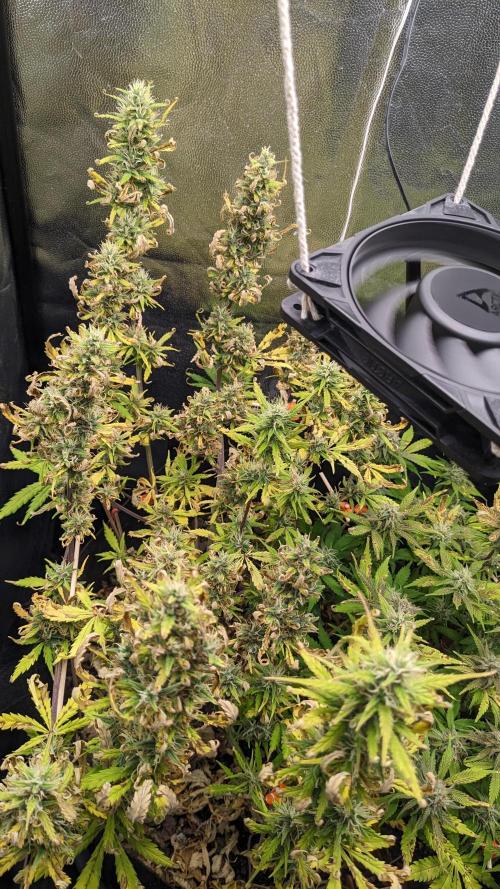
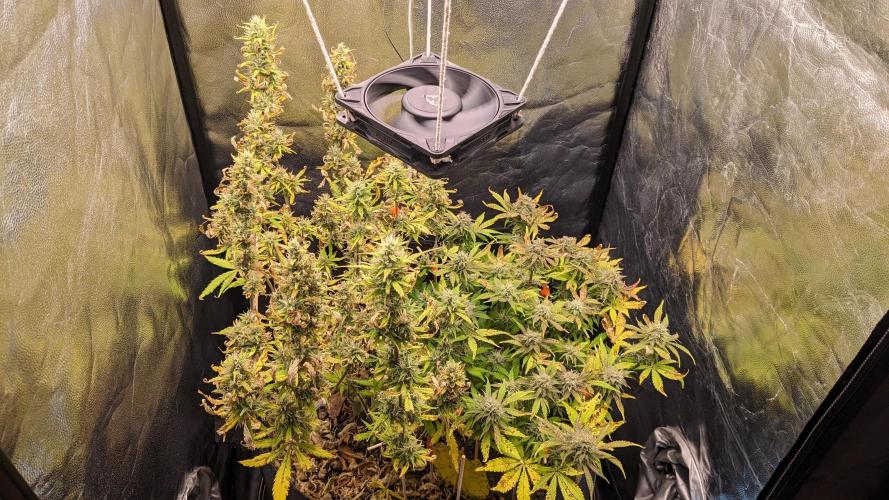
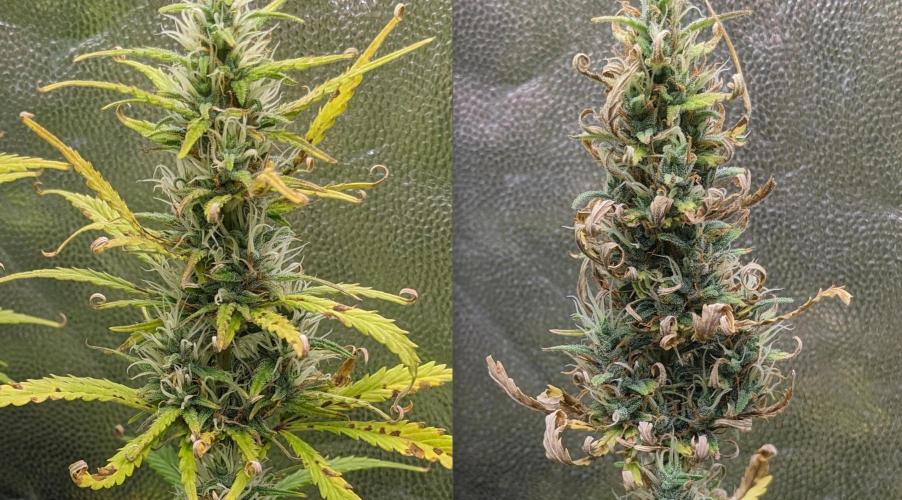
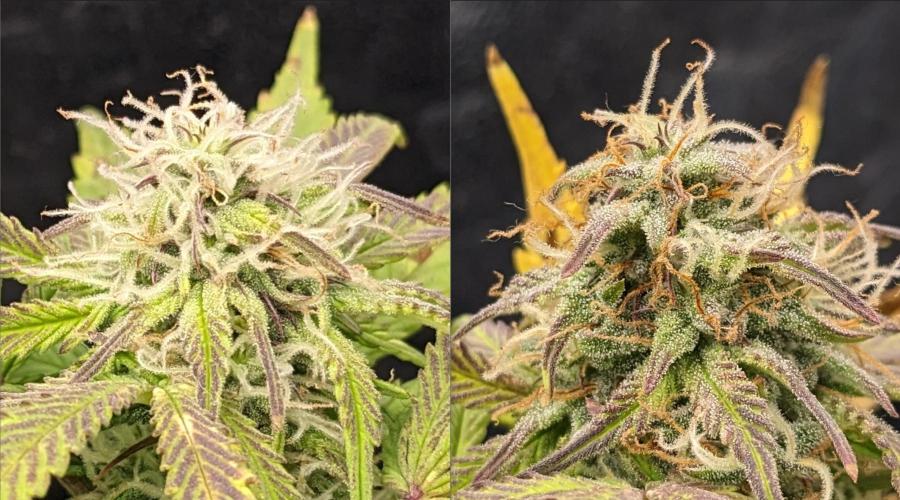
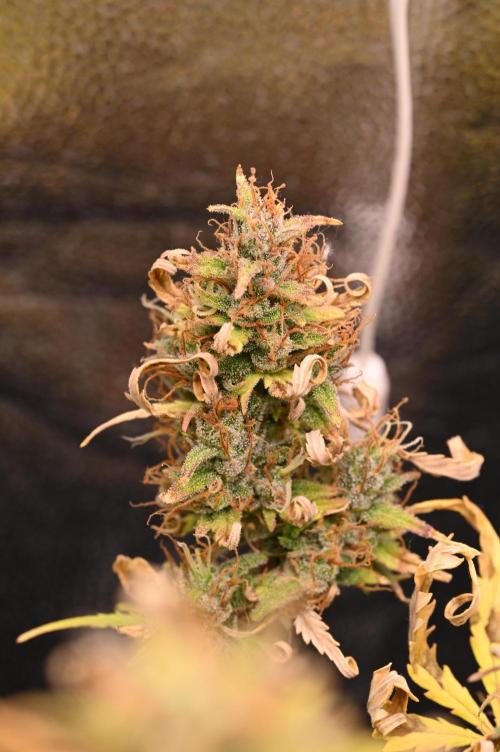
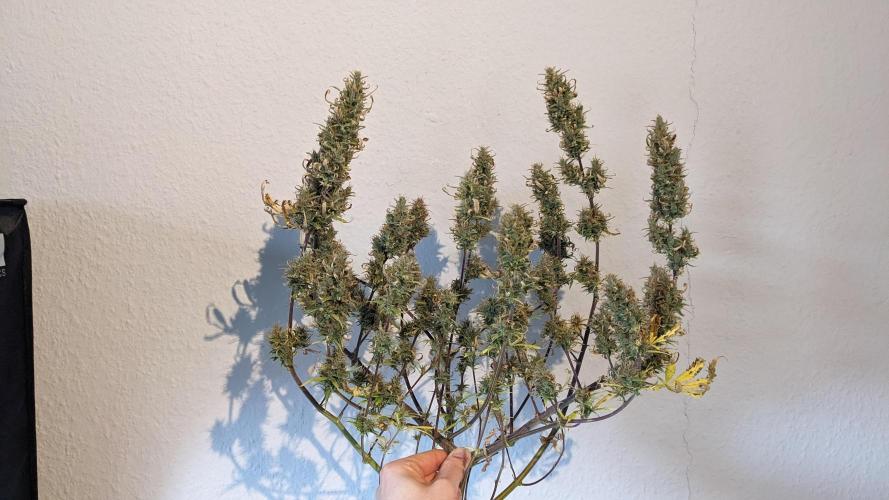
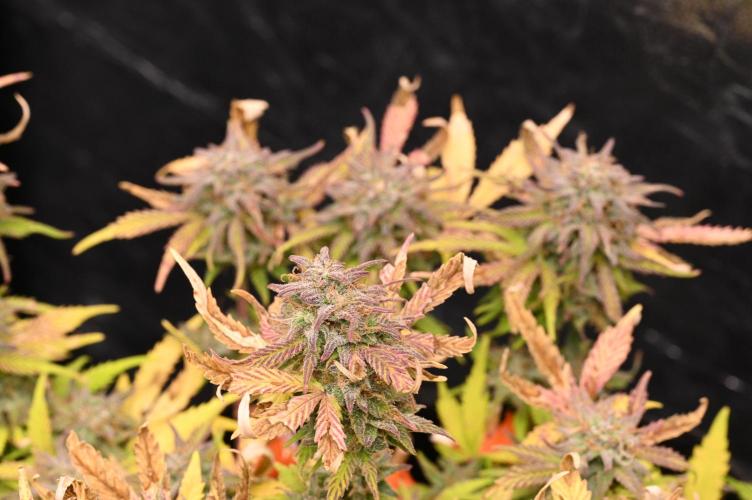
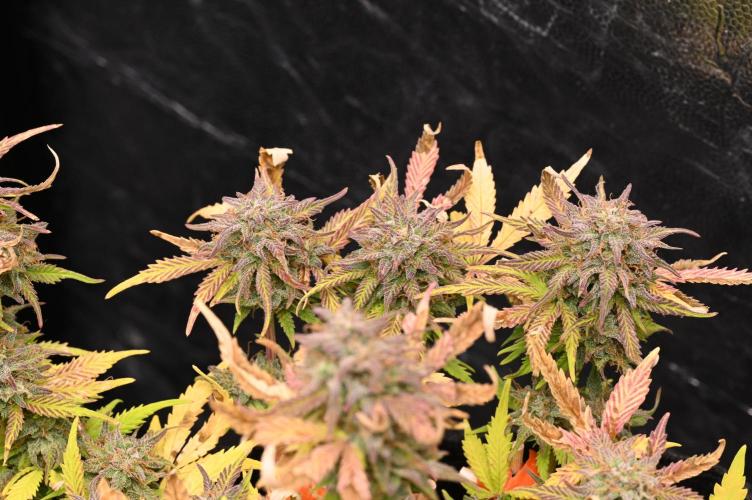
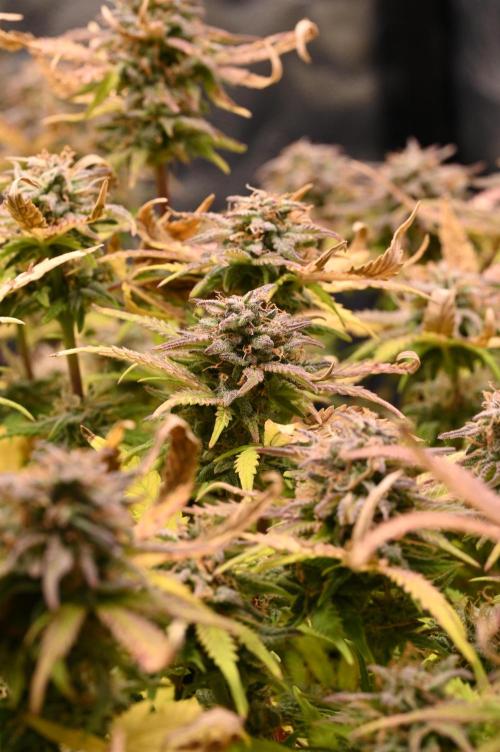
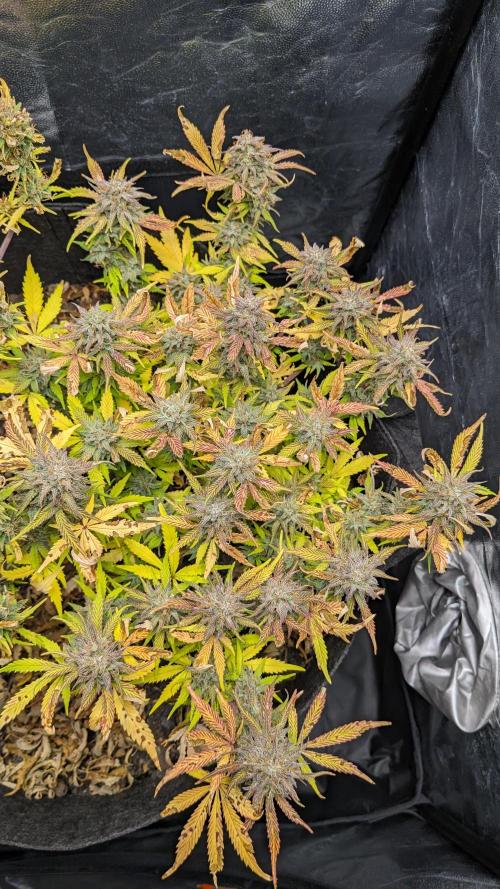
poloq _Flower
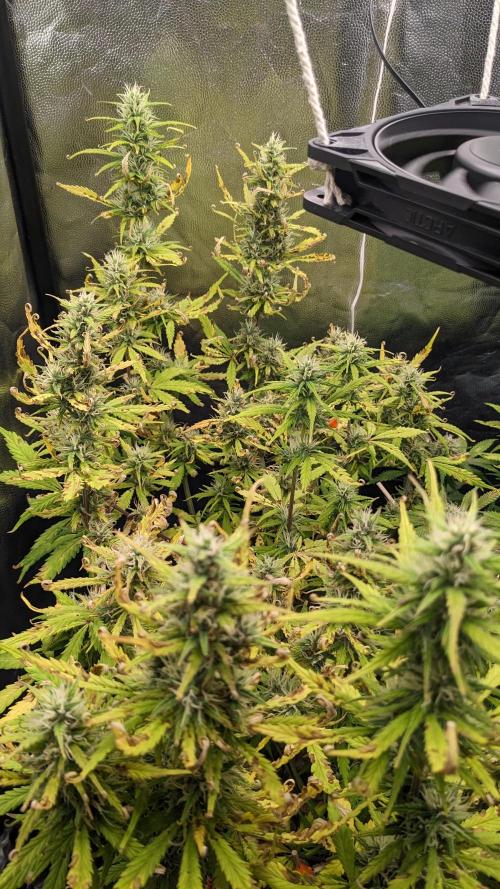
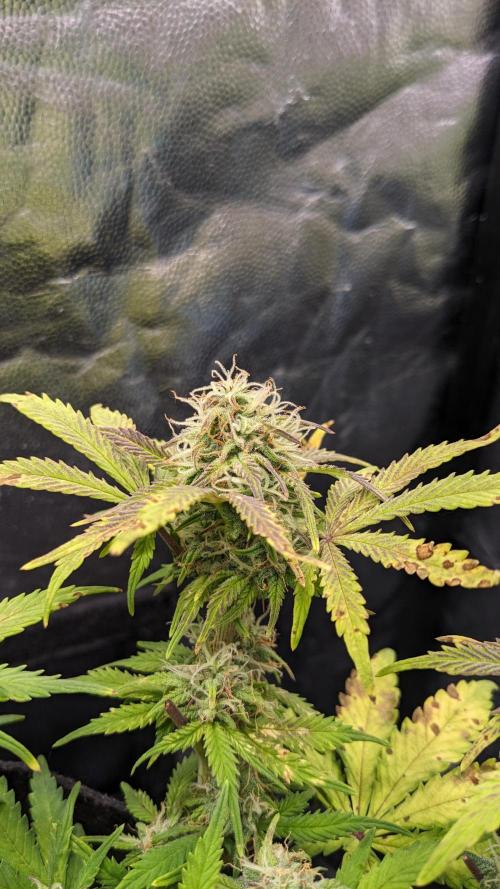
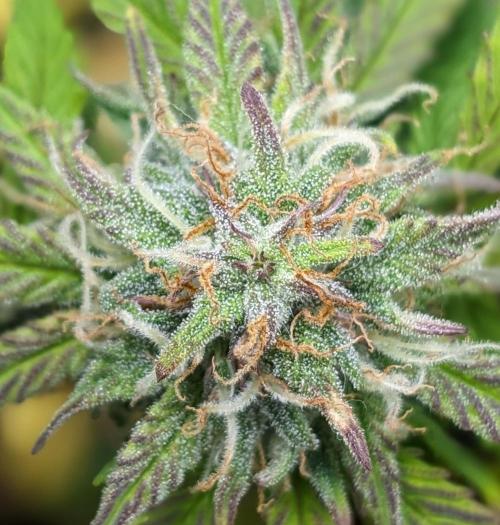
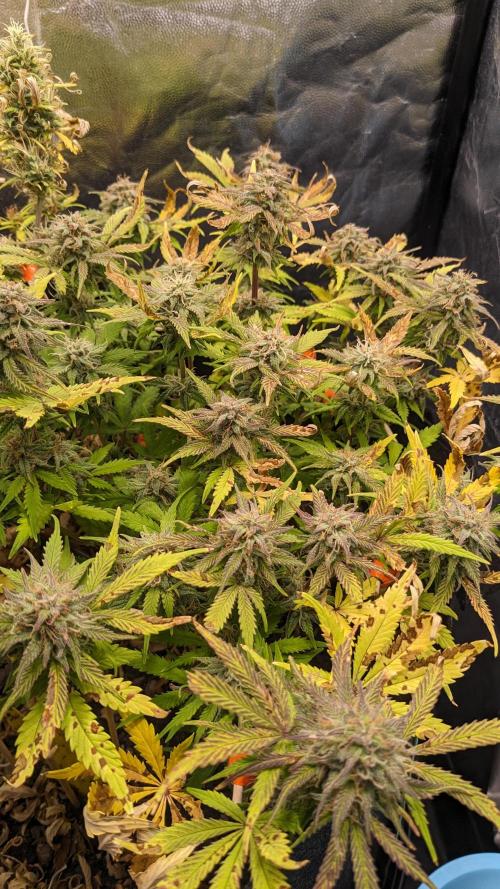
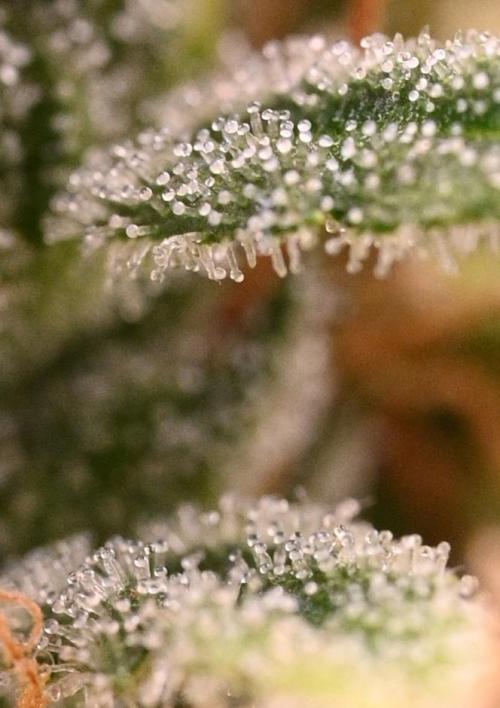
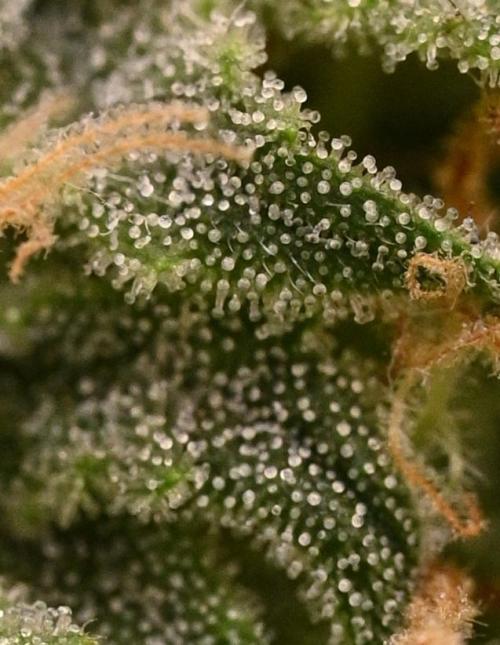
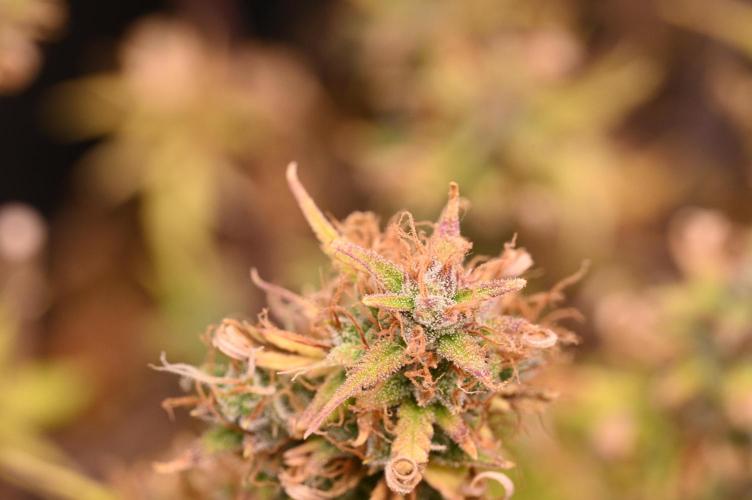
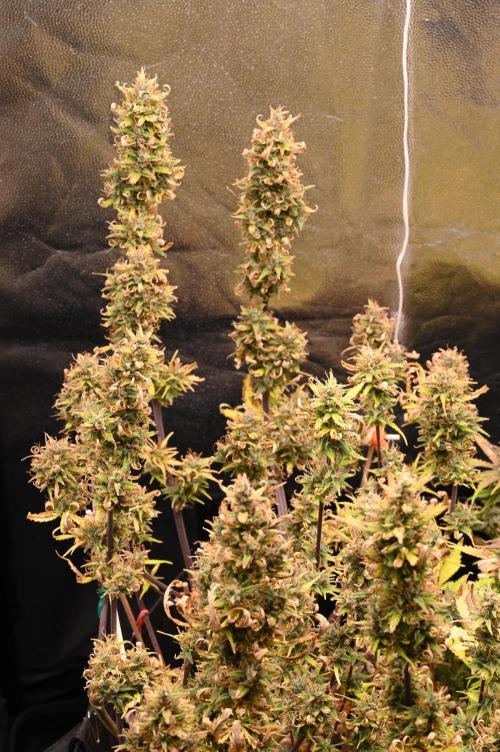
Gorilla Z looking frosty (day 92) - about 70 - 80 % milky, less than 1% amber. Mimosa Cake on the other hand is rather 50% milky, but smells incredibly strong in comparison; virtually just waiting for them to finish up.
On day 98, Gorilla Z is pretty much done (90%+ milky, 5%-ish amber) with the upper buds, but got a little more time for the lower ones. Mimosa Cake is now where Gorilla Z was 6 days ago, so I guess I will harvest both of them between day 101 and 105, depending on when I can make time for it.
The smells are also finilazing their nuances:
Gorilla Z
Creamy, fruity, lime, 'lime sorbet', slightly sweet, slightly fresh/ minty ---to--- 1st dank, earthy, lime; 2nd herbal, minty, 3rd fruity, creamy.
Overall: Deep, rounded notes with a fresh lime layer floating above everything else - like a sniff of a forest's ground + some lemon balm.
Mimosa Cake
creamy, berry, sweet, herbal, slightly spicy/ peppery ---to--- 1st orange, creamy; 2nd sweet, sour; 3rd berry, herbal.
Overall: Incredibly fresh, tangy, but smooth strain - like a zest-based orange candy with a little bit of vanilla.
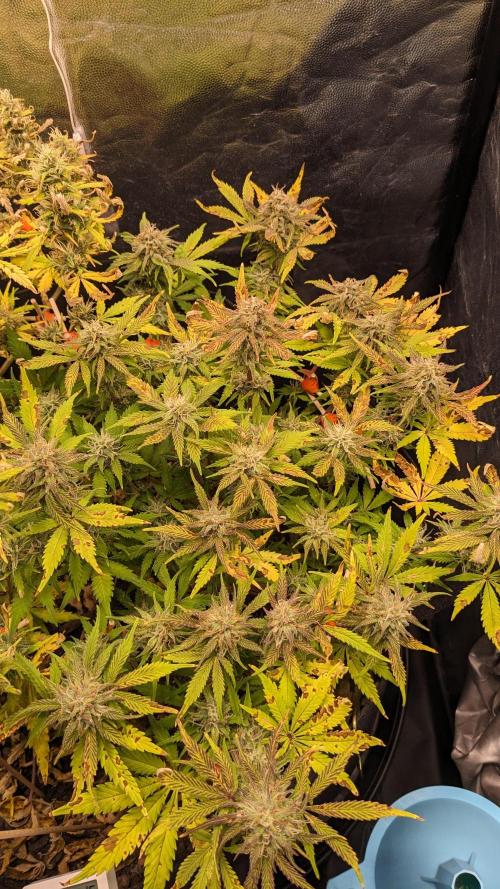
_Environment
The RH actually dropped another 5%, creating the 'optimal' VPD for late flower.
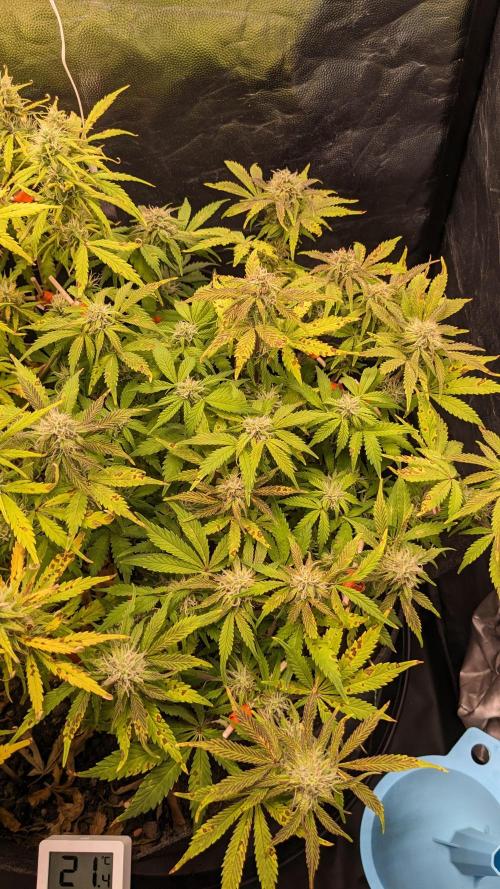
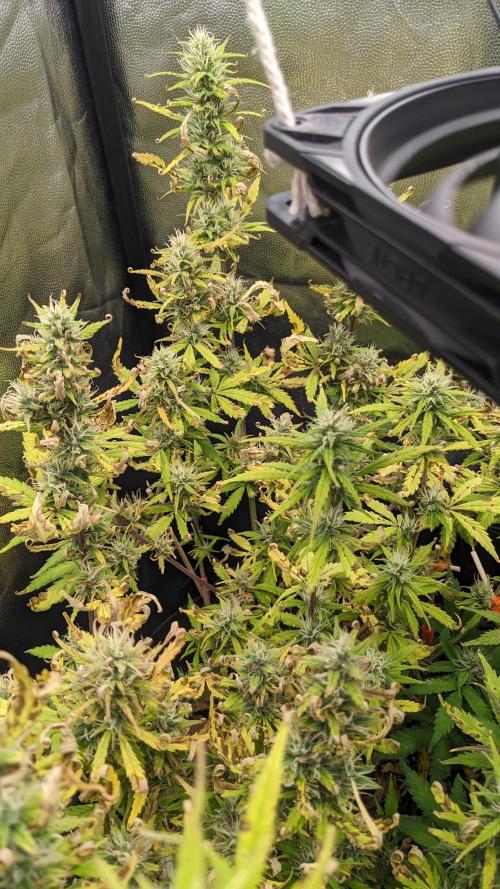
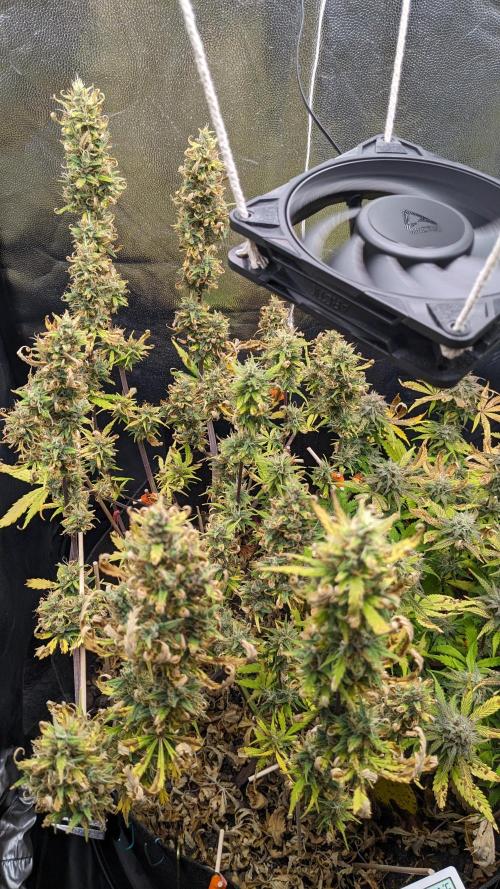
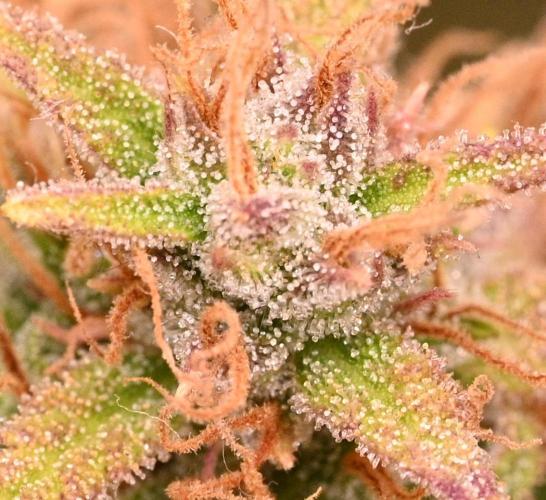
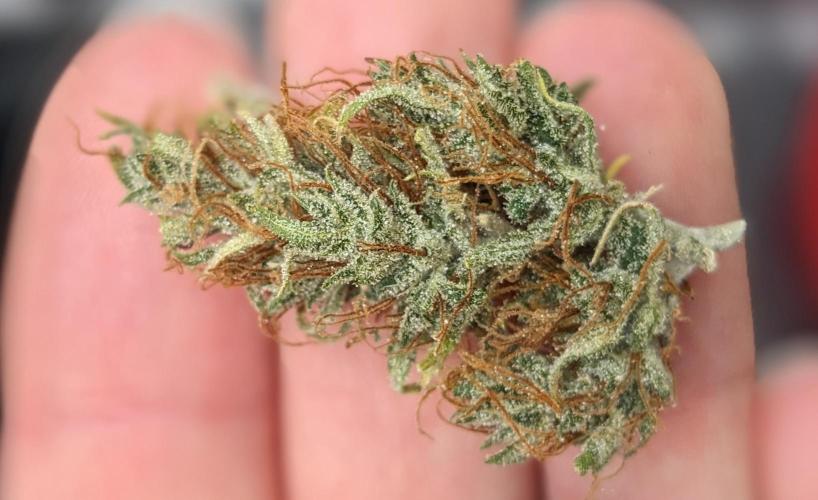
Can you see the fine fibrous strands on the buds? Those are plastic fibers from the pot and/or the air... Plastics are literally everywhere in and around us - I hate that stuff (or rather the way its missused nowadays).
I did NOT water this week because 1) the plants are almost done and should get the signals to finish up and 2) this once again shows that there was too much moisture within the substrate anyways.
_Plants
*Gorilla Z Auto was 46 cm tall, Mimosa Cake Auto 27 cm.
4 likes
comments
Share
15
Week 15. Flowering5mo ago
37 cm
Height
18 hrs
Light Schedule
22 °C
Day Air Temp
Strong
Smell
50 %
Air Humidity
18 °C
Substrate Temp
18 °C
Night Air Temp
55.99 l
Pot Size
0.15 l
Watering Volume
30 cm
Lamp Distance
420 PPM
CO₂ Level
Nutrients 1
PPFD
500 mll
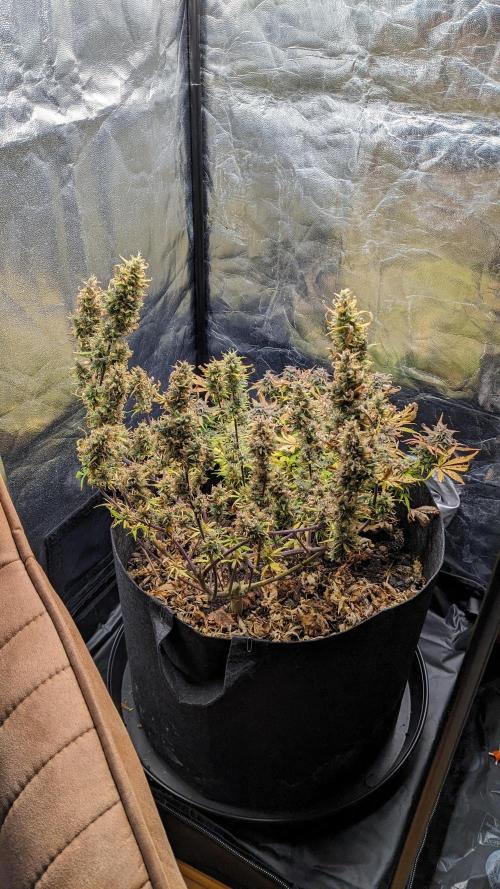
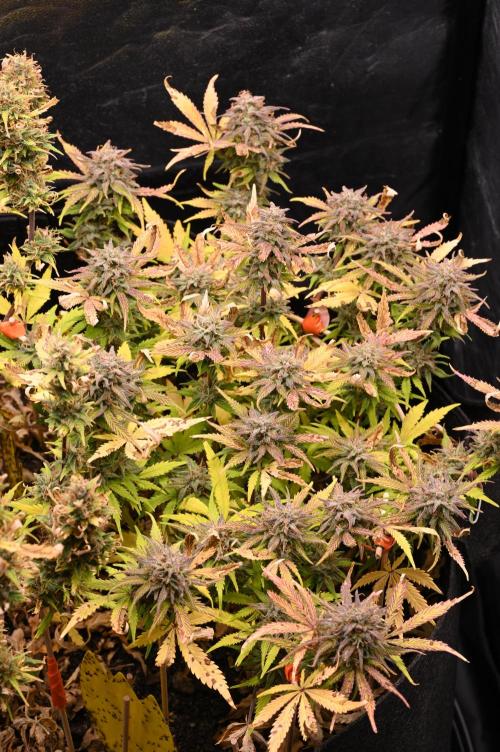
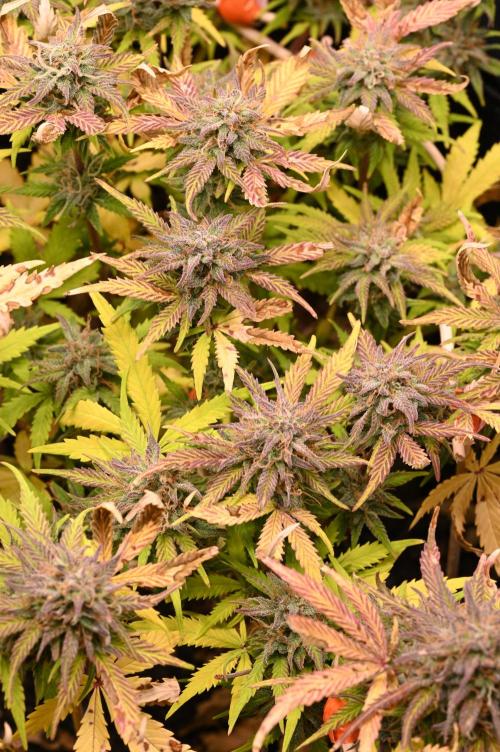
poloq _Last Days
This week - on day 101 to be precise - I cut both plants.
*More Infos in the Harvest-Tab.
_Plants
*Gorilla Z Auto was 46 cm tall, Mimosa Cake Auto 27 cm.
3 likes
comments
Share
16
Week 16. Harvest4mo ago
Happy Harvest Day!


6/10
Rated
__Growth__
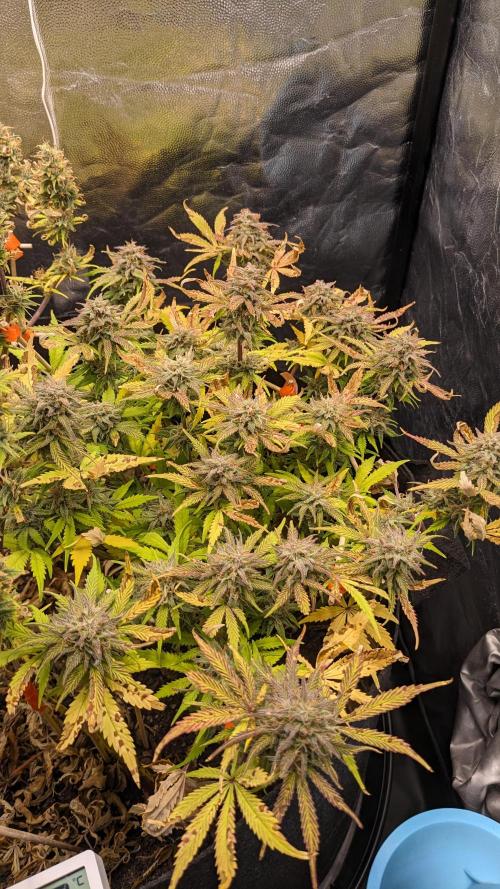
Gorilla Z Auto by FastBuds was an interesting strain. Although the genetics seem quite sensitive - especially to suboptimal nutrient supply - this is offset by its low-maintenance structure. Its tendency to grow in a foxtail-like pattern, combined with sparse foliage, makes it a plant that requires little pruning and is relatively unlikely to develop problems regarding mold. It also grows extremely symmetrical and ‘predictable’ - you only have to realign it every 5 - 7 days and that's it. I (personally) also like its lime-green color with the berry-colored accents.
__Smell__
Its scent is pleasant and not very intense - it can really only be sensed when touched.
_Taste
Doesn't taste like much to be honest.
__Trim__
One unique feature of this strain - at least in my grow - is that the plant practically trims itself. It literally encapsulates all the fan leafes, so they can simply be plucked off. All that’s left to do is to remove a few sugar leaves, and that’s it.
Show more
Translate
Spent 108 days
Ger Veg Flo Har
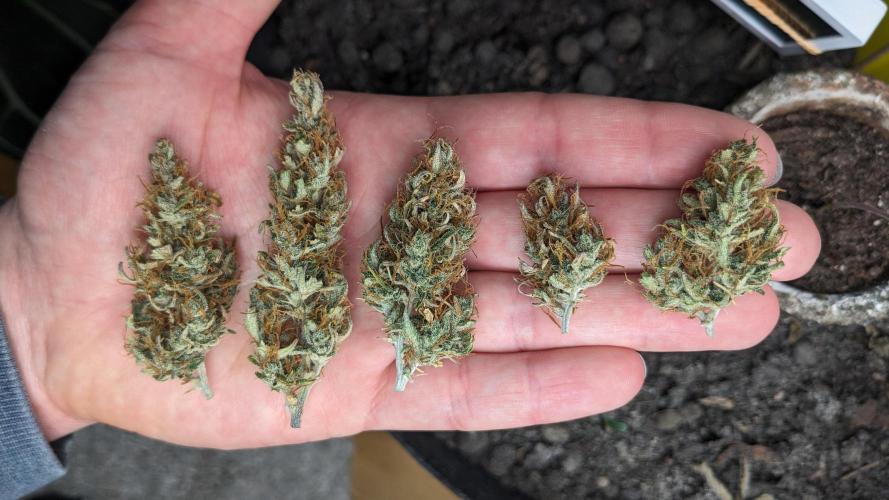
194 g
Bud wet weight per plant
29 g
Bud dry weight per plant
1
Plants
Normal
Difficulty

Relaxed
Positive effects

Paranoia
Negative effects

Earthy, Cream, Herbs
Taste
Height
Day air temperature
Air humidity
PH
CO2
Light schedule
Night air temperature
Substrate temperature
Pot size
Lamp distance


poloq *Don't ask me why the lamp is in the review like 3 times.
5 likes
comments
Share
Equipment Reviews


16
Week 16. Harvest4mo ago
Happy Harvest Day!

9/10
Rated
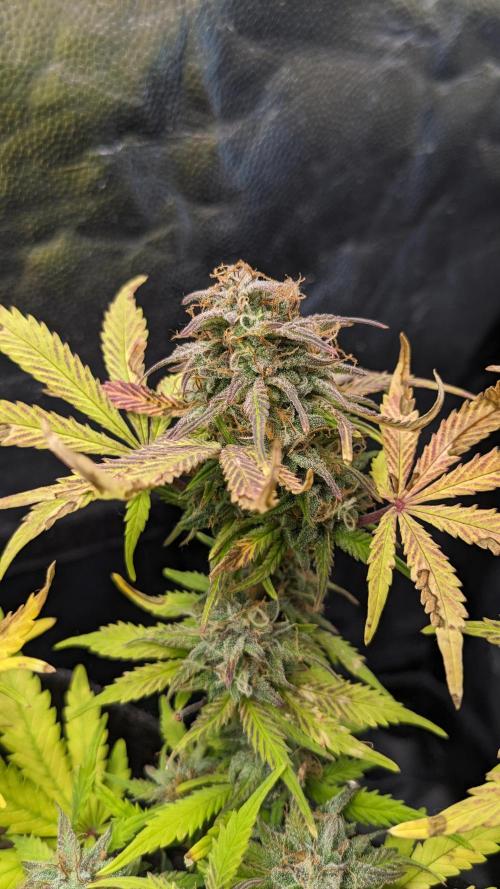
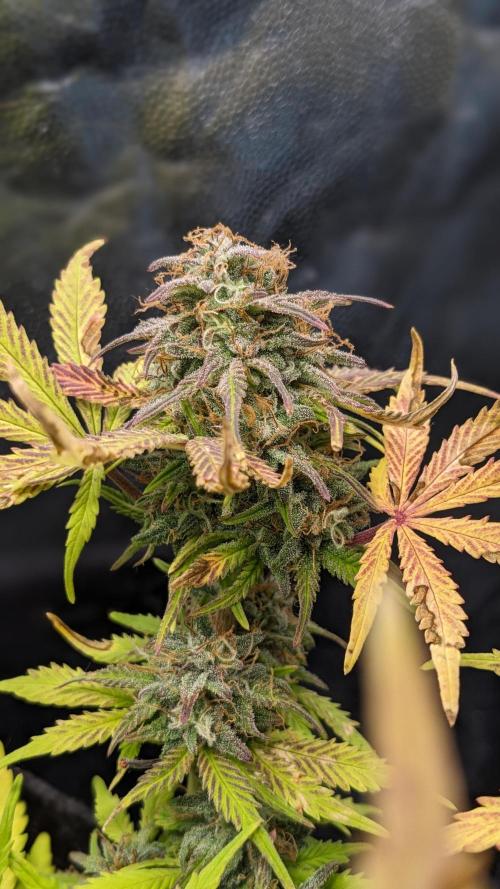
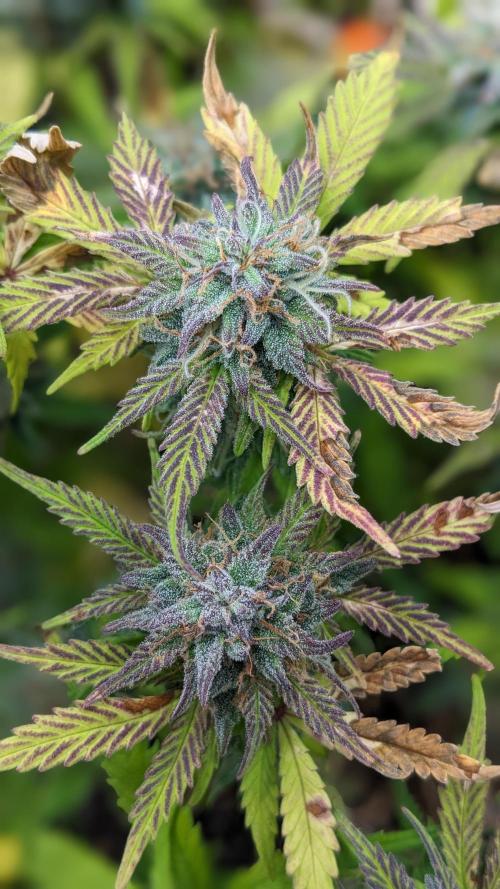
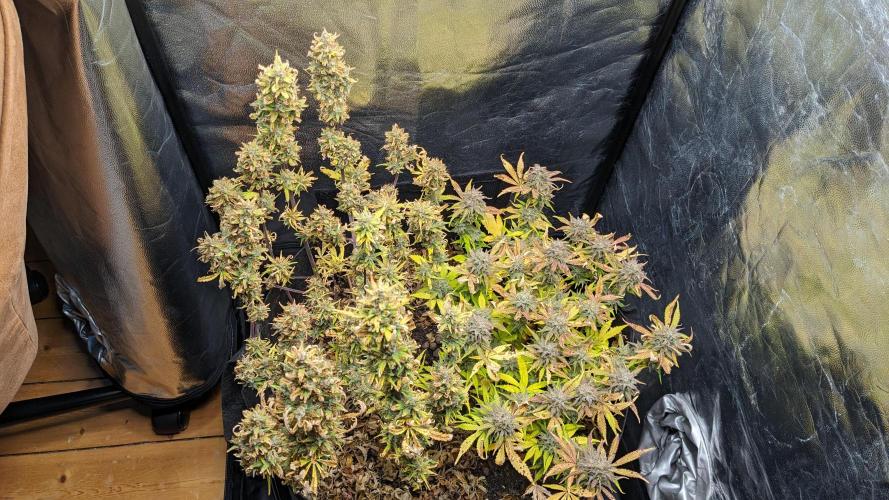
__Growth__
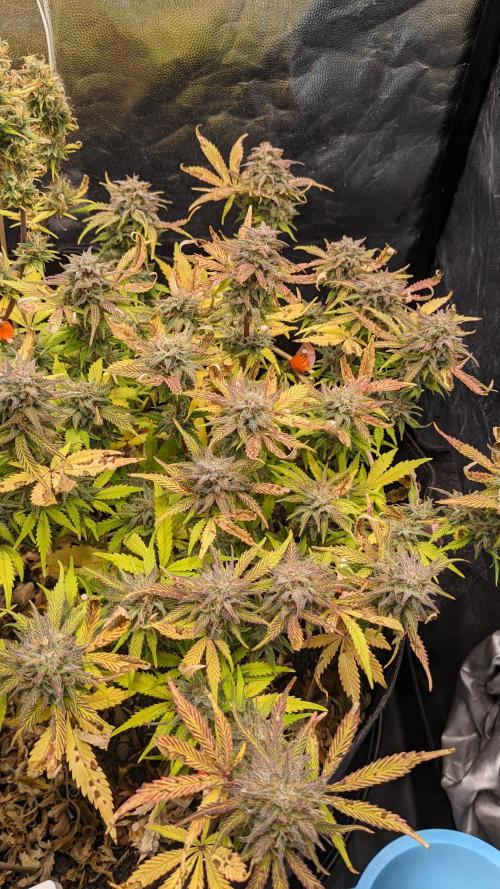
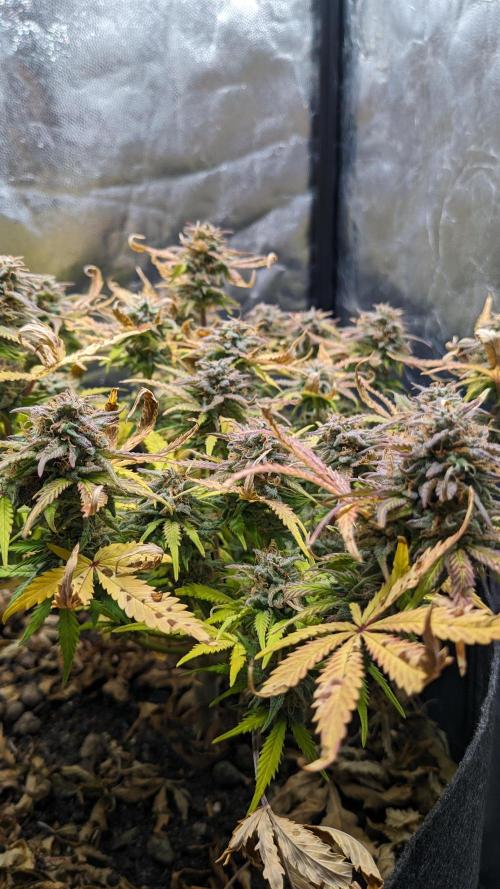
Mimosa Cake Auto by FastBuds was also quite an interesting strain - especially when compared to Gorilla Z Auto. It’s practically the exact opposite: very dense growth, lots of foliage, and highly resistant to fluctuations in nutrients and environmental conditions. But you have to remove quite a few shoots and realign them at least every 2-3 days, which involves a considerable amount of effort. Lastly, I realyl enjoy its colors - dark greens, pinks to purples and a beautiful fall-aesthetic when harvest comes closer.
__Smell__
Its aroma intensifies daily, becoming sweeter and fruitier as it goes.
_Taste
Actually pretty smooth orange.
Show more
Translate
Spent 108 days
Ger Veg Flo Har
136 g
Bud wet weight per plant
18 g
Bud dry weight per plant
1
Plants
Normal
Difficulty

Happy, Talkative
Positive effects

Citrus, Tropical, Sour
Taste
Height
Day air temperature
Air humidity
PH
CO2
Light schedule
Night air temperature
Substrate temperature
Pot size
Lamp distance

poloq *Don't ask me why the lamp is in the review like 3 times.
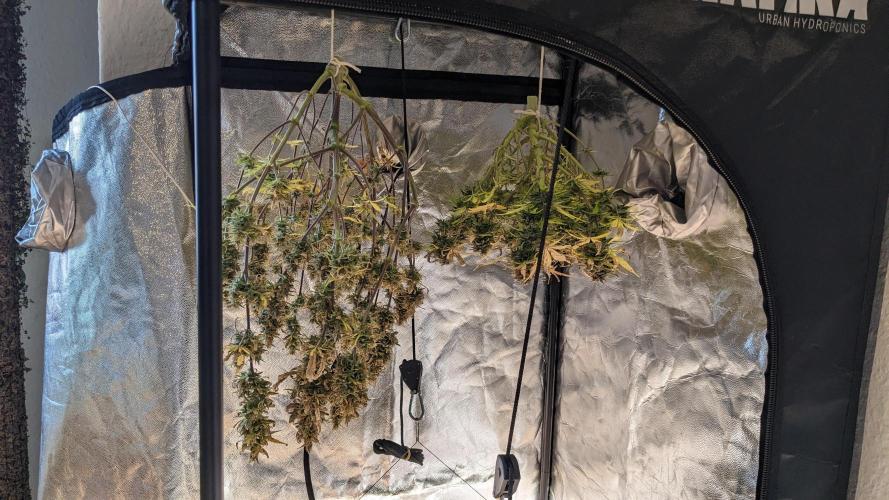
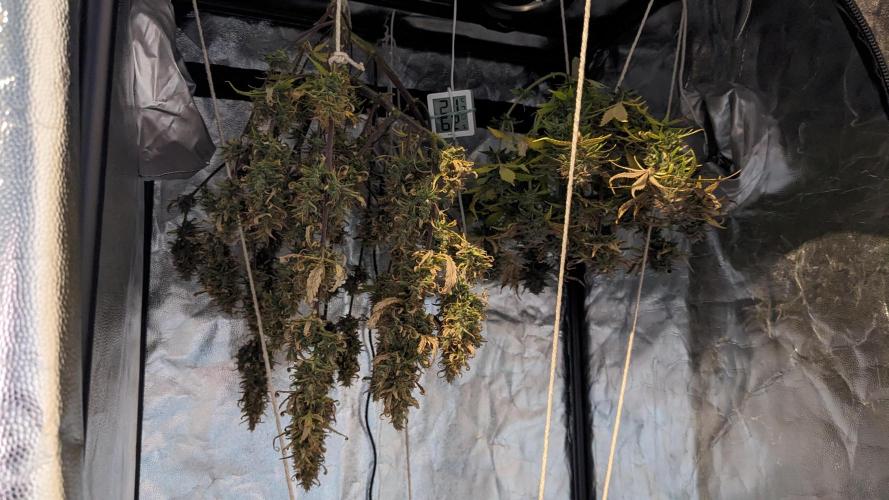
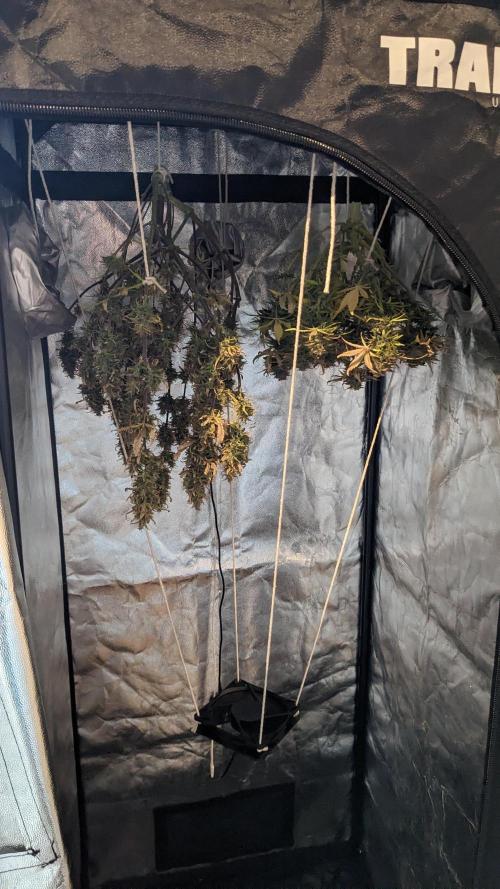
_Drying + Setup
Got 15 - 18°C and 50 -70% RH right now (mostly 17°C and 60% RH), with a slow but steady circulating fan + exhaust fan (about 25% power). The circulating fan is positioned in a way so that it draws the air from the, intake trough the buds, to the exhaust.
II decided to do the final trim 8 days (Mimosa Cake) and 9 days (Gorilla Z) after the drying process began, so I could then transfer them to jars. Mimosa Cake (after 24 hours in the jar) still had a relative humidity of 74%, so I placed it back on aluminum foil (also for just under 24 hours) and then put it back in the jar. Gorilla Z was at 57% RH after 12 hours in the jar, but at 61% after 24 hours. Mimosa Cake was now also at 64%.
I won’t use Bovedas until the humidity in the jar reaches 59% RH or lower (I want to maintain the optimal range of 58 - 62% naturally for as long as possible).
_Smell (2-ish days in jars)
Gorilla Z is really smooth already, still a little 'planty', but mostly creamy, earthy, oily, herbal, lime.
Miimosa Cake is pretty sour, pineapple, orange, fruity, a little more 'planty' (chlorophyll), creamy.
8 likes
3 comments
Share
Equipment Reviews
18 comments
Sort by
popularity
popularity
newest
oldest

HuskyHouse commentedweek 27mo ago
Good luck! Welcome!
likes 4

poloq commented7mo ago
@HuskyHouse, Oh thank you! 😊
likes 4

wolfvb commentedweek 67mo ago
Nice LST diagram! Planning ahead will help maximize yield 🌿📊
likes 3
poloq commented7mo ago
@wolfvb, Makes the handling also soo much more efficient. 😁
likes 4

cangrowz commentedweek 37mo ago
Nice Report Growmie!
likes 3
poloq commented7mo ago
@cangrowz, thank you, appreciate it. 😁
likes 4

Lajolend commentedweek 96mo ago
it happened to me too.... on Apricot Auto
likes 2
poloq commented6mo ago
@Lajolend, I think it's simply due to stress – either genetic (unstable), environmental, pests, etc. But as long as it doesn't affect the overall goal too much, I definitely welcome such minor peculiarities.
likes 3
Lajolend commented6mo ago
@poloq, For me, it might have been because I overwatered the flowers.
likes 2
poloq commented6mo ago
@Lajolend, would definitly make sense. But tbf the plants seem to have nutrient deficiencies and/ or too much light/ heat of the light source (wilting, young leaves). GL anyways!
likes 3

RabbitHole commentedweek 67mo ago
Good luck ma dude =) !
likes 2
poloq commented7mo ago
@RabbitHole, Thanks and good harvest! Blueberry Cupcake is on my list too. 👀
likes 3
RabbitHole commented7mo ago
@poloq, thanks =) so far im super happy with BBCC great genetic 😊💪
likes 2

Fast_Buds  commentedweek 164mo ago
Hi there, thank you for running this diary. Happy Harvest!!! 🌱🌱 😃
like 1
poloq commented4mo ago
@Fast_Buds, Hey what up? Appreciate you guys for commenting - Grüße aus Braunschweig. 😇
like 1

GhostTerpZ commentedweek 135mo ago
Looking really good ❗️ ❗️ ❗️
like 1
poloq commented5mo ago
@GhostTerpZ, thank you! Even though I ain't too happy with the result so far, it's definitly still fine oberalle - especially for the problems the system had. + I learned a lot, so the next run will be better for sure. 😊
likes 2
Fast_Buds commentedweek 164mo ago
Hi there, thank you for running this diary. Happy Harvest!!! 🌱🌱 😃
like 1

the end.
Enjoying this diary? Follow for more updates!


Prefer the old Diary view?
Go back to the old Diary view