Sensi's Seed Drop 2026!

2
78
14
115
5d ago
120x60x180
Soil
Living Soil
Indoor
Room Type
Transplantation
weeks 1
Topping
weeks 5
Main-Lining
weeks 5-6
Defoliation
weeks 6
40 l
Pot Size
2 l
Watering
Start at 6 Week
G
Germination
1mo ago
SleepyChow Hey friends of stable genetics and beautiful plants👋🏼, We’re in the year 2026, and Sensi Seeds has once again nailed some heavy hitters and cooked up some fine genetics. 🔥 For this year’s release, the breeders have stepped onto the Olympus of old-school classics and, in a wild orgy, brought to life the crème de la crème of old, hazy stoner dreams in our girl, the “High School Reunion.” The family tree reads like the lineup of a ridiculously strong fantasy football team. But unlike that, this is hard reality. Our nepo baby was created from legends like Afghani, Hindu Kush, Mother’s Finest, Skunk #1, NL#5 Fruity Juice,Jack Herer and Black Domina. 💪🏼I’m curious whether she can live up to the reputation of her parents. She will be my first more sativa-leaning lady in the tent. That’s why I was considering growing her in a smaller pot—but you know what? Fuck it. I’m going to use one of my large pots with established living soil. Only one plant, but she’ll easily fill out the entire footprint of my tent. I put the seed into a moist Jiffy about two and a half days ago, in a propagator with a heatmat underneath it (23°C) and on 29/04/2026 Hannah saw the light of day. I’m really looking forward to her development, and I’m still debating whether I’ll train her with LST over the next few weeks, go with cross mainlining, or stick to classic mainlining. A big thank you to Sensi Seeds for providing me with the seeds and for giving me the opportunity to be the first here on Grow Diaries to introduce this genetics🙌🏼 See you, growmies 😁 High School Reunion ((Hindu Kush x Jack Herer) x (Northern Lights x Skunk #1)) x (( Fruity Juice x Black Domina) x ( Mother's Finest x Afghani #1))
12 likes
7 comments
Share
Used method
Peat Pellet
Germination Method
1
Week 1. Vegetation
1mo ago
18 hrs
Light Schedule
24 °C
Day Air Temp
65 %
Air Humidity
40 l
Pot Size
3 l
Watering Volume
60 cm
Lamp Distance
SleepyChow Hello again Friends and Folks,long Time no see😂 i decided to transplant today. I’ve been giving the big pot a bit of water here and there over the past few weeks and also reseeded some cover crop. Did that again today since quite a bit didn’t germinate, unfortunately. I’m hoping at least some of it will still pop.? The companion planting is really important for the soil life and also helps stabilize the soil pH. It’s a big support for little Hannah. I transplanted her today, setting the Jiffy slightly deeper into the soil—just a bit—since she had stretched a little from me keeping the light a bit too far away.😅 Before that, I watered the soil again with 2 liters of water. Into those 2 liters I mixed 10 ml of EM and 4 ml of Root Juice—EM for the lactobacillus, and Root Juice for the humic acids.💪🏼 Then I placed the Jiffy into the hole, which I had pre-treated with mycorrhiza, and trichoderma. After transplanting, I watered again with another liter of water, this time adding half a teaspoon of molasses. 🚨 As I learned from the head microbiologist at GreenBull, mycorrhiza—especially with young seedlings—should be activated with a bit of sugar. In nature, this happens through root exudates, which naturally contain sugars. But our little ladies don’t produce enough of that yet, so there’s a real chance that you apply mycorrhiza and nothing really happens.🚨 Honestly, that’s a great little trick and a super useful tip I picked up. I also stuck a Blumat tensiometer into the soil today. I prepped that beforehand—pretty straightforward stuff, to be honest. You’re supposed to soak the ceramic tip (the shaft with the tip) in water for about an hour. Then you fill the hollow tube completely with water, screw on the digital head, and insert it about 15–18 cm deep into the soil, roughly 5–8 cm away from the edge of the pot. After around three hours, you can take your first reading and see where the millibar level is at.? I’m still deciding whether I’ll water fully by hand throughout the grow or go with a combination of the Blumat system and hand watering. I kinda want to push her a bit more than usual this run😁 See u 👍🏼
13 likes
1 comment
Share
Used techniques
Transplantation
Technique
2
Week 2. Vegetation
1mo ago
18 hrs
Light Schedule
24 °C
Day Air Temp
50 %
Air Humidity
40 l
Pot Size
2 l
Watering Volume
60 cm
Lamp Distance
SleepyChow Day 7Hello Folks 👋🏼 Little Hannah is now seven days old and developing completely normally — everything is well within the green zone. During the first few days, I kept the propagator dome over her so the humidity around her would stay nice and high. However, that noticeably reduced the amount of light she was getting, and her first leaves also started looking a bit rough. Nothing serious though — her first leaves aren’t exactly pretty, but the ones coming in now already look much better. The lamp is currently set to 70%. I can’t really get the humidity much higher, but I’m just making sure it stays consistently above 50% rH. I’m still experimenting a bit with the watering amounts right now. I placed a Blumat tensiometer into the soil according to the manufacturer’s instructions and keep checking the millibar readings it shows from time to time. The optimal range for container plants is between 50 and 120 millibars. I really underestimated how little water it actually takes to make those values swing quite heavily. Two days ago, I watered with two liters (with 2ml Root juice per l) and the reading dropped from 160 down to 50 millibars. Still within the ideal range, but it definitely surprised me at first. Right now I just need to observe things a little more closely. Hanna is still very small, so she obviously doesn’t drink that much yet. The cover crop also isn’t as developed as it should be at this stage. That should improve naturally once the root system becomes more established. Good old Tim from Sonnenerde once said in a video — quite a long time ago actually — that 100 millibars is the sweet spot. That was originally the value I wanted to aim for, but I think it’ll only become realistic later on to consistently stay somewhere around 100. Maybe I’ll just keep the range a bit wider for now. So far though, Hannah is doing pretty well overall. See u guys and girls 👍🏼
12 likes
comments
Share
3
Week 3. Vegetation
1mo ago
18 hrs
Light Schedule
24 °C
Day Air Temp
55 %
Air Humidity
40 l
Pot Size
1.5 l
Watering Volume
60 cm
Lamp Distance
SleepyChow Day 14Hello friends of beautiful plants 👋🏼 Yeah, our little Hanna is developing wonderfully and looking great. I actually removed the first leaves because one of them already looked a bit damaged, but that can happen - nothing serious. Honestly, I don’t think I’ve ever had a plant where the very first leaves looked perfect anyway.🤷🏼‍♂️ Other than that, she’s looking really healthy. She’s developing normally. Considering her environment and the living soil setup, growth could maybe be a little faster, but everything is still well within range. She’s already starting to develop some additional branches at two of the nodes, just on a small scale for now. Unfortunately, I can’t keep the humidity all that high. It usually fluctuates around 55% relative humidity, but she’s handling it pretty well. Watering is still a bit tricky. She doesn’t drink much yet, and the cover crop is still establishing itself, although it’s starting to come through strongly now. I have to keep an eye on it so it doesn’t completely overgrow our little Hanna. 😅 Because of that, the overall pull in the pot still isn’t very strong, so I really have to water very rarely and only in small amounts. The goal with living soil is to water small amounts frequently in order to maintain consistent moisture levels and avoid major pH swings in the soil. That’s why drip systems like Blumat are so great. But this time I wanted to water manually with the help of the tensiometer to push the process a bit more💪🏼 See you around.
16 likes
2 comments
Share
4
Week 4. Vegetation
21d ago
18 hrs
Light Schedule
27 °C
Day Air Temp
55 %
Air Humidity
40 l
Pot Size
2 l
Watering Volume
55 cm
Lamp Distance
SleepyChow Day 22Hi growmies 👋🏼 Hanna is developing incredibly well . honestly, she looks fantastic😁. She’s very healthy, showing a beautiful vibrant green color, and the branching on the second node is getting stronger and larger every day. Overall, she is completely on track. What definitely stands out in the pictures is that the cover crop is slowly starting to outgrow her. I make sure to keep the companion plants around her trimmed back, but at the same time I’m extremely happy to see so much life happening inside the pot. In the end, all of that biodiversity only benefits little Hanna. Watering is still a bit tricky. The pot is drinking a lot more now — both because of the expanding cover crop and because Hanna herself is getting bigger and demanding more water. Over the last few days I watered 1l per day,twice with one liter each time mixed with 10 ml of Greenbull. Greenbull is honestly an amazing product. the guys behind it, based in Berlin-Tegel, have a seriously professional background. One of the founders is a microbiologist, the other an agricultural scientist. But more importantly, they came up with a genuinely brilliant idea. Modern biochemistry already works heavily with microalgae because of the incredible results they can produce. These guys adapted that concept for agricultural use. Microalgae are fascinating because they’re almost like bacteria and plants at the same time . they perform photosynthesis and metabolic processes with extremely high efficiency. What they basically did was take the advantages we living soil growers already use with things like kelp extracts and push them much further. They subjected their microalgae to massive amounts of stress . heat stress, light stress, cold stress, and more .causing the algae to develop huge amounts of beneficial phytohormones that are incredibly useful for plant growth. E.g. for early growth they contain a lot of auxins. They essentially stressed their microalgae so hard that the algae turned into absolute monsters🦖 And honestly, i think the product 'll speak for itself. I wouldn’t even mention it here if I wasn’t genuinely impressed by both the product and the idea behind it. I’m testing it in this grow for the first time, and so far the results have been very positive. The cover crop has never looked this vigorous, and Hanna herself is looking absolutely great😂 In a future grow, I’ll test it again in a much more visible and structured way, mainly out of personal curiosity as well. I’d really like to document the effects more clearly and make the whole experiment easier to follow. Look for greenbull.green on insta to get more information or listen to one of the latest podcasts by vincent weed😁 See u guys😬
11 likes
comments
Share
5
Week 5. Vegetation
11d ago
18 hrs
Light Schedule
34 °C
Day Air Temp
Weak
Smell
55 %
Air Humidity
40 l
Pot Size
2 l
Watering Volume
55 cm
Lamp Distance
SleepyChow Day 32 Hi Folks 😬 Busy week,thats why im late to the party. Last week i treated little Hannah with a foliar spray made of 1 litre water and 30ml horsetail manure. Horsetail manure has many benefitial attributes.Its rich in silicial acid, which strengthen the cell walls/plant tissue and helps our plants to overcome stress more easily💪🏼 It also suppresses fungal diseases on the plant itself as also in the soil.Therefor i poured also Something on the soil. Last benefit which comes to my mind is,that little beasts like gnarts hate the smell of (that) manure😈 Its great to use before and after topping to support our plants to recover. It's also highly recommended because the last few days have been extremely, extremely hot, and that obviously puts a lot of stress on our plants as well After that treatment i topped her. I decided to use the for me familiar version of cross Mainlining.I waited till there were at least four nodes or more,focused on the third and looked,which node is closer to that. and bing bing bing🎊 the second node was the winner (with a distance of just 5mm). i,of course, cutted the first nodes also off.I left as much of the stump as possible, although there wasn't much to work with due to Hanna's compact growth structure. Hannah didnt really reacted to that.Shes growing like shes in a concentrated state of mind but happy. Surprisingly shes still very modest and compact growing with broader leaves. Never the less she looks pretty healthy. maybe a indica leaning pheno after all?🤔Dont judge a book by its cover,she can still show her sativa heritage in flowering stage. Originally, I thought Hannah was going to stretch a lot😅because I started her under higher light intensity quite early, and maybe the soil was a bit too dense and rich in nitrogen as well,she kept compact 🤷🏼‍♂️ I'm not really sure. The companion plants have actually been growing really well, though. that well i had to radically chop and drop them. So far, the stretch hasn't gotten out of hand, which is nice. I'm still seriously considering whether I should add a second Hannah to the tent or not. The original idea was that, since my tent isn't particularly large and I've learned that it's not really enough space for three plants without them getting in each other's way, I would train them more aggressively and spread them across the entire canopy. But I'm still undecided. If she ends up staying fairly compact, I might have wasted a bit of valuable tent space😔 See u guys 👍🏼
8 likes
2 comments
Share
Used techniques
Main-Lining
Technique
Topping
Technique
6
Week 6. Vegetation
5d ago
18 hrs
Light Schedule
27 °C
Day Air Temp
Weak
Smell
55 %
Air Humidity
40 l
Pot Size
2 l
Watering Volume
55 cm
Lamp Distance
SleepyChow Day 38 Hi Folks 👋🏼 Quick update: Alright, I kept the mainlining project going and basically repeated the same process on each branch that I originally did on the main stem. I removed the first two nodes, kept the third one, and topped above the fourth. ✂️ That gave me eight new branches to work with. The plan is to keep pushing the manifold a bit further until I end up with 16 main branches in total. Once that's done and everything is nicely balanced, it'll be time to flip these ladies into flower. 😎 I picked up this style of manifolding from the YouTuber Hyperactive Highs, who unfortunately hasn't posted anything in years. Hopefully he's doing well wherever he is. 🙏 What I really like about this technique is that it encourages the plant to spread out sideways as much as possible rather than growing straight up. The result is a wider, more open structure that should make canopy management a lot easier later on. 🌿 Another nice bonus is that it creates a bit more space toward the center of the plant, improving access and helping me arrange everything more evenly once the branches start filling out. With a well-spread manifold, it's much easier to keep all the tops at a similar height and make the most of the available grow space. 💪 As for watering, I'm still letting the tensiometer do most of the decision-making. The readings fluctuate quite a bit, I have to admit, but that's not necessarily a bad thing. Allowing the soil to dry back a little from time to time encourages the plants to keep pushing their roots further in search of moisture. 🌱 To support that process, I started the week by giving Hannah 2 liters of water mixed with each 5 ml of Beetroot and Sweet Potato FFJ, plus 20 ml of EM (Effective Microorganisms). A couple of days later, I followed up with another 2 liters containing 20 ml of Pumpkin FPE to provide a nice potassium boost. 🎃 The Pumpkin FPE also contains lactobacillus, which is always a welcome addition for maintaining a healthy soil microbiome. One of the things I really like about pumpkin ferments is their versatility. They're great for promoting vigorous plant growth and can be used from the vegetative stage all the way into late flower. During flowering, they can also help support larger and denser buds, so it's a pretty handy little input to have around. 😎 Today, I gave them another liter with 20 ml of Green Bull. The goal here is simply to help the plants get through this stressful manifolding phase a bit more comfortably while continuing to encourage strong root development. 💪 Before I topped and defoliated the plants, I also applied a foliar spray made from horsetail manure. I mentioned it in a previous update, but it's worth repeating: horsetail is naturally rich in silica, which plays an important role in cell wall development and overall plant health. Stronger cell structures mean tougher plants, and it also contributes to a more resilient immune system. Hahaha well, my "quick little update" turned out to be not so quick after all. 😅😂 Thanks for stopping by and following along with the grow. See u guys 👍🏼
6 likes
2 comments
Share
Used techniques
Defoliation
Technique
Main-Lining
Technique

Login

14 comments
Sort by
popularity
popularity
newest
oldest
SensiSeeds
SensiSeeds
Official Brand Representative
commentedweek 323d ago
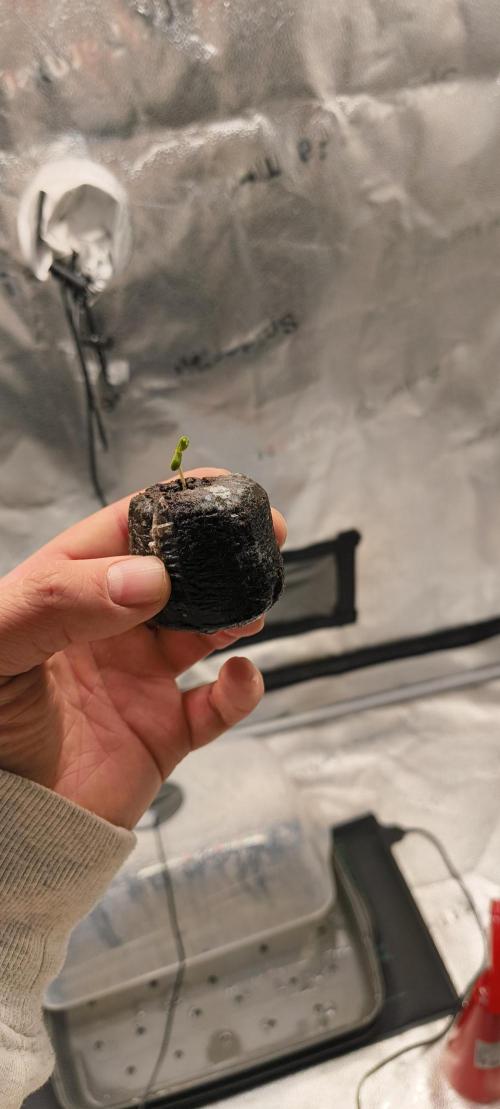
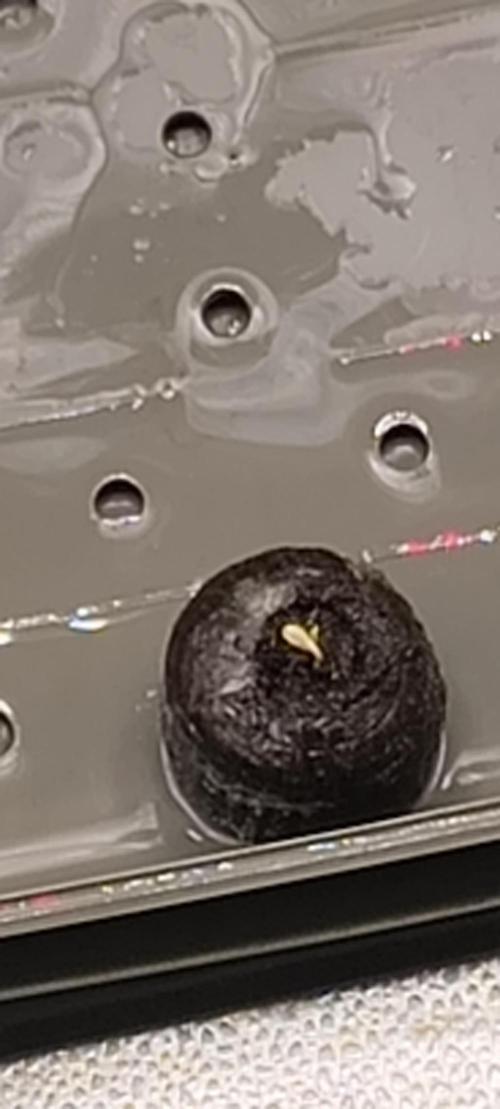
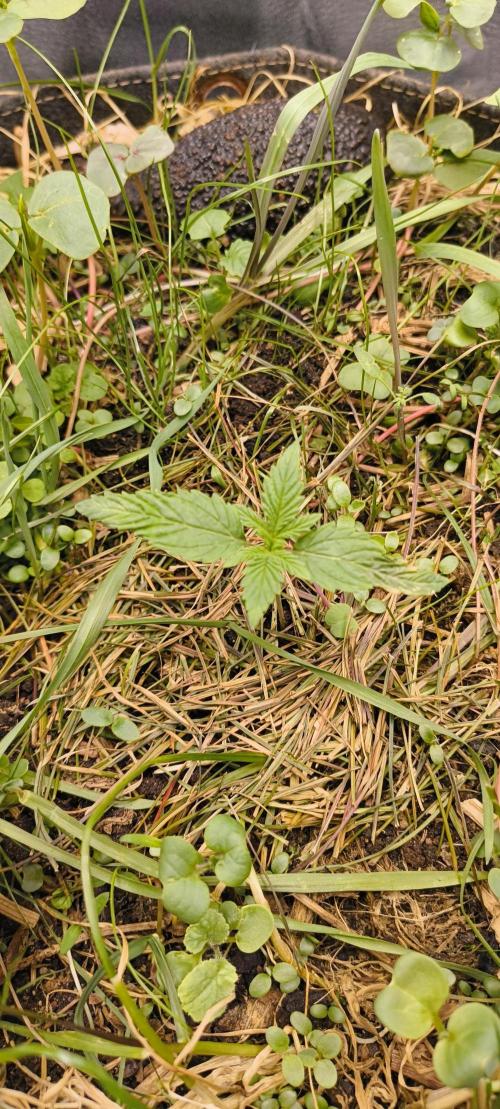
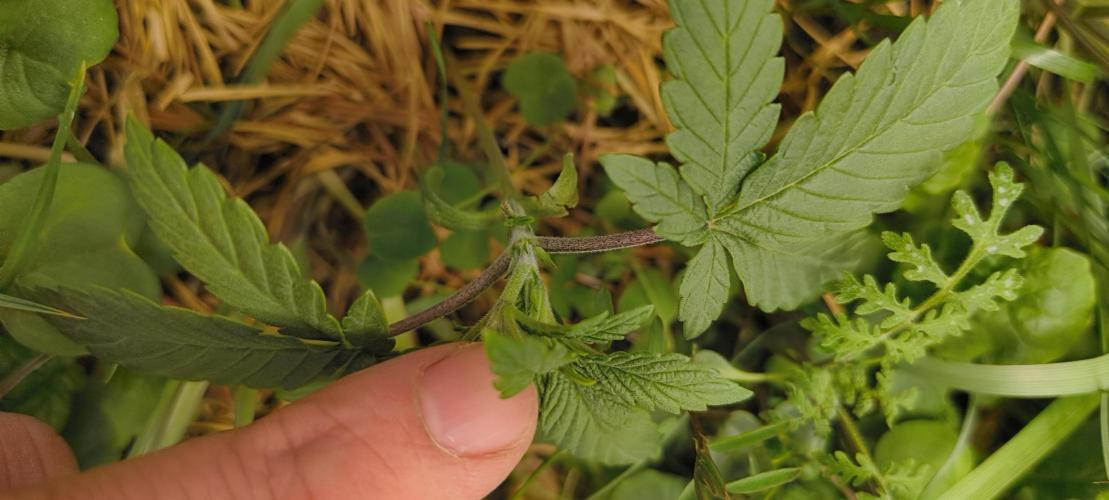
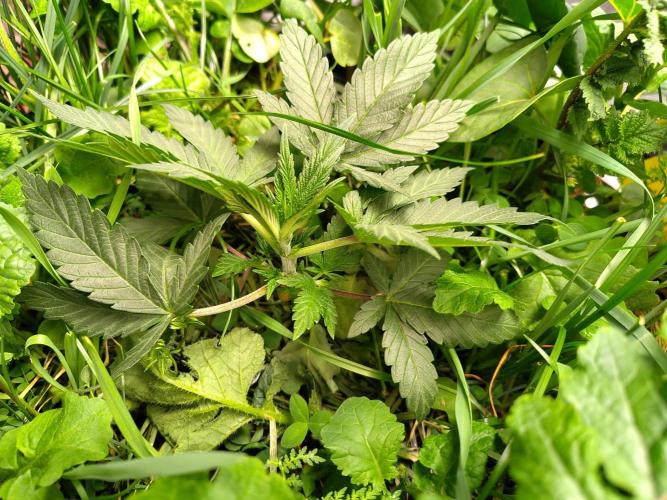
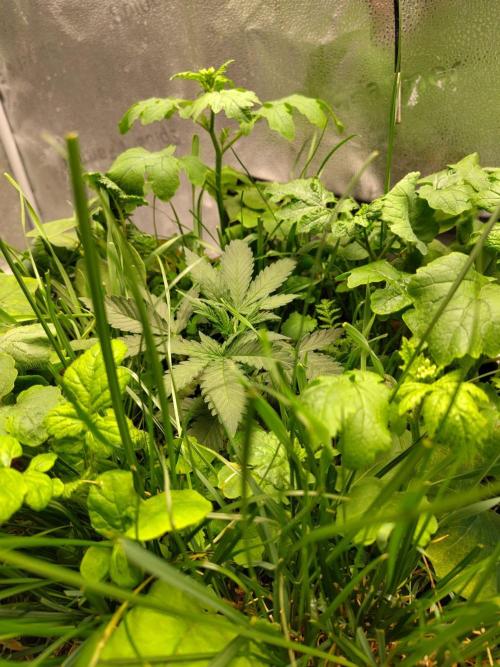
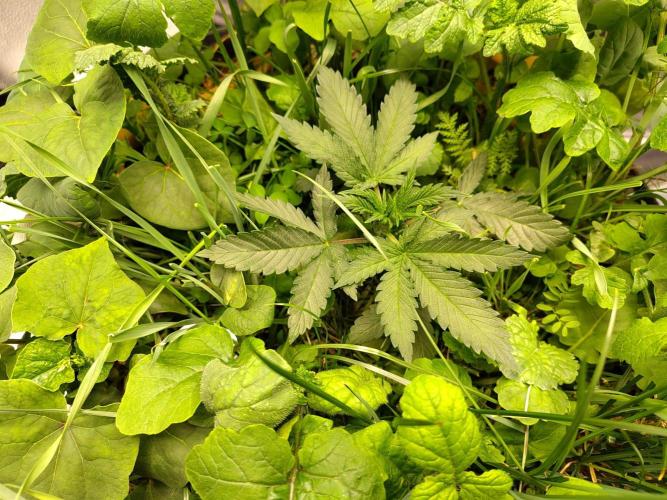
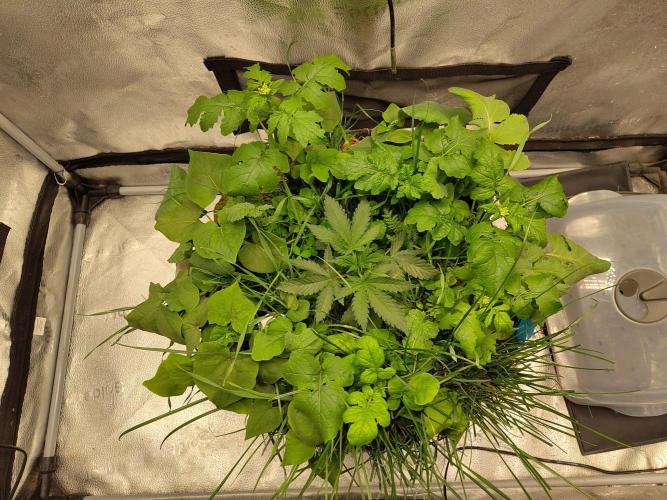
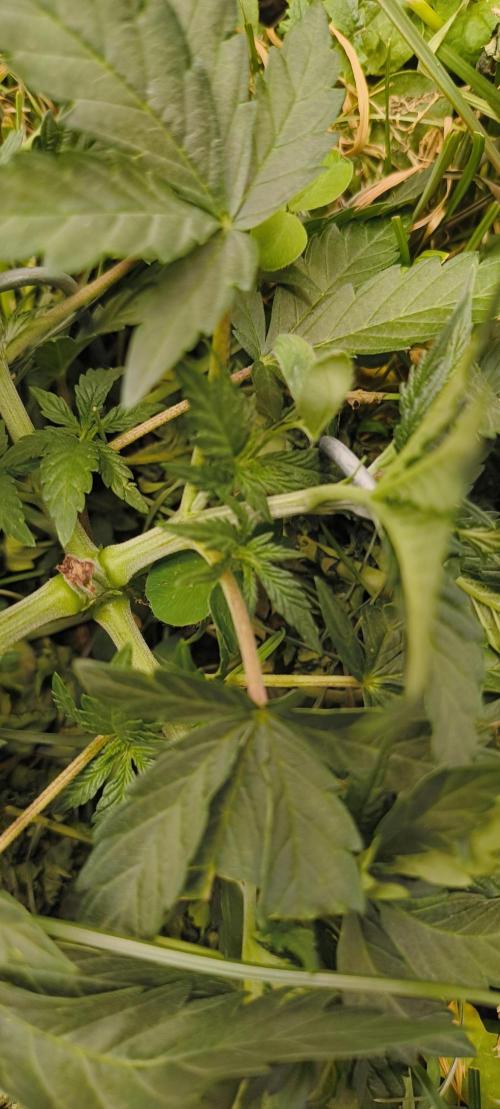
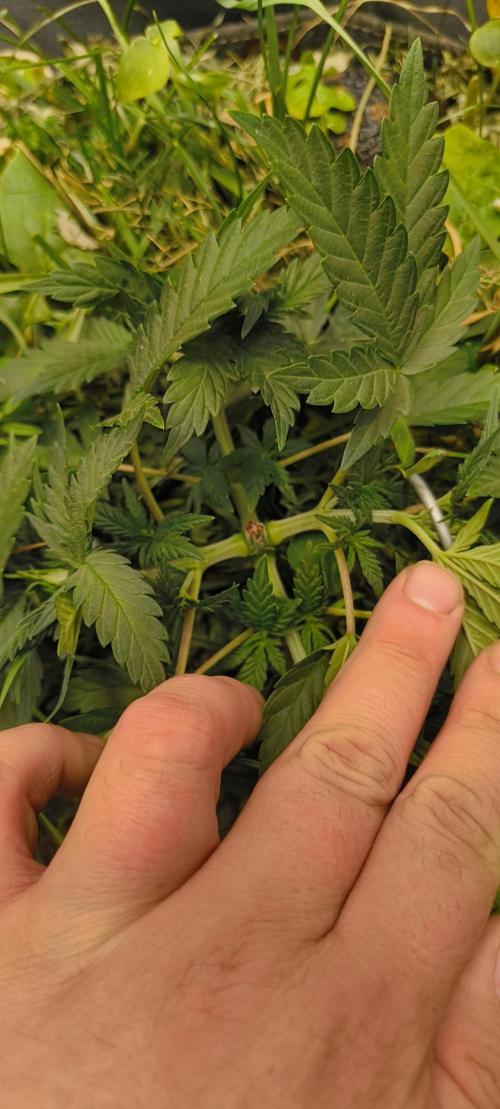
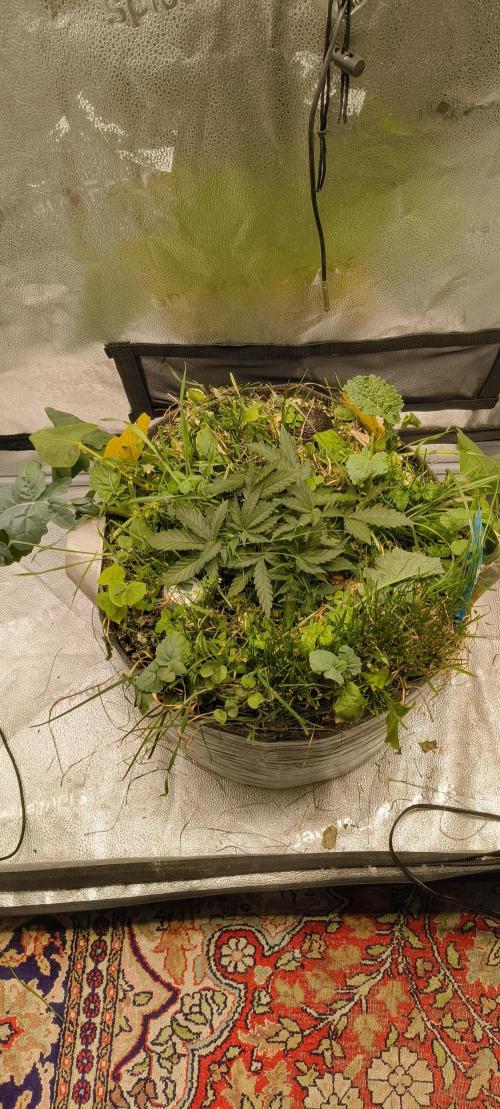
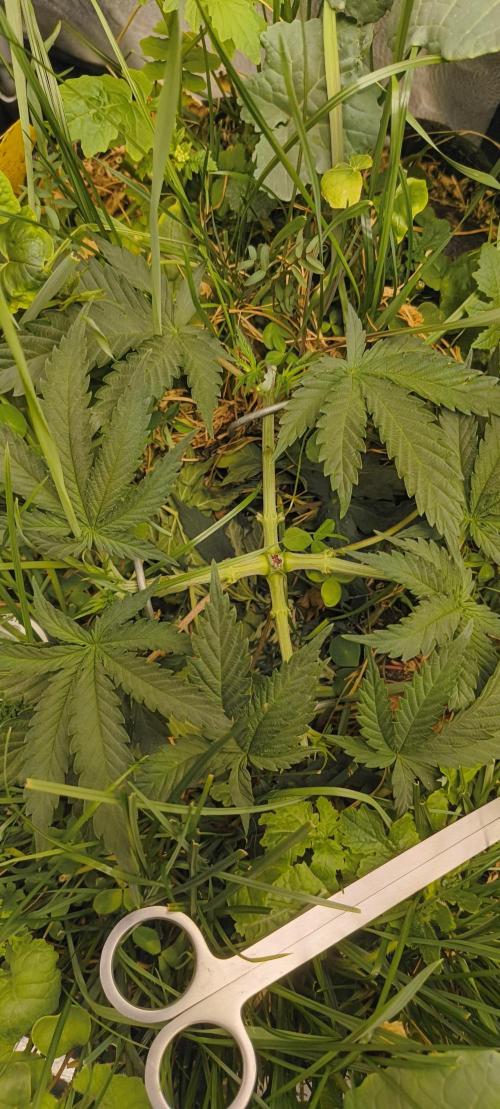
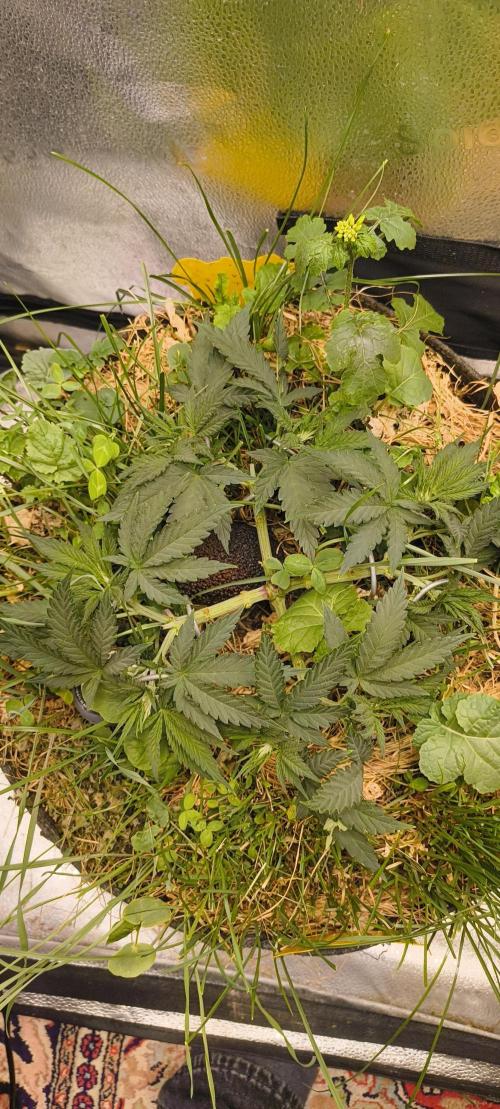
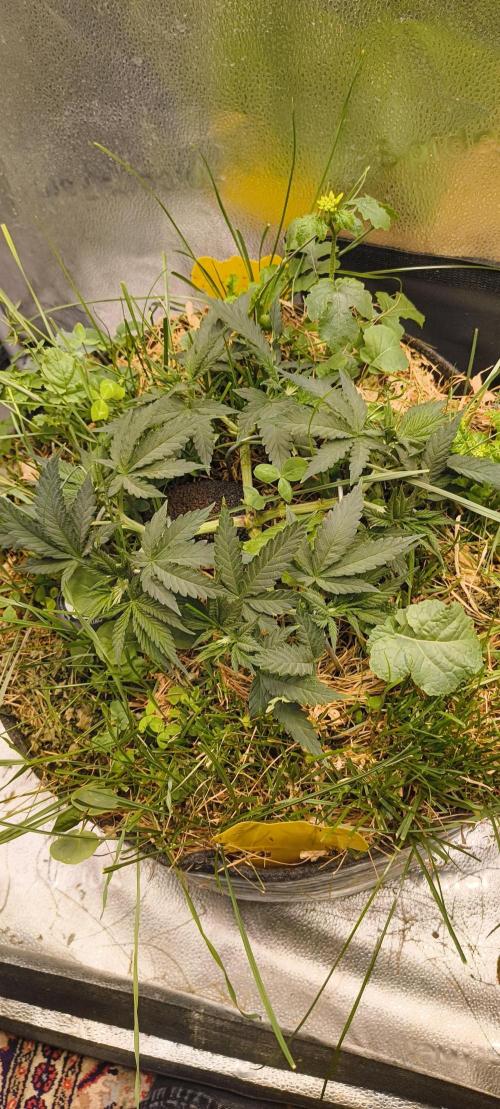
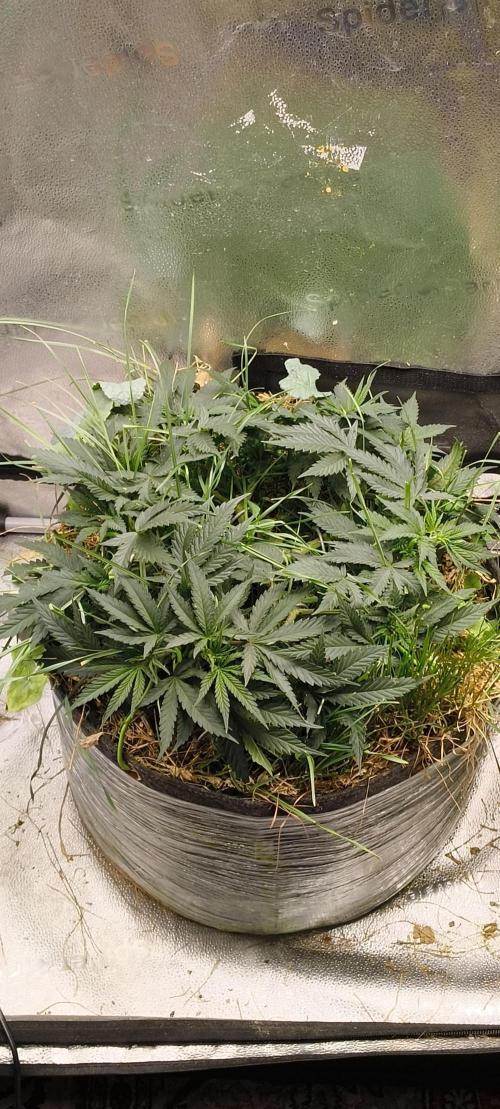
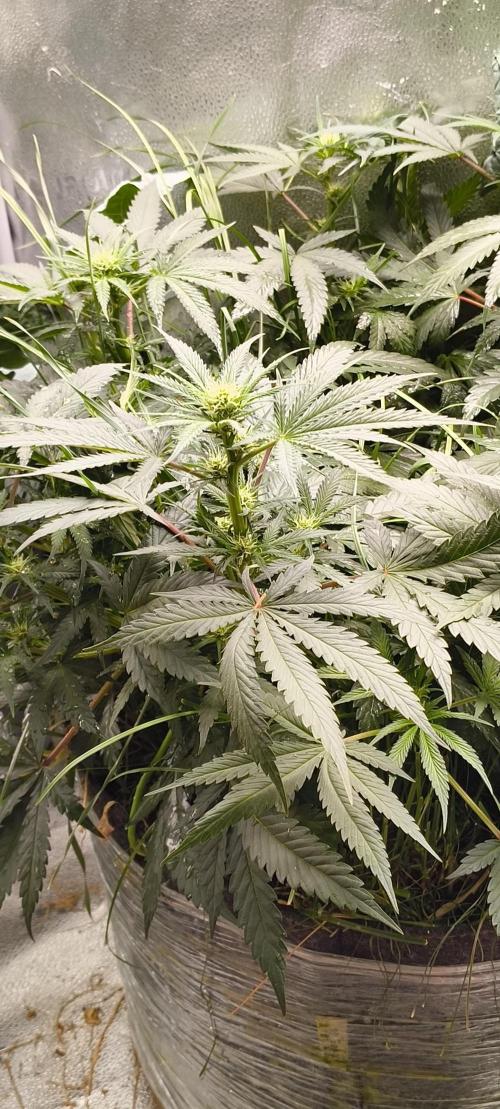
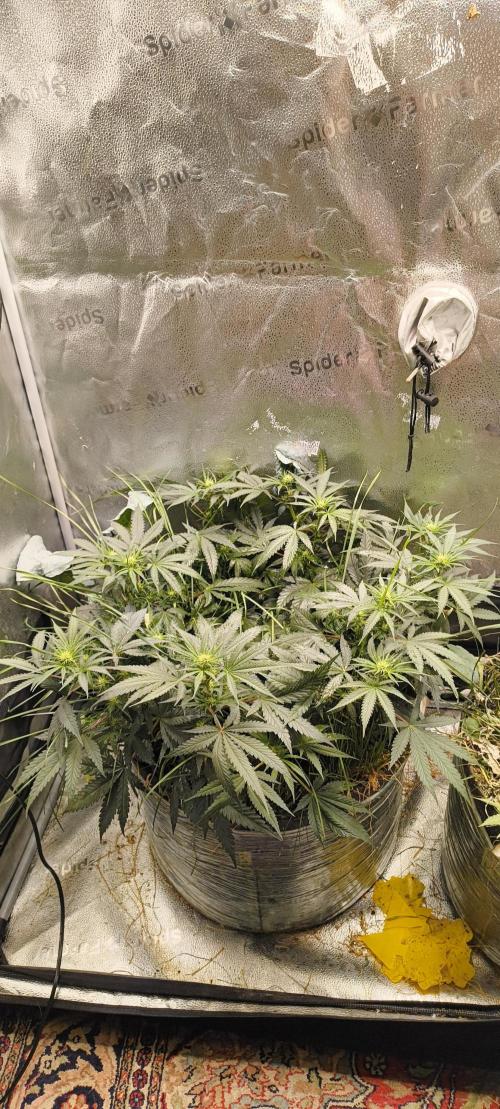
Little Hannah is looking beautiful! Thank you for growing the first High School Reunion diary 💚 We developed this strain from some of our most legendary genetics (see below) to celebrate Sensi Seeds’ 40th anniversary in 2025. It literally took YEARS of hard work to get this one right! The complex lineage for those interested: ((Hindu Kush x Jack Herer) x (Northern Lights x Skunk #1)) x (( Fruity Juice x Black Domina) x ( Mother's Finest x Afghani #1)) 🌱
SleepyChow
SleepyChow commented22d ago
@SensiSeeds, thanks for ur comment and of course for ur seeds and this opportunity🙏🏼 i mentioned her heritage in my first post/germination week 😁
Wilstang
Wilstang commentedweek 61d ago
Happy and healthy 🌱💯
SleepyChow
SleepyChow commented1d ago
@Wilstang, yea of course😏😬 i cant wait for the next post shes getting thicker and bigger🙌🏼thank u
Kushycat
Kushycat commentedweek 511d ago
Wie süß die ist! 😊 Hat sich die junge Dame ein richtig feines Nest gebaut. Ich denke, der Wuchs hat wahrscheinlich auch etwas mit der Lampe zu tun – also Leistung, Abstand zur Pflanze usw. Du könntest die Lampe vielleicht etwas höher hängen, sofern genug Leistung anliegt. Alternativ den Abstand so lassen und die Leistung etwas reduzieren. KI kann übrigens ein gutes Werkzeug sein, wenn man die Antworten kritisch hinterfragt. Da kommen teilweise echt brauchbare Tipps bei raus. Vielleicht fütterst du sie einfach mal mit deinen Angaben – Lampe, Abstand, Strain usw. – und schaust, was sie ausspuckt. Ich habe mich zum Beispiel anfangs auch über den kompakten Wuchs gewundert und dabei gelernt, dass bei Vollspektrum-LEDs kurze Internodien oft völlig normal sind. Ich will aber auch nicht klugscheißern. Reicht ja schon, dass ich überall alles vollschreibe mit meinem endlosen Gelaber. Blah blah blah... lol ^^
SleepyChow
SleepyChow commented10d ago
@Kushycat, ne ich denke es liegt auch an der höheren ppfd.der Abstand zur Lampe ist weit genug. war ja eigentlich auch von mir so beabsichtigt,um den wuchs kompakt zu halten.andererseits hab ich trotzdem gedacht,dass sie etwas schlaksiger wird😂ich bin echt noch hart am überlegen,ob das aktuelle Wuchsverhalten nicht sogar zu vorteilhaft ist für mein Mainlining,um was dran ändern zu wollen. Dennoch bin ich auch gespannt,wie sieht die Blattform noch im Laufe des grows verändern wird.ob sie sativa like wird oder so breitblättrig bleibt. mal schaun.
Kushycat
Kushycat commentedweek 01mo ago
Viel Spaß mit Pflanzis! 🐱🌞🍀🙏🏼🥦
Kushycat
Kushycat commented1mo ago
@SleepyChow, wie Groß bist du? ^^
SleepyChow
SleepyChow commented1mo ago
@Kushycat, 1.81m an guten Tagen morgens mit dicken Socken?
Kushycat
Kushycat commented1mo ago
@SleepyChow, lol okay na dann kann sie ja ordentlich Stretchen bis 1,82 xD
Show More (1)
Kali_flauer
Kali_flauer commentedweek 01mo ago
I thought high school sucked ass, but your grow certainly won't! Can't wait to see how she turns out with that lineage propping her up!
SleepyChow
SleepyChow commented1mo ago
@Kali_flauer, i hope shes fire like her parents.we'll see👍🏼
Mrfarmer
Mrfarmer commentedweek 11mo ago
I see your going organic atomic soil💪🏽👍🏽👨‍🌾, good luck Growmie
Enjoying this diary? Follow for more updates!
SleepyChowSleepyChow
Follow Author
OR
Prefer the old Diary view?
Go back to the old Diary view