


Sleepy yoda philosopher seeds



VEG
Lampwin Light Emitting Diodes/300W
Lampwin
FLO
Lampwin Light Emitting Diodes/300W
Lampwin

Soil
Custom

Indoor
Room Type
LST
weeks 3-5
Defoliation
weeks 5, 7, 10
10 liters
Pot Size
Start at Harvest
1
Week 1. Vegetation7y ago


3 cm
Height
24 hrs
Light Schedule
26 °C
Day Air Temp
6.3
pH
70 %
Air Humidity
22 °C
Solution Temp
21 °C
Night Air Temp
10 liters
Pot Size
0.1 liters
Watering Volume
90 cm
Lamp Distance
Nutrients 3

BioBloom
3 mll

BioGrow
3 mll

BioEnhancer
0.6 mll
Master_weeda Hello to all the padawans and Jedi masters!
First of all, thanks to Philosopher Seeds and Greenhouse for allowing me to do this grow by providing the Greenhouse feeding and seeds.
I remind you that I am simultaneously growing 9 pots of 10 and 11 liters in a box designed for 4, and I am only using the bare minimum of equipment necessary for a proper grow at the lowest possible price.
EQUIPMENT CONFIGURATION
Box 80×80×160
Lamp LED Lampwin 300 watts ×2
Clip fan 15 watts
Xiaomi Deerma humidifiers 5L
Hygrometer thermometer
Extractor PROFAN 107 m3/h - 100
Programmable electronic socket ×2
1 black square pot 10 liters
Greenhouse feeding enhancer
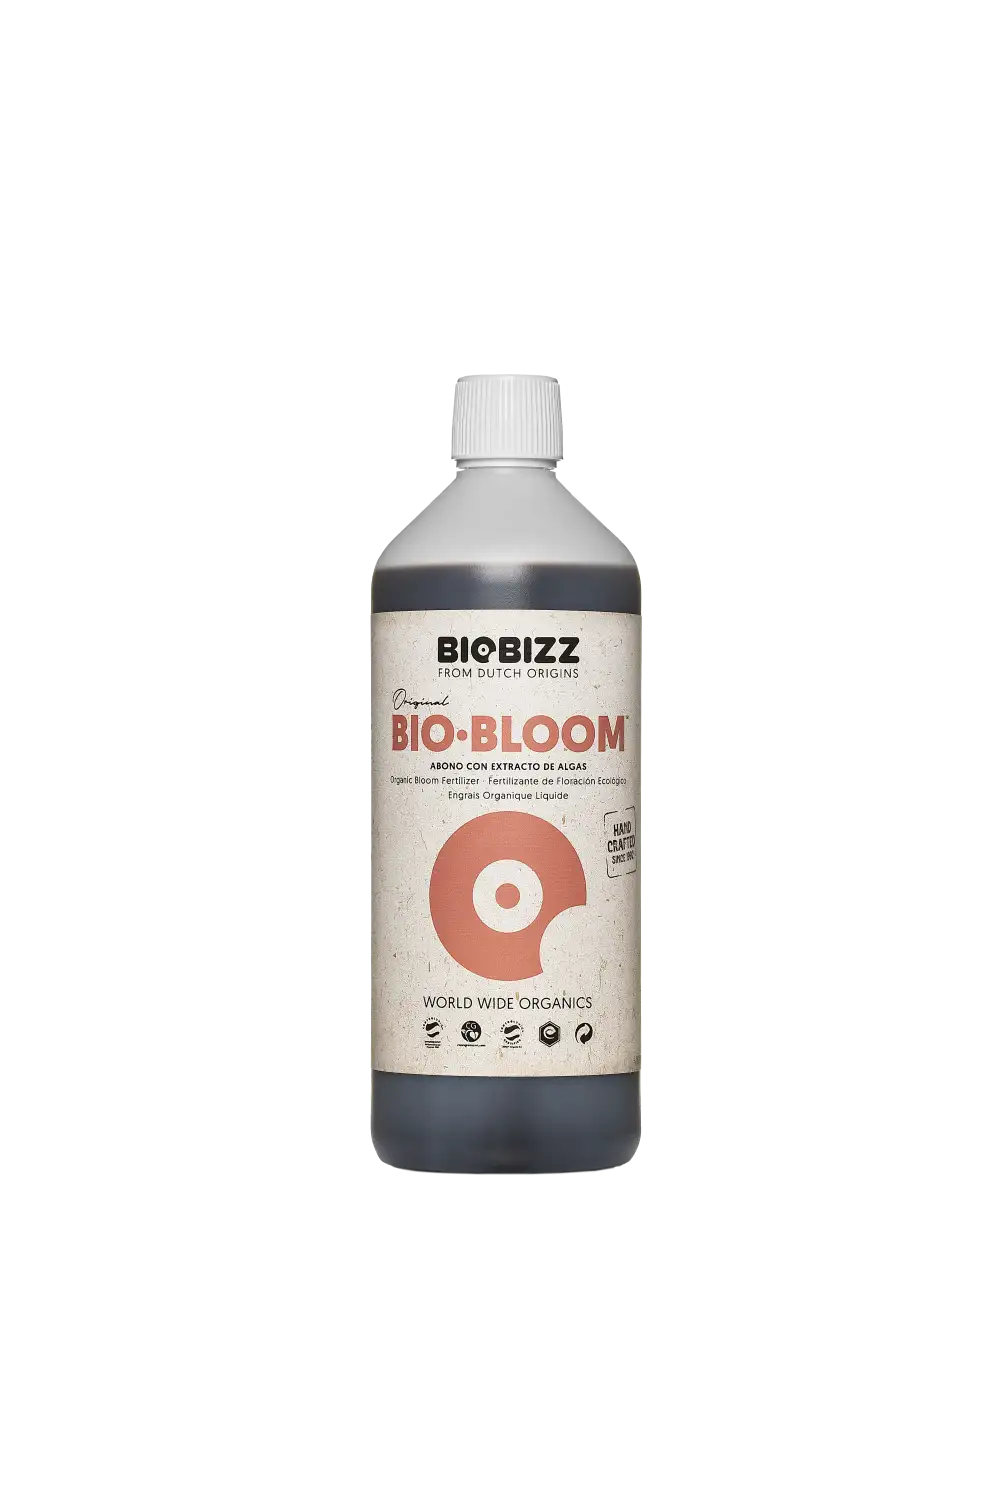
Greenhouse feeding biobloom
Greenhouse feeding biogrow
Biobizz lightmix substrate
Wire and cutting pliers
Microscope
Small precision scale
GROW STEP BY STEP
First, I germinated my seed with the Easy Start from Royal Queen Seeds, and I am pleasantly surprised because honestly, the success rate is very high (17 seeds out of 19), easy to use, and very effective.
Once the seedling is out and about 2 or 3 centimeters tall, I gently take it and place it directly into its final pot. I recommend pots ranging from 10 liters to 15 liters for autoflowering grown indoors.
The pot will have been pre-prepared (video in diary) with 30 grams of Greenhouse feeding biobloom and 30 grams of Greenhouse feeding biogrow, which is the equivalent of 3 grams per liter of substrate.
So I place the seedling in its final pot, cover it a bit with soil, lightly compact it, and water it to keep the substrate moist, no more.
I place my 300-watt LED lamp about 90 centimeters above the seedling with a light cycle of 24/24 for a week. At the beginning of week 2, the light cycle will switch to 20/4 thanks to a timer because for me, this light cycle offers the best yield for an autoflowering.
Day 1: light watering
Day 2: light watering
Day 3: the seedling starts to become more vigorous, setting up ventilation to increase its root mass and light watering
Day 4: watering with one and a half liters of water pH 6.3 to which I added 0.9 grams of Greenhouse feeding enhancer (that’s 0.6 grams per liter of water)
Day 5: no special technique
Day 6: no special technique
A pleasantly calm week with no problems or apparent deficiencies.
May the force be with you!
25 likes
6 comments
Share
2
Week 2. Vegetation7y ago



8 cm
Height
20 hrs
Light Schedule
24 °C
Day Air Temp
6.3
pH
70 %
Air Humidity
22 °C
Solution Temp
21 °C
Night Air Temp
10 liters
Pot Size
0.1 liters
Watering Volume
90 cm
Lamp Distance
Nutrients 3
BioBloom
3 mll
BioGrow
3 mll
BioEnhancer
0.6 mll
Master_weeda Hello to all the padawans and Jedi masters
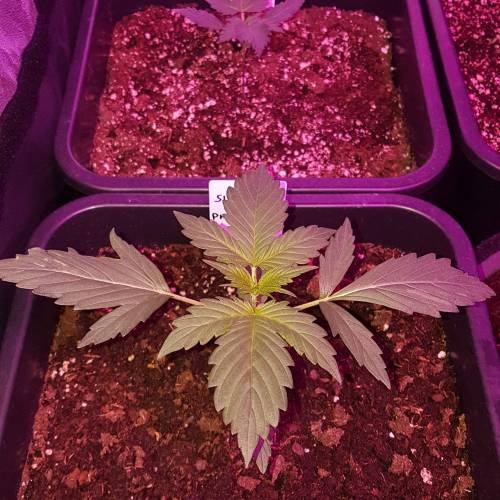
For this week 2, no techniques were practiced, I just monitored that the humidity stays at a rate of 70%. I did a light watering until day 10 because transplanting the autoflowering plants into their final pots increases the risk of overwatering the substrate. 🤐
To mitigate this risk, it's better to water with 10 or 20 centiliters of water at pH 6.3 during the first 10 days of the seedling. On day 11, I water my pot normally with a quarter of its volume in water (for a 10-liter pot, 2.5 liters), still with a pH of 6.3, and I add 0.6 grams of greenhouse feeding enhancer per liter of water.👍
Enhancer is a mix of humic acids, seaweed extracts, strains of Trichoderma harzianum, and Bacillus subtilis.
It increases the vitality of the plant, improves nutrient absorption, and enhances soil quality.👍
I will do a similar watering in 2 weeks.
A few little tips to master your watering:
Don’t put your plants in a stone or clay pot, the pot absorbs water and under the sun's rays, its edges heat up and dry out its contents.
Make enough holes in the base of your pot/tray/bucket to ensure excess water drainage. Overwatering can be as damaging as drought (though it's a problem that's easier to solve).
You’ll recognize overwatering when the leaves (yellow) fall, have a "thick" appearance, and droop.
Don’t place the pot directly on the ground as this increases the chances of poor water drainage. Some growers use plastic risers to lift the pots off the ground; wood should be avoided due to the risk of rot.
In pots or trays, a plant requires more frequent watering. You can develop an instinct to determine the ideal time to water by regularly lifting the pot and memorizing its weight when wet and dry.
You can also stick your finger into the soil and feel if it is sufficiently moist. The top few centimeters can be dry as long as the soil below is sufficiently moist.
A tensiometer is the best way to measure water levels, but it’s a device that comes at a price.
Letting your plants dry out from time to time has a beneficial effect on root development and promotes nutrient uptake by the roots, but the line between a little dry and too dry is thin, so be careful.
It’s often the case that the top layer of soil has difficulty absorbing water when dehydrated. If this is the case, take a fork and turn the soil over 2-3 cm deep, then cover with a little water, wait at least 5 minutes, then repeat the process, after which you can water normally with much better results.
NO WATERING DURING THE LAST WEEK BEFORE HARVEST!!!!
One week before harvest, stop watering the plant: this will give it a little boost in its budding development.
May the force be with you 💪
18 likes
4 comments
Share
3
Week 3. Vegetation7y ago


16 cm
Height
20 hrs
Light Schedule
24 °C
Day Air Temp
6.3
pH
70 %
Air Humidity
22 °C
Solution Temp
21 °C
Night Air Temp
10 liters
Pot Size
0.1 liters
Watering Volume
90 cm
Lamp Distance
Nutrients 3
BioBloom
3 mll
BioGrow
3 mll
BioEnhancer
0.6 mll
Master_weeda Hello to all the padawans and Jedi masters!
For this week 3 on day 19, my plant is 21 centimeters tall and its seventh node is appearing, so I decide to practice LST on my plant.
For this, I use galvanized wire that I plant directly into the substrate, being careful not to damage the roots because let's not forget that what grows above also grows below.
Day 17, I spray a solution made of one teaspoon of soft black soap (Briochin brand) diluted in half a liter of water as a preventive measure against potential pests.
Why soft black soap?
Black soap: what use for the garden?
Black soap is a natural product whose cleaning properties have been known since ancient times. Used for household maintenance and body care, its antibacterial and insecticidal virtues make it a valuable ally for the organic gardener.
Black soap is made from potash and a fatty substance like vegetable oils such as olive, flax, or corn oil.
A natural and biodegradable product (if it doesn't contain additives, as can sometimes be the case), it's a very good cleaning product for floors, kitchens, dishes, laundry, etc... Very versatile, it is also economical compared to the multiple commercial detergents.
Black soap comes in the form of soft brown paste or liquid, diluted with water. It's liquid black soap that is generally used in the garden because its use is simpler. It can be purchased in organic stores as well as in supermarkets or garden centers.
Caution: the recipe for household black soap and that for black soap used in cosmetics are not necessarily the same; household black soaps (multi-purpose) may contain more potash to improve degreasing power (irritating or drying for the skin), and even some chemical additives.
In the garden, it is primarily the antiseptic and insecticidal properties of black soap that are used.
Liquid black soap is used to combat aphids, mealybugs, red spiders, whiteflies, psyllids, and other thrips. It is a contact insecticide; it kills larvae and cleans the honeydew that glues the leaves.
The recipe for the black soap insecticide (soft for me, Briochin brand) is simple to make: one or two teaspoons of soft black soap (Briochin) diluted in half a liter of warm water (5% dilution); once the preparation has cooled, spray it on the affected plants, taking care not to forget the underside of the leaves. Repeat 1 to 2 times if necessary, to be completely rid of the unwanted pests.
As is customary for most treatments, do not spray the black soap solution in the middle of the day, under the sun (nor in the rain!); proceed early in the morning or wait until the end of the day when temperatures are below 20°C.
Day 18, I adjust my LST according to the growth of my plant...
For me, this is how I proceed, but just a reminder of the LST technique.
When to start applying the LST technique?
Many growers start manipulating as soon as the plants have between 3 and 6 nodes or a pair of leaves. During this first stage of growth, the still flexible trunk can be bent without the risk of breaking, even though as the plant develops, it will become increasingly difficult to bend. We can continue to guide the growth of the branches throughout the cultivation, even during flowering, which represents a significant advantage over pruning, which is not recommended at all once the formation of the buds begins, as it will stress the plant, delaying the harvest.
How to apply the LST guiding technique
If we are careful, the natural flexibility of cannabis fibers allows us to bend their trunk and branches with relative ease, even during the flowering of the plants.
Using a thin rope, we can attach the tip of the plant to the base of the pot, for example, or to a stake that we have planted in the substrate. We will carefully bend the trunk and secure it with the rope; from there, we can gradually increase the tension of the rope, a little more each day, until we achieve the desired position. Be attentive to the plant's reaction, try not to apply too much pressure on the rope, and remember that the flexibility of the branches can vary from plant to plant.
To achieve the best results, just follow a few simple rules. First, we need to choose a thin rope but not too thin so as not to injure the trunks as they grow and become thicker.
We can use soft plastic hooks or any other flexible material to avoid damaging the plants. Especially indoors, using colored plastic cords (see @Silky's diaries) is very practical for easily seeing the attachments and facilitating work among the network formed by the ropes, stakes, nets, or supports we have in the cultivation. Of course, in outdoor cultivation, especially in guerrilla growing, we will do just the opposite and use materials of colors that do not attract attention so that our garden remains discreet.
To minimize stress on the plants, it's best to perform these manipulations in the evening or just after the indoor lights go out, allowing them to recover during the night. Normally, the next day we will be able to observe how the tips of the branches we bent rise again towards the light source.
May the force be with you 💪
22 likes
comments
Share
Used techniques
LST
Technique
4
Week 4. Vegetation7y ago




16 cm
Height
20 hrs
Light Schedule
24 °C
Day Air Temp
6.3
pH
70 %
Air Humidity
22 °C
Solution Temp
21 °C
Night Air Temp
10 liters
Pot Size
0.1 liters
Watering Volume
90 cm
Lamp Distance
Nutrients 3
BioBloom
3 mll
BioGrow
3 mll
BioEnhancer
0.6 mll
Master_weeda Hello to all the padawans and Jedi masters
Week 4 is already here!
This plant is truly exceptional! It represents strength, and I'm proud of it 😍
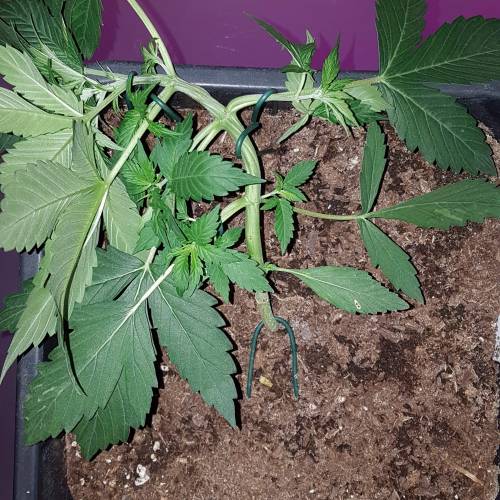
I challenge myself to make the trunk do a turn on itself during my LST.
My plant is healthy, the LST is going relatively well, I adjust it every day, and I combine it with the Apex pinching technique, which will allow me to have a more uniform canopy, thus better light penetration and consequently a better yield.
Pinching is a common practice in horticulture.
Many growers use it to improve the yield of their cannabis or other plantations.
It's often about 'trimming' the apical buds.
This trimming is also practiced, but then it is no longer strictly speaking about pinching.
Like a trim, pinching will stimulate the development of branches while preserving the tips for flowering.
It is very useful for uniformizing a canopy.
To perform pinching, you just need to 'firmly' press the stem [between your thumb and index finger] around the apex until you feel a slight 'crack'.
This will result in damaging the vessels involved in the circulation of sap [located around the stem], but the stem still retains some rigidity.
To achieve the same result, it is also possible to slightly twist the stem on itself.
The interruption of the nutrient circuit between the apexes and the rest of the plant will cause a hormonal imbalance that will lead to the development of branches before the pinching point.
Day 25, I water my pot normally with a quarter of its volume in water, always with a pH of 6.3. To this water, I add 0.7 grams of greenhouse feeding enhancer to promote root development.
After that, I will just have to adjust my LST until the stretch and monitor my watering. I will pinch my apexes according to the plant's growth to uniformize the canopy.
Day 26, with patience and delicacy, I succeeded in the challenge I set for myself by making the trunk turn on itself (photo day 26). This challenge greatly improved my LST technique. Beyond that, it allowed me to give the trunk a spine-like structure, resulting in better light penetration and a nice uniform canopy.
May the force be with you 💪
19 likes
2 comments
Share
Used techniques
LST
Technique
5
Week 5. Vegetation7y ago




18 cm
Height
20 hrs
Light Schedule
24 °C
Day Air Temp
6.3
pH
70 %
Air Humidity
22 °C
Solution Temp
21 °C
Night Air Temp
10 liters
Pot Size
0.1 liters
Watering Volume
90 cm
Lamp Distance
Nutrients 4

Top-Max
0.5 mll
BioBloom
3 mll
BioGrow
3 mll
Master_weeda Hello to all the padawans and Jedi masters
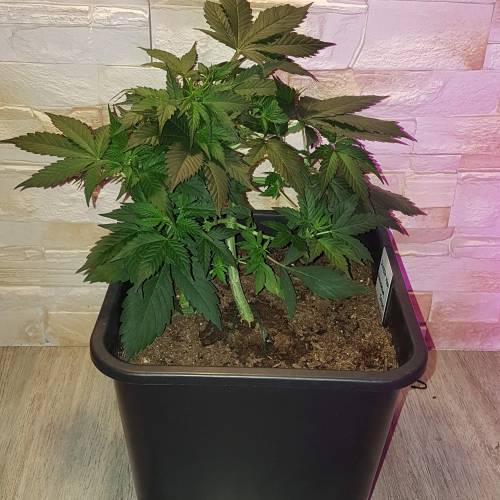
The LST is done, my trunk in the shape of a spine is turning on itself (video day 32) this shape fully satisfies me, so I decide to remove most of the wires used for LST
Pinching the Apex gives the plant a uniform canopy (photo day 32 34)
Day 33 watering with 2 liters of water pH 6 to which I add 0.5ml of topmax biobizz (very light dosage to avoid causing a lock-out) this will promote its entry into flowering.
I perform a slight defoliation to allow better light penetration to the lower apexs.
What is defoliation?
AMATEUR GROWERS, BE CAREFUL, BUT DON’T BE AFRAID
Defoliation involves removing the leaves from indoor cannabis plants to increase the final yield. The amateur grower must be vigilant when starting to apply this pruning technique. Despite the endless debate between those who advocate for this technique and those who disparage it, there is no reason for an amateur not to try it out to see if it suits them or not.
HOW TO DEFOLIATE
Whether you’re trimming the leaves or branches of cannabis plants, it’s best to use a sterile pair of scissors that feels comfortable in your hand. Pulling leaves off by hand lacks finesse and often accidentally results in tearing layers of a stem along with the leaf. The main goal of defoliation is to allow better light penetration and promote the production of larger buds. The fan leaves that create shade should be removed. Trimming the main stem and/or secondary shoots is not defoliation.
The golden rule when refreshing your plants is to start with the largest and broadest nutrient leaves, trimming from the bottom up. It’s important to remove leaves strategically and not randomly. Also, keep in mind that you should limit your refreshment to approximately 10 to 20% of the total leaves on your plant. It’s very easy to get carried away during trimming and end up with bald plants. Excessive leaf trimming will hinder photosynthesis and paralyze your plants.
WHEN TO DEFOLIATE
It’s quite rare to apply defoliation as the sole technique for achieving a high yield. Leaf trimming is generally associated with other pruning and training methods for better yield such as topping or head topping, FIMming, LST, manifolding, supercropping, and ScrOG. Growers using the ScrOG method will need to remove all lower growth as well as leaves and stems located under the net.
Cannabis plants can be defoliated as soon as they transition from the seedling phase to the vegetative growth phase. However, it is recommended that amateur growers allow the plants 1 to 2 weeks of vegetative growth before tackling their defoliation. Additionally, some strains are more sensitive to pruning than others and will therefore be more stressed by leaf trimming. Carefully monitor your plants’ behavior after pruning. A recovery period of at least 3 to 7 days before resuming defoliation is highly recommended to avoid too much stress on the plants. Growers can also defoliate during the flowering phase, which will allow the plant's energy to be focused on bud production while limiting shade and excess moisture. Nevertheless, it’s important not to defoliate too late to avoid unnecessarily harming your plants.
THE ADVANTAGES OF DEFOLIATION
Obviously, the number one advantage of defoliation is the increased yield potential of this pruning technique for all types of cannabis, from photoperiod to autoflowering varieties. It’s no secret that flowers receiving more light become larger and wider than those hidden in the shade of leaves. Moreover, removing the inner leaves of bushy plants helps prevent any threats of mold. Very leafy plants with dense inner foliage will produce a significant amount of popcorn buds. In the worst-case scenario, the dense bud branches and buds will succumb to rot.
If you see water droplets forming on the surface of the leaves, it’s high time to consider defoliation. Clearing the lower and middle areas of leaves is a great way to improve air circulation.
THE DISADVANTAGES OF DEFOLIATION
Indoor cannabis plants benefit from defoliation for two reasons. The first is because they receive light from a stationary source above them, and the second is because the environmental conditions are controlled by the grower and not Mother Nature. Outdoor plants, on the other hand, don’t gain much, as the circumstances apply to them. The sun moves across the sky, illuminating different portions of the plant from sunrise to sunset.
Outdoor growers don’t need to manipulate the plants to grow them in a flat structure since the sun is infinitely more powerful than any grow light and, moreover, it is always moving. Trimming the leaves of outdoor plants also makes them more vulnerable to humid conditions and breaks their natural barriers against pests.
Many indoor growers can, and unfortunately often do, reduce the final yield due to defoliation done at the wrong time and/or excessive. Trimming seedlings is not advisable and often results in stunted plants. Scalping mature plants is even worse, and instead of getting long bud branches, you’ll probably end up with even fewer flowers. Similarly, trimming sick or unhealthy plants at any stage of growth risks stunting growth rather than encouraging the formation of dense flowers.
May the force be with you 💪
21 likes
5 comments
Share
Used techniques
LST
Technique
Defoliation
Technique
6
Week 6. Flowering7y ago


28 cm
Height
20 hrs
Light Schedule
24 °C
Day Air Temp
6.3
pH
55 %
Air Humidity
22 °C
Solution Temp
21 °C
Night Air Temp
10 liters
Pot Size
0.1 liters
Watering Volume
60 cm
Lamp Distance
Nutrients 5
Top-Max
0.5 mll

Bio-Bloom
1 mll
BioBloom
3 mll
Master_weeda Hello to all the padawans and Jedi masters
10 centimeters in a week!
Day 39 biobloom and I'm keeping an eye on humidity and watering as usual. I'm fine-tuning my LST while stressing my plant as little as possible. I'm combining my LST with an Apex pinch, which will allow me to have a more uniform canopy, thus better light penetration and consequently a better yield.
A little reminder about the Apex pinch:
Pinching cannabis plants
Close to the apex trimming principle, this technique has several advantages, the main one being to preserve the main central bud of the plant, with maximum production and quality.
Pinching cannabis plants
The apex pinching (top of the plant) simply involves gently pinching the stem of the last tier of the plant between your thumb and index finger until you feel the fiber crush under your fingers with a characteristic little crunch sound. If the available space on the stem of the last tier doesn't allow you to comfortably place your fingers, you should pinch the tier below instead.
Pinching will significantly slow the vertical growth of the plant while stimulating the development of secondary branches, thus giving the plant a bushy shape. The plant will take a few days to repair this pinch, forming a knot at that spot, and will then continue its growth normally. The pinching can then be repeated if necessary, on the newly formed next tier, as well as on any secondary branches that might exceed the apex.
Pinching is therefore an excellent technique for achieving a nice uniform green wave-type canopy. By regularly pinching the apex of the tallest plants in your space during the growth phase and at the beginning of flowering (stretch), you'll easily get plants of uniform height in full bloom, which will facilitate cultivation and increase final production, especially if you're simultaneously growing multiple marijuana varieties.
With a bit of practice, pinching can be done quickly and effectively. In case of too violent pinching resulting in a torn apex, it will simply produce the same results as a classic apex trimming, so it won't be dramatic.
May the force be with you 💪
21 likes
comments
Share
7
Week 7. Flowering7y ago


43 cm
Height
20 hrs
Light Schedule
24 °C
Day Air Temp
6.3
pH
55 %
Air Humidity
22 °C
Solution Temp
21 °C
Night Air Temp
10 liters
Pot Size
0.1 liters
Watering Volume
60 cm
Lamp Distance
Nutrients 5
Top-Max
0.5 mll
Bio-Bloom
1 mll
BioBloom
3 mll
Master_weeda Hello to all the padawans and masters
Stretch 15 centimeters
Day 42 defoliation
Day 45 watering with 1ml topmax water
Day 47 watering with two liters of water ph6.3 to which I add 1ml per liter of biobizz topmax water
What is stretching?
How to Control Stretching: Mastering Cannabis's Growth Push
Stretching is a natural growth spurt for cannabis plants, but it is known to affect final yield. We dive into what causes stretching in the first place and how to prevent it from invading your growing space.
There is little more irritating than an overloaded grow room. Stretching, the term used to describe the accelerated growth of cannabis stems, is part of the natural process of the vegetative phase and is influenced by plant genetics among other variables.
Unfortunately, stretching is a recurring culprit in poor yields and plants that are too long resulting in the wobble of physically unstable crops. Despite the threat it confers, stretching can be controlled by first examining the factors influencing growth and then creating a protocol to accompany these problems step by step. Controlling cannabis stretching requires an understanding of how plants interact with their internal and external environments.
WHY DO PLANTS STRETCH?
There are many reasons why plants are stretched, one of which revolves around the varieties themselves. Genetics play an essential role in determining the possible height of sativas, indicas and hybrids. While most indica varieties are reared to grow in a smaller and denser way, sativas often undergo significant stretches of up to sometimes almost 2 or more mothers depending on the species.
While stretching itself is not harmful, drastic flare-ups on the part of the stems can result in the potential loss of a large crop of between 20% and 30% in total. When thinking about species for your next home growing session, look for the standard size of each variety you are interested in so you can judge whether or not these species undergo drastic stretching during flowering.
22 likes
4 comments
Share
Used techniques
Defoliation
Technique
8
Week 8. Flowering7y ago


68 cm
Height
20 hrs
Light Schedule
24 °C
Day Air Temp
6.3
pH
50 %
Air Humidity
22 °C
Solution Temp
21 °C
Night Air Temp
10 liters
Pot Size
0.1 liters
Watering Volume
60 cm
Lamp Distance
Nutrients 5
Top-Max
0.5 mll
Bio-Bloom
1 mll
BioBloom
3 mll
Master_weeda Hello to all the padawans and Jedi masters
stretch 15 centimeters
(Stretch explanations more)
EXPOSURE TO LIGHT
One of the main culprits in abnormal stretching of cannabis plants is the lack of light. Plants that are too far from an adequate light source will respond by accelerating stem growth in order to get closer to the lamp themselves. Especially when there are many other plants. A lack of lighting can easily cause overcrowding in a growing chamber, reducing the steady progression of your crop and the distance ratio between your bulbs and your plants.
To address this problem, be sure to provide enough light to your plants to prevent stem growth. At the same time, you should not position your lights too close to your plants either since this would also result in an over-stretching of the stems and in some cases, the loss of your crop.
In addition to the distance between the light source and the plant, the type of light you will use also affects the size of the stretching of your crop. The orange and red lights encourage stretching and result in thinner, larger stems. And conversely, blue light stimulates a growth of thicker stems and a smaller size. When a species is ready to enter the vegetative phase and undergo its most drastic stretching period, metal halide lamps can be used to deter far too long stems.
THE HEAT
Heat is another essential element that can determine the stretch size of your plants during vegetation. Temperatures above 27 degrees push the stems to lengthen more and more and will propel the potential of sativas to push as high as possible. Heat lamps that are positioned too close to plants create an intolerable environment that will grow large, soft plants that will potentially wobble until they fall and lose flowers in its fall.
OTHER CAUSES OF STRETCHING
There are multiple variables that can lead to the stretching of plants beyond what could normally be expected of the plant. Environmental stressors resulting from transplantation (when a plant passes from one pot to another) can cause the plant to return to shock. This will eventually trigger a reaction causing a stretch. Cannabis plants that are not grown in decent conditions or do not receive enough nutrients will respond in a variety of ways and this includes stretching.
Crops that are not spaced far enough apart are likely to stretch to sting the light to other plants. Due to extreme proximity, the plants will fight among themselves to reach the light, forcing them to expand as much as possible throughout the crop.
HOW TO CONTROL STRETCHING DURING FLOWERING
Stretching during flowering, you guessed it, takes place when you move your plants from the vegetation stage to the flowering stage. This is a completely normal reaction, as your plants are preparing to bear the weight of their heads.
Stretching of a plant at the beginning of flowering varies widely; some plants can double in height while others grow only a few centimeters. There are, however, two main variables that can give you at least an idea of how your plants are stretching during flowering, and how much. Here are these two variables:
Variety: Genetics has the greatest impact on the size of your plant. In general, sativa varieties stretch more than indicas and tend to develop long, slender stems.
Light: Some lights, such as HPS, are more likely to encourage stretching. In addition, great distances between your canopy and your lights will cause the plants to stretch as they try to get closer to the light source.
Stretching during flowering usually lasts the first two weeks of the phase. To minimize stretching, keep your lights between 10 (for CFL) and 30 centimeters (for HID) of your canopy. Finally, choose indica varieties if you have a smaller growing space.
HOW TO AVOID STRETCHING
In many cases, you can expect your cannabis plants to stretch during the flowering phase. Keeping that in mind helps to make a plan in case your species ends up growing much more than you could have imagined. If the information is available, get information on the standard size of your species and compare it to the size of your growing space taking into account the necessary distances between the bulbs and the plants.
TRAFFIC
While outdoor crop operations benefit from natural air to naturally limit stretching, indoor crops must assume the maintenance of air circulation within a confined space. Basic ventilation is enough to help the cannabis stems strengthen and become thicker rather than too high. In this way, the plants continue to grow vigorously without reaching heights and at the same time, your tolerance ceiling.
MANUAL INTERVENTION
For growers who want to get their hands dirty, there are physical procedures that can be done to reduce stretching. Similar to the natural effect that the wind has on cannabis plants, manually bending the leaves and stems will cause tiny cracks in the plant's tissues that will cause the plant to focus on regenerating its wounds instead of its vertical growth.
THE TOPPING
Topping is a form of manual intervention on cannabis to influence its performance, shape or size. In essence, topping is a process in which a new node is cut, growing from the plant to reduce its size and create a "v"-shaped notch that will eventually form two heads. Topping may be an effective measure to combat stretching, but it is important not to do so when the flowering phase begins.
In most cases, an abnormal stretch of cannabis plants will not completely destroy your crop. In fact, stretching can indeed help increase your performance. For growers with a growing operation large enough to contain tall plants, stretching can increase the total yield of a species with more vertical space for head formation. In both cases, stretching can easily be planned in advance and there are multiple solutions to help you with this problem which is all too common.
Day 49 watering
Day 51 watering 2 liters of water
Day 54 slight defoliation watering with two liters of water ph6.3 to which I add 0.6 grams of feeding enhancer greenhouse
Good luck for your grow 🤞🌱
May the force be with you 💪
23 likes
2 comments
Share
9
Week 9. Flowering7y ago


82 cm
Height
20 hrs
Light Schedule
24 °C
Day Air Temp
6.3
pH
50 %
Air Humidity
22 °C
Solution Temp
21 °C
Night Air Temp
10 liters
Pot Size
0.1 liters
Watering Volume
60 cm
Lamp Distance
Nutrients 5
Top-Max
0.5 mll
Bio-Bloom
1 mll
BioBloom
3 mll
Master_weeda Hello to all the padawans and Jedi masters
+ 14 centimeters
Day 56 watering with two liters of water pH 6.3
Day 59 watering with two liters of water pH 6.3 to which I add 4ml per liter of water of Topmax Biobizz
Day 61 watering with two liters of water pH 6.3
24 likes
2 comments
Share
10
Week 10. Flowering7y ago


90 cm
Height
20 hrs
Light Schedule
24 °C
Day Air Temp
6.3
pH
50 %
Air Humidity
22 °C
Solution Temp
21 °C
Night Air Temp
10 liters
Pot Size
0.1 liters
Watering Volume
60 cm
Lamp Distance
Nutrients 5
Top-Max
0.5 mll
Bio-Bloom
1 mll
BioBloom
3 mll
Master_weeda Stretch 8cm
Day 63 watering with two liters of water pH 6.6
Day 66 big defoliation and watering with water pH 6.3 to which I add one gram per liter of water of feeding enhancer greenhouse
20 likes
5 comments
Share
Used techniques
Defoliation
Technique
11
Week 11. Flowering7y ago


93 cm
Height
20 hrs
Light Schedule
24 °C
Day Air Temp
6.3
pH
50 %
Air Humidity
22 °C
Solution Temp
21 °C
Night Air Temp
10 liters
Pot Size
0.1 liters
Watering Volume
60 cm
Lamp Distance
Nutrients 5
Top-Max
0.5 mll
Bio-Bloom
1 mll
BioBloom
3 mll
Master_weeda Hello to all the padawans and Jedi masters
Day 71 watering with 2 liters of water pH 6.3
Day 73 watering with 2 liters of water pH 6.3
Day 75 watering with 2 liters of water pH 6.3
WHAT IS THE OPTIMAL LIGHT SCHEDULE?
Autoflowering cannabis can survive on as little as 5 hours of sunlight per day. But if you want your plants to thrive, reach their peak potency, and produce a heavy harvest, they need at least 18 hours of light per day. The optimal light schedule for indoor autoflowering cannabis cultivation is a constant 20-4 throughout the life cycle. Of course, schedules of 18-6, 20-2, and 24 hours non-stop all have their advantages, but we have achieved the best results with the 20-4 schedule.
Outdoor growers can potentially start growing as early as spring. However, we always recommend germinating the seeds and growing the young seedlings indoors under artificial lights for a week or two to achieve the best results. We will discuss outdoor options in more detail a bit further down.
THE LIFE CYCLE OF AUTOFLOWERING CANNABIS
The biggest difference between photoperiod cannabis and autoflowering cannabis is that the clock starts ticking for an auto as soon as the seed shell opens. The post-germination life cycle of the vast majority of modern autoflowering strains is 8-12 weeks in total. Unlike photoperiod strains, autos do not need the current 12-12 light schedule to transition to flowering. An autoflowering strain will progress in its life cycle regardless of the day-night cycle.
ACCELERATED VEGETATIVE GROWTH
It is almost impossible to delineate the seedling phase from vegetative growth with autoflowering strains nowadays. Moreover, within 30 days, most will suddenly explode into the flowering phase. Giving autos a good, solid, and healthy start is a critical factor for successful cultivation. A lot can happen in a week with a vigorous autoflowering hybrid in cultivation. There is also not much time for transplanting. We recommend using our germination kit or planting directly into the first and final containers right from the start. 10-20 L plastic pots/containers with plenty of drainage holes at the bottom are perfect. Air-Pots are even better. Many growers find out the hard way that small pots are not sustainable for larger modern auto hybrids.
Be prepared to adjust your grow light daily to avoid burning the foliage. Additionally, just like photoperiod strains, the optimal environmental conditions for young autoflowering plants are temperatures between 20 and 25 °C and a humidity range of 50-70%. Furthermore, nutrient needs will be significantly lower than photoperiod strains. So there is no good reason not to grow organically. Generally, autos prefer a slightly fertilized and well-aerated growing medium. Light soils and/or coco are highly recommended substrates.
Most growers prefer warm white CFLs, LEDs, and MH for the short vegetative period. However, dual-spectrum HPS lights are just as effective and probably more practical to use.
FAST AND FIERCE FLOWERING
As soon as you can see the pistils growing from the first flowers, you can tell yourself that in 45-60 days, the plants will finish the flowering cycle and be ready for harvest. Whether you are ready or not. But you will be ready, as you will have made the necessary adjustments in time.
Vegetative growth fertilizer inputs at a low to medium dosage will be replaced by flowering nutrients and appropriate doses of flowering supplements and boosters. Once again, a Spartan diet is recommended. No need to change the light schedule, as you will follow your original schedule until harvest. But you must ensure that temperatures do not exceed 28 °C and you need to lower your humidity to a lower range of 40-60%. The plants will stretch to varying degrees. In any case, you need to be careful and always maintain an optimal distance between the light and the canopy. A set of adjustable ropes or hooks will make the task much easier.
Don’t assume that all autos will develop a short bushy structure unless the breeder provides data suggesting so.
Naturally, the last two weeks of flowering should be reserved for a thorough flush of the medium. Pure water or a light flushing solution will work very well. When the majority of the hairs or pistils on the flowers have changed from white to orange/red, you should start flushing. Don’t skip this critical final step. You deserve the tastiest flowers, free from contamination.
HOW WILL AUTOS RESPOND TO PRUNING AND TRAINING TECHNIQUES?
The short answer: very well! Most new-generation autoflowering strains will respond very positively to LST. And as long as you prune early, topping and fimming can multiply the head stems and also boost yields. Additionally, the ScrOG method can be combined with all these techniques for maximum yield. However, large-volume growing using the SOG method is probably the most popular growing style right now. An increasing number of auto growers are experimenting with the same common high-yield pruning and training practices that photoperiod cannabis growers use.
Beginner growers probably shouldn’t dive into intensive or excessive pruning or training until they have some experience.
However, bending the growth tips a bit to create a flatter canopy can’t hurt yields. Similarly, minimal defoliation to increase light penetration is unlikely to stress healthy plants, as long as you limit yourself to removing the large nutrient leaves that shade the flowering sites.
May the force be with you 💪
19 likes
2 comments
Share
12
Week 12. Flowering7y ago




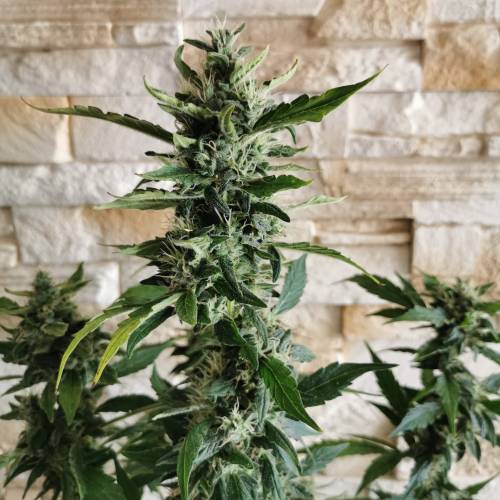


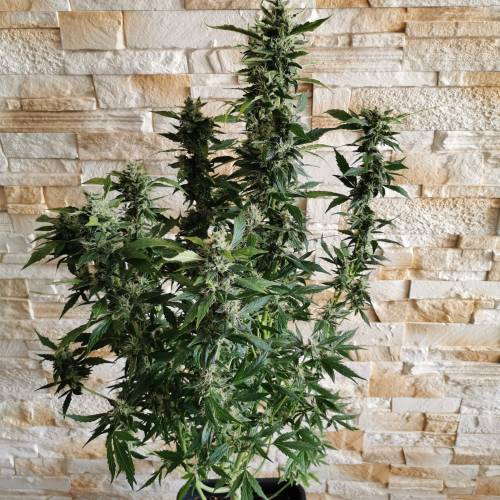


93 cm
Height
20 hrs
Light Schedule
24 °C
Day Air Temp
6.3
pH
50 %
Air Humidity
22 °C
Solution Temp
21 °C
Night Air Temp
10 liters
Pot Size
0.1 liters
Watering Volume
60 cm
Lamp Distance
Nutrients 5
Top-Max
0.5 mll
Bio-Bloom
1 mll
BioBloom
3 mll
Master_weeda Hello to all the padawans and Jedi masters
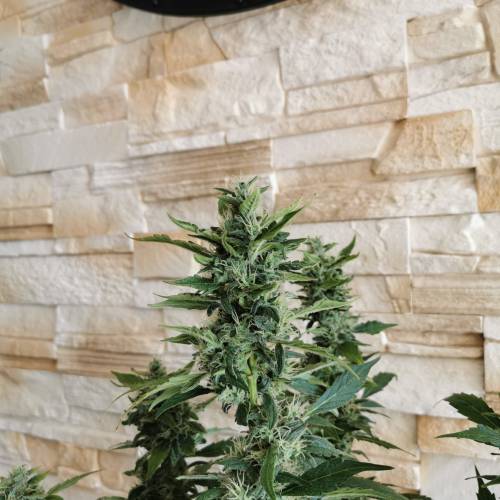
Day 77 watering with 2 liters of water pH 6.3
Day 80 I'm adding by scratching the soil 3 grams of biobloom feeding and watering with 2 liters of water pH 6.3
This will be my last feeding, I'm starting my flushing next week
Day 82 watering with 3 liters of water pH 6.3
16 likes
comments
Share
13
Week 13. Flowering7y ago


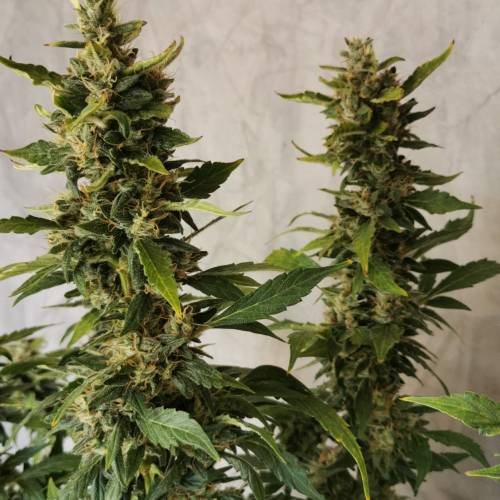


95 cm
Height
20 hrs
Light Schedule
24 °C
Day Air Temp
6.3
pH
Strong
Smell
50 %
Air Humidity
22 °C
Solution Temp
21 °C
Night Air Temp
10 liters
Pot Size
0.1 liters
Watering Volume
60 cm
Lamp Distance
Nutrients 5
Top-Max
0.5 mll
Bio-Bloom
1 mll
BioBloom
3 mll
Master_weeda Hello to all the padawans and Jedi masters
Day 84 watering with 2 liters of water pH 6.3
Day 86 watering with 2.5 liters of water pH 6.3
Day 89 watering with 2 liters of water pH 6.3
THE BEST TIME TO FLUSH YOUR CANNABIS
Flushing generally starts two weeks before harvest. If the plant has an eight-week flowering period, flushing should begin six weeks after the start of the flowering period. It’s best to closely observe the trichomes on the plant to determine when your cannabis is ready to be harvested. If the small trichomes are just starting to change from a clear color to a milky white hue, it’s a good indication that the plants can start to be flushed. You should aim for the majority of the trichomes to have changed to the desired color for harvest after two weeks – it gets easier with experience, so hang in there!
Flushing can also be a good way to reset the soil when a plant is still in the vegetative growth phase. Sometimes, a grower accidentally overfeeds their cannabis, causing a color change and wilting at the tips of the leaves. This is called "nutrient burn." Flushing the soil can remove excess nutrients, which helps resolve the issue. However, it’s a drastic measure at this stage of growth, so make sure the problem is indeed nutrient burn and not something else.
Flushing isn’t just about the harvest time. This technique can also be implemented during the growth phase to rid the soil of nutrients. Of course, nutrients keep your plant healthy and ensure maximum yields, but too much can cause a buildup and a static state where the plant can no longer access them.
Nutrient blockage can be caused by salt buildup or incorrect pH levels. Both of these issues can be resolved by flushing your plant with clear water. The fluids will push the nutrients out of the substrate and clear the buildup, allowing the roots to access nutrients again.
PREVENTING NUTRIENT ABSORPTION BLOCKAGE BEFORE IT BECOMES A PROBLEM
At best, nutrient blockage can be an issue; at worst, it can be a real disaster. As the saying goes, it’s better to prevent than to cure. It’s better to take proactive steps to prevent nutrient blockage rather than dealing with it when it’s too late.
Preventing nutrient blockage can be done through routine flushing. By flushing your plants once before flowering and once in the middle of it, you will minimize nutrient buildup.
ENZYMES TO THE RESCUE
After flushing to counteract nutrient buildup or blockage, you may notice that your plants have a dark green appearance, which is a sign of nutrient excess. In this case, some growers choose to add an enzyme-rich formula to their substrate.
In case you’ve forgotten your biology lessons, enzymes are proteins that catalyze reactions. They help flush the substrate by breaking down starches, carbohydrates, and nutrients. There is a wide variety of products on the market that contain very effective enzyme formulas.
If water isn’t enough for your plants, these little proteins will easily tackle the nutrient buildup!
HOW TO FLUSH YOUR CANNABIS PROPERLY
Flushing your cannabis plant is a simple process. Every time you would normally add nutrients, you flush instead. Untreated tap water is all you need to flush; just make sure its pH is safe for cannabis. Most well water has a healthy pH and doesn’t require treatment, but if it’s necessary to treat the flushing water to achieve a suitable pH, do it. pH adjustments will be the only thing to consider.
Soak the soil with as much fresh water as it can hold. Let the water sit for a few minutes to absorb the nutrients, then soak the soil again to flush the nutrients away from the plant. If you’re growing indoors in pots, note the color of the water that drains from the bottom of the pots. It will be stained and have a dirty color. This is where a TDS (Total Dissolved Solids) meter comes in handy. If you collect and measure the TDS of the "drained" water, it should have a reading of 1300ppm, which is quite high. It’s important to flush the plant until the total drops to a level of 50ppm, or at least approaches the TDS of the fresh water you’re using to flush the plant. The color of the runoff water will lighten and appear cleaner. You need to leach as many dissolved minerals from the plant as possible.
How and When to Flush Cannabis Plants
Flushing cannabis plants before harvest can make the difference between the best buds or the harshest smoke. This little task is simple and easy to do. Just add water! Be careful because the timing of the flush plays a critical role.
The basics of flushing your cannabis plants.
Summary:
1. What is flushing?
2. The best time to flush your cannabis
3. Preventing nutrient absorption blockage before it becomes a problem
4. Enzymes to the rescue
5. How to flush your cannabis properly
6. How to flush your plants in hydroponics
7. The results of flushing your cannabis
8. When to avoid flushing your cannabis
You’ve finally finished your grows and find yourself with a beautiful plant covered in super buds, now dry, you’ve done the curing, and you’re ready to smoke – and yet something is wrong. The weed seems unwilling to burn, and when you take a hit, it feels like you’ve been punched in the lungs, and you cough, fearing for your life! The taste is harsh and disappointing. If this is a situation you’ve experienced, chances are your plants weren’t flushed properly before harvest.
This smoke, far from pleasant, is caused by the presence of nutrients and minerals in the plant used during cultivation, which alters how the plant burns. Flushing the plant removes these remaining nutrients, improving the quality of the experience. Fortunately, flushing cannabis plants is easy and effortless, allowing you to produce smooth and delicious buds in no time.
RELATED ARTICLE
How to Use Nutrients for Cannabis
WHAT IS FLUSHING?
The act of flushing a plant involves using water to remove any nutrients present in the soil. A large amount of water is passed through the soil and drained on a regular basis. All the minerals and nutrients present in the soil are gradually flushed out with the water, leaving clean soil.
But why would you want to remove all the minerals from the soil? Isn’t that bad for the harvest? In fact, it significantly helps the harvest. When nutrients are removed from the soil, this forces the cannabis plant to use all the nutrients still present in the plant. It’s like the human body. When we consume a lot of food, what we don’t use is turned into fat. In extreme situations where food is scarce, the body relies on that stored fat for energy.
Since flushing forces the cannabis to use all the remaining nutrients in the plant, none should remain to alter the harvested buds. However, if you do it too early, it can harm the plant's health, so timing is key.
THE BEST TIME TO FLUSH YOUR CANNABIS
Flushing generally starts two weeks before harvest. If the plant has an eight-week flowering period, flushing should begin six weeks after the start of the flowering period. It’s best to closely observe the trichomes on the plant to determine when your cannabis is ready to be harvested. If the small trichomes are just starting to change from a clear color to a milky white hue, it’s a good indication that the plants can start to be flushed. You should aim for the majority of the trichomes to have changed to the desired color for harvest after two weeks – it gets easier with experience, so hang in there!
Flushing can also be a good way to reset the soil when a plant is still in the vegetative growth phase. Sometimes, a grower accidentally overfeeds their cannabis, causing a color change and wilting at the tips of the leaves. This is called "nutrient burn." Flushing the soil can remove excess nutrients, which helps resolve the issue. However, it’s a drastic measure at this stage of growth, so make sure the problem is indeed nutrient burn and not something else.
Flushing
Flushing isn’t just about the harvest time. This technique can also be implemented during the growth phase to rid the soil of nutrients. Of course, nutrients keep your plant healthy and ensure maximum yields, but too much can cause a buildup and a static state where the plant can no longer access them.
Nutrient blockage can be caused by salt buildup or incorrect pH levels. Both of these issues can be resolved by flushing your plant with clear water. The fluids will push the nutrients out of the substrate and clear the buildup, allowing the roots to access nutrients again.
PREVENTING NUTRIENT ABSORPTION BLOCKAGE BEFORE IT BECOMES A PROBLEM
At best, nutrient blockage can be an issue; at worst, it can be a real disaster. As the saying goes, it’s better to prevent than to cure. It’s better to take proactive steps to prevent nutrient blockage rather than dealing with it when it’s too late.
Preventing nutrient blockage can be done through routine flushing. By flushing your plants once before flowering and once in the middle of it, you will minimize nutrient buildup.
ENZYMES TO THE RESCUE
After flushing to counteract nutrient buildup or blockage, you may notice that your plants have a dark green appearance, which is a sign of nutrient excess. In this case, some growers choose to add an enzyme-rich formula to their substrate.
In case you’ve forgotten your biology lessons, enzymes are proteins that catalyze reactions. They help flush the substrate by breaking down starches, carbohydrates, and nutrients. There is a wide variety of products on the market that contain very effective enzyme formulas.
If water isn’t enough for your plants, these little proteins will easily tackle the nutrient buildup!
How and When to Flush Cannabis Plants
HOW TO FLUSH YOUR CANNABIS PROPERLY
Flushing your cannabis plant is a simple process. Every time you would normally add nutrients, you flush instead. Untreated tap water is all you need to flush; just make sure its pH is safe for cannabis. Most well water has a healthy pH and doesn’t require treatment, but if it’s necessary to treat the flushing water to achieve a suitable pH, do it. pH adjustments will be the only thing to consider.
Soak the soil with as much fresh water as it can hold. Let the water sit for a few minutes to absorb the nutrients, then soak the soil again to flush the nutrients away from the plant. If you’re growing indoors in pots, note the color of the water that drains from the bottom of the pots. It will be stained and have a dirty color. This is where a TDS (Total Dissolved Solids) meter comes in handy. If you collect and measure the TDS of the "drained" water, it should have a reading of 1300ppm, which is quite high. It’s important to flush the plant until the total drops to a level of 50ppm, or at least approaches the TDS of the fresh water you’re using to flush the plant. The color of the runoff water will lighten and appear cleaner. You need to leach as many dissolved minerals from the plant as possible.
HOW TO FLUSH YOUR PLANTS IN HYDROPONICS
Flushing plants in hydroponics is much simpler than getting rid of nutrients in soil. Hydroponic growers can simply drain their system and replace it with neutral pH water.
Flushing plants in hydroponics is also a much shorter process. Once the water reservoir has been changed, hydro plants will not have access to external nutrients. For this reason, a two-day flush will suffice.
THE RESULTS OF FLUSHING YOUR CANNABIS
After harvesting the buds, take time to properly cure to reach the highest potential. Proper curing reduces the harshness of the buds even further by eliminating things like excess chlorophyll. You’ll be amazed at the difference this little effort can make on your product. All your hard work will be felt in the first puff of that silky smooth weed, caressing your throat like honey. The sweetest of nature. So you can improve the quality of your cannabis by just adding water!
WHEN TO AVOID FLUSHING YOUR PLANTS
The only time we recommend avoiding flushing your cannabis is when working with amended organic soil or super soil. These substrates have been carefully developed to host beneficial microorganisms such as bacteria or fungi. This delicate biodiversity could be eliminated and damaged by flushing.
Once again, the absence of flushing shouldn’t pose any issues, as no external or synthetic nutrients will have been added to the substrate. Instead, the plants rely on microorganisms to break down organic matter and deliver it to the roots.
May the force be with you 💪
14 likes
comments
Share
14
Week 14. Flowering6y ago


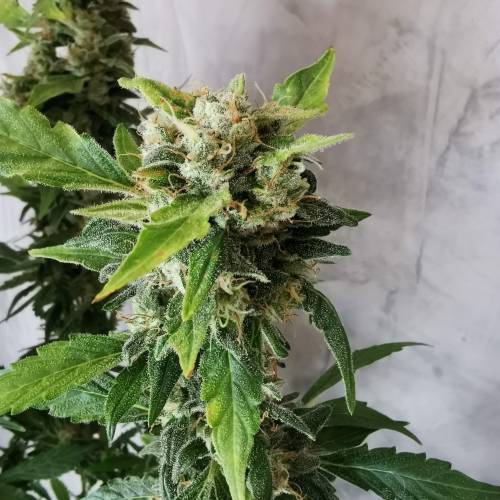


95 cm
Height
20 hrs
Light Schedule
24 °C
Day Air Temp
6.3
pH
Strong
Smell
50 %
Air Humidity
22 °C
Solution Temp
21 °C
Night Air Temp
10 liters
Pot Size
0.1 liters
Watering Volume
60 cm
Lamp Distance
Nutrients 5
Top-Max
0.5 mll
Bio-Bloom
1 mll
BioBloom
3 mll
Master_weeda Hello to all the padawans and Jedi masters
Day 84 watering with 2 liters of water ph6.3
15 likes
5 comments
Share
15
Week 15. Flowering6y ago


95 cm
Height
20 hrs
Light Schedule
24 °C
Day Air Temp
6.3
pH
Strong
Smell
50 %
Air Humidity
22 °C
Solution Temp
21 °C
Night Air Temp
10 liters
Pot Size
0.1 liters
Watering Volume
60 cm
Lamp Distance
Nutrients 5
Top-Max
0.5 mll
Bio-Bloom
1 mll
BioBloom
3 mll
Master_weeda Hello to all the padawans and Jedi masters
This run is coming to an end, but I’ve decided to harvest my plant in two stages because the top of the plant is ripe and the bottom is not.
Why harvest in two stages?
Because after inspecting the trichomes, those at the bottom are not ready for harvest; it would be a waste to harvest them. It is possible to harvest a plant in two stages, so don’t hesitate to do so if you think the lower buds can still develop.
What are the techniques to know the best window for a harvest?
One of the first signs of maturation in a marijuana plant is the browning of the pistils. Once more than half of the pistils have turned brown, it starts to reach the optimal point for harvesting, until all the pistils are completely brown. In the first case, the weed is more psychoactive, and in the second case, it will be more intoxicating.
In some cases, this system can be misleading, as dry wind or lack of irrigation could also lead to brownish pistils.
I’ll harvest the buds from the top that are ripe and let the ones at the bottom mature and grow for another 10 or 15 days.
Observing the trichomes on the buds
For this method, we would need a magnifying glass that enlarges at least ten times, but the most suitable magnifying glasses or microscopes are the 50x ones. We observe the trichomes of the plant to see if they have reached optimal maturity. It’s when they have completely taken on a mushroom-like shape and at least half of them have transitioned from translucent to milky, with a small percentage being amber, that the time will come to harvest.
This is certainly the most reliable of all systems to determine the optimal point for harvesting cannabis, but ideally, you should combine them to draw the best conclusions.
Once we have analyzed all the factors and decided to cut, it should be done when the relative humidity is as low as possible to avoid that same humidity remaining inside the buds and causing mold. Then, we will proceed to the cut, whether it’s the whole plant or by branches, and then comes the time to manicure the cannabis. Manicuring involves cutting the largest leaves off the plant and the leaves without resin, then comes the drying in a dark and ventilated place.
May the force be with you
12 likes
4 comments
Share
15
Week 15. Harvest6y ago
Happy Harvest Day!


9/10
Rated
Bonjour à tous les padawans et maîtres jedis
Tout d'abord merci à philosopher seeds de m'avoir donné l'occasion de cultiver cette incroyable souche
Cette plante est tout simplement exceptionnelle et très robuste !
J'ai pratiqué sur elle un LST poussé à l'extrême et avec un peu de patience de delicatesse, du temps j'ai réussi à faire au tronc un tour sur lui même.
J'ai attendu le cinquième nœud et j'ai commencer mon palissage que je me suis permis de pousser à l'extrême
Je me permet d'insister dsur le LST car il démontre toute la robustesse de la plante...
Toute les explications ce trouvent dans les semaines concernées.
Pour ce qui est du goût ❤️WOW ce léger goût et subtil de bois noble qui ce mari au musc légèrement plus prononcé un réel ravissement pour les papilles qui aiment les goût old school de la Northern ligth...
Lors de la consommation de la Sleepy Yoda Auto des odeurs et des saveurs sucrées et de musc sont perceptibles, des qualités organoleptiques typiques de la Northern Lights, avec des touches de bois nobles pour certains phénotypes.
L'effet est tout aussi appréciable qui tire plus dans le narcotique que le récréatif... Idéal pour lire en caressant sont chien ou joué à la console 😁
Franchement j'ai vraiment aimé cultiver cette souche je la recommande vivement car elle ne demande pas de soin particulier, c'est une souche robuste qui a du quand même avec l'engrais. Je préconise de mettre un tier de moins que ce que préconise le fabricant de l'engrais que hours utilisez
Que la force soit avec vous 💪
Show more
Translate
Spent 106 days
Ger Veg Flo Har
416 g
Bud wet weight per plant
80 g
Bud dry weight per plant
1
Plants
0.8 m²
Grow Room size
Hard
Difficulty

Relaxed, Sleepy
Positive effects

Dry mouth
Negative effects

Earthy, Woody
Taste
Height
Day air temperature
Air humidity
PH
Light schedule
Solution temperature
Night air temperature
Pot size
Lamp distance


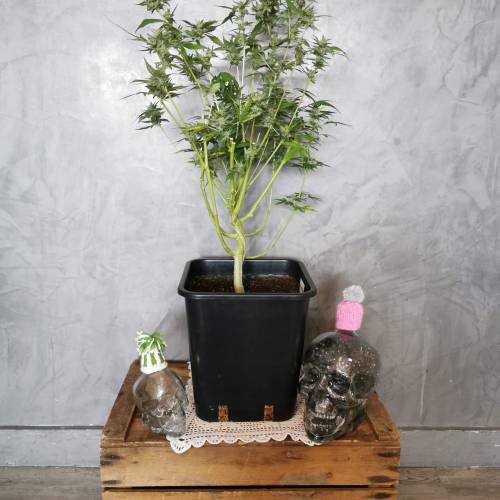


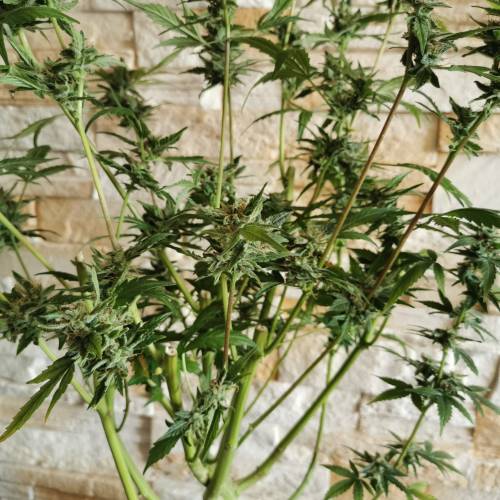


Master_weeda Thanks to all the padawans and Jedi masters who brought me strength, advice, and kindness for this diary 🙏 @philosopherseeds
@Williamsii @Castafunk @greenhousefeeding
23 likes
15 comments
Share
Equipment Reviews






6 comments
Sort by
popularity
popularity
newest
oldest

Crazyweedpt commented7y ago
love the " tail " of 1st section midle picture! Sexy lady will be! 😜
likes 5

Master_weeda commented7y ago
RplCrazyWeedpt, Thank you for the compliment
May the strength be with you 💪
likes 11

TheUsualSuspect commented7y ago
How suitable... Sleepy Yoda (for the Jedi Master) 👊
likes 3
Master_weeda commented7y ago
@ Green_Fire, I really thank you 🙏 I saw one of your cultures 👍 I love it!
likes 9

HydroGrowLED commented7y ago
Ahhh new babies 😜 exciting times 😜 💪 🌱
likes 3
Master_weeda commented7y ago
@HydroGrowLED, 👍 😉
likes 9

the end.
Enjoying this diary? Follow for more updates!

Prefer the old Diary view?
Go back to the old Diary view