How to Cultivate Cannabis Using 12/12 Lighting from Seedling?

Are you thinking about starting your cannabis growing journey with a 12/12 lighting schedule right from the seedling stage? Can it even work? Is it worth it?
Whether you’re a seasoned grower looking to optimize your process or a beginner aiming for simplicity and efficiency, you can grow your cannabis with 12/12 from seed. By diving straight into the flowering phase, you can expect quicker harvests and streamlined maintenance.
However, understanding the nuances of this approach is key to maximizing your yields and ensuring successful cultivation. So, let’s delve into the essentials of growing cannabis with a 12/12 light cycle from seedling and uncover how you can navigate this properly.
Understanding how Cannabis Seedlings Grow in 12/12

The 12/12 lighting cycle dictates the duration of light and darkness that a cannabis plant receives — being exposed to 12 hours of each. In contrast, during the growth phase, plants are usually subjected to an 18/6 light cycle, providing more hours of light to stimulate vegetative growth, increase plant size, and develop foliage.
When you transition to a 12/12 light cycle — whether naturally as seasons change or artificially through intervention — they prompt the plant's flowering phase.
When the light cycle shifts to 12 hours of light and 12 hours of darkness, it signals to the cannabis plant that autumn is approaching, prompting it to start flowering to reproduce. By immediately starting with a 12/12 light cycle, you skip the vegetative phase and move the plant directly into flowering.
Cannabis Yield Potential with 12/12 Lighting
If you’re considering growing cannabis under a 12/12 light cycle, you may be curious about its yield. Generally, you won’t get as big of a yield as you’d with traditional methods — the growth period is much shorter here.
However, many factors like the quality of light, chosen strain, and container size can influence the yield. This can give you a rough idea of what to expect.
Solo Cup
Growing your cannabis in a solo cup with 12/12 from the get-go can typically yield an average of around 3.5 grams. This method is space-efficient, and perfect for home growers who are just starting.
Larger Pots
If you’re using larger pots, you can yield around 14 grams per plant. The larger pots have more root space and nutrients available, which allows the plants to grow bigger. Still, don’t expect the yield to be the same as a regular plant.
Gallon Container
If you’re looking for even bigger yields, you can use gallon containers that can sustain plants that grow at least an ounce of weed. These containers have more than enough space to accommodate the roots to grow.
Maximizing with the Sea of Green Method
To maximize yields when growing cannabis under a 12/12 light cycle, many growers opt for the Sea of Green (SoG) technique. You should, too.
This method involves cultivating multiple small plants closely together, optimizing the use of space and light. By growing several plants in a small area and ensuring all receive adequate light exposure, you can achieve a collective yield that surpasses what would be possible with fewer, larger plants.
In summary, while the 12/12 light cycle offers a quicker path to flowering and harvesting cannabis, it typically results in smaller individual yields per plant compared to traditional methods.
However, with strategic cultivation techniques like SoG and careful consideration of lighting and container size, you can still achieve satisfactory yields while benefiting from reduced grow times and resource usage.
Advantages of Growing Cannabis with 12/12 from Seed

Growing cannabis with a 12/12 light cycle from seed provides benefits that cater to both beginners and experienced cultivators. This method simplifies the cultivation process by bypassing the vegetative stage, leading to quicker harvests and reduced maintenance needs.
If you’re a beginner, the straightforward approach and less demanding care make it an attractive option to achieve successful results without extensive experience. Experienced growers, on the other hand, can leverage this method to optimize their growing cycles, conserve resources, and experiment with different strains more efficiently.
Here are some advantages:
-
Faster Harvests
By kickstarting the flowering phase, you can anticipate harvesting buds in around 7–10 weeks from germination. This accelerates the growth process compared to traditional methods.
-
Easy Maintenance
Plants cultivated under a 12/12 light cycle from seed are easier to handle as they bypass the vegetative stage. This means less need for leaf removal, pruning, or shaping, as their smaller size naturally requires less upkeep.
-
Compact and Discreet
These plants maintain a smaller stature, making them suitable if you have limited space, like small grow tents, indoor cabinets, or balconies. Their smaller footprint allows for discreet cultivation and simpler management.
-
Space Optimization
On a similar note, plants cultivated under a 12-hour light cycle from seed take up less space because of their compact growth and limited side branching. This efficiency enables you to maximize their yield per square meter, especially when employing methods like the Sea of Green (SoG).
-
Cost and Energy Efficient
With reduced time spent under grow lights, energy consumption is notably decreased compared to plants grown using longer cycles. This leads to lower electricity bills and overall operational expenses.
-
Uninterrupted Yields
By having seeds sprout under a 12/12 lighting schedule, you can maintain a continuous rotation of flowering plants without the need for separate vegetative areas or light timing adjustments. This smoothens out production processes and guarantees a steady harvest supply.
-
Fewer Resources Required
The 12-hour light cycle helps conserve resources across various aspects. It slashes water usage by half, reduces nutrient needs by one-third, and significantly lowers CO2 emissions and electricity consumption. This eco-friendly approach aligns with sustainable cultivation practices.
Disadvantages of Growing Cannabis with 12/12 from Seed

While there are benefits to the 12/12 light regimen, it's crucial to acknowledge its limitations and possible disadvantages. Understanding both sides of this approach allows you to make more informed decisions and better manage their expectations. So, here are some disadvantages of growing cannabis with 12/12 from seed.
-
Limited Plant Growth Potential
Plants grown under a 12/12 light cycle from the seed stage may not achieve their maximum size potential due to the shortened vegetative period. This shorter growth phase can lead to reduced yields compared to plants that are allowed a longer vegetative stage to develop larger structures and more robust foliage.
Thus, while the 12/12 light cycle accelerates the flowering process and allows quicker harvests, it may compromise the overall yield potential of the plants. Growers opting for this method should consider these trade-offs and adjust their cultivation strategies accordingly to optimize their harvests.
-
Limited Training Options
Techniques like topping, super cropping, and monster cropping are less effective with a 12/12 light cycle because they rely on extended vegetative growth periods for optimal results.
With a shorter vegetative phase under 12/12 lighting, you are limited to methods like low-stress training (LST), which involves gently bending and securing branches to control plant growth.
LST is suitable for maintaining plant size and maximizing light exposure in a compact space, making it a practical choice within the constraints of a 12/12 cycle.
-
Yield Potential
While the 12/12 light cycle accelerates the harvesting process, it typically leads to reduced yields per plant when compared to cultivation methods that afford plants a longer vegetative phase to establish robust structures. This shorter growth period under 12/12 lighting can limit the plant's overall biomass and potentially diminish the final harvest weight of cannabis buds.
-
Genetic Potential
Certain cannabis strains may not fully express their genetic potential when subjected to a 12/12 light cycle from seed. This is because certain genetic traits and characteristics, such as complex cannabinoid profiles or specific terpene expressions, often require a longer vegetative phase to fully develop.
The abbreviated growth period under 12/12 lighting may limit the plant's ability to reach its genetic peak, potentially affecting the overall quality and complexity of the final cannabis product.
-
Risk Management
With the shortened growth period, any issues such as deficiencies, pests, or environmental stressors can have a more significant impact on the plant's health and yield quality.
While growing cannabis using a 12/12 light cycle from seed accelerates the flowering process and brings some advantages, it's important to consider both the benefits and drawbacks of this method.
If you are prioritizing quick flowering, efficient use of space, and resource conservation, starting with a 12/12 light cycle from seed can be a viable choice. On the other hand, if maximizing yield and having flexibility in training plants are priorities, sticking to traditional vegetative growth techniques may be preferable.
By understanding these factors, you can make decisions based on their objectives, available resources, and cultivation preferences.
How to Start 12/12 from Seed?

Embarking on your cannabis-growing journey using a 12/12 lighting schedule from seed requires careful planning and execution. This detailed guide provides comprehensive tips and insights for each phase of the process, ensuring you're equipped with the knowledge to cultivate healthy and productive plants from start to finish.
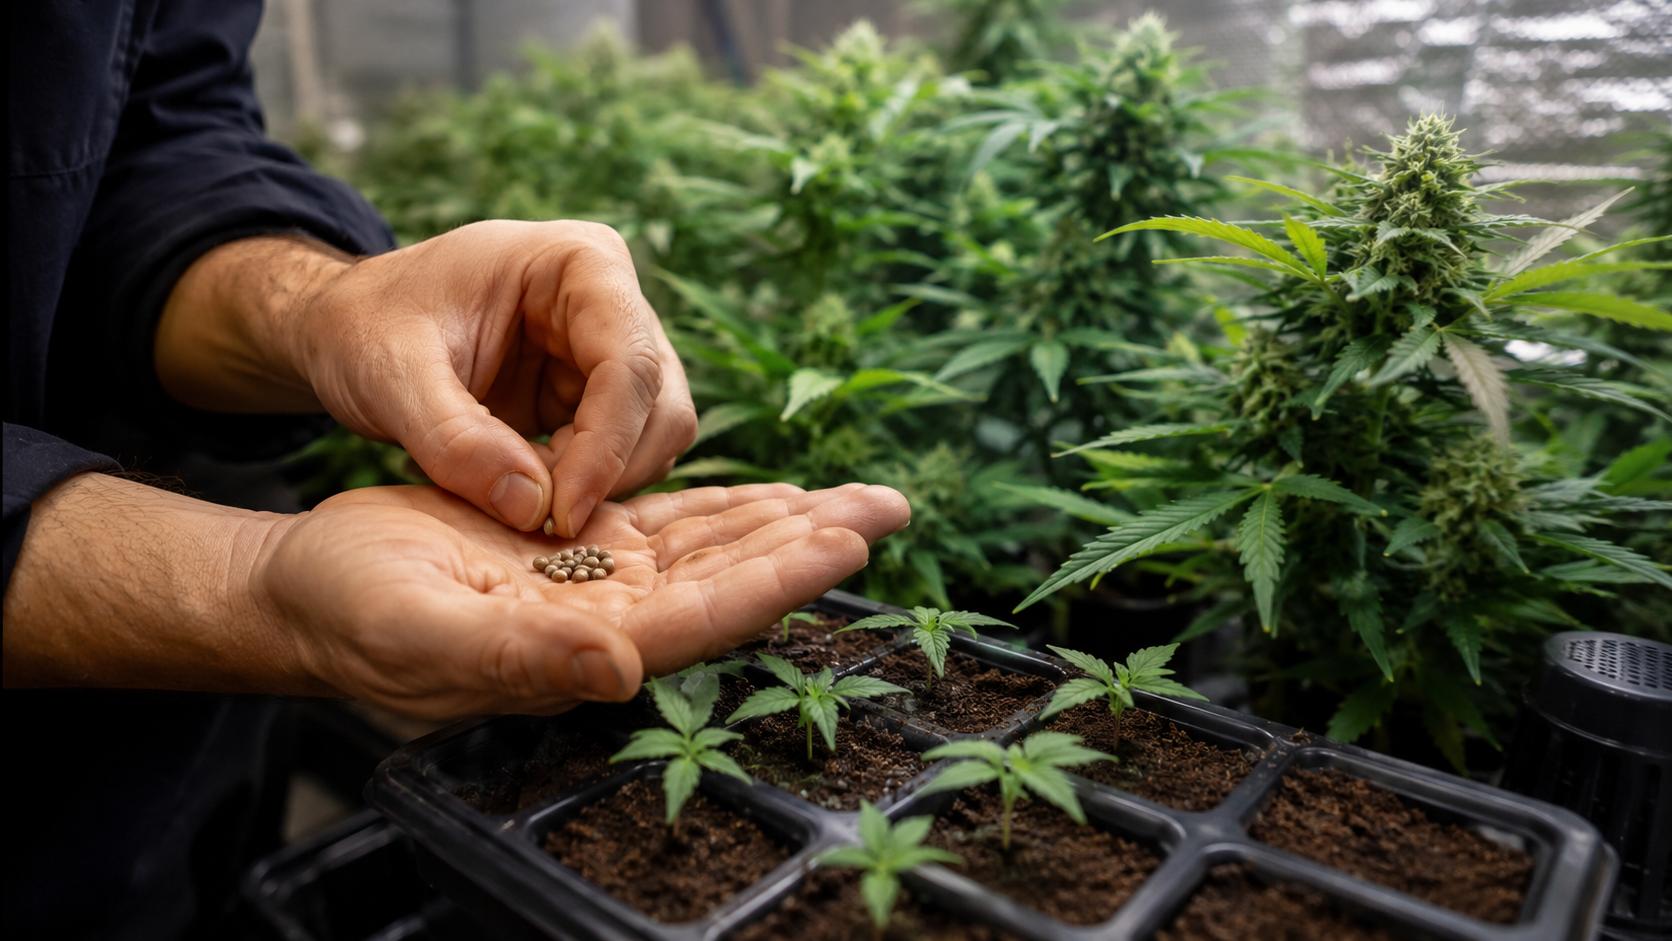
1. Germination Stage
Here are the things you need to keep in mind during the germination stage:
Moisture
Seeds need a moist environment to germinate. So, use methods like the paper towel technique or direct planting in moist soil.
Warmth
Next, you need to keep the germination environment consistently warm, ideally between 70°F to 85°F (21°C to 29°C). This will promote faster and more reliable seedling emergence.
Light
While seeds don’t need light to germinate, you should still provide a gentle light source to maintain a stable temperature and signal to the seeds that it’s time to sprout.
Patience
Germination can take anywhere from a few days to more than a week, depending on the strain and conditions. So, be patient and avoid disturbing the seeds unnecessarily.
Finally, consider using a complete seed starting kit for the best results, especially if you want to grow multiple seeds.
2. Prepare Your Seedlings for Growth (2-3 Weeks)
After your seeds have sprouted and developed into seedlings, it's crucial to allow them time to adapt to their environment before progressing to the flowering stage. Here are some steps to help prepare your seedlings:
Develop Root System
Allow your seedlings to develop a root system by providing them with a balanced nutrient solution suitable for young plants.
Gradual Adjustment
Gradually expose your seedlings to ideal temperatures and reduced humidity levels to toughen them up for the upcoming flowering phase.
Lighting Needs
Throughout this stage, ensure that your seedlings receive 24 hours of light to promote robust growth. It is advisable to use a lower-intensity fluorescent grow light to prevent heat-related issues.
3. Transitioning Into the Flowering Stage (12/12 Light Cycle)
Moving your seedlings into the flowering stage under a 12/12 light cycle marks a milestone in 12/12 cultivation from seed. Here's a guide to doing it:
Set up the Grow Lights
Start by setting up your grow lights, whether it's Ceramic Metal Halide (CMH), LED, High-Intensity Discharge (HID), or other suitable options for flowering cannabis.
Set the Light Schedule
Change the cycle to 12 hours on, 12 hours off. This replicates the natural lighting conditions that prompt cannabis plants to shift from growth to flowering.
Take Care of the Plant
Provide your plants with care during flowering: adjust nutrient blends with higher phosphorus and potassium levels, maintain pH levels between 6.0 and 6.5, and keep a close eye on environmental factors.
Monitor the Progress
About three weeks after switching to the 12/12 light cycle, you should begin seeing signs of flowering, like pre-flowers appearing at the nodes. Regularly check plant health, address any pest issues, and monitor nutrient needs.
Determining Harvest Time
Depending on the strain, flowering usually lasts from 7 to 10 weeks after starting the 12/12 light cycle. Harvest when trichomes on the buds change from clear to milky or amber, indicating peak production.
When you follow these steps and suggestions, you can successfully cultivate cannabis using a 12/12 light cycle from the seed stage, increasing your chances of a harvest with top-quality buds. You will have to adjust your methods and growing conditions to suit the strain and setup you have to enhance your growing experience.
Tips for Growing 12/12 Cannabis from Seed

To help improve your results even better, you can try employing some of these tips, too. Here are some nifty tips for growing 12/12 cannabis from seed.
1. Keep an Open Mind
Many growers criticize the 12/12 method without even trying it. So, if you’re trying this, believe in the process and keep an open mind. See how it fits your needs and preferences. Even if it doesn’t become your primary method, the experience can help you learn a thing or two about growing cannabis.
2. Use the SOG Method
As previously mentioned, the Sea of Green (SOG) technique is ideal for maximizing yields, especially in limited spaces. This method focuses on maximizing the number of flowering sites per square meter of grow space.
By cultivating multiple smaller plants closely together and training them to produce a single dominant cola, growers can significantly increase their overall yield.
The SOG technique is particularly effective when combined with a 12/12 light cycle from seed, as it aligns well with the shorter vegetative period and accelerates the flowering process to achieve quicker harvests.
3. Provide the Right Nutrients
Even though starting with a 12/12 light schedule from seed skips the vegetative growth stage, cannabis plants still need proper nutrition to thrive. Begin with a fertilizer that has an NPK ratio of 3-3-3 to support growth and metabolic functions.
Once the plants enter the flowering stage (after 2-3 weeks), switch to a formula rich in phosphorus and potassium to encourage healthy flower development.
Cannabis plants must receive nutrients in proper quantities to grow well and produce lots of buds. Like everything else in cannabis cultivation, the nutrient needs of the plants change according to their stages of growth. However, you should carefully monitor the plants to watch for any nutrient deficiencies or excesses.
Nutrient Requirement According to the Stages of Growth
Seedling Stage: Seedlings have fewer requirements when it comes to nutrients. Since the cotyledons have enough nutrition to help the seedling sustain for at least 1-2 weeks, it's unnecessary to provide nutrients at this stage.
In fact, it can be detrimental to feed nutrients at this stage because the plants are very delicate. But, if you must, you can use a quarter-strength of nutrients or a premium seedling soil mix that has some nutrients.
Vegetative Stage: During this phase, cannabis plants require higher levels of nitrogen to promote leaf and stem growth. A balanced nutrient solution with a ratio of around 3-1-2 (N P K) is effective. If you're not buying nutrients separately and are using commercially bottled nutrients instead, you should use the “Grow” part of the formulation.
Flowering Stage: In the flowering period, plants need increased phosphorus and potassium to aid in bud formation. An ideal nutrient ratio would be 1-3-2 (N P K). It's best to gradually decrease nitrogen levels to prioritize flower development. If you're using commercially bottled nutrients, go for the “Bloom” part of the formulation at this stage.
Nutrient Application
Use a pH meter to confirm that nutrient solutions fall within the recommended pH range of 6.0 to 7.0 for plants growing in soil and 5.5 to 6.5 if you've chosen a hydroponic setup.
When feeding nutrients, always stick to a proper regimen. You must follow it religiously so you can understand when the plants are hungry or don't need any nutrients at all. Regardless of whether you purchase nutrients separately or go for liquid bottled nutrients, follow the instructions of the manufacturer and increase the concentrations only if necessary.
For example, even if the plants need more potassium during the flowering stage, you shouldn't do it randomly as it can create toxicity issues. Instead, follow the guidelines and make adjustments only if you see problems come up.
In any case, if you stick to the proper pH range, you'll rarely have nutrient deficiencies or toxicities as most issues occur primarily due to the pH. An imbalance in pH levels prevents the plants from absorbing nutrients properly. Therefore, keep an eye on the pH range and your plants will be fine.
4. Choose the Right Seeds
There are countless cannabis strains out there, but not all of them are suitable for 12/12 light cycles from seed. Instead, you need to pick particular strains and seed types that would be ideal for this method, such as:
Photoperiod Indicas
These plants flower quickly, making them great for maximizing space efficiency.
Autoflowers
While not requiring photoperiod adjustments, autoflowers grown under 12/12 lighting can help save on energy costs and are ideal for compact spaces.
F1 Hybrids
F1 hybrids are known for their robust growth, high THC content, and effective resistance to pests and diseases. When growing F1 hybrids, many can flower using a 12/12 lighting schedule, making it a cost-effective way to cultivate them.
By implementing these suggestions, you can enhance your cannabis cultivation using a 12/12 lighting cycle from the seed stage. Whether your goal is to increase yield, save on expenses, or explore different strains, these strategies can help you achieve success.
Opting for a 12/12 lighting schedule right from the seed stage comes with its set of pros and cons in the realm of cannabis farming. By bypassing the vegetative phase, growers can speed up their harvests and save on resources, making this method attractive for various growing setups.
5. Avoid Light Issues
Since it's uncommon to grow cannabis in a 12/12 cycle from the very beginning, you can face a few light-related issues, including:
Light Stress
Various forms of stress such as light burn, bleaching, and heat stress can arise as you'll be using high-intensity lights to compensate for the lack of light in a 12/12 cycle. Understanding the symptoms associated with each type is vital for managing these issues and maintaining the overall health and productivity of cannabis plants.
Light Burn
Light burn occurs when plants are exposed to extremely high light intensity or positioned close to high-intensity lights. This condition primarily affects the parts of the plants where light exposure is most intense.
The leaves at the top of the plant nearest to the source start turning yellow. Initially, it will show with the leaf tips curling and yellowing at the edges. Gradually, the entire leaf can become yellow.
If you don't address the problem in time, the tips of the leaves may become brownish in color and appear burnt, indicating a symptom of light burn. When leaves are affected they may curl upwards in response to light as the plant tries to reduce its exposed surface area to the source.
Regularly inspect for signs of burn and modify the distance accordingly. You can also consider using lights of less intensity if the plants are unable to handle them.
Light Bleaching
Light bleaching, a term coined for the buds turning pale or white, occurs when the lights are too intense. The affected areas look pale because of a loss of chlorophyll. This issue is common with growers placing their plants too close to LED lights. The upper leaves and buds right beneath the lights look even white at times. Increase the intensity gradually as the plants develop, giving them time to adapt to light levels.
To prevent this you need to place the plants in such a way that they all receive uniform light, preventing concentrated spots that could lead to bleaching. You can also use reflectors to spread light evenly throughout the growing area and reduce the chances of bleaching.
To prevent these problems, pay attention to:
Light Distance and Brightness
It is vital to maintain the distance and brightness for cannabis plants cultivated under a 12/12 lighting regimen starting from the seedling stage. Effective light management guarantees that plants receive light for photosynthesis while preventing them from experiencing heat or light-related stress.
Seedling Stage: During the seedling phase, it is important to keep the lights at an appropriate distance to prevent damaging the delicate young plants. Typically, fluorescent lights or LEDs are positioned at least 12-24 inches above the seedlings.
Vegetative Stage: As plants progress into the vegetative or growing stage, adjusting the distance can encourage stronger growth. High-intensity discharge (HID) lights or LEDs should be placed around 18-24 inches above the canopy.
Flowering Stage: You should maintain a proper distance between the lights and plants even during the flowering phase for optimizing bud production. HID lights should be situated about 12-18 inches away while LEDs can be positioned at 12 inches based on their intensity and heat emission.
Light Intensity
Seedling Stage: Seedlings thrive with intensity levels typically around 200-400 micromoles per square meter per second (µmol/m²/s).
Vegetative Stage: At this stage, the plants will be stronger to absorb high-intensity light so you can boost the intensity to 400-600 µmol/m²/s during this stage to promote robust development.
Blooming Stage: During the flowering stage, it is recommended to maximize intensity to about 600-1000 µmol/m²/s for bud growth and potency.
6. Adjust Temperature and Humidity
Cannabis plants thrive best within ideal temperature and humidity ranges which may vary depending on their growth phase. Maintaining these conditions is essential for growth. Let's take a quick look at these ranges:
Temperature
Seedling Stage: Seedlings prefer temperatures ranging between 70-75°F (21-24°C).
Vegetative Stage: Ideal temperatures range from 70-85°F (21-29°C), although the plants will tolerate slightly higher temperatures due to increased metabolic activity.
Flowering Stage: It is best to keep temperatures between 65-80°F (18-26°C) during flowering. In fact, it's even better if you can lower the temps slightly at night to enhance bud quality and resin production.
Humidity
Seedling Stage: Humidity levels of about 65-70% aid seedlings in root establishment and nutrient absorption.
Vegetative Stage: Humidity levels can be reduced to 40-60% to support growth and prevent mold and mildew.
Flowering Stage: Lower humidity levels between 40-50% are crucial in preventing bud rot and other moisture-related issues. Towards the end of flowering, reducing humidity further can boost resin production.
Make sure to keep an eye on the growing environment by using hygrometers and thermometers. It's especially important to maintain the desired humidity levels with humidifiers or dehumidifiers and control the temperature by using fans, air conditioners, or heaters to ensure good conditions.
7. Avoid Heat Stress
Heat stress occurs when the temperature in the growing space surpasses extreme levels. Coupled with high-intensity lights, the situation just gets worse and harms the plants more by reducing their yields.
One of the indicators of heat stress is when the leaves start to droop. The edges of the leaves dry up as well. In response to heat, leaves may curl either upwards or downwards. If they are brittle, it indicates that the plant is losing moisture rapidly. You may also see the leaves yellowing and confuse it with some nutrient deficiency that shows similar symptoms, but it’s easy to identify heat stress as the temperatures will be hot. Check the temperature if you’re not sure. If it’s more than the recommended levels, you need to act fast and fix the issue before it gets out of hand.
We have already discussed the ideal temperature ranges, so you just need to maintain it between those levels. Another culprit that makes heat stress worse is the lack of air circulation. Without proper circulation, the heat gets trapped in the grow tent and the plants just suffer until they can’t take it anymore.
To prevent this, use fans to enhance airflow and distribute heat evenly. This will also prevent hotspots where the heat gets accumulated in one spot.
8. Avoid Nutrient Deficiencies
Nutrient deficiencies can hinder growth and diminish yields if you do not address them promptly. One issue is that it’s difficult for beginners to identify the symptoms correctly. Also, the symptoms may overlap, making it difficult to treat the condition. Regardless, there will be some differences in the deficiencies, and you’ll be able to treat the plants better once you gain experience.
Common Nutrient Deficiencies
- Nitrogen (N) Deficiency: Yellowing of leaves, stunted growth, and a pale green hue. The symptoms start from the bottom parts of the plant and spread to the top.
- Phosphorus (P) Deficiency: Dark green or purplish foliage, slow growth, and weak stems. Again, the symptoms will first appear on the lower parts of the plant and spread to the top.
- Potassium (K) Deficiency: Yellowing and browning of leaf edges, weak stems, and decreased disease resistance. Similar to nitrogen and phosphorus, the symptoms start from the bottom and spread to the top.
- Calcium (Ca) Deficiency: Curling leaves, brown spots, and weak stems. Unlike nitrogen, phosphorus, and potassium, the deficiency starts from the top parts or the leaves that are most exposed to light and then spreads to the bottom.
- Magnesium (Mg) Deficiency: Yellowing between leaf veins starting from the leaves upward.
To overcome these deficiencies, you need to first identify the problem correctly. But, before anything, check the pH as most deficiencies typically occur when there’s an imbalance in the pH. If the pH is in the right range (5.0 to 6.0 for soil and 5.5 to 6.5 for hydroponics) then you need to take a closer look at the plant to identify the exact problem.
Next, modify the solution to include the lacking nutrient and work on maintaining the right pH to improve the chances of the plant absorbing nutrients. If there’s a lockout of nutrients where the plants can’t take in the nutrients, you can try flushing the medium rigorously with plain, pH-balanced water and then give it the right amount of nutrients.
Signs of Flowering to Lookout For

When growing cannabis under a 12/12 light cycle from seed, identifying the onset of flowering is crucial for monitoring plant development and adjusting cultivation techniques accordingly.
Understanding these signs ensures that plants receive appropriate care and are harvested at the optimal time.
Early Growth Phases
In the weeks following germination, photoperiod cannabis strains grown under 12/12 lighting focus on vegetative growth. This stage is characterized by foliage expansion and the establishment of robust root systems.
Plants utilize this period to accumulate energy through photosynthesis in preparation for the phase triggered by changes in light duration.
As the buds continue to develop, they accumulate resin glands known as trichomes, which house cannabinoids like THC and CBD. The ripening process varies based on the strain and environmental factors, typically lasting from a few weeks to a couple of months.
Environmental Impact
Factors such as temperature, humidity, and nutrient availability play crucial roles during the flowering stage. Proper management of these elements supports healthy bud growth and helps prevent issues such as nutrient deficiencies or pest infestations, which can adversely affect yield and quality.
Knowing When to Harvest
Determining the ideal harvest time involves monitoring the development of buds and trichomes. You can assess bud maturity by observing the color and clarity of trichomes using specialized tools.
Clear or translucent trichomes indicate early developmental stages, while cloudy or amber-colored ones signal higher cannabinoid levels, indicating readiness for harvest. Ideally, you want to harvest the buds when 70% of the trichomes have turned amber.
As you can understand, cultivating cannabis under a 12/12 light cycle from seed accelerates flowering compared to other methods, expediting bud production. By recognizing the signs of flowering — from initial flower appearance to full bud maturation — you can refine your cultivation techniques to achieve higher yields and potency.
Summary: How to Cultivate Cannabis Using 12/12 Lighting from Seedling?
Adopting a 12/12 lighting cycle from seedlings for your cannabis cultivation presents both benefits and challenges. It accelerates the flowering process, allowing for faster turnarounds and reduced resource consumption.
Yet, this approach may limit plant size and training options, impacting overall yield potential. By carefully weighing these factors and employing strategic techniques like the Sea of Green (SoG) method, you can mitigate drawbacks and enhance your growing experience.
Whether you prioritize speed, space optimization, or sustainability, integrating these insights will empower you to cultivate healthy plants and achieve satisfactory yields under a 12/12 lighting regimen from seedlings.
Read more