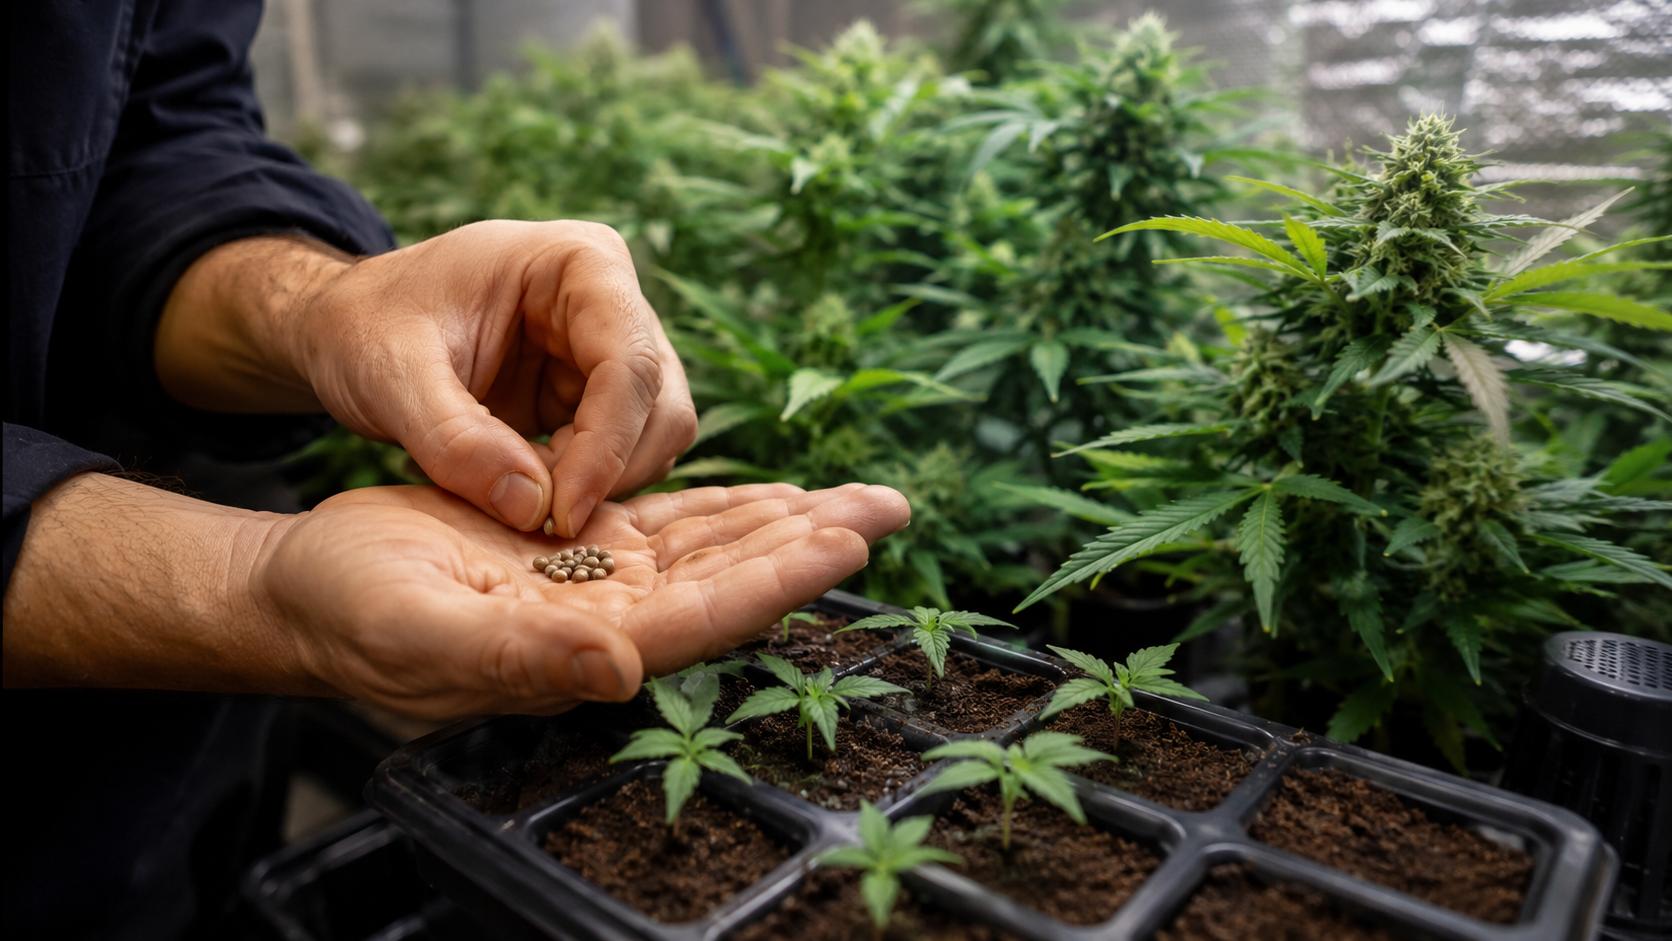
So, you want to grow cannabis at home? Great choice! But before you go start making a jungle out of your closet or talking yourself into thinking the bathroom has the right humidity, let’s discuss a real game-changer: grow tents.
Picture a grow tent as a personal luxury tent for your plants that controls climate, is safe, and ensures your plant’s maximum growth. Grow tents also keep everything discreet (not everyone needs to know you’re planting stuff), stop pests from crashing the party, and prevent unwanted light from entering, which can mess with your plants’ growth cycles.
You are completely dependent on your home’s environmental conditions if you are not growing in a tent – too dry, too humid, too cold, too hot – it’ll all affect your plants and the growing process.
But, with a tent? You’re the boss. You provide just the right temperature, airflow, and lighting. It also makes it look more organized and contained, so your grow setup doesn’t look like a mad scientist's setup.
This guide provides you with all the information you need to know about the grow tents and choosing the right one, and their setup. Get ready to pamper your plants with luxury treatment, just like they deserve.
What Are Grow Tents?

A grow tent is a portable, self-contained indoor growing environment that will give your plants the perfect environment to thrive. Imagine a little indoor greenhouse with your plants placed in it. However, it is not glass but made up of reflective and light-proof material. Thus, it helps in making your grow lights more efficient.
You can find tents in a range of sizes, starting from small setups that can fit a few plants to larger tents that can manage a serious grow operation. These compact tents are easy to put together, have built-in ventilation ports, come with a sturdy frame, and feature a reflective interior that makes sure your plants soak up light.
A grow tent allows total control over temperature, humidity, and airflow, so there’s no need to worry about the weather or peeping neighbors.
Why Use a Grow Tent for Cannabis Cultivation?
A grow tent is simply perfect if you want to cultivate cannabis indoors. Here’s why:
- Complete control of the environment: Cannabis plants want an ideal set of conditions to grow properly. A grow tent assists you in managing temperature, airflow, and humidity like an expert.
- Maximum light efficiency: A grow tent has an inside part that is shiny and helps to reflect light. Thus, the light that is coming from outside will not get wasted. It will make your grow light very efficient and provide ample light to your plant for good growth.
- Prevents Pests and Contaminants: You don’t want bugs and mold and random stuff from the air to contaminate your plants. A grow tent acts as a barrier against unwanted invaders.
- Better odor control: A grow tent provides better odor control as cannabis has a strong smell. They are efficient when you team them up with carbon filters.
- Saves space: Whether you live in a small apartment or have an entire grow room, a tent will keep things compact, clean, and easy to manage.
- Discreet: If you're worried about light leaks or the loud ventilation systems that announce to everyone that something's going on in your room, grow tents keep your operation discreet.
To put it simply, a grow tent can make growing cannabis indoors much easier and more efficient. It is essential for cannabis cultivation, no matter your skills.
Choosing the Right Grow Tent

Choosing a perfect grow tent is not just about getting the first one that fits into your space. This means, when you try to choose one, you need to think about size, durability, airflow, and lightproofing. Let’s break it all down so you get the best tent for growing your cannabis.
Size Considerations
In terms of cannabis cultivation, bigger isn’t always better. But, then again, it all depends on your cultivation goals. Here’s what to think about when choosing the right size:
- How many plants are you going to grow? A small-sized tent like 2’x2’ or 2’x4’ is great as a starter, and a bigger size like 4’x4’ or 5’x5’ or even a 10’x10’ is good for multiple plants.
- How much space do you really have? Make sure your tent can fit inside your house comfortably! You don't want something you can't use, so measure your space before buying.
- Vertical space matters! Opt for a tent that’s at least 5-7 feet high to give your cannabis plants room to stretch and to position your light correctly.
- Future expansion? If you’re considering growing more plants later, choose a larger tent size so that you don’t have to upgrade soon. If you use a hydroponic system, make sure to have space for your reservoirs and equipment.
Material & Build Quality
A good grow tent is more than just a sheet. It should be strong, sturdy, and built to last. Here’s what to look for:
- Look for 600D to 1680D Oxford cloth (the higher the number, the stronger it is). This prevents light leaks and improves insulation.
- Choose metal frames; stay away from plastic ones! A solid frame made from steel or aluminium holds up lights, fans, and filters without collapse.
- Use heavy-duty zippers. Bad zippers will ruin your operation. Choose a tent that comes with high-quality, thick zippers to avoid light leaks and bad times.
- Having more than one opening in your tent is very useful as you will not have to crawl inside.
- If you notice your tent being flimsy, you can support it with zip ties or extra support poles for heavier equipment.
Ventilation & Airflow Design
Good airflow is crucial for healthy cannabis plants. Lack of air circulation causes overheating, water issues, and fungus. Here’s what to check for.
- An ideal tent has several vent ports for fresh air intake, an exhaust fan, and carbon filter ducting. Make sure they’re positioned for easy setup.
- Some tents have mesh vents at the bottom, which allow passive airflow, and these vents can bring in fresh air naturally.
- Be sure that your tent can take an inline fan, carbon filter, and ducting system.
- A small oscillating fan inside the tent keeps air moving and helps prevent your buds from growing mold.
Lightproofing & Reflection Efficiency
Consistent light cycles are essential for cannabis plants, and a small light leak can have a detrimental effect. Here’s what matters:
- Make sure to select a tent that features heavy-duty zippers and double-stitched seams that prevent your grow tent from getting any light leaks.
- A tent with a reflective silver floor can also reflect a good amount of light back to your plants to maximise light effectiveness. This means better yields with less wasted energy.
- Seams and flaps that are not correctly sealed allow an influx of light. Make sure all flaps and zippers fully close without gaps.
- Looking for a quick way to test for light leaks? Turn your tent’s lights off, step inside, zip it up, and check for any tiny beams of light getting through. If you spot leaks, use black tape to patch them up.
Types of Grow Tents to Grow Cannabis

There are several types of grow tents, but you’ll have to search for that one specific tent that suits you for maximum yield and control. Let’s take a look at different types of grow tents, features, benefits, and drawbacks.
1. Standard Grow Tents
Ideal for people who are new to cannabis cultivation and like to grow at home.
Features
- Fully enclosed design with lightproof, reflective walls (usually Mylar).
- Ventilation ports for inline fans, filters, and ducting.
- Sturdy metal frame for hanging grow lights and accessories.
- Zippered doors for easy access.
Pros:
- Easy to set up and dismantle.
- Affordable and widely available.
- Provides a controlled environment for better plant growth.
Cons:
- Limited in size, usually suited for small to medium grows.
- Not expandable—you may need a bigger tent later as your grow operation expands.
Best for: First-time growers or those with limited space looking for an efficient and straightforward growing environment.
2. Multi Chamber Grow Tents
These are ideal for people who want to clone, indulge in perpetual harvests, and bloom plants in one area.
Features
- Has one tent with two or more separate chambers.
- Usually contains a small area for seedlings/clones and a larger flowering area.
- It won't let any light shine through to the other section.
- Some models come with a place to dry your buds.
Pros:
- You can germinate, veg, and flower productively at the same time.
- Requires less space than a handful of separate grow tents.
- Perfect for a system that provides a constant supply of buds.
Cons
- It requires careful control of the environment — each section may need distinct temperature, moisture, and lighting levels.
- Costs more than a one-chamber grow tent.
It is best for growers who want to grow plants in different stages of growth in the same tent to increase efficiency and yield.
3. Small & Compact Grow Tents
Ideal for growers with little room in closets and apartments
Features
- You can grow one or two plants in an area that is usually 2 feet by 2 feet or 3 feet by 3 feet.
- Made for discretion.
- Often comes with support for lights, and ventilation is also built-in.
Pros
- It is used to grow plants discreetly and save space at the same time.
- Uses less electricity and resources than larger growing systems.
- Essentially, it will be easy to control the temperature and humidity.
Cons
- Usually, only one or two plants are picked to grow.
- When the plants are smaller, the yield is lesser every growing cycle.
- Ideal for growers who need to make the best use of space, want to grow discreetly but do not want to compromise on quality.
4. Large and Commercial Grow Tents
Big plants give you a big harvest, so it’s perfect for growers who want more yield in a single growing cycle.
Features
- Sizes range from 4x8 ft to 10x10 ft or more.
- Made of thick fabric to provide better insulation.
- It has many ports for airflow and cooling.
- Strong metal frames support more than one light and a big fan.
Pros
- Higher plant capacity allows you to grow multiple plants for bigger yields.
- Permits advanced growth techniques (SCROG, hydroponics, CO₂ enrichment).
- Gives serious growers a smarter long-term solution.
Cons
- Takes more area, power, and upkeep.
- It will cost you more initially due to the requirement for larger grow lights, ventilation, etc.
Best for: Growers who want to get the most possible from their crop and use fancy methods.
Which Grow Tent Is Right for You?

The decision for a grow tent depends upon your experience level, space availability, growing goals, and cultivation method. We will discuss the most appropriate kind of tent for your requirements below.
1. Beginner
Choose a standard-sized grow tent, which is either 2×2 ft. or 3×3 ft.
If you are a beginner, then a standard grow tent is a great way to learn the ropes of cannabis cultivation. They are affordable and simple. These tents usually come in 2x2 ft and 3x3 ft, which is just right for growing 1 to 3 plants.
Benefits for Beginners
- Easy to set up and maintain, no complex set up.
- These regular or small tents cost much less than multi-chamber or commercial sizes.
- Lets you keep your attention on understanding light cycles, nutrients, and plant care without too much stress.
- They are small enough to fit into closets, spare rooms, or garages and do not take up much space.
Tip: Start by growing in soil instead of hydroponics, as it's more forgiving.
2. Perpetual Harvests
Would you like to grow multiple stages together? Choose a multi-chamber tent.
A multi-chamber grow tent will allow you to germinate, vegetated, and flower plants at the same time. Best for those looking to yield maximum and keep a perpetual grow. These tents have multiple chambers, usually a larger one for flowering plants and smaller ones for seedlings/ clones and veg-stage plants.
Benefits of Multi-Chamber Tents
- You will always have cannabis buds for harvesting as the plants are grown in different stages.
- Saves room when compared to using different separate tents.
- Each chamber has its own light cycle due to lightproof walls.
- You can enjoy more harvests because as soon as you harvest one batch, the next batch is ready to flower.
Tip: Using a multi-chamber tent alongside a cloning setup is an excellent way to constantly have buds available to you.
3. Limited Space
Opt for a small/compact grow tent if you have less space.
A small grow tent (2x2 ft or even smaller) is the best solution if you live in an apartment, have a small closet, or just want a discreet grow. These tents allow for micro-growing, which is a great option to have a controlled environment.
Benefits of Small Grow Tents
- Ideal for discreet cultivation as it can easily be placed inside a closet or a small corner of a room
- Uses very little energy – good for budget growing
- It is effective with auto-flowering cannabis strains, which stay small but yield well.
- Less maintenance.
How to Set Up a Grow Tent?

Now that you’ve got all your equipment, it’s time to set up your grow tent and turn it into a successful cannabis-growing setup. A good tent setup guarantees that your cannabis growing plants have the best environment possible. So, let’s take this step by step.
First off, setting up a grow tent is easier than it seems; however, following the right steps can help you save time and headaches. Here’s how to do it:
Step-by-Step Assembly Guide
Setting up a grow tent is easier than you might imagine, but following the right instructions will save you time and frustration. Here’s how to do it.
1. Choose the perfect location for your grow tent
Before you think of putting up your grow tent, choosing the right location is one of the more important steps. The place where you choose to put your tent will affect temperature, humidity, airflow, etc.
So, do not just shove it in the first available space and hope for the best! You should ideally set up your grow tent in a cool, dry place with a consistent temperature so you’re not stressing your plants with extremes. Good spots include spare bedrooms, basements, garages, or a dedicated grow room. As your lights, fans, and other equipment will need power, you'll want access to power sockets.
Certain locations can cause more harm than good, so not all spaces are grow friendly. Never put your tent near anything that can generate heat like a radiator, heater, or HVAC vents, as they’ll spike the temperature, making it harder to maintain an optimum growing environment.
Also, don't put your tent in direct sunlight. Although it may seem that putting your tent outside to capture the sun makes sense, the lights inside are made to control this space. Light will leak in through the sides and make everything much hotter inside. This will stress your plants out, but even worse, it may revert your plants into a vegetative state or cause them to become hermaphrodites (grow both sex organs). An additional major factor is ventilation. By setting up your tent in a poorly ventilated space such as a small closet with no buffer area, you can trap heat and humidity, causing an environment that breeds mold, mildew, and plant death.
In addition, focus on a place that is not noisy and smelly if you're considering growing in an apartment. Tents typically generate noise from the fans and release odor, so placing a tent inside a bedroom or communal area won’t be an ideal thing to do (except if you plan to install a carbon filter and sound-dampening solution). The earlier you choose a good location, the more you will save yourself troubles in the future and set yourself up for a successful grow!
2. Assemble the Tent Frame
Right after setting up your tent in a proper place, the next step involves assembling the grow tent frame. It will serve as the foundation for the lights and ventilators, so make sure it's sturdy.
Most grow tents have a metal frame made of interlocking poles that need to be connected tightly so it doesn’t move or cause accidents later on. If your frame is weak or wobbly, then it can cause lights to fall, ventilation systems to move, or even worse – your whole tent may collapse. If you want to avoid issues later on, make sure all the poles interlock to form a strong frame. By laying everything out like this, you will be able to easily visualise the whole structure.
Once everything is set up, follow the guidelines of the manufacturer carefully. Please don't try to do your own thing, or your tent will end up lopsided. Depending on the model of tent you are assembling, the poles may snap together or screws may be required; either way ensure every connection is fully locked in. While assembling, check and make sure that the frame is level and secure since it will need to support heavy equipment like the grow lights, exhaust fan, and carbon filters. If the setup is unstable now, it may create dangerous imbalances later on.
If you’re building the tent alone, put together the bottom part of the frame first before attaching the top, which makes it much easier to manage and limits frustration. When it comes to larger tents, you may want to ask a friend for help since some parts are tricky to do alone. By taking the time to build the frame properly, your grow tent will be strong and stable. It will also be able to support a great cannabis grow!
3. Attach the Tent Fabric
After you’ve assembled the frame, it’s time to continue covering the fabric shell. Admittedly, if you don’t do it right, this might be a very frustrating job to do. The cloth that covers the frame in a grow tent can be pretty heavy, so be patient. Unravel the fabric carefully. Try not to tear any seams or damage the zippers. Any rips or misaligned zippers can cause light leaks. This is a huge problem for cannabis plants that need proper light cycles. After you lay it out, try to identify the top, bottom, and door sections to make it easier to drape it over the frame.
To cover the frame, draping the fabric over the frame evenly is the best option. Use a second person if your tent is large, as it can get awkward and take time if you do it alone. After draping the material over the frame, zip up all the doors and seams all the way. This is essential for ensuring that you have a fully light-proof seal, eliminating light leaks from disrupting your grow cycle.
After this, check that your ventilation opening, access door, and cable opening are in the correct location. Make sure they align correctly with your lights, fans, and ducting — this makes your installation much easier down the line. If the openings are not aligned, it could mean you have to unzip and re-do the tent, so make sure you do it right the first time around.
If you’re having trouble getting the openings to line up properly, partially zip up the tent first, while the frame is still a bit flexible. Next, once inside the tent, you need to adjust the frame. If you’re struggling, partially zip up the tent first, then adjust the frame inside to help with alignment. It’s a simple trick that can save you time and frustration, making the process much smoother!
4. Install the Ventilation System
Set up the ventilation system to ensure fresh air. To grow cannabis well, one must have proper ventilation. If you don't install the ventilation system, you risk heat buildup, high humidity, stagnant air, and much more. This will cause issues such as mold, mildew, or weak plants. The ventilation system doesn't just push air around. Rather, it sets up the perfect airflow dynamics in your grow room. This means that your plants will get the right amount of fresh air and humidity levels while removing excessive heat and carbon dioxide.
To kick things off, you'll want to attach the inline fan and carbon filter to the top of the tent. Heat rises, and our purpose is to vent out that heat and stale air while taking in cold air from the bottom. Placing the exhaust system high targets the hot air near the ceiling of the tent to vent out the warm air.
Now, connect the ducting from the inline fan to the exhaust port of the tent. This will allow stale, hot air to escape your growing environment and assist you in maintaining the correct humidity and temperature. Ensure the ducting is connected properly and doesn’t have any leaks as this will hinder airflow efficiency. Put an oscillating fan inside the tent to improve air circulation further. This fan will circulate the air and eliminate hot spots. Thus, it will ensure a constant air circulation throughout the tent. The wind also makes the plant stem stronger so that the flowers grow heavier and do not need to be supported later on.
To make sure your system is working, look for negative pressure, which is when the walls of your tent slightly pull inwards. If you see this happening, your fan is doing a good job of pulling out air to allow new air to come in. Negative pressure indicates that your system is working properly. The tent walls should suck inwards. If the walls of your tent are not pushing inward, you probably have a leak in your ducting. You should also reposition your fan.
To effectively handle odors, you have to install the carbon filter inside the tent and connect it before the exhaust fan. It will clean the air before leaving your tent and remove any odor. This helps ensure that all odor stays in the tent and doesn’t pollute your living room so you can keep your grow private and smell-free. If your ventilation system is set up, your cannabis will be in a fresh environment, and you can control the growth conditions throughout the year.
Summary: Why Are Grow Tents Essential for Growing Cannabis
Growing cannabis in a grow tent is an excellent way to create a controlled environment that maximizes your plant’s potential. From choosing the right tent to harvesting, this guide covers all the essential steps for successful cannabis cultivation.
Start by choosing the right grow tent based on size, material quality, ventilation needs, and lightproofing. Once you’ve set it up, gather essential equipment like grow lights, ventilation systems, and temperature control tools to optimize the growing environment.
Your plants will go through three main stages:
- Seedling – When your plant is delicate and just starting out.
- Vegetative – The stage of rapid growth where your plants need plenty of light, nutrients, and air circulation.
- Flowering – The final stretch, where your plant focuses on bud production, requiring careful monitoring of light cycles and humidity levels.
Throughout the grow process, avoid common mistakes like overwatering, poor airflow, and light leaks, which can stress your plants and affect your yield. Keep your environment stable to promote healthy, thriving cannabis.
When it’s time to harvest, look for the right signs, such as trichome color and pistil maturity, to ensure your buds are ripe for picking. After harvesting, dry and cure your cannabis properly to enhance flavor, aroma, and potency. Finally, remember to clean your grow tent and store equipment properly to prepare for your next cycle.
By following these steps and optimizing every phase of the grow, you’ll be able to enjoy healthy, potent cannabis with maximum yields. Happy growing and we hope you have great yields!