
Likes
Comments
Share


@w33dhawk
Follow
Leider bin ich unzufrieden aber nicht mit Anesia oder der Sorte sondern mit mir selber habe erst zu spät bemerkt das ich Trauer mücken im Zelt hatte 😢 diese scheiß fliege hatte das erste mal mit den Biestern zu tun ich sag euch der name passt zu den fliegen wenn sie erstmal da sind Dann Fängst du an um deine Ladys zu trauern 😂 naja wieder ne erfahrung reicher nur gelb sticker haben nicht geholfen werde die Sorte sicher noch einmal growen da ich gerne den Durchgang mit gesunden Pflanzen als Bericht erstellen möchte

Likes
19
Share


@Sti_Cazz
Follow
Day 70.
Watered with heavy nutes last Wednesday and just water today... Just wanna give em a little break and see...
The super silver haze is pretty much done. Will wait another week to get more Amber just a few seen atm.
The main cola must be 10 grams alone... Bets are on!
Definitely doing 100% better then last time... Guessing going to be 20/25 grams dry compared to last grow.

Likes
15
Share


@38PLAN
Follow
Stiamo ancora raccogliendo,ancora nessuna pianta é morta,sto rimuovendo piano piano le cime più mature,così facendo evitiamo le cime popcorn e diamo il tempo alla pianta di riempire anche le cime inferiori,per adesso levando quella fumata e venduta siamo all'incirca sui 780g,però aspettiamo anche il nuovo stendino,alla fine del raccolto dovremmo arrivare a quasi 2 Kili con 7 piante e 6 vasi,con una media di 333g a pianta,ho pubblicato tutto quello che potevo,ogni procedimento,spero vi piaccia e mi seguiate

Likes
2
Share


@aquaMan
Follow
Premise was to see how "optimal" i can get my first ever Grow. After some Research i came up with the idea to build an Aeroponic System myself using Water Buckets and Venturi Injektors to provider proper aeration.
Sadly Seedlings had to wait in EazyCubes cause some parts and Nutrients didnt arrive on time. System was fully operationable on Day 16. Atami Nutrients are inside the System since Day 24, Calmag has been added Day 28. Before that, some Tri-part Nutrient.
Planning on switching to Plagron in the Long run, as well as adding Co2, a water chiller and a ~700W LED.
Stats:
- 5 30L Buckets, 4 Plants and 1 Reservoir
- Recirculation happens through 90mm PVC pipes
- 16000 l/h pump going through 4x 1" Venturi Injektors pulling around 700 liters of Air per hour
- 1mx1mx2m Growtent
- 250W The Jackson Nemesis LED
Happy about any Questions and Suggestions!
Likes
12
Share


Likes
53
Share


@Hempy_The_Kid
Follow
08/10/22 watered with Recharge.
Welcome to motel 6
More ladybug porno. Now have yellow ladybugs
8/14/22 this plant is a magnet for ladybugs 🐞

Processing
Likes
10
Share


@Ts1Ko
Follow
She didn't come out of the stress completely. I was sure that she will stretch 🤷♂️ She stayed short but bushy ✌️ Other than that everything looks nice. No signs of any kind of dis balance ✌️
Likes
Comments
Share


@Milk_Babler
Follow
107 грамм сахарных шишек и 14 грамм трима.
После нее очень классно спать или кушать

Likes
2
Share


@KeemBboomin
Follow
This should be the final week where everything is sloppy and unprofessional but hey, you got to see what I’ve been working with
Likes
16
Share


@Ieiogrow94
Follow
Eccoci qui.
Finalmente iniziamo a vedere i frutti del nostro lavoro, sono veramente contento e non vedo l'ora di portare a termine questo cultivo.
Abbiamo riempito gli spazi della rete.
GRAZIE A TUTTI
Processing
Likes
10
Share


@yaron
Follow
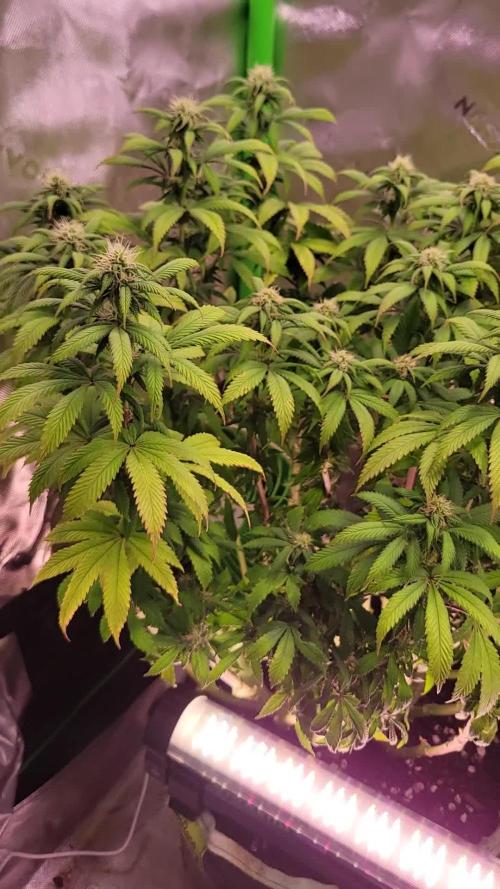
starting week 6,the wedding cheesecakes are in flower for a couple of days now and the gg are starting to flower.
alot of wind and clouds and rain these past two weeks but the girls are looking good in my opinion.
update:after 4 or 5 days of rain and low temperatures finally the re is sunlight so the girls have to recover a bit.
but things are looking better wheatherwise.
cheers!
Processing
Likes
64
Share


Processing
Likes
47
Share


@blazin_skywalker
Follow
Day 64 - I've been patiently waiting for the time to come, and it's finally here! Changed the lights over to 12/12 to send the tent into flower. Current light settings R99 W99 B50 as suggested by California Lightworks.
I did a full reservoir change - switching over to bloom nutes. I also added some Si28 and P31 Microbes to the reservoir to test out this new product that I was fortunate enough to receive samples of. I've seen the results of others with crazy booming root growth.... Let's see what happens!
Day 65 - I swear, it's like she's been waiting for me to flip the light cycle. I kicked one plant out of the tent so now there's even more room for improved air circulation and light distribution.
This plant is a serious beast!
Day 67/ Day 3 of Flower - Last massive round of defoliation before I sit back and let her do her thang. ✌️

Likes
142
Share


@MadeInGermany
Follow
Hi people 🤗
A lot has happened this week 😄
The 3 Blue Cheese and 2 Kosher Tangie Kush which have been in the flowering tent for 1 week have become very bushy 👍
Unfortunately I just noticed that I completely forgot to take pictures of the Blue Cheese Phenotype # 3 🤦♂️🏻
The picture will be given later.
The rest of the Vegi tent is also progressing very well.
They are repotted in 11 liter pots this week, and then come to the flowering chamber die the following week
The next week there will be new pictures, until then I wish everyone a nice start into the new week 🙏🏻💪🏻
Let it grow 🍀🌱


Likes
11
Share

@PavementPunk
Follow
6/30/26 50% strength Strive ph 6.3 tds 600 ec 1100 water temperature 69 degrees Fahrenheit. The indoor tent seems to be doing generally good. Split my z42 down the middle and duct taped it back together. I expect a full recovery. Started running the small dehumidifier in the tent again. It makes it warmer but it also gets the vpd kpa cranking. 1.9 was the high yesterday. Thats high. Easing them into the strive w a half strength dose to start. Happy growing friends ✌️


Likes
34
Share


Likes
4
Share


@CannaIGrow
Follow
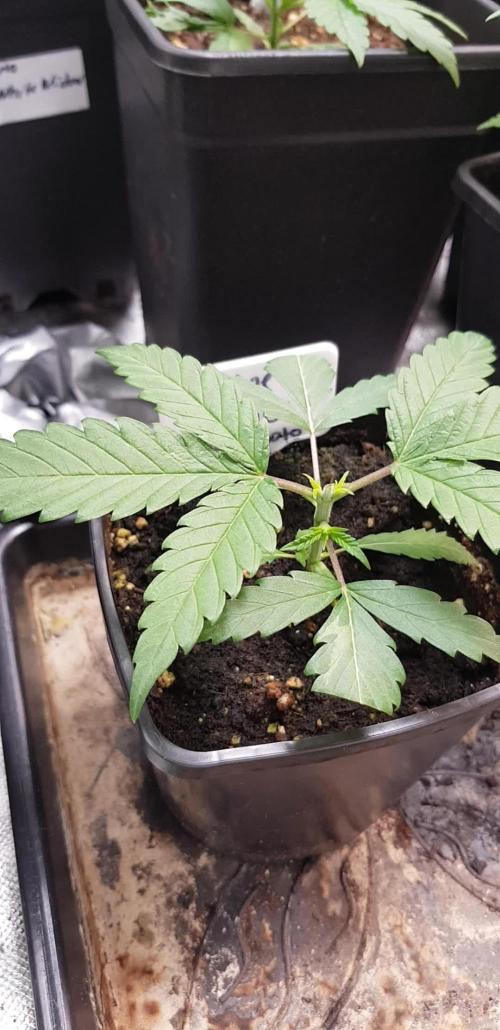
This plant plus one more started to wilt earlier on in the week, I figured it was probably time to transplant seeing as they had been in the solo cups for 2 weeks. After transplant plants seemed to be happy again. I introduced amino acids this week as well. They are getting the grease spray and drench program


Likes
34
Share


@Southwest_budders21
Follow
Candyman is now Day 22 of flower!
The smells are beautiful 2 smell more gassy and one smells more lemon now. They are drinking a lot every 2 days now, I've took a lot of leaves off and lower bud spots to give the tops more energy the finish line is fast approaching now and I can't wait 😍
Day 26 of flower and they are stinking they smell like gassy shit 🤣 but my last run of skywalker did that and was unreal smoke, so 🤞🏻
Update: Day 78, Day 28 of flower! It's the start of week 4 today and the colours are starting to change 😍 smelling and getting frosty by the day now. Really can't wait to try these girls out ✌️🏻
Likes
11
Share

@GERGrowDesigns
Follow
Welcome to Veg Week 3 of Divine Seeds Divine Rapier
I'm excited to share my grow journey with you from my
Sensi Seeds Project . It's going to be an incredible ride, full of learning, growing, and connecting with fellow growers from all around the world!
For this Project , I’ve chosen the Feminized Photo Strain Divine Rapier:
Here’s what I’m working with:
• 🌱 Tent: 120x60x80
• 🧑🌾 Breeder Company: Divine Seeds
• 💧Strain Info : 29%
• ⏳ Flowering Time: 6-7weeks
