


4x caramel machiato pls!!!



VEG
Gib Fluorescent/400W
Gib
FLO
Gib High-Intensity Discharge/400W
Gib


Soil
Custom

Indoor
Room Type
Main-Lining
weeks 4-6, 8-12
Topping
weeks 4, 6
LST
weeks 9
25 liters
Pot Size
Start at Harvest
G
Germination5y ago


Nutrients 3

Lemon Kick
0.2 mll

Power Roots
1 mll

Pure Zym
1 mll
w33dhawk 04.06.21 Started the seeds in eazy plugs, I pre-soaked the plugs with roots, zyme, and lemon kick, then put the seeds in and soaked them again. Left them in the dark for 24 hours at 21 degrees and about 70% humidity.
07.06.21 I've kept the seeds moist over the days, just with water without additives (lemon kick is included in the water, so it's not really an additive). The lamp is set up 100 cm away after 24 hours of darkness and on an 18/6 schedule. Since there are no leaves yet, the light is actually unnecessary, but I thought, in nature, the light isn't off all day either, and environmental adaptation probably starts with the seed. The temperature fluctuations from 21 degrees at night to nearly 25 degrees during the day (so 4 degrees) should be pretty good. 😬😬😬
7 likes
9 comments
Share
Used method
Peat Pellet
Germination Method
1
Week 1. Vegetation5y ago


5 cm
Height
18 hrs
Light Schedule
26 °C
Day Air Temp
No Smell
Smell
60 %
Air Humidity
21 °C
Solution Temp
21 °C
Night Air Temp
65 cm
Lamp Distance
Nutrients 3
Lemon Kick
0.2 mll
Power Roots
1 mll
Pure Zym
1 mll
w33dhawk 14.06.21 (Day 10 after planting seeds) unfortunately, one of my seeds died, but I immediately threw in a replacement seed on Tuesday (08.06.21). That's why one is a bit smaller than the others. I also know what my mistake was; I thought the seed was moist enough, but the eazy plug was dry 😭😭😭. Well, now I have one that is currently a little shorter, but it's not a big deal; I can live with it. Today, I put 3 Purps OG out of 4 into their first intermediate pots (0.25l) with Plagron soil. I flushed everything once with my nutrient solution (Roots, Zyme) to wash out any accumulated nutrients a bit, so the little ones don't get nutrient burn. Other than that, there's not much to do at the moment, just occasionally sticking my finger in the soil to check if I need to water 😄😄.
4 likes
4 comments
Share
2
Week 2. Vegetation5y ago


7 cm
Height
18 hrs
Light Schedule
28 °C
Day Air Temp
No Smell
Smell
60 %
Air Humidity
21 °C
Solution Temp
23 °C
Night Air Temp
65 cm
Lamp Distance
Nutrients 4
Lemon Kick
0.2 mll
Power Roots
0.3 mll
Pure Zym
0.3 mll
w33dhawk 21.06.21 Today is day 17 after planting the seeds. I used Great White for the first time yesterday and dissolved 0.3 grams of the powder in 1 liter of water, then watered all 4 plants with it. I also adjusted the pH value to 6.2. Since I have no idea about Great White, I hope the bacteria, etc., can handle it (I adjusted the pH first and then added Great White). Please correct me if I applied Great White incorrectly. My plan is to water when it's time to water, always alternating between a very weak nutrient solution and then just Great White for the next watering, and then back to the start since the soil contains enough nutrients.
5 likes
1 comment
Share
3
Week 3. Vegetation5y ago


7 cm
Height
18 hrs
Light Schedule
28 °C
Day Air Temp
60 %
Air Humidity
21 °C
Solution Temp
22 °C
Night Air Temp
50 cm
Lamp Distance
Nutrients 4
Lemon Kick
0.5 mll
Power Roots
1 mll
Pure Zym
1 mll
w33dhawk 29.06.21 Hey dear growers, today I put the first 3 Purps OG into their next pots 3.5L, they will stay there for the next 14 to 21 days and then move to the final pot. I "flushed" the ladies again with nutrient solution because of the fresh soil, to avoid too many nutrients accumulating. I think I will start topping on Saturday at the beginning of week 4 of veg, so the little plants have a few days to get used to their new home. Purps OG no.4 will move to its new home only on the weekend; the roots are well developed, but I think the plant itself should be a bit bigger 😁😁. That's it for now, as soon as something happens again, I'll give an update and pictures, and I wish you all much success with gardening.......
2 likes
1 comment
Share
4
Week 4. Vegetation5y ago




5 cm
Height
18 hrs
Light Schedule
28 °C
Day Air Temp
No Smell
Smell
60 %
Air Humidity
21 °C
Solution Temp
23 °C
Night Air Temp
50 cm
Lamp Distance
Nutrients 4
Lemon Kick
0.5 mll
Power Roots
1 mll
Pure Zym
1 mll
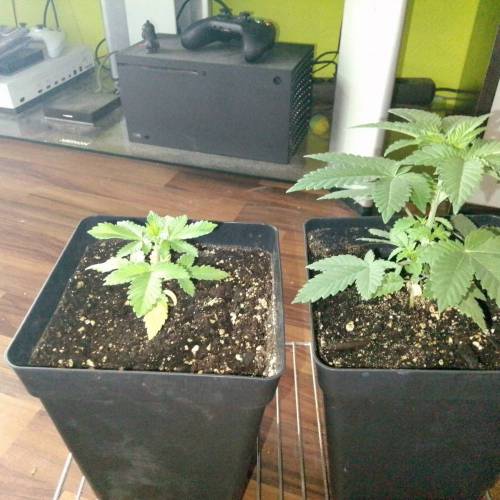
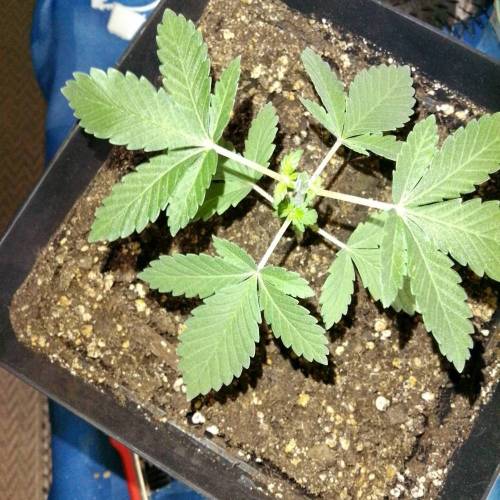
w33dhawk 05.07.21 hi dear growers today was the day I topped the purps OG No. 1, 2, and 3 and I'm trying to make cuttings from the trimmed parts (it's the first time, wish me luck). I dipped the cut parts at the cut point (cut at an angle) in great White and stuck them in eazy plugs that were soaked with pH adjusted root stimulator, hope that works. I currently have everything in the tent under an old cake dome. I will start mainlining in a few days once the plants have recovered. I topped the plants above the 3rd node and cut off the lowest side branches so that only nodes 2 and 3 remain on the plant. The manufacturer, Anesia Seeds, recommends SOG and light defoliation for more yield for this strain. I decided to give the plant 8 main stems, which I will keep apart with a homemade tomato ring, and then send them into flowering. For purps OG No. 4, I will probably only use LST and defoliation since it is quite a bit shorter than the others. That's it for now, updates will follow if anything happens this week, cu Growmies......
09.07.21 I started mainlining today with purps OG No. 1, 2, and 3. For No. 4, I decided to top it after all and also try to create 8 main stems since it has recovered quite well in the last few days. Nothing else is happening this week.........
4 likes
comments
Share
Used techniques
Topping
Technique
Main-Lining
Technique
5
Week 5. Vegetation5y ago


10 cm
Height
18 hrs
Light Schedule
28 °C
Day Air Temp
Weak
Smell
60 %
Air Humidity
21 °C
Solution Temp
25 °C
Night Air Temp
25 liters
Pot Size
50 cm
Lamp Distance
Nutrients 5
Lemon Kick
0.5 mll
Power Roots
1 mll
Pure Zym
1 mll
w33dhawk 16.07.21 Day 42 everything is going great, I think maybe I'm just imagining it. The purps OG is really fun for me to grow so far, especially since it already smells like a little skunk even though nothing is happening with flowering yet 👌👌💪💪 This week I've just been watching the plants grow. Yesterday (15.07.21) I put the first 3 ladies into their final pots, they were supposed to be 15L fabric pots from gronest, but they actually fit about 25L if you want to fill them with soil. I'll continue with the main lining of the first 3 ladies sitting in their final pots next Sunday and will probably upload updates about it 2x a week (finally something is happening now). Oh, and about the great White, I didn't specify any ml amount above because I didn't water it but distributed it on the root ball during repotting and didn't weigh it beforehand. I estimate that about 2 grams per root ball were used............
4 likes
comments
Share
Used techniques
Main-Lining
Technique
6
Week 6. Vegetation5y ago


10 cm
Height
18 hrs
Light Schedule
28 °C
Day Air Temp
6.3
pH
Weak
Smell
60 %
Air Humidity
21 °C
Solution Temp
25 °C
Night Air Temp
25 liters
Pot Size
50 cm
Lamp Distance
Nutrients 5
Lemon Kick
0.5 mll
Power Roots
1 mll
Pure Zym
1 mll
w33dhawk 19.07.21 Hey dear grower community, I topped the first 3 ladies again yesterday (Sunday 18.07.21) and defoliated them. After that, I tried to align all 4 branches (on each lady) to grow tall, which worked out pretty well. I noticed that all the ladies are producing even nodes, except for purps OG No. 3, which actually has 4 new ones clustered on one branch, as seen in the picture. I'm assuming this was caused by the stress from topping. I think such anomalies are normal, and I'll keep observing the fun. I've found something to learn again 😎😎😎😎😎. Let's see how this all develops. I think I’ll put lady No. 4 in her final pot on Wednesday or Thursday, and then I'll continue with Main Lining on the first 3. Oh, and regarding the 3 cuttings in the middle, I plan to put them outside in the next few days. I know it’s pretty late for that, but I love experiments. Until then, to all of you who are about to harvest soon, I wish you a bountiful fat harvest with sparkling disco balls 🕺🕺🕺🕺🕺😄😄😄😄😄.
22.07.21 Yesterday, I built the first 3 tomato rings, each made from 5x35 cm fencing wire that I twisted (so basically a loop). I then cut everything to the same length and got a long piece of wire about one and a half pot rim lengths. I distributed the stakes around the pot rim as they should stand and then threaded the wire through. Finally, I secured the excess with cable ties (straps). Now the stakes stand about 14 cm above the pot rim. Cross your fingers for me that everything goes as I envision; it's the first time I'm working with the tomato ring. As for purps OG No. 4, she was transplanted into her final pot today. I’ll top her to 8 branches on Sunday and then incorporate the tomato ring. Wishing you all a fruitful week!
4 likes
2 comments
Share
Used techniques
Topping
Technique
Main-Lining
Technique
7
Week 7. Vegetation5y ago


10 cm
Height
18 hrs
Light Schedule
27 °C
Day Air Temp
6.3
pH
Weak
Smell
60 %
Air Humidity
21 °C
Solution Temp
25 °C
Night Air Temp
25 liters
Pot Size
50 cm
Lamp Distance
Nutrients 5
Lemon Kick
0.5 mll
Power Roots
1 mll
Pure Zym
1 mll
w33dhawk 25.07.21 Day 51 of veg, I've tied down all the ladies again and topped Lady no. 4 and hacked her. I will remove the stakes I made for the tomato support as soon as the plants have grown around them and then fix the ring to the pot for branch spreading. I think otherwise the plant will just push the stakes up.........
27.07.21 Day 53, this morning I took care of raising the giant pots a bit so that air can circulate under the pot and the pots don't sit soaking wet after watering but can still drip a little. I used my old frame, which I usually use for my net for SCROG, it's about 90x90 cm with sturdy chicken wire stretched across, stones on the sides at the corners, and wood in the middle for stabilization so that the fence doesn't bend too much and the pots don't stand too crooked. I think it worked quite well. As for the cuttings, 2 of them are in the garden in a 20L fabric pot together. I know many are thinking, oh man, this will go wrong, we'll see, I love experimenting. The 3rd cutting is at my buddy's balcony; I gave it to him because I had no more space for it. I will occasionally add pictures of the plants outside here, so I don't want to make a separate report for that. Until the next few days, I'll be back, no question.........
28.07.21 Day 4 Outdoor, the ladies have doubled in 4 days, and that's despite sharing the pot. Let's see what the next few days bring for the 2 cuttings.
3 likes
1 comment
Share
8
Week 8. Vegetation5y ago


15 cm
Height
18 hrs
Light Schedule
27 °C
Day Air Temp
6.3
pH
Weak
Smell
60 %
Air Humidity
21 °C
Solution Temp
25 °C
Night Air Temp
25 liters
Pot Size
40 cm
Lamp Distance
Nutrients 4
Lemon Kick
0.5 mll
Power Roots
1 mll
Pure Zym
1 mll
w33dhawk 03.08.21 Hey Growmies, I’ve been thinking about my plan with the tomato rings this past week and I noticed that the ladies aren’t growing evenly. This is probably because I, being a fool, wanted to be clever and left a few side branches on. In other words, during the first topping, I should have removed everything except for the 2 shoots from the 3rd node, but I left the 2nd node because I thought I was being smart 🤬🤬🤬🤬🤬🤬🤬🤬🤬🤬🤬🤬🤬🤬🤬🤬🤬🤬🤬🤬🤬🤬. I could slap myself for that stupidity. Anyway, the result is uneven growth, so I can forget about the tomato rings... But I’ve revised my system again. I used different pot risers (2x old wooden picture frames screwed onto pallet beams and covered with chicken wire, placed on stones so I can put a tray underneath for drainage). I collected the frame from the scrog net again and re-stretched it (the frame is 90x90 cm, cut from an old pavilion frame and covered with fencing; the spaces between the diamonds are 6 cm, which should be enough room for the shoots). I installed it yesterday at a height of 16 cm above the pot rim, secured it with cable ties to the tent poles, so it’s fixed in place and can’t be pushed up by the plants when they go into bloom. So it turned out to be a scrog after all, but the ladies are doing well overall; they’re growing and thriving and seem healthy. In the next few weeks, I’ll weave the ladies into the net and see what they think of scrogging, à la Milchschnitte.
Oh, and the purps from the garden apparently went straight into stretch after repotting; I was a bit late with putting them outside, but there’s no changing that now. Let’s see what comes of it; maybe a gummy bear tree 😏😉. I built a little rain protection for the outdoor ladies yesterday; it’s not the prettiest, but it should serve its purpose so the pot can dry out a bit. The weather has been really changeable for almost 14 days, and the pot hasn’t been properly dry even once. That’s basically what’s happened up until today. Catch you later, Growmies, and wishing you all much success...
2 likes
comments
Share
Used techniques
Main-Lining
Technique
9
Week 9. Vegetation5y ago


18 cm
Height
18 hrs
Light Schedule
27 °C
Day Air Temp
6.3
pH
Weak
Smell
60 %
Air Humidity
21 °C
Solution Temp
25 °C
Night Air Temp
25 liters
Pot Size
40 cm
Lamp Distance
Nutrients 4
Lemon Kick
0.5 mll
Power Roots
1 mll
Pure Zym
1 mll
w33dhawk 13.08.21 hello all growmies and cannabis lovers this week was not bad for the plants growth is going and going like a Duracell battery in the pot that just keeps going and going...... What’s not so cool is my new phone with which I took the pictures suddenly has display problems nothing more to do now I’m back to using the old phone to record where of course the pictures don’t come out as nice and clear I tried to get a camera that takes nice pictures during the week but that was a bust, it didn’t work out. Anyway back to the ladies I plan to let the last day of veg run today and when the lights go out tonight I’ll switch to 12/12h I’m super curious to see how the plants develop I hope they develop a few more nodes during the stretch and don’t just get tall since indica strains tend to just stretch without developing new nodes but the purps og is a hybrid so I hope a bit more comes in for better yield wishing you all a nice weekend
5 likes
comments
Share
Used techniques
LST
Technique
Main-Lining
Technique
10
Week 10. Vegetation5y ago


23 cm
Height
12 hrs
Light Schedule
25 °C
Day Air Temp
6.4
pH
Weak
Smell
60 %
Air Humidity
21 °C
Solution Temp
18 °C
Night Air Temp
25 liters
Pot Size
40 cm
Lamp Distance
Nutrients 5
Lemon Kick
0.5 mll
Power Roots
1 mll
Pure Zym
1 mll
w33dhawk 18.08.21 Hey dear growmies, I started switching to 12/12 this week (14.08.21) and yesterday I adjusted again to keep the height even, and I noticed an accidental stem split. I only realized it this morning; the leaves aren't drooping and it's growing unstoppable 😅😅😅😅 what luck for me! When I discovered it this morning, I could have cried. I inspected the plant and noticed that it doesn't seem to mind. I've stabilized it with plant wire and gently pushed it back, but I can't get the wound to close since it was already dried out by that time. I'll take a picture tonight without the light on because it's already showing the first signs of pre-flowering after just 4 days of 12/12. I'm thrilled! The cuttings I put outside are growing beautifully and look overall healthy.
I'm more than satisfied so far, except for the little shock this morning...
19.08.21 I thought for ages yesterday about how I could fix this better and close the stem split more effectively. I came up with something new and put it into action right away. I took a wide nylon band and tied it around the two arms on each side, then bound them together with a cable tie across from each other to close the split as best as I could. Then I noticed today that OG Purps No. 3 (which was completely intact last night) also suffered a stem split this morning 😭😭😭😵😵😵. So I'm doing the same thing with the combination of wide nylon rope and cable ties for stabilization. Now I need to come up with something for the height again since the ladies are now standing about 3 to 4 cm taller than the others 😩😩😩. I guess to solve the problem, I'll run nylon tape along the tent poles and then pull the branches outward. I hope that will get me back to the right height (at least I hope so)...
2 likes
comments
Share
Used techniques
Main-Lining
Technique
Grow Questions

w33dhawkstarted grow question 5y ago
What deficiency is this? Nitrogen or magnesium or am I completely off track and it's something else?????

Solved
Leaves. Other
likes

ChitownCannaChicaanswered grow question 5y ago
Because half the leaf looks great and the other wrinkled—- I’m going with heat and wind burn. Not nutrients, but environment and or genetics. Show the whole plant— one pic looks perfect and then just a wonky leaf. I think you are good!
11
Week 11. Flowering5y ago



23 cm
Height
12 hrs
Light Schedule
25 °C
Day Air Temp
6.4
pH
Normal
Smell
55 %
Air Humidity
21 °C
Solution Temp
18 °C
Night Air Temp
25 liters
Pot Size
30 cm
Lamp Distance
Nutrients 4
Lemon Kick
0.5 mll
Power Roots
1 mll
Pure Zym
1 mll
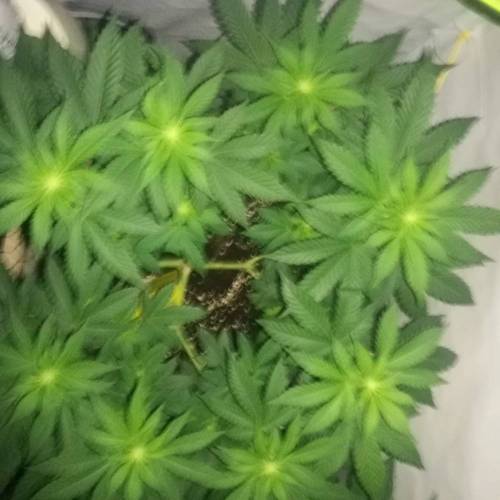
w33dhawk 27.08. 21 The ladies are doing well, it took another 7 days for them to go into flowering. Sugar Royal really helps with the transition into flowering. During the week, I removed some fan leaves from the middle; I left all the leaves that were outside around the ladies. I'm really impressed with the genetics so far. What the ladies have had to endure with me is really something (e.g., the stem splitting), and they show no signs of stress and keep growing relentlessly. The smell is already amazing, that typical weed scent we all know, just 100 times more intense, like a skunk but with a higher concentrated aroma. It's really awesome; let's see what next week brings!
4 likes
1 comment
Share
Used techniques
Main-Lining
Technique
12
Week 12. Flowering5y ago


37 cm
Height
12 hrs
Light Schedule
25 °C
Day Air Temp
6.4
pH
Normal
Smell
50 %
Air Humidity
21 °C
Solution Temp
18 °C
Night Air Temp
25 liters
Pot Size
30 cm
Lamp Distance
Nutrients 6
Lemon Kick
0.5 mll
Power Roots
1 mll
Pure Zym
1 mll
w33dhawk 04.08.21 not much to say, the pictures say it all again.......... up to this point everything has been going fine and then my problem comes like in every grow, always starting from the 2nd week of flowering. I'm going crazy, I hope I can get a grip on this eventually. I've come to terms with having another problem for this grow. I think I underdosed the veg nutrients during the transition to flowering, and now trying to compensate with veg nutrients seems counterproductive. I’ll try using a bit more flowering nutrients to get the plants looking a bit more vibrant in color, but I don’t think it’s going to work. However, I’ve thought about the next round and will switch to Light mix so I can get a better feel for feeding since I can fertilize continuously there. I’ll probably also change the nutrients, either old school with guanokalong or powder feeding from greenhouse seeds. I’m not sure yet, I need to inform myself more about the handling of both nutrients.
4 likes
comments
Share
Used techniques
Main-Lining
Technique
13
Week 13. Flowering5y ago
37 cm
Height
12 hrs
Light Schedule
25 °C
Day Air Temp
6.5
pH
Normal
Smell
50 %
Air Humidity
21 °C
Solution Temp
18 °C
Night Air Temp
25 liters
Pot Size
35 cm
Lamp Distance
Nutrients 1
Lemon Kick
0.5 mll
w33dhawk 11.09.21 Hi everyone, I'm losing control with the Purps OG No. 1. I've tried a lot, but nothing really helps. Purps OG No. 2 is also starting to have problems. No. 3 and 4 still look good, so I hope I can make it through without them giving up early. As for the two cuttings that I'm keeping outdoors in a 20L pot, they look good and are developing nicely, which tells me that it's not the genetics that's the problem indoors, but me 😞😞. Somewhere I've made a mistake again. I've gone through my own report from start to finish to figure out what I did wrong, checked my handwritten diary where I track the development of each plant and note what, how, and where I've done things with the plants, but I'm at a loss. I will continue to try to save what can be saved and give you a fat grow with a fat harvest!!!!!
3 likes
comments
Share
14
Week 14. Flowering5y ago
37 cm
Height
12 hrs
Light Schedule
25 °C
Day Air Temp
6.5
pH
Strong
Smell
50 %
Air Humidity
21 °C
Solution Temp
17 °C
Night Air Temp
25 liters
Pot Size
35 cm
Lamp Distance
Nutrients 1
Lemon Kick
0.5 mll
w33dhawk Moin............. I'm out of ideas, the ladies are messed up, the yield is going to be minimal, and that's only because I can't find or fix this damn mistake. The pH value of the soil is totally weird; after watering, it's at pH 6.5, and by the next watering, it's back up to 8.0. I push it back down to about 6.5, and by the next watering, it's high again—it's frustrating. Something has happened with the soil, but I have no clue what........ Well, it seems like success just isn't meant to be with the ladies this time. Next round will be better; I'm staying positive about it, and for my next grow, I plan to "not despair, ask other growers." Until then. good night good fight!!!!!!
1 like
3 comments
Share
15
Week 15. Flowering5y ago



37 cm
Height
12 hrs
Light Schedule
25 °C
Day Air Temp
6.5
pH
Strong
Smell
50 %
Air Humidity
21 °C
Solution Temp
17 °C
Night Air Temp
25 liters
Pot Size
35 cm
Lamp Distance
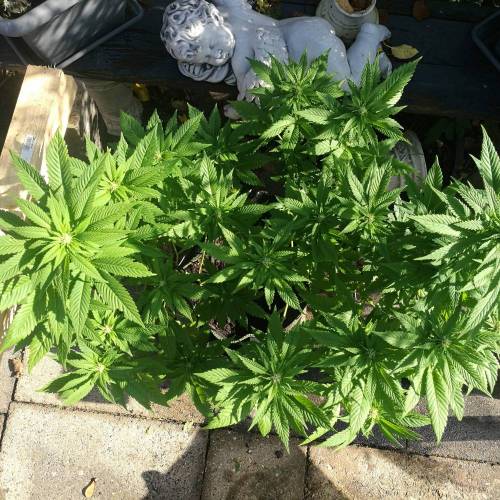
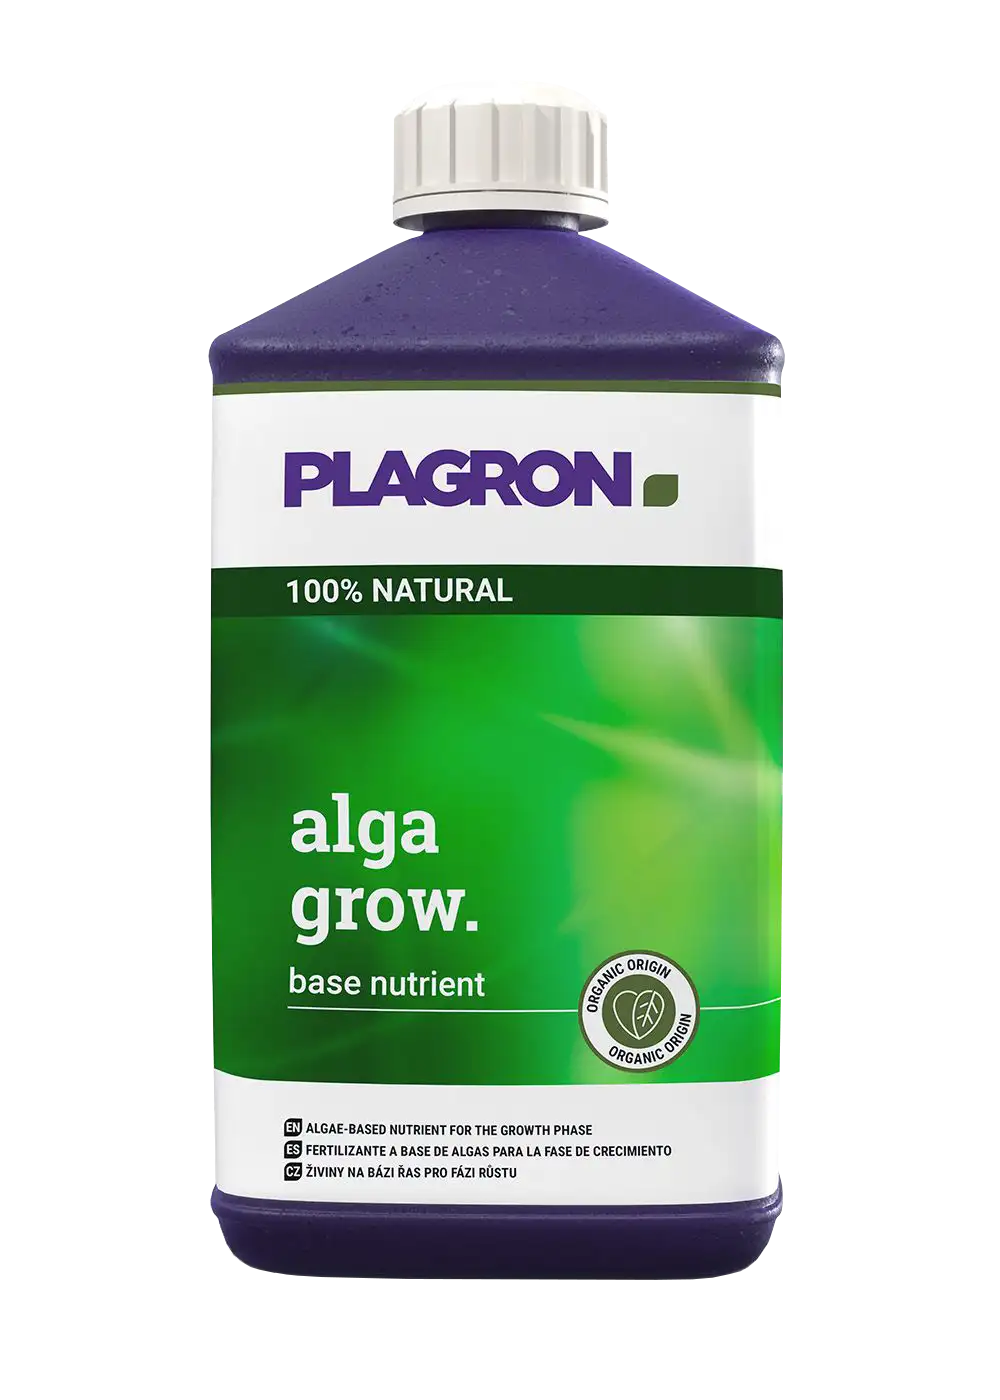
w33dhawk Moin moin everyone, first of all, I want to thank djiny this week for bringing me the idea to test my Lemon Kick from Plagron overnight (1 liter of water mixed with Lemon Kick from Plagron set to pH 6.0 and another liter with pH down from Hesi). The next morning, I tested the pH value of both, and the pH down from Hesi remained stable, still at 6 after 1 hour and also at 6 after 24 hours. The Lemon Kick from Plagron climbed back up to almost pH 7.0 after 12 hours and was at 8.3 after 24 hours. Wow, that's unstable, I thought, I believe djiny has solved my problem, so thanks for that, djiny. Indoors, the plants don't look that great, but at least the leaves aren't just falling off anymore after I've watered them twice with Hesi pH-adjusted water. They are producing good sugar and smell intensely like sweet coffee with a typical grass note. As for the cuttings that I'm keeping outdoors in one pot, I personally think they're not looking bad. We've had such terrible weather here in the north with storms and rain for the last 3 weeks; I think there were 3 or 4 days of nice sunny weather in those 3 weeks. But considering it hasn't been nice outside and I hardly take care of the ladies (when the weather is bad, I use my second hobby, playing Rocket League on Xbox Series, so it's been a lot of gaming in the last 3 weeks 😱😱😱😱😱😎😎😎😎 ups.... One has to treat oneself, right?). Wishing you all a successful grow and that you all are smarter than I am and don’t make this kindergarten mistake or find it faster than I did.
3 likes
2 comments
Share
18
Week 18. Harvest5y ago
Happy Harvest Day!


8/10
Rated
Endgültiger Rauch Bericht kommt noch. Erster test joint ist geraucht ist ziemlich süsslich im Geschmack das high fängt mit ziemlich guter Laune an und man wird gesprächig nach ca 30 Minute Setzt der couch look ein doch der Kopf bleibt auf kreativ gut zum chillen mit Freunden oder zum Film gucken
Show more
Translate
Spent 107 days
Ger Veg Flo Har
178 g
Bud wet weight per plant
4
Plants
1 m²
Grow Room size
Easy
Difficulty
Height
Day air temperature
Air humidity
PH
Light schedule
Solution temperature
Night air temperature
Pot size
Lamp distance


w33dhawk Unfortunately, I'm dissatisfied, but not with Anesia or the strain, rather with myself. I only noticed too late that I had fungus gnats in the tent 😢 I dealt with those damn flies for the first time, and let me tell you, the name fits the flies perfectly. Once they're there, you start mourning for your ladies 😂 Well, just another experience gained. The yellow stickers didn't help at all. I'll definitely grow this strain again because I want to create a report with healthy plants.
6 likes
3 comments
Share
Equipment Reviews








27 comments
Sort by
popularity
popularity
newest
oldest

homerjgangia commentedweek 05y ago
Good luck with your grow mate!💪💪
likes 6
w33dhawk commented5y ago
@homerjgangia, thx Mr. Simpson😉
like 1

spyder commentedweek 05y ago
good luck with the grow.....enjoy.
likes 5
w33dhawk commented5y ago
@spyder, thx dude
like 1

Cannabeast40 commentedweek 05y ago
Wish you good luck and happy growing 😊👊🙌
likes 5
w33dhawk commented5y ago
@Cannabeast40, thx mate
likes 2

Ferenc commentedweek 155y ago
Buds on haha well done
likes 5

SEGA_Y_Griega commentedweek 15y ago
👌 Nice work, looks great !!! I wish you good results !!! See my reports and leave your opinion in the comments 😉 I'll be glad to see you again 👍
likes 4
w33dhawk commented5y ago
@SEGA_Y_Griega, thx bro I’ll check you out 👍
like 1

Lacrima commentedweek 05y ago
Happy Growing ! 😊💪
likes 4
w33dhawk commented5y ago
@Lacrima,thx dude
like 1

Terp_Djiny commentedweek 05y ago
Good luck with anesia, I've had some of those too. Very nice genetics. 👌
likes 3
w33dhawk commented5y ago
@Terp_Djiny, oh do I have 3 wishes now? 😎😎😎 Just kidding, thanks a lot! They looked so delicious on Anesia's website that I couldn't help but grab some. 🤤
likes 2
Terp_Djiny commented5y ago
@w33dhawk, I can understand that. I'll jump in and keep an eye on it.🧐
like 1
Cannabeast40 commentedweek 25y ago
Looking good 😊
likes 3
w33dhawk commented5y ago
@Cannabeast40, thanks, I don't do that much 😎
likes 2

DoDrugs420 commentedweek 65y ago
Beautifull Purps OG!
likes 2
w33dhawk commented5y ago
@DoDrugs420, thx bro
like 1

Legendaryseedthumb commentedweek 115y ago
Good luck with your grow I hope you get the best taste of buds and healthy plants! Take care and stay lit! I will drop by sometimes to check on your process! Say hello if you ever visit my page!
Greetings from L.S.T 🙏🏼🌟
likes 2
Terp_Djiny commentedweek 145y ago
Okay, you're using the Lemon Kick from Plagron to lower the pH, right? Have you tried adjusting it with one or two liters and letting it sit overnight? I had it at first too, it started to smell really bad and the pH level climbed back up every hour for me. Even higher than the starting value... so I almost think it's due to the Lemon Kick. Since I've been using the regular pH down, I haven't had that problem anymore..
like 1
w33dhawk commented5y ago
@Terp_Djiny, hey, you were right! I tested it last night, adjusted the pH with Plagron, and used Hesi's pH minus, and guess what? This morning, the one from Hesi was still at pH 6, and the one from Plagron was back at pH 7. Thanks for reminding me! I even read in a blog that this stuff is supposed to be crap and that the pH climbs back up. Now I have some insights. Plagron pH minus went straight to the trash this morning. I could really get worked up about this, especially from a reputable manufacturer like Plagron. 😞😞
like 1
Terp_Djiny commented5y ago
@w33dhawk, yeah, I thought that too back then... maybe you can still save the ladies a bit.. I'm keeping my fingers crossed for you.
like 1

ZoobZoob_farmZ commentedweek 75y ago
good grow!!!! don't hesitate to check out my gardens if you have 5 min peace
like 1
Terp_Djiny commentedweek 185y ago
Neem oil 4ml/l water for watering helps quite well against the pests. 😅 But it still looks pretty good.
likes

Godesskat commentedweek 185y ago
v
likes
Godesskat commentedweek 185y ago
Everything is better with a beg of weed👻 Good luck happy growing😍
likes
Terp_Djiny commentedweek 155y ago
Seems like it was the right approach. I'm glad I could help you. Yeah, the weather here is pretty miserable for an outdoor grow...
likes

the end.
Enjoying this diary? Follow for more updates!

Prefer the old Diary view?
Go back to the old Diary view